

Transaction Approval Workflow

Once Approvals is configured for a module, users of your organization can submit transactions created in that module for approval. Approvers can either accept or reject transactions submitted for approval. In this help document, you’ll learn how to perform these actions in Zoho Books.
Submit a Transaction for Approval
You can create a transaction and submit it for approval. Here’s how:
- Create a transaction and fill in the required details.
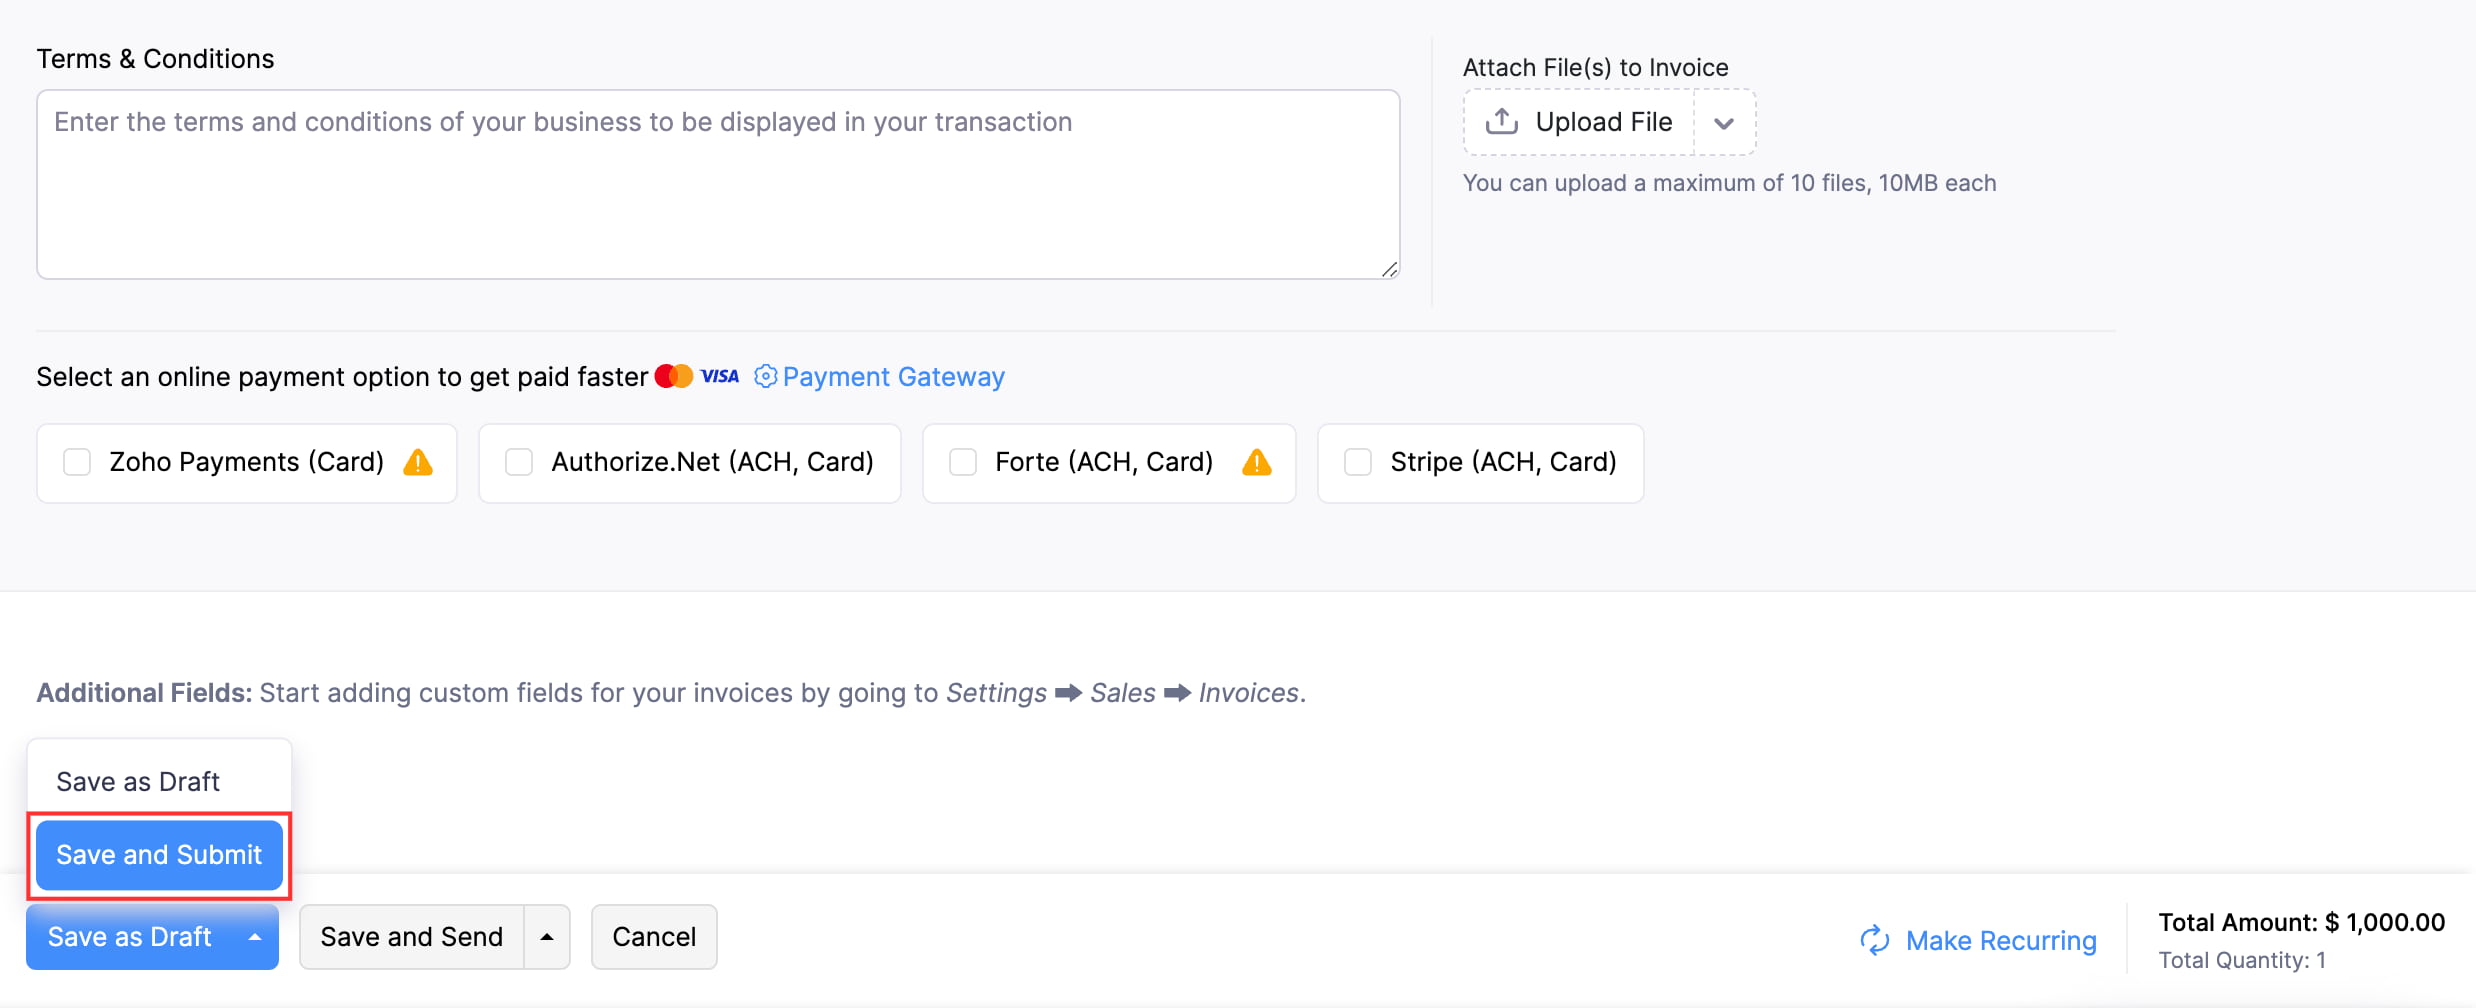
- Click the dropdown next to Save and Send and select Save and Submit.
You can also submit an existing transaction for approval, provided it is in the Draft status. Here’s how:
- Go to the module in which you created the transaction.
- Click the transaction that has to be submitted for approval.
- Click Submit for Approval on the transaction’s Details page.
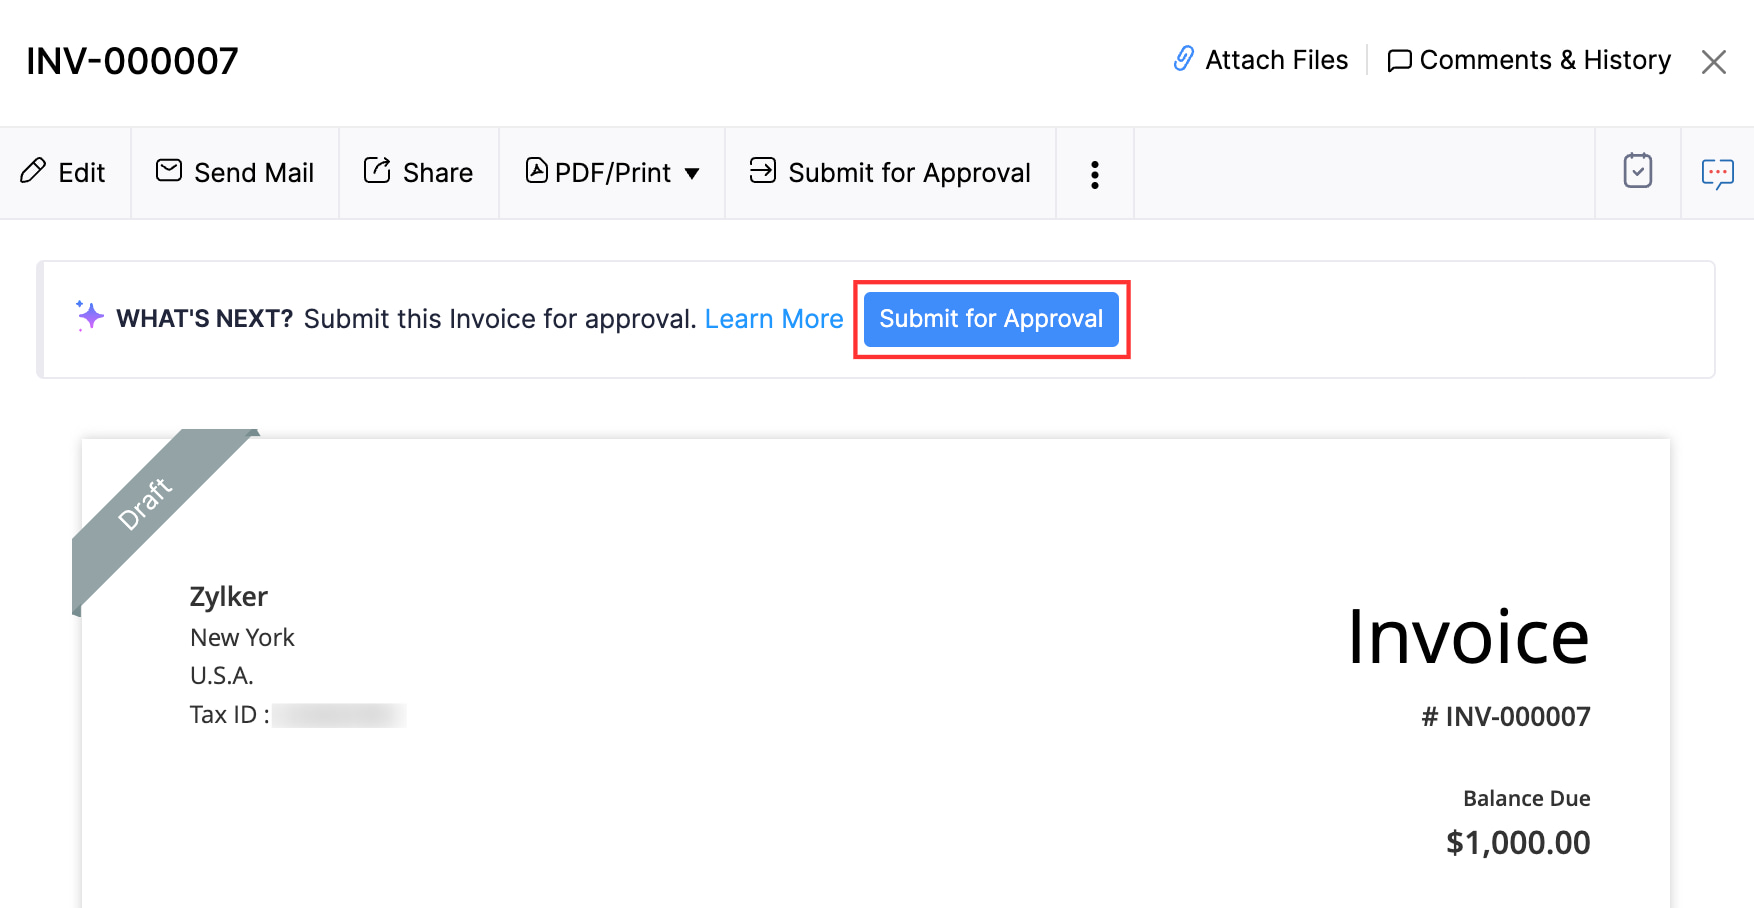
The transaction will be sent to the approvers for approval. If notifications are enabled in the module’s Notification Preferences, approvers will receive in-app and email notifications, and the submitter will be notified when the transaction is approved or rejected. Notification Preferences are configured per approval type — see Simple Approval, Multi-Level Approval, or Custom Approval.
Approve a Transaction
Users with permission to approve records of the module can approve transactions submitted for approval. The approval behavior depends on the approval type configured for the module:
- Simple Approval — Any one admin or approver can approve the transaction.
- Multi-Level Approval — Transactions move through the configured hierarchy. Each level’s approver must approve in turn. Admins can also Final Approve to override the hierarchy.
- Custom Approval — Transactions are routed to the approver defined by the matching custom approval criteria.
To approve a transaction:
- Open the transaction that has to be approved.
- Click Approve on the transaction’s Details page.

Bulk Approve Transactions
To approve multiple transactions at once:
- Go to the module in which you want to bulk approve transactions.
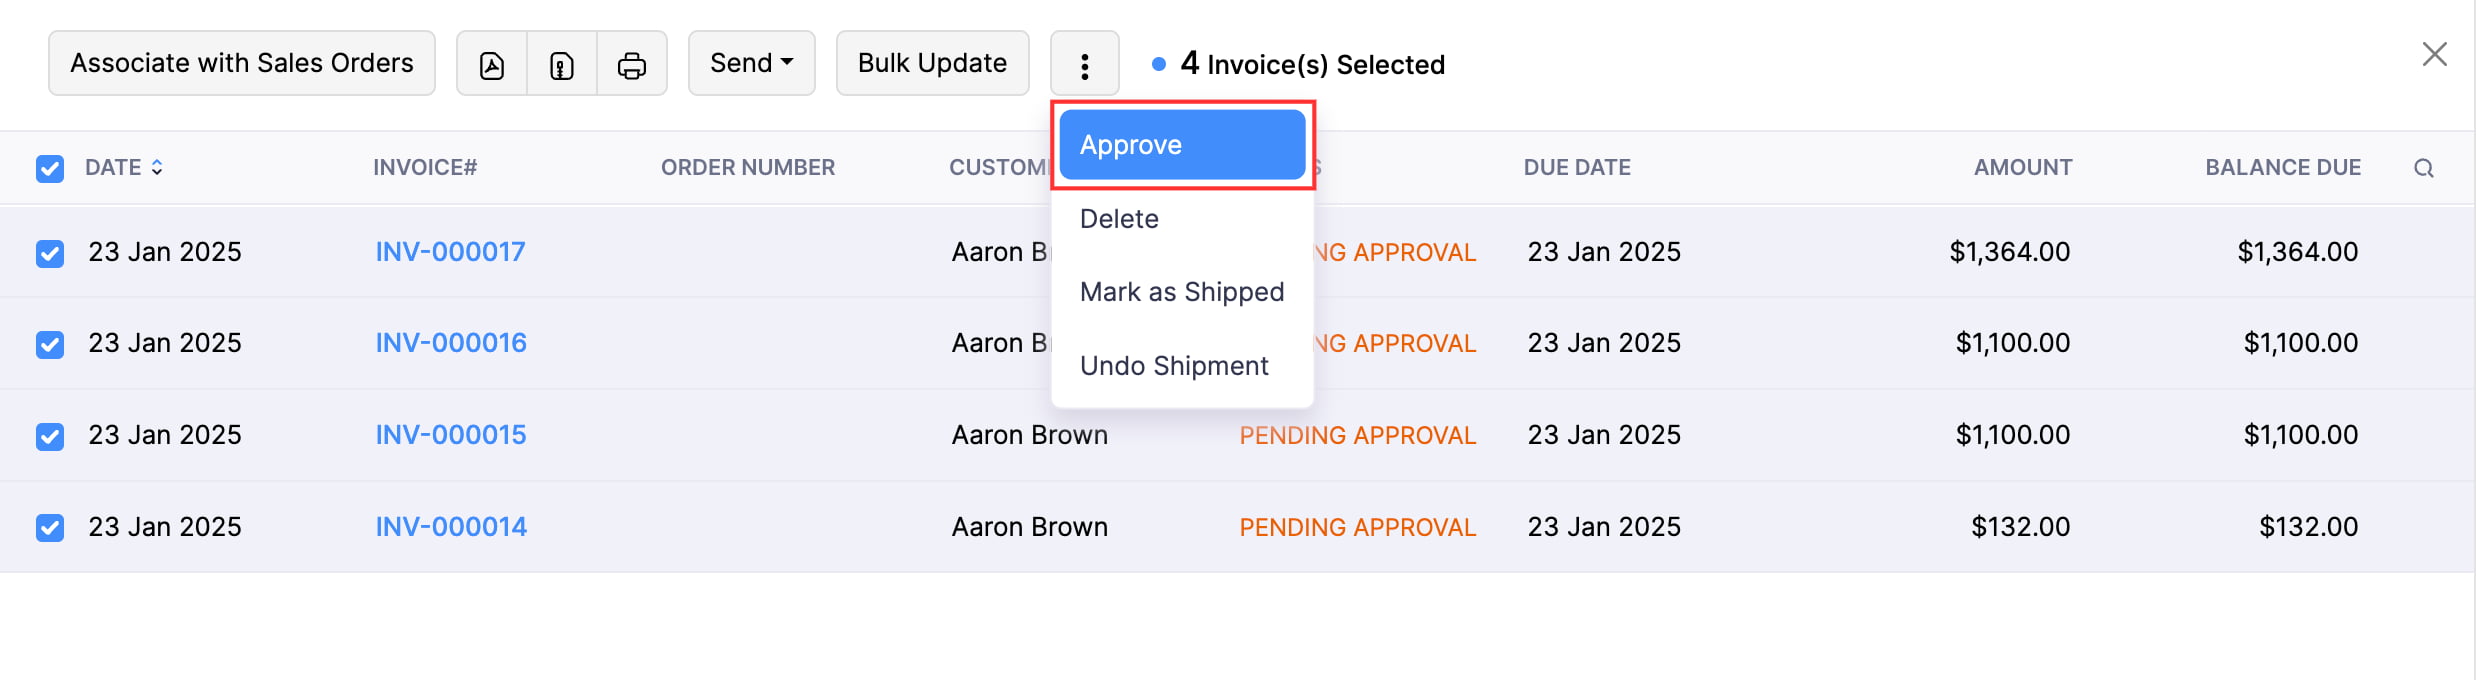
- If the module’s approval type is Simple Approval, select the transactions you want to approve.
- If the module’s approval type is Multi-Level Approval, click All at the top of the page, select My Approvals, and select the transactions you want to approve.
- Click Approve at the top of the page.
Final Approve a Transaction
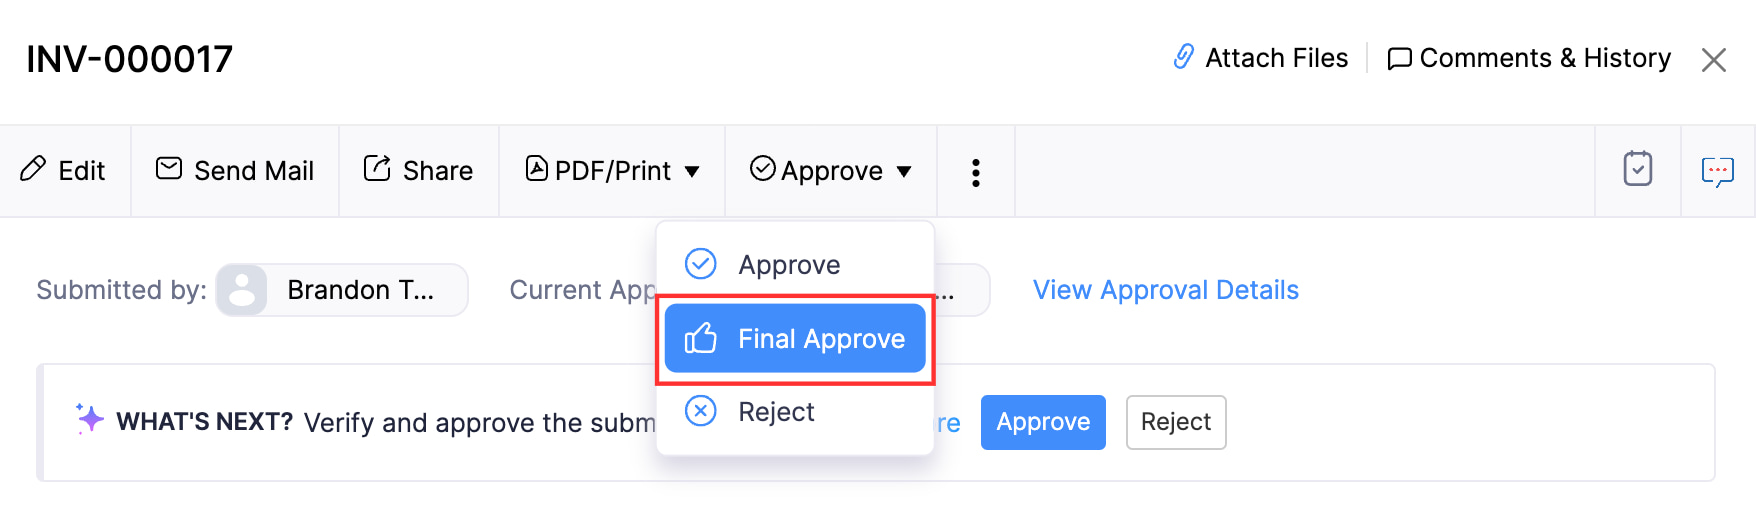
In Multi-Level Approval, admins can bypass the approval hierarchy and approve a transaction once and for all using Final Approve.
To Final Approve a transaction, admins should:
- Select the transaction that has to be approved.
- Click Approve and select Final Approve from the dropdown.
If an admin is not the current approver for the module or not part of the approval flow, they can still Final Approve transactions:
- Select the transaction that has to be approved.
- Click the More button and select Final Approve from the dropdown.
Reject a Transaction
Admins and approvers can reject transactions submitted for approval if they have incorrect details. By doing so, the submitter can make the necessary changes and resubmit the transaction for approval if required.
To reject a transaction, the admins or approvers should:
- Select the transaction.
- Click Reject on the transaction’s Details page.
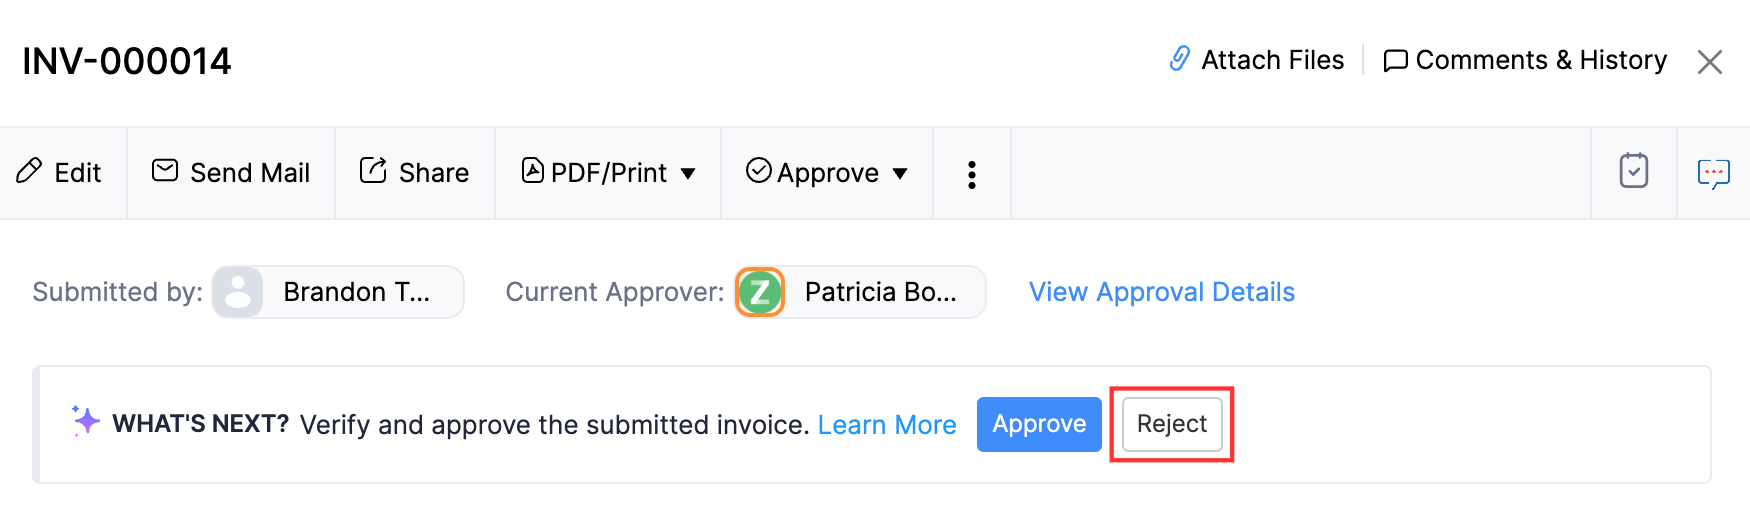
- Enter a reason for rejecting the transaction.
- Click Reject.
Pro-tip: If you do not want to reject a transaction, you still want the submitter to edit the transaction, you can convert a transaction to a draft by entering a reason.
Note: In Multi-Level Approval, if any of the approvers rejects the transaction, it will be rejected even if previous approvers approved it.
Resubmit a Rejected Transaction for Approval
If your approver rejects a transaction due to missing or incorrect details, you can correct these details and resubmit the transaction for approval. Here’s how:
- Open the transaction that was rejected.
- Click Resubmit at the top of the transaction’s Details page.
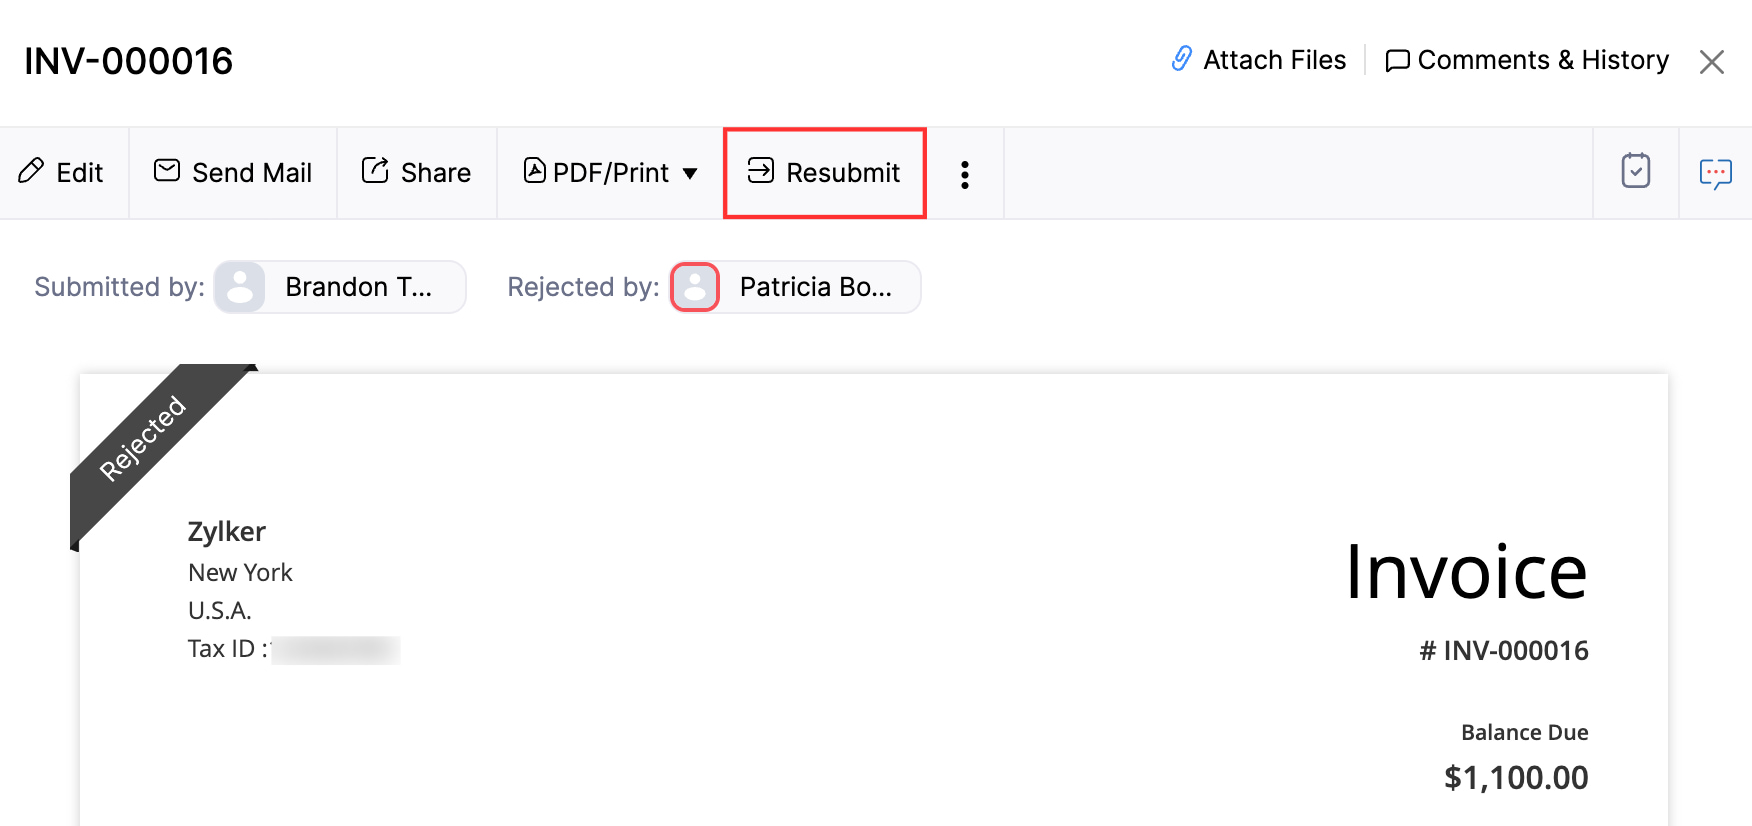
- Click Yes in the pop-up that appears.
Filter Transactions by Approval Status
Approval Filters let you filter transactions based on their current approval status. You can filter transactions by Draft, Pending Approval, Approved, or Rejected status across supported modules in Zoho Books.
Note: You can filter transactions by approval status for the following modules: Quotes, Sales Orders, Invoices, Retainer Invoices, Credit Notes, Sales Returns, Purchase Orders, Purchase Receives, Bills, Payments Made, Vendor Credits, Transfer Orders, Inventory Adjustments, and Custom Modules.
Scenario: Bailey, an accounts manager at Zylker Inc, needs to review all invoices awaiting sign-off before the month-end close. Instead of scrolling through the entire invoice list, Bailey uses the Pending Approval filter on the Invoices list page to instantly see only the invoices that require action — saving time and ensuring nothing is missed.
From Transaction List Page
You can filter transactions directly from the list view of any module that has Approvals enabled.
- Go to the module whose transactions you want to filter (for example, Invoices in the left sidebar).
- Click the All dropdown at the top of the list.
- Select the approval status you want to filter by — Draft, Pending Approval, Approved, or Rejected.
The list will refresh to show only transactions matching the selected approval status.
From Items Transaction Details
You can filter transactions associated with an item by their approval status from the item’s Transactions tab.
- Go to Items in the left sidebar.
- Click an item to open its Details page.
- Click the Transactions tab.
- Click the Status dropdown and select the approval status.
The transactions listed for that item will be filtered to show only those matching the selected approval status.
From Custom Views
You can create or edit a Custom View to include an approval status condition, letting you save a filtered view for repeated use.
- Go to the module in which you want to create a filtered custom view.
- Click the Custom Views dropdown at the top of the list and select New Custom View, or click the Edit icon next to an existing custom view.
- Under Criteria, add a condition where the field is Approval Status and the value is Draft, Pending Approval, Approved, or Rejected.
- Fill in the remaining details and click Save.
The custom view will display only transactions that match the configured approval status.
From Advanced Search
Use Advanced Search to find transactions that match a specific approval status alongside other search criteria.
- Go to the module whose transactions you want to filter.
- Click the Search icon at the top of the list and select Advanced Search.
- Choose the module from the Search dropdown and select a status from the Status dropdown.
- Add any additional criteria as needed and click Search.
The search results will display transactions matching all the criteria you specified, including the selected approval status.
From Vendor Transaction Details
You can filter transactions associated with a vendor by their approval status from the vendor’s Transactions tab.
- Go to Purchases and select Vendors in the left sidebar.
- Click a vendor to open their Details page.
- Click the Transactions tab.
- Select the module for which you want to filter.
- Click the dropdown next to Status and select the approval status.
The transactions listed for that vendor will be filtered to show only those matching the selected approval status.
View Approval History
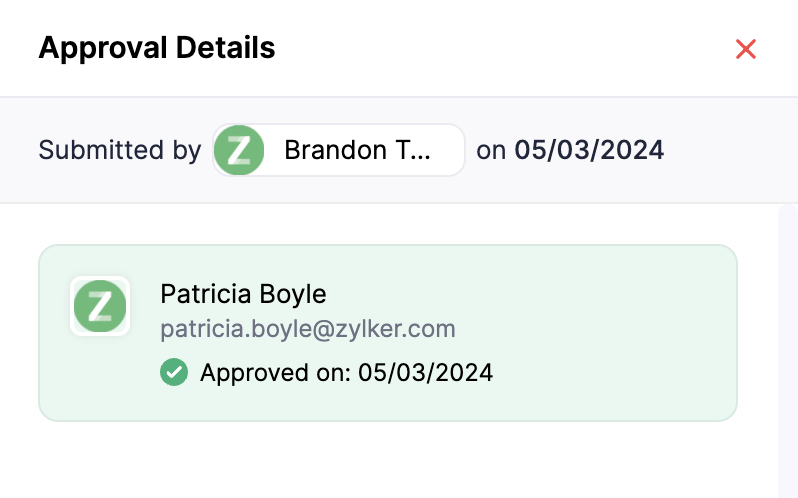
The admins and approvers who are associated with a transaction can view the details of the approval process and approval history. Here’s how:
- Select a transaction.
- Click View Approval Details on the transaction’s Details page.
Related
 Yes
Yes