Connect Cassandra Data with Zoho Analytics
Apache Cassandra DB is an open-source, distributed NoSQL database designed to handle large volumes of data across many servers with high availability and scalability.
Import data from your Cassandra database into Zoho Analytics and build insightful reports and dashboards. Use built-in AI features to explore trends, spot anomalies, and forecast outcomes. With support for incremental data sync and customizable schedules, keep your analysis always up to date.
Here's what you'll find in this document:
- Import Data from Cassandra
- Import Rollback
- Live Connect
- Manage Data Source
- Manage Table Synchronization Settings
- Resolving Sync Failures
- Data Blending
Import Data from Cassandra
Importing data from Cassandra comprises of three steps:
Configure Connection Details
- From the Zoho Analytics home page, click Import Your Data.
- Select Databases & Datalakes > Cassandra.
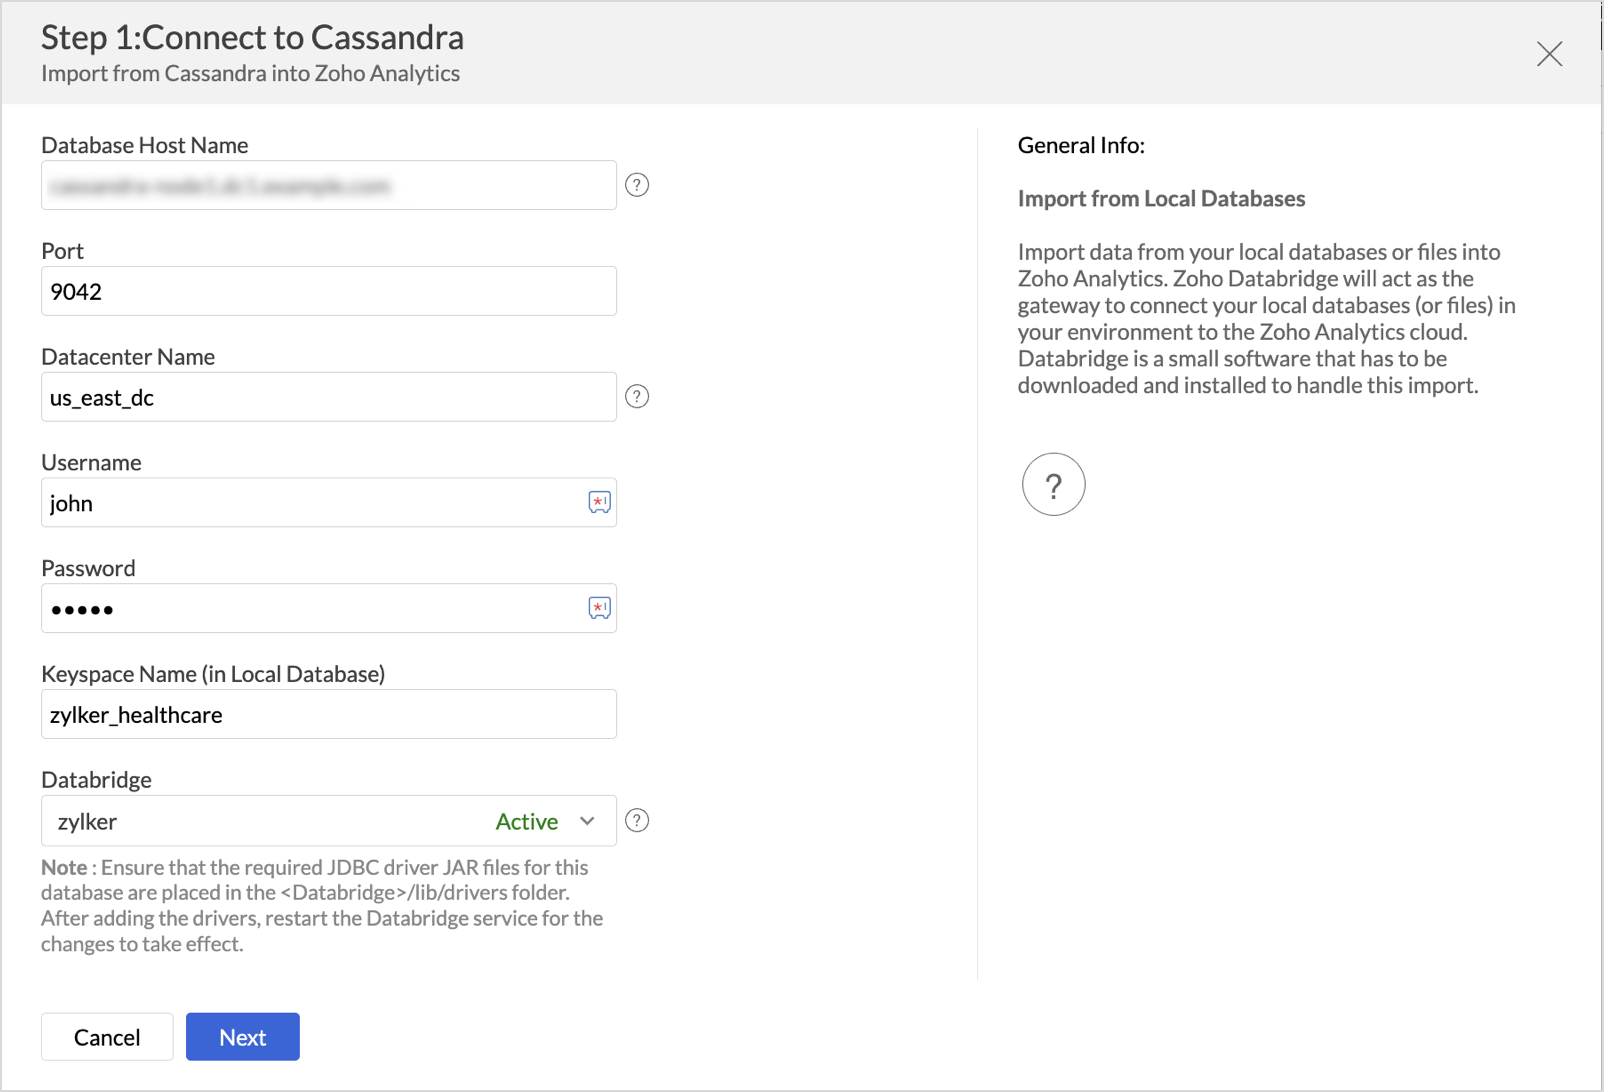
- Provide the necessary credentials like Database Host Name, Port, Datacenter Name, Username, Password, and Keyspace Name.
- Connect through Zoho Databridge, an utility tool that helps fetch the data hosted in private networks. Ensure to have the latest version of Zoho Databridge.

Choose Data to Import
Once the connection details are configured, you need to decide which data you want to import from Cassandra. Zoho Analytics offers import options, such as Single Collection and Multiple Collections to support various data structures and analysis needs.
Cassandra data is often stored in a wide format, where a single row may contain many related values.
For example, one patient profile collection (Parent) may have multiple medical visits or prescribed medications (Child records).
To use this data in Zoho Analytics:
- If the collection contains any multi-value fields (such as visits or medications), Zoho Analytics splits the data into a parent table and one or more child tables using a parent-child relationship.
- A collection represents a parent-level entity (for example, a patient profile).
- Each multi-value field (like visits or medications) is placed into a separate child table.
When importing data:
- You can import both parent and child tables only by selecting a Single collection.
- If you select Multiple collections, only the parent tables from each collection will be imported. Child tables will not be included.
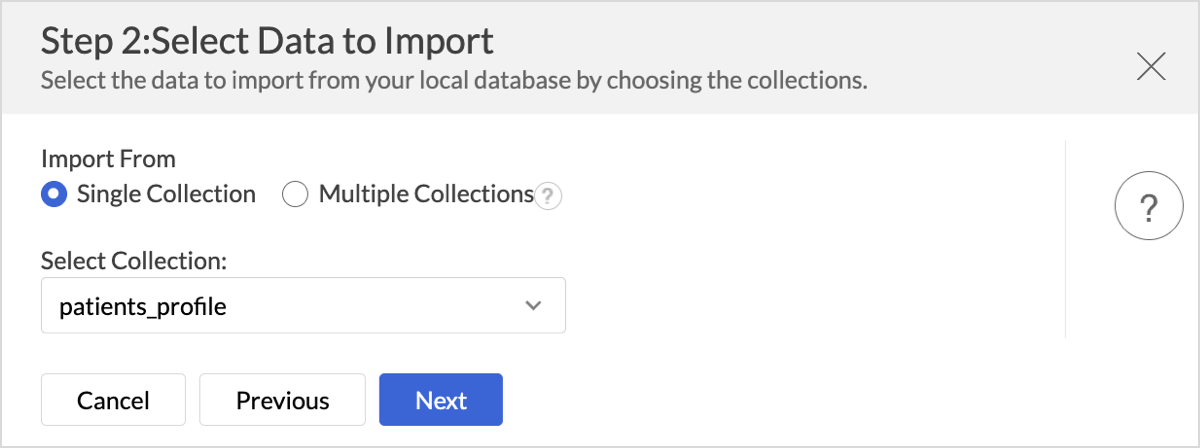
Single Collection
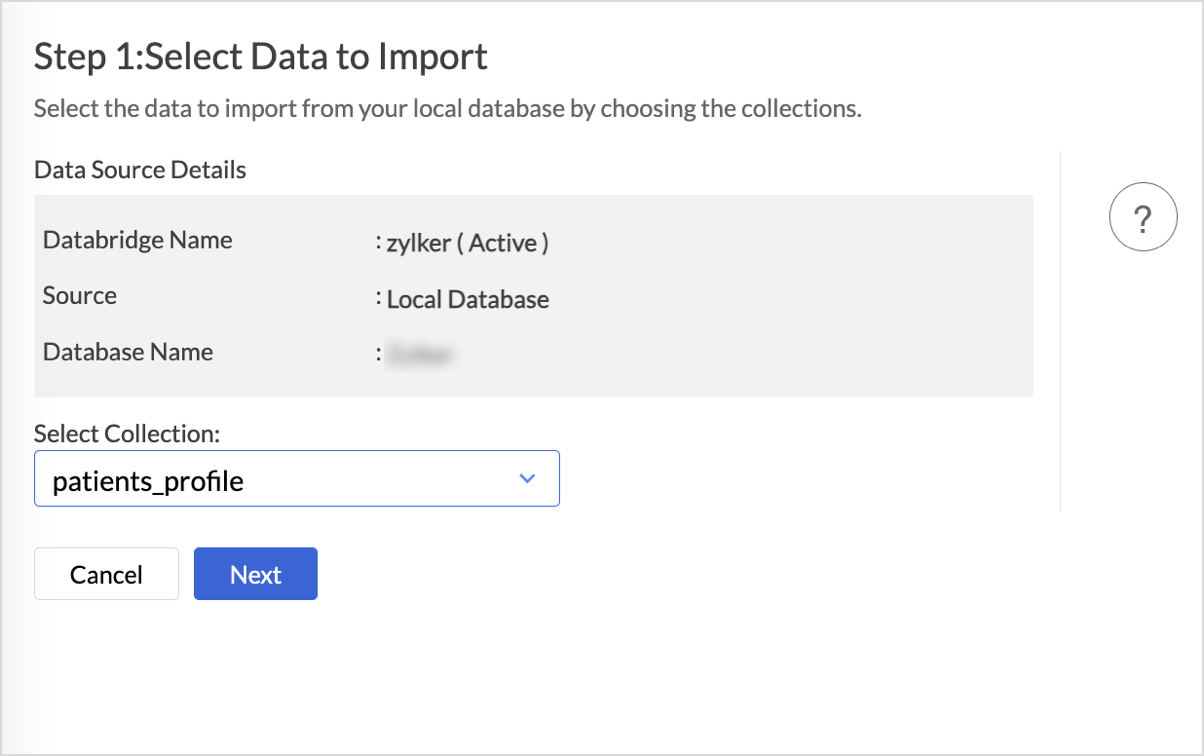
- Select Single Collection from the Import From section.
- Choose the collection to import from the Select Collection drop-down menu.
- Click Next to continue.
- Select the child tables you wish to import and click Next.
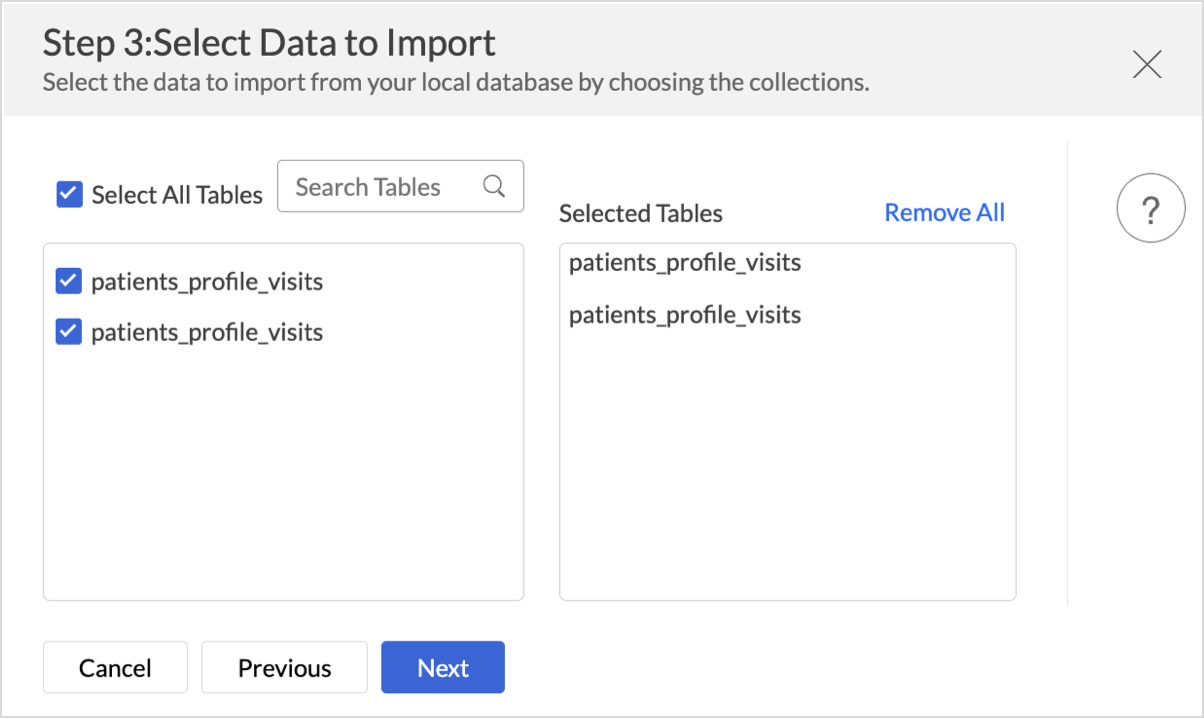
- The Import Settings page will open.
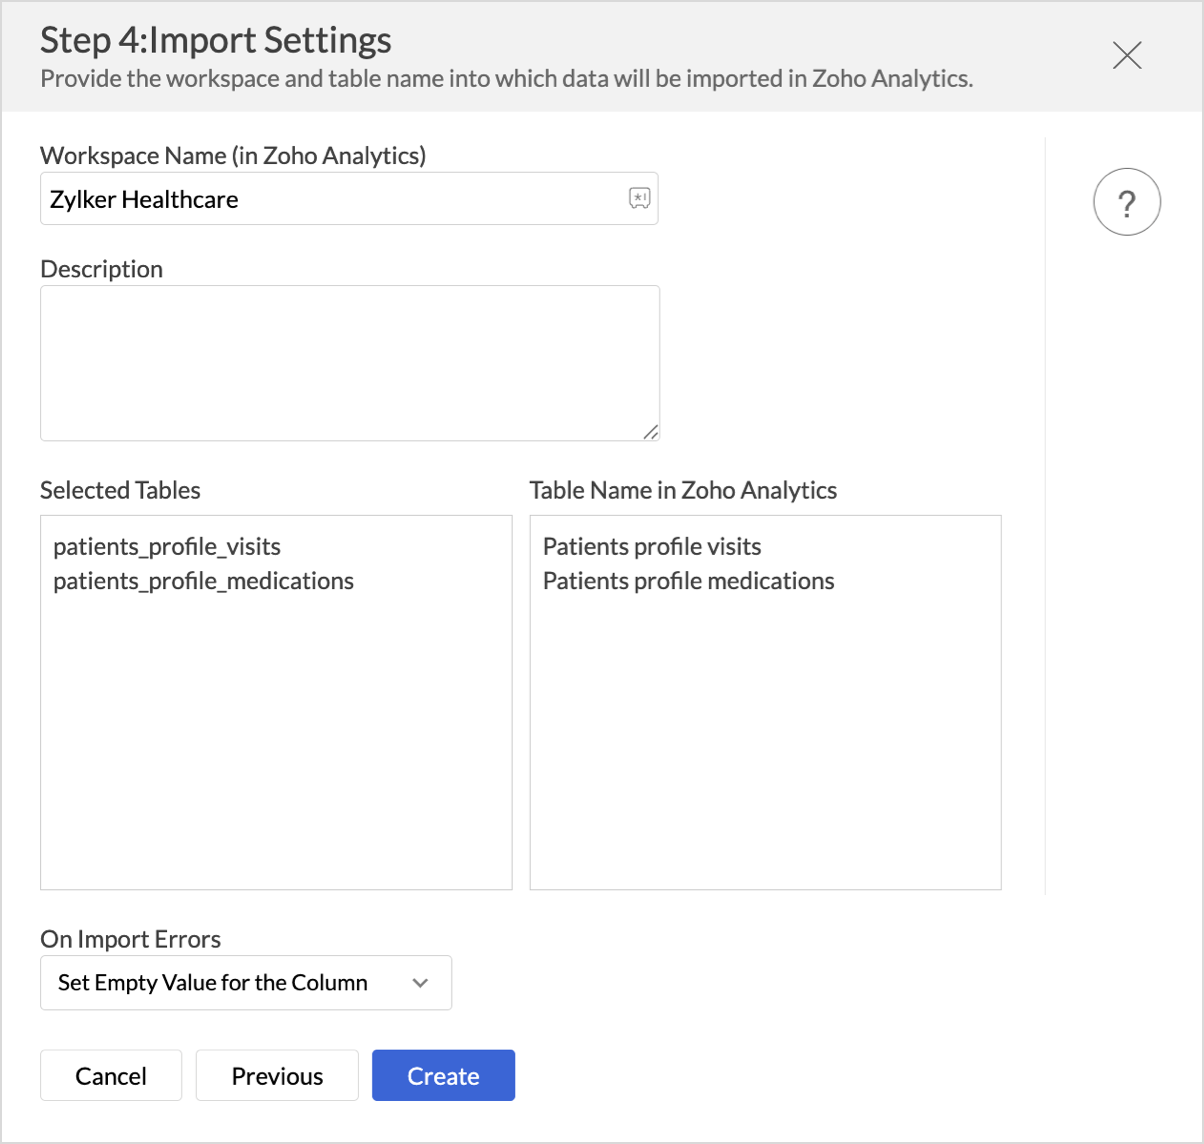
- You can edit the Workspace Name, Table Name, and add a description if needed.
- You can edit the Workspace Name, Table Name, and add a description if needed.
- On Import Errors section allows you to specify how to handle error conditions in case they occur while importing data. The following are the possible options:
- Set Empty Value for the Column (default): Sets an empty value to the corresponding column value which had problems while importing.
- Skip Corresponding Rows: Skips the corresponding rows in which an error occurs while importing.
- Don't Import the Data: Aborts the import process if any error occurs during importing.
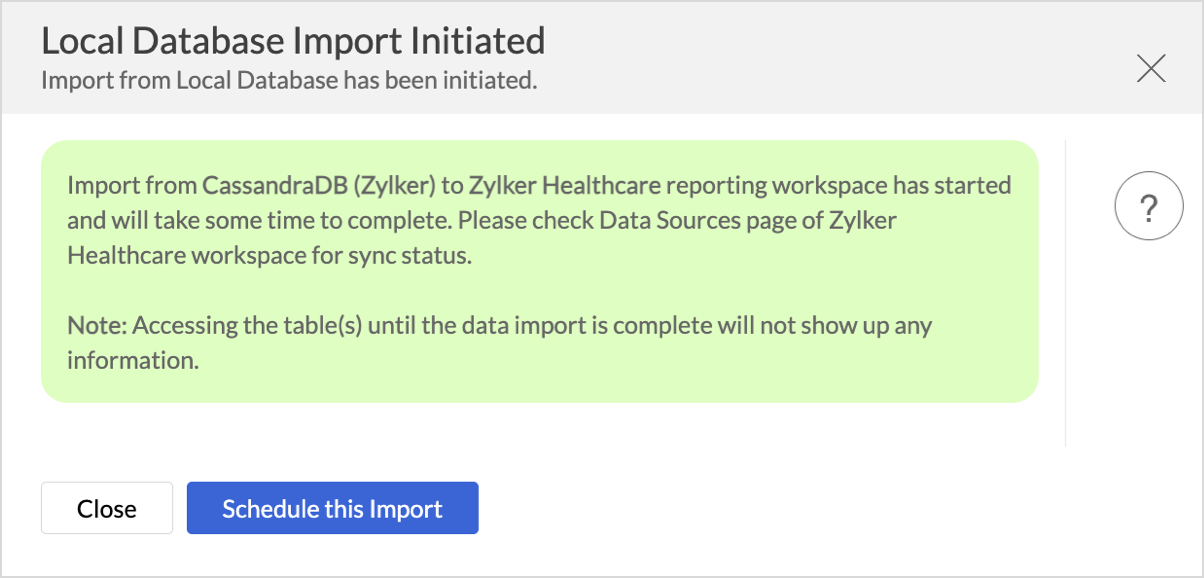
- Click Create. Data import will be initiated, and you can also choose to schedule the import.


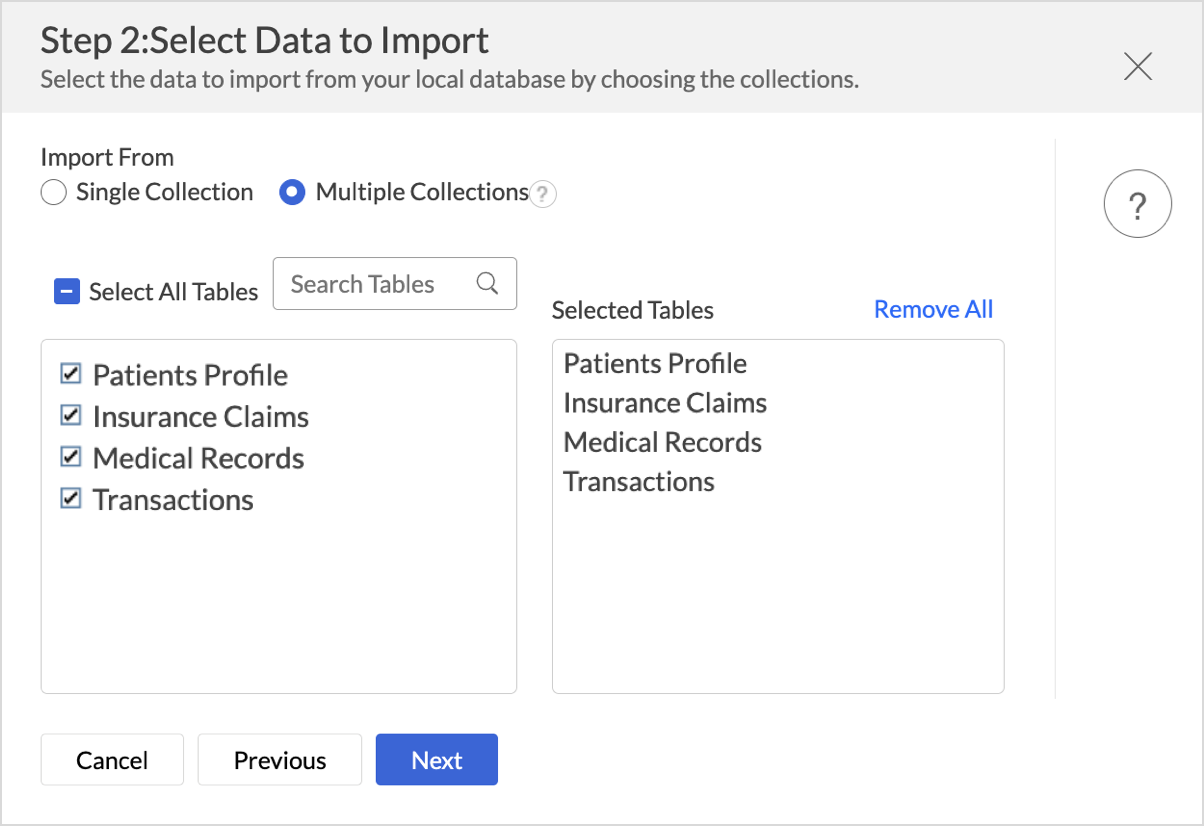
Multiple Collections
- Select Multiple Collections from the ImportFrom section.
- Choose the tables you wish to import and then click Next.
- In the Import Settings page that opens, specify the Workspace Name that is to be created in Zoho Analytics. You can also provide a Description about the workspace.
- Click the Edit icon that appears on mouse hover to edit the Table Name.
- Specify how to handle errors that occur during import in the On Import Errors section.
- Click Create. Data import will be initiated, and you can also schedule the import.


Schedule Data Import
Data Refresh
Data freshness is important for effective analysis. Zoho Analytics allows you to configure what data should be fetched in each schedule.
- Import all records: This option imports all the records in each schedule. Refer to the Schedule import article to learn more.
- Incremental Fetch: This option imports only the new and updated or modified records into Zoho Analytics.This method is beneficial when the database contains transactional records that get updated frequently. Refer to the Incremental Fetch article to learn more.
Follow the below steps to configure the Import synchronization settings (data refresh settings)
- Once you have initiated the data import, Click Schedule this Import.
- Choose What data to fetch in each schedule drop-down menu. You can choose to import all the records or incrementally fetch only the newly added or modified records.
- Choose How do you want to import the data?
- Select Include new columns added in your cloud database automatically into Zoho Analytics table(s) to import data from newly created columns in the subsequent imports.
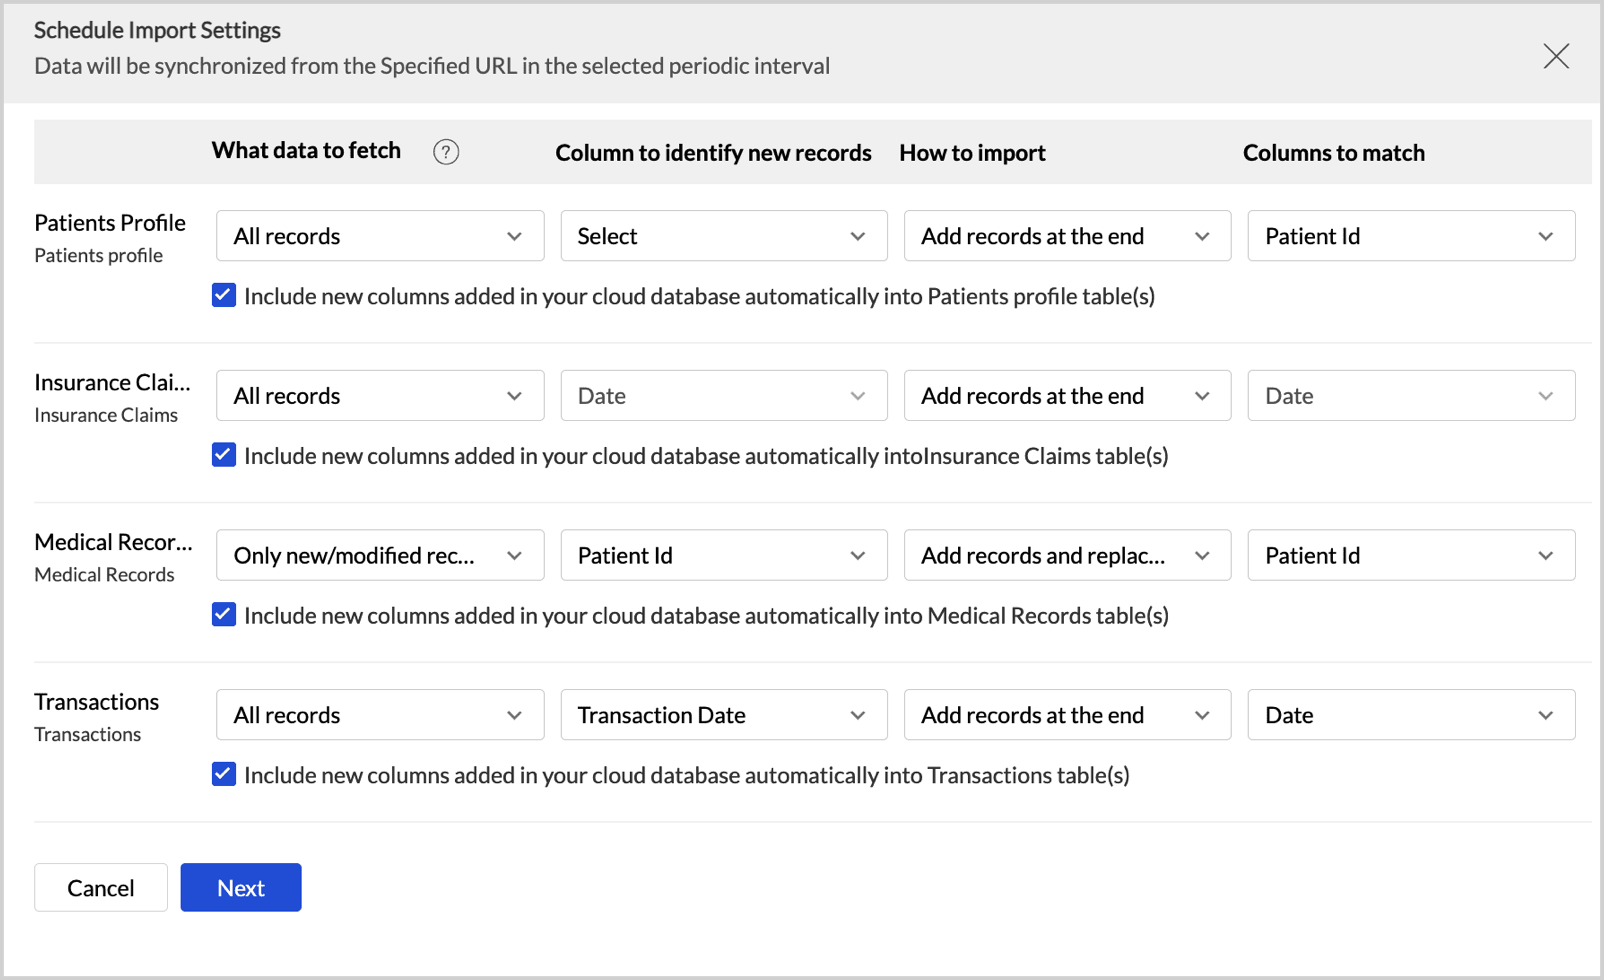
- Click Next.


Data Sync Frequency
Zoho Analytics offers flexible sync schedules to ensure that the data is always up-to-date for effective analysis.
- In the Schedule Setting pane, choose the interval in which you would like to synchronize the data. You can choose to synchronize your data at one of the intervals mentioned below.
- Every 'N' hour
- Everyday
- Weekly Once (Standard plan and above)
- Monthly Once (Standard plan and above)
- Selecting Not Scheduled will import the data only once, i.e., at the time of import.
- In the case of continuous import errors, you can choose to be notified via email. To get notifications, select the interval at which you need to be notified from the Notify me after every drop-down menu.
- Trigger when at least ‘n’ tables fail: Set the number of table failures that may occur during import before Zoho Analytics sends a failure notification.
- You can also choose to notify the Account Admin, All Workspace Admins, All Organization Admins, or any Custom User.
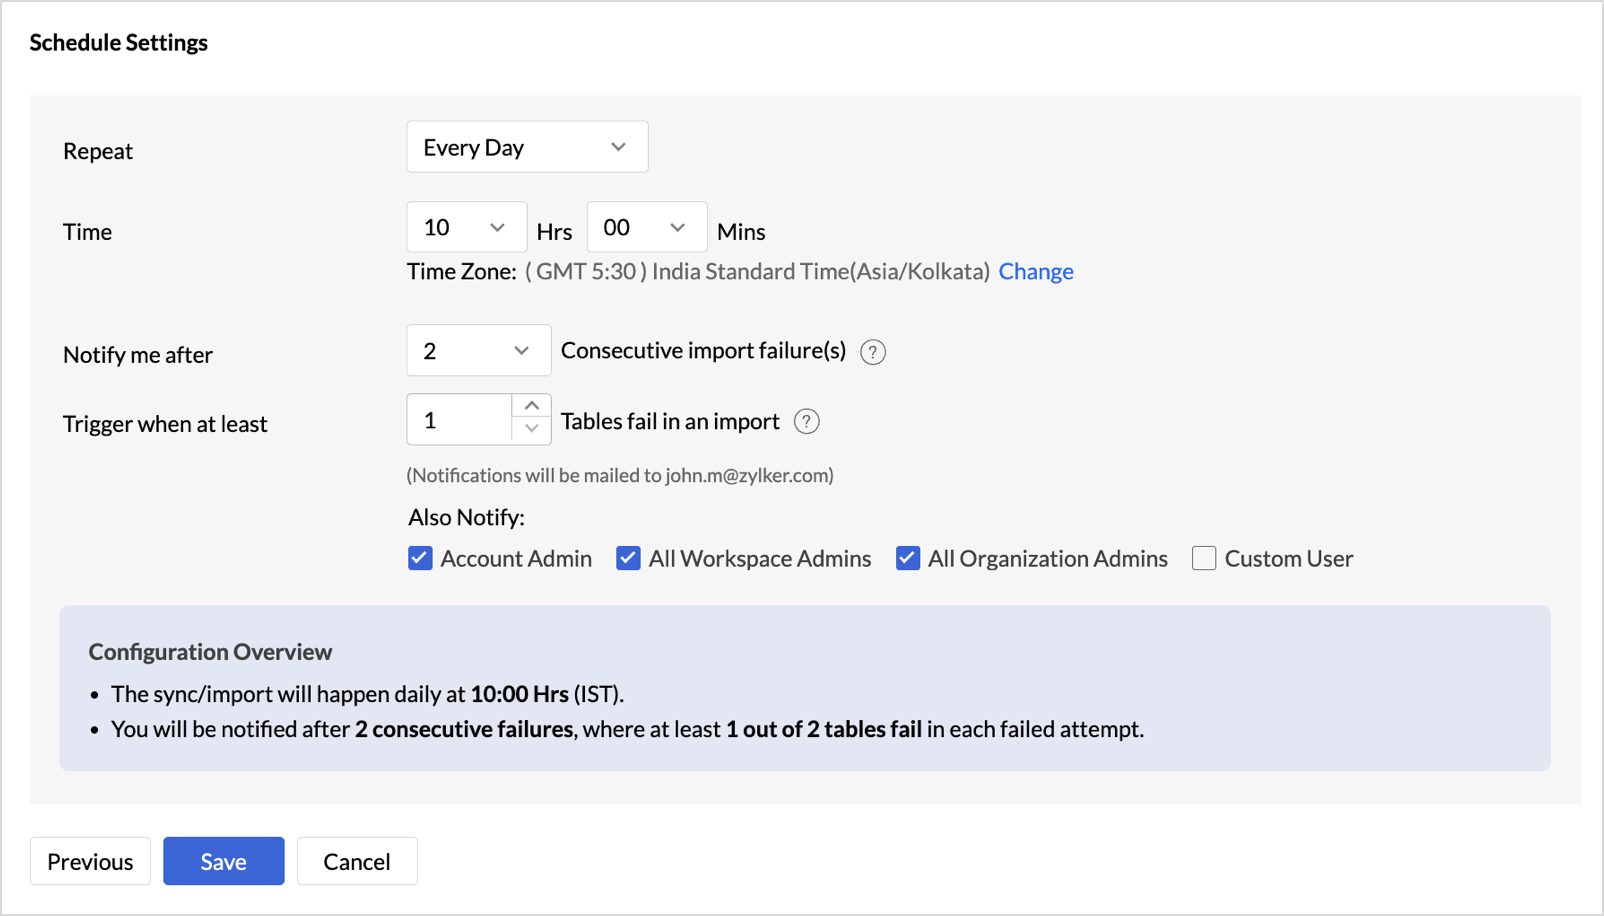
- Click Save.

Refer to the Multiple Sync Schedule interval section to learn how to sync different tables at different sync intervals.
Import Rollback
Import rollback reverts the most recent data import to the previous version. Users with administrator privileges and custom role users with permission to create tables can perform this action. Rollback facilitates the correction of errors in data without disrupting operations and also minimizes data loss. It is useful in collaborative environments where multiple users access the data and make changes.
Note:
- Data can be reverted to its previous state within 4 hours of the import.
- Deleted columns will not be reverted during the import rollback.
Any actions, such as adding a new column, creating formulas, formatting columns, and having lookups defined, will be preserved during the import rollback.
Follow the below steps to revert the data import to the previous version,
- Access the data table, which needs to be reverted.
- Click Import Data > Last Import Details.
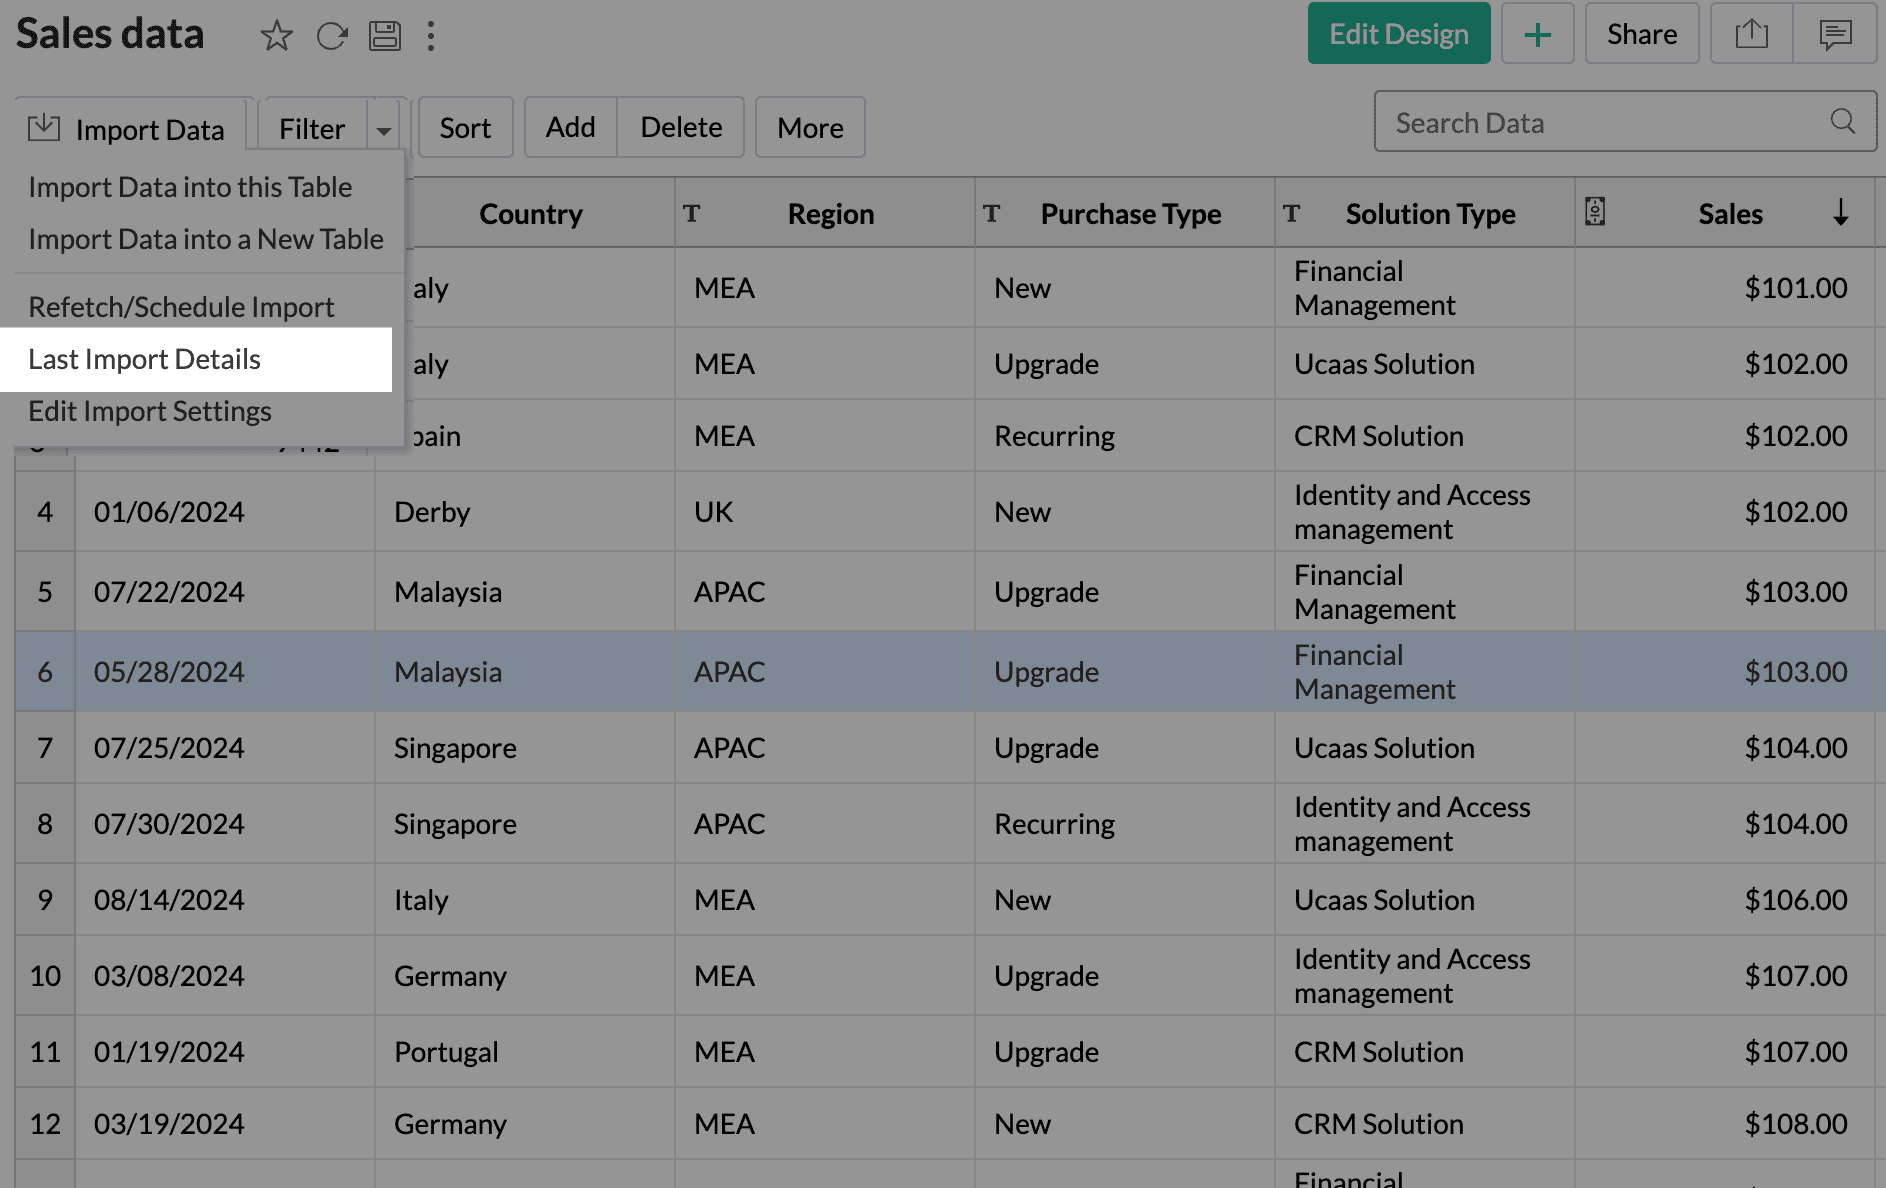
- Click Rollback to revert to the previous instance.
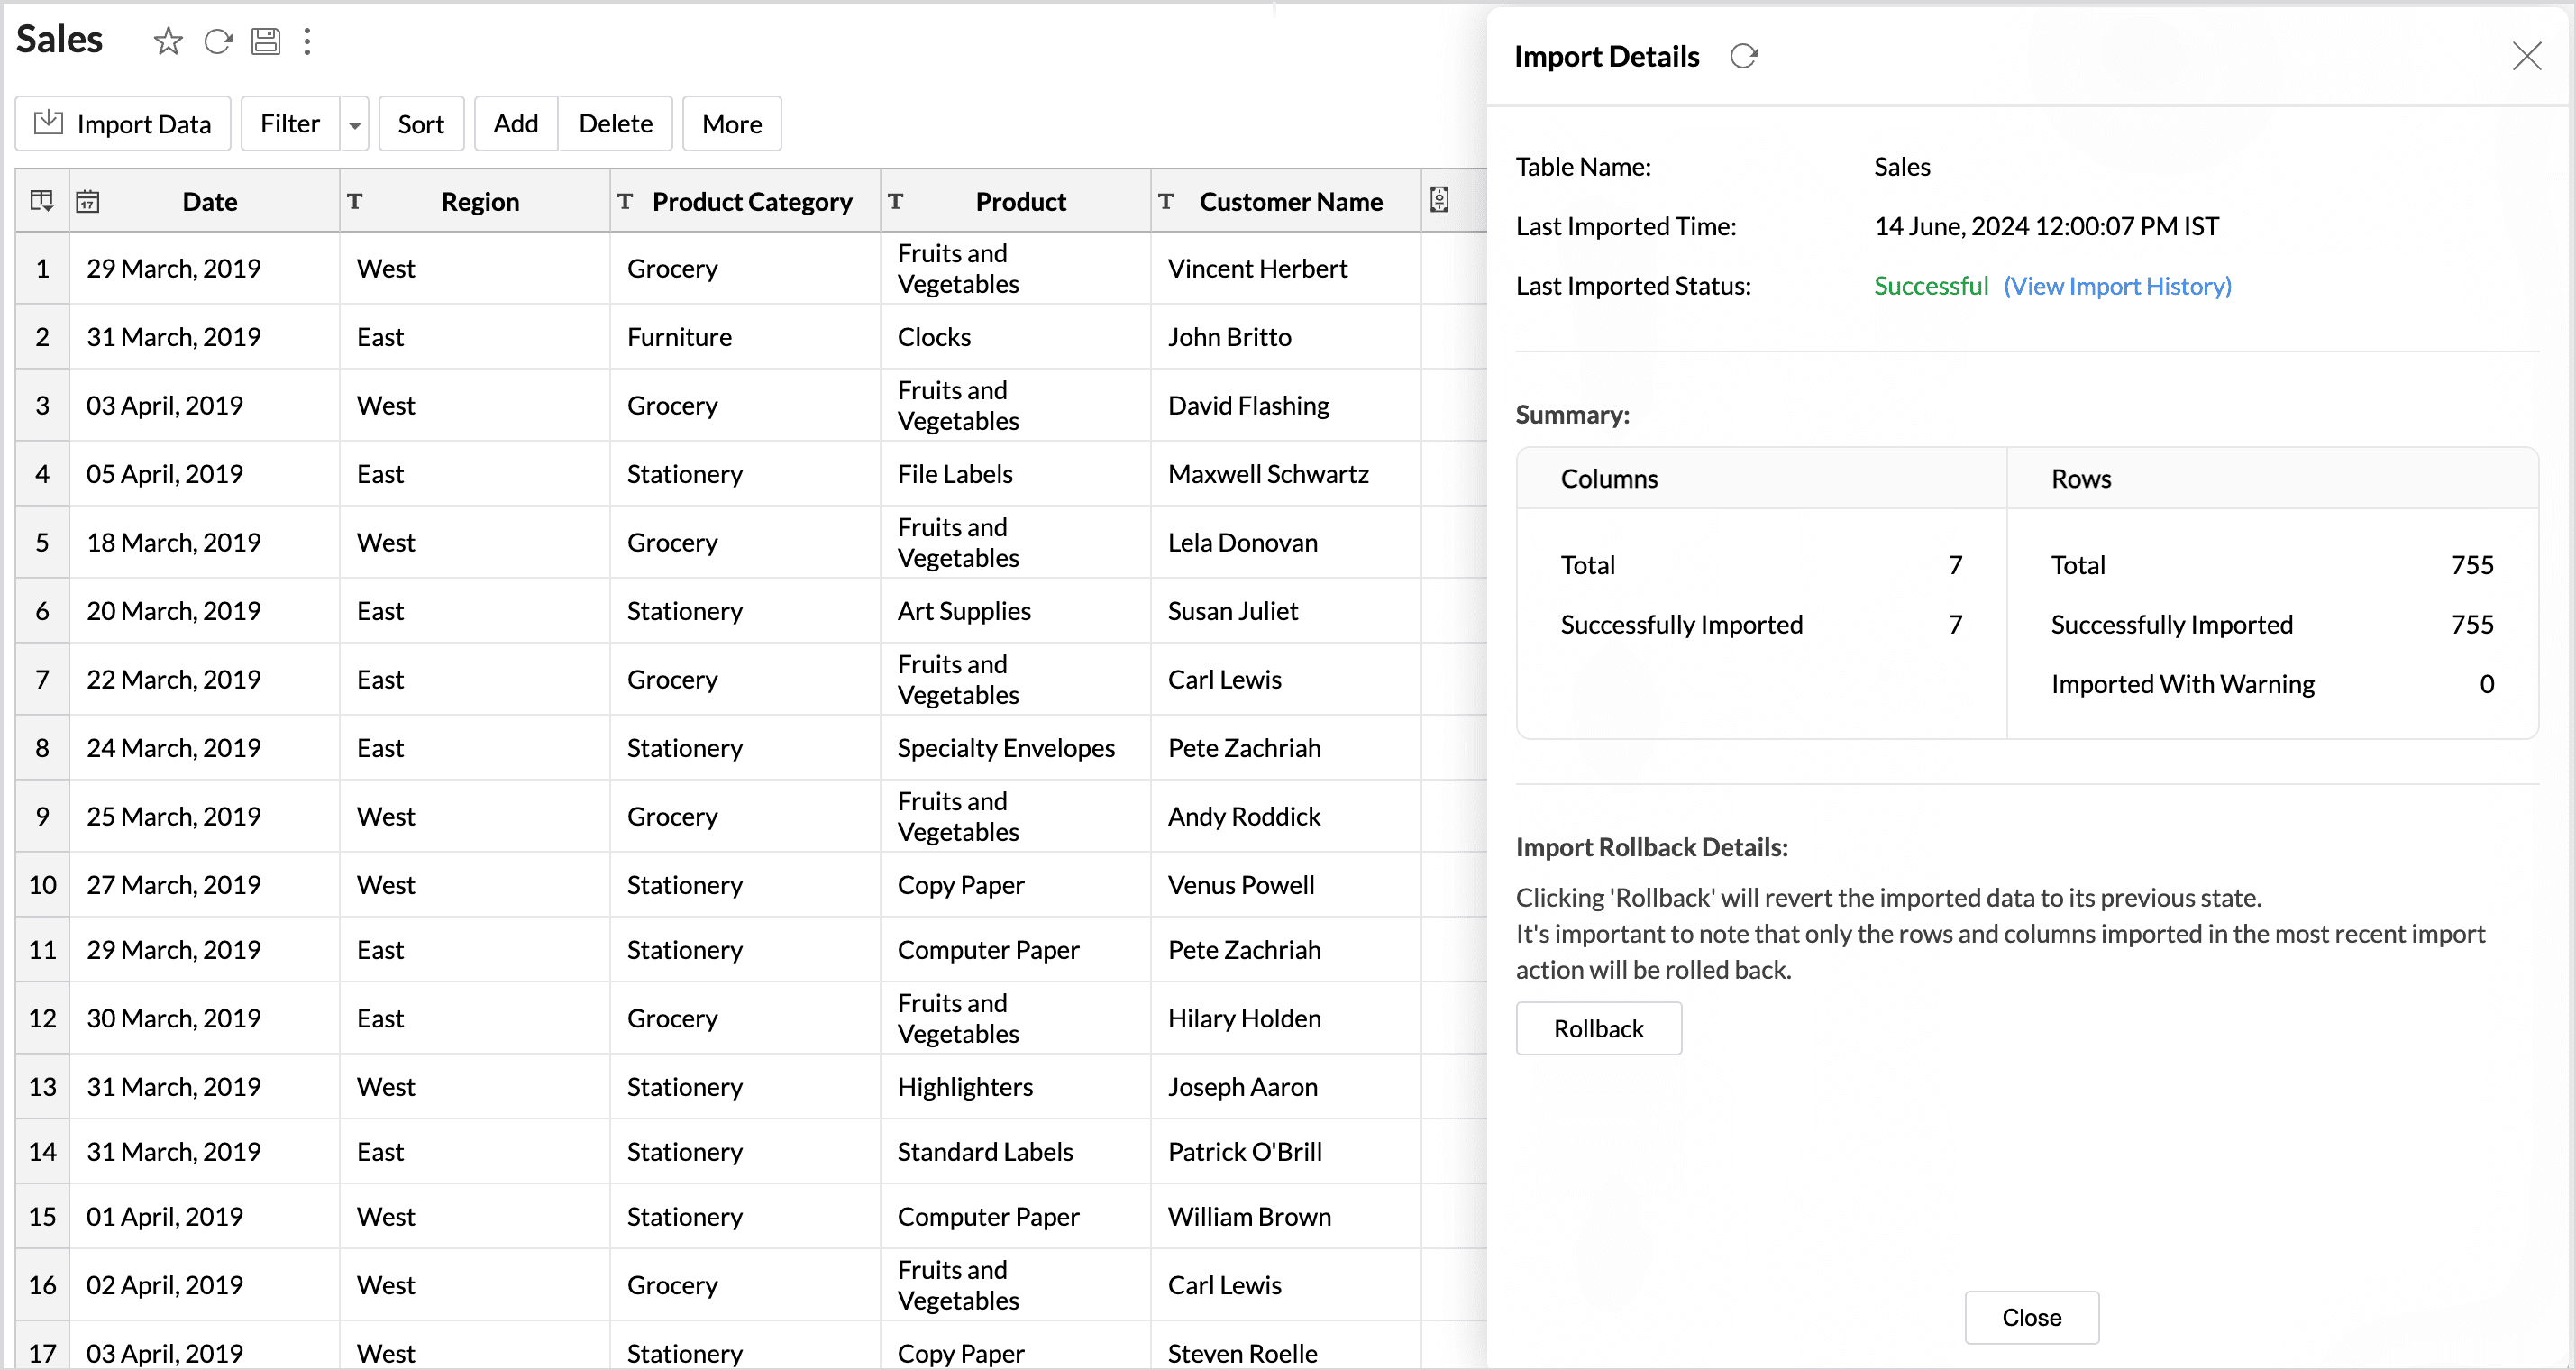
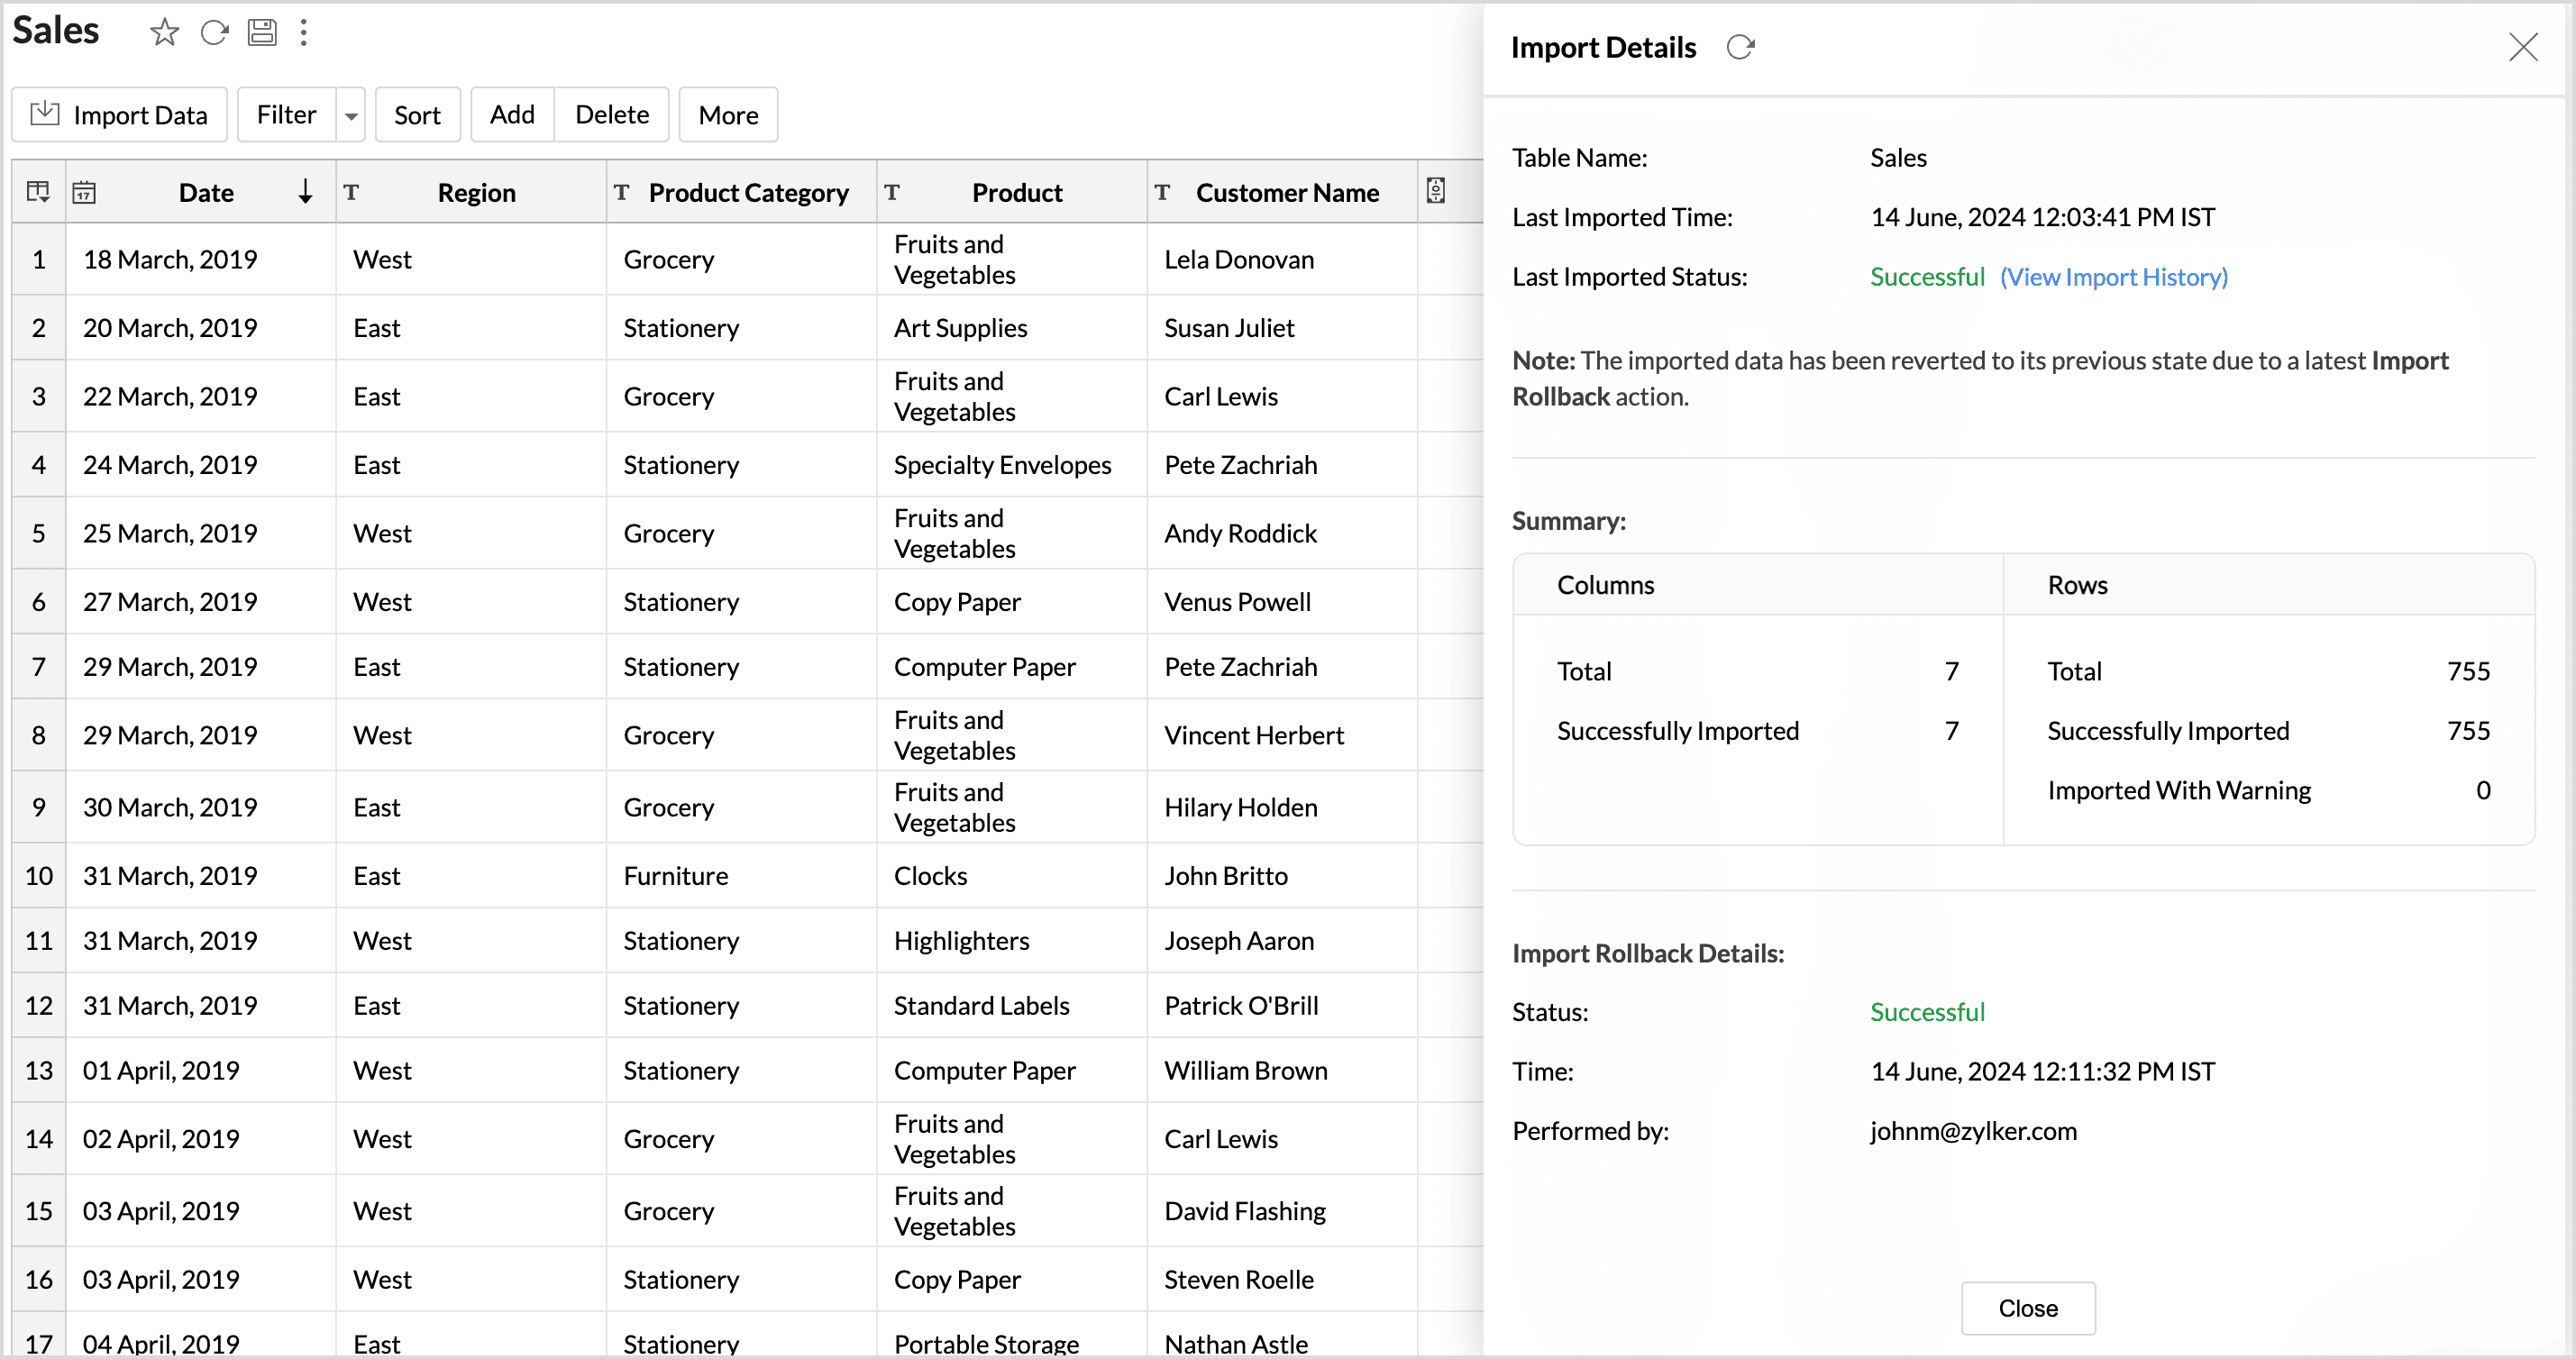
- Import rollback will be initiated, displaying the status along with the details of the admin who performed the action and the time of execution.


Live Connect
Live Connect enables direct, real-time connection to the data source, ensuring that up-to-the-minute data is used for analysis. In this method, the data is not imported or stored within the Zoho Analytics application. Refer to the Live Connect article to learn more.
Manage Data Source
The Data Sources tab is the central hub that helps manage all the connection settings of the data sources in the workspace. It also helps keep tabs on the data sync status and notifies in the case of data sync failures. User with the Administrator Privilege can access the data sources tab and make necessary changes when needed.
- Edit Connection: Enables admins to re-authenticate and update the connection details such as credentials or configuration settings without causing any interruption to the existing data flow. Learn more

- Sync Settings: Set up how often your data syncs and manage who gets notified when a sync fails. Learn more
- Audit History: Track user and system actions with detailed audit logs for each data source. Learn more
- Sync History: View the status of past syncs and troubleshoot any failures. Learn more

Manage Table Synchronization Settings
Zoho Analytics provides flexible data fetch options like full data and incremental fetch, which imports only the new records. Each table can have different data fetch configurations. All the tables imported from the database will be listed with the Table and Source Table Name, What data is fetched in each sync, Last Fetch Time, and its Sync status. Learn more.
Resolving Sync Failures
Data synchronization can fail if the credential provided is invalid or expired, or if the data type mismatches. Zoho Analytics sends an email to the workspace admin and also sends an in-app notification with the reason for failure along with the necessary action to be taken to resolve the issue. Access the Data Sources tab to resolve sync failure. Refer to the Edit Connection section for more details.
Data Blending
Combine data from various data sources, such as Files, Feeds, Cloud storage Databases, and Business applications, for in-depth analysis. While importing data in an existing workspace, Zoho Analytics auto identifies columns of the same data type and provides suggestions for lookup. With Query Tables, you can combine data from different tables in the workspace.
To import data into an existing workspace, Click the Create icon on the side navigation panel and choose New Table/Import Data from the drop-down menu. Successive steps are similar to the steps mentioned in this section.
Import Data into an existing table
- Click Import > Import data into this Table.

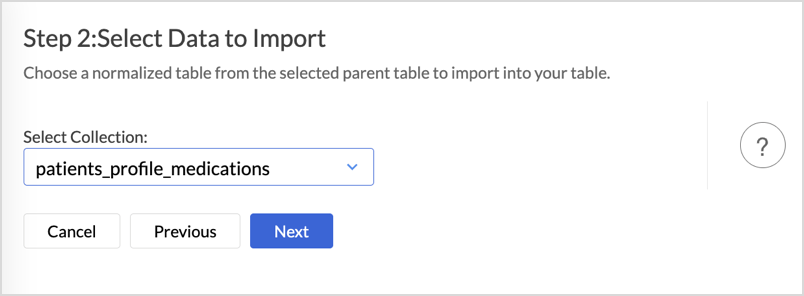
- Select the Collection you want to import and click Next.
- Select the normalized table (child) from the drop-down menu and click Next.
- Choose how you want to import the data into the existing table and select how to handle import errors.
- Click Import.


