Create a Budget
You can create budgets for your expenses and compare your actual spending with your set budgets by taking a look at the Budget vs Actuals Report.
Create Budgets For Your Organization
To create a budget for your organisation:
- Click Admin View.
- Go to Budgets on the left sidebar.
- Click + New Budget at the top right corner of the screen.

You can create two types of budgets in Zoho Expense:
- Category Based Budgets
You can create budgets for the categories in your organisation. For example, you can create and allocate budgets for your automobile expenses, meals and entertainment expenses, fuel and mileage expenses, and other categories. - Expense Type Based Budgets
Similarly, you can also create budgets for the expense types that comprise of the categories in your organisation. For example, you can create budgets for the expense type called Travel. The Travel expense type can include all your categories related to travel such as travel expenses, automobile expenses and parking.
- Category Based Budgets
- Select the preferred budget type.
- Once you select the budget type, you can enter other details.
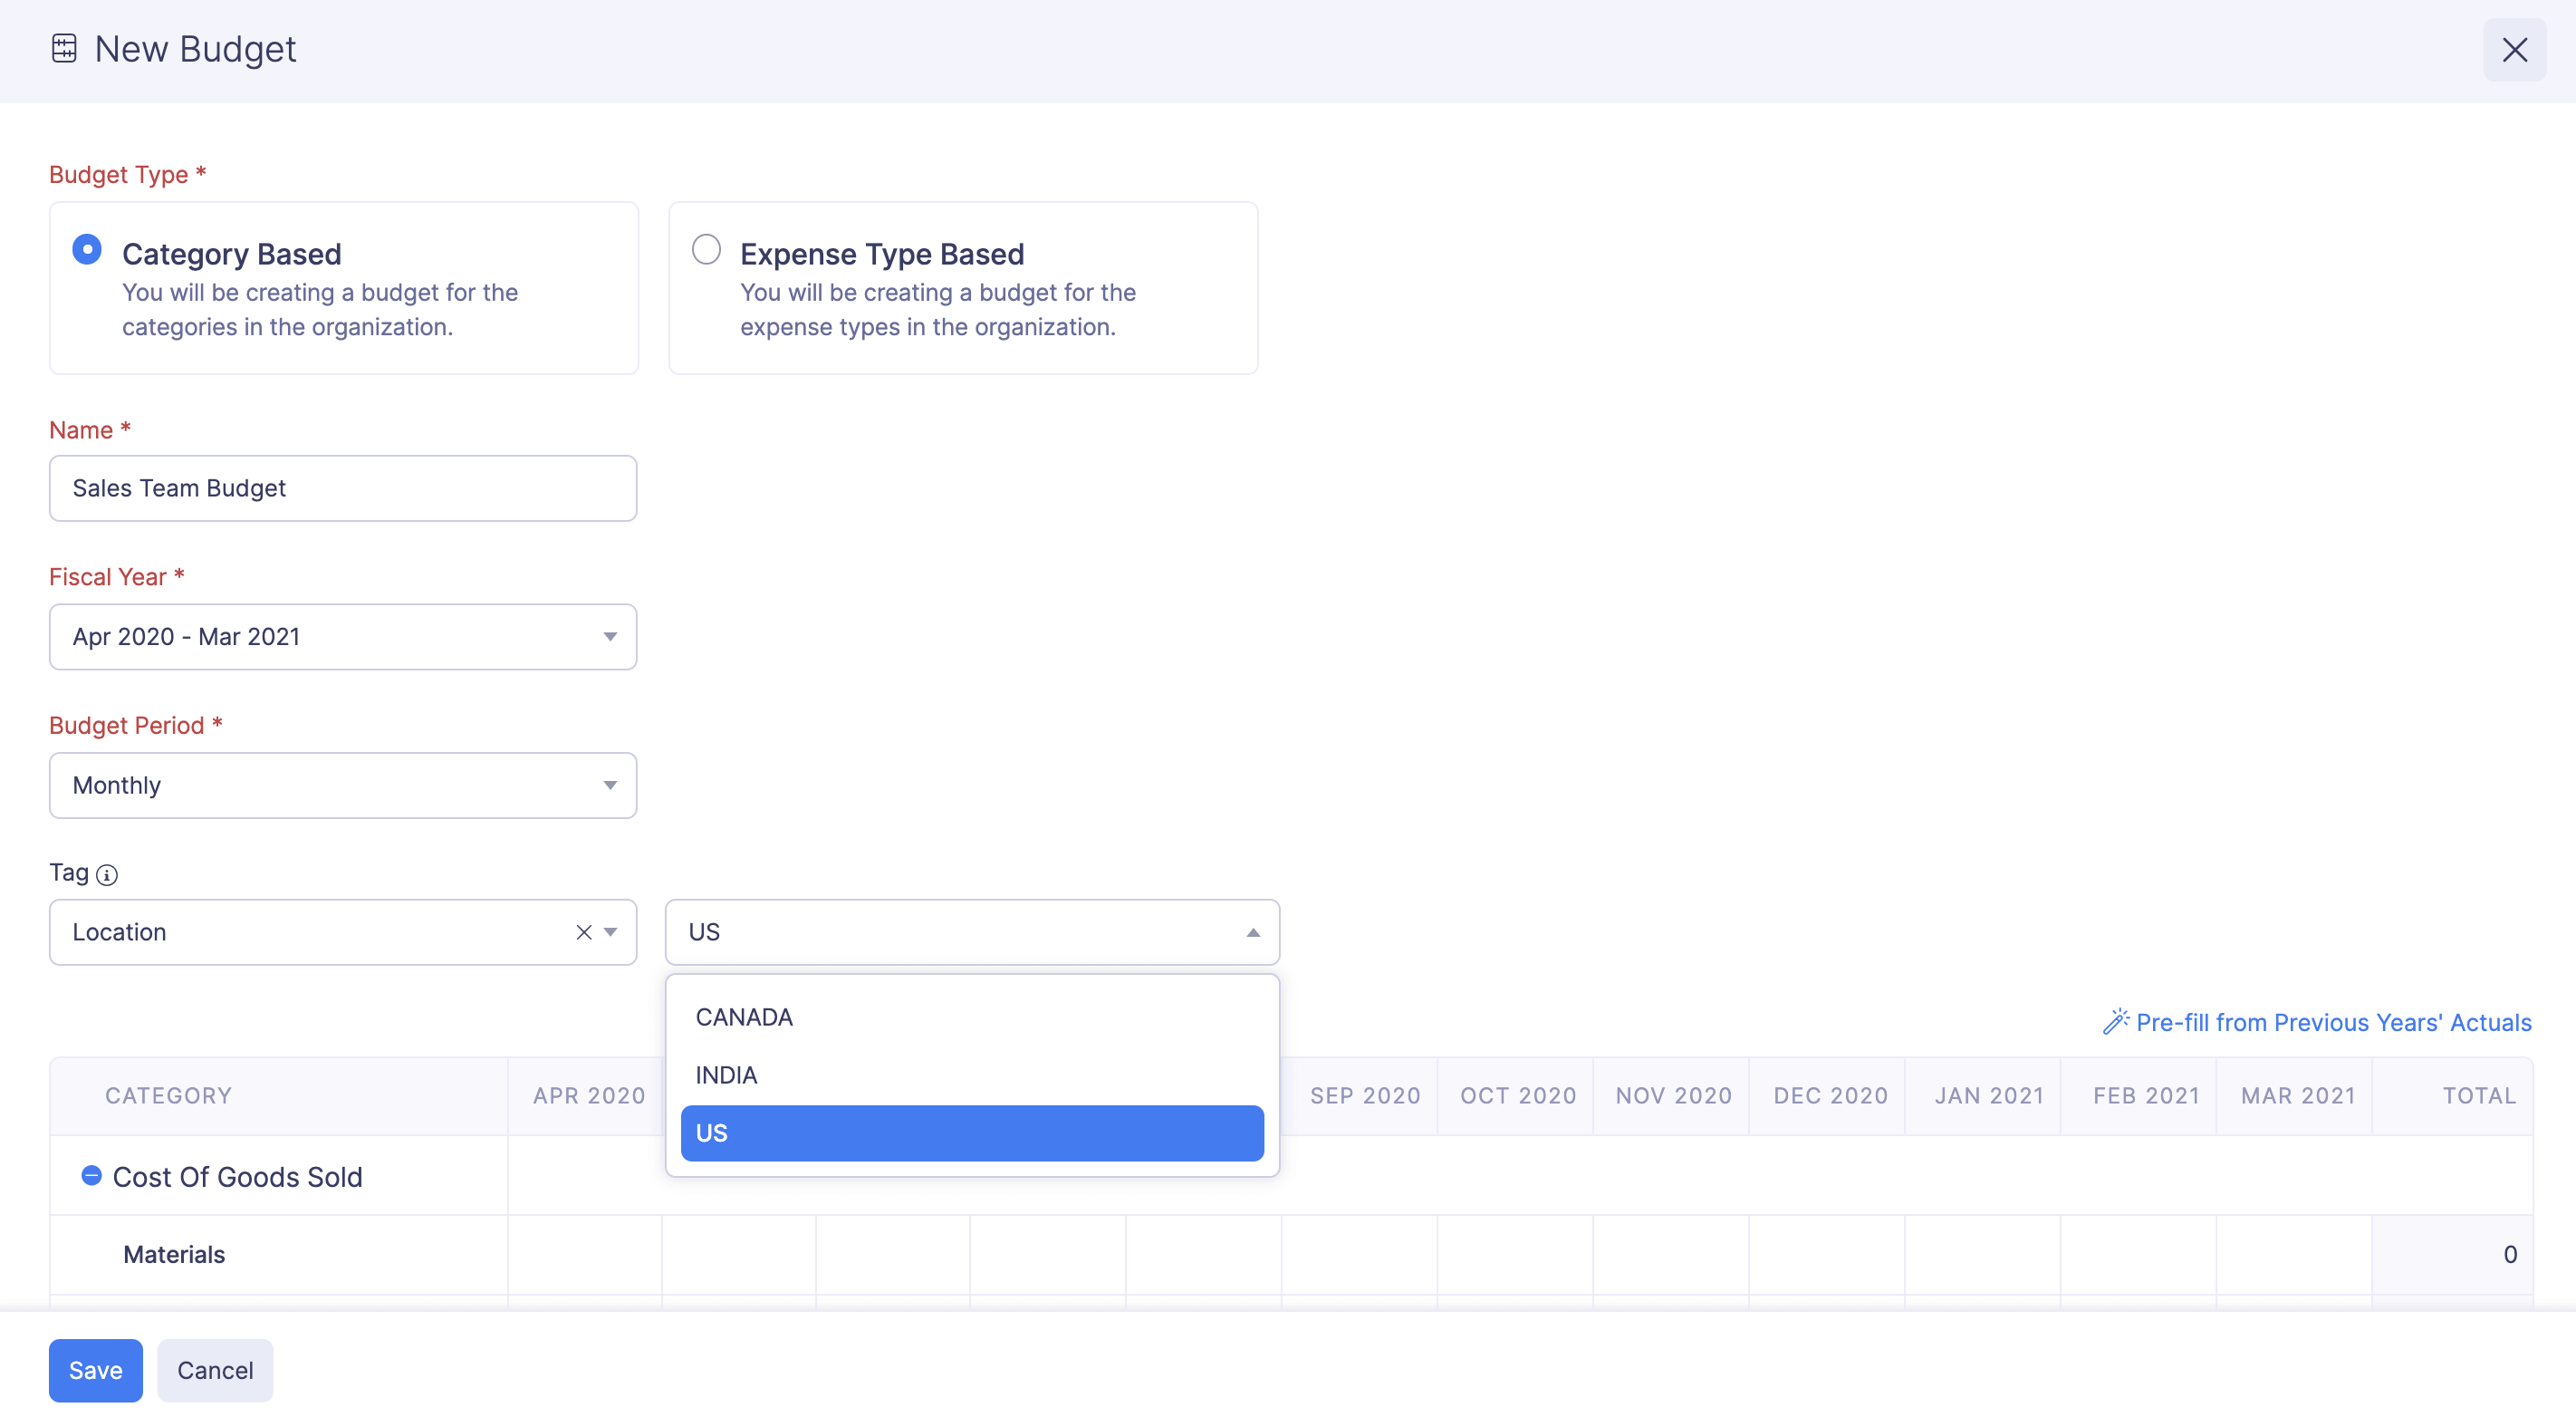
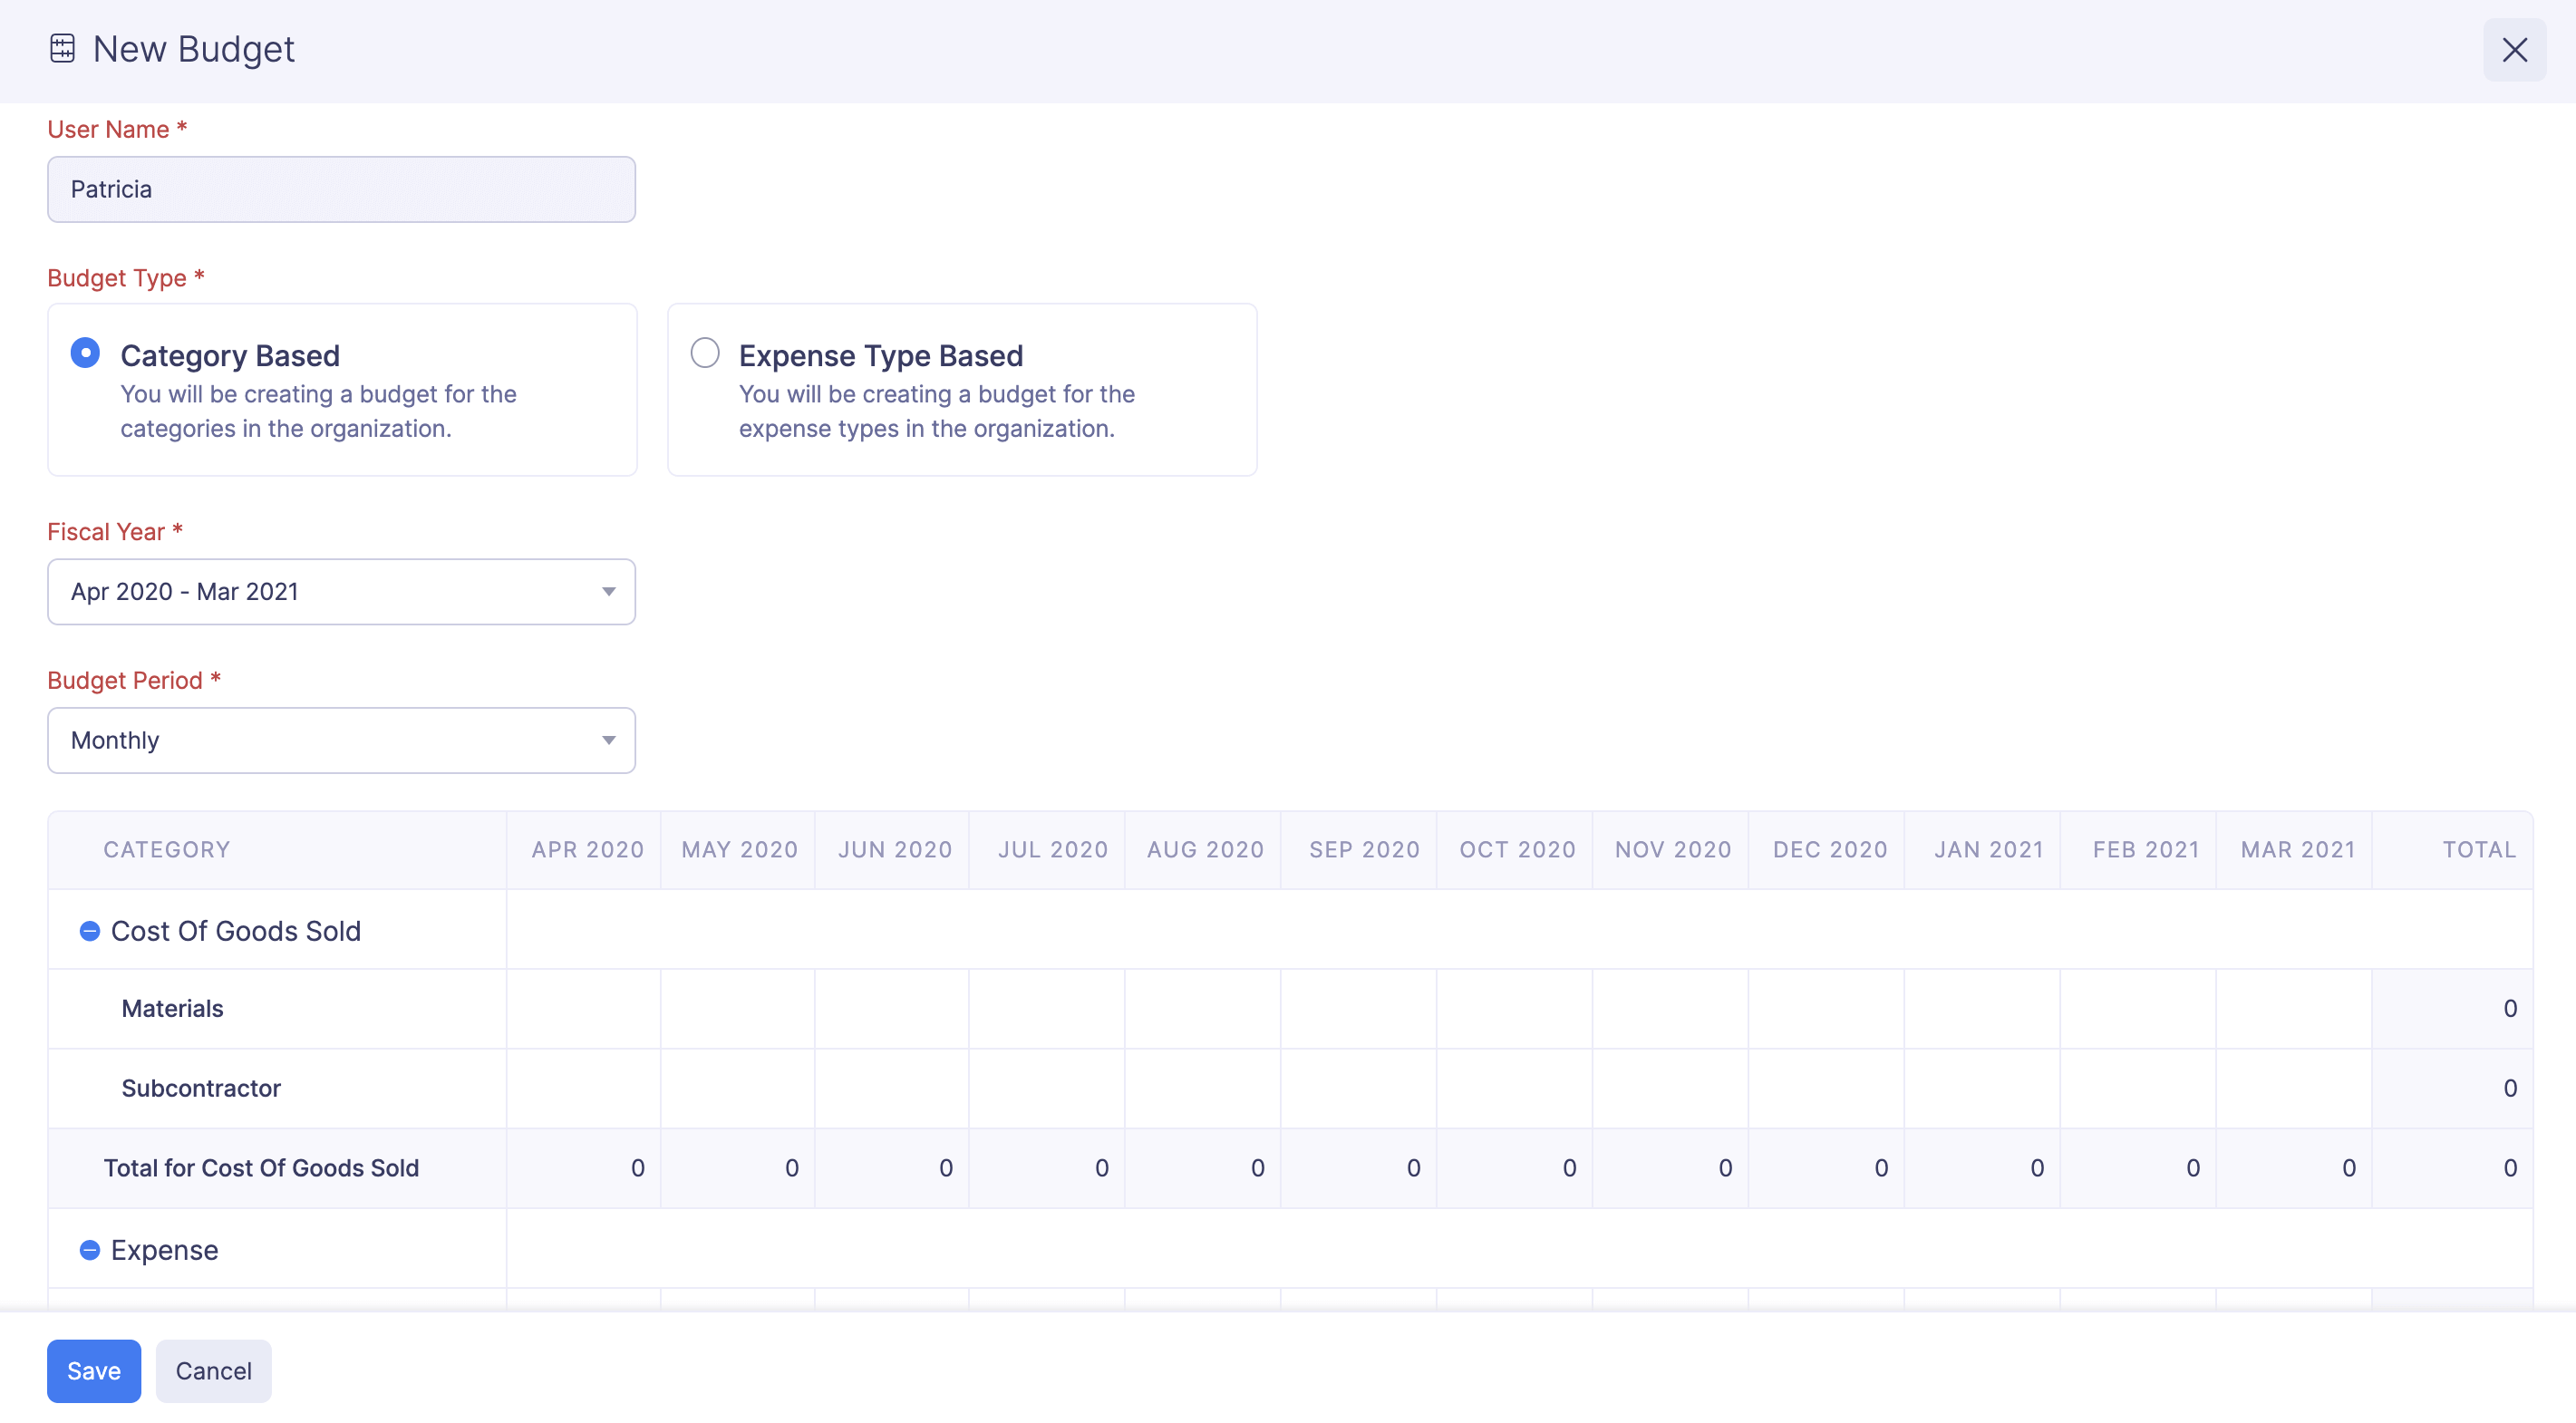
Enter the following details in the budget creation page:
Field Description Name Enter a name to identify your budget. Budget Type Select whether it is going to be a category based or an expense type based budget. Fiscal Year Select the financial year for which you would like to create a budget. Budget Period Select a period for your budget. The budget period can either be monthly, quarterly, half-yearly, or yearly. Calculate budget for tagged expenses:
You can associate tags to your budgets. When you associate a tag to a budget, only the expenses associated to that tag will be included for calculating the actuals (the actual amount spent for expenses). For example, when you associate a location tag to a budget, you can set location based budgets and compare the actuals versus the budget for the expenses incurred in that location. To do this:Click Create this budget for a specific tag.
- Next, you can enter the budget amounts by entering them manually, pre-filling them based on previous year’s actuals or by autofilling the budget amounts.
- Click Save. A new budget will be created.
Create Budgets For Your Users
You can also create budgets for the individual users in your organisation. This feature is available only in the paid plans of Zoho Expense.
To create a budget for a user:
- Click Admin View.
- Click the Gear icon on the top right corner.

- Click Users under Users and Control.
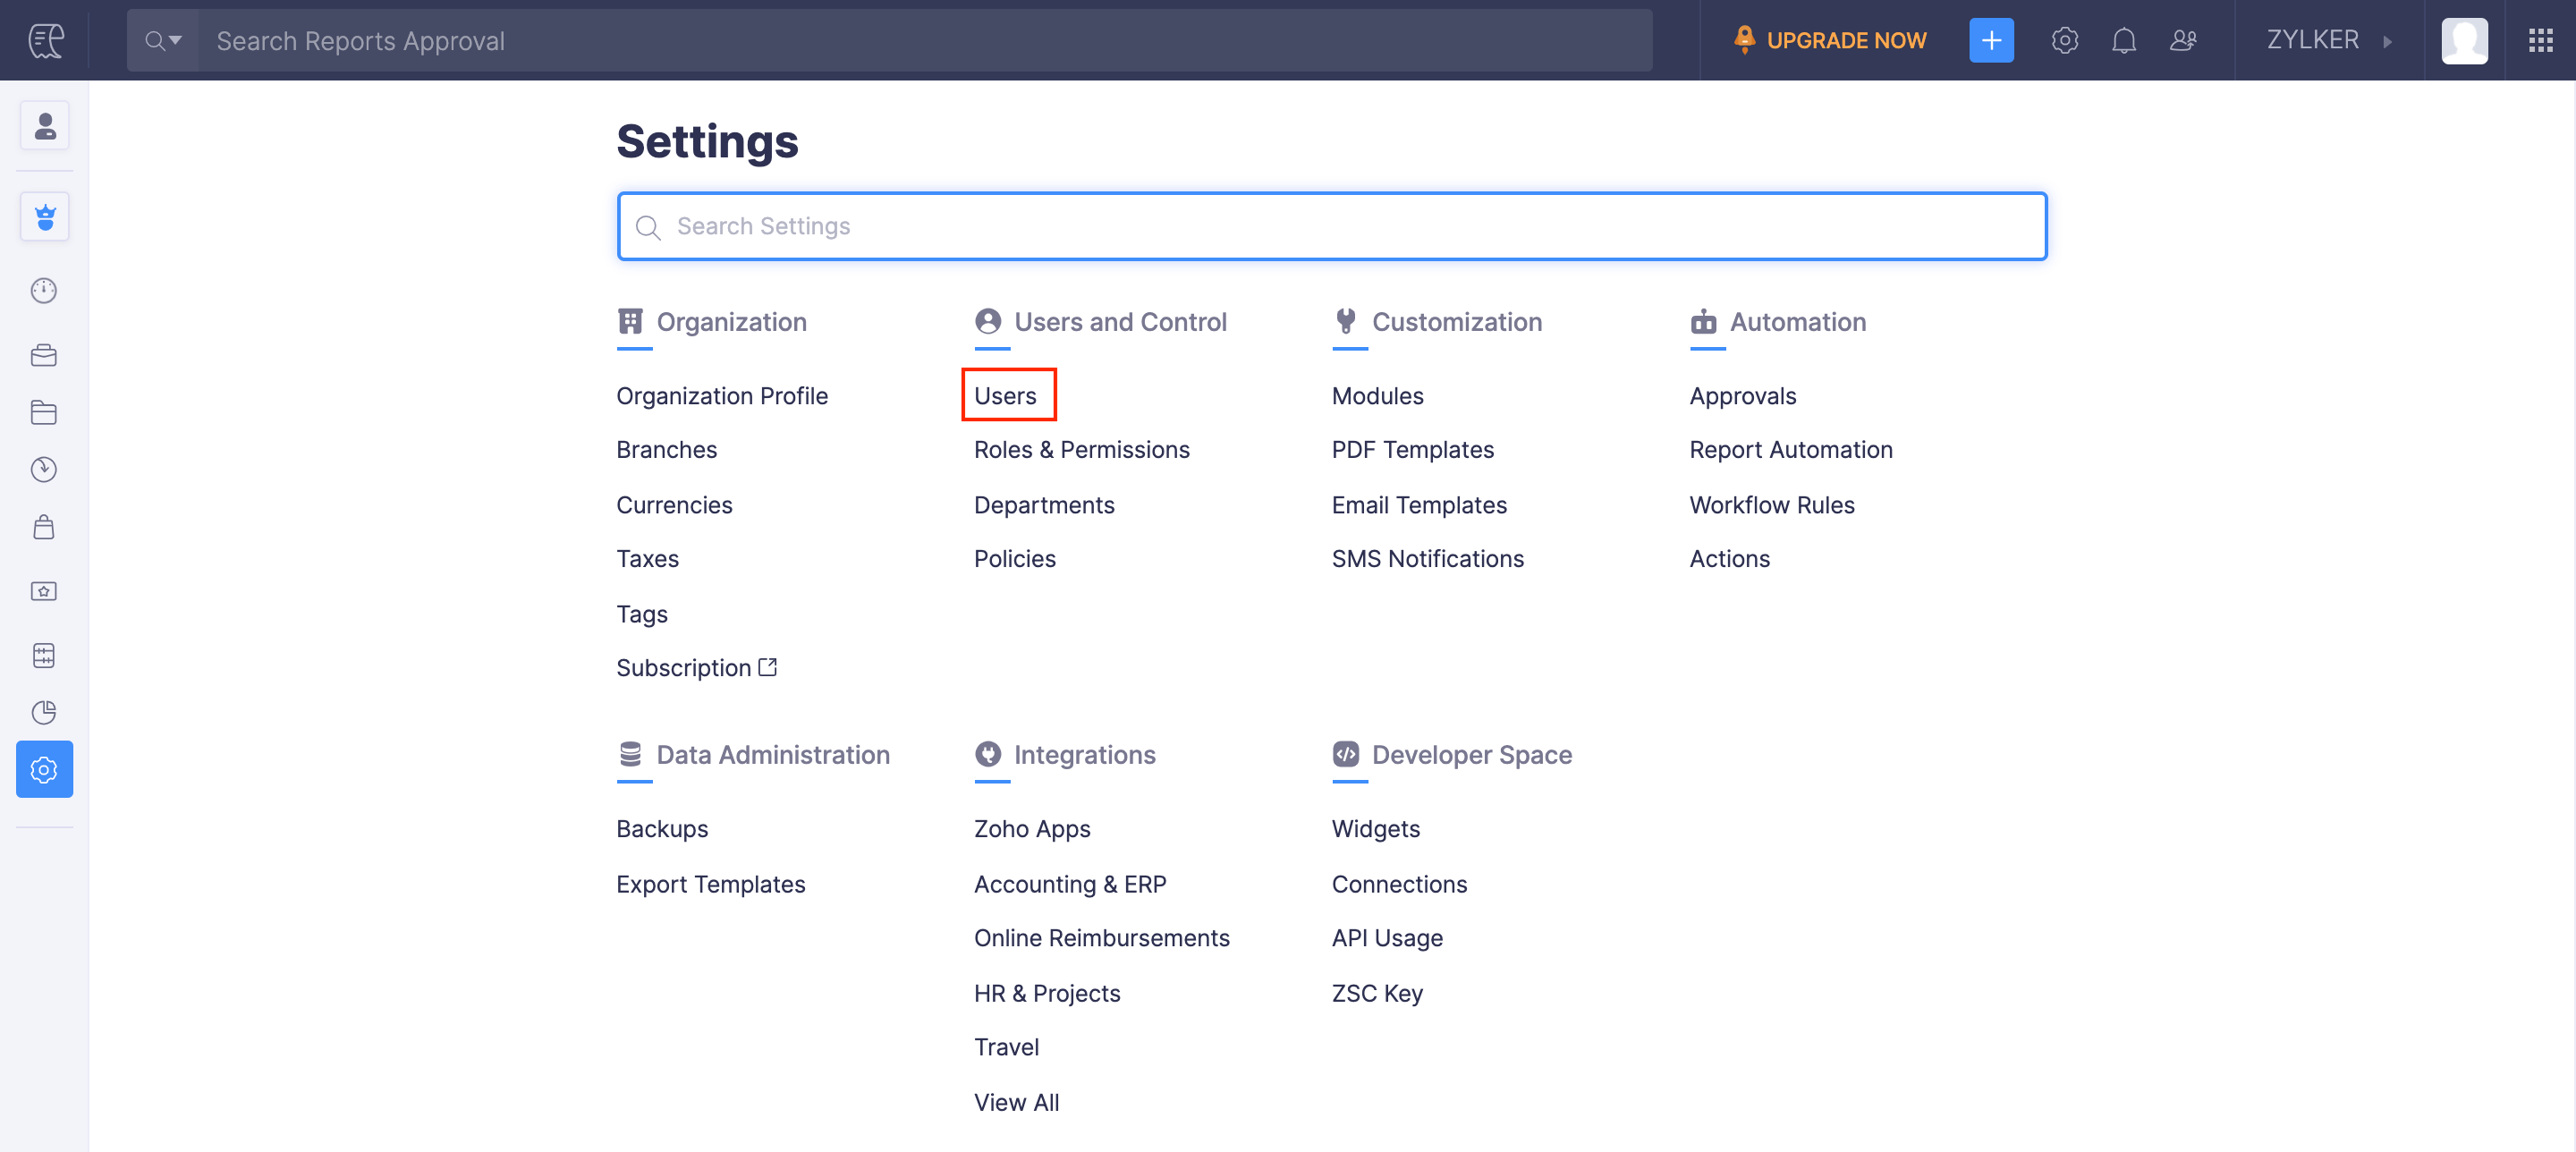
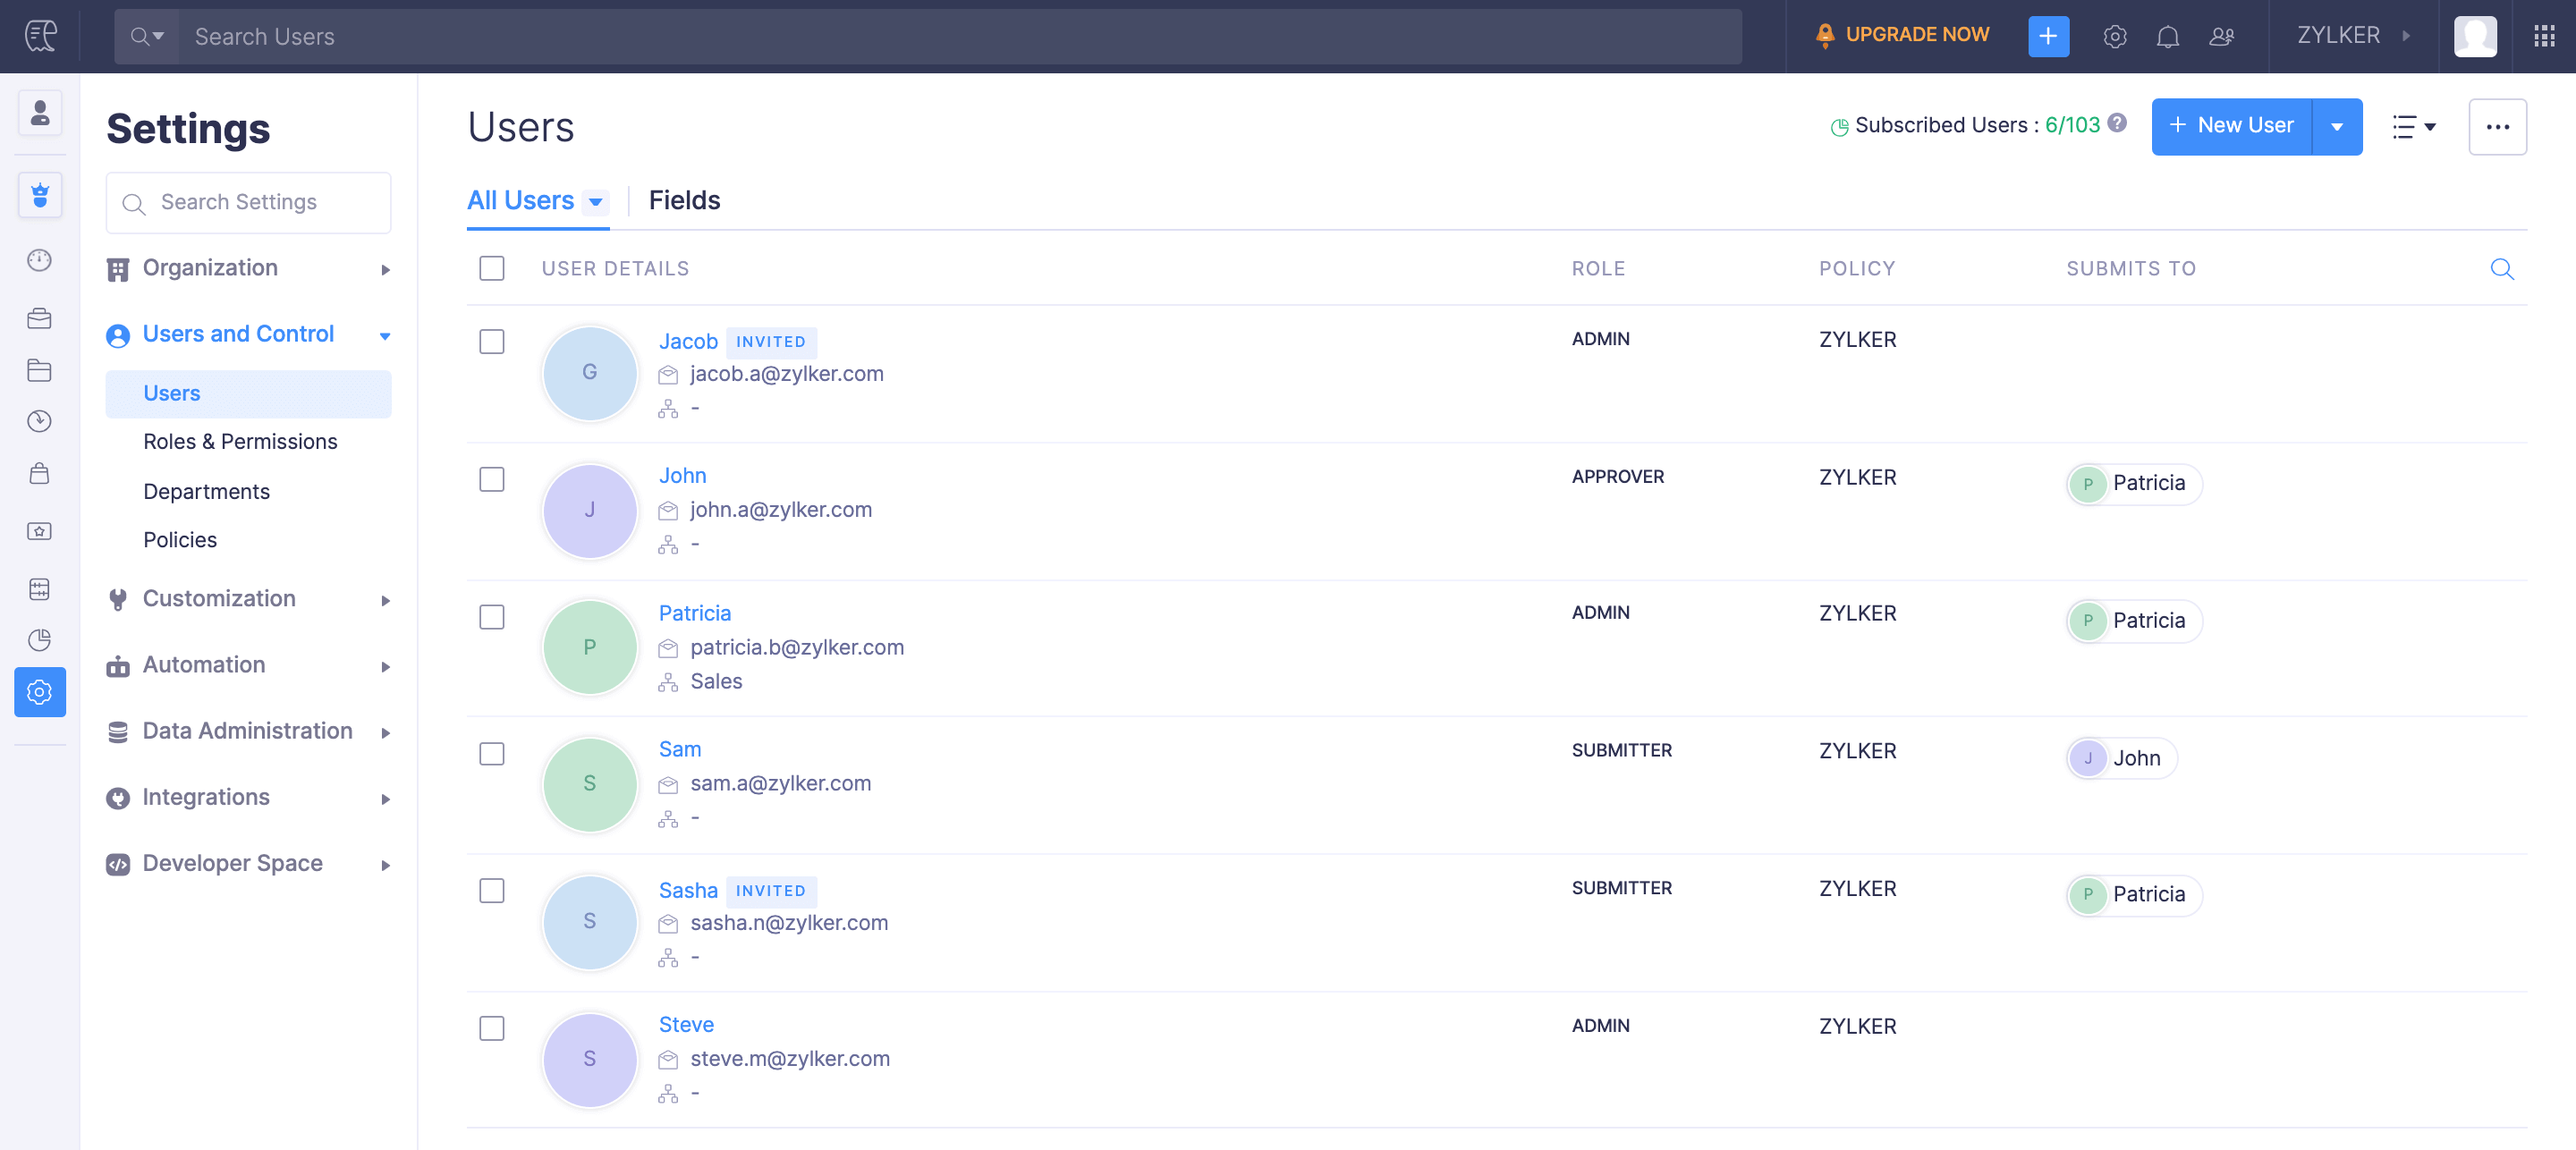
- The list of users in your organisation will be displayed. Click the user for whom you want to create a budget.
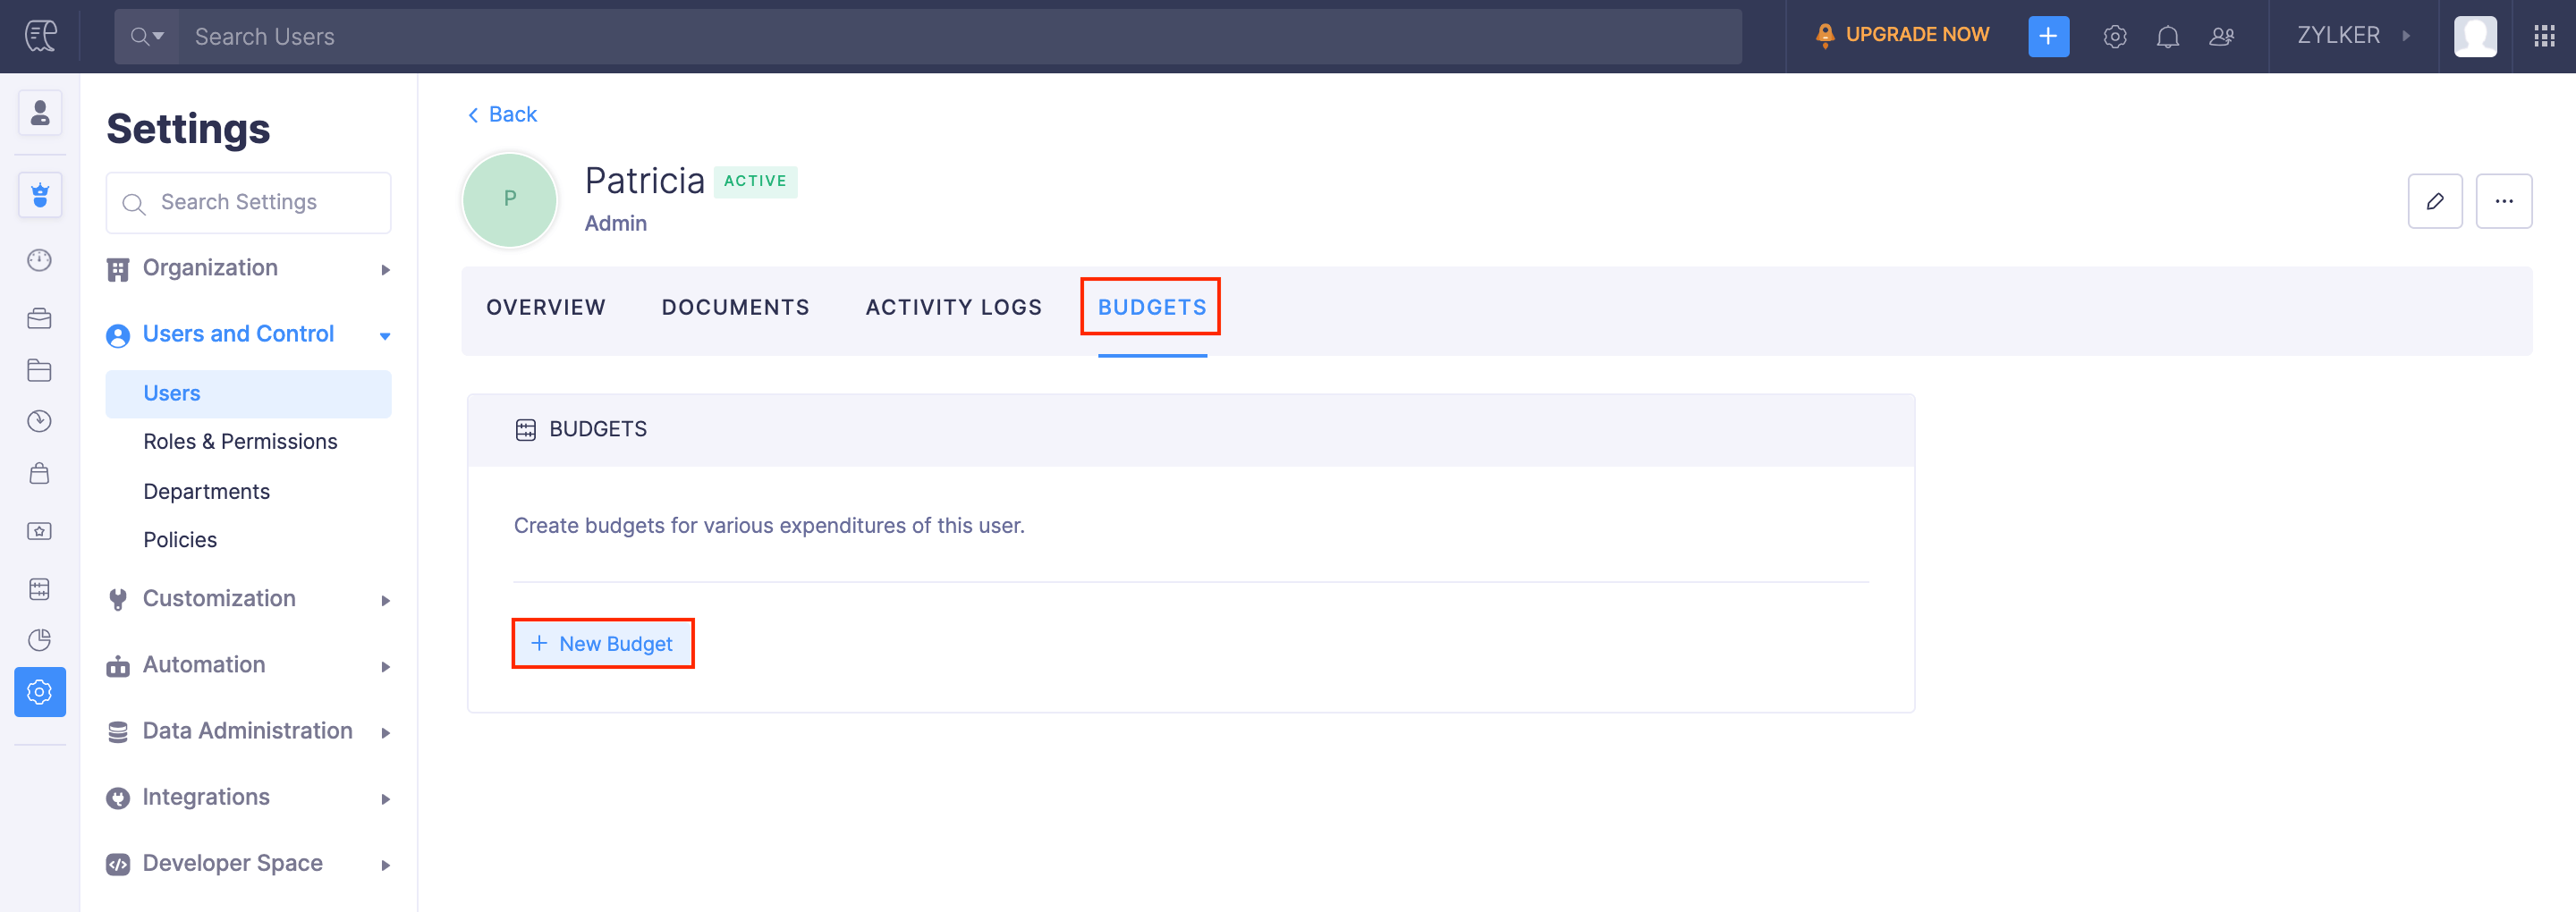
- Navigate to the Budgets tab. Click + New Budget.
You can create two types of budgets for your users in Zoho Expense:
- Category Based Budgets You can create and allocate budgets for your users based on the categories in your organisation. For example, you can create and allocate budgets for your employees’ automobile expenses, meals and entertainment expenses, fuel and mileage expenses, and other categories.
- Expense Type Based Budgets Similarly, you can also create and allocate budgets for your users based on the expense types that comprise of the categories in your organisation. For example, you can create budgets for the expense type called Travel which will include your employees’ categories related to travel such as travel expenses, automobile expenses, and parking.
- Select the preferred budget type.
- Once you select the budget type, you can enter other details.
- Enter the following details in the budget creation page:
Field Description Fiscal Year Select the financial year for which you would like to create a budget. Budget Period Select a period for your budget. The budget period can either be monthly, quarterly, half-yearly, or yearly.
- Enter the following details in the budget creation page:
- Next, you can enter the budget amounts by entering them manually, pre-filling them based on previous year’s actuals or by autofilling the budget amounts.
- Click Save.
Ways to Enter Budget Amounts
The following are the ways in which you can enter the amounts for your budget:
Enter them manually
If you would like to enter the budget manually, you can enter the amounts in the fields, next to the respective expense categories.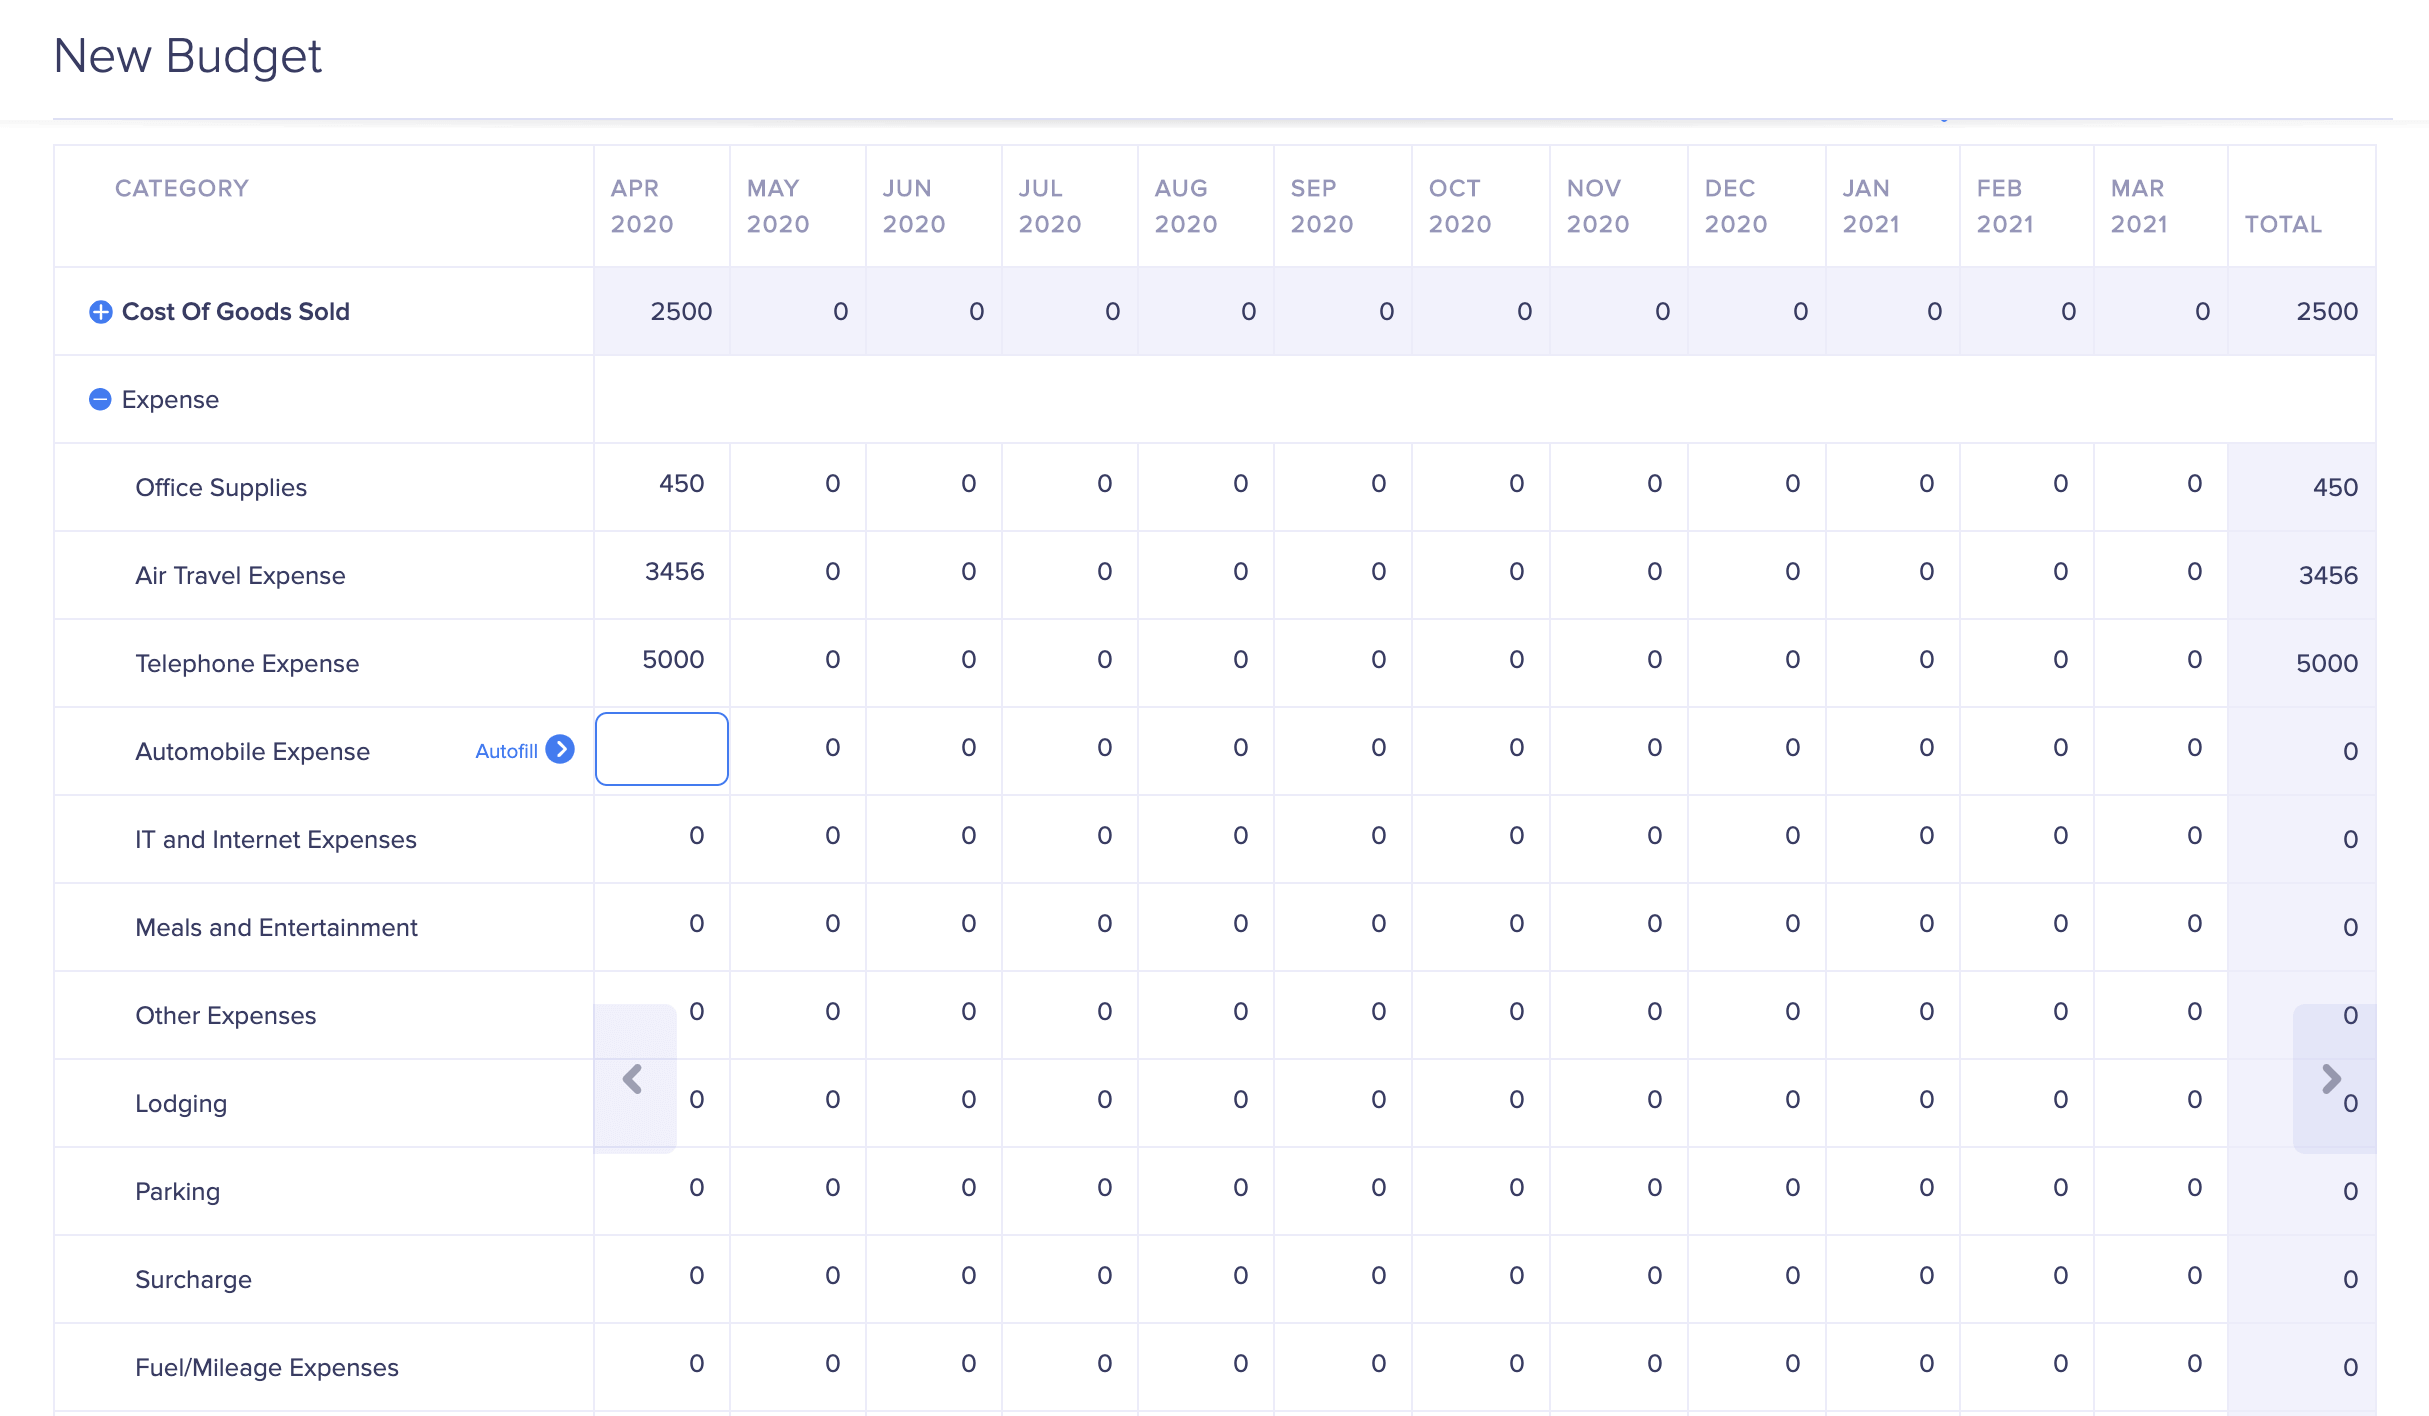
Pre-fill based on previous years’ actuals
If you want to create a budget based on one of your previous year’s business expenditures, you can do that in Zoho Expense.
- Click Pre-fill from Previous Years’ Actuals.
- Select a previous year.
- Click Pre-fill.
- Click Save.
That year’s actual expenses will be filled in as the budget amount.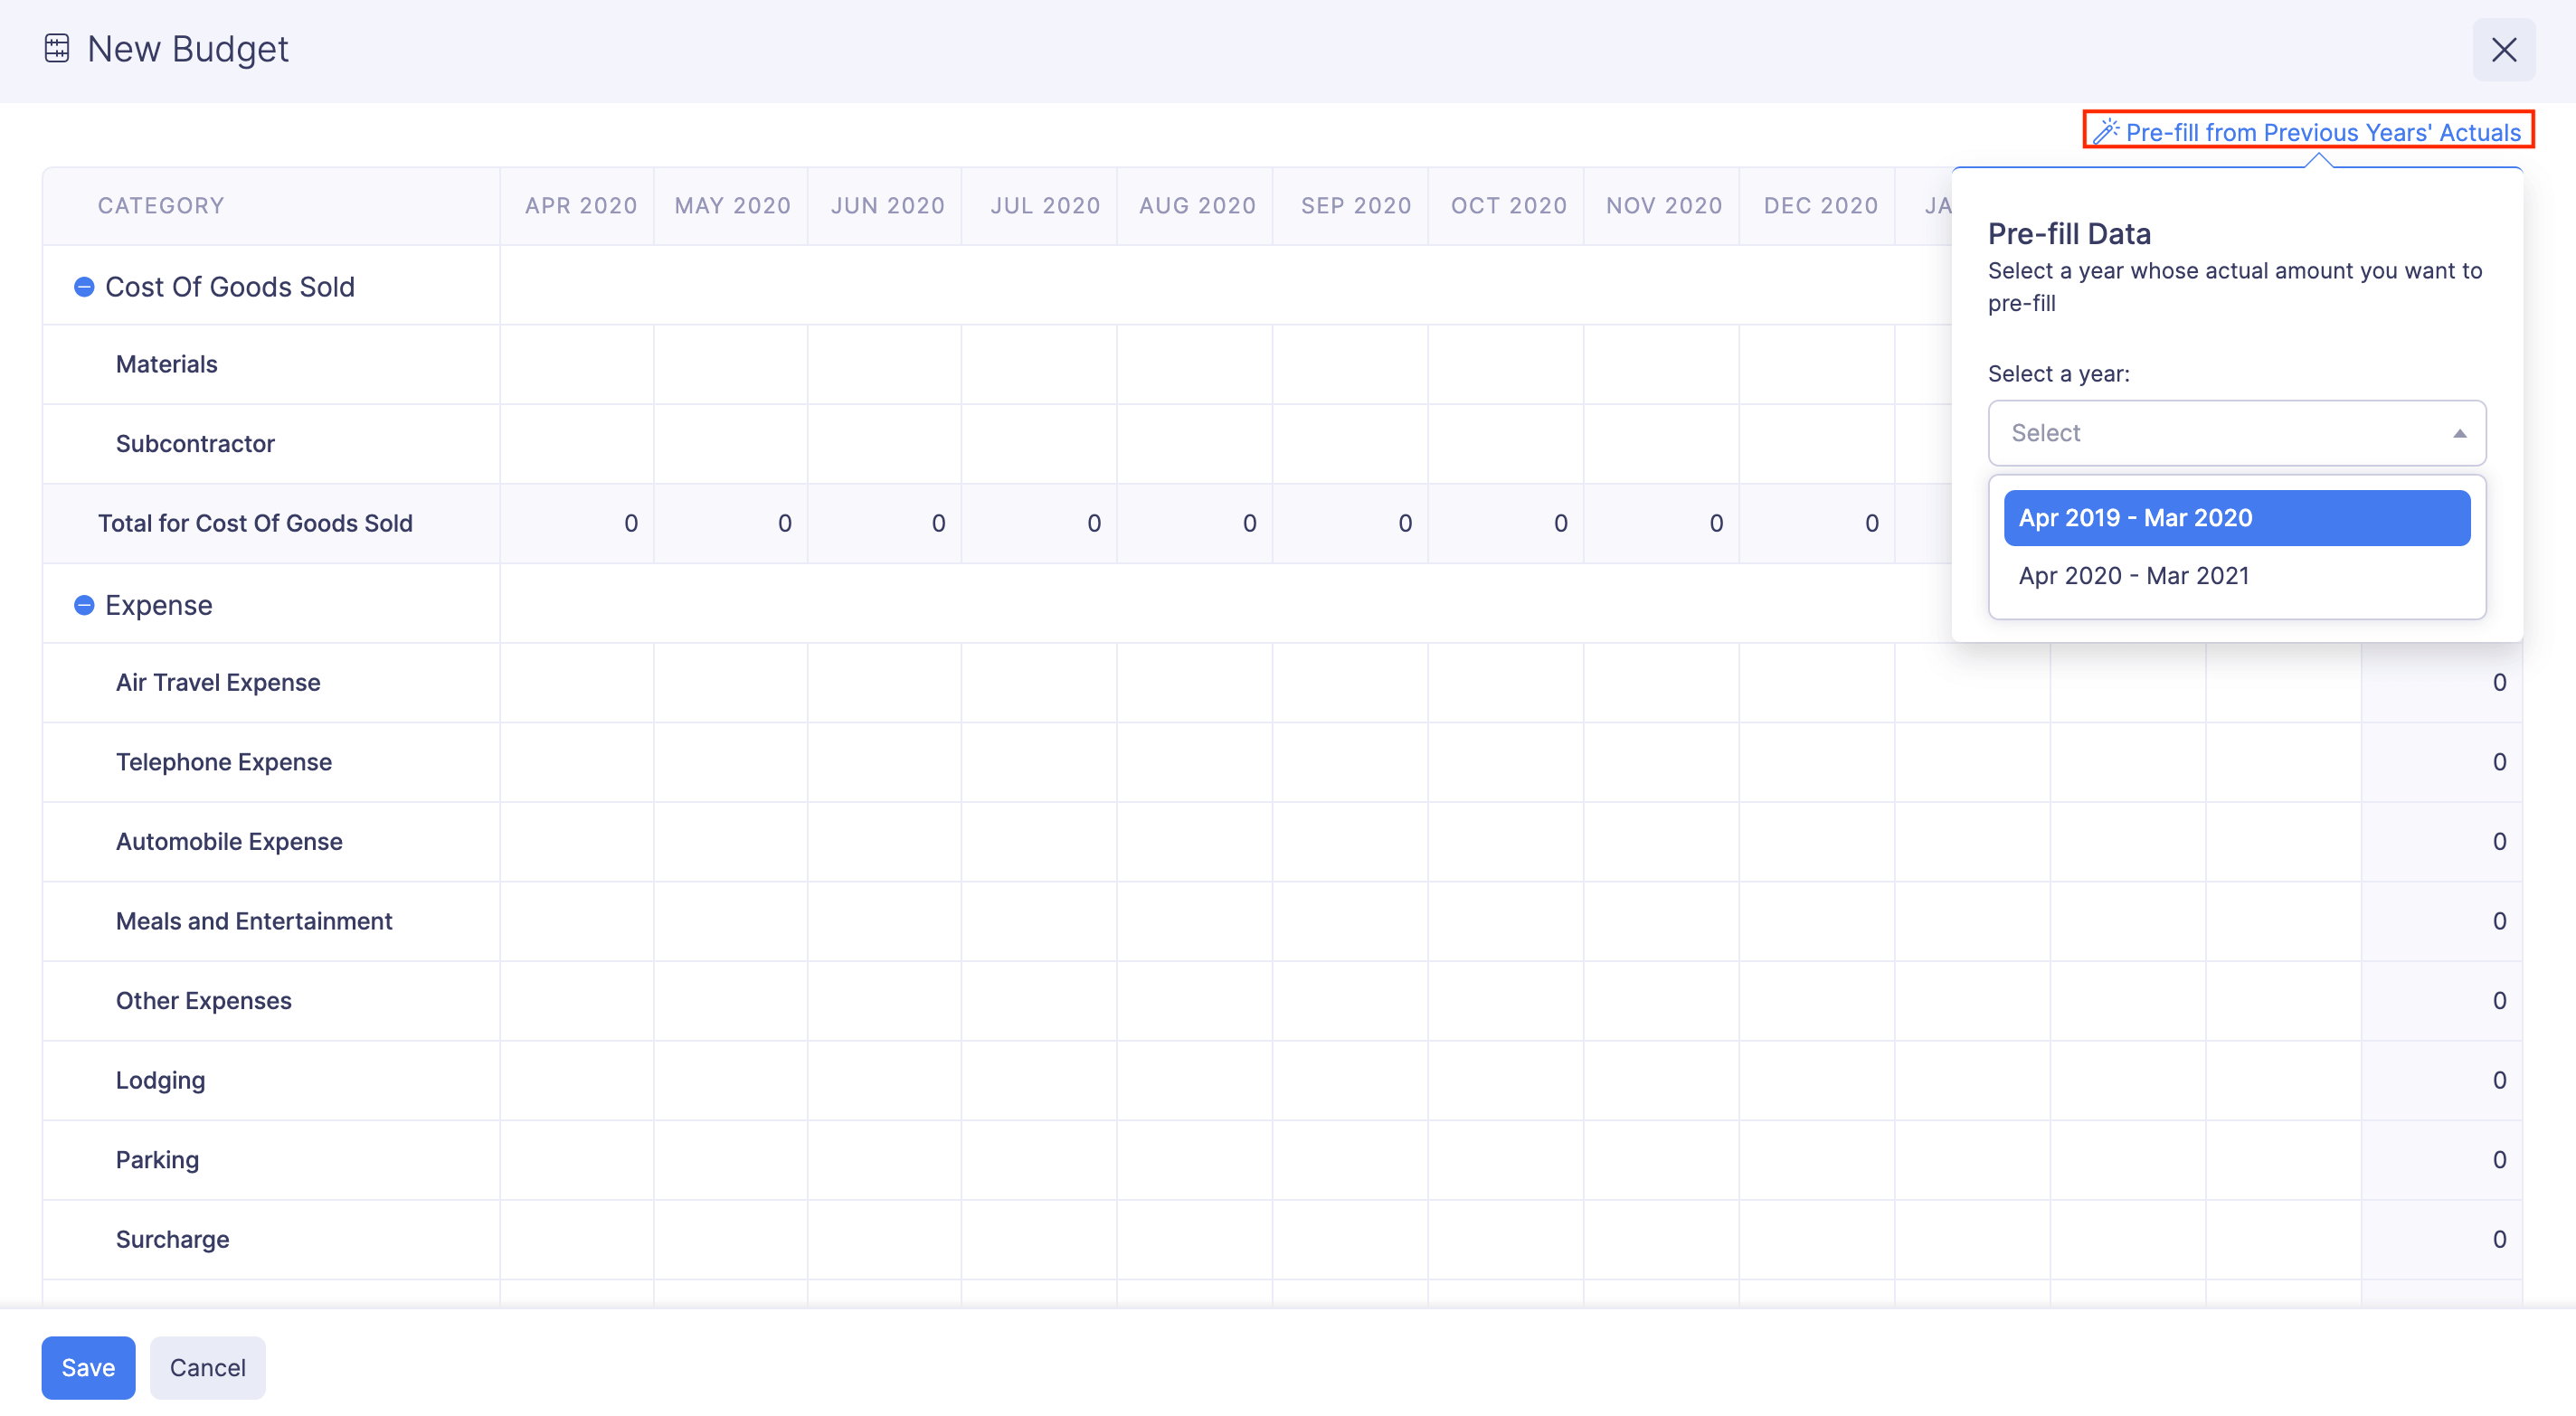
Autofill budget amount
Instead of entering the amount for each expense category or expense type individually, you can just enter the amount for the first period and choose to autofill values for the subsequent periods (monthly, quarterly, or half-yearly).
To autofill the amount:
- Hover over an expense category or the expense type and click the Autofill option next to it.
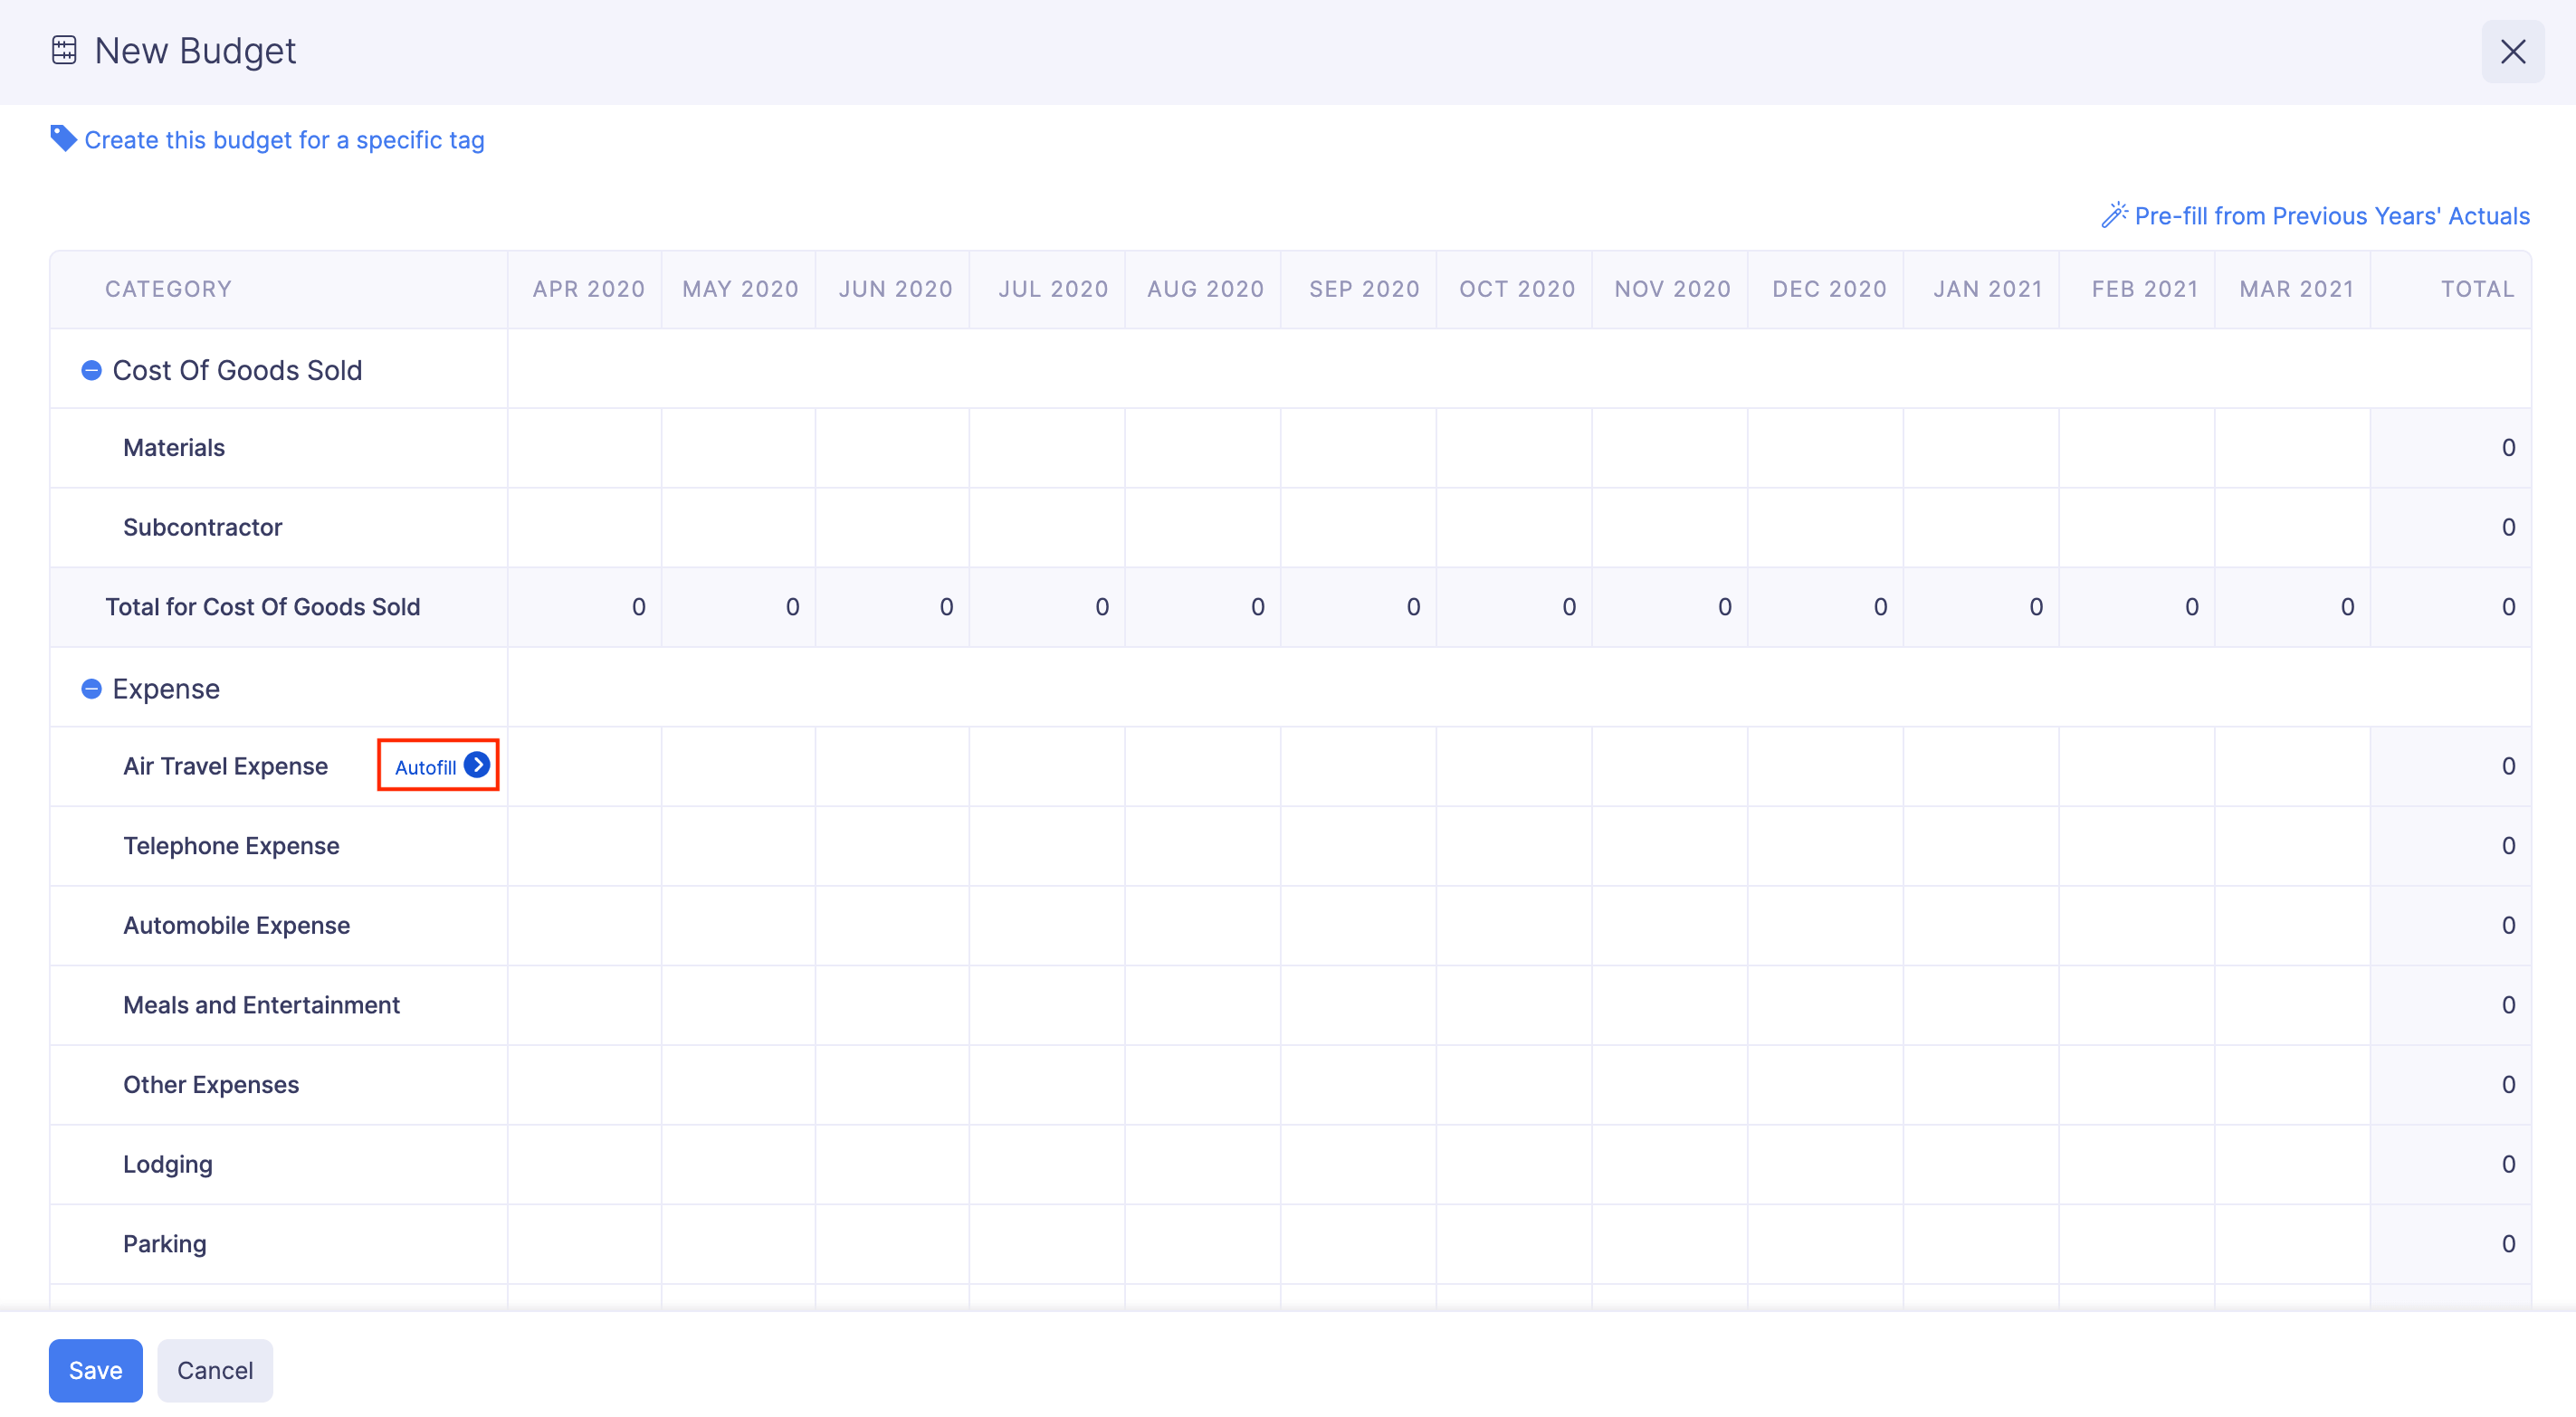
- Enter the Initial Amount.
- Choose a criteria for the autofill. You’ll be able to preview the budget you’ve auto-filled based on the criteria you’ve chosen.
- Click Apply.
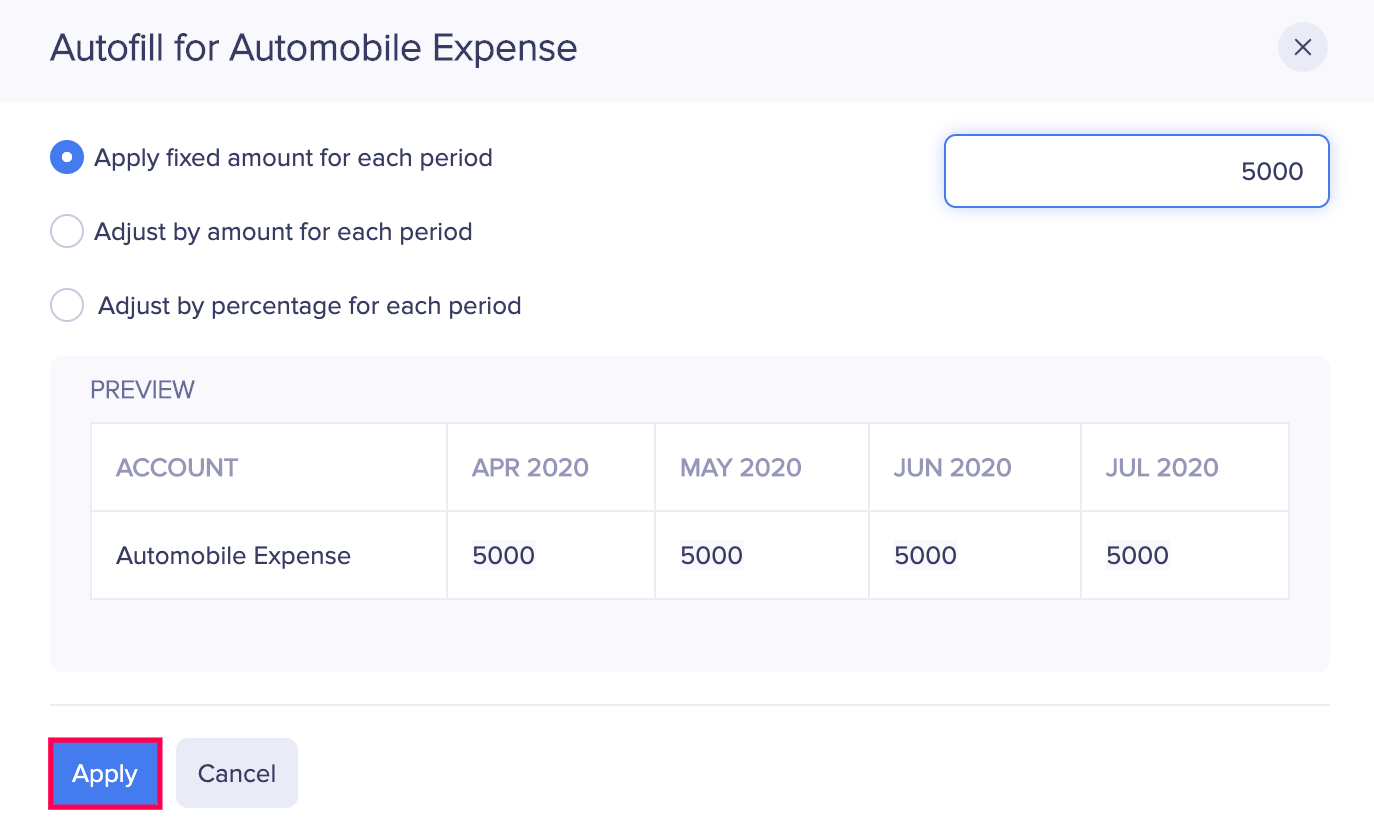
You can autofill the budget amounts for the subsequent periods based on the first period’s amount and any of the following criteria{#autofill-criteria}:
- Apply a fixed amount for each period
- Adjust by amount for each period
- Adjust by percentage for each period
Pre-requisite:
- You will not be able to autofill the expense categories if you have chosen a yearly budget.
- You can create only one budget for a fiscal year.
Autofill by Applying a Fixed Amount for Each Period
If the expense category or expense type is projected to incur the same expense amount for each period in your budget, you can select this option. You will have to enter a fixed amount for the initial period. The subsequent periods will be autofilled with the initial amount you entered.
Autofill by Adjusting the Amount for Each Period
If the expense category or expense type is projected to incur expenses incrementally or decrementally by a specific amount over the course of the budget period, you can select this option. You’ll be able to enter the adjustment amount and it will be added to the:
- First period’s amount
- Each period’s existing amount
1. Add the adjustment amount to the first period’s amount
You can enter an amount for the first period and the adjustment amount will be added to it for the subsequent periods.
Example: If you have set the first period’s amount as 1000 and the adjustment amount for each period as 100, then 1000 will be the amount for the first period, 1100 for the second, 1200 for the third and so on.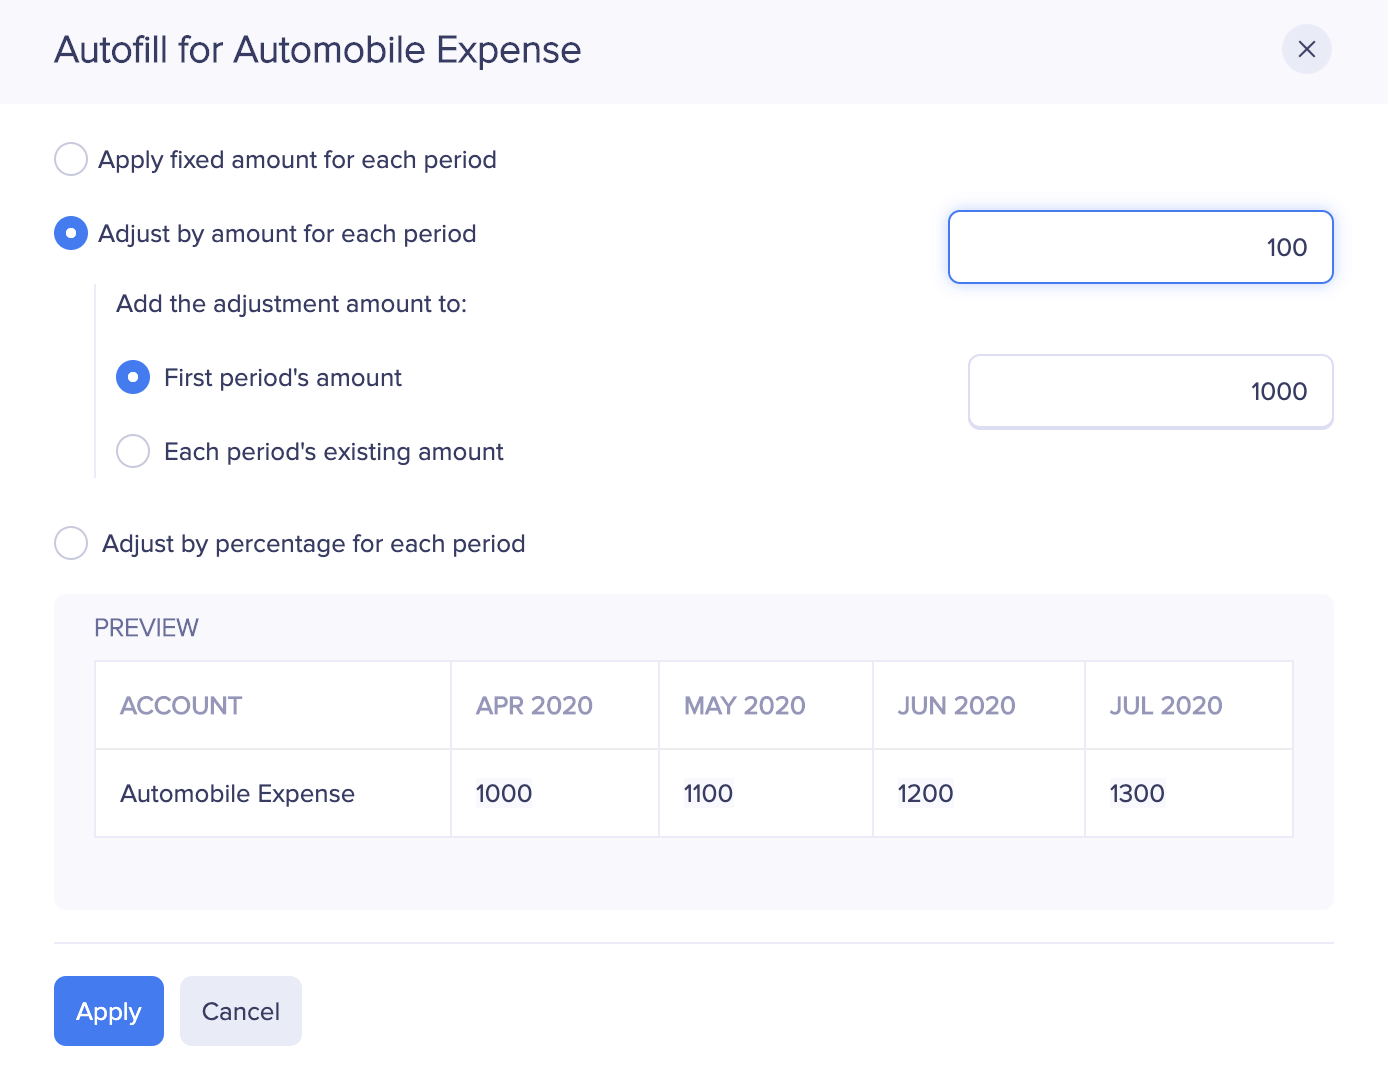
Pro Tip: You can add the negative symbol (-) if you want the amounts in the subsequent periods to decrease.
2. Add the adjustment amount for each period’s existing amount
You can select this option if you’ve already entered your budget for each period and want to update them with an adjustment amount.
Scenario: Let’s say, you want to create a budget such that you want to add 100 to the expense categories of the previous years’ budgets. Let’s assume the previous years’ budgets for the first three periods are 1000, 2000, and 1500. When you enter your adjustment amount as 100, the amounts for the newly created budget for the first three periods will be 1100, 2100 and 1600 respectively.
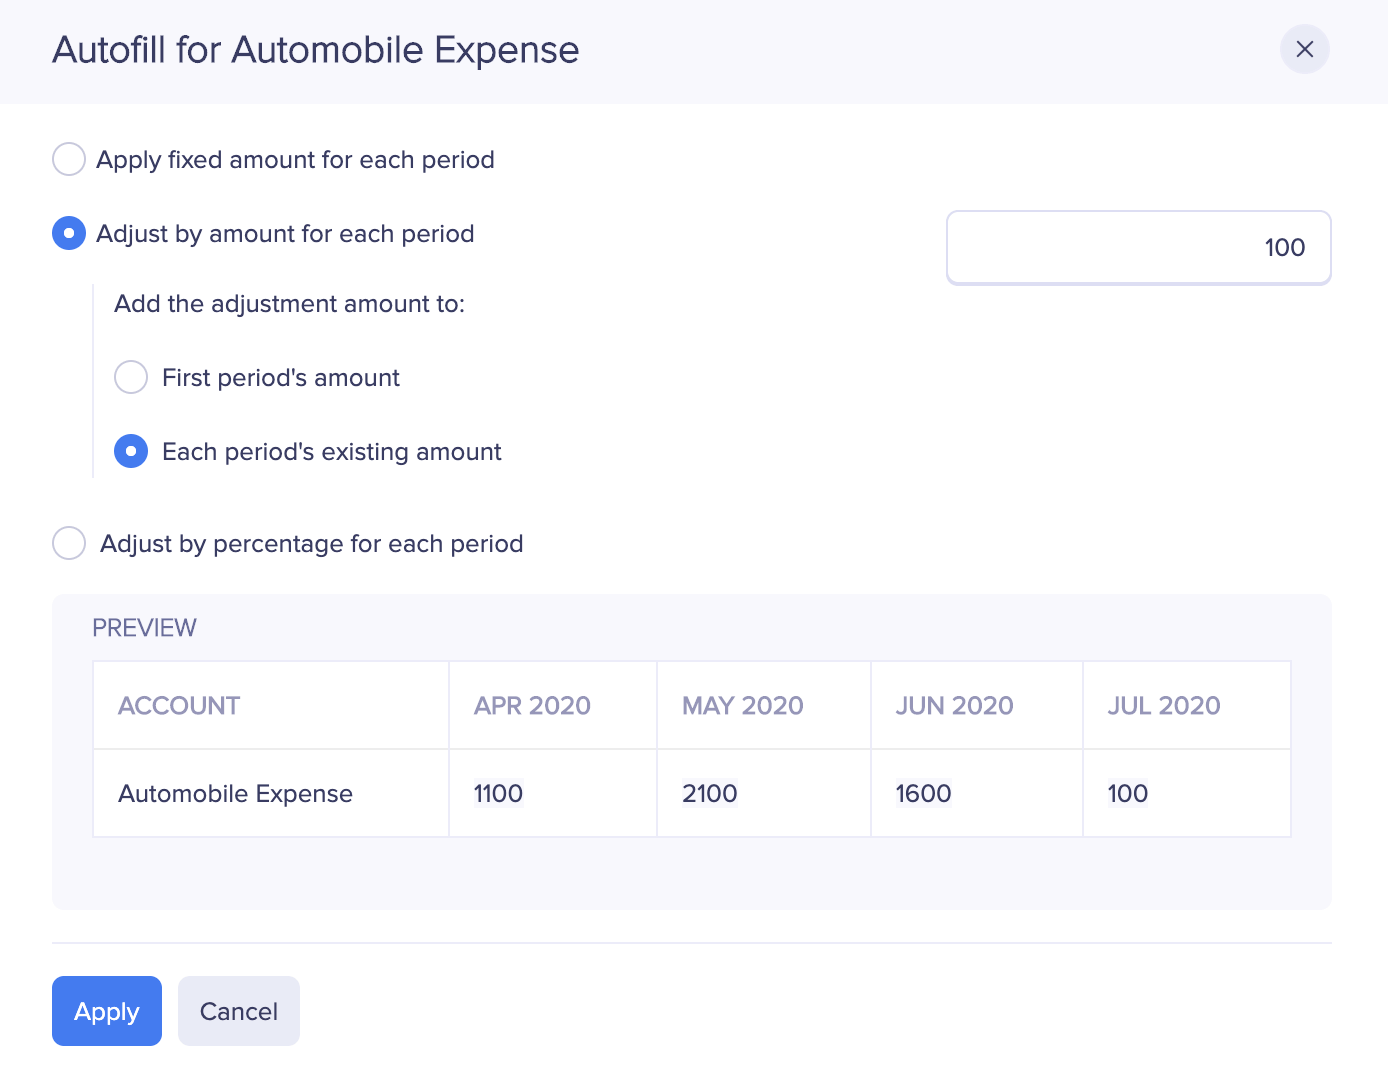
Pro-tip: You can add a negative symbol (-) if you want the amounts in the subsequent periods to depreciate.
Autofill by Adjusting the Percentage for Each Period
If the expense category or expense type is projected to incur expenses incrementally or decrementally by a specific percentage over the course of the budget period, you can select this option. You’ll be able to add the percentage of amount to the:
- First period’s amount
- Each period’s existing amount
1. Add the adjustment percentage to the first period’s amount
You can enter an amount for the first period and the subsequent periods will be autofilled based on the percentage of adjustment.
Scenario: If you have set the first period’s amount as 1000 and the adjustment for each period is 10%, then 1000 will be amount for the first period, 1100 for the second, 1210 for the third and so on.
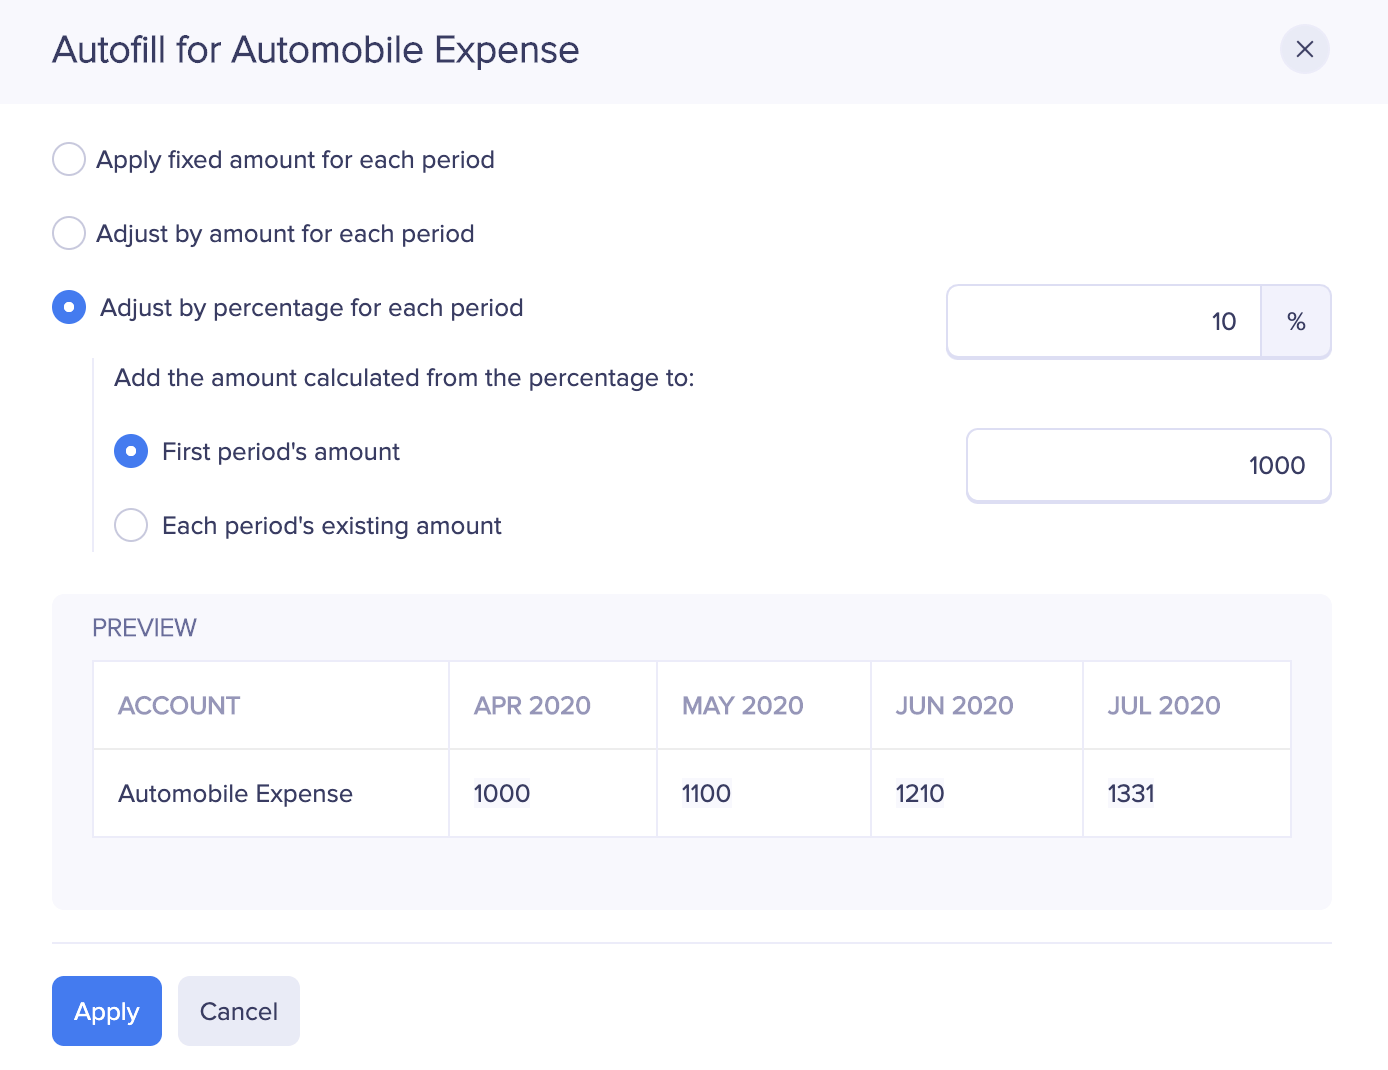
Pro-tip: You can add negative (-) symbol if you want the amounts in the subsequent periods to decrease.
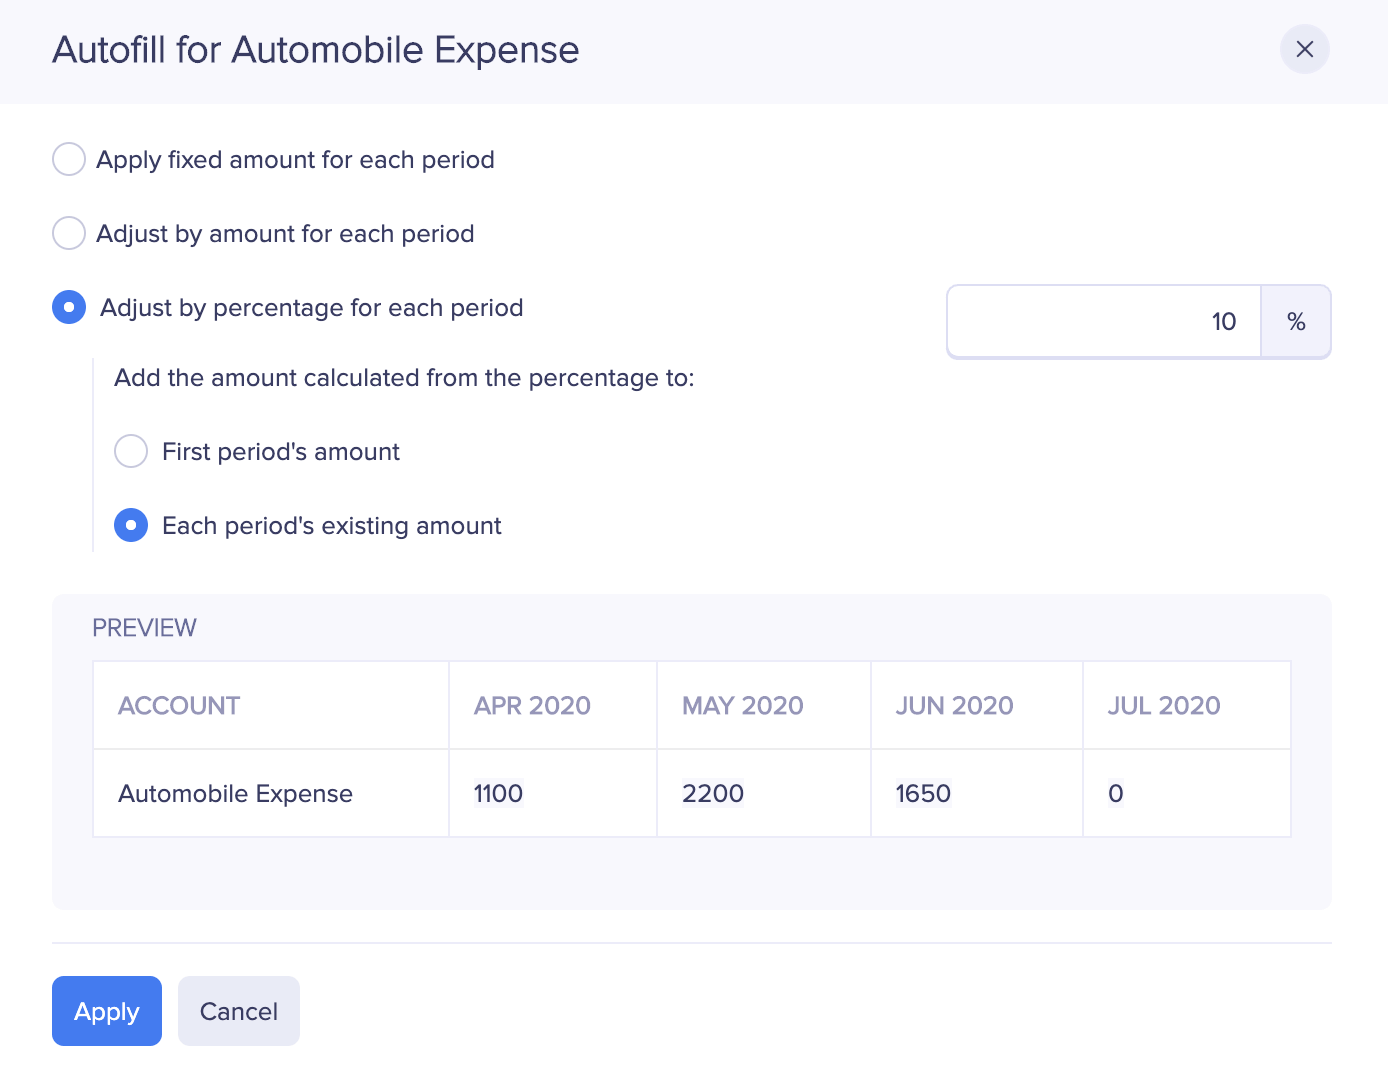
2. Add the adjustment amount for each period’s existing amount
You can select this option if you’ve already entered your budget and you wish to update them with a percentage adjustment.
Scenario: Let’s say, you want to create a budget such that you expect a 10% increase to the expenses of the previous year’s budget. Let’s assume the previous year’s budget for the first three periods as 1000, 2000, and 1500 respectively. When you enter the percentage of adjustment as 10%, the amounts for the newly created budget for the first three periods will be 1100, 2200 and 1650 and so on.
Pro-tip: You can add a negative symbol(-) if you want the amounts in the subsequent periods to decrease.
