Set Up Zoho Commerce
Already selling on another platform? Zoho Commerce lets you import your existing products and customers from other applications, so you can set up your store quickly without manually re-entering every product and customer data.
Note: Zoho Commerce currently supports only the migration of products and customers from other applications. In case you require assistance for setting up Zoho Commerce while migrating from other applications, feel free to drop us an email at presales@zohocommerce.com.
Migrate from Other Applications
If you are migrating from another platform, Zoho Commerce makes it easy to get your store up and running quickly by importing your existing products and customers. Instead of adding each product and customer manually, you can bring in your entire products and customers from other applications in just a few steps, saving you time and effort. Follow the steps to set up Zoho Commerce:
- Export Products from Other Applications
- Import Items into Zoho Commerce
- Export Customers from Other Applications
- Import Customers into Zoho Commerce
Export Products from Other Applications
Before importing your products into Zoho Commerce, you will need to export them from your current platform. Most ecommerce applications allow you to export your product as a CSV or spreadsheet file, which can then be used to import your products into Zoho Commerce seamlessly.
- Login to your existing application.
- Navigate to the Products page.
- Export all the products in CSV or XLS file format.
Import Items into Zoho Commerce
After exporting your product from your current platform, you can import it directly into Zoho Commerce. This lets you transfer all your product data in one step, instead of adding them manually one by one. The import runs through three-steps: Configure, Map Fields, and Preview. This lets you upload your file, match its columns to the fields in Zoho Commerce, and preview the data before it is added to your store.
Note: Ensure your file meets the following requirements:
- Supported formats: CSV, TSV, or XLS.
- Maximum file size: 25 MB.
- Use the sample file as a template so your column headers line up with Zoho Commerce fields and the mandatory fields are filled in.
Steps to Import Items
- Sign In to your Zoho Commerce organisation.
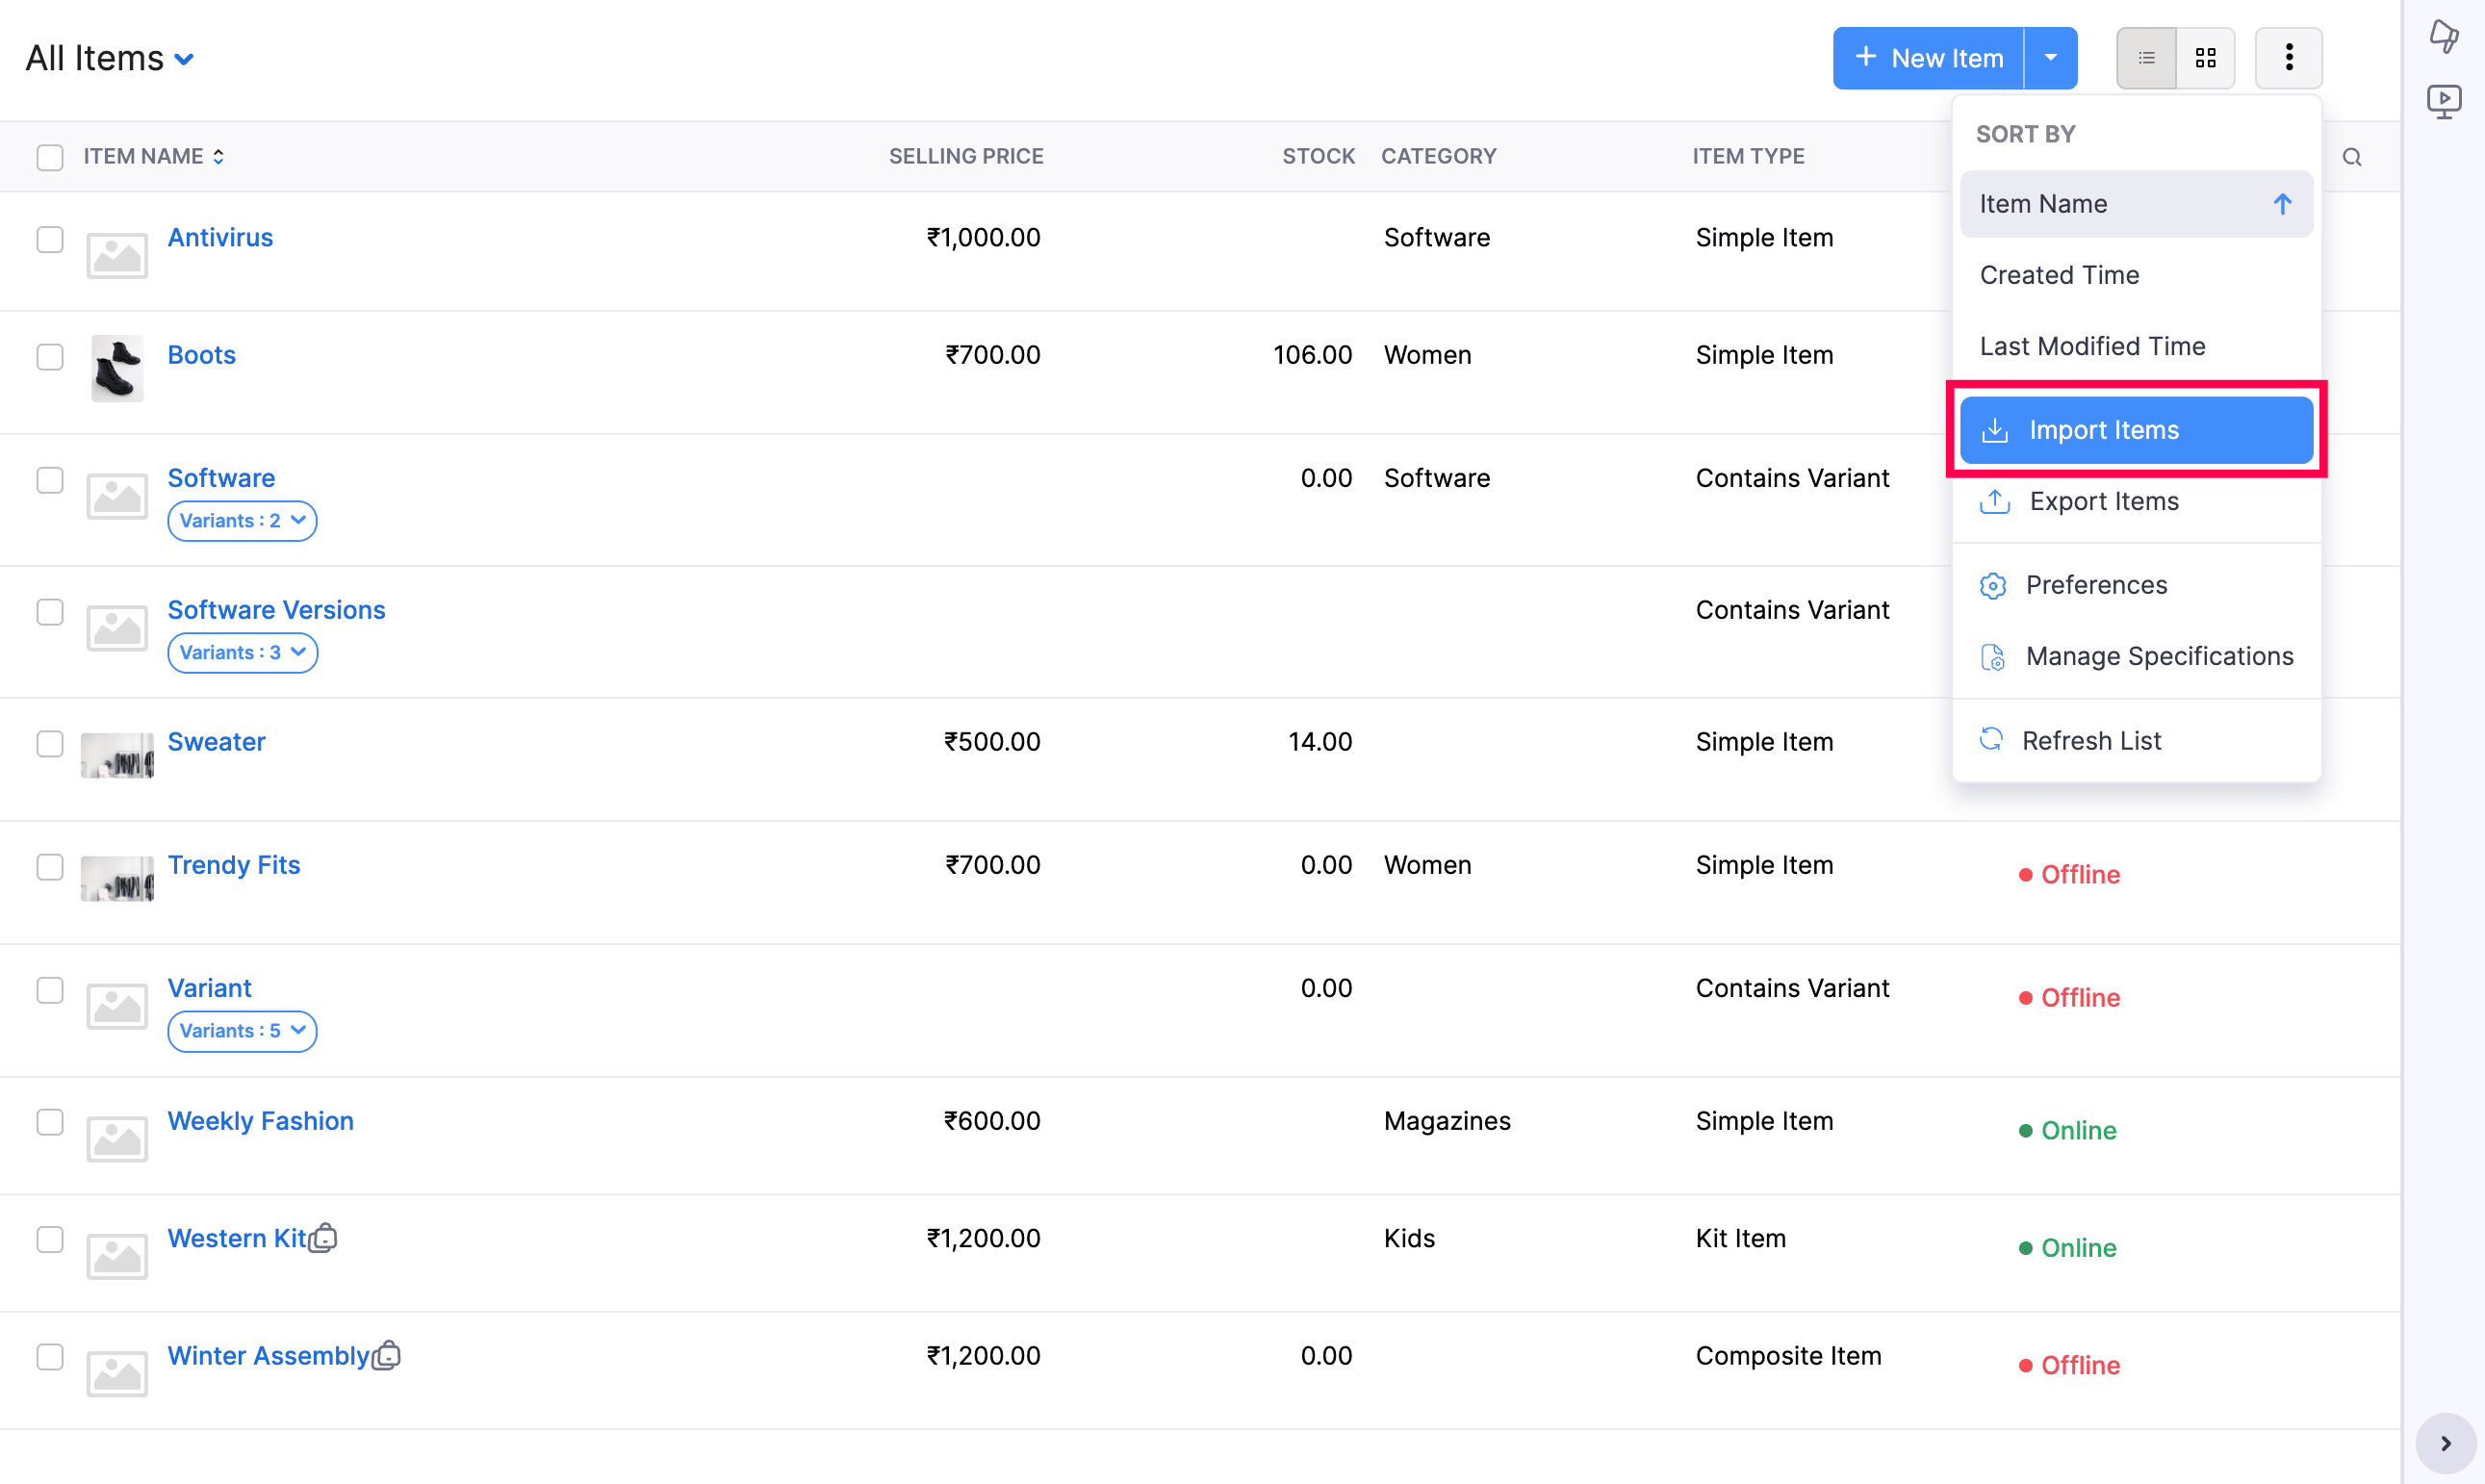
- Navigate to the Items module.
- Select Import Items from the More options dropdown.
Step 1: Configure
In the Configure section, upload your file in one of two ways:
- Drag and drop the file onto the upload area, or
- Click Choose File and select the file from your device.
- To use a different file, click Replace File.
- To clear the selected file, click Remove.
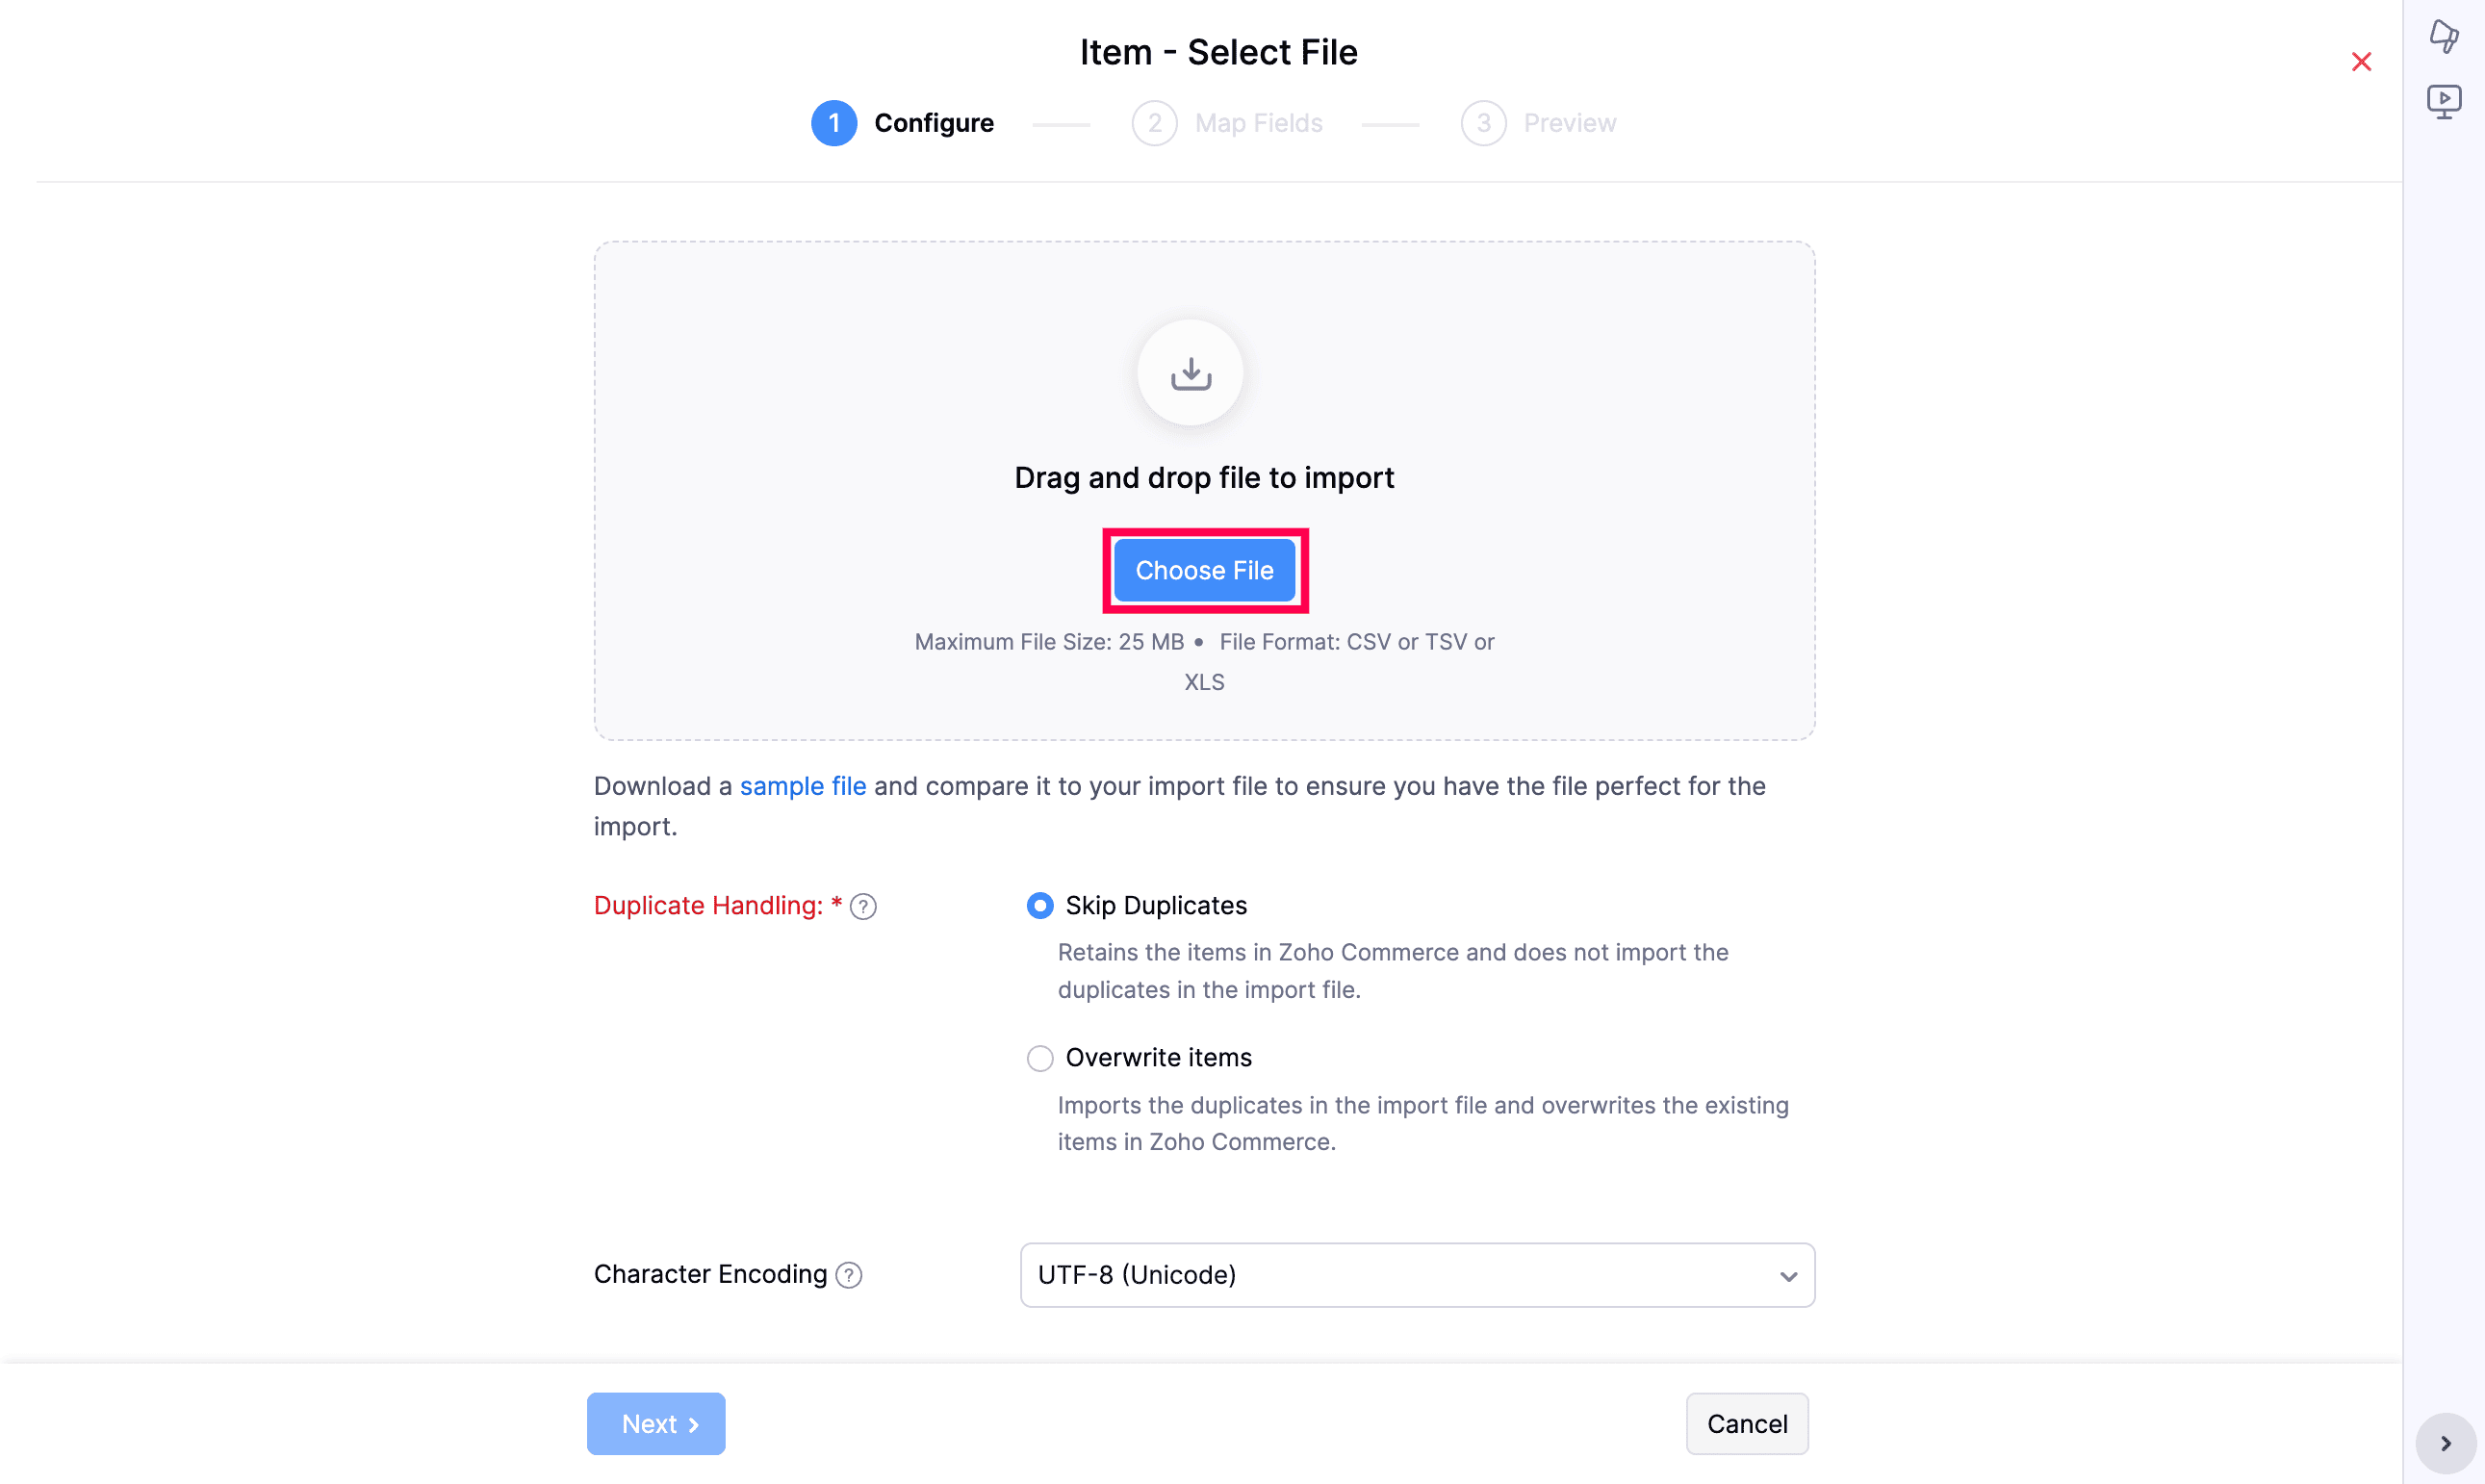
- If you do not have a file ready, click sample file and compare it to your import file to ensure the format is correct before uploading.
- Set Duplicate Handling (this field is mandatory). This controls what happens when an item in your file already exists in Zoho Commerce:
- Skip Duplicates (selected by default) - Retains the items already in Zoho Commerce and does not import the duplicate items from the import file.
- Overwrite items - Imports the duplicate items from the import file and overwrites the existing items in Zoho Commerce.
- Choose the Character Encoding from the dropdown. It is set to UTF-8 (Unicode) by default; change it only if your file uses a different encoding.
- The File Delimiter option (comma or semicolon) appears after upload, select the one matching your file.
- Click Next to proceed to mapping the fields.
Step 2: Map Fields
- Zoho Commerce automatically matches the column headers in your file to the closest matching Zoho Commerce fields.
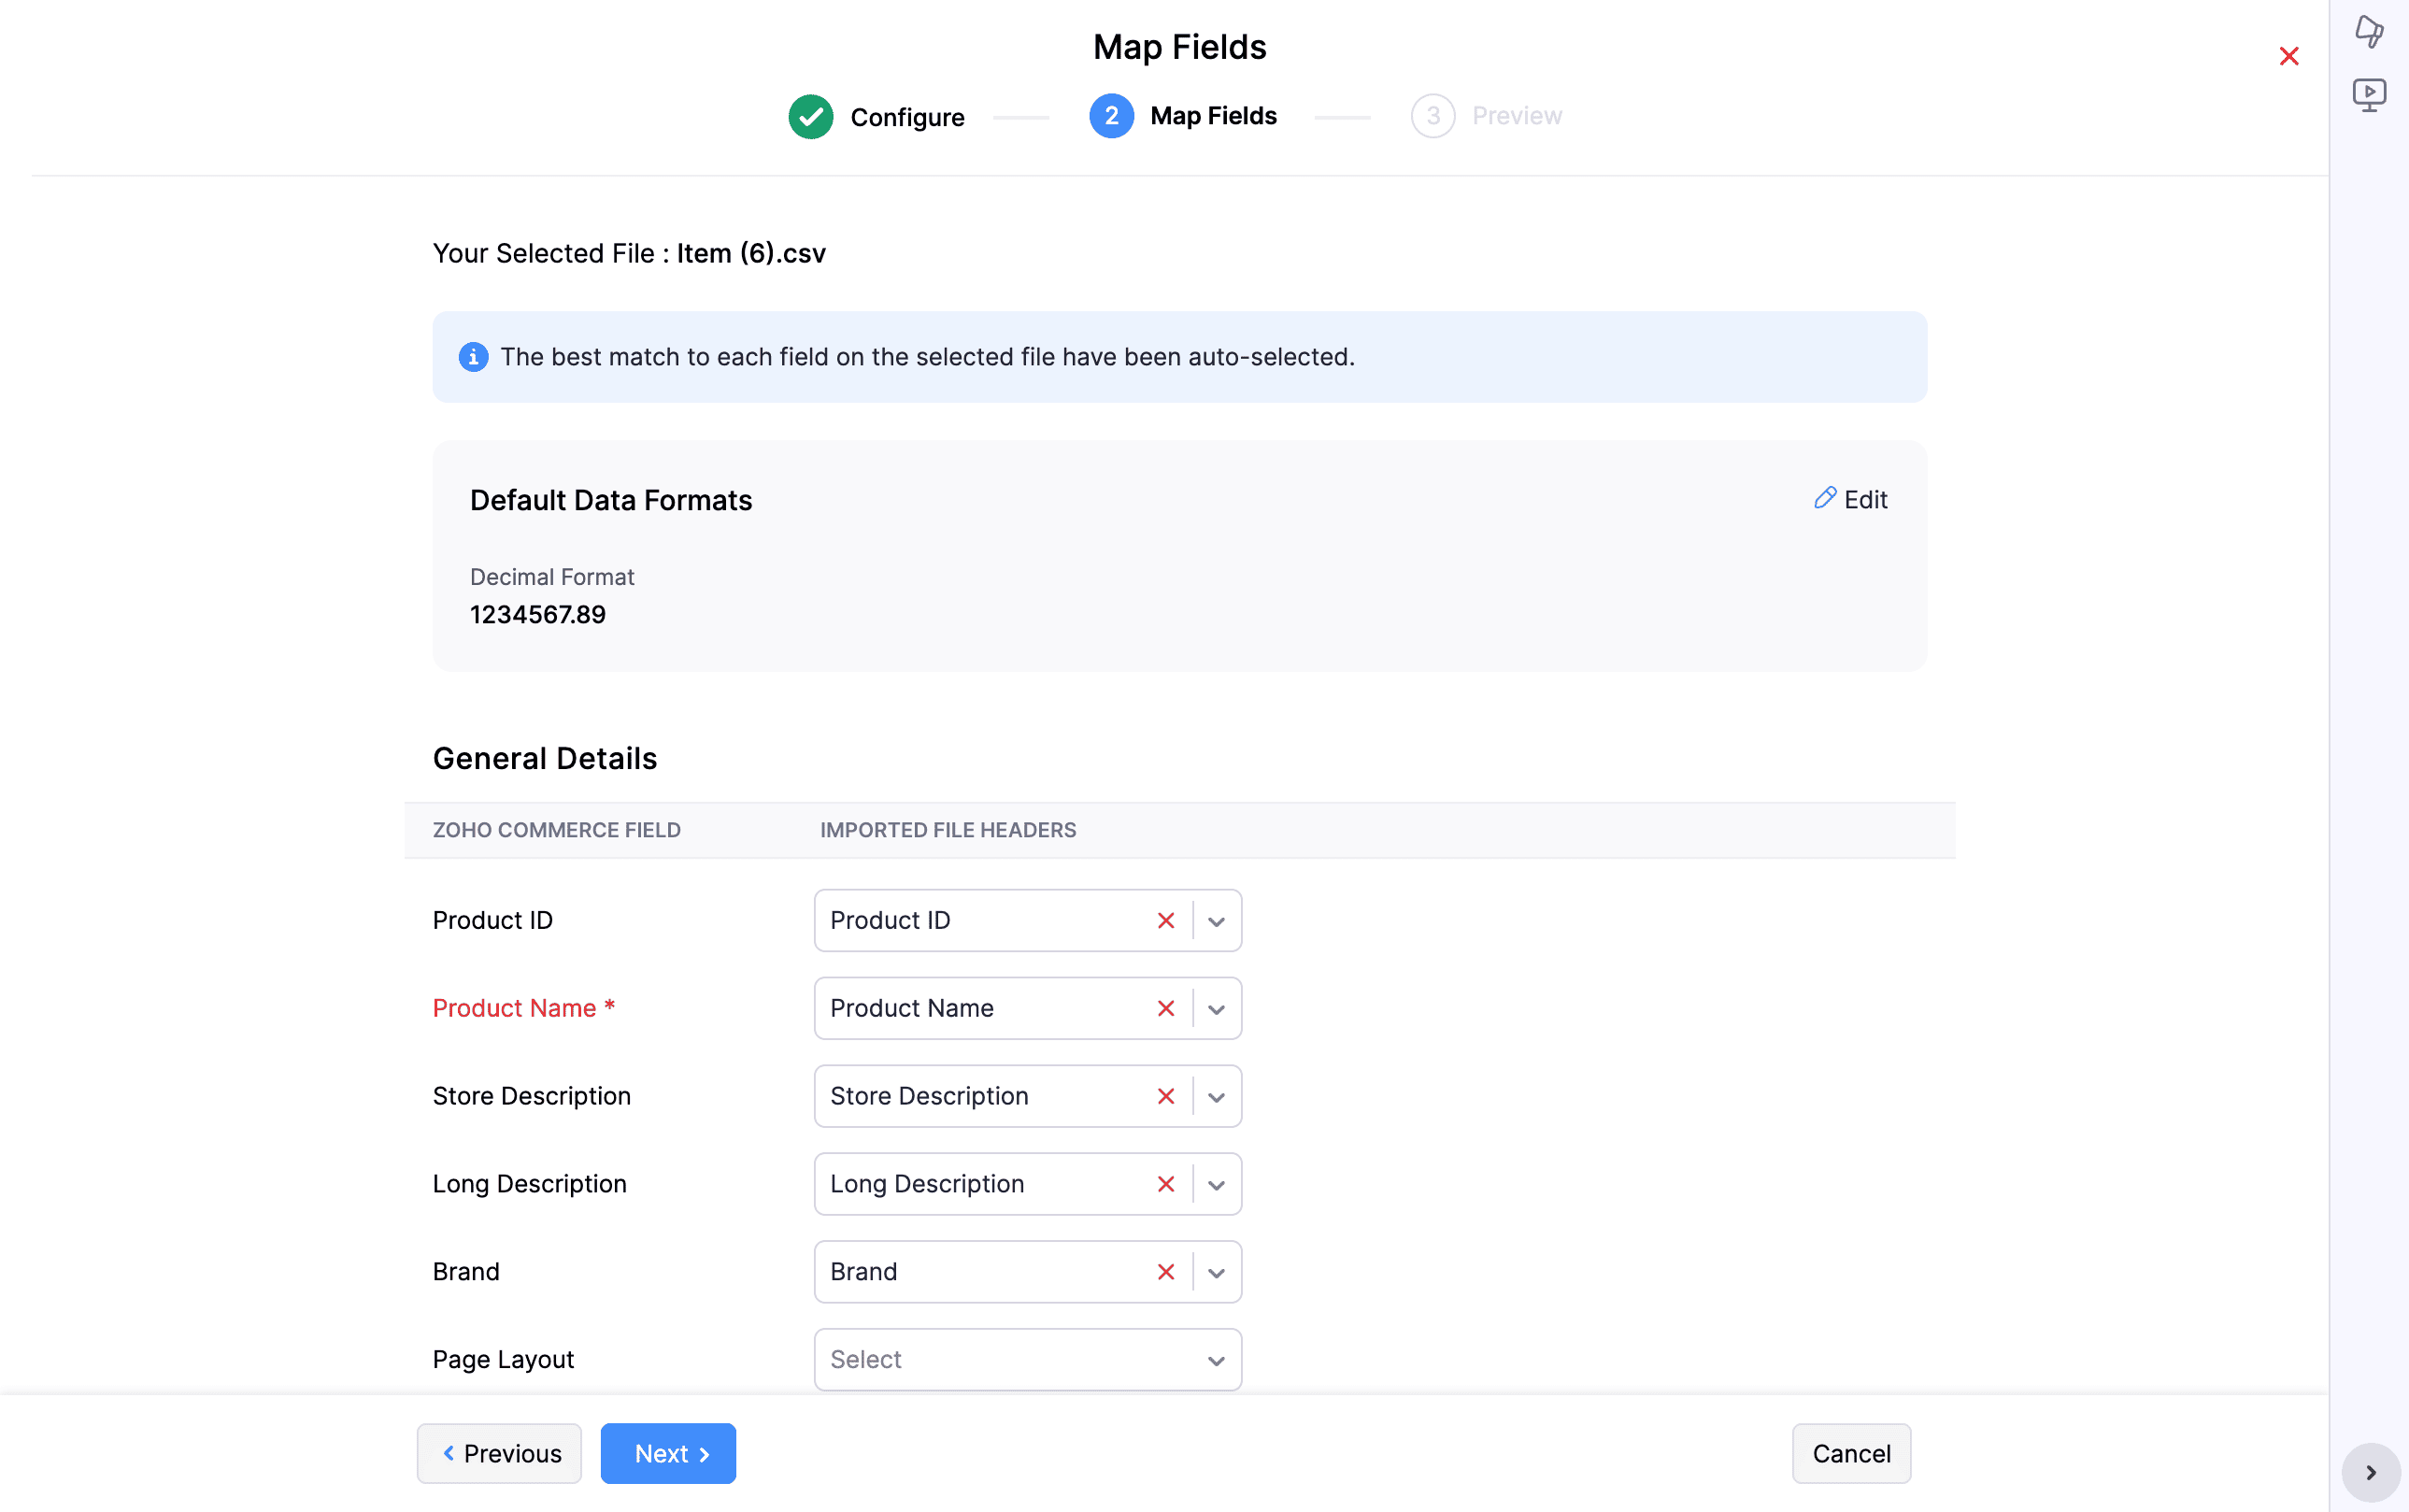
- Review the auto-mapped columns and manually map any unmapped fields by selecting the correct Zoho Commerce field for each remaining header.
- Ensure all mandatory fields are mapped to proceed with the import.
- Check the “Save these selections for use during future imports” option to reuse this mapping next time.
- Click Next to proceed to the preview. Use Previous if you need to return and adjust the configuration.
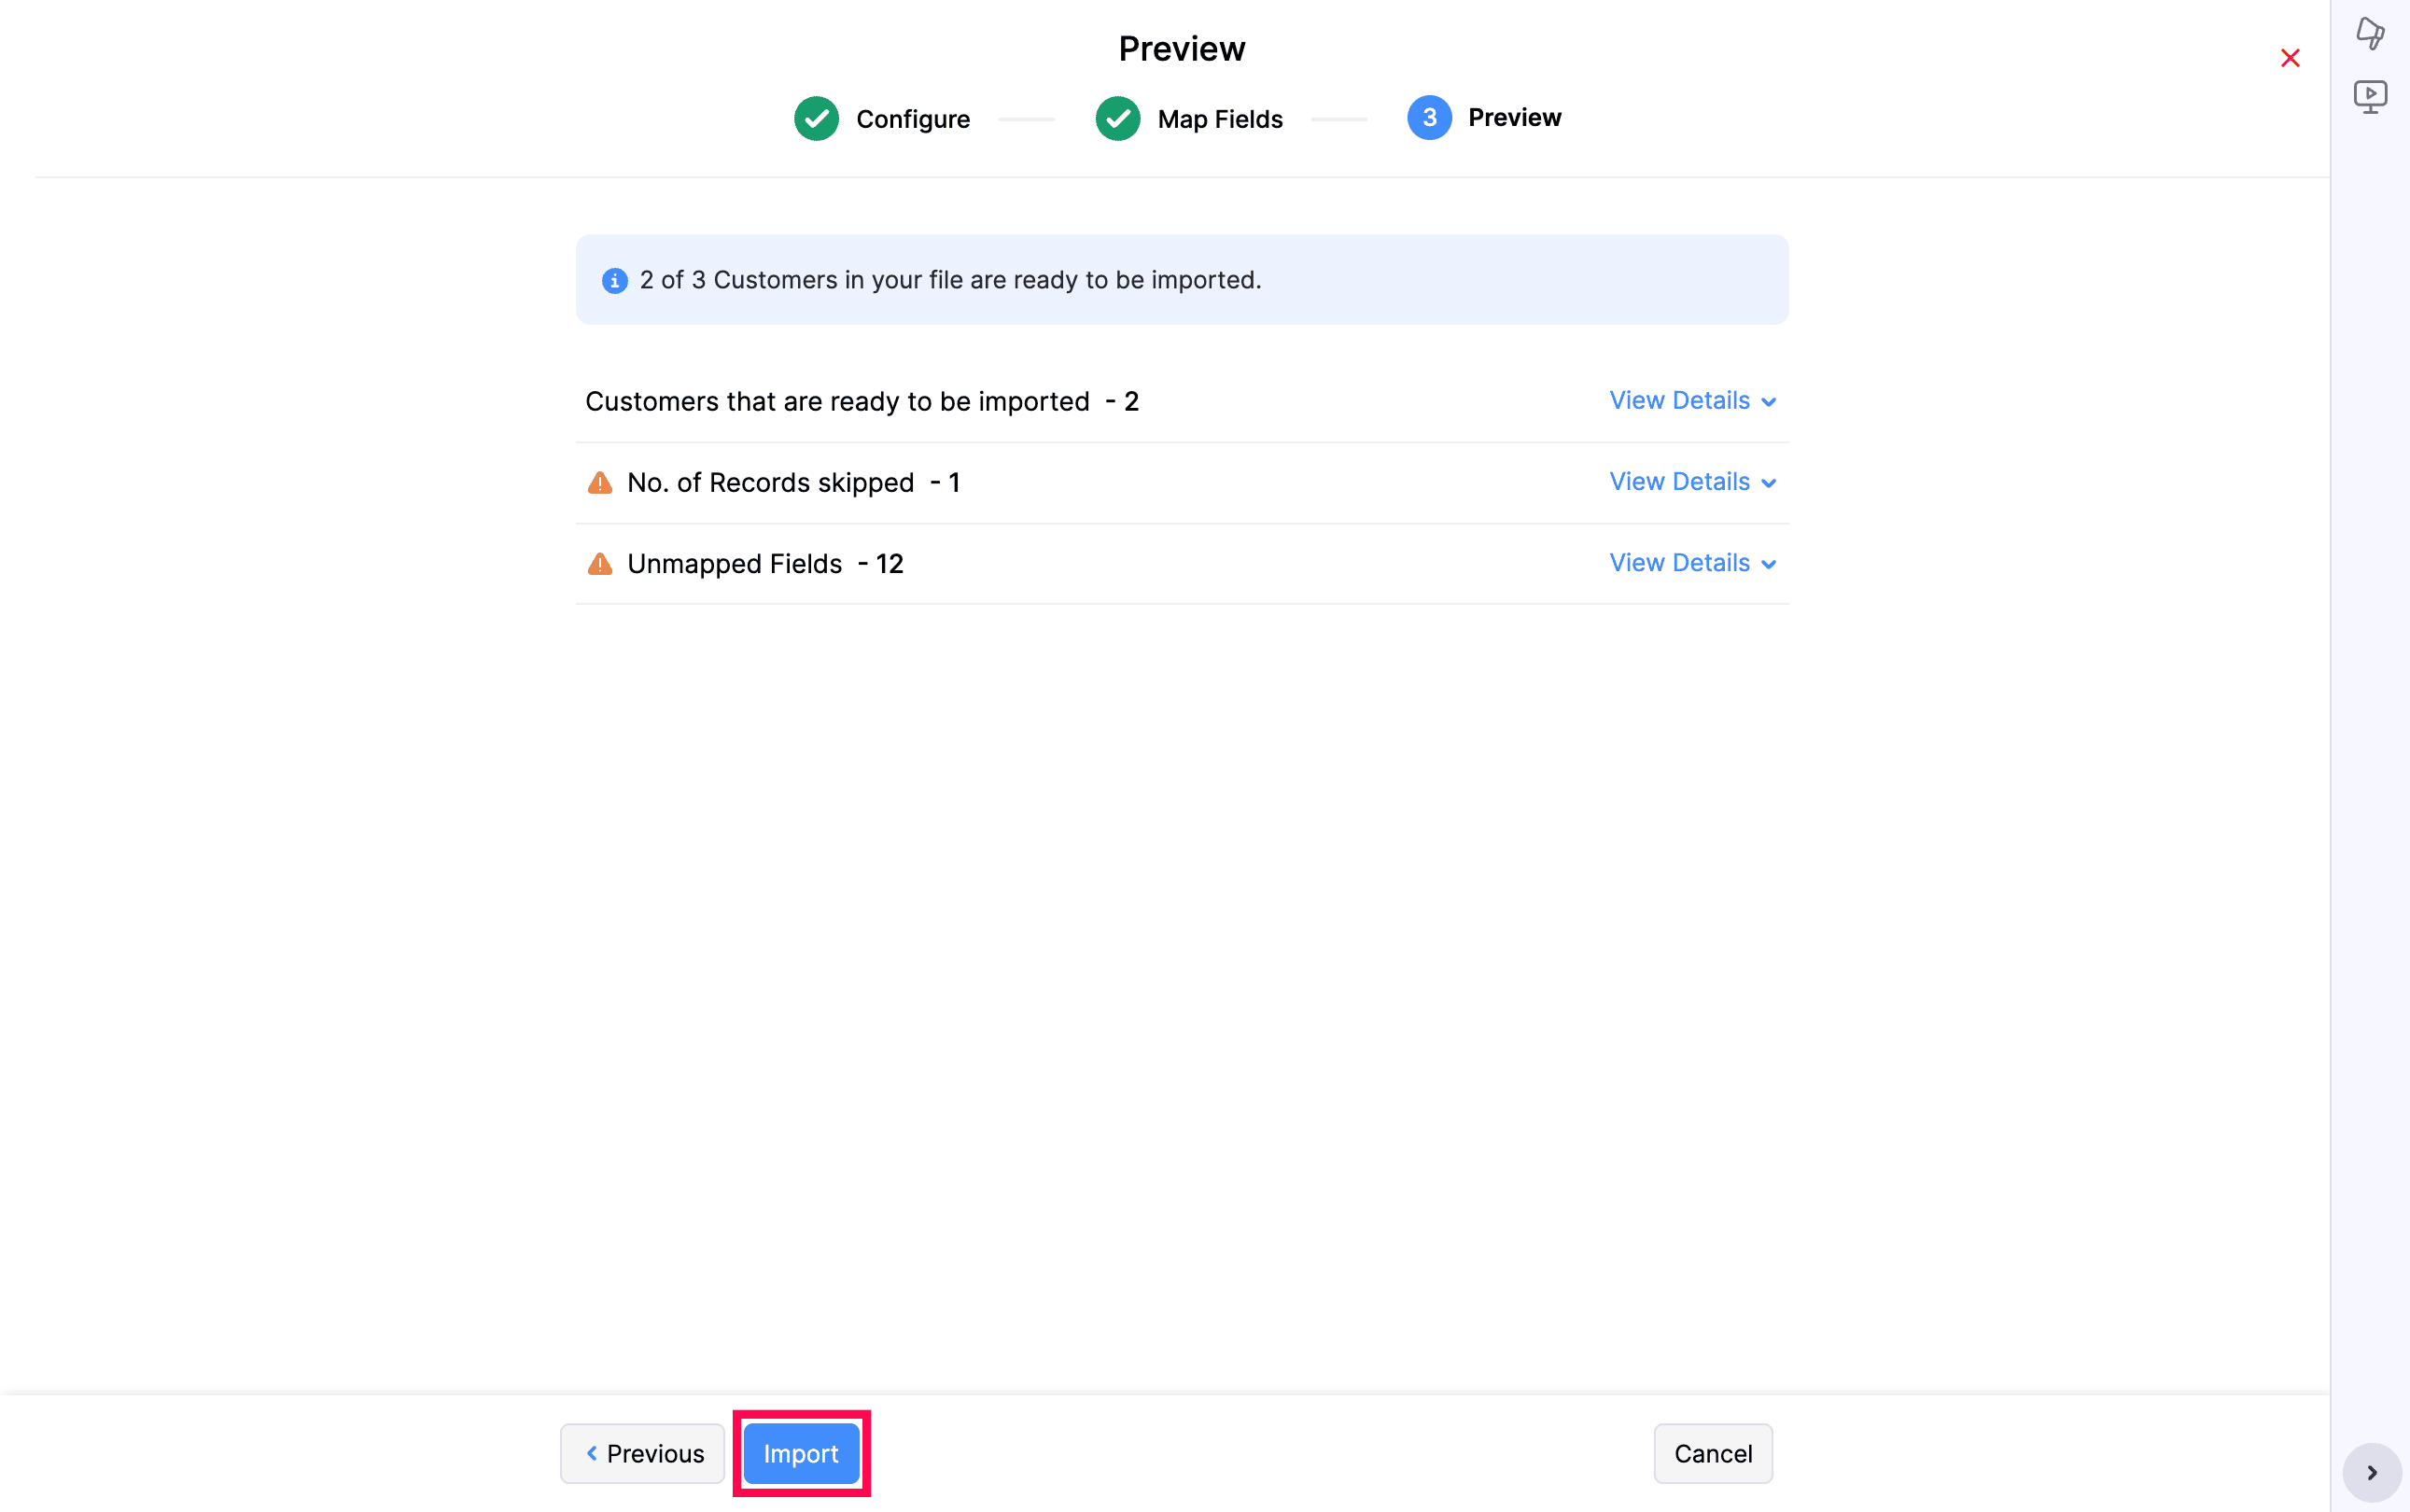
Step 3: Preview
- Review the import summary, which shows the number of items ready to import, any skipped records, and any unmapped fields.
- Click View Details against the respective summary to view the record details.
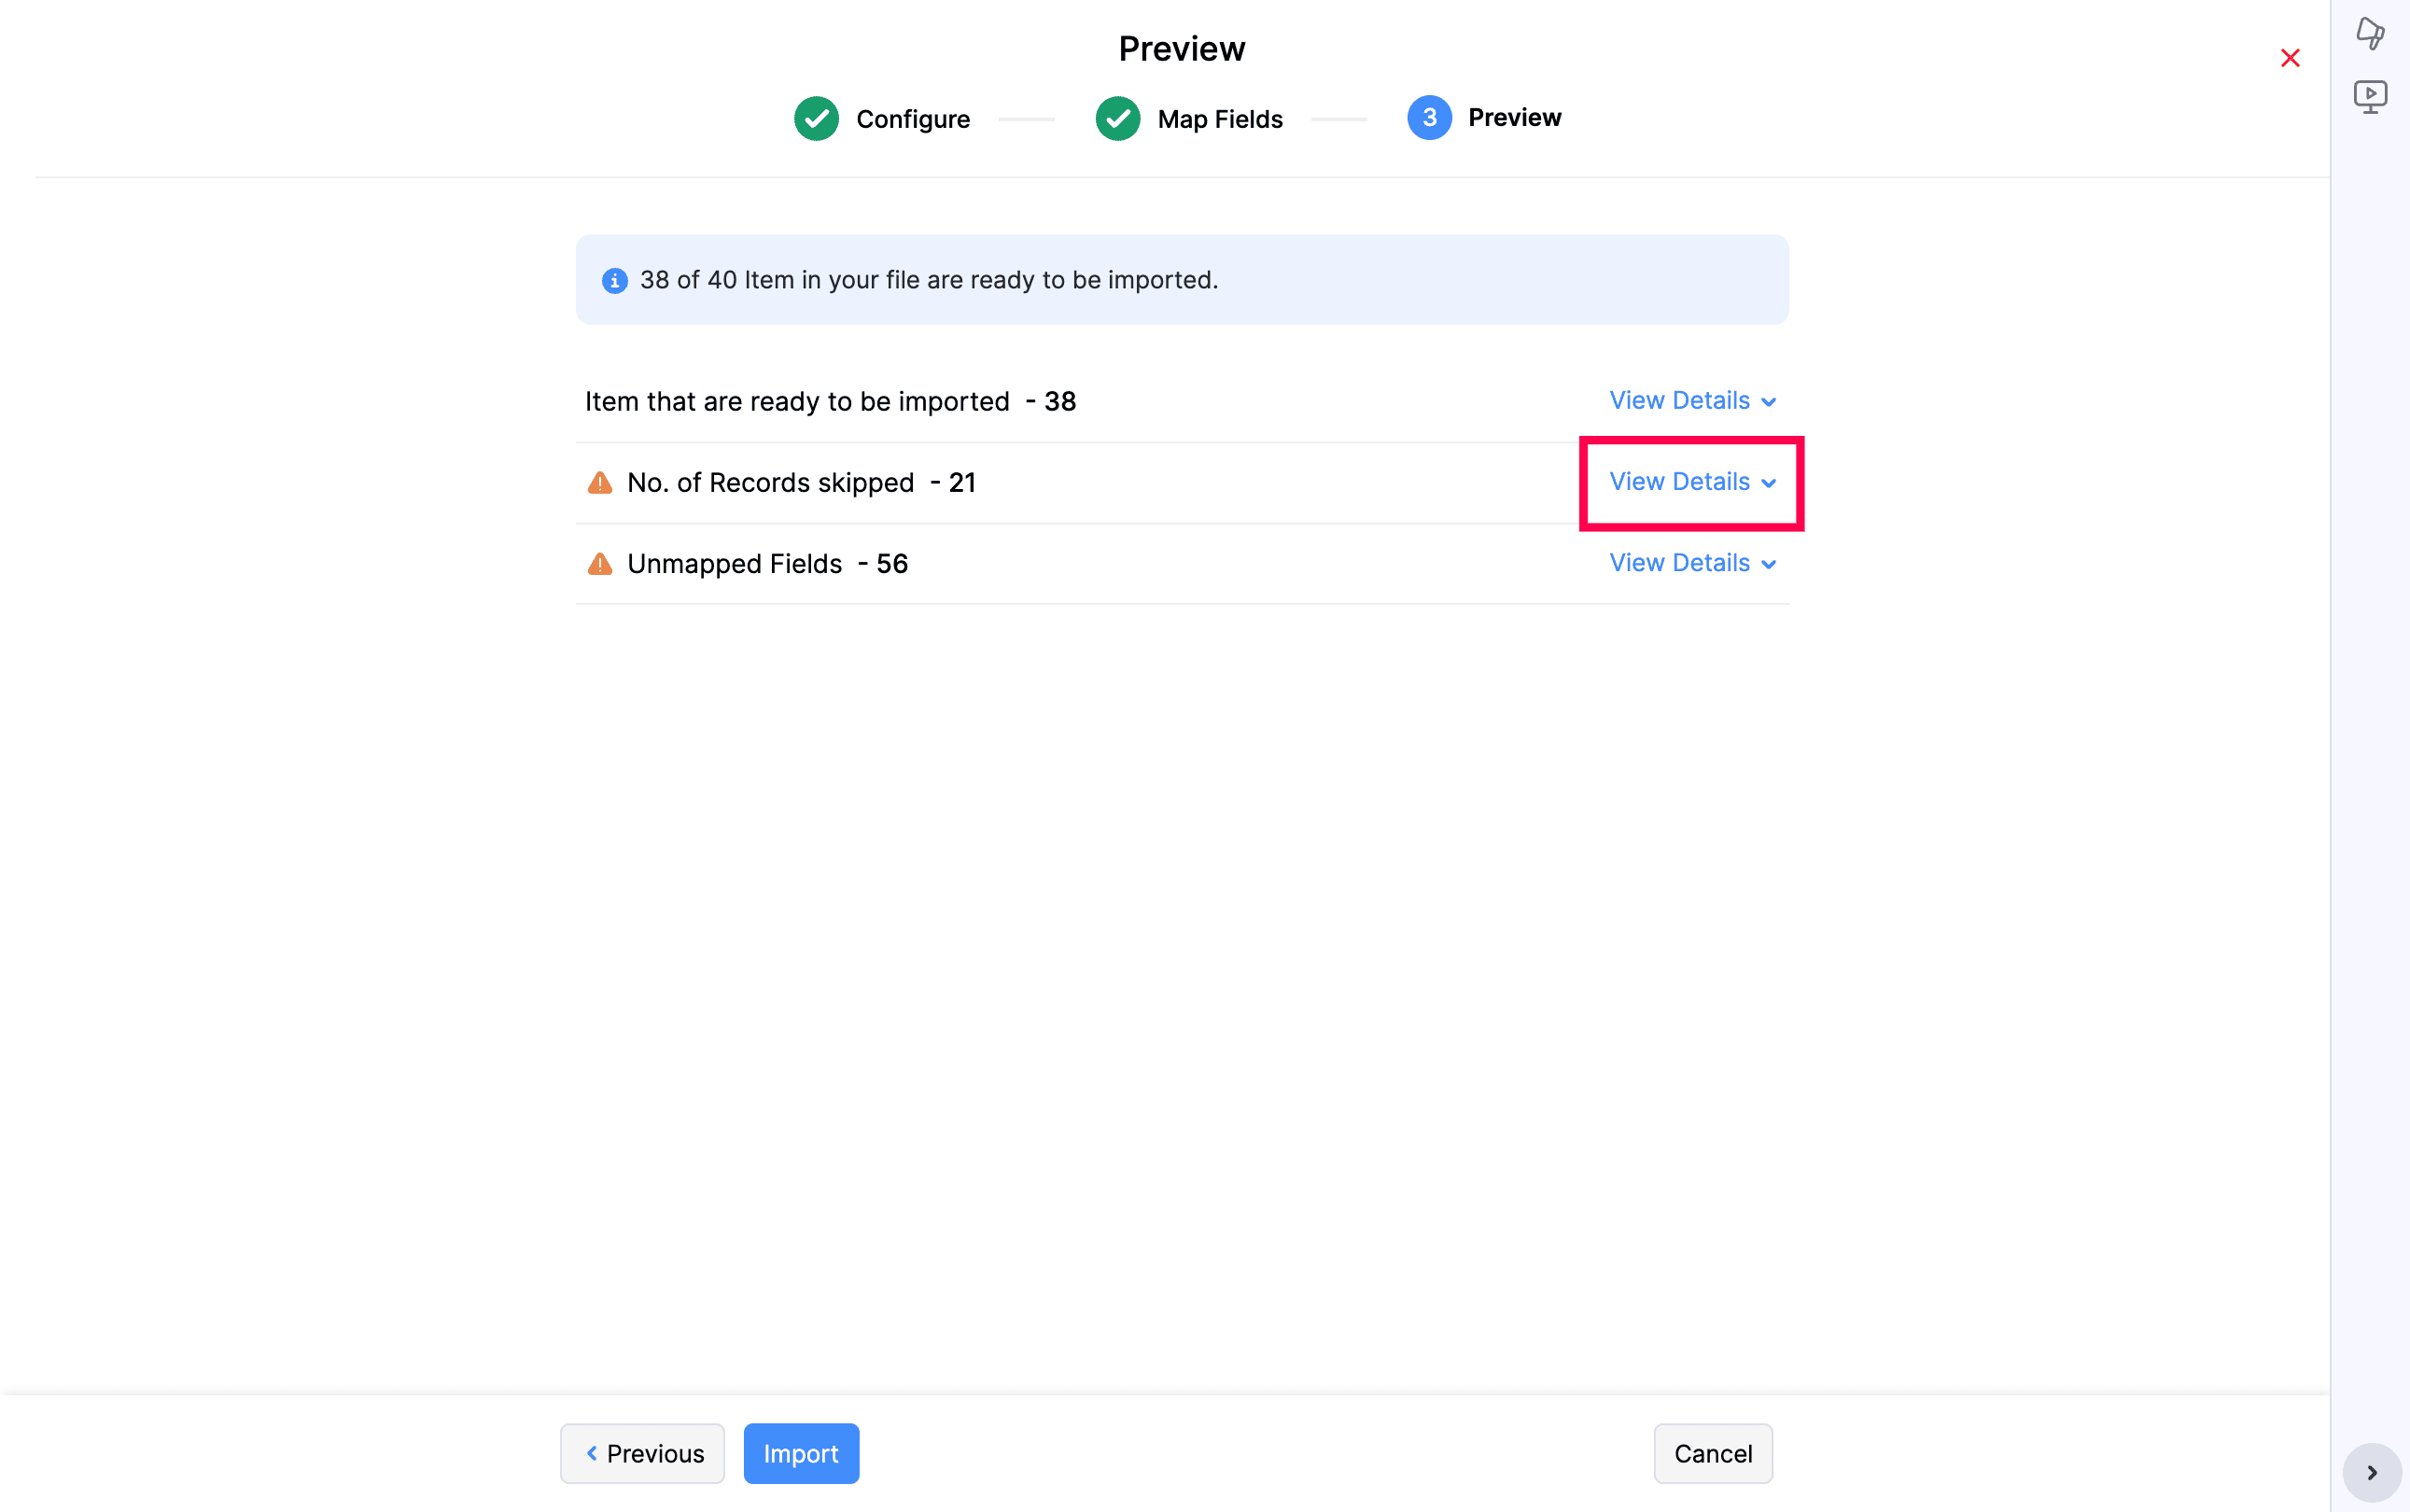
- If you need to change the mapping, click Previous to return to the Map Fields section.
- Once the items are mapped, click Import. Successfully imported items are added to your Items list.
Export Customers from Other Applications
Before importing your customers into Zoho Commerce, you will need to export them from your current platform. Most ecommerce applications allow you to export your customer data as a CSV or spreadsheet file, which can then be used to import your customers into Zoho Commerce seamlessly.
- Login to your existing application.
- Navigate to the Customers page.
- Export all the customer data in CSV or XLS file format.
Import Customers into Zoho Commerce
You can bring your existing customer data into Zoho Commerce by importing a file. This is useful when you are migrating from another platform or adding a large number of customers at once, instead of creating each customer manually.
Note: Only your customers’ data will be imported. Their portal access will not be carried over. To give customers access to the portal, the admin can invite them, or customers can sign up themselves.
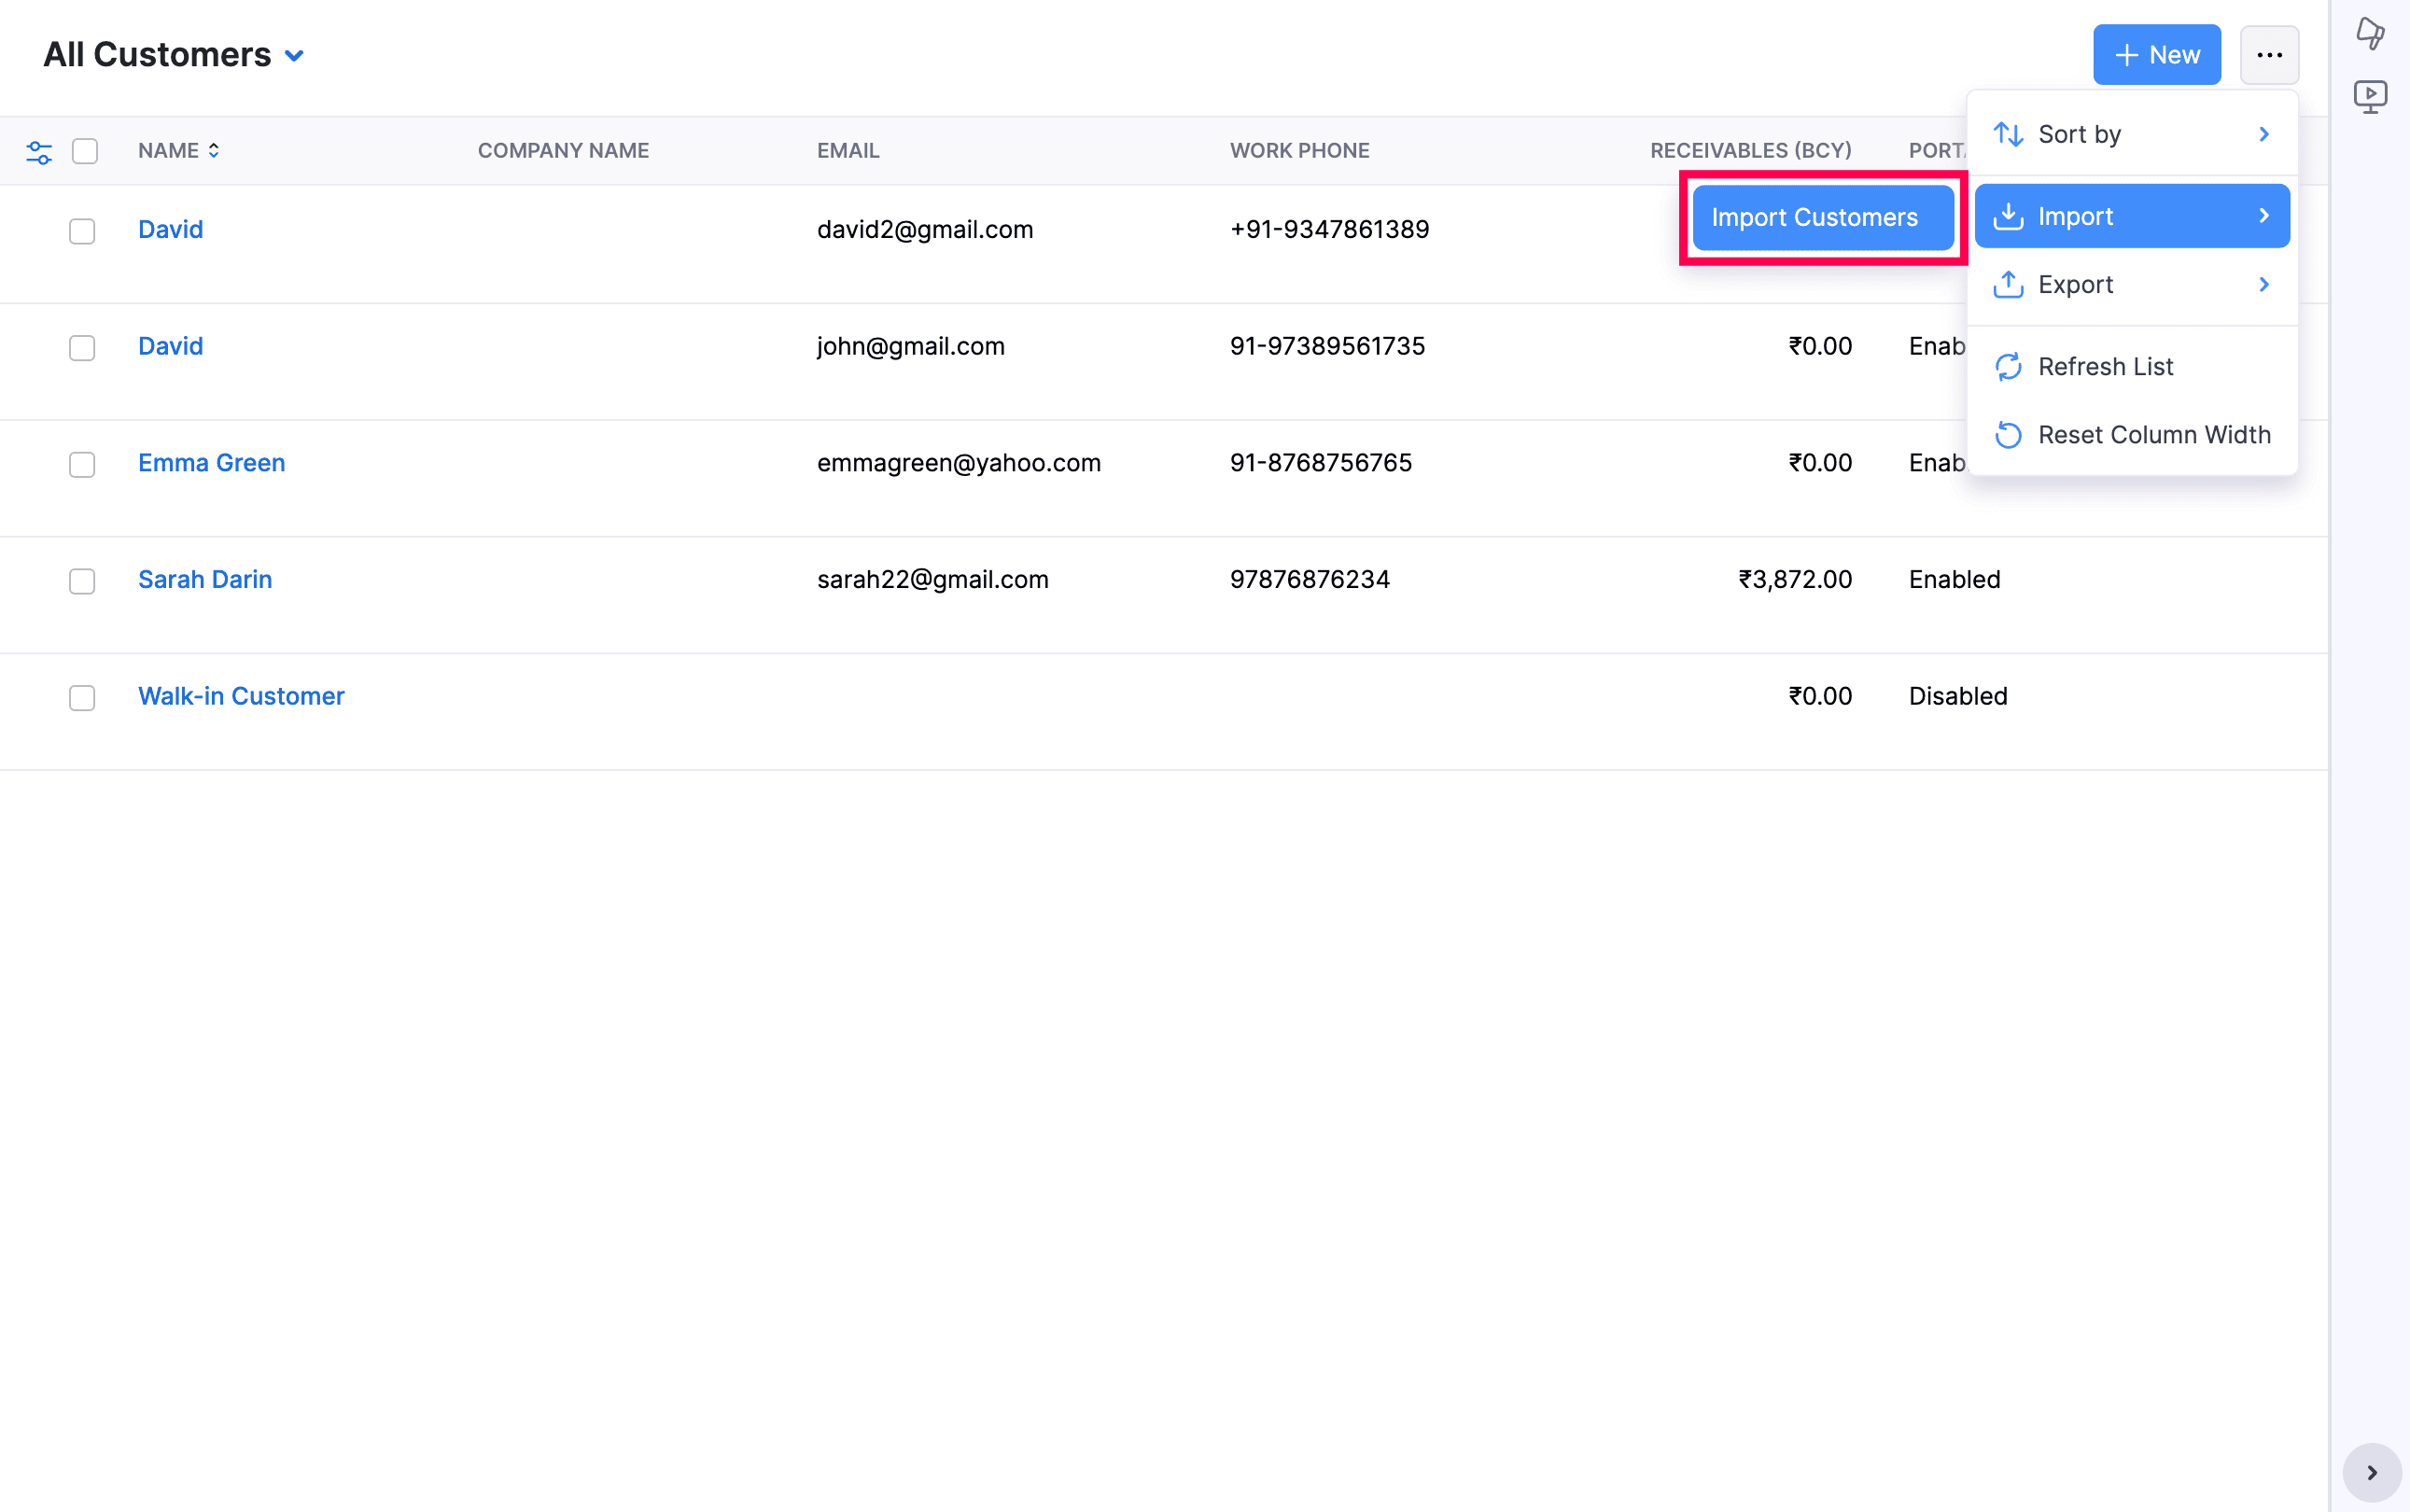
Steps to Import Customers
To import customers:
- Navigate to Customers.
- Click the More icon in the top-right corner and select Import Customers.
The import runs through three steps: Configure, Map Fields, and Preview.
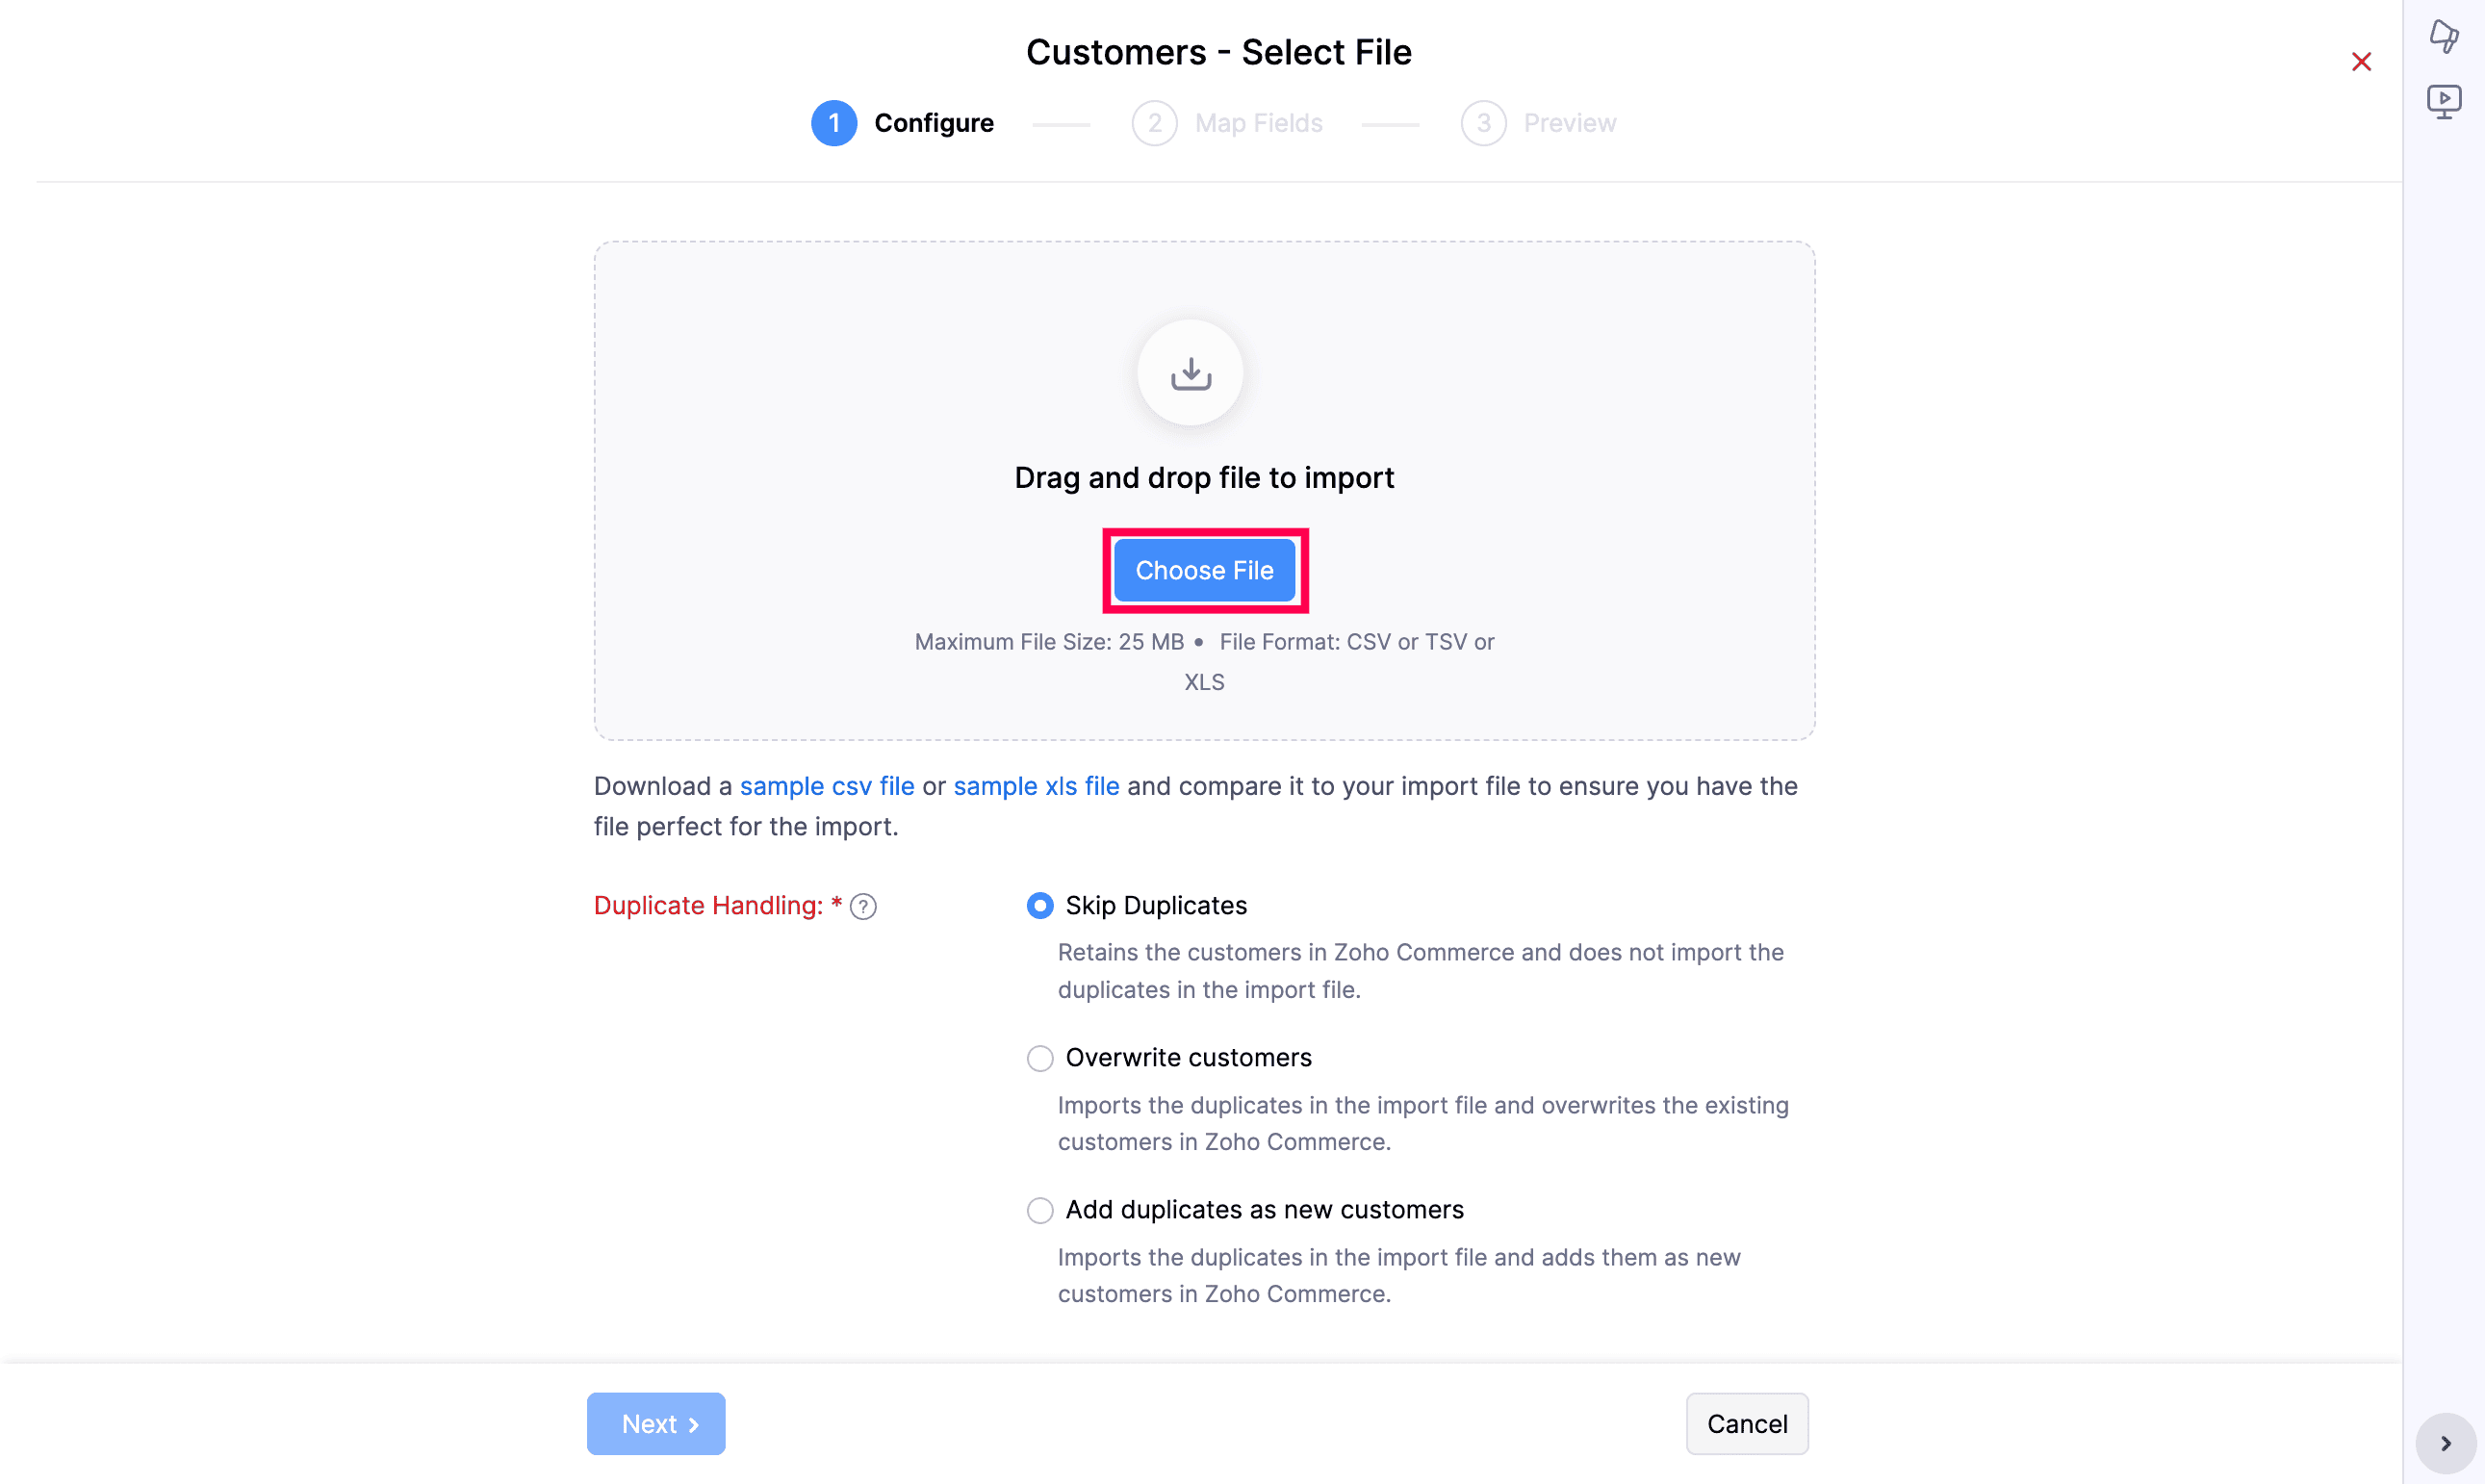
Step 1: Configure
- Drag and drop your file into the upload area, or
- Click Choose File to browse the file from your device.
- To use a different file, click Replace File.
- To clear the selected file, click Remove.
Note: Ensure your file meets the following requirements:
- File format: CSV, TSV, or XLS
- Maximum file size: 25 MB
- Use the sample file as a template so your column headers line up with Zoho Commerce fields and the mandatory fields are filled in.
- If you need a reference, click sample csv file or sample xls file to download a sample and compare it with your import file.
- Under Duplicate Handling, choose how Zoho Commerce should treat records in your file that match existing customers.
- Skip Duplicates - Retains the existing customers in Zoho Commerce and does not import the duplicate records from your file.
- Overwrite customers - Imports the duplicate records and overwrites the existing customers in Zoho Commerce.
- Add duplicates as new customers - Imports the duplicate records and adds them as new customers in Zoho Commerce.
- Choose the Character Encoding from the dropdown. It is set to UTF-8 (Unicode) by default; change it only if your file uses a different encoding.
- The File Delimiter option (comma or semicolon) appears after upload, select the one matching your file.
- Click Next.
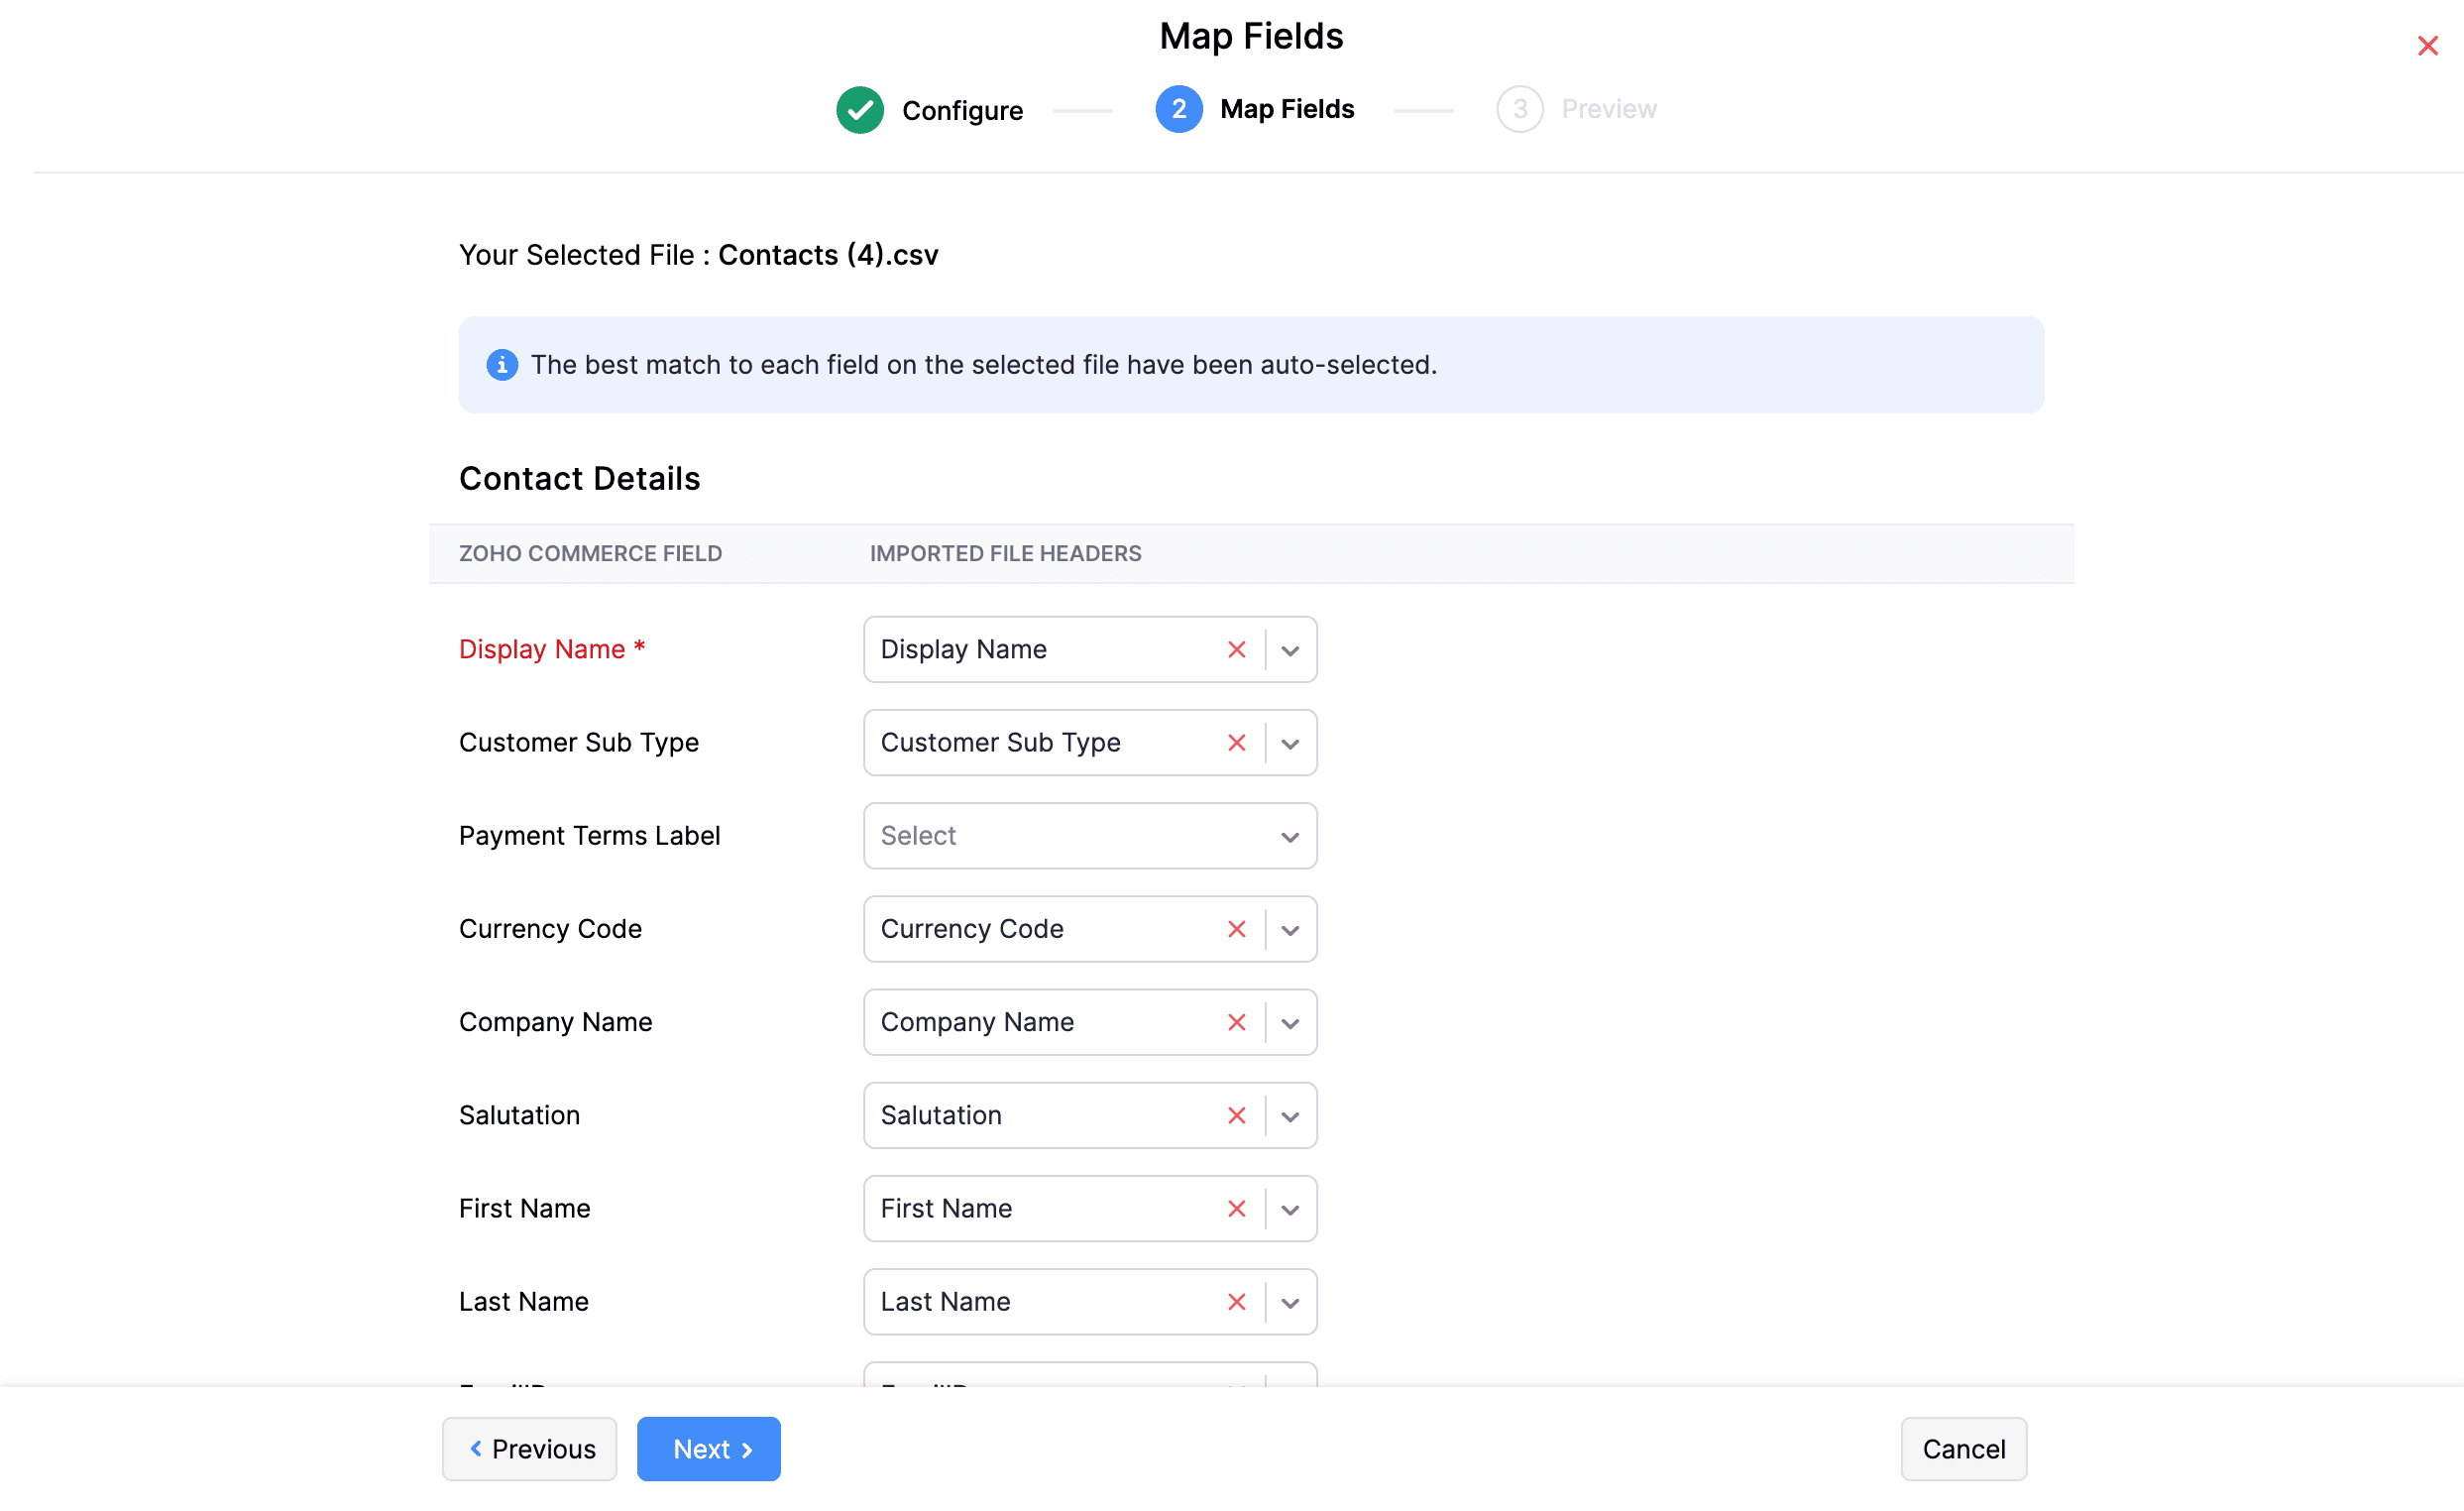
Step 2: Map Fields
In this step, map the columns in your import file to the corresponding customer fields in Zoho Commerce.
- Zoho Commerce automatically matches the column headers in your file to the closest matching Zoho Commerce fields.
- Review each mapping and use the dropdowns to map any remaining columns manually.
- Check the “Save these selections for use during future imports” option to reuse this mapping next time.
- Click Next to proceed. Use Previous if you need to return and adjust the configuration.
Step 3: Preview
- Review the import summary, which shows the number of customers ready to import, any skipped records, and any unmapped fields.
- Click View Details against the respective summary to view the record details.
- If you need to change the mapping, click Previous to return to the Map Fields section.
- Once the mapping is complete, click Import.
Once the import is complete, customers will be added to the Customers module.