Zoho CPaaS Plugin for Bubble
Bubble is a no-code platform that helps you develop your applications. They have an array of features that aid you in building your web as well as mobile applications. Besides this, they also offer integrations with various applications for different purposes.
The Zoho CPaaS plugin for Bubble allows you to send transactional emails from applications built using Bubble. You can use the Agents in your account to send the emails.
Pre-requisites to add Zoho CPaaS Plugin
You need the following to start sending emails from your application :
- A Zoho CPaaS account.
- An application developed in Bubble platform.
Installing Zoho CPaaS plugin in Bubble
- Login to your Bubble account and navigate to the App from which you wish to send your transactional emails.
- Select Plugins from the left menu. Click the Add plugin button.

- Search for Zoho CPaaS and click Install.
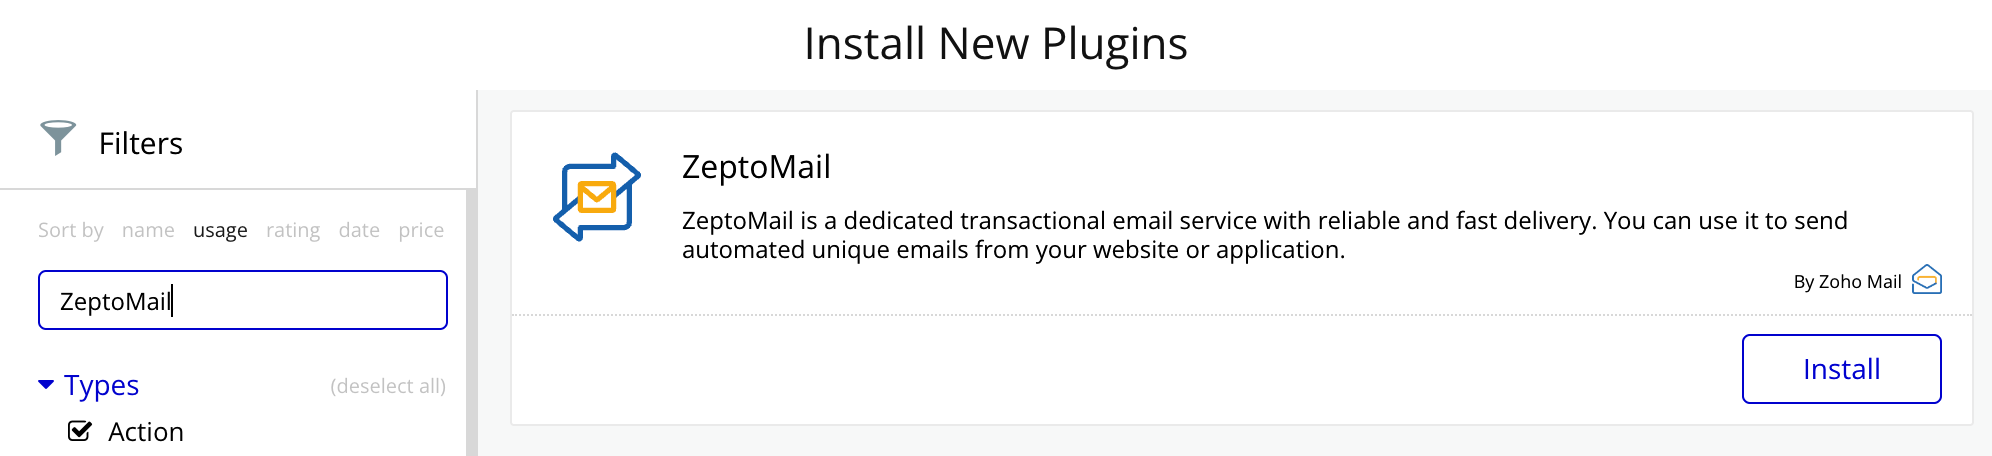
- Once installed, you will be able to fill in the configuration parameters. Apart from this, you will also be able to review and rate the plugin.
Configuration parameters in Zoho CPaaS Bubble Plugin
| Parameter | Description |
| Hosted region | The region in which your Zoho Account Data resides. (One of the valid domains hosted with Zoho) |
| API Key | It is the Send API key generated in the Zoho CPaaS Agent you wish to configure in Bubble. |
| From Email Address | The email address that will be used while sending all emails. |
| From Name | The name that will be shown as the Display Name while sending all emails from Bubble. |
Configure Zoho CPaaS Plugin
Once the plugin is installed, you need to configure your Zoho CPaaS account in Bubble.io to send transactional emails via Zoho CPaaS API. Follow the steps below:
- Login to your Zoho CPaaS account and access the relevant Agent you wish to configure in Bubble.
- Navigate to the SMTP/API tab and go to Bubble.io plugin section.
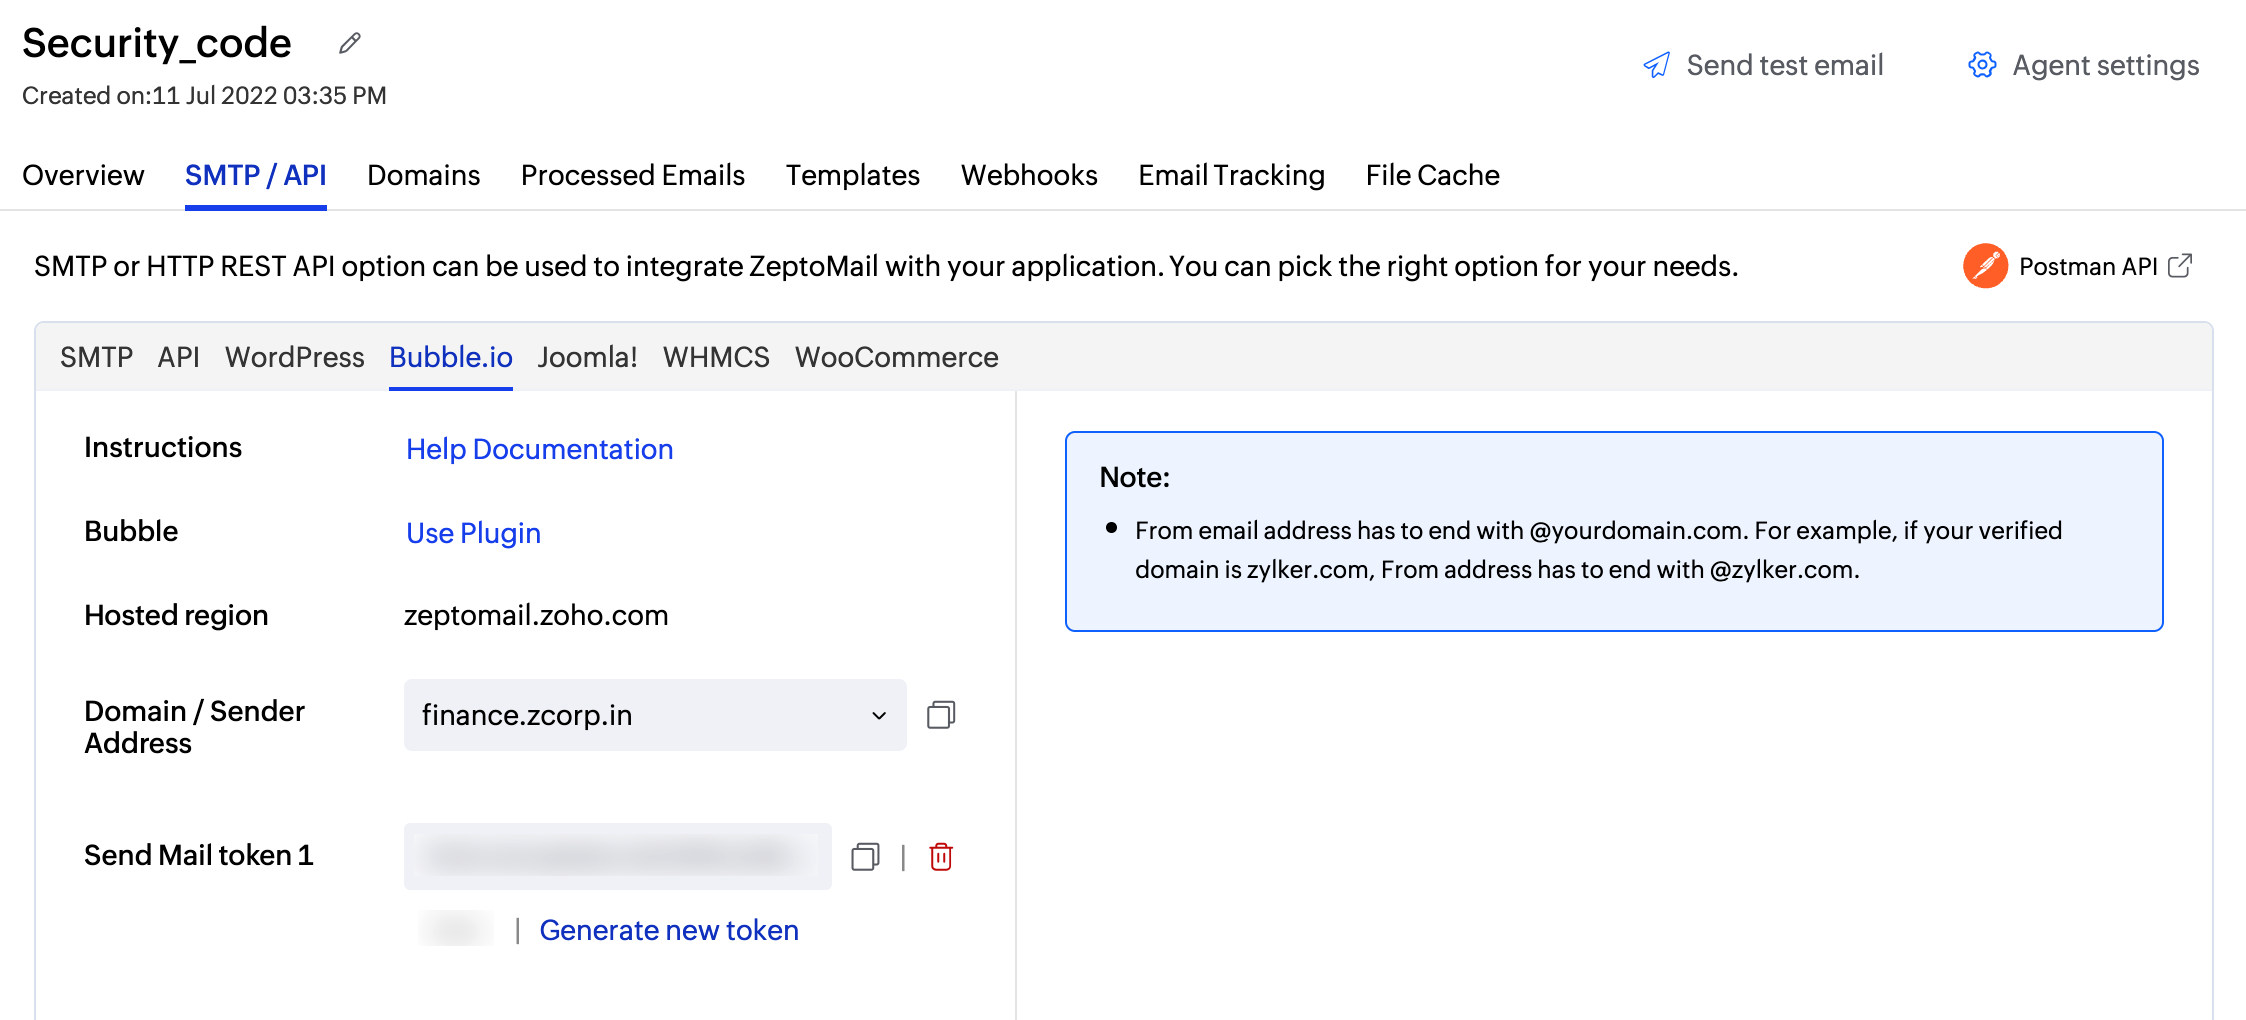
- Copy the fields and enter them in the Zoho CPaaS configuration page.
- Under Hosted region, enter the domain region where your Zoho CPaaS account is hosted.
- Copy the Send API key generated from your account in API key field.
- Provide the From email address and the From Name which will be used in the emails sent from the plugin.
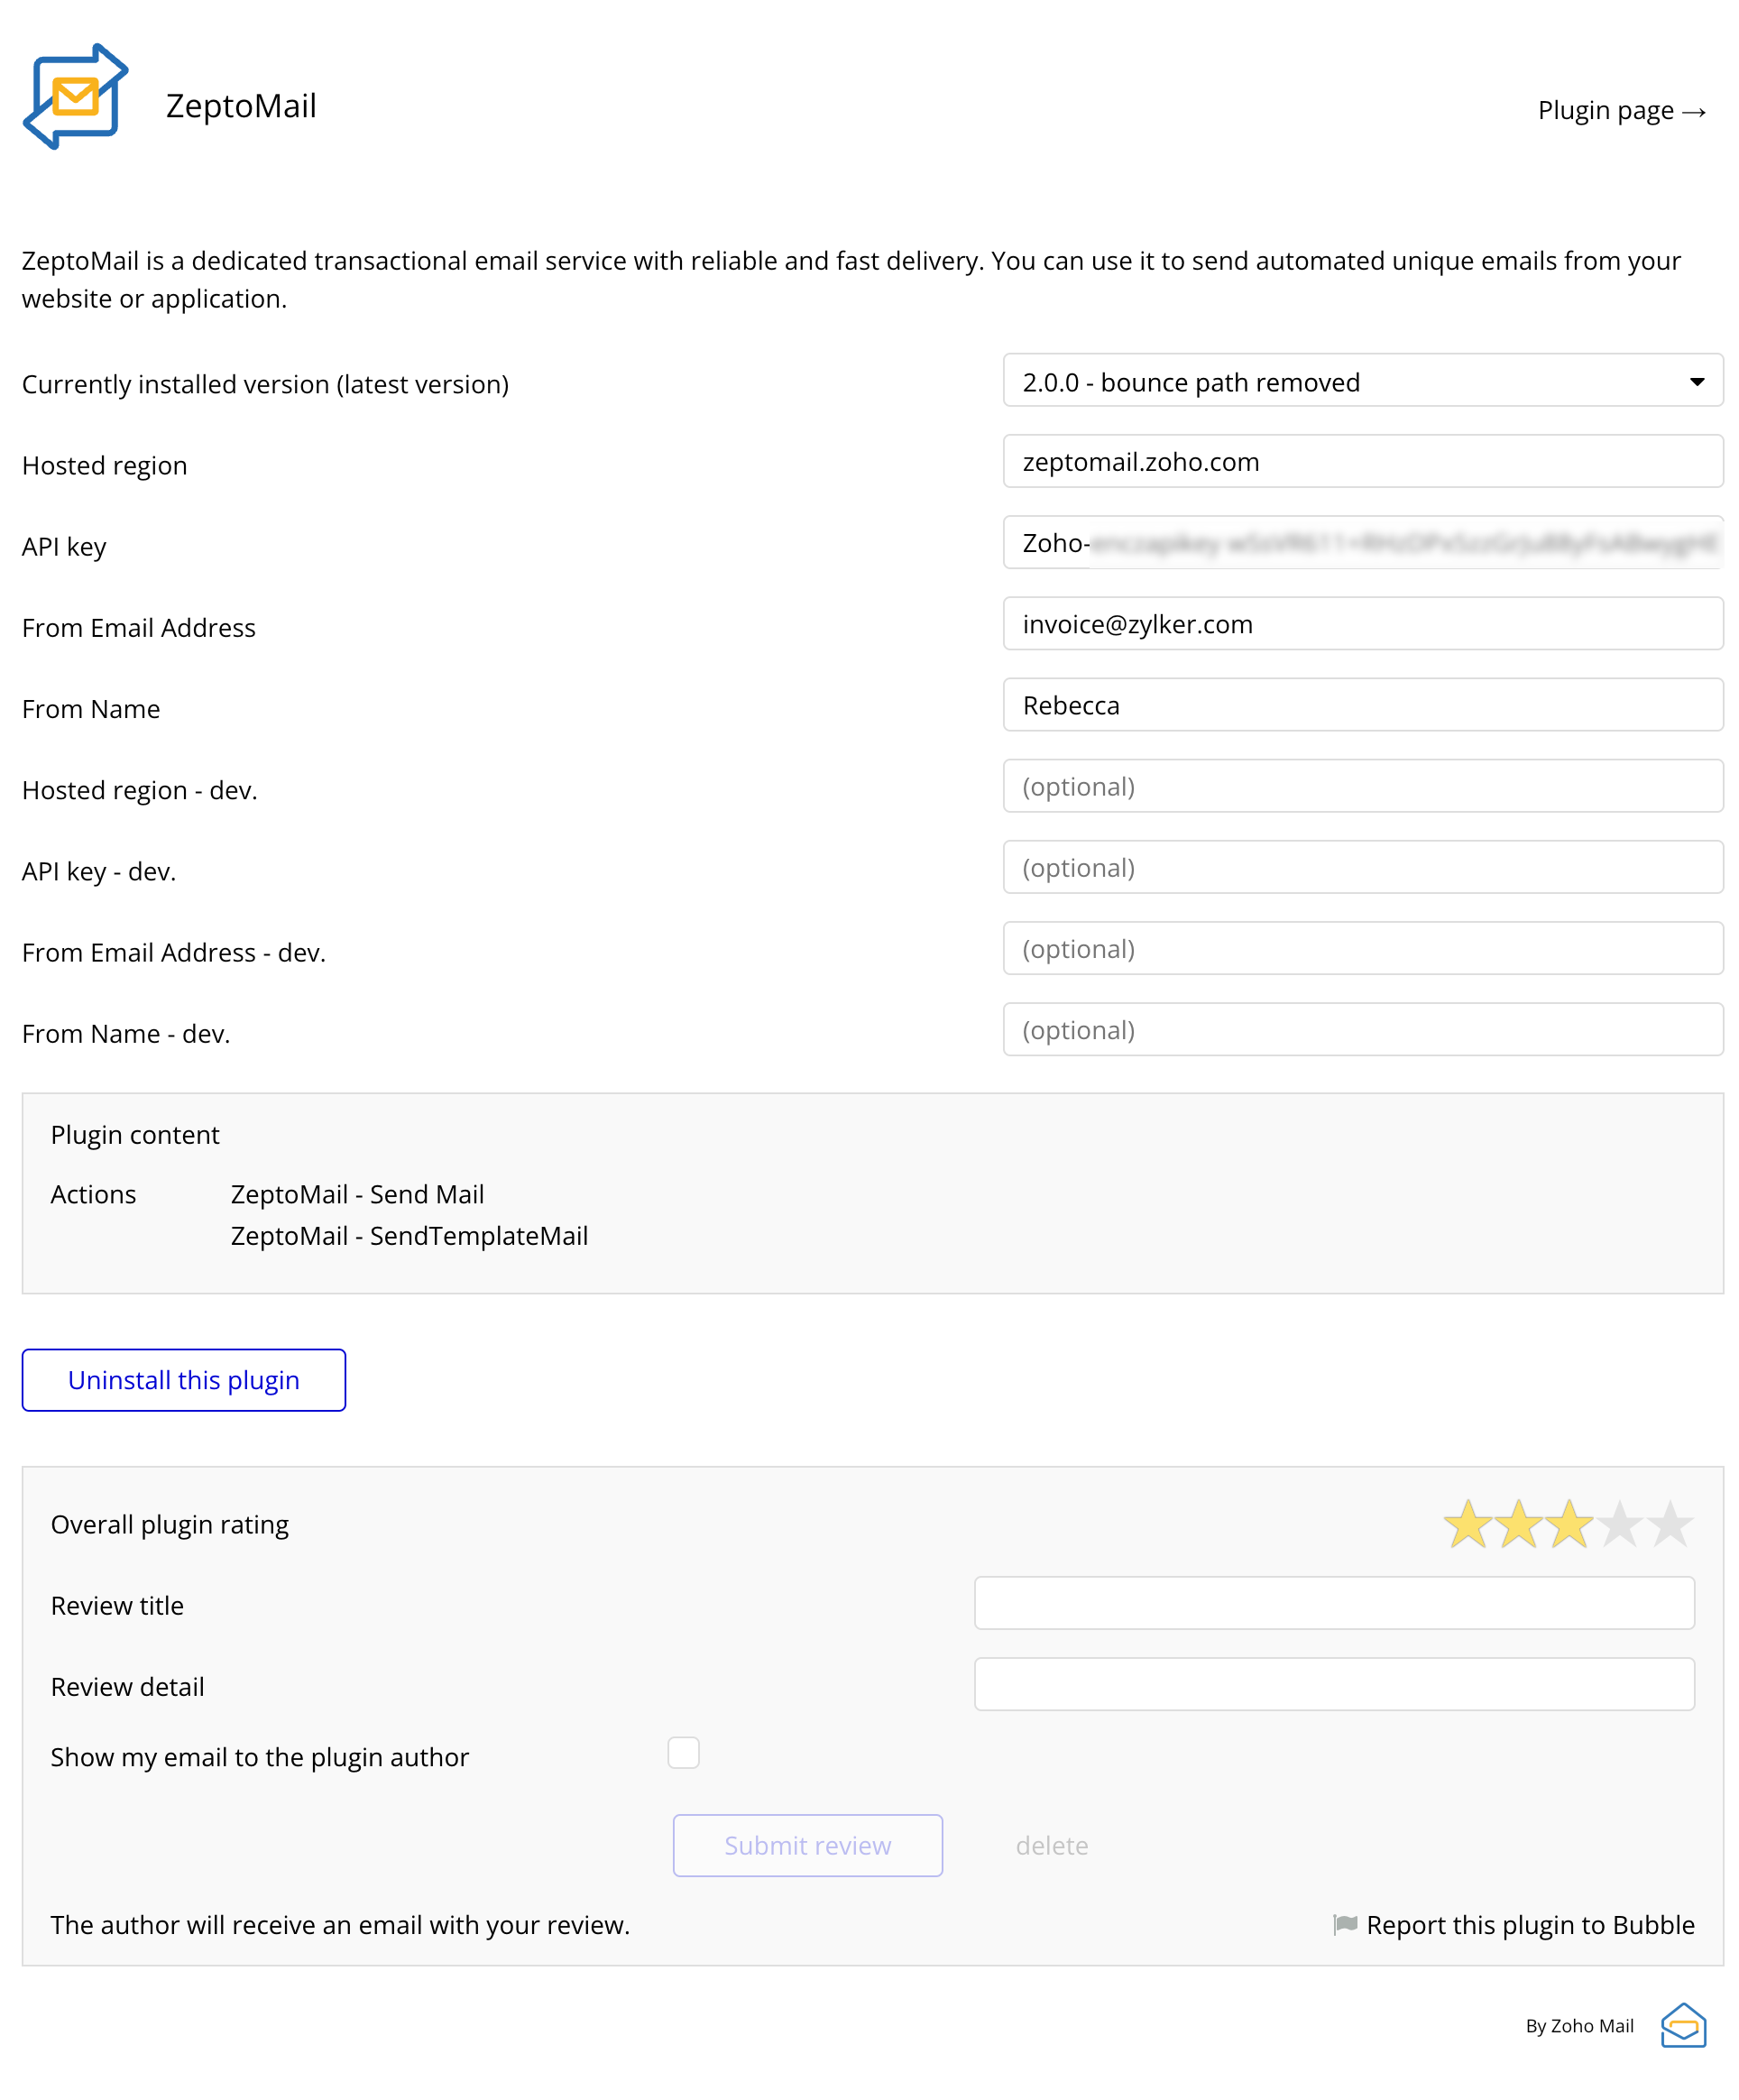
- You can also rate and review the plugin.
Initiating workflow
You can initiate workflows to send out emails automatically from your account. To create a workflow :
- Navigate to the workflow menu on the left pane.
- Click the New button at the top to create a new workflow.
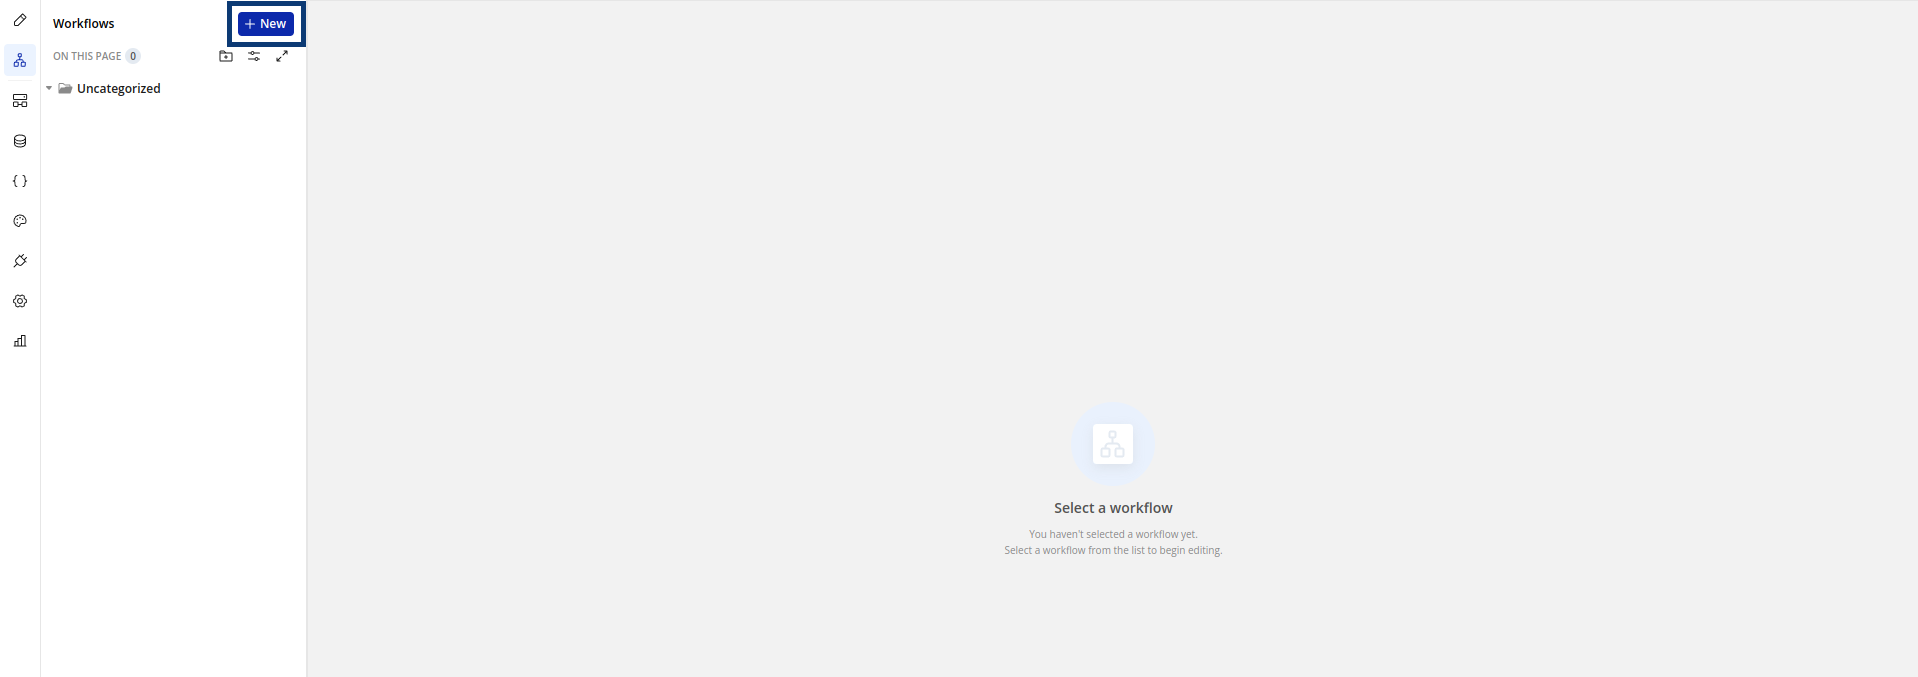
- Click the New event option to create a new event that will trigger a transactional email from your application. You can either choose from the given list of events or create a custom event.

- For a custom event, fill in the event name and the user constraints in the pop-up.

- Once you add an event, you can add the corresponding actions that should be executed once the event is triggered.
- Click the plus symbol below it to choose the desired action.
- Navigate to the plugins section to select Zoho CPaaS's action for the trigger event you have created. You can choose two ways to use the plugin— send email using the template in Bubble or use the templates available in your Zoho CPaaS account.
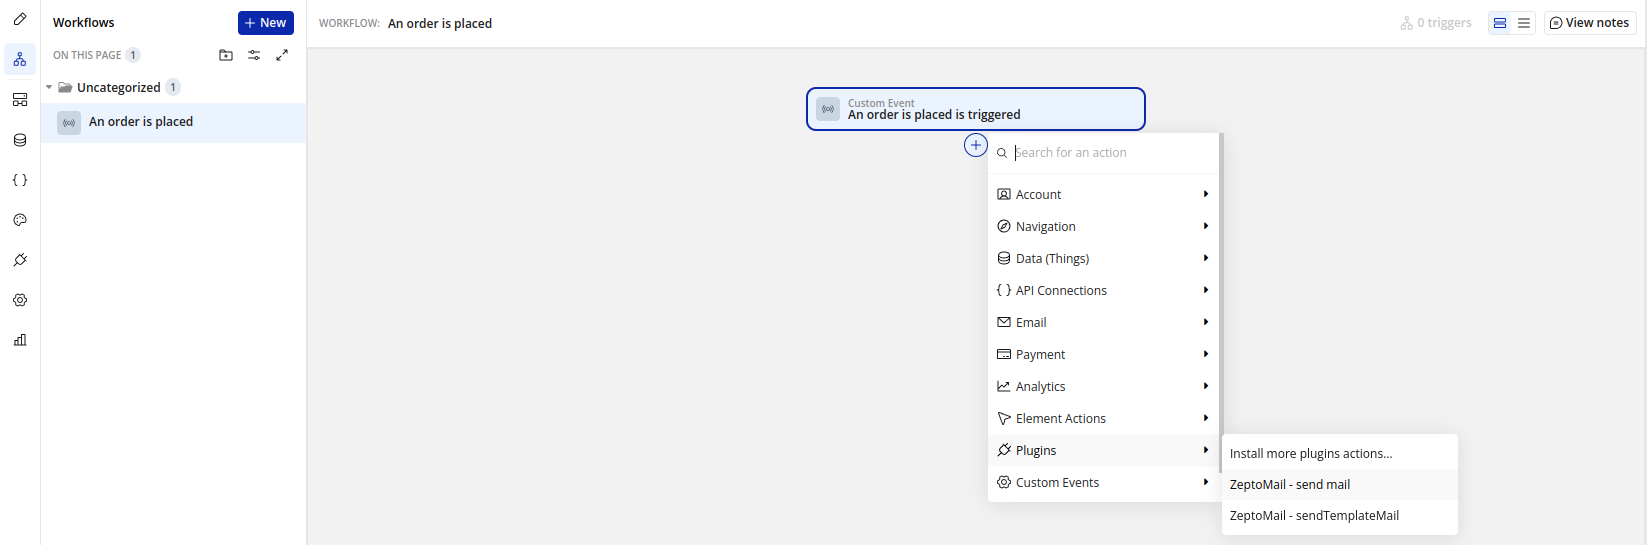
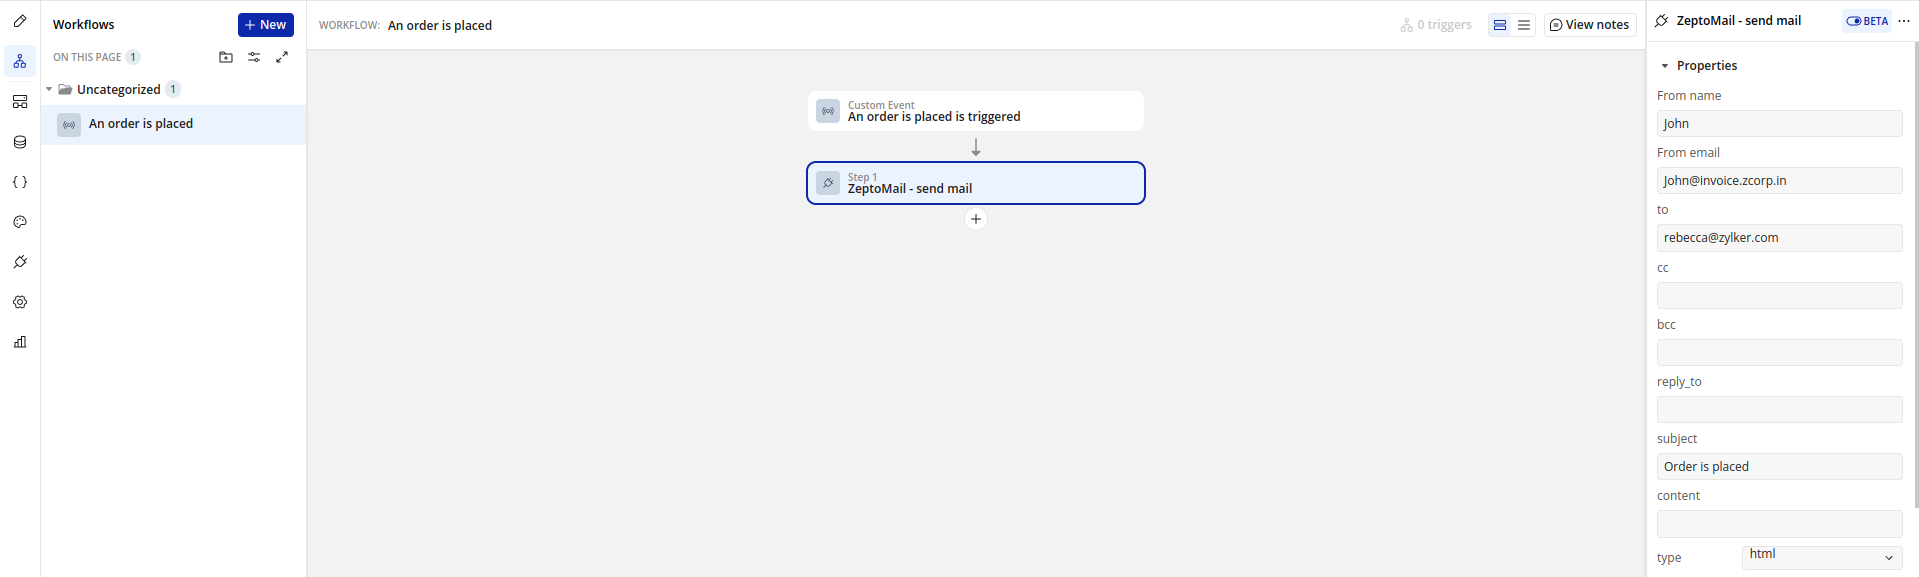
- If you select the send email action, the fields will be auto-populated based on the user's credentials in your application.
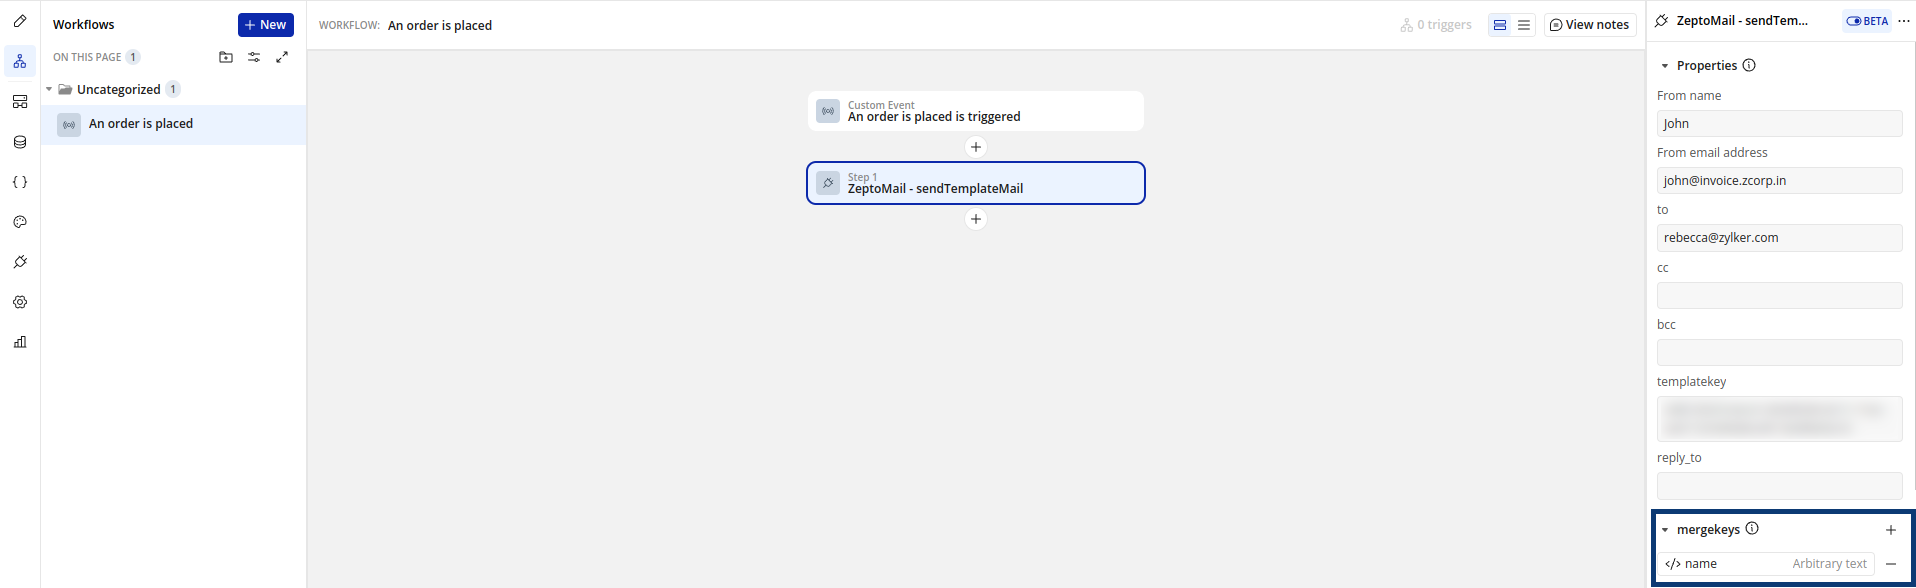
- If you wish to use the templates available in your Zoho CPaaS account, then choose the Zoho CPaaS-sendTemplateMail option in the actions drop-down.
- Update the template key and other relevant details in the Properties column. You can copy paste the template key from the Templates tab in the respective Agent.
- You can also add placeholders for dynamic data (name, order id, etc.) in your emails. This can be done using the merge info fields in Zoho CPaaS's templates.
- If your email templates contain any merge info parameters, you should include them either in the mergekeys or merge info field in your Bubble workflow.
- Mergekeys: Mergekeys allow you to add Zoho CPaaS's merge info values as key-value pairs.
- In the mergekeys field, enter the relevant placeholder and its corresponding value.
- You can add multiple values using the Set another key/value button.
- Merge info(JSON): The merge info field allows you to add the entire merge info values in a valid JSON format. This is particularly useful when your template contains collection iteration values.
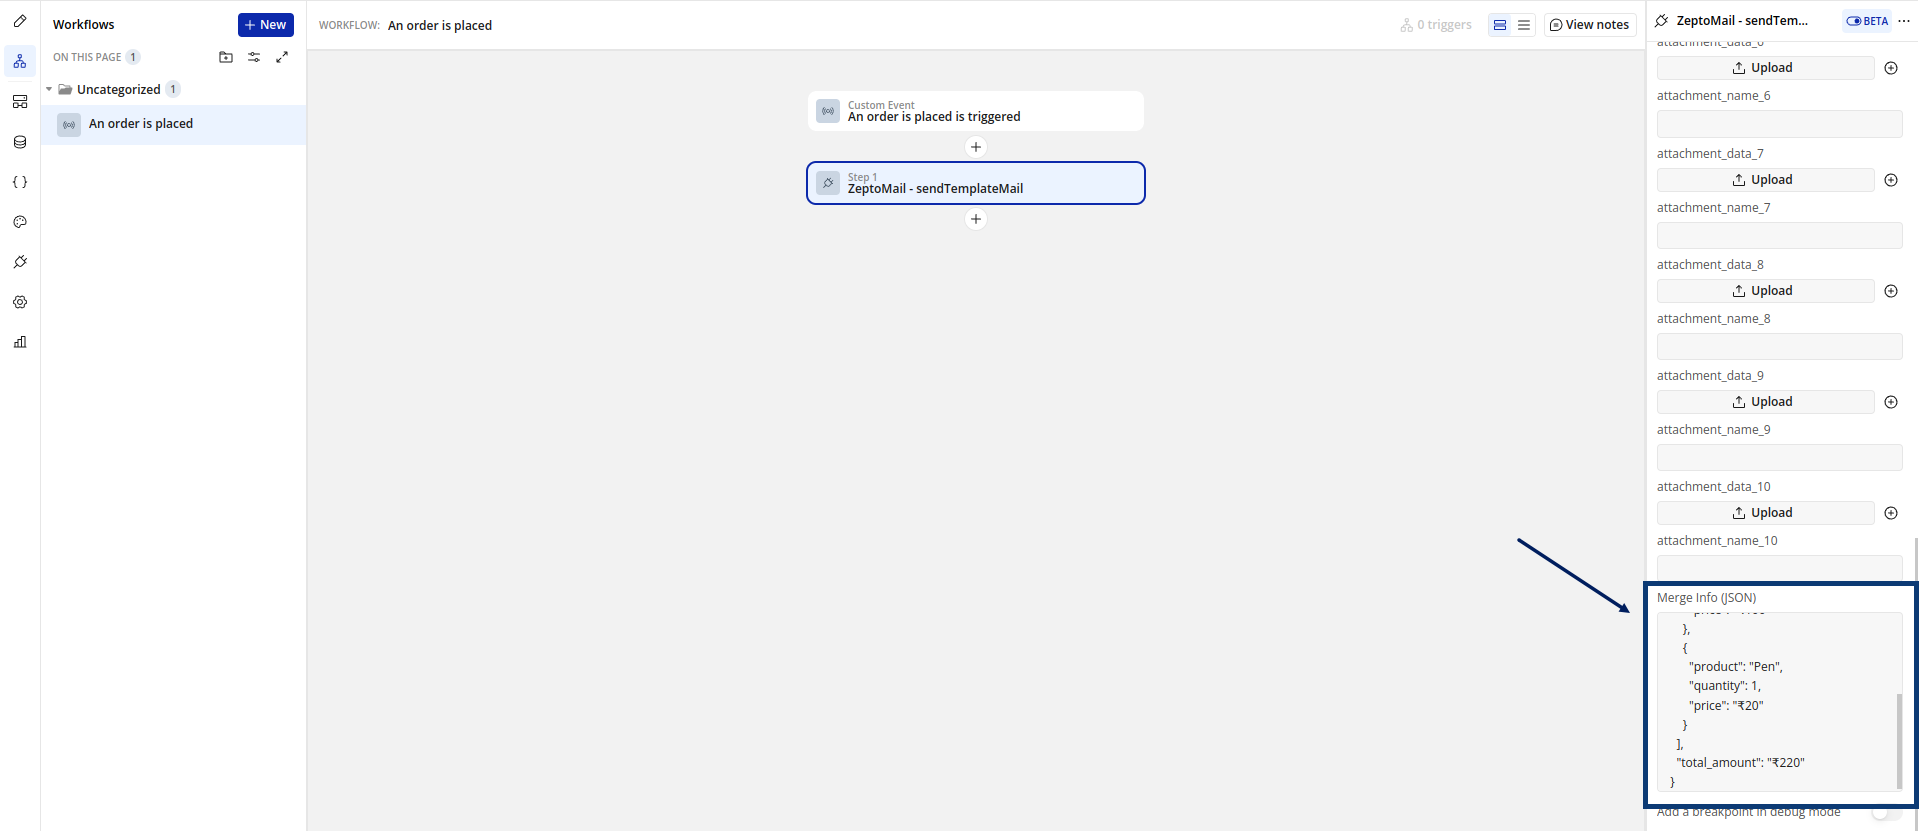
- If your workflow contains both mergekeys and merge info(JSON) values, the merge info(JSON) values will be given precedence.
- This will create a workflow for a particular task in your application. You can create multiple such workflows to send emails specific to other actions. Once a workflow is created, it will automatically be executed within your application when an event is triggered.
- You can view the email logs of all the emails sent from a particular Agent in the processed emails section of your Zoho CPaaS account
Sending emails through Zoho CPaaS is subjective to our Usage Policy restrictions. Please refer to our Usage Policy page for details.