Node.js SDK for Zoho CRM APIs
The Node.js SDK for Zoho CRM allows developers to easily create Node.js applications that can be integrated with Zoho CRM. It serves as a wrapper for the Zoho CRM REST APIs, making it easier to access and utilize the services of Zoho CRM.
Authentication to access the CRM APIs is facilitated through OAuth2.0, and the authentication process is streamlined through the use of the Node.js SDK. The grant and access/refresh tokens are generated and managed within the SDK code, eliminating the need for manual handling during data synchronization between Zoho CRM and the client application.
The latest version of Node.js SDK (v2.0.0) supports version 8 of Zoho CRM APIs. For more information on the released Node.js SDK versions, refer here.
Prerequisites
- Ensure that the client app has Node version 14.21.3 or above.
- An IDE such as Visual Studio Code or Eclipse
- Zoho CRM account.
Step 1: Register your application
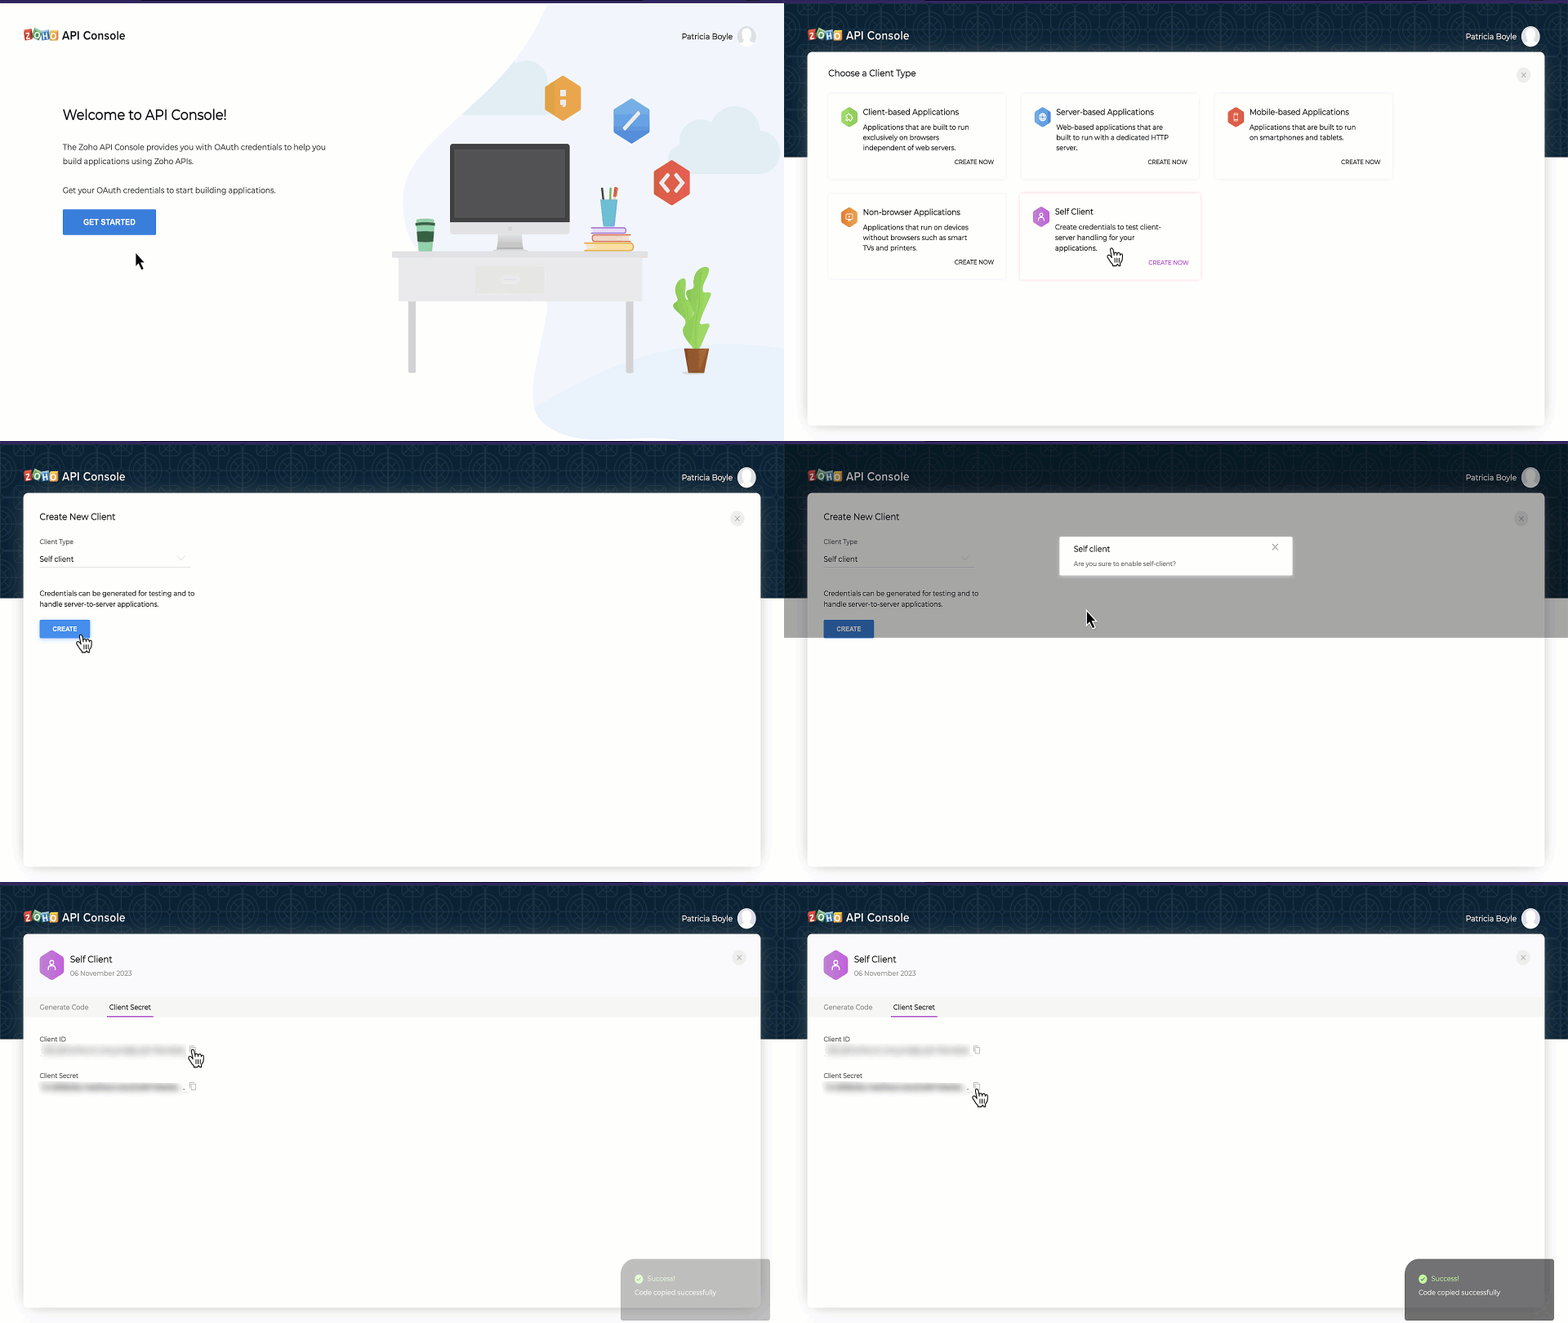
Before you get started with authorization and make any API calls using the Zoho CRM Node.js SDKs, you need to register your application with Zoho CRM.
- Go to Zoho API console and click on Add Client
- Choose the client type as Self Client or Server-based Applications depending on your requirements.
- Enter the required credentials.
- Click CREATE
- Make a note of the Client ID and Client Secret generated for your application.
Step 2 : Create a project and add NodeJS SDK in your project.
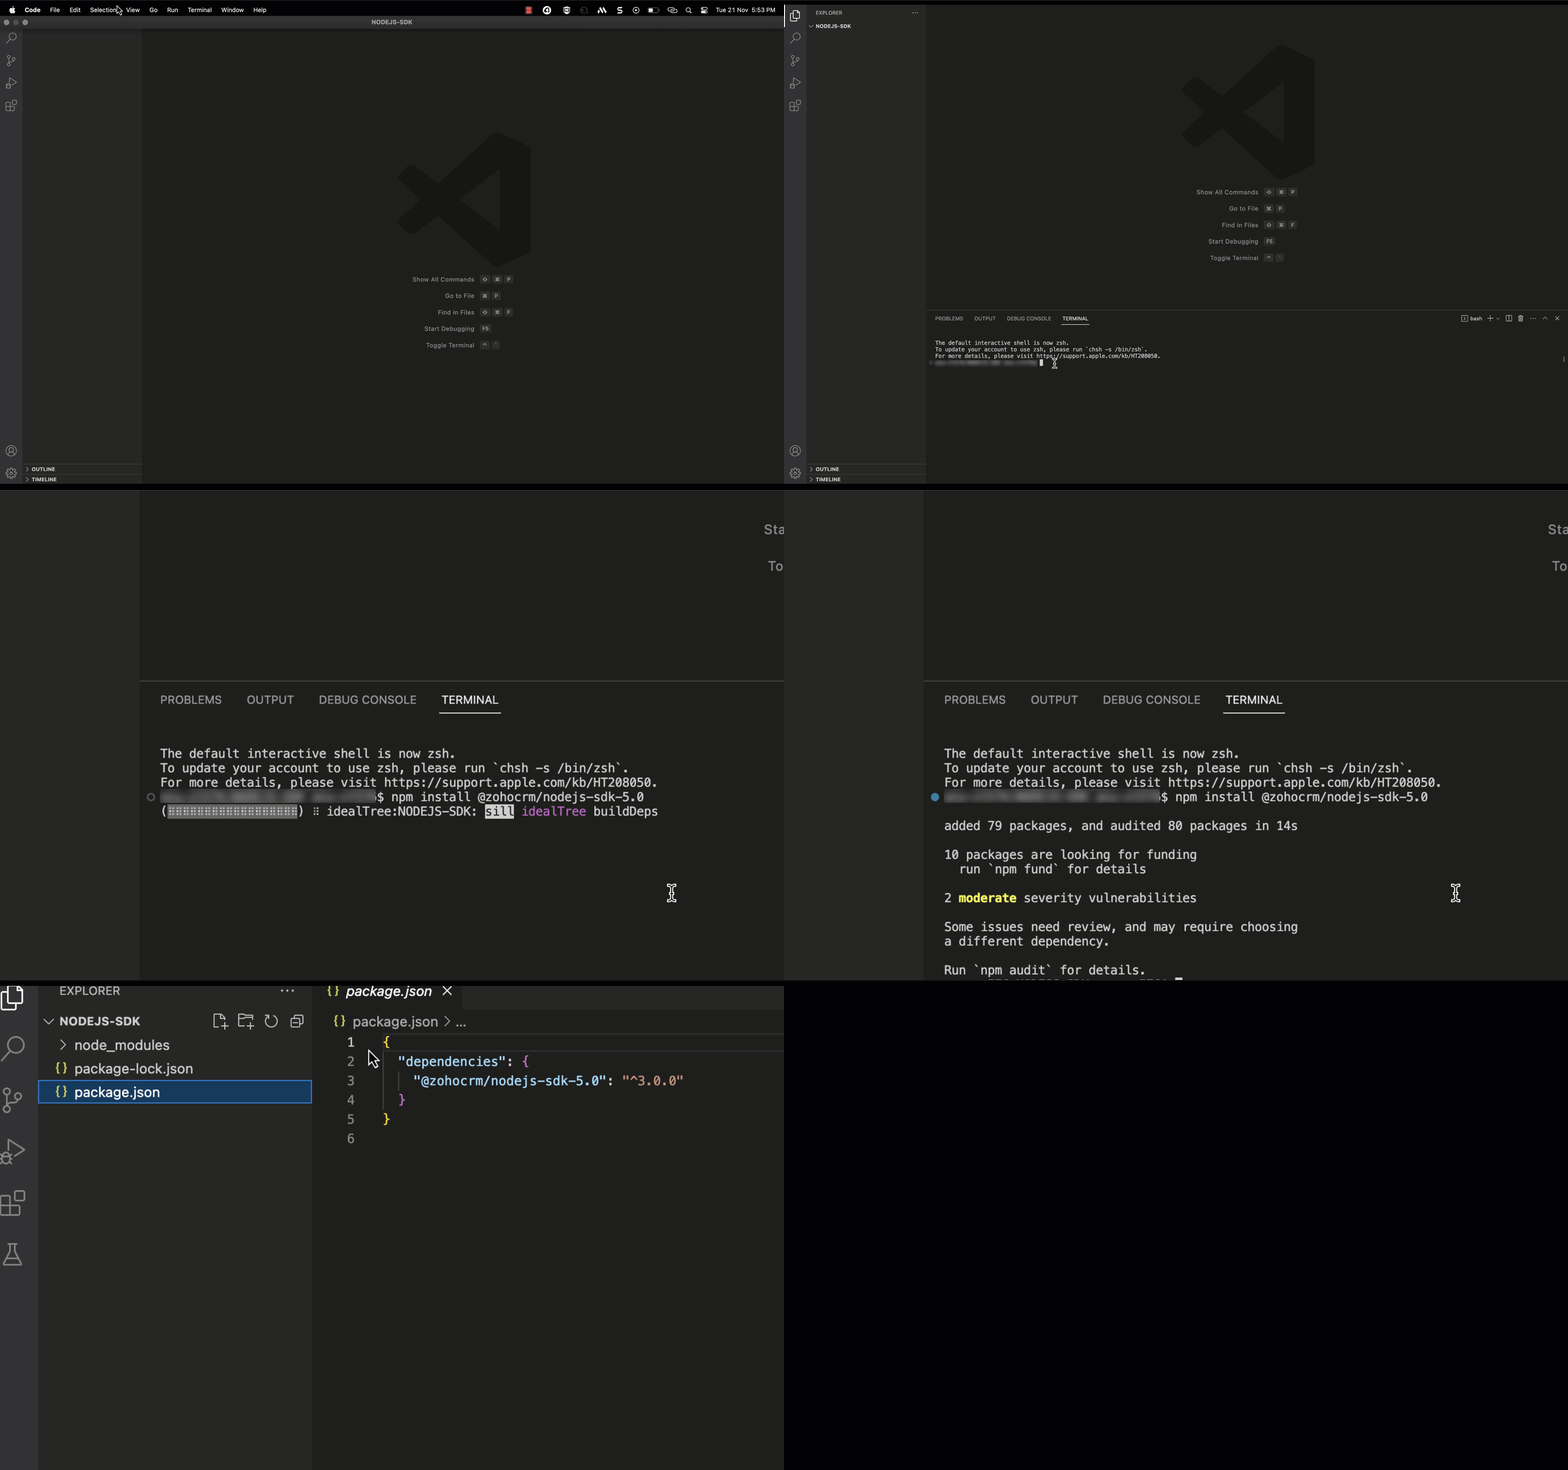
In this step, you'll create a new project in your preferred IDE and add the NodeJS project in your project. We will be using Visual Studio Code IDE in this guide.
- Create a project in your preferred IDE
- Install NodeJS SDK. Run the following command in the workspace terminal to install V8 SDKs: npm install @zohocrm/nodejs-sdk-8.0
- Add the following line to your package.json file to include make use of the ES modules : "type" : "module".
Step 3 : Generation of Grant token
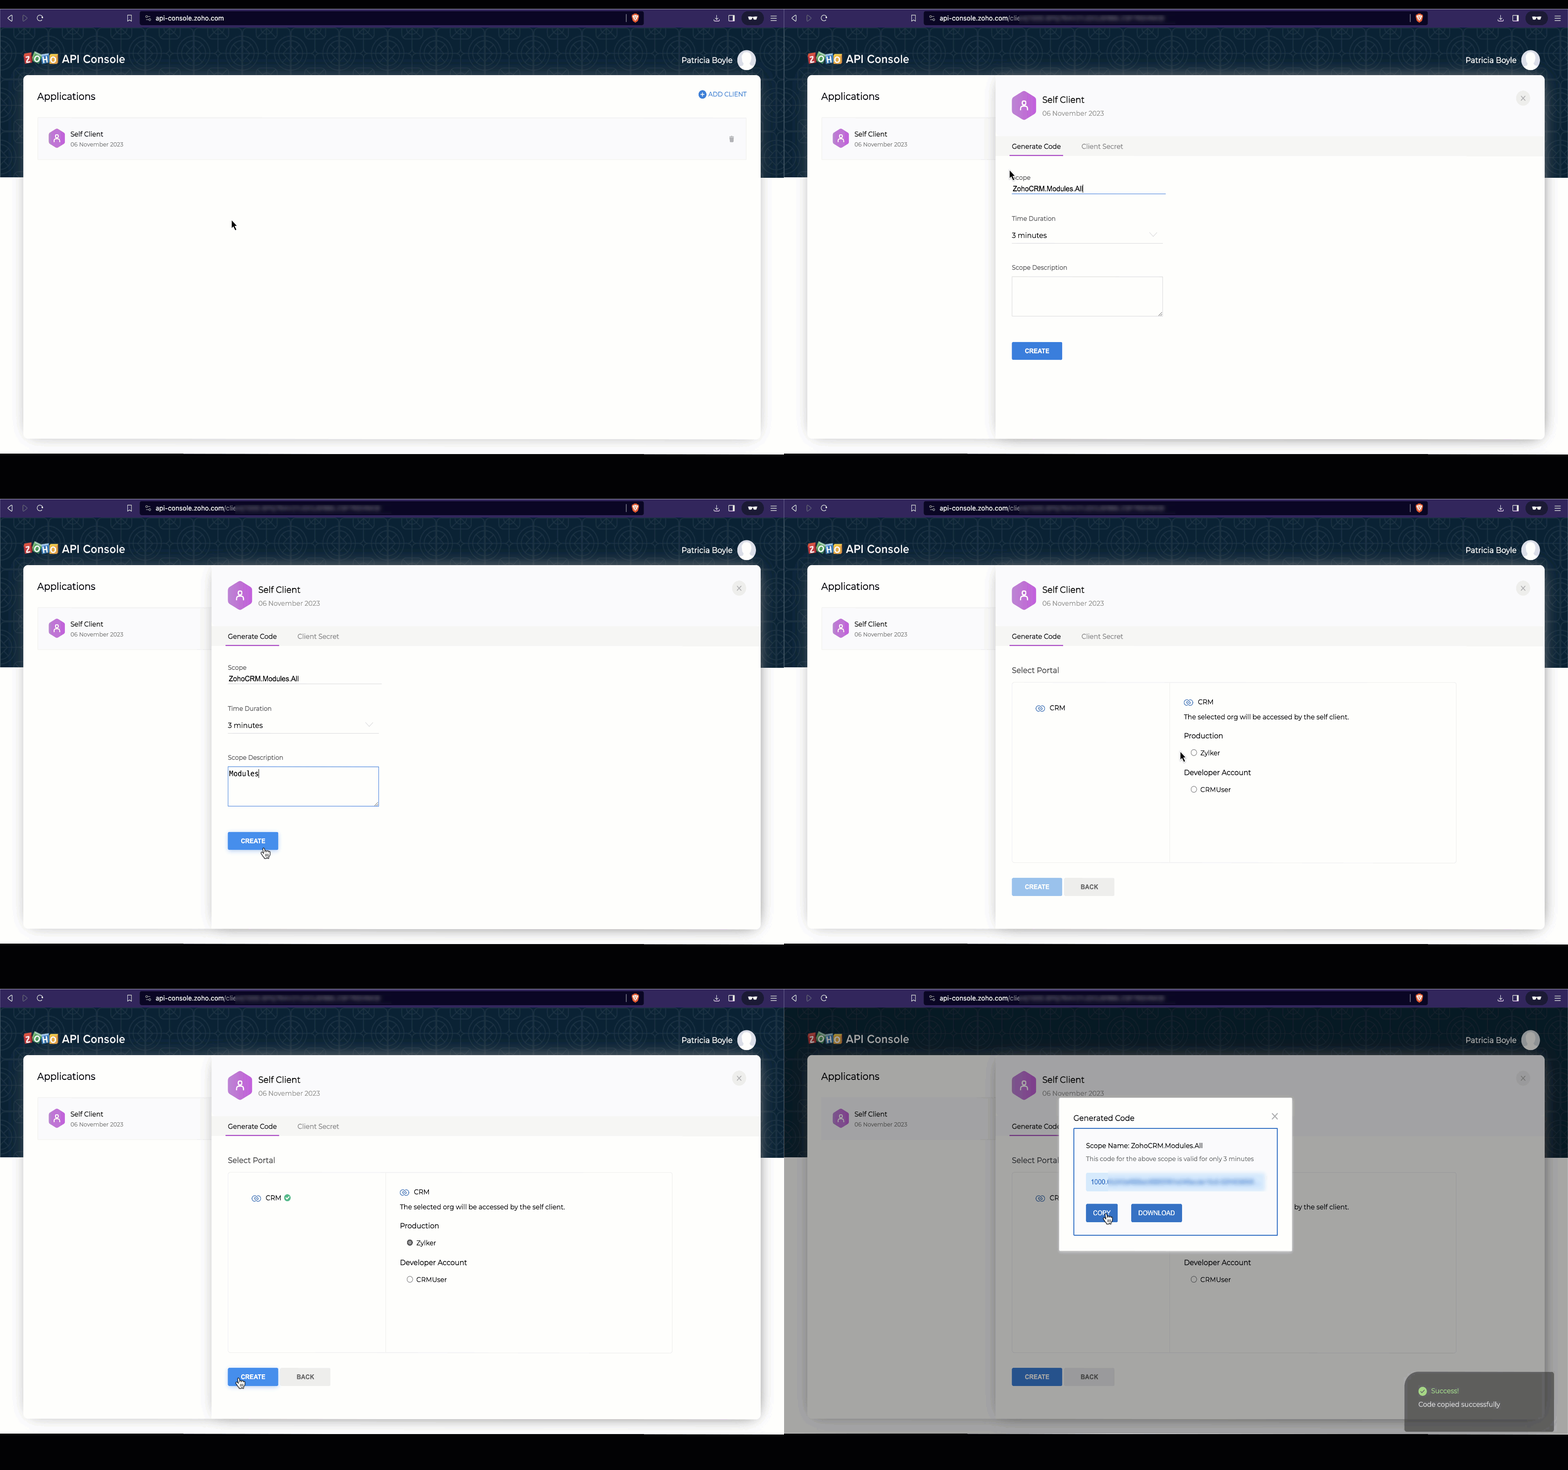
Generate a grant token from the Zoho API Console by following the steps described in this page.
Step 4: Configuration and Initialization
In the configuration step, you will set up details such as user authentication, environment, token persistence, logging, and API call timeout settings. The following table gives the details of all the keys you can configure, with detailed explanation.
| Key | Description | Sample |
|---|---|---|
environment mandatory | Represents the domain information to make API calls in Domain.Environment pattern. Domains: USDataCenter, EUDataCenter, INDataCenter, CNDataCenter, AUDataCenter Environments: PRODUCTION(), DEVELOPER(), SANDBOX() | let environment = ZOHOCRMSDK.USDataCenter.PRODUCTION(); |
token mandatory | Contains user token details. Depending on the tokens, you can choose grantToken flow, refreshToken flow, or accessToken flow. | let token = (new ZOHOCRMSDK.OAuthBuilder()) .clientId("clientId") .clientSecret("clientSecret") .grantToken("grantToken") .redirectURL("redirectURL") .findUser(false)// by default true .build(); |
logger optional | Contains the configuration for logging exceptions and API call information. By default, the logs will be available in the workspace as sdk_logs.log. | let logger = new ZOHOCRMSDK.LogBuilder() .level(ZOHOCRMSDK.Levels.INFO) .filePath("/Users/Documents/final-logs.txt") .build(); |
store optional | Contains details for the Token Persistence object. You can choose between DB Store, File Store, or Custom Store and configure accordingly. To know more about token persistence, refer here. | let tokenstore = new ZOHOCRMSDK.DBBuilder() .host("hostName") .databaseName("databaseName") .userName("userName") .portNumber("portNumber") .tableName("tableName") .password("password") .build(); |
SDKConfig optional | Contains additional configuration details like timeout, autorefresh fields, picklistvalidation, etc. | let sdkConfig = new ZOHOCRMSDK.SDKConfigBuilder() .pickListValidation(false) .autoRefreshFields(true) .build(); |
resourcePath optional | The path containing the absolute directory path to store user-specific files containing the module fields information. The field metadata for the current user will be fetched and saved in the JSON file. Whenever a user performs a record operation, the data types, picklist values, unique fields etc in the input will be validated against the field metadata stored in the JSON file. In case the user tries to perform a record operation with wrong pick list values, or wrong datatype, it will be caught during this validation stage, and the SDK will throw an error. This will ensure that credits are not consumed for such operations that would anyway result in a failure. In addition to this, the response will also be parsed in the correct format depending on the data in the JSON file. | let resourcePath = "/Users/nodejs-app"; |
For detailed instructions on how to configure the above keys and get started, refer here. Find a sample code for initialization here.
Step 5 : Making requests using Node.js SDK
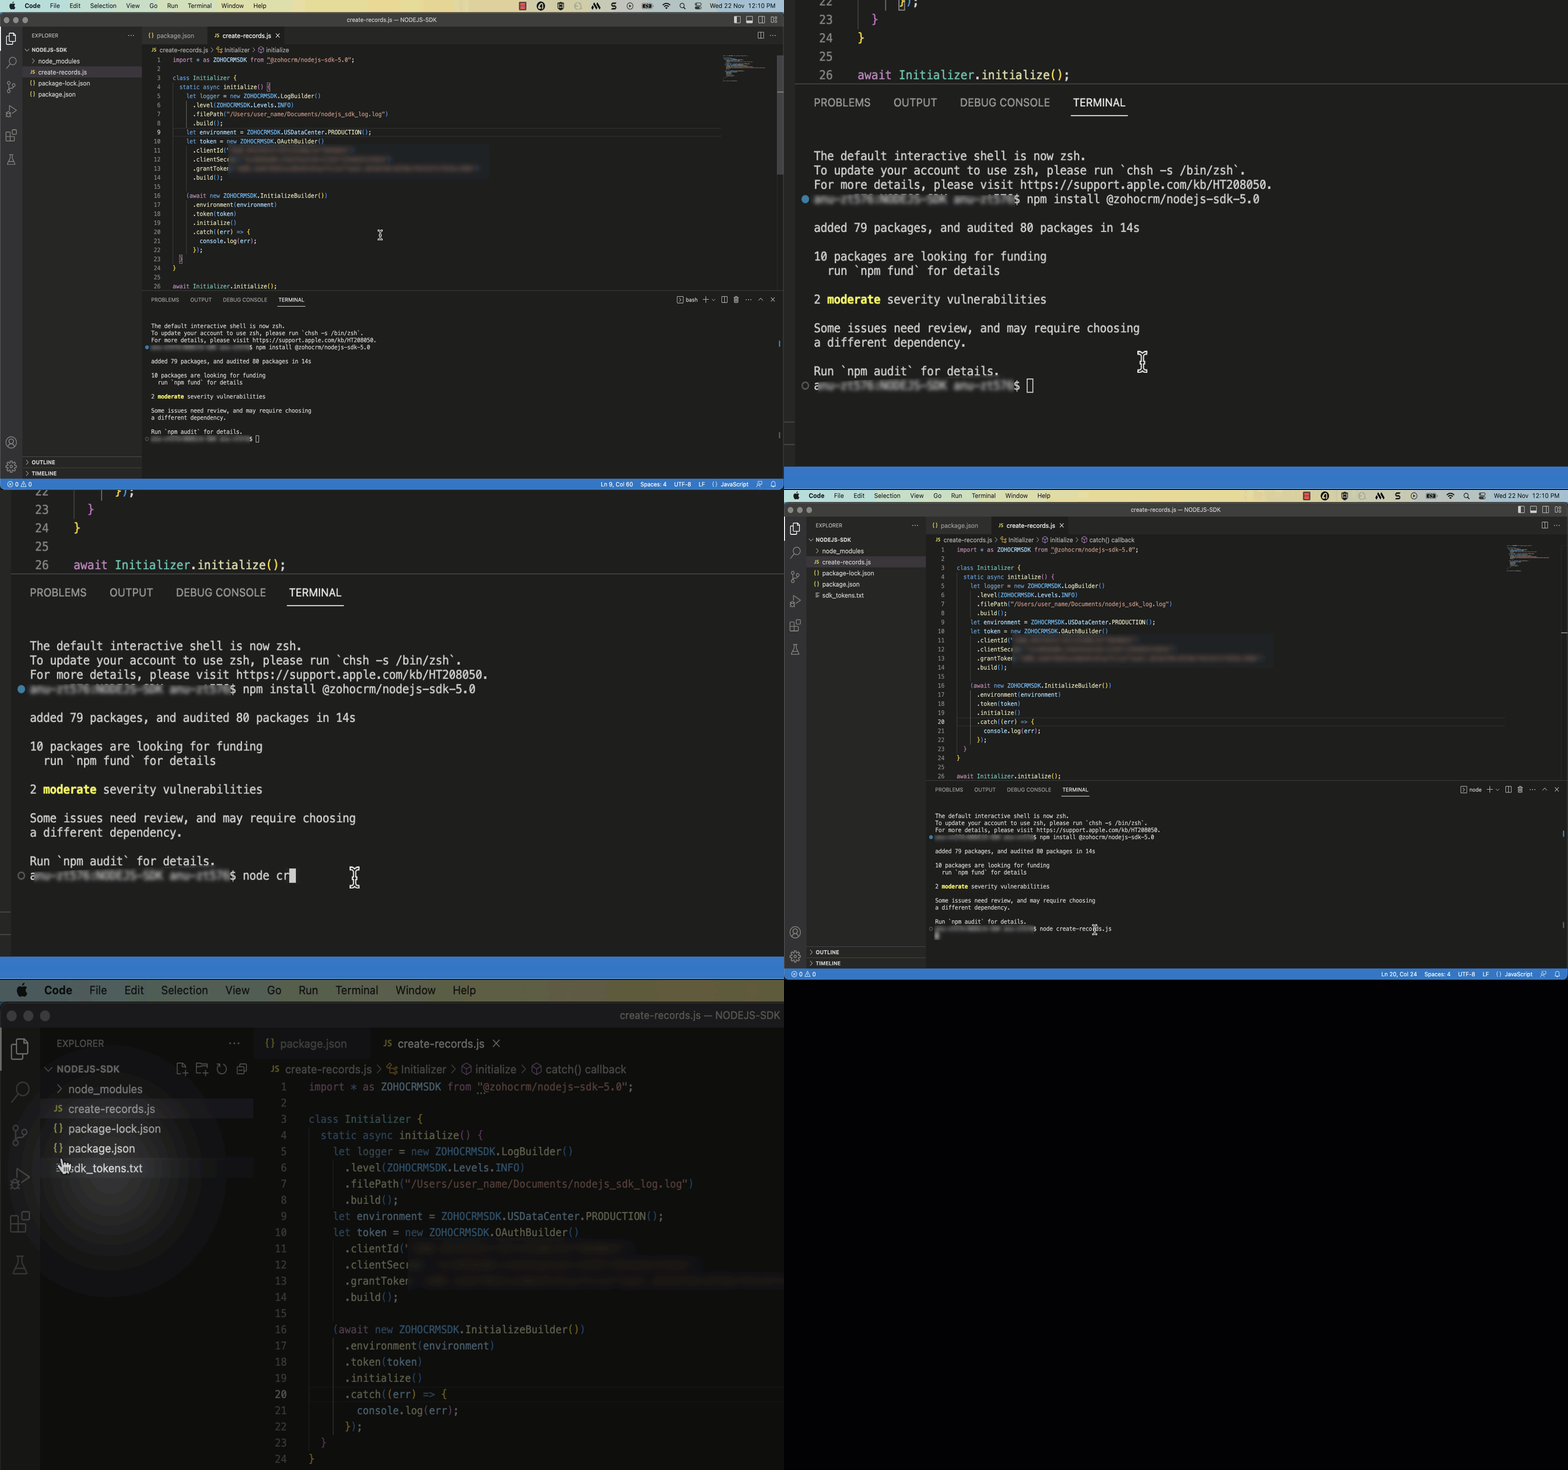
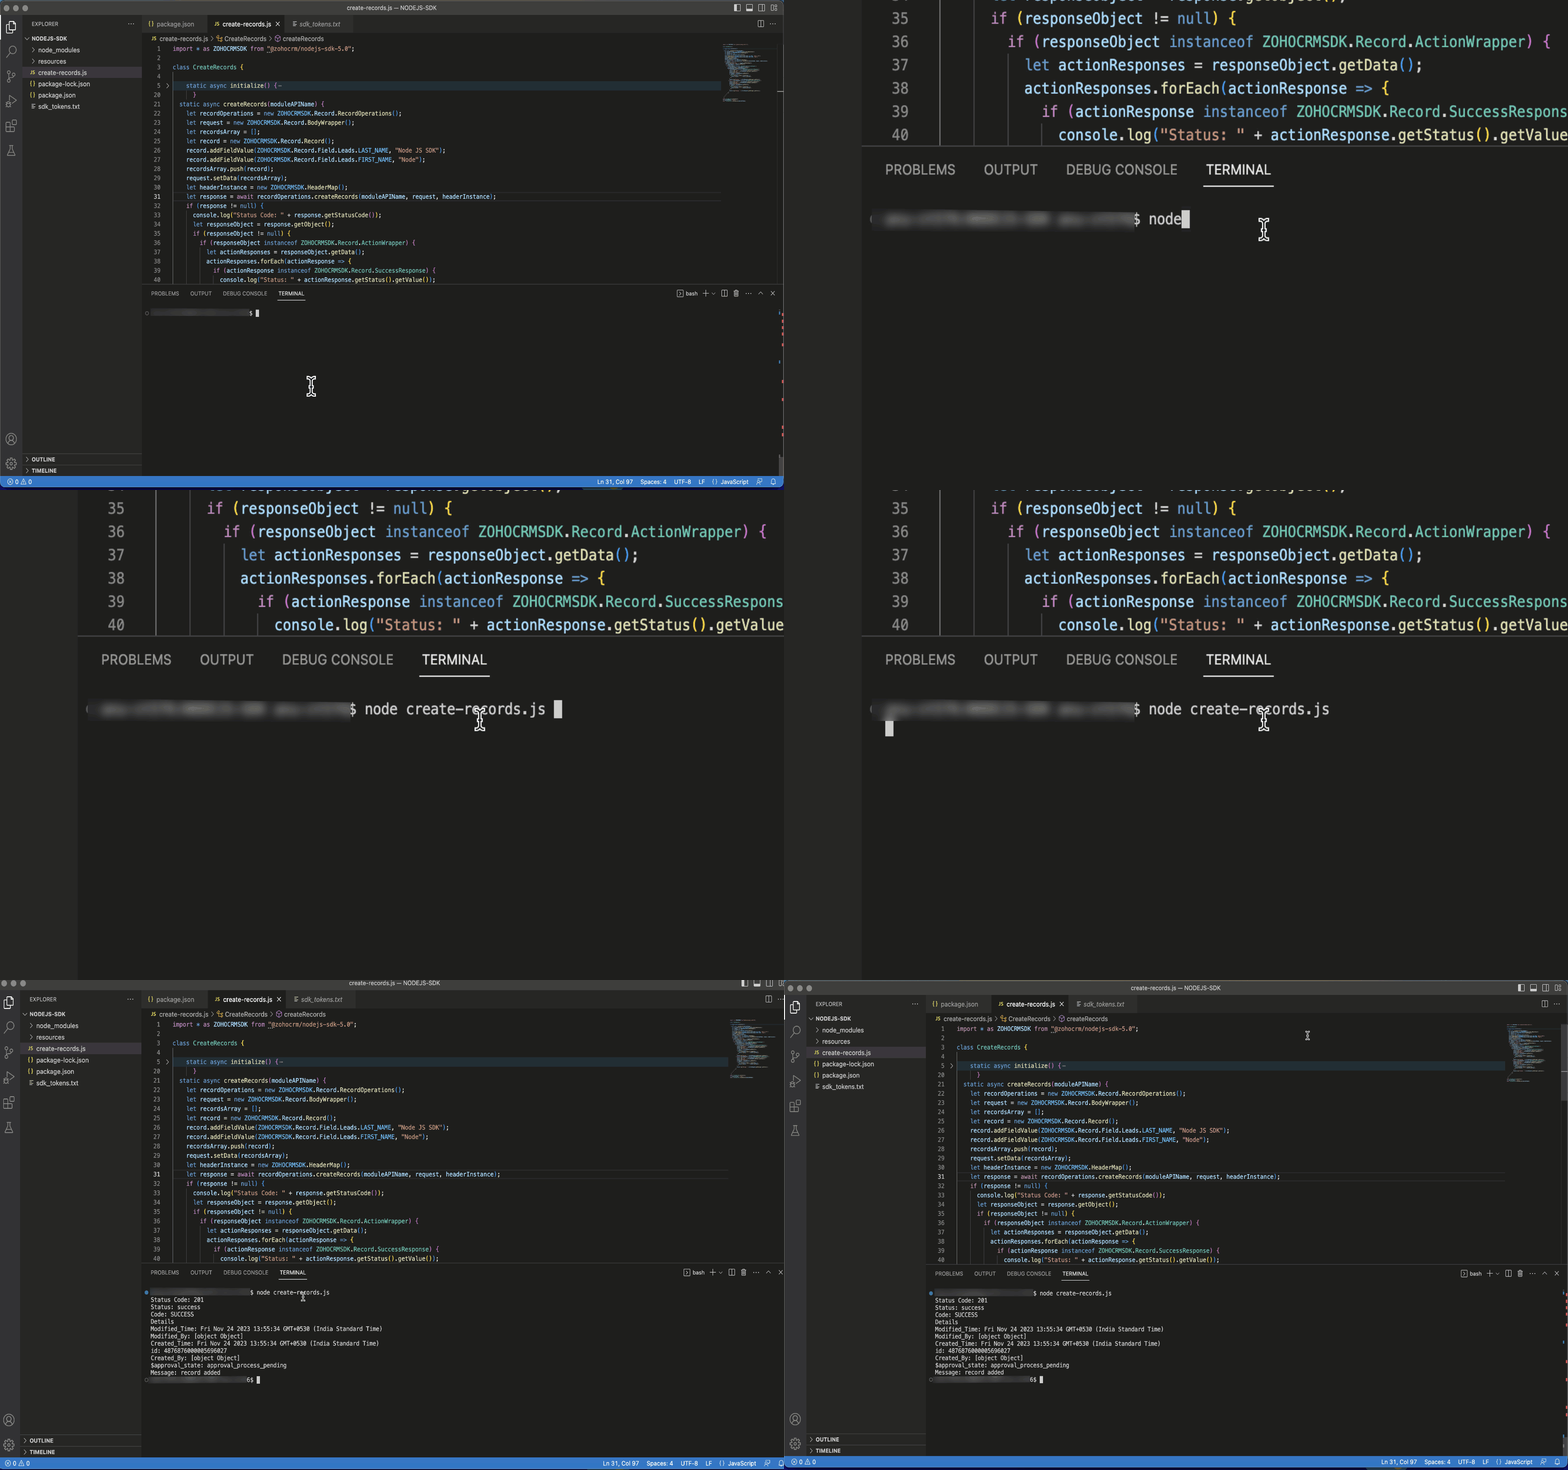
After you have configured and initialised, you can start making your requests using Node.js SDK and utilise the functionalities of Zoho CRM. Here is a sample code to insert a new record in to the Leads module.
Note:
- Node.js's default execution model is asynchronous. However, our SDK supports synchronous operations. To invoke our SDK methods synchronously, use the await keyword as demonstrated in the sample code. Failure to do so will result in an error.
Responses and Exceptions
When working with the Zoho CRM Node.js SDK, it is important to understand the responses and exceptions that can be encountered during API calls.
Note:
- The APIResponse object holds the results of your request. You can access the actual response data using the getObject() method.
- The APIResponse<ResponseHandler>and APIResponse<ActionHandler> are the common wrapper objects for handling responses from Zoho CRM APIs. This depends on the API. For more details, refer here.
- APIException: This exception is thrown for errors that are related to the API itself, such as authentication errors or invalid request parameters.
- SDKException: This exception is thrown for errors that are related to the Zoho CRM SDK, such as network errors or SDK implementation errors.
For more details on the Responses and Exceptions, refer here.