
Buttons

Buttons are new buttons you can create in Zoho Books to perform specific actions for your records. You can create them using the Deluge Script Editor and execute actions based on the functions you add. Also, you can use buttons to open links from records.
Let us understand how buttons work with the help of few scenarios.
Scenario 1: Peter runs a business and sells goods on credit to select customers. At the end of each month, he sends out statements for the amounts due. Instead of applying multiple filters and manually emailing the statements, Peter creates a button that allows him to send the statement with a single click.
Scenario 2: Patricia charges a 2% late fee on invoices that are not paid by the due date. To make this process simpler and straightforward, he creates a button that automatically applies the late fee to overdue invoices.
Scenario 3: Sarah manages an online store and needs to track shipments easily. She creates a button in the Items module for a shipment tracking website that also includes a placeholder for the invoice number in the tracking URL. Now, when she clicks the button, it takes her directly to the specific shipment’s tracking page.
Scenario 4: Peter uses an external software to manage his customer details. When customers request services, he needs to access their previous service records, which can be time-consuming. To simplify this, he creates a button that uses the Customer ID as a placeholder for his external application’s link. By clicking this button on the Customer Details page, Peter quickly opens the external link with the specific customer’s information.
Create a Button
You can create buttons for the following:
- Users and Preferences
- Customers and Vendors
- Projects
- Sales
- Purchases
- Items
Insight: You can add up to 10 buttons and links per module.
To create a button:
- Go to Settings in the top right corner.
- Choose the module where you want the button.
- Click the Buttons tab.
- Click + New Button in the top right corner.
- In the New Button pop-up, fill in the following fields:
- Button Name: Enter a name for your button.
- Action Type: Choose the type of action this button should perform:
- Execute Task: Performs an automated action on the record when clicked. For example, sending a statement to a customer or applying a late fee to an overdue invoice.
- Open URL: Redirects you to a configured URL when clicked.
- Convert Record: Converts a record from one module into a record of another module. This option is available for Custom Modules.
- Location: Choose where the button should appear on the module page. Click Preview to see where the button will be available. You can choose from the following locations:
- Details Page: The button appears on the page you see when you open a specific record in a module.
- List Page - Action Menu: The button appears in the Action menu on the page that lists all records in a module.
- List Page - Bulk Action Menu: The button appears in the Bulk Actions menu when you select multiple records on the List page of a module. This option will be available only if you select Execute Task as the Action Type.
- Visibility: Choose who can access the button. This field will be available only if you select Open URL as the Action Type.
- URL: Enter the URL that should open when the button is clicked. This field will be available only if you select Open URL as the Action Type. You can add placeholders to the URL by clicking Insert Placeholders next to the field if necessary.
- Click Proceed if the Action Type is Execute Task, or Save if the Action Type is Open URL.
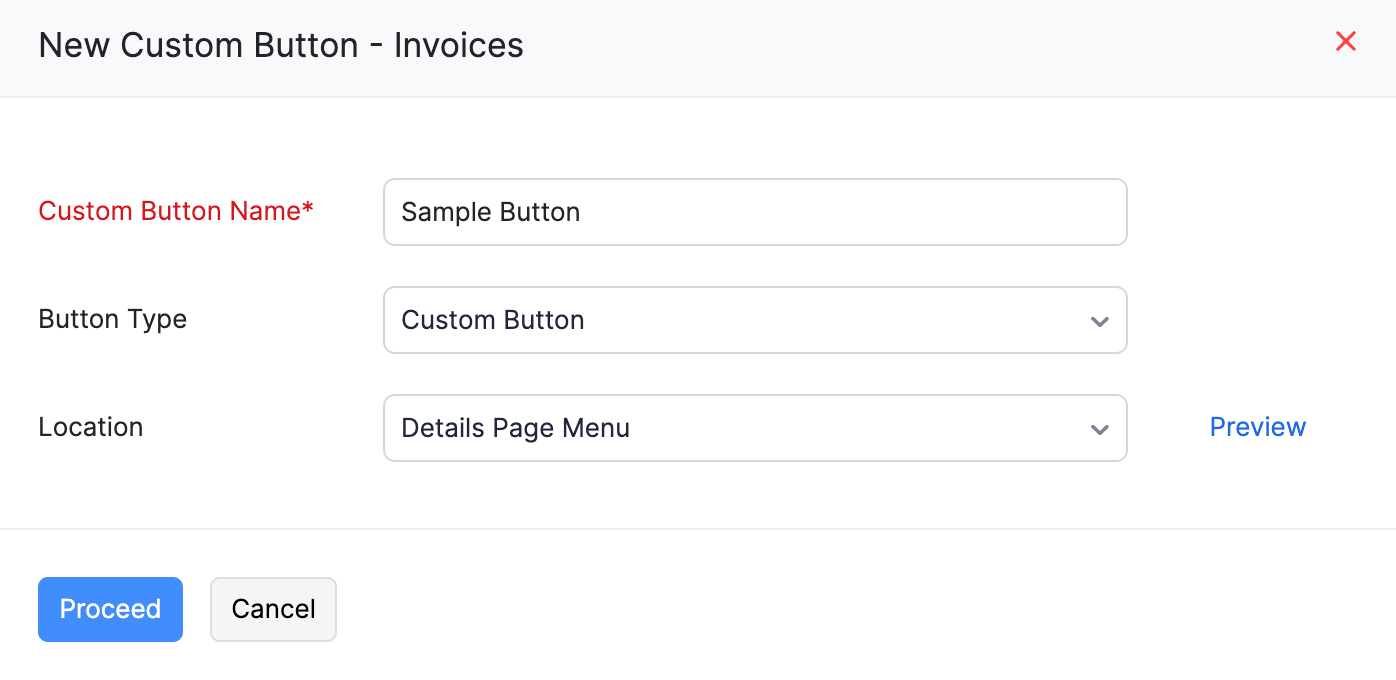
- If you selected Execute Task, you need to enter additional details. On the page that follows:
- Enter the Deluge script to define the button’s function.
- Under When to show this button?, choose one of the options based on your preference:
- Show Always: Select this option to display the button in all records (e.g., INV-01, INV-02, etc.) without any criteria.
- Show based on criteria: Select this option to add criteria to display the button for specific records.
Note: You can use predefined criteria templates to create a new criteria by clicking + New Criteria to set conditions for displaying the button. This option is available only for Invoices and Quotes and the button can only be added on the Details page.
- Under Who can access this button?, select who can view and access the button from any of the following options:
- Only me: Select this option if you don’t want other users to access this button.
- Only Selected Users: Select this option and select specific users in your organization who can view and access the button.
- Everyone: Select this option to make the button visible for all users in your organization.
- Click Save to save and execute it later, or Save and Execute to save and run it immediately.
Now, the button will be created, and it will be displayed in the selected module based on the configured preference.
Use a Button
Once you create the button, you can use it from the respective module where you’ve configured it to appear. Here’s how:
- Go to the module where you set up the button.
- Locate the button and click it. If multiple buttons exist for a module, the top-most one will be shown. You can view the others by clicking the dropdown next to the button. You can change the order by reordering the buttons.
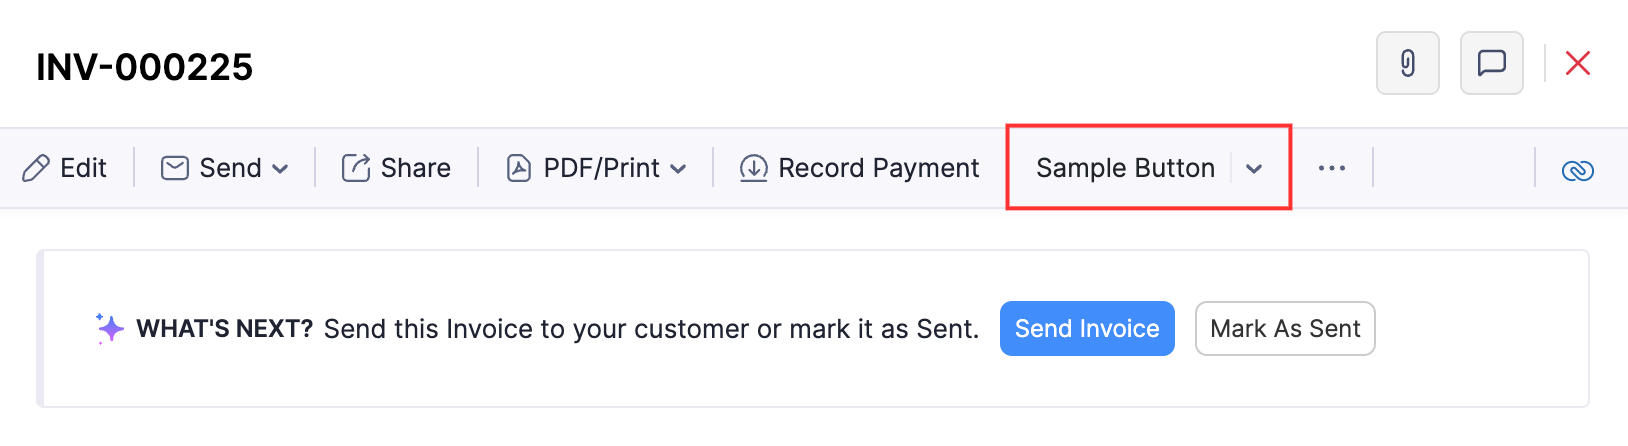
- In the pop-up, click Proceed to continue. An Execute Task button executes its configured action, while an Open URL button redirects you to its configured URL.
Edit a Button
To edit a button:
- Go to Settings in the top right corner.
- Select the module where the button is configured.
- Click the Buttons tab.
- Hover over the button you want to edit.
- Click the Dropdown icon and select Edit.

- Make the necessary changes.
- Click Save to save the button, or Save and Execute to save and run it immediately.
Reorder Buttons
You can change the order of buttons to suit your preferences. Here’s how:
- Go to Settings in the top right corner.
- Select the module where the button is configured.
- Click the Buttons tab.
- Select the location where you want to reorder the buttons from the Location dropdown. You cannot reorder buttons when the Location is All.
- Click Change Order in the top right corner.

- Drag and drop the buttons the buttons to arrange them in your preferred order.
Insight: You can identify Open URL buttons using the URL icon next to the button name.
- Click Save Reorder in the top right corner to apply the changes.
View Workflow Logs
You can view the workflow logs for buttons to view details such as its execution status, reason for failure, and other details. To view the workflow logs for buttons:
- Go to Settings in the top right corner.
- Select the module where the button is configured.
- Click the Buttons tab.
- Click View Logs in the top right corner. You’ll be redirected to the Workflow Logs page.
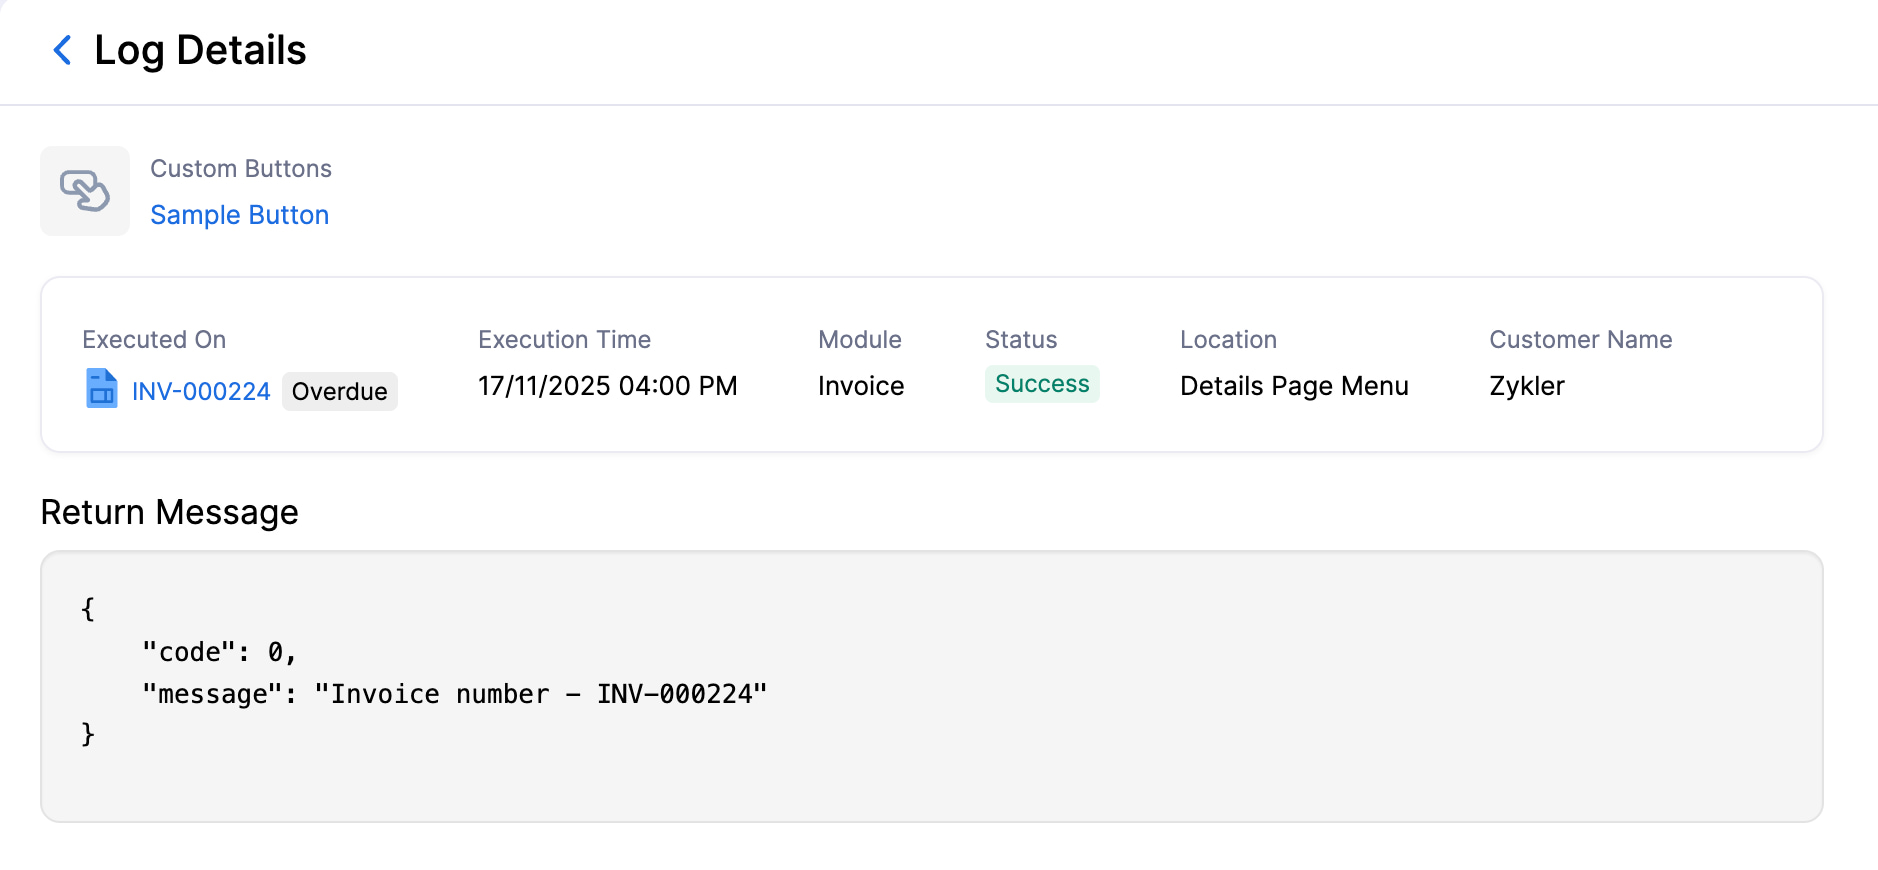 You’ll be able to find details such as the time when the button was executed, the module, the location, and the execution status. You can click on a log to view additional details, such as the return message.
Delete a Button
To delete a button:
- Go to Settings in the top right corner.
- Select the module where the button is configured.
- Click the Buttons tab.
- Hover over the button you want to delete.
- Click the Dropdown icon and select Delete.
- In the pop-up, click OK to confirm the deletion.
 Yes
Yes