
Items
Items in Zoho Books represent the products and services your business sells to customers or purchases from vendors. With Zoho Books, you can easily manage every aspect of your items, from creating them to tracking inventory, setting default tax rates, and adding items to transactions. This ensures your sales and purchase processes are streamlined, while helping you stay compliant with tax regulations. Whether you’re selling goods, offering services, or managing stock, Zoho Books helps you manage your items efficiently.
Create an Item
You can create items manually or import them in bulk if you’re switching from another accounting software. Creating items with accurate information makes it effortless to create transactions for customers or vendors quickly. To create an item:
- Go to Items on the left sidebar, and select Items.
- Click + New in the top right corner.

- In the New Item page, complete the following fields:
- Type: Choose if it’s a physical good or service.
- Name: Enter the item name.
- SKU: Provide the stock keeping unit.
- Unit: Choose the item’s measurement unit (example: kg, dozen).
- HS Code: Enter the 8-digit code for the item.
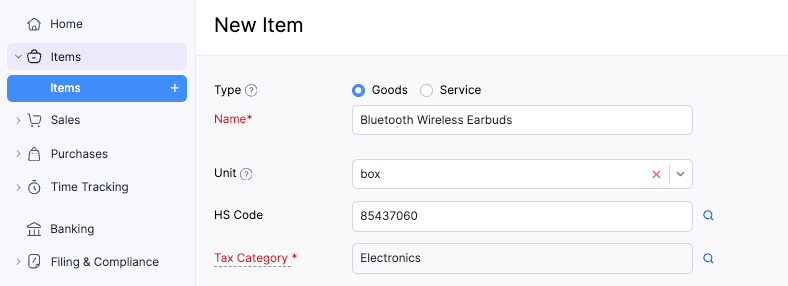
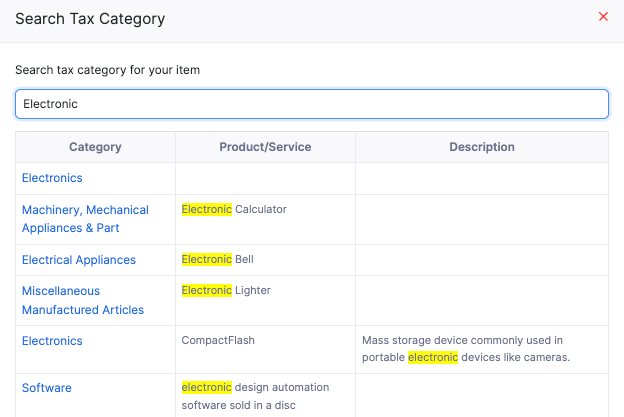
- Tax Category: Click the Search icon next to the field. In the popup, search for the item’s tax category and select it based on the item type. For example, if you’re adding an item named Bluetooth Wireless Earbuds, enter Electronics and select the relevant tax category that corresponds to the Product/Service. The applicable tax will be automatically applied based on the selected category.
Pro Tip: If you’re not sure of the item’s tax category, choose Default Product. This will apply a 9% GST for standard-rated items. For overseas customers, the tax rate will automatically become 0%. For categories like Financial Services or Import of local supply of IPM, the item will be marked as tax-exempt.
Note: GST rates (0%, 8%, 9%, or tax-exempt) are applied based on the selected tax category for the item. Refer to our help document to learn how a tax rate is assigned to an item.
Drag image(s) here or Browse images: Upload item images if any.
Check Sales information and complete the following fields:
- Selling Price: Enter the selling price.
- Account: Select the sales account.
- Description: Add a brief description if necessary.
Check Purchase Information and complete the following fields:
- Cost Price: Enter the purchase price.
- Account: Select the purchase account.
- Description: Add a brief description if necessary.
- Preferred Vendor: Select a preferred vendor.

- To track inventory, check Track Inventory for this item and complete the following fields:
Notes:
- This option is available only if inventory tracking is enabled for your organisation. Learn more about how to enable inventory tracking.
- You cannot disable inventory tracking for an item once transactions have been created for it.
- Inventory Account: Select the inventory account.
- Opening Stock: Enter the stock available at the start of the accounting period.
- Inventory Valuation Method: Choose either FIFO (First In, First Out) to sell the oldest stock first, or WAC (Weighted Average Costing) from the dropdown to calculate inventory costs using the average cost of all available stock in Zoho Books.
- Opening Stock Rate per Unit: Enter the cost per unit of the opening stock.
Note: You cannot enable or disable inventory tracking after creating transactions for an item. To enable it later, delete all existing transactions first.
Insight: If you’ve enabled locations, you can set the Opening Stock and Opening Stock Value for each location individually. Click Copy to All to apply the same values to all locations.
- Select Associate Tags to add any reporting tags for the item, if required.
- Click Save.
You can now create transactions for the item.
Import Items
Scenario: Zylker Inc is migrating from another accounting system and wants to import all the existing items in bulk. Using the Import Items option, Zylker can import all the items into Zoho Books effortlessly instead of having to add them manually.
If you have existing items stored locally or you’re migrating to Zoho Books from another accounting system, you can easily import items. To import them:
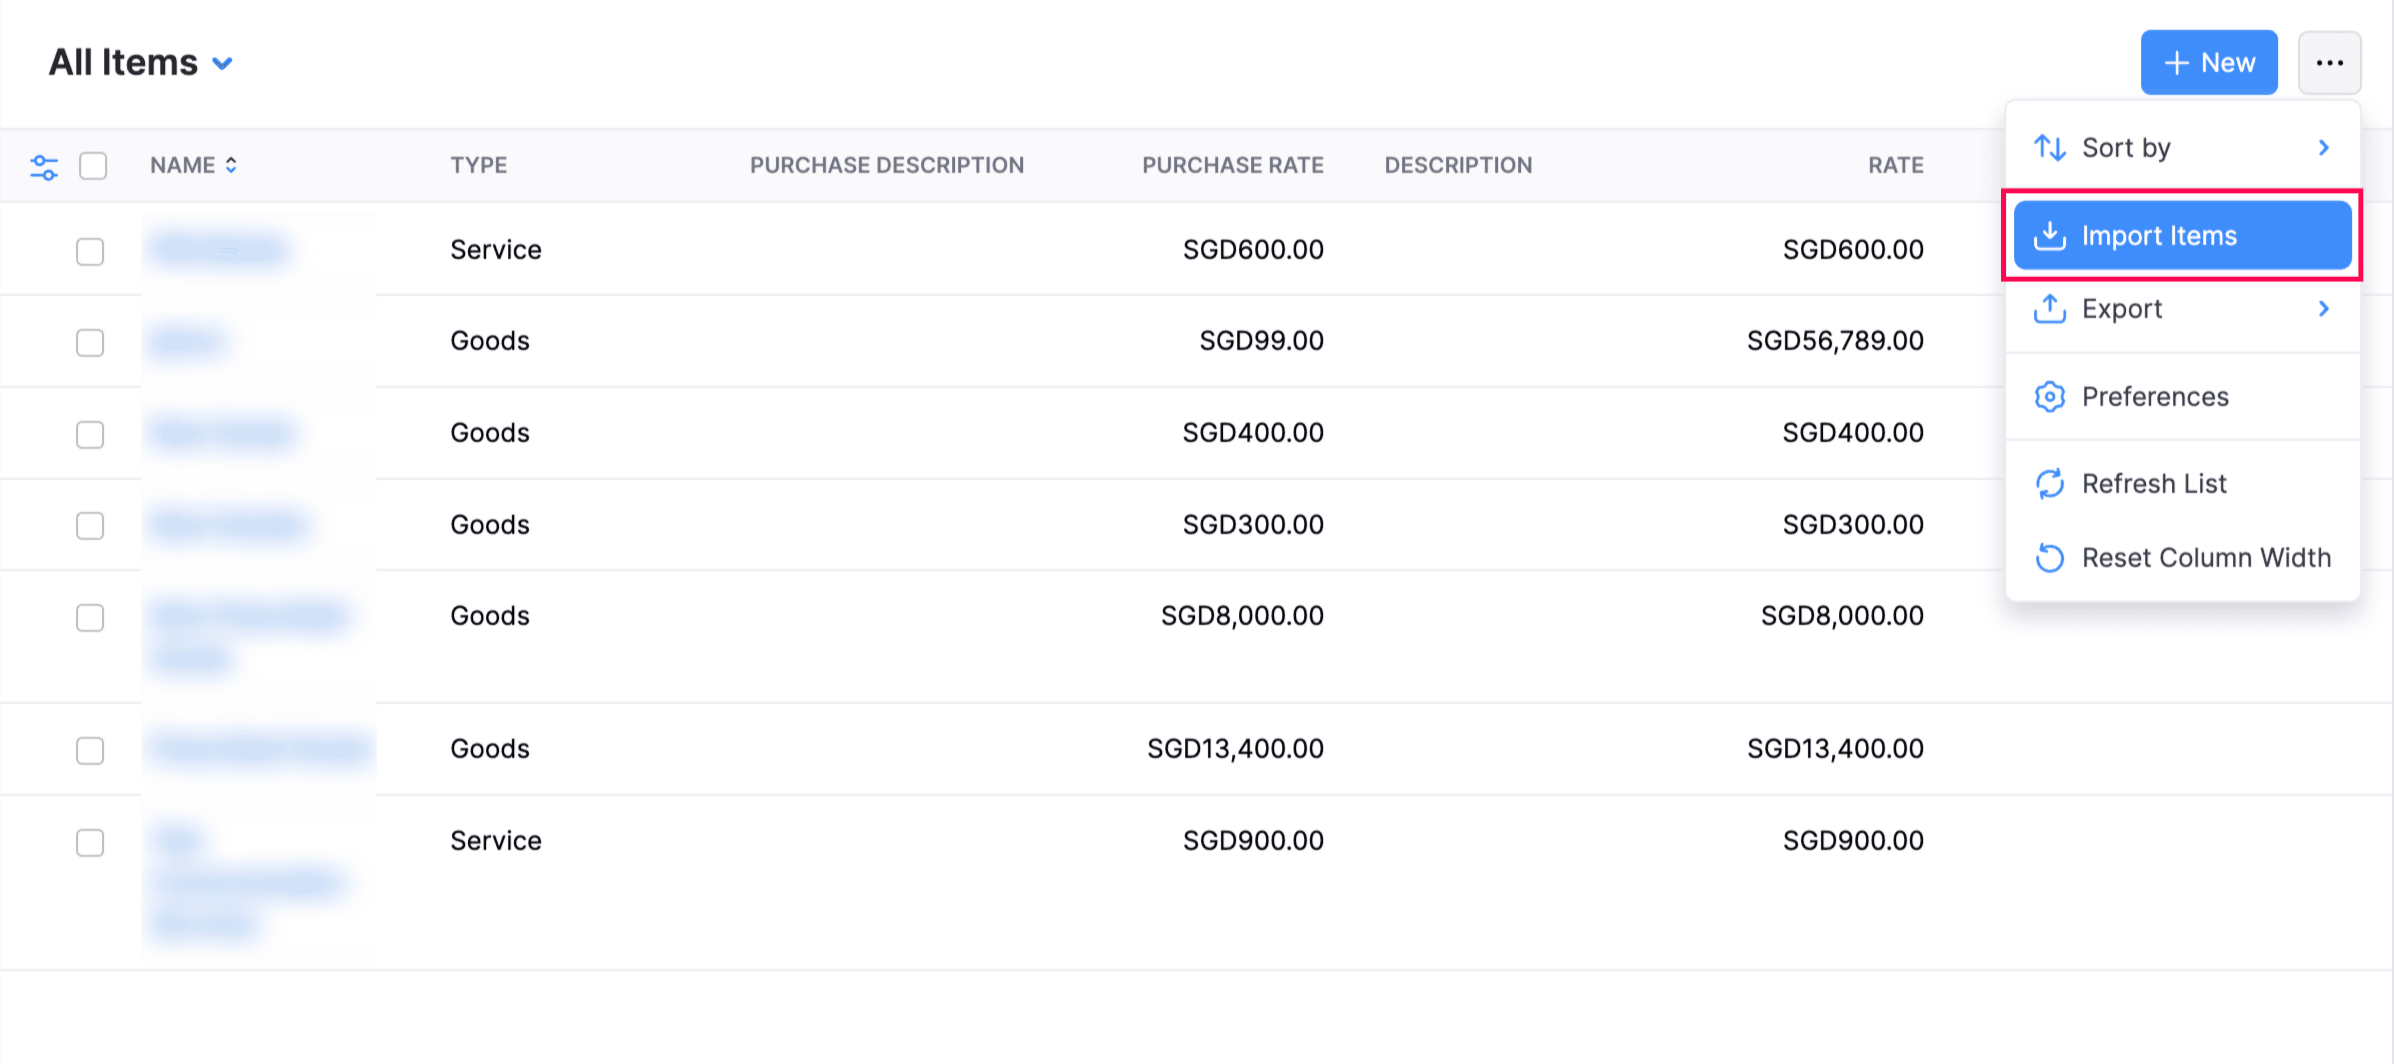
- Go to Items on the left sidebar, and select Items.
- Click the More icon in the top right corner and select Import Items from the dropdown.
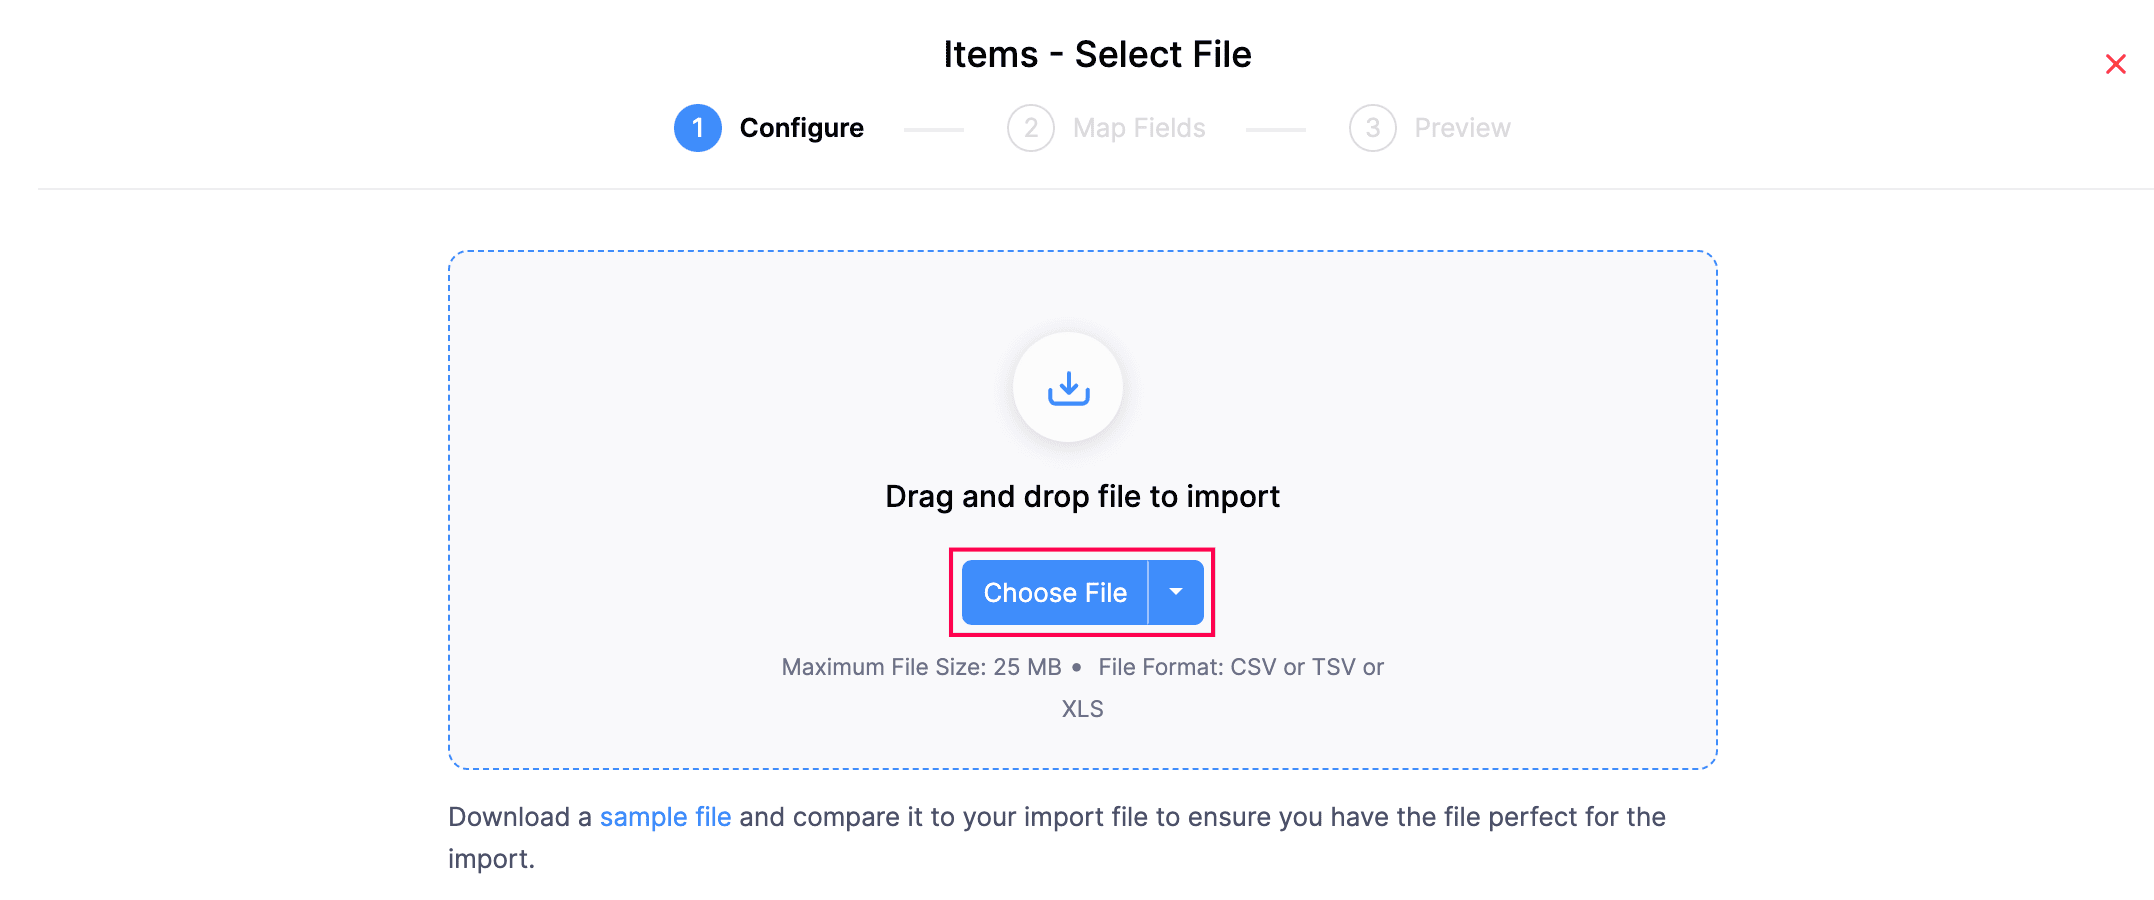
- In the Import page, click Choose file to select the file you want to import.
Notes:
- You can only import files in CSV, TSV, and XLS formats.
- The file size must not exceed 25 MB.
Pro Tip: You can download and use the sample file as a reference for the format, and if needed, fill in the data you want to import.
After you select the file, under the Configure tab, complete the following fields:
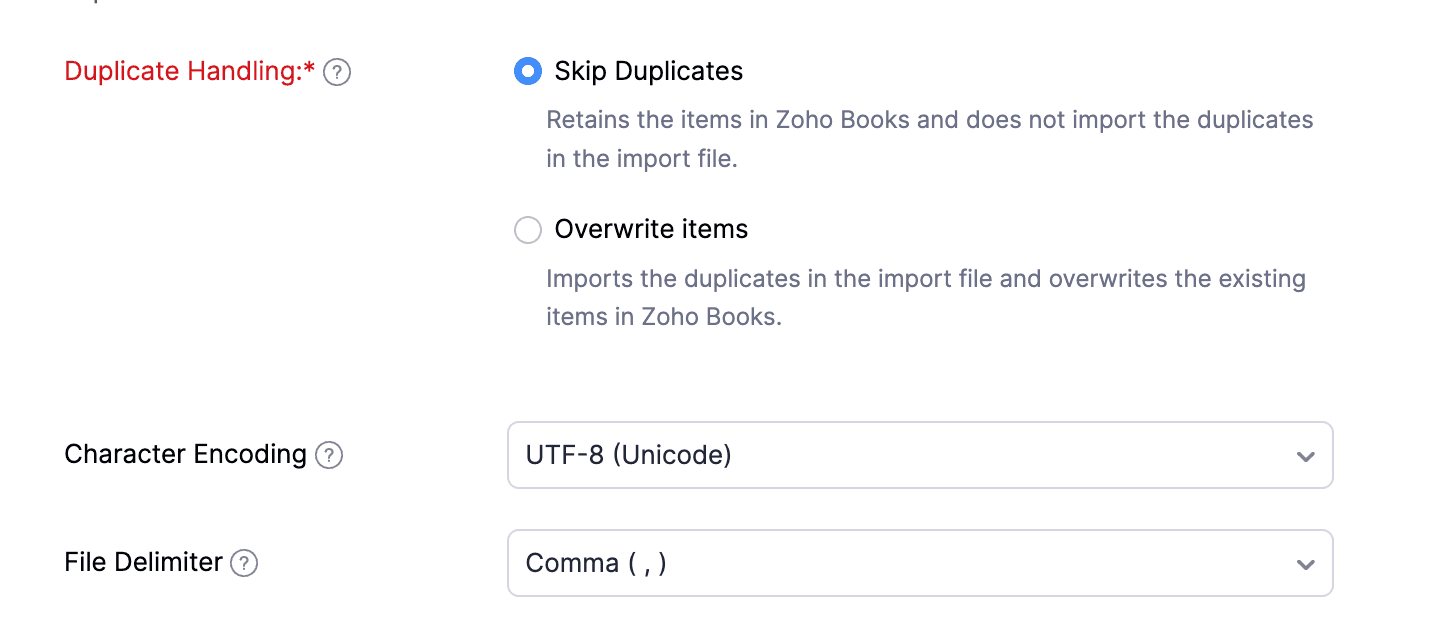
- Duplicate Handling: Select Skip Duplicates to ignore duplicate item entries from the import file that already exist in Zoho Books, or Overwrite Items to update existing items with the details from the import file.
- Character Encoding: The default is UTF-8 (Unicode). Ensure you select the correct encoding based on your file.
- File Delimiter: The default is Comma(,). Modify it if needed based on the delimiter used in your import file.
Pro Tip: If your file is in a different format, use an online or offline converter to convert it to one of the supported formats (CSV, TSV, or XLSX).
Click Next >.
In the Map Fields tab:
- Default Date Format: The default Decimal Format will be 1234567.89. Click Edit to customize it if required.

Map the fields based on your preference. Click Save these selections for use during future imports if you want to reuse the mapped fields for future imports.
Next, on the Preview page, review the fields you mapped, and click Import.
The file containing the items will now be imported into Zoho Books.