


Configuring Approvals
Zoho Expense lets you configure approvals for the various modules available in the app. To access approval settings:
- Go to Settings on the left sidebar.
(OR)
Click Settings in the top right corner of the page. - Select the module you want to configure approvals for.
- Go to the Approvals tab.
- Select the approval type you want to configure.
| Approval Type | Description | Supported Modules |
|---|---|---|
| Hierarchical Approval | Routes submitted records to the user’s default approver based on their Submits To hierarchy. | Trips, Reports |
| Simple Approval | Sends advances to admins for approval. | Advances, Petty Cash Account Top-ups |
| Custom Approval | Lets you build rule-based, multi-level approval flows. You define which records trigger the flow and who approves at each level. | Trips, Reports, Advances, Petty Cash Account Top-ups |
Custom Approval
Custom approval lets admins set up rule-based approval flows for the support modules. You define the criteria that triggers the flow and the approvers at each level.
If a record meets the criteria of more than one approval flow, only the flow with the highest priority runs. You can set priorities to control which flow that is.
Scenario 1: At Zylker, all expense reports from the marketing team go to the marketing manager by default. Patricia wants reports from the sales team to follow the same logic but route to the sales manager instead. She creates a custom approval with the criteria: When department is Sales. She sets Level 1 to Submits To, so each sales team member’s report goes to their own default approver. When Bailey from the sales team submits a report, it routes to Bailey’s assigned approver automatically.
Note: For scenario 1, when you create a flow for a specific condition, also create a separate flow for the opposite condition. In this case, create another flow for reports where department is not Sales so all reports are covered.
Scenario 2: At Zylker, Bailey is working on a web design project. Patricia wants all expense reports tagged to this project to go to the project head for review before reaching her. She creates a custom approval with the criteria: When project is Web Design. She sets Level 1 to Project Head so the report goes directly to the person assigned as the project head. She sets herself as Level 2. When Bailey submits a report tagged to the web design project, it goes to the project head first and then to Patricia.
Scenario 3: At Zylker, Patricia wants reports with a reimbursable total over $5,000 to be reviewed by the finance team before reimbursement. The finance team has five members, but Patricia only needs two of them to approve before the report can move forward. She creates a custom approval with the criteria: When reimbursable total > $5,000. She sets Level 1 to Approval Group and selects the Finance Review Group, which has five members. She sets the minimum approvals required to 2. When Ravi submits a report for $6,200, all five members of the Finance Review Group receive it. Once any two members approve, the report moves forward.
Scenario 4: At Zylker, Patricia wants reports with more than 3 policy violations to go to the first senior manager in the submitter’s reporting chain. She creates a custom approval with the criteria: When total policy violation count > 3. She sets Level 1 to Choose a Designation - Hierarchy Based and selects the Senior Manager designation. When Bailey submits a report with 4 violations, the system finds the first person with the Senior Manager designation in Bailey’s Submits To hierarchy and routes the report to them.
Create Custom Approval
To create a custom approval:
- Go to Settings on the left sidebar.
(OR)
Click Settings in the top right corner of the page. - Select the module for which you want to enable custom approvals.
- Go to the Approvals tab.
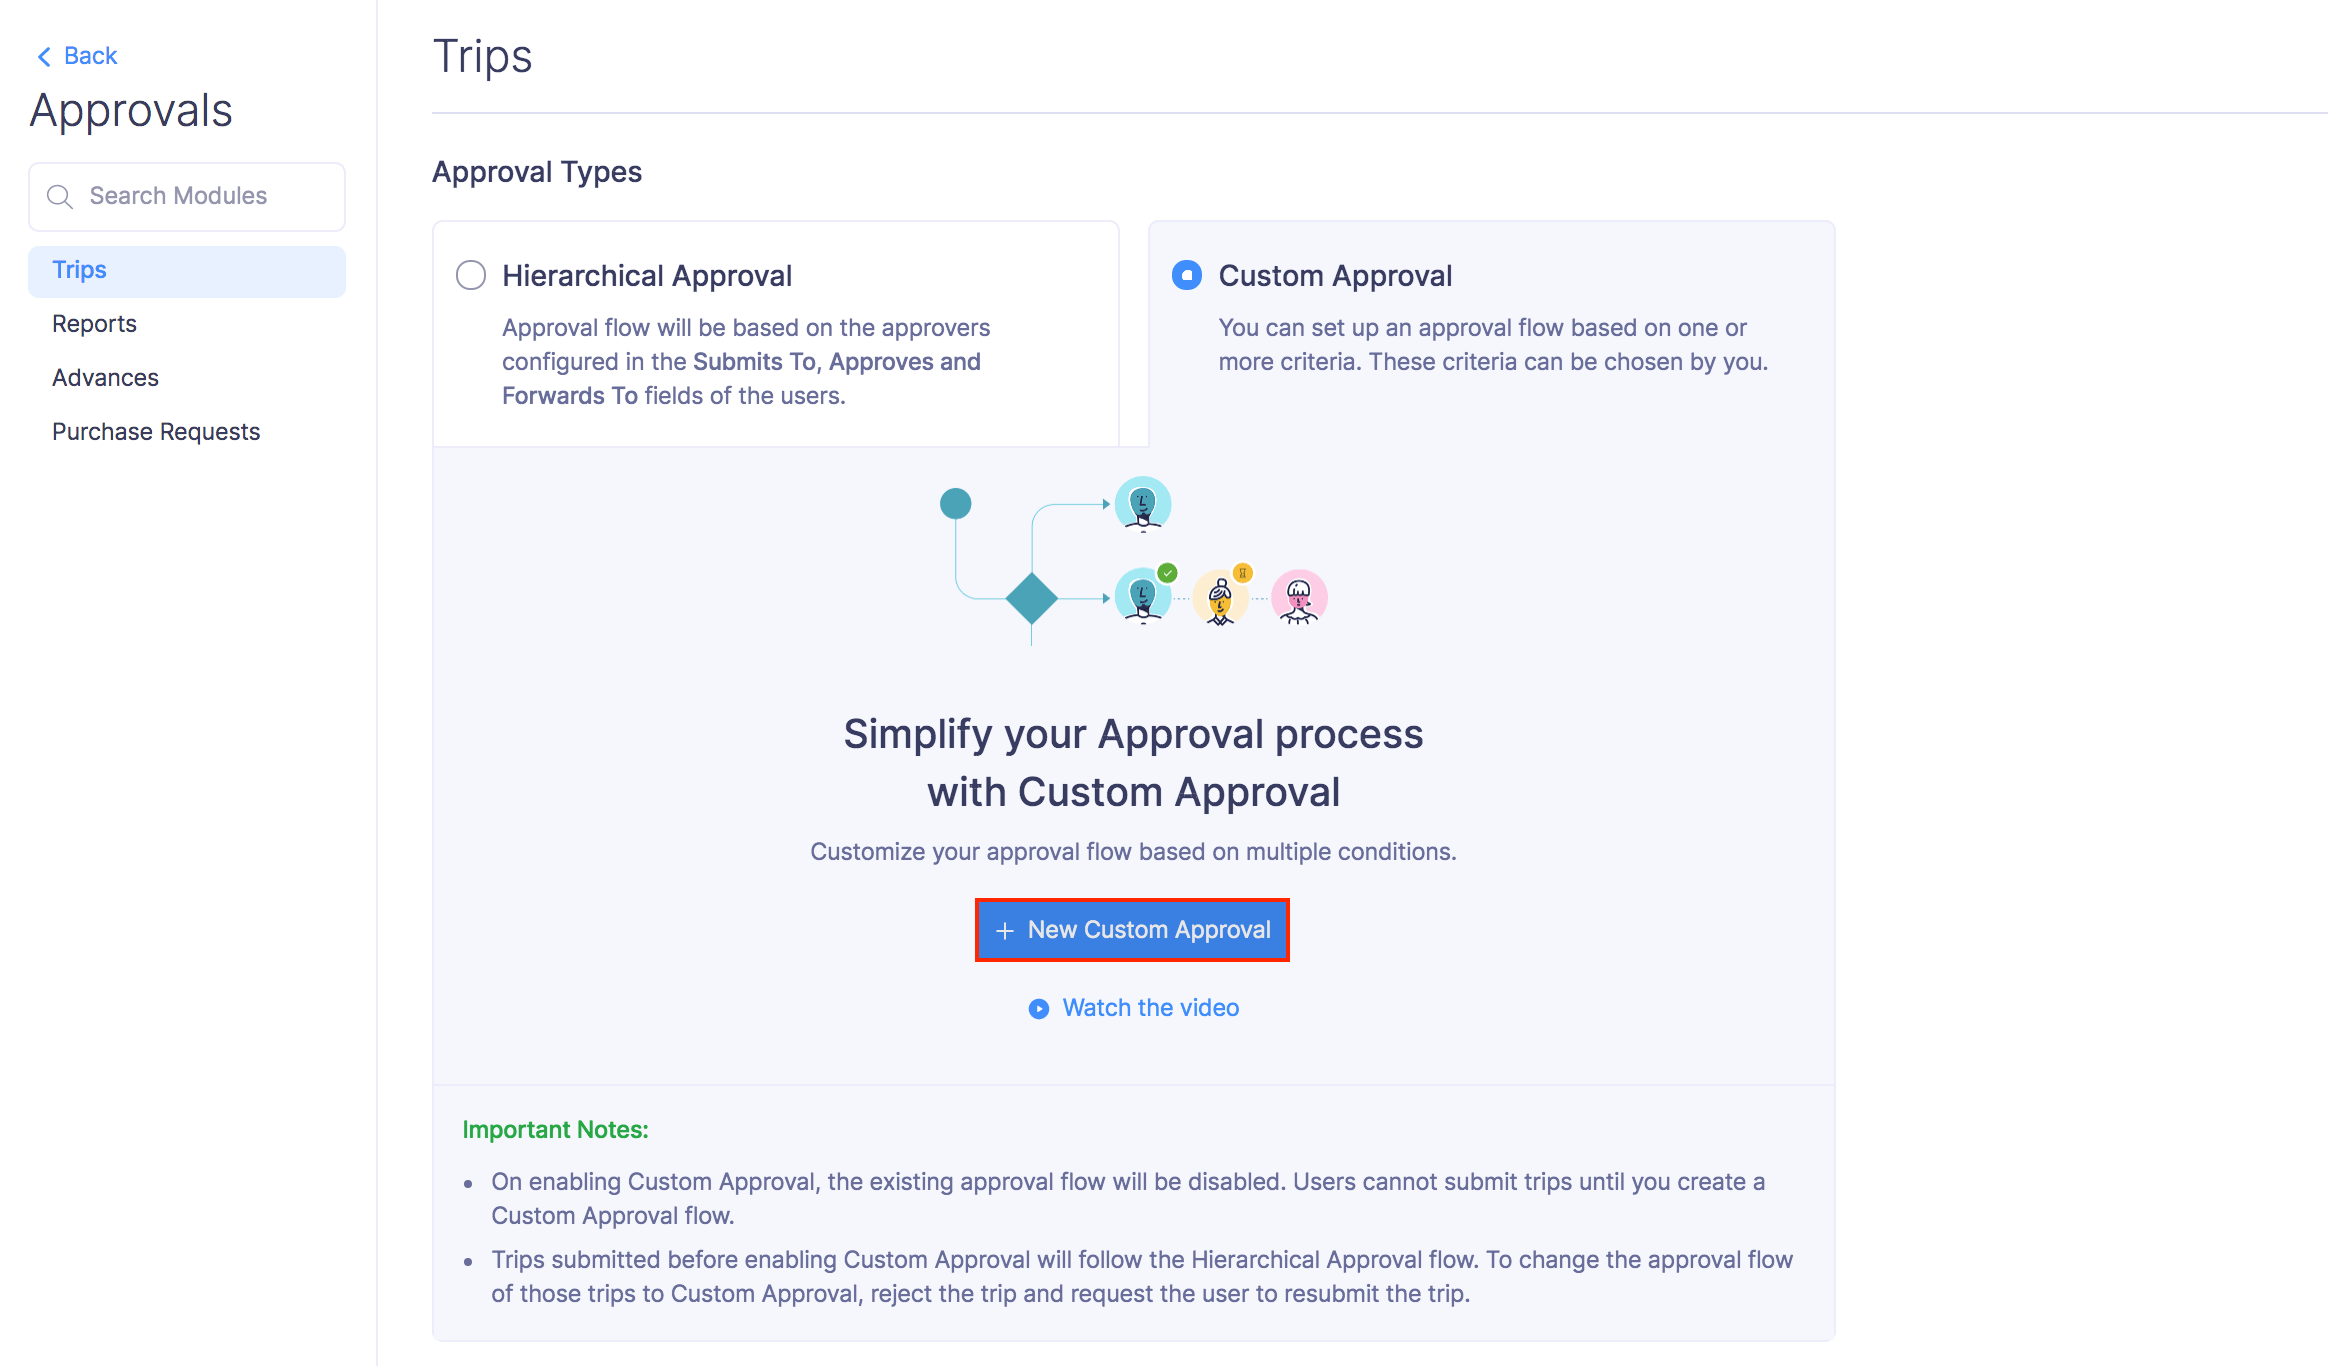
- Select Custom Approval.
- Click + New Custom Approval.
- Enter an Approval Name.
- Enter a Description if required.
Define the Criteria
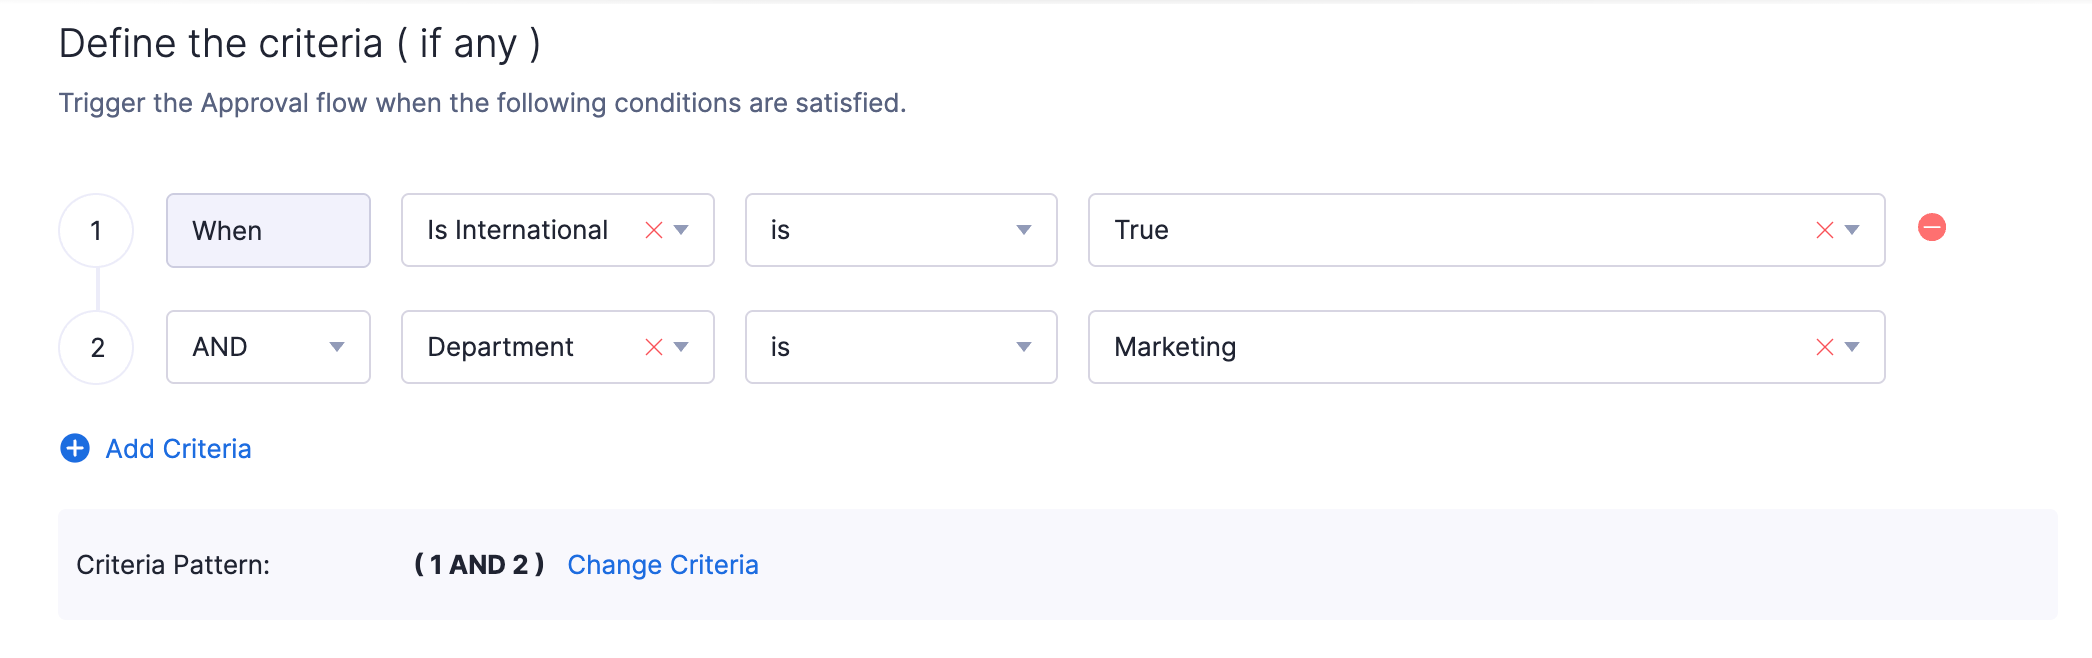
Set the conditions that trigger the approval flow. You can combine up to 10 conditions using AND or OR logic.
- AND: All conditions must be true. For example: When report total > $2,000 AND customer is Zylker.
- OR: Any one condition is enough. For example: When project is Web Design OR owner is Bailey.
- Click + Add Criteria to add more conditions.
- To use a custom criteria pattern, click Change Criteria next to Criteria Pattern and enter the pattern. For example: (1 AND 2) or ((1 AND 2) OR 3).
- To remove a condition, click the (-) icon on the right.
Approvals
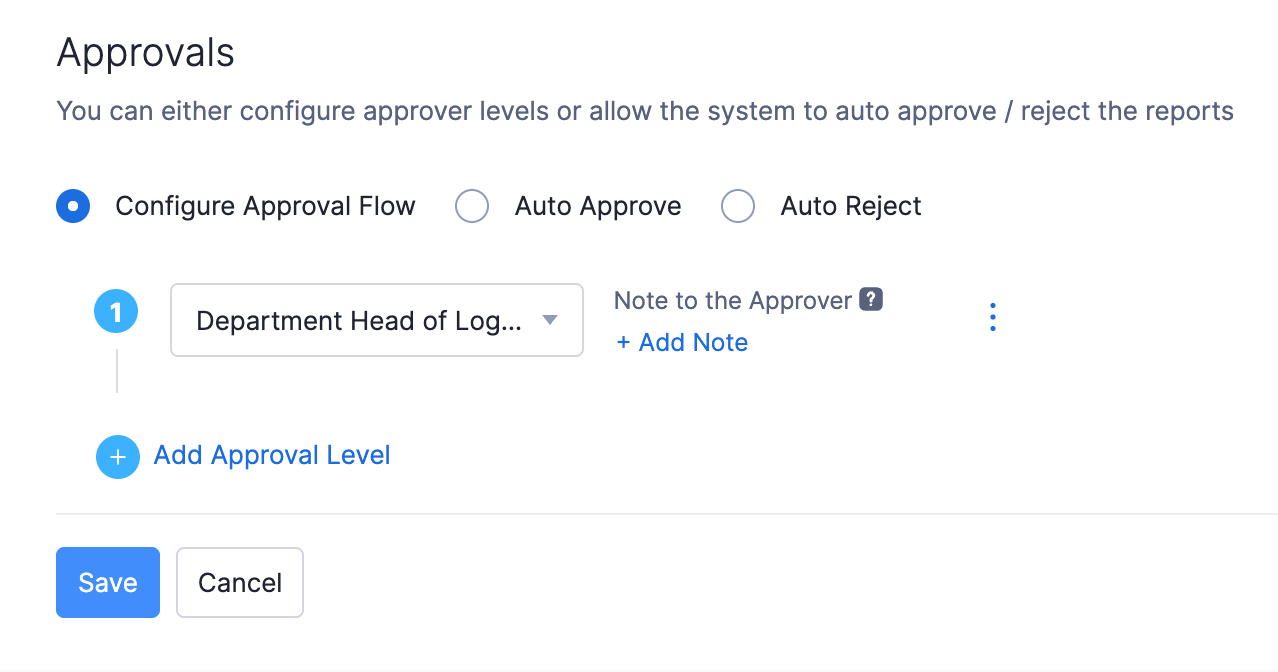
Select how the record should be handled when it meets the criteria:
- Auto Approve: The record is approved automatically.
- Auto Reject: The record is rejected automatically.
- Configure Approval Flow: Set up a level-based flow where a record goes to Level 1 first, then Level 2, and so on.
For each level under Configure Approval Flow, click the approver type dropdown and select one of the following:
- Approval Group: Route the record to a group of users and set the minimum number who need to approve before that level is complete. Learn more about Approval Groups.
- Submits To: The default approver of the user based on their reporting hierarchy.
- Choose an Approver Manually: Select a specific user as the approver.
- Project Head: The head of the project associated with the record.
- Project Heads of Expenses: The project heads of all expenses included in the report or trip.
- Department Head of Logged-in User: The head of the department the record owner belongs to.
- Department Head: The head of a department you choose manually.
- Choose a Designation - Hierarchy Based: The first user in the Submits To hierarchy who has the designation you specify.
- Choose a Lookup Field: The user selected in the lookup custom field you choose.
Click + Add Approval Level to add a new level. To remove a level, click the - icon on the right.
- Click Save.
You can also set up parallel approval within a custom approval level, where a transaction is sent to multiple approvers at the same time. This reduces the time taken for approvals as approvers don’t have to wait for others to act.
Note: Parallel Approval is currently available in Early Access. Write to us at support@zohoexpense.com to enable it for your organization.
Scenario: At Zylker, Patricia is the admin. Any expense report over $5,000 needs both Aaron (the finance lead) and Bailey (the department head) to review it. Patricia does not want either of them to wait for the other to finish first.
Patricia opens the custom approval flow for reports and converts the approval level to a parallel level. She adds Aaron and Bailey as the two approvers.
When an employee submits a report for $6,000, both Aaron and Bailey receive it at the same time. Aaron approves it that morning. Bailey approves it that afternoon. Once both have approved, the report is approved.
To set up parallel approval:
- Go to Settings on the left sidebar.
(OR)
Click Settings in the top right corner of the page. - Select the module for which you want to enable parallel approvals.
- Go to the Approvals tab.
- Select Custom Approval.
- Click + New Custom Approval.
- Enter an Approval Name and an optional Description.
- Define the criteria that triggers the approval flow.
- Under Approvals, select Configure Approval Flow.
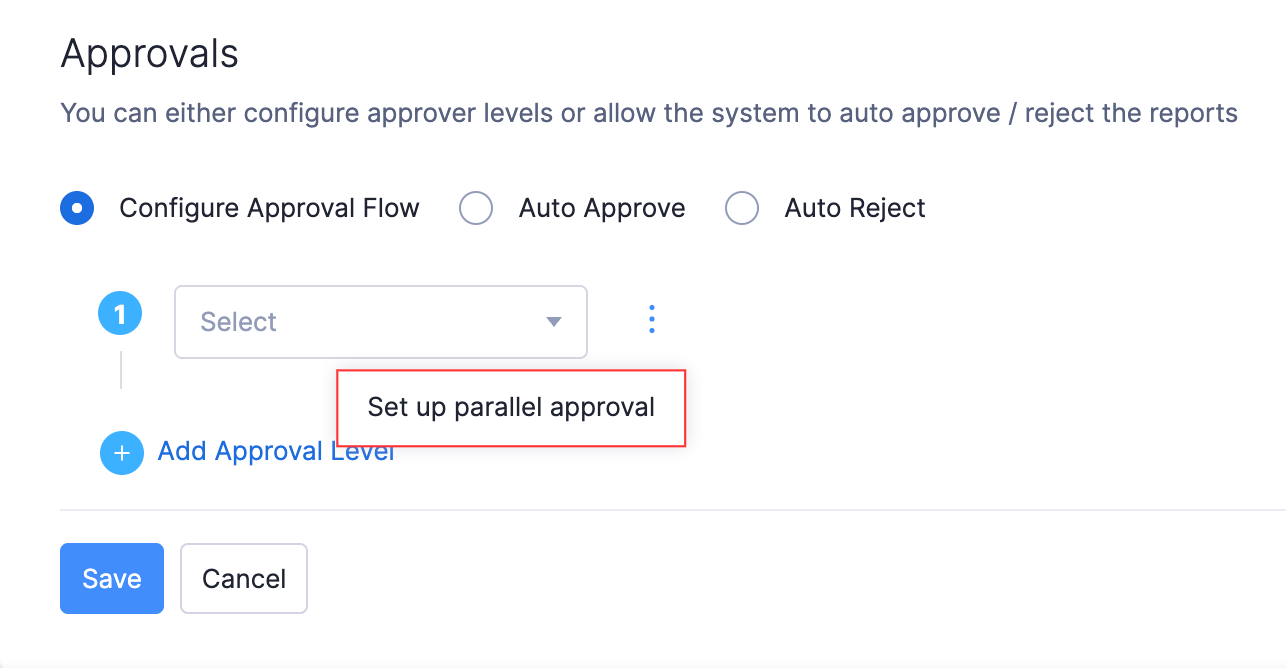
- Click the More icon on the approval level you want to convert to a parallel level.
- Select Set up parallel approval. The level converts to a parallel level and shows a Parallel Approval header.
- Select the approver type for each parallel approval level. See the Approvals section for the full list of available approver types.
- Click + Add Approver to add more approvers to the same parallel level. You can add up to five approvers in a single parallel approval level.
- Click Save.
To revert a parallel level back to individual sequential levels, click the More icon on the parallel approval level, and select Split into individual approval levels.
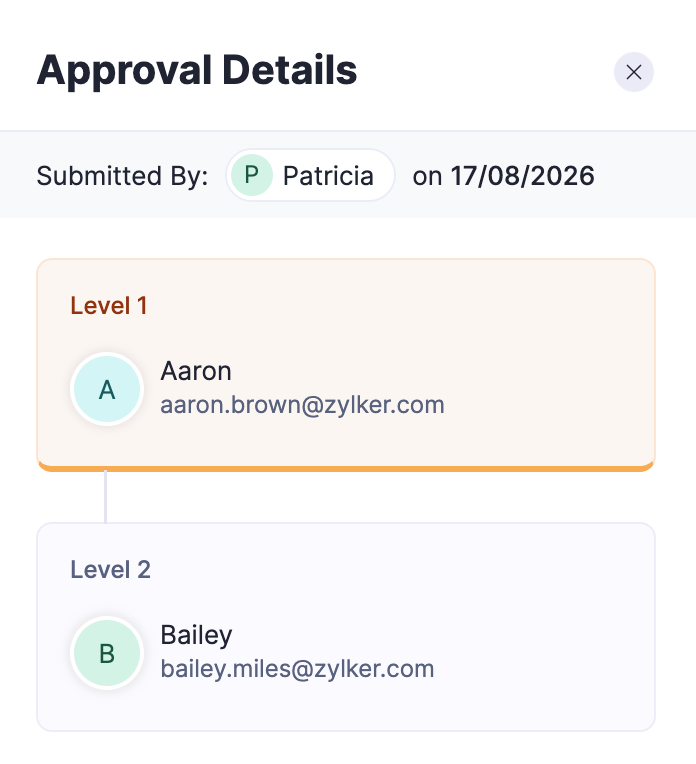
To track approval details for parallel approval in a transaction, open the transaction and click View approval flow. The Approval Details pane opens and shows all levels. Approved levels are shown in green, the current approval level is highlighted in orange, and upcoming levels are shown in gray.
Prioritize an Approval Flow
In some cases, a record may meet the criteria of more than one approval flow. When that happens, only the flow at priority 1 runs. You can drag and reorder the flows to choose which flow gets priority 1.
To prioritize an approval flow:
- Go to Settings on the left sidebar.
(OR)
Click Settings in the top right corner of the page. - Select the module for which you want to set priorities.
- Go to the Approvals tab.
- Select Custom Approval.
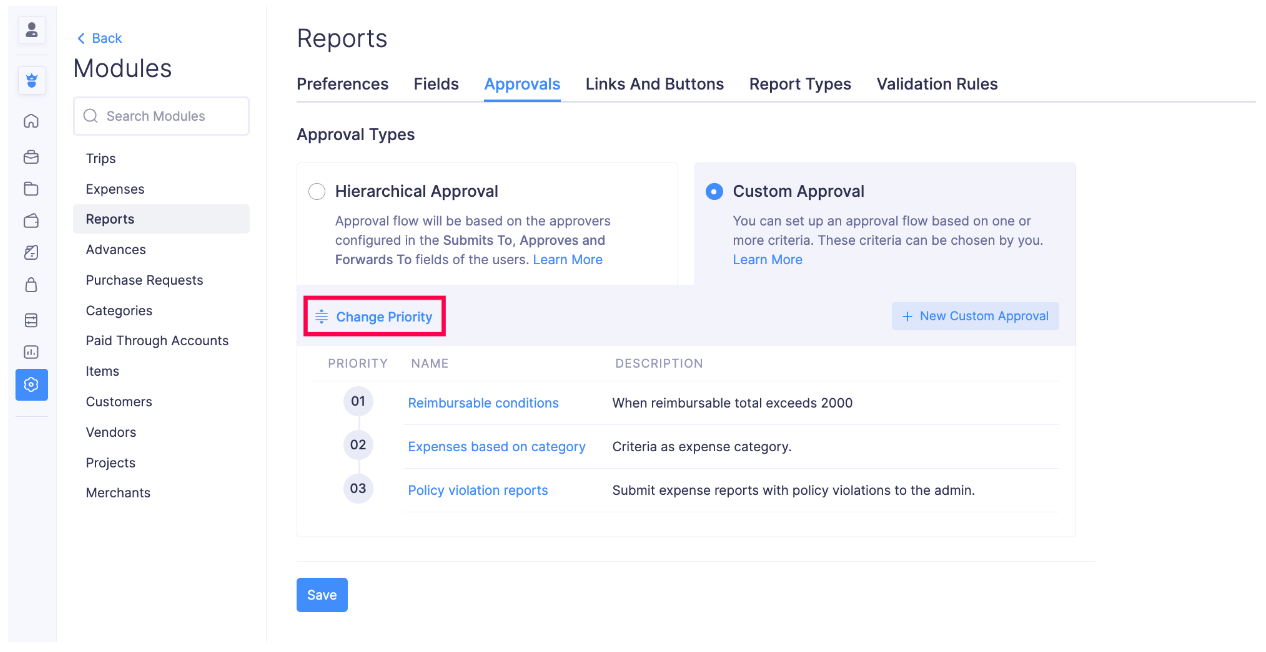
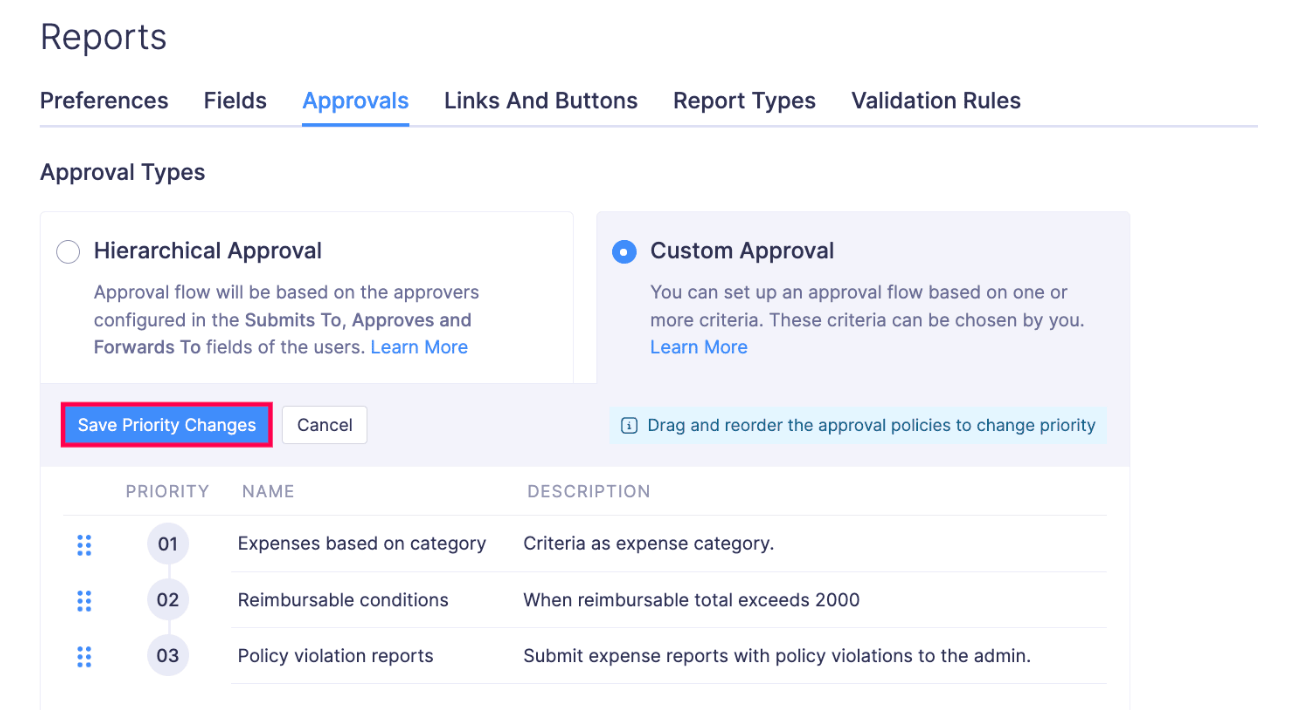
- Click Change Priority. Drag and reorder the flows. Only the flow at priority 1 runs when a record matches more than one flow.
- Click Save Priority Changes.
Edit a Custom Approval
To edit a custom approval:
- Go to Settings on the left sidebar.
(OR)
Click Settings in the top right corner of the page. - Select the module that has the custom approval you want to edit.
- Go to the Approvals tab.
- Select Custom Approval.
- Click the More icon next to the custom approval you want to edit..
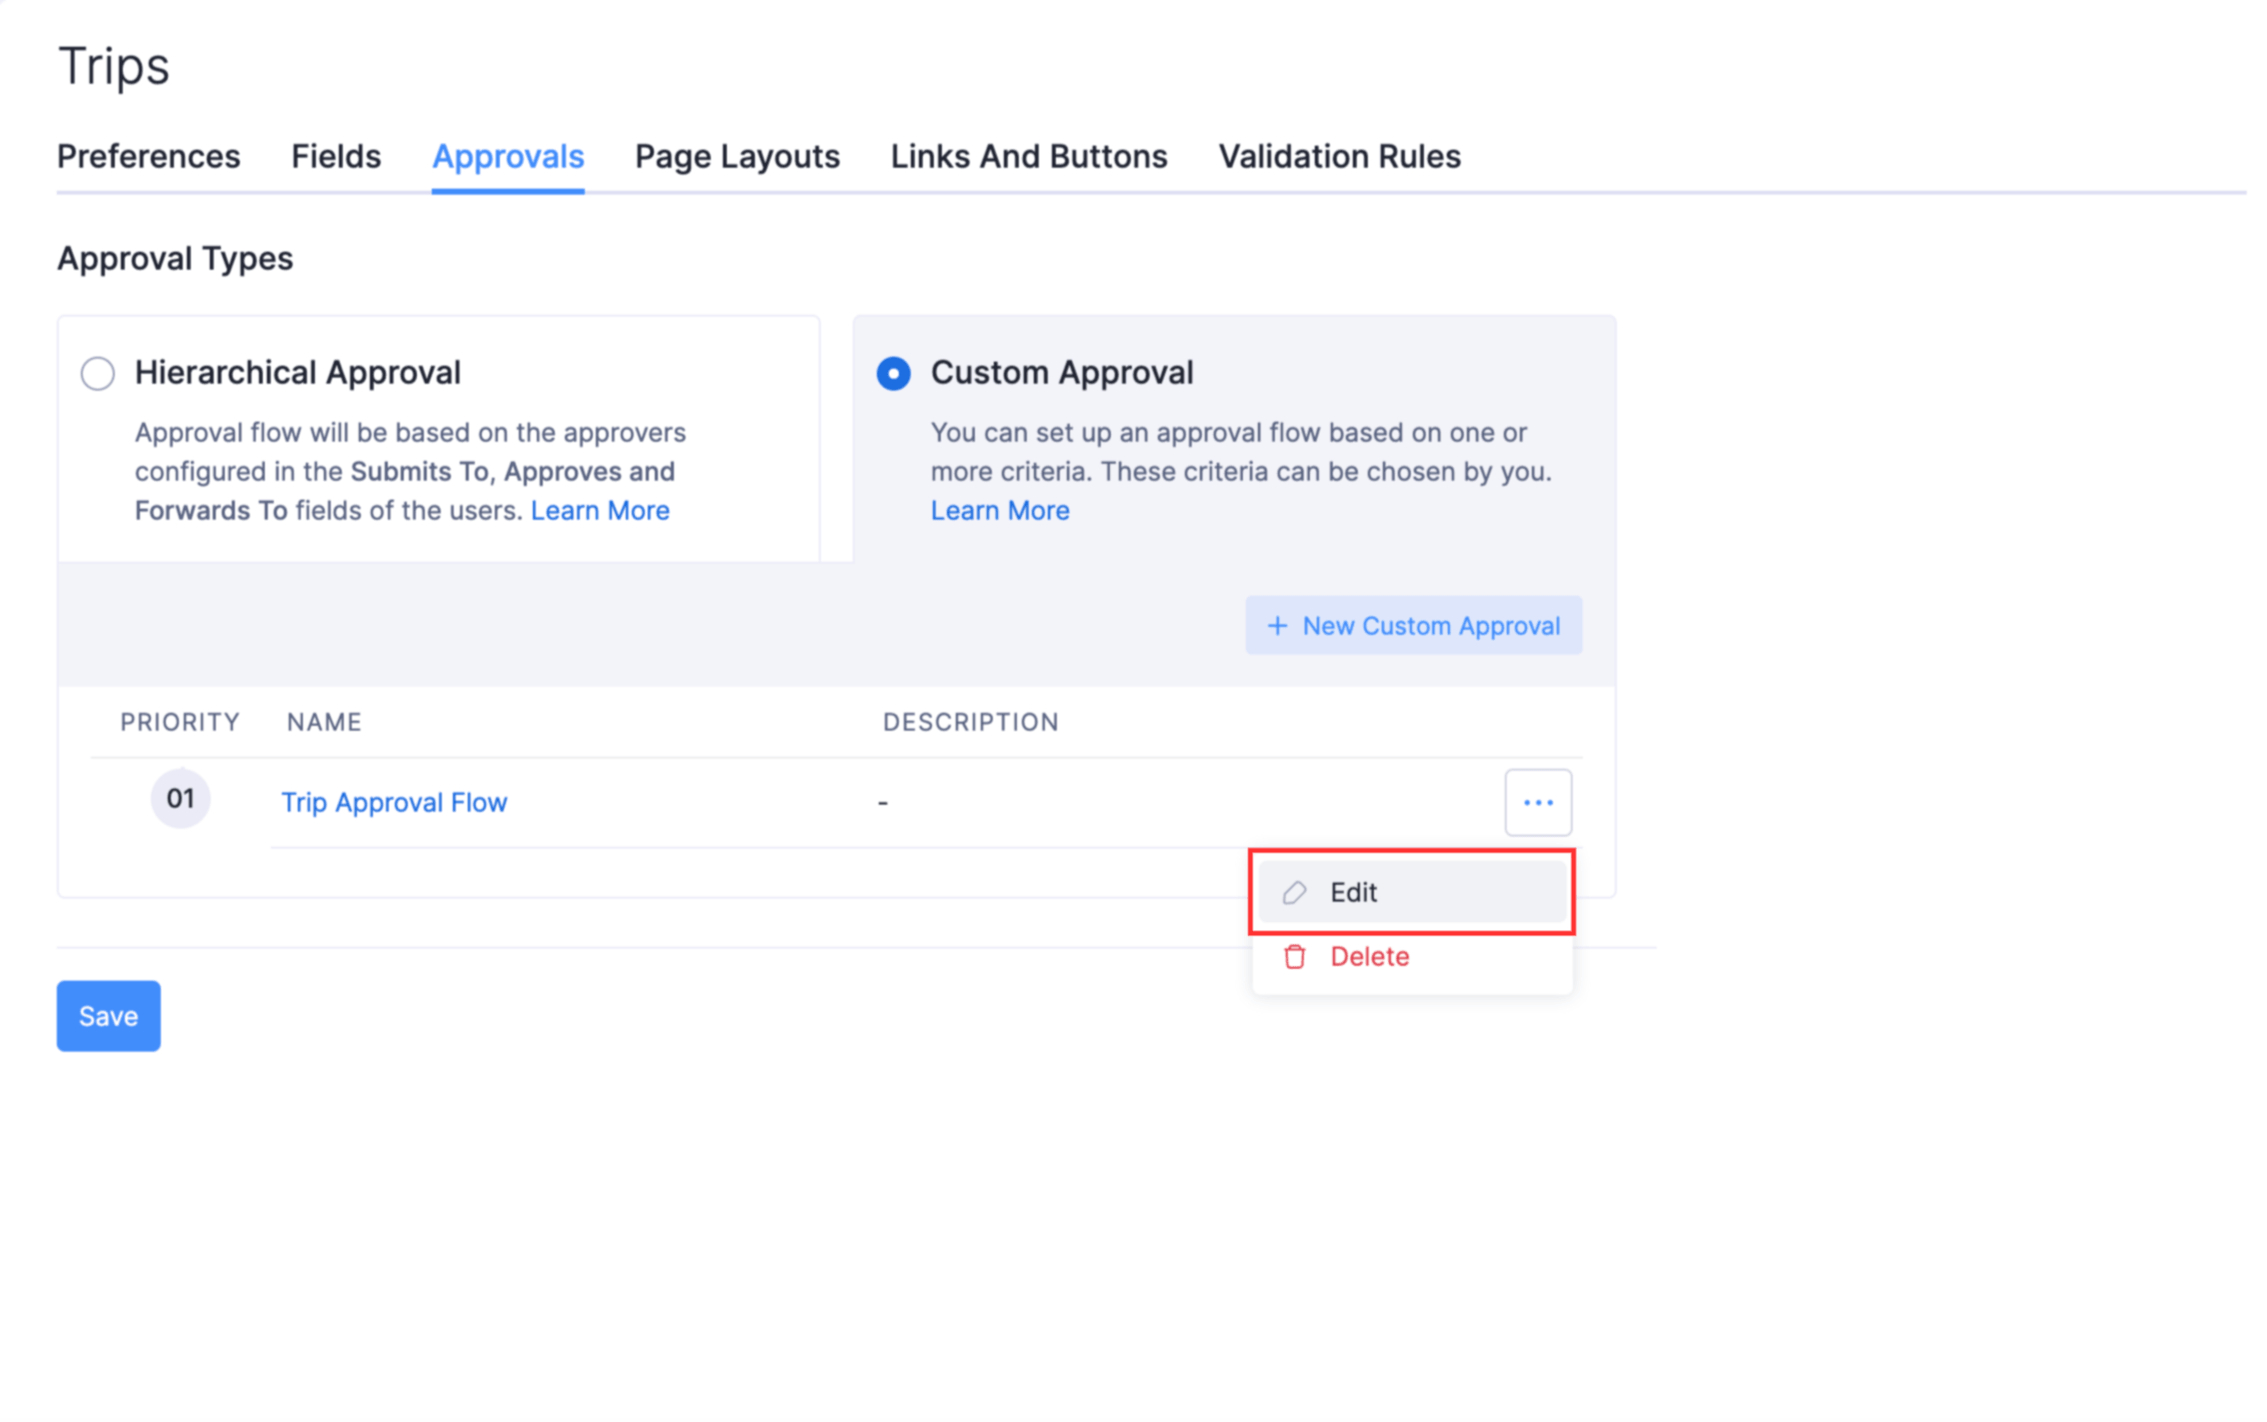
- Make the necessary changes and click Save.
Delete a Custom Approval
To delete a custom approval:
- Go to Settings on the left sidebar.
(OR)
Click Settings in the top right corner of the page. - Select the module that has the custom approval you want to delete.
- Go to the Approvals tab.
- Select Custom Approval.
- Click the More icon next to the custom approval you want to delete.
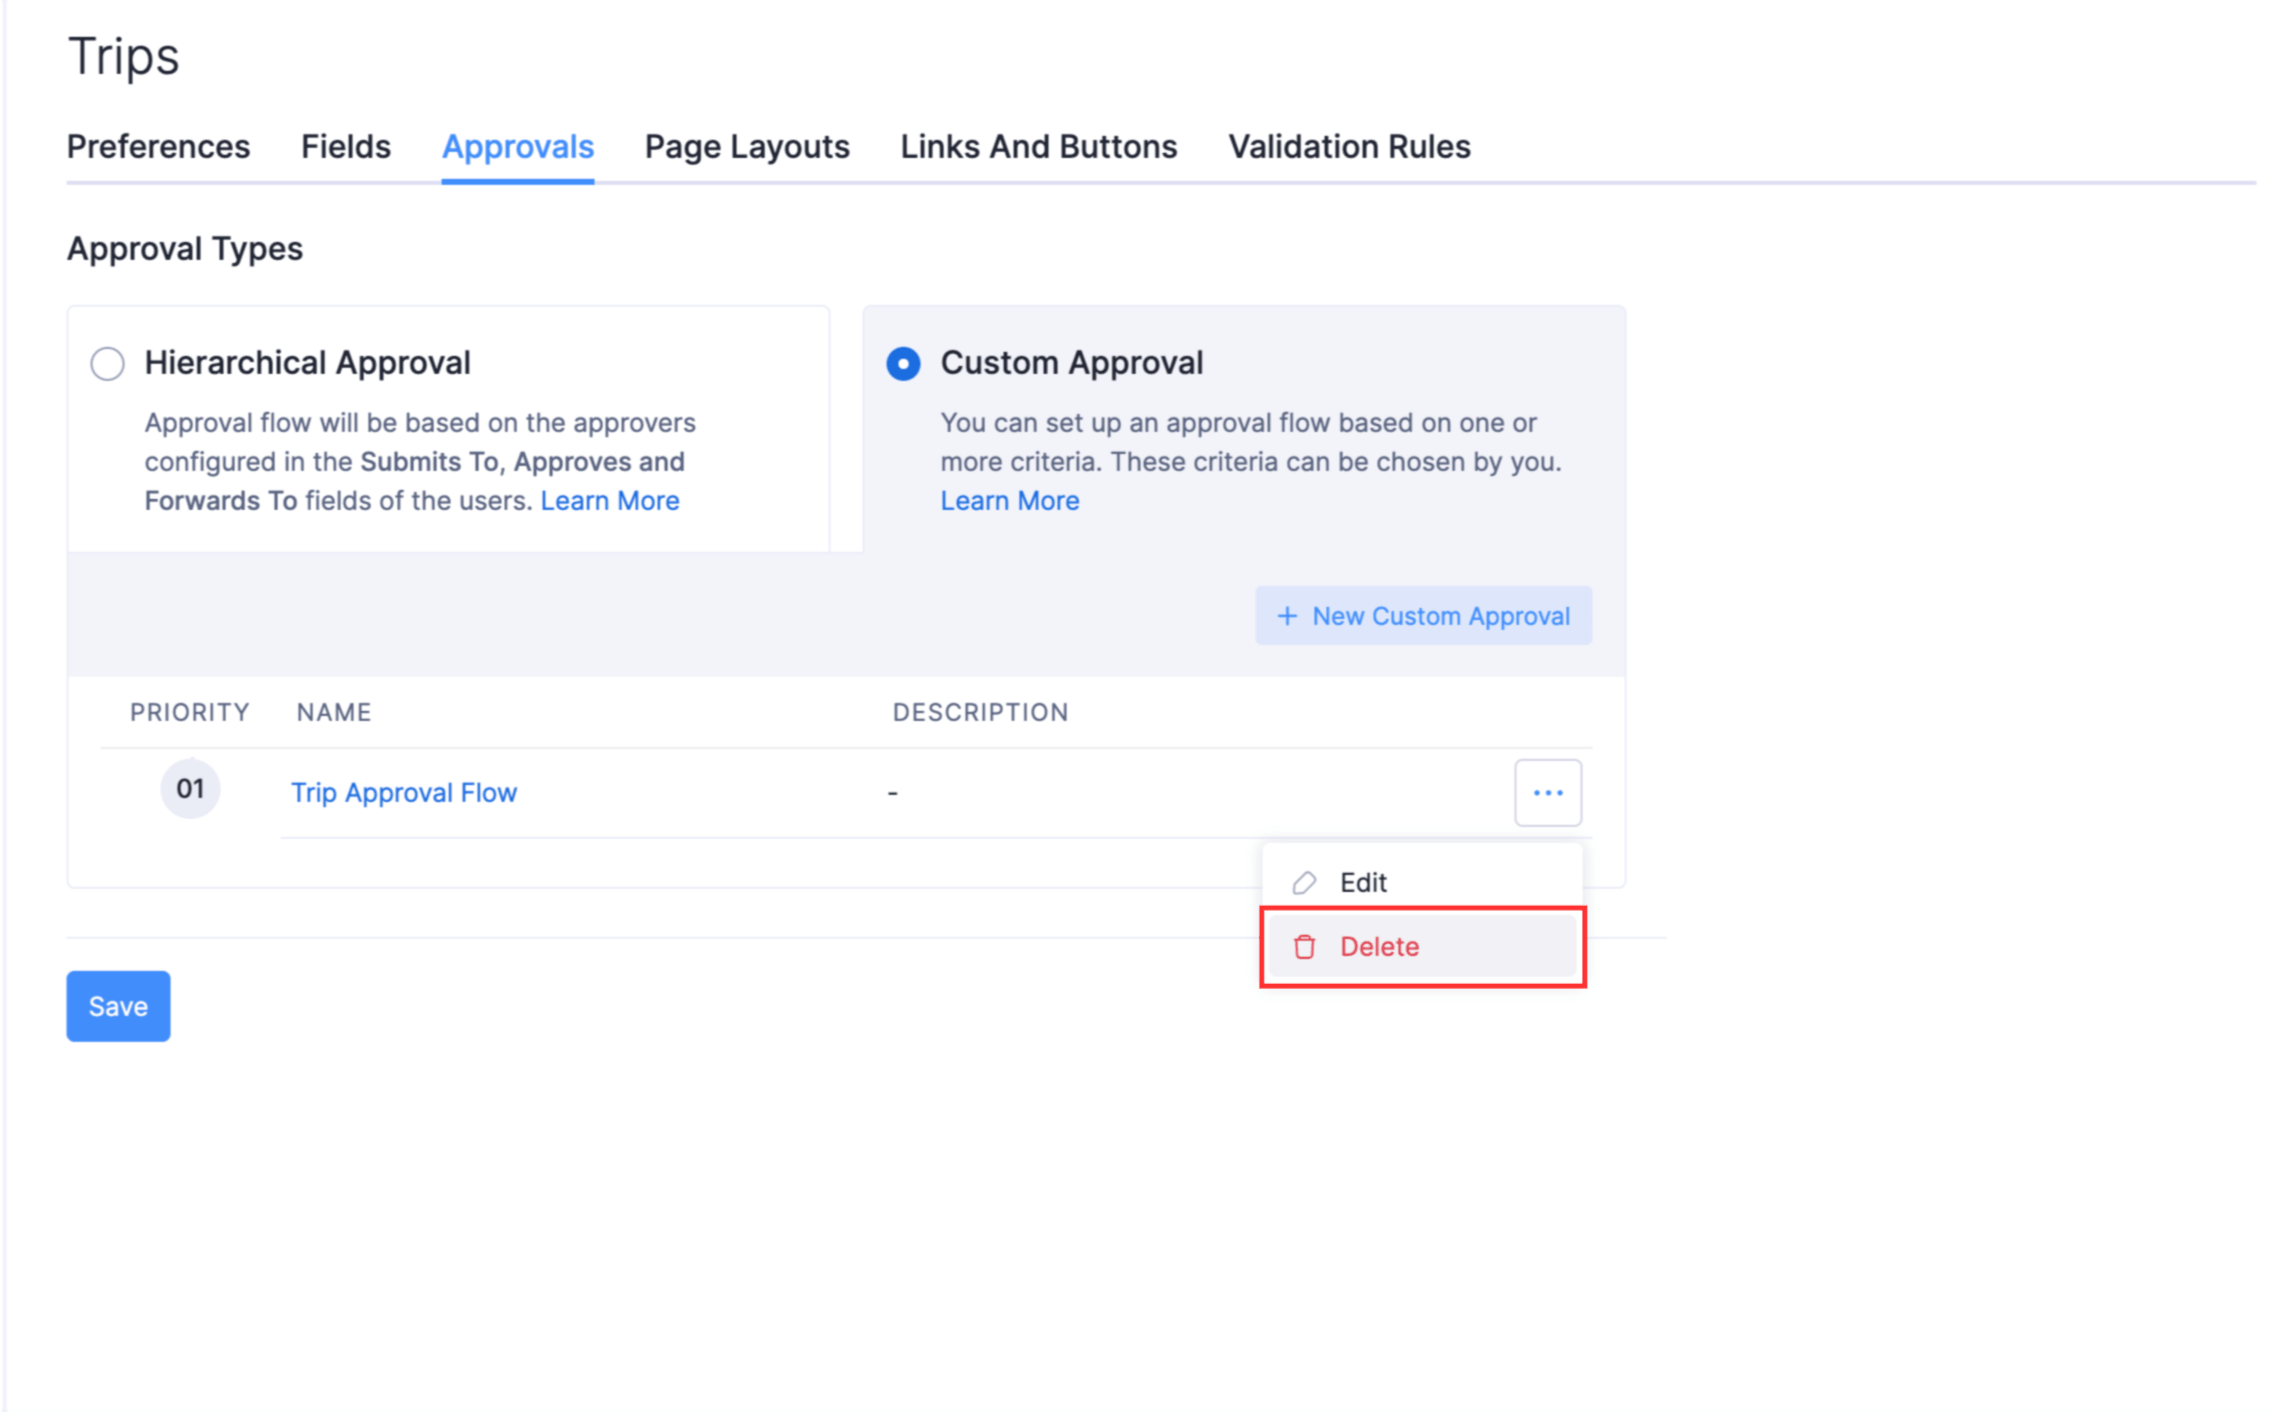
- Confirm by clicking Delete in the pop-up that appears.
Related Topics