
Submitting Reports
Add Expenses to Report
Once you’ve created a report, you can add expenses to it.
Prerequisite: You can add expenses to the reports in Draft, Recalled, or Rejected statuses.
To add expenses to a report:
- Go to Reports on the left sidebar.
- Click the report for which you want to add expenses.
- If you have any unreported expenses, you can add them to a report by clicking Add Unreported Expenses. Select the relevant expenses and click Add Expenses.
- To add a new expense, click + New Expense or click the Add Unreported Expenses dropdown and select New Expense to create a new expense for the report.

Resolve Policy Violations in a Report
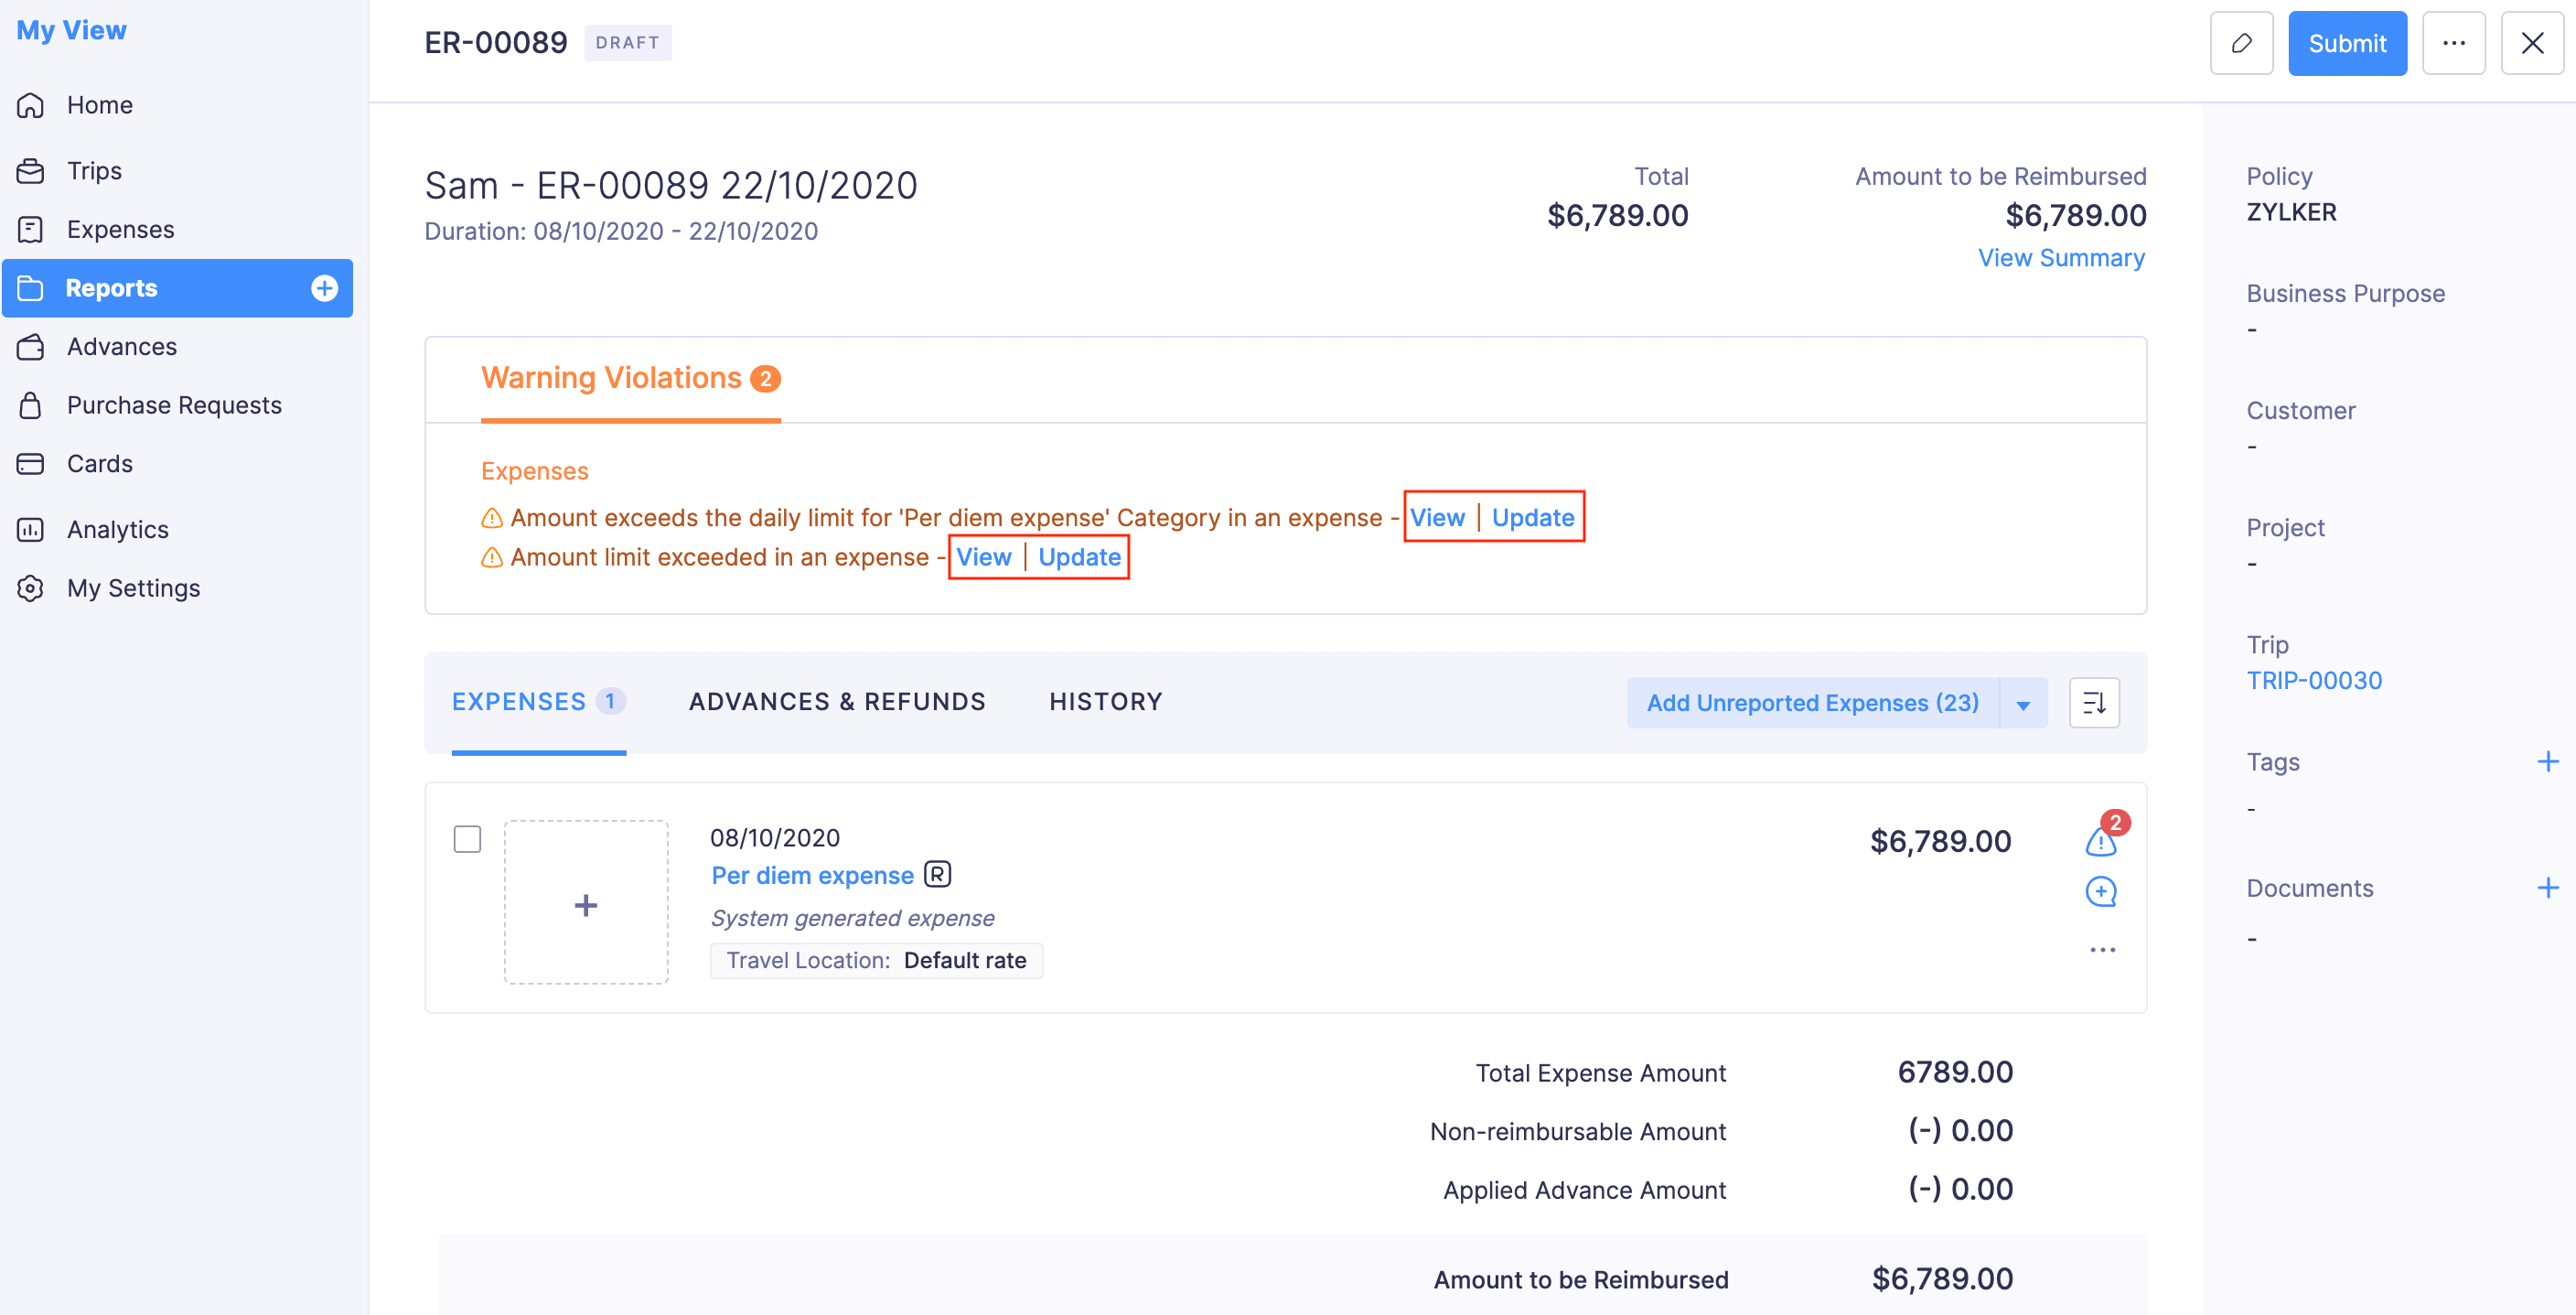
If your report or the expenses in the report have violated your organization’s policies, the violations will be highlighted in the report. You can resolve the violations and submit the report. There are two types of policy violations:
- Warning Violations:
This type of violation warns you regarding the policy violations you’ve made in your report. You can either resolve the violation or submit the report and leave it to the approver to approve or reject the report. - Blocking Violations:
This violation blocks you from submitting the report. You have to resolve the blocking violations to submit the report.
To resolve the violations:
- Go to Reports on the left sidebar.
- Click the report with policy violations.
- Click View to view details about the violation.
- Click Update to edit your expense or your report as per your company’s policy and resolve the violations.
Record and Apply Advances to Reports
Record Advances in Reports
If approval is not configured in your organization, the users can directly record the advances they’ve received inside reports.
Prerequisite: You can apply advances only to the reports in Draft, Recalled, or Rejected statuses.
To record advances in reports:
- Go to Reports on the left sidebar.
- Click the report for which you want to record advance.
- Navigate to the ADVANCES & REFUNDS tab.
- Click the Record Advance button.

- In the page that opens, enter the amount you want to add as advance.
- Click Record Advance. The advance will be applied to your report.

- All the advances that you record will be listed in the ADVANCES & REFUNDS tab of your report.
Note: You can also record advances from the Advances module.
Apply Advances to Reports
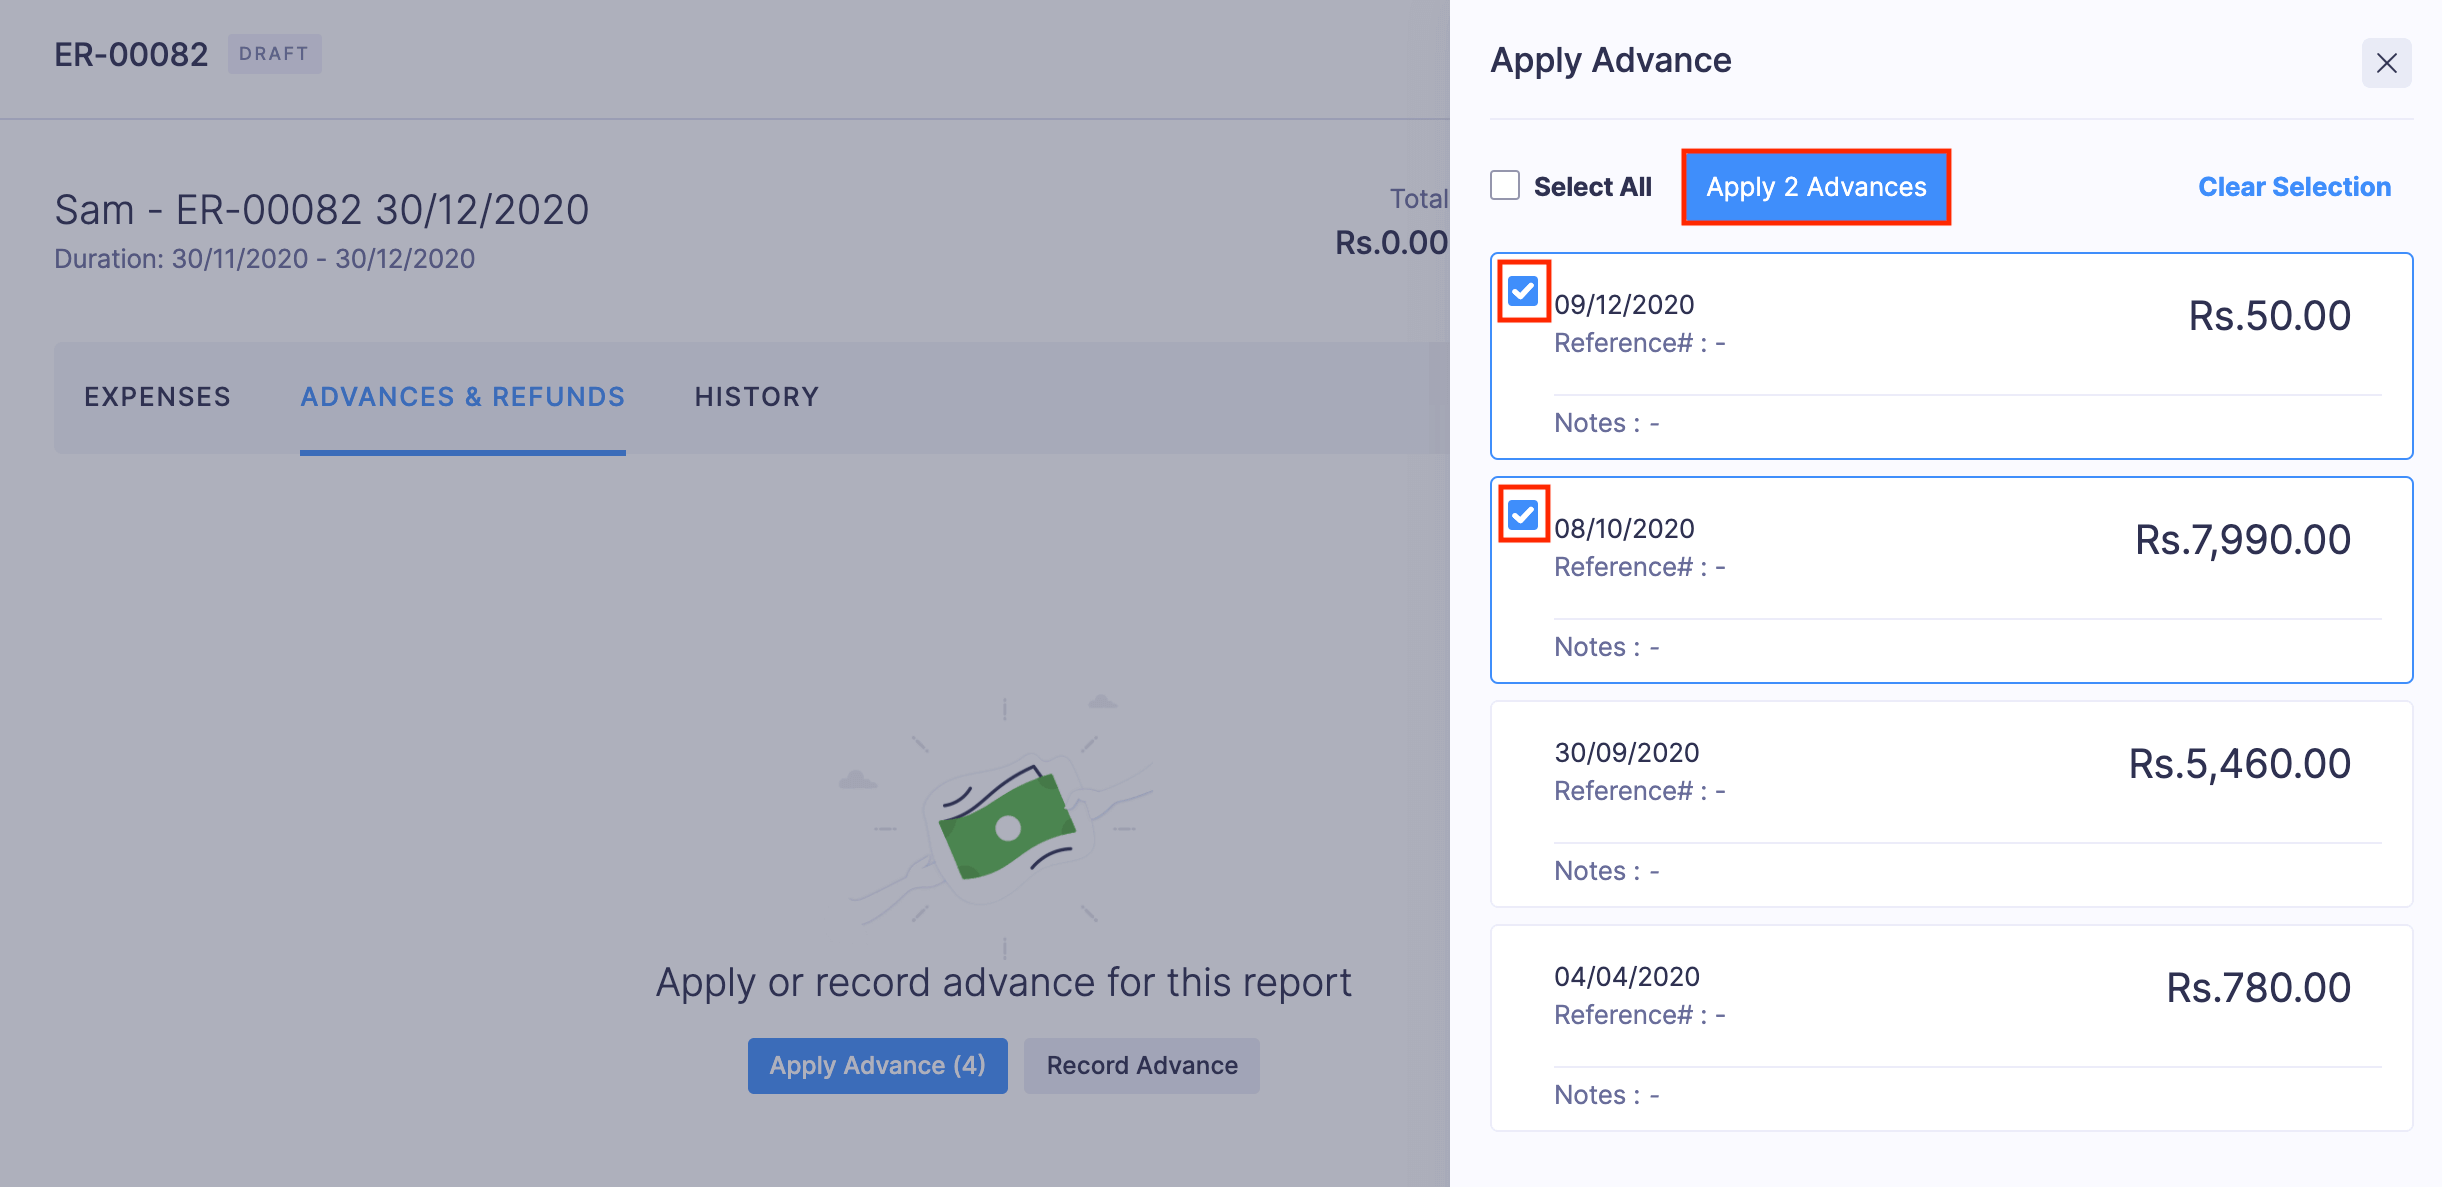
You can apply the advances you’ve received, to your reports. Once you apply an advance to a report, the advance amount will be deducted from the reimbursable total and the balance will be reimbursed to you.
Prerequisite: You can apply advances only to the reports in Draft or Rejected statuses.
To apply advances:
- Go to Reports.
- Click the report for which you want to apply advance.
- Navigate to ADVANCES & REFUNDS tab.
- Click Apply Advance.

- Select the advances you want to apply to this report.
- Click Apply Advances. The selected advances will be applied to the report.
Alternatively, you can apply advances from the Advances module.
Attach Documents to a Report
You can attach any document or file which the approver might want to view while reviewing a report.
Scenario: John has received an approval statement for a business trip from his manager. While claiming reimbursement for the expenses incurred during the trip, it will be convenient for John’s manager to view the approval statement along with the expense report. In this case, John can attach the approval statement along with the expense report making it easy for his manager to review the report.
To attach documents to a report:
- Go to Reports.
- Click the report for which you want to attach a file.
- Click the icon in the Documents section on the right side of the report.

- You can upload it either by dragging and dropping it into the box or upload it from your computer or a cloud account. You can upload a maximum of 5 files of 7MB each.
The file can be of any of the following formats:- JPEG (JPG)
- PNG
- DOC (DOCX)
- XML
- The approver can view the files in the Documents section on the right side of the report.
Note: Files in PNG and JPEG formats will not be shown in the PDF of the report.
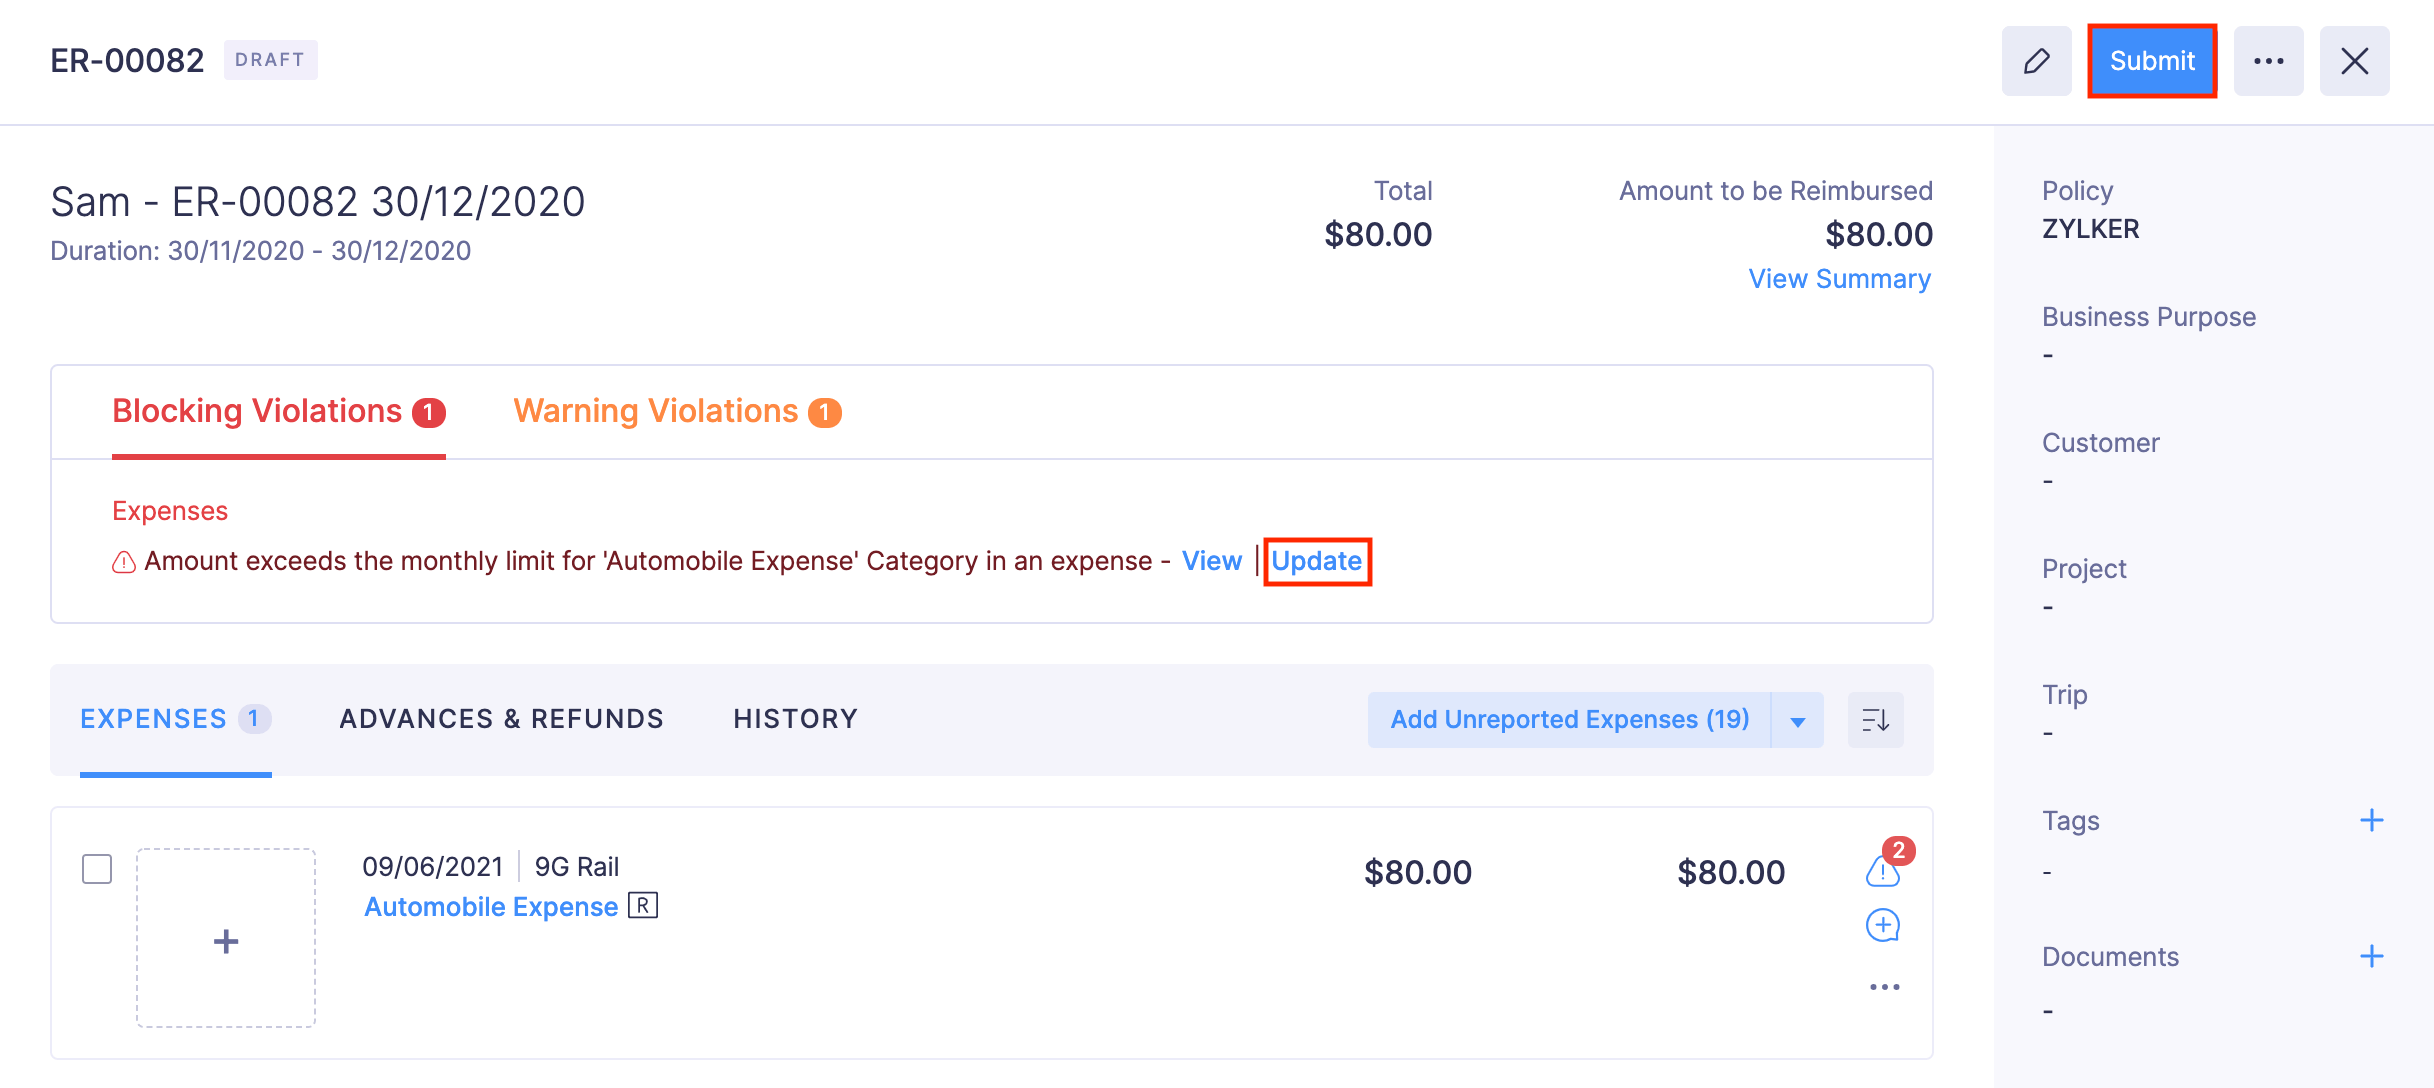
Submit Report
Create a report, add expenses to it, apply advances if any, resolve the policy violations, and submit for approval.
To submit the report:
- Go to Reports.
- Click the report that you want to submit.
- Click the Submit button at the top right corner to submit the report for approval.
- If you have blocking violations, you will not be able to submit the report. Click Update, resolve the violations and submit the report again.
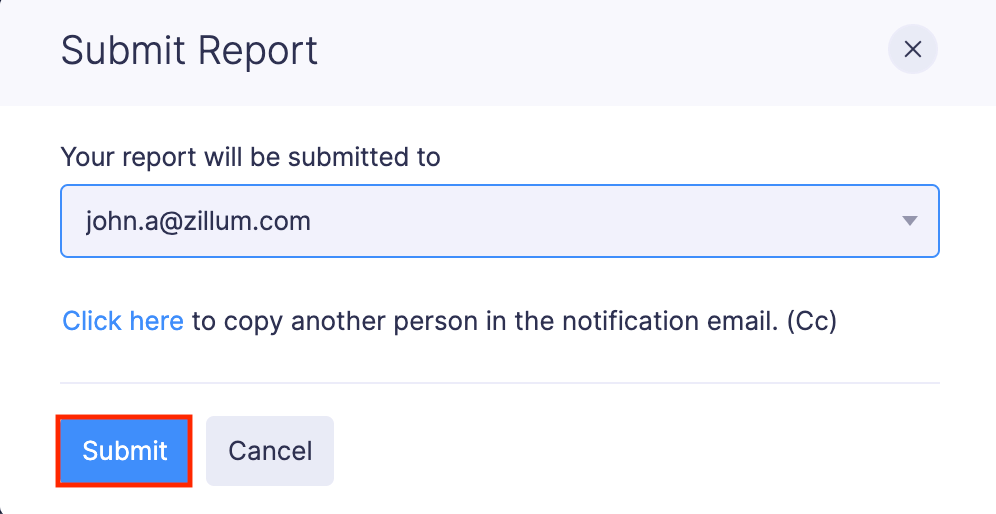
- In a pop-up, your approver’s name will be displayed. Enter the email address to whom you want to carbon copy the report.
- Click Submit. Your report will be submitted to the approver.
Submit Reports in Bulk
You can also submit your reports in bulk.
To submit reports in bulk:
- Go to Reports.
- Select the reports you want to submit.
- Click the Submit button at the top of the page.
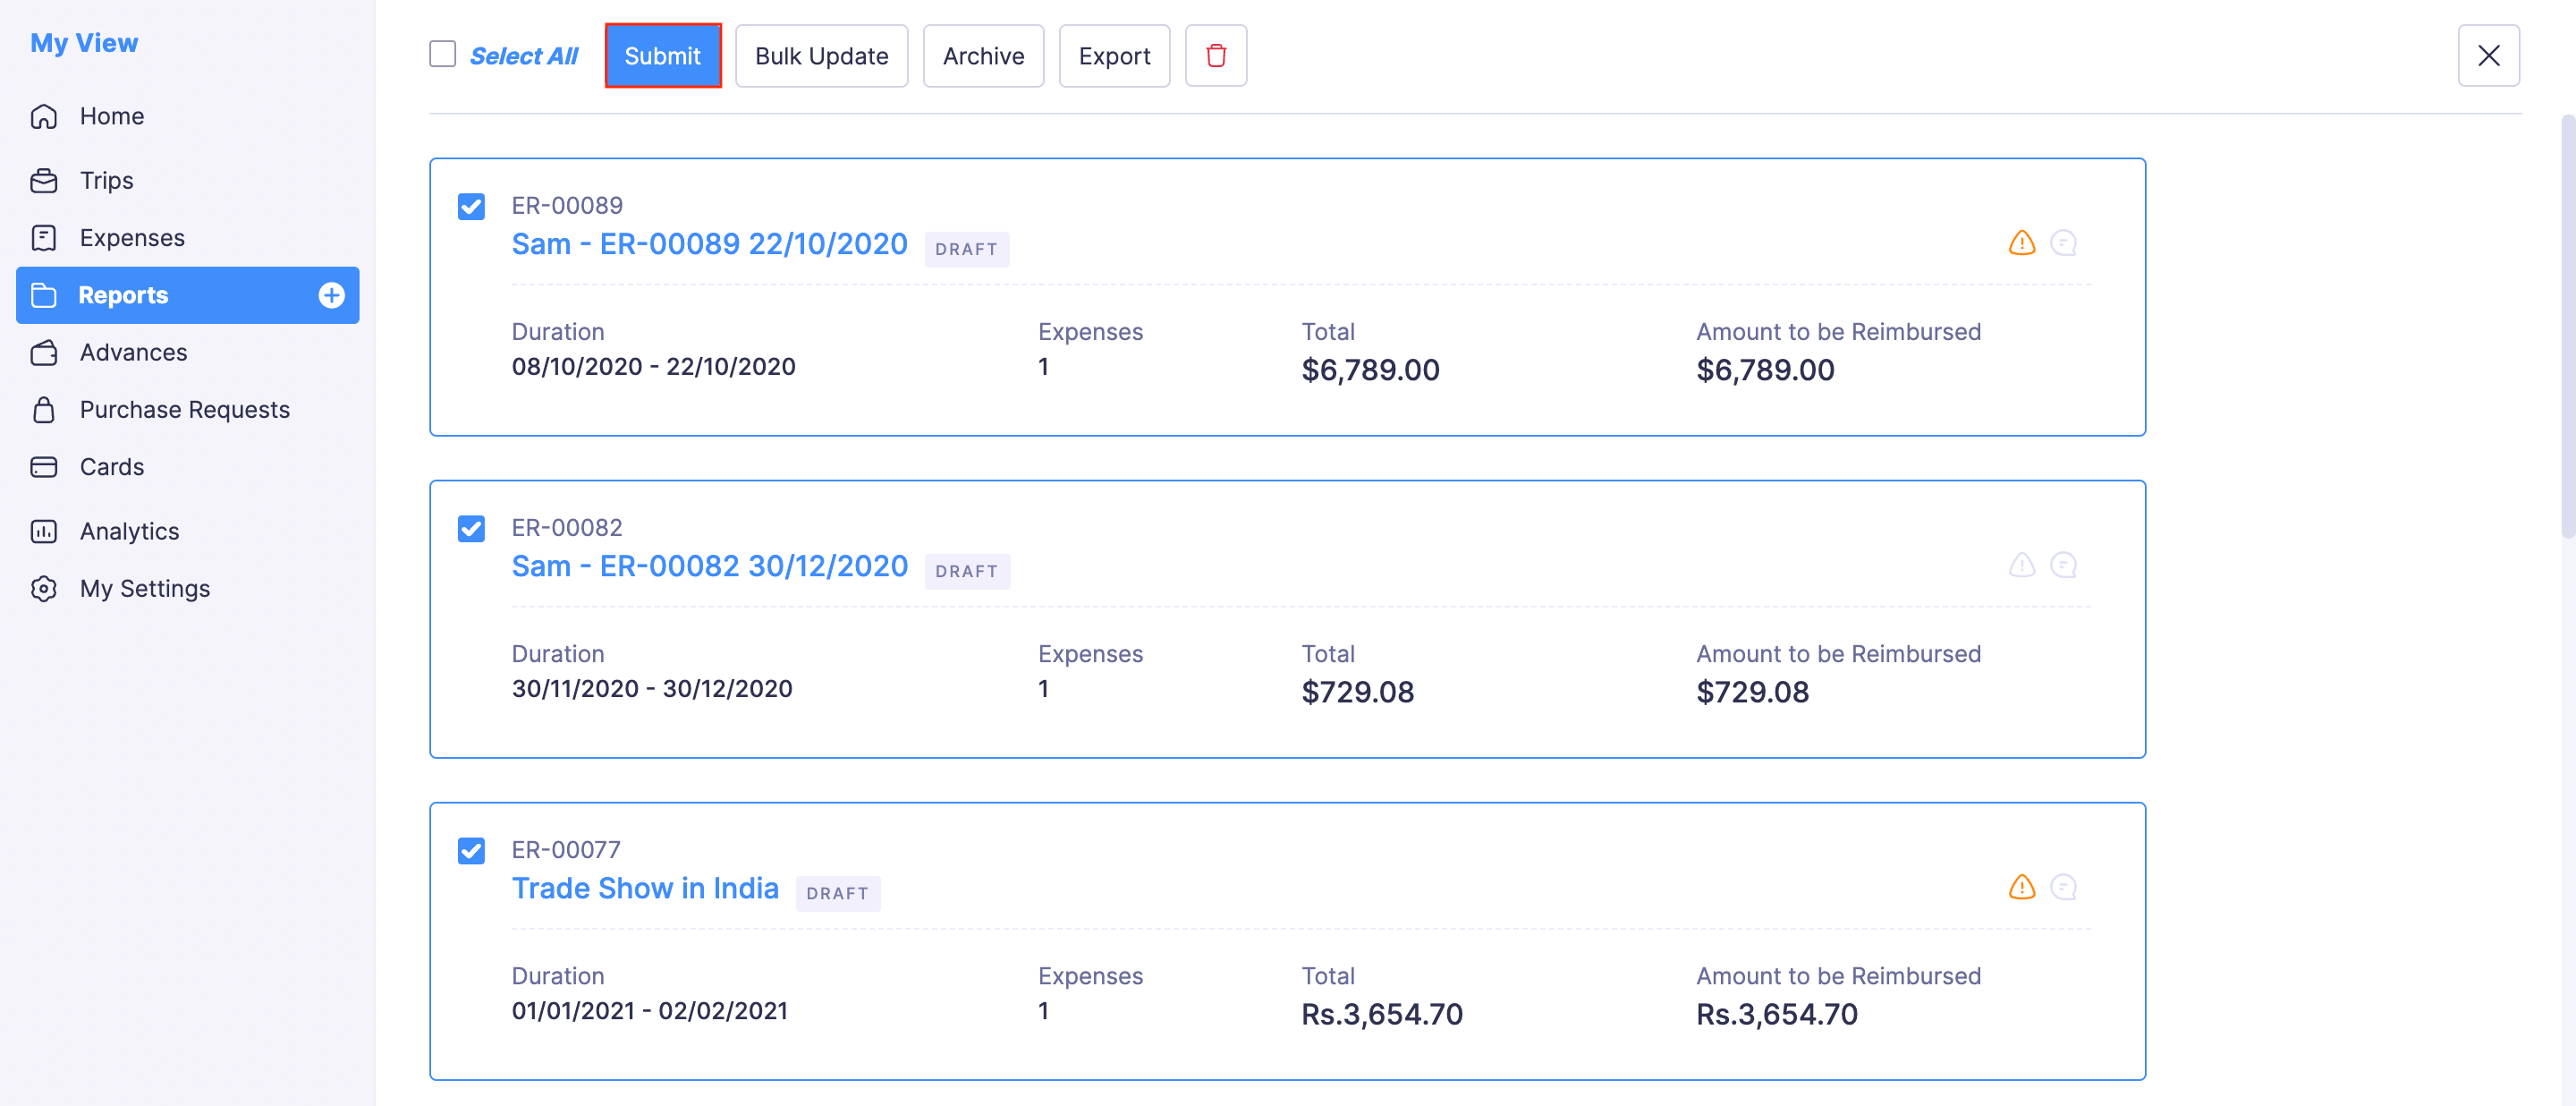
- In the pop-up that appears, your approver’s name will be displayed and you can enter the email address to whom you want to carbon copy the report.
- Click Submit. All the selected reports will be submitted to the approver.
Recall a Submitted Report
Note: Only the reports in the Awaiting Approval status can be recalled.
If you want to edit a report that has already been submitted, you can recall it and make the changes. To do this:
- Go to Reports.
- Click the submitted report you want to edit.
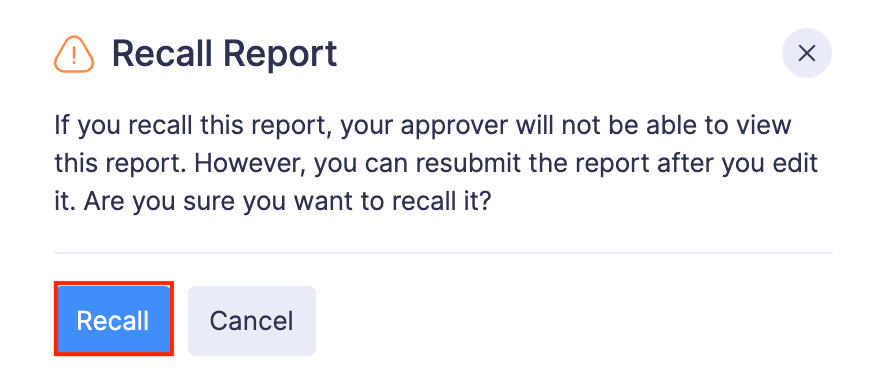
- Click the Recall button at the top right corner of the report.

- Click Recall again to confirm recalling the report. Your report will be assigned the status Recalled.
- Click the Edit icon at the top right side of the page.
- Make the necessary changes and click Save.

- You can also edit the expenses and the advances in the report.
- After editing the report, click the Re-submit button to submit it for approval again.
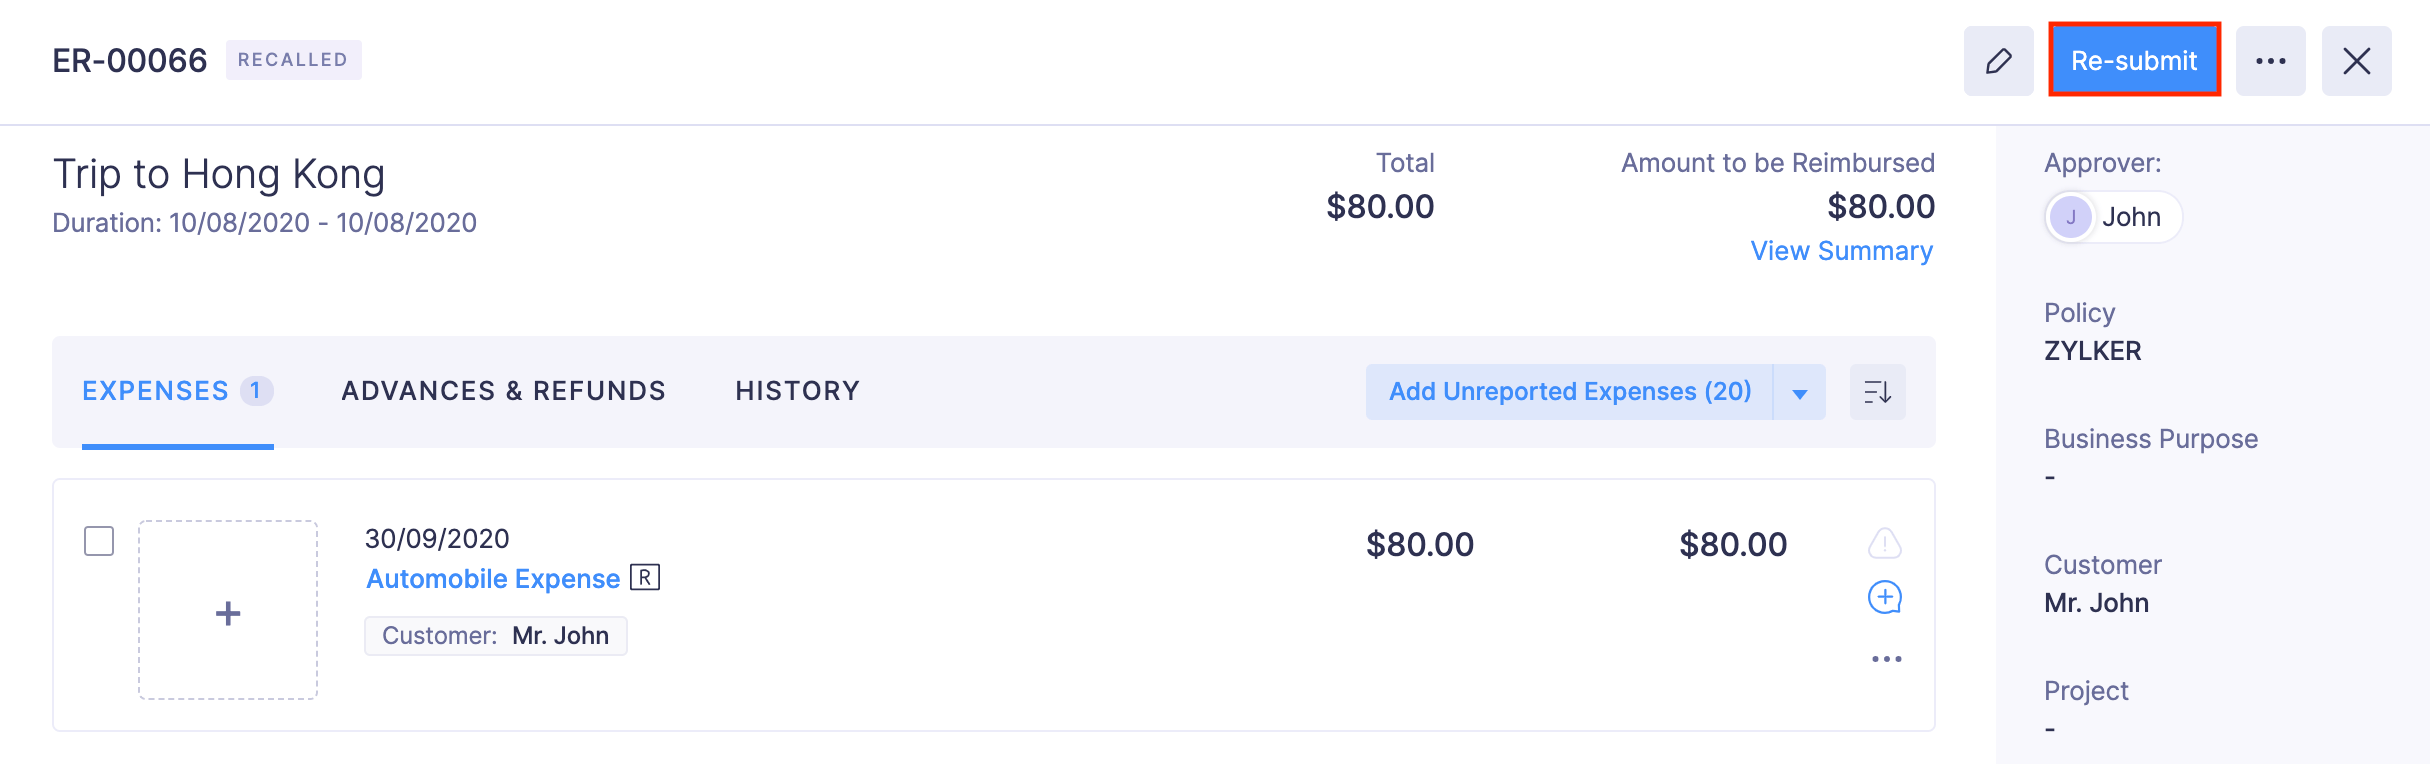
- Next, select your approver and enter the email address to whom you want to carbon copy the report. Click Submit and your report will be re-submitted for approval with the updated details.
Note: While recalling a report, a notification email will be sent to your approver that you’ve recalled the report.
Add Expenses to Report
Once you’ve created a report, you can add expenses to it.
Note: You can add expenses to the reports in Draft, Recalled, or Rejected statuses.
To add expenses to a report:
- Open the Zoho Expense app on your device.
- Tap the Menu icon in the top left corner.
- Navigate to the Reports module and open the report for which you want to add expenses.
- Under the Expenses tab, tap the + icon in the bottom right corner to add expenses.
- Select Add Unreported Expenses to add the existing unreported expenses, New Expense to create a new one, or Upload Receipts for Autoscan to capture and upload receipts, upload from photo library, or files.
Note: Alternatively, you can add the unreported expenses to an existing report from the Expenses module.
Resolve Policy Violations in a Report
Before you submit a report you must resolve the Policy Violations in a report, if any. If your report or the expenses in the report have violated your organisation’s policies, the violations will be highlighted in the report. You can resolve the violations and submit the report. There are two types of policy violations:
Warning Violations:
This type of violation warns you regarding the policy violations you’ve made in your report. You can either resolve the violation or submit the report and leave it to the approver to approve or reject the report.Blocking Violations:
This violation blocks you from submitting the report. You have to resolve the blocking violations to submit the report.
To resolve the policy violations:
- Open the Zoho Expense app on your device.
- Tap the Menu icon in the top left corner.
- Navigate to the Reports module and open the report with policy violations.
- Tap View to view all the violations.
- Tap View next to the violation you want to view.
- Make the necessary changes and resolve the violations.
Apply Advances to Reports
You can apply the advances you’ve received to your reports. Once you apply an advance to a report, the advance amount will be deducted from the total reimbursable amount and the balance will be reimbursed to you.
Note: You can apply advances only to the reports in Draft or Rejected statuses.
To apply advances in reports:
- Open the Zoho Expense app on your device.
- Tap the Menu icon in the top left corner.
- Navigate to the Reports module and open the report for which you want to apply advance.
- Select the advances you want to apply to this report.
- Tap Apply in the top right corner. The selected advances will be applied to the report.
Note: Alternatively, you can apply advances from the Advances module.
Attach Documents to a Report
You can attach any document or file which the approver might want to view while reviewing a report.
Scenario: John has received an approval statement for a business trip from his manager. While claiming reimbursement for the expenses incurred during the trip, it will be convenient for John’s manager to view the approval statement along with the expense report. In this case, John can attach the approval statement along with the expense report making it easy for his manager to review the report.
To attach documents to a report:
- Open the Zoho Expense app on your device.
- Tap the Menu icon in the top left corner.
- Navigate to the Reports module and open the report for which you want to attach a file.
- Tap the Attachments icon in the report details section.
- You can upload it either by capturing an image, uploading from photo library, or files. You can upload a maximum of 5 files of 7MB each.
Submit a Report
You can submit a report for approval once you’ve resolved the policy violations, if any.
To submit the report:
- Open the Zoho Expense app on your device.
- Tap the Menu icon in the top left corner.
- Navigate to the Reports module and open the report you want to submit.
- If you have blocking violations, you will not be able to submit the report. Resolve the violations and submit the report.
- If the approval flow is configured in your organization, the approver will be auto-selected in the pop-up that appears. Otherwise, select an approver for the report.
- Select the email address to whom you want to carbon copy the report.
- Tap Submit. Your report will be submitted to the approver.
Recall a Submitted Report
If you want to edit a report that has already been submitted, you can recall it and make the changes.
Notes:
- Only the reports in the Awaiting Approval status can be recalled.
- While recalling a report, a notification email will be sent to your approver that you’ve recalled the report.
To recall a report:
- Open the Zoho Expense app on your device.
- Tap the Menu icon in the top left corner.
- Navigate to the Reports module and open the submitted report you want to recall.
- Tap Recall at the bottom of the screen.
- In the pop-up, tap Confirm. Your report will be recalled. Your report will be assigned the status Recalled.
- Tap Edit to make the necessary changes.
- Tap Save Report.
- Tap Re-submit to submit it for approval.
- If the approval flow is configured in your organization, the approver will be auto-selected in the pop-up that appears. Otherwise, select an approver for the report.
- Tap Submit. Your report will be submitted to the approver.
 Yes
No
Yes
No
Thank you for your feedback!