

Basic Functions in Bills of Entry

Let us have a look at how you can enable and create a Bill of Entry in Zoho Books.
Enable Bills of Entry
Prerequisite: A valid GSTIN must already be added in your organisation’s GST settings.
To create a bill of entry for a GSTIN, you must enable import/export trading in your GST settings. Once enabled, you can create bills of entry for the locations associated with the respective GSTIN. If your organisation manages multiple GSTINs which deals with import/export, enable this setting for each GSTIN separately.
- Go to Settings in the top right corner of the page.
- Select Taxes under Taxes & Compliance.
- In the Taxes pane, under GST Settings, select the GSTIN for which you want to enable Bill of Entry.
- In Import / Export, check the My business is involved in SEZ / Overseas Trading option.
- Select the Custom Duty Tracking Account or create a new account with type as Expense or Other Expense.
- Click Save.
Import/export trading is now enabled for the selected GSTIN, and you can create bills of entry.
Create Bills of Entry
Note: You can create a bill of entry only for vendors whose GST treatment is Overseas or Special Economic Zone (SEZ).
You can create a bill of entry for a vendor and add line items from the vendor’s open or overdue bills. To create a bill of entry:
- Go to Purchases on the left sidebar and select Bills of Entry.
- Click + New in the top right.
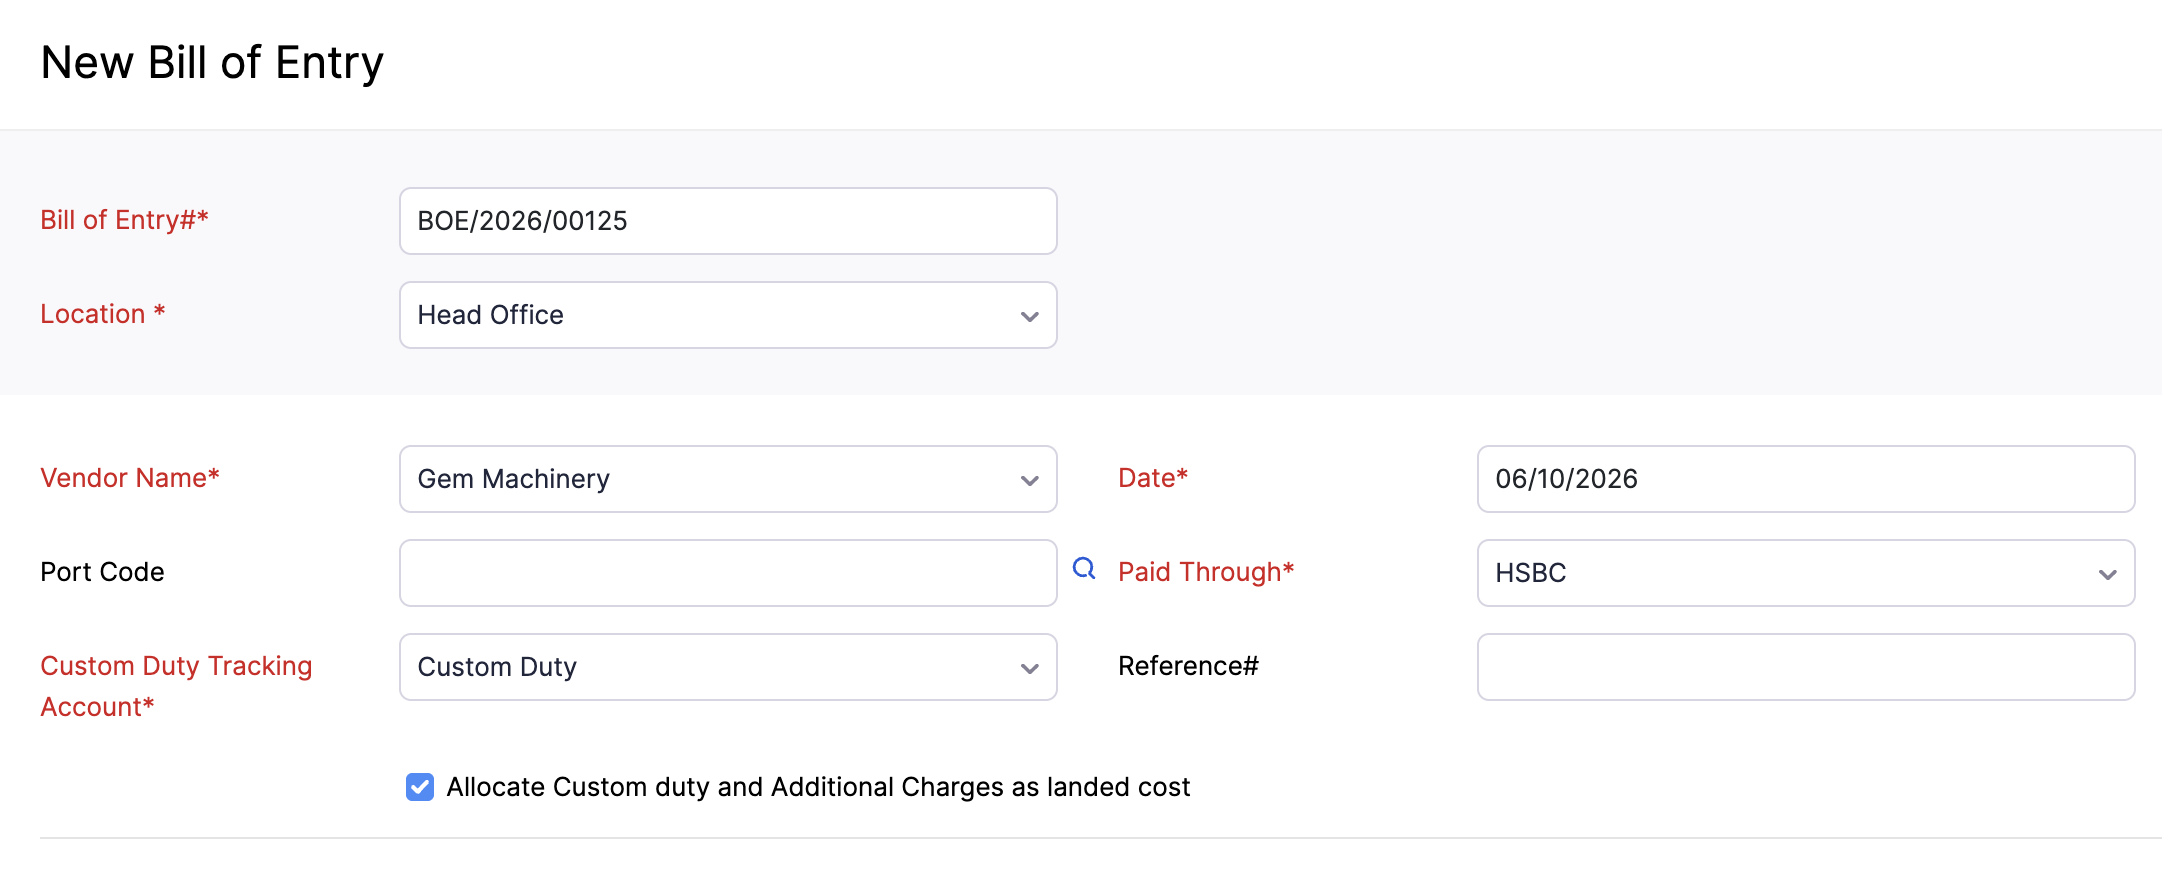
- Fill in the following details:
| Fields | Description |
|---|---|
| Bill of Entry# | Enter the unique number of the bill of entry given on the customs document. |
| Location | Select the location for the bill of entry. Insight: You can add line items from bills of any location, but the journal entry is posted to the selected location. |
| Vendor Name | Select the overseas or SEZ vendor for the bill of entry. |
| Date | Enter the date on which the bill of entry is generated. |
| Port Code | Enter the customs port code for the transaction. |
| Paid Through | Select the account from which the payment is made. |
| Custom Duty Tracking Account | Select the account in which you want to track the custom duty for the bill of entry. |
- Select Allocate Custom Duty and Additional Charges as Landed Cost if you want the customs duty and other charges entered in the bill of entry to be added to the landed costs of the items.
Insight: If you select the Allocate Custom Duty and Additional Charges as Landed Cost option, the customs duty and other charges entered in the bill of entry are distributed among the selected line items and added to the landed cost of the associated bills. If you edit or remove a line item later, the landed cost in the related bills is updated accordingly.
- Scroll down and click Add Items.
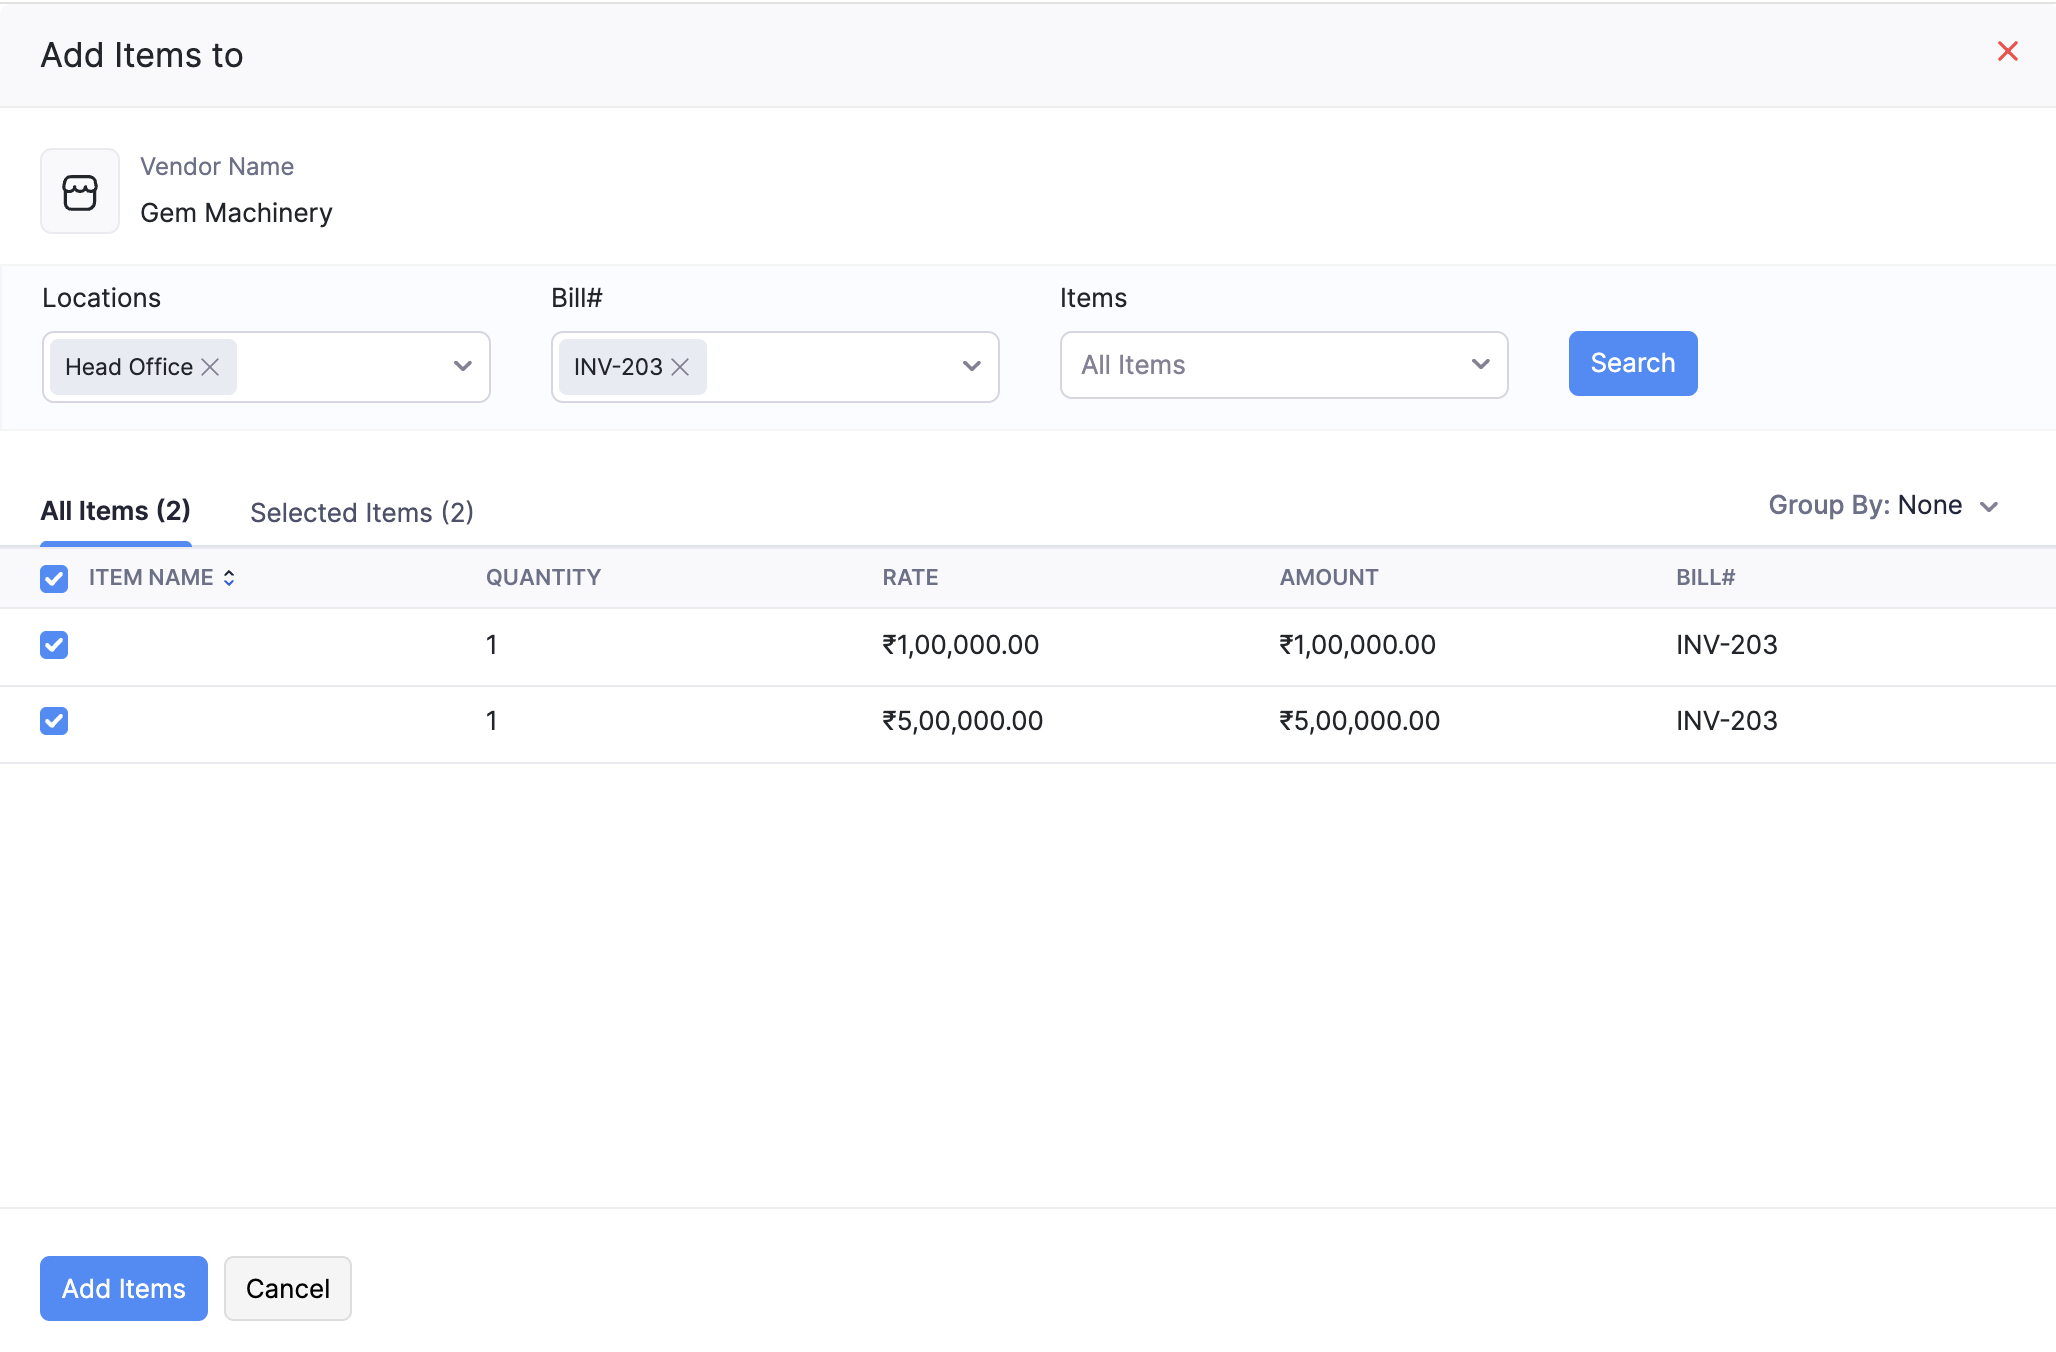
- Fill in the following details:
| Fields | Description |
|---|---|
| Location | Select the location of the bills from which you want to add line items. |
| Bill# | Select the bills from which you want to add line items. |
| Items | Select the items you want to add. If you don’t select any items, all line items from the selected bills are displayed. |
- Click Search. The selected items from the selected bills appear under the All Items tab.
- Select the items you want to include in the bill of entry. The selected items appear under the Selected Items tab.
- Click Group By and select Bill # to group the items by their bill.
- Click Add Items. The selected items are added to the bill of entry.
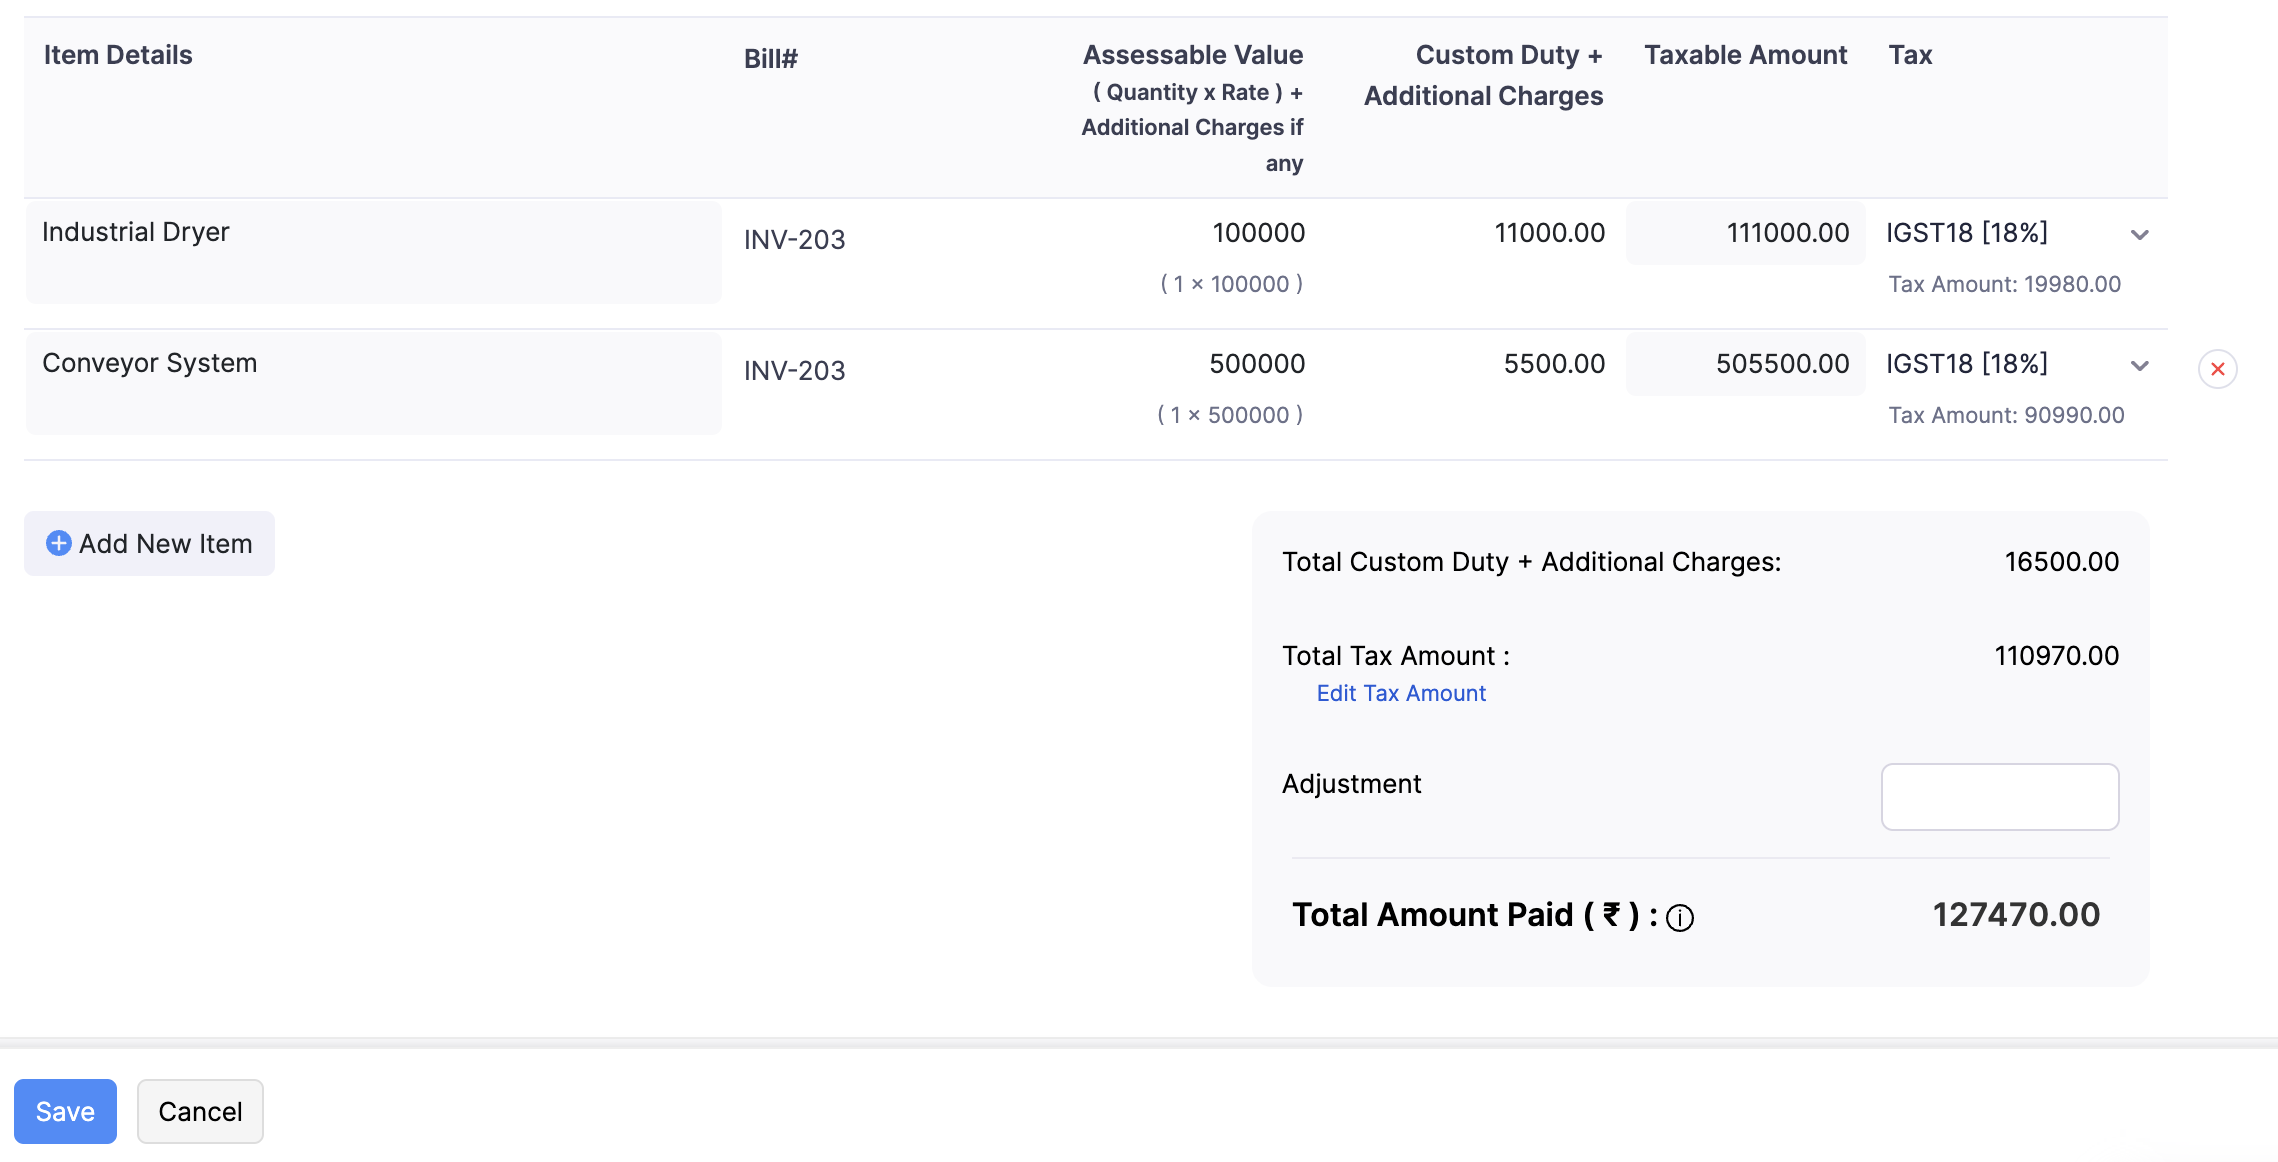
- Fill in the following details for each item:
| Fields | Description |
|---|---|
| Item Details | The line item added to the bill of entry. |
| Bill# | The bill from which the line item was added. |
| Assessable Value | The item amount fetched from the associated bill, calculated as Quantity × Rate. You can add additional charges to this field. |
| Custom Duty + Additional Charges | Enter the custom duty and other charges incurred for the line item. |
| Taxable Amount | The sum of the Assessable Value and Custom Duty + Additional Charges. |
| Tax | Select the tax applicable to the line item. |
- To add a line item, click + Add New Item below the item table.
- Click Save.
The bill of entry is saved and its details will appear on the respective bill’s details page.
You can also create bills of entry from a bill’s Details page. This is helpful when you want to record a bill of entry for a single bill.
 Yes
Yes