Payments Received
Once you record payment for an invoice, it will be saved in the Payments Received tab.
View Payments Received
You can view the payments received for your invoices in two ways:
- Go to Sales > Invoices and select an invoice for which you have recorded payment.
- Click the Payments Received tab in the right side of the page.

Alternatively, you can:
- Go to the Sales > Payments Received.
- Select the payment received for the invoice.
Edit Payments Received
You can change the amount or other details of the payment that you have recorded for an invoice. Here’s how:
- Go to Sales > Invoices and select an invoice for which you have recorded payment.
- Click the Payments Received tab in the right side of the page.
- Hover over the payment received and click the Pencil icon next to it.
- Make the changes and click Save.

You can also edit the payments received directly by going to Sales > Payments Received.
Delete Payments Received
To delete the payment received for any invoice:
- Go to Sales > Invoices and select an invoice which is in the Paid status.
- Click the Payments Received tab in the invoice details page.
- Hover over the payment received and click the Delete icon next to it.

You can also delete the Payments Received directly by going to Sales > Payments Received.
Payments Received Preferences
In the Payments Received module, you can add additional fields from the ones that already exist. These fields are called Custom Fields.
- Go to Settings on the top right corner of the page.
- Select Payments Received under Sales.

Additional Fields in Payments Received
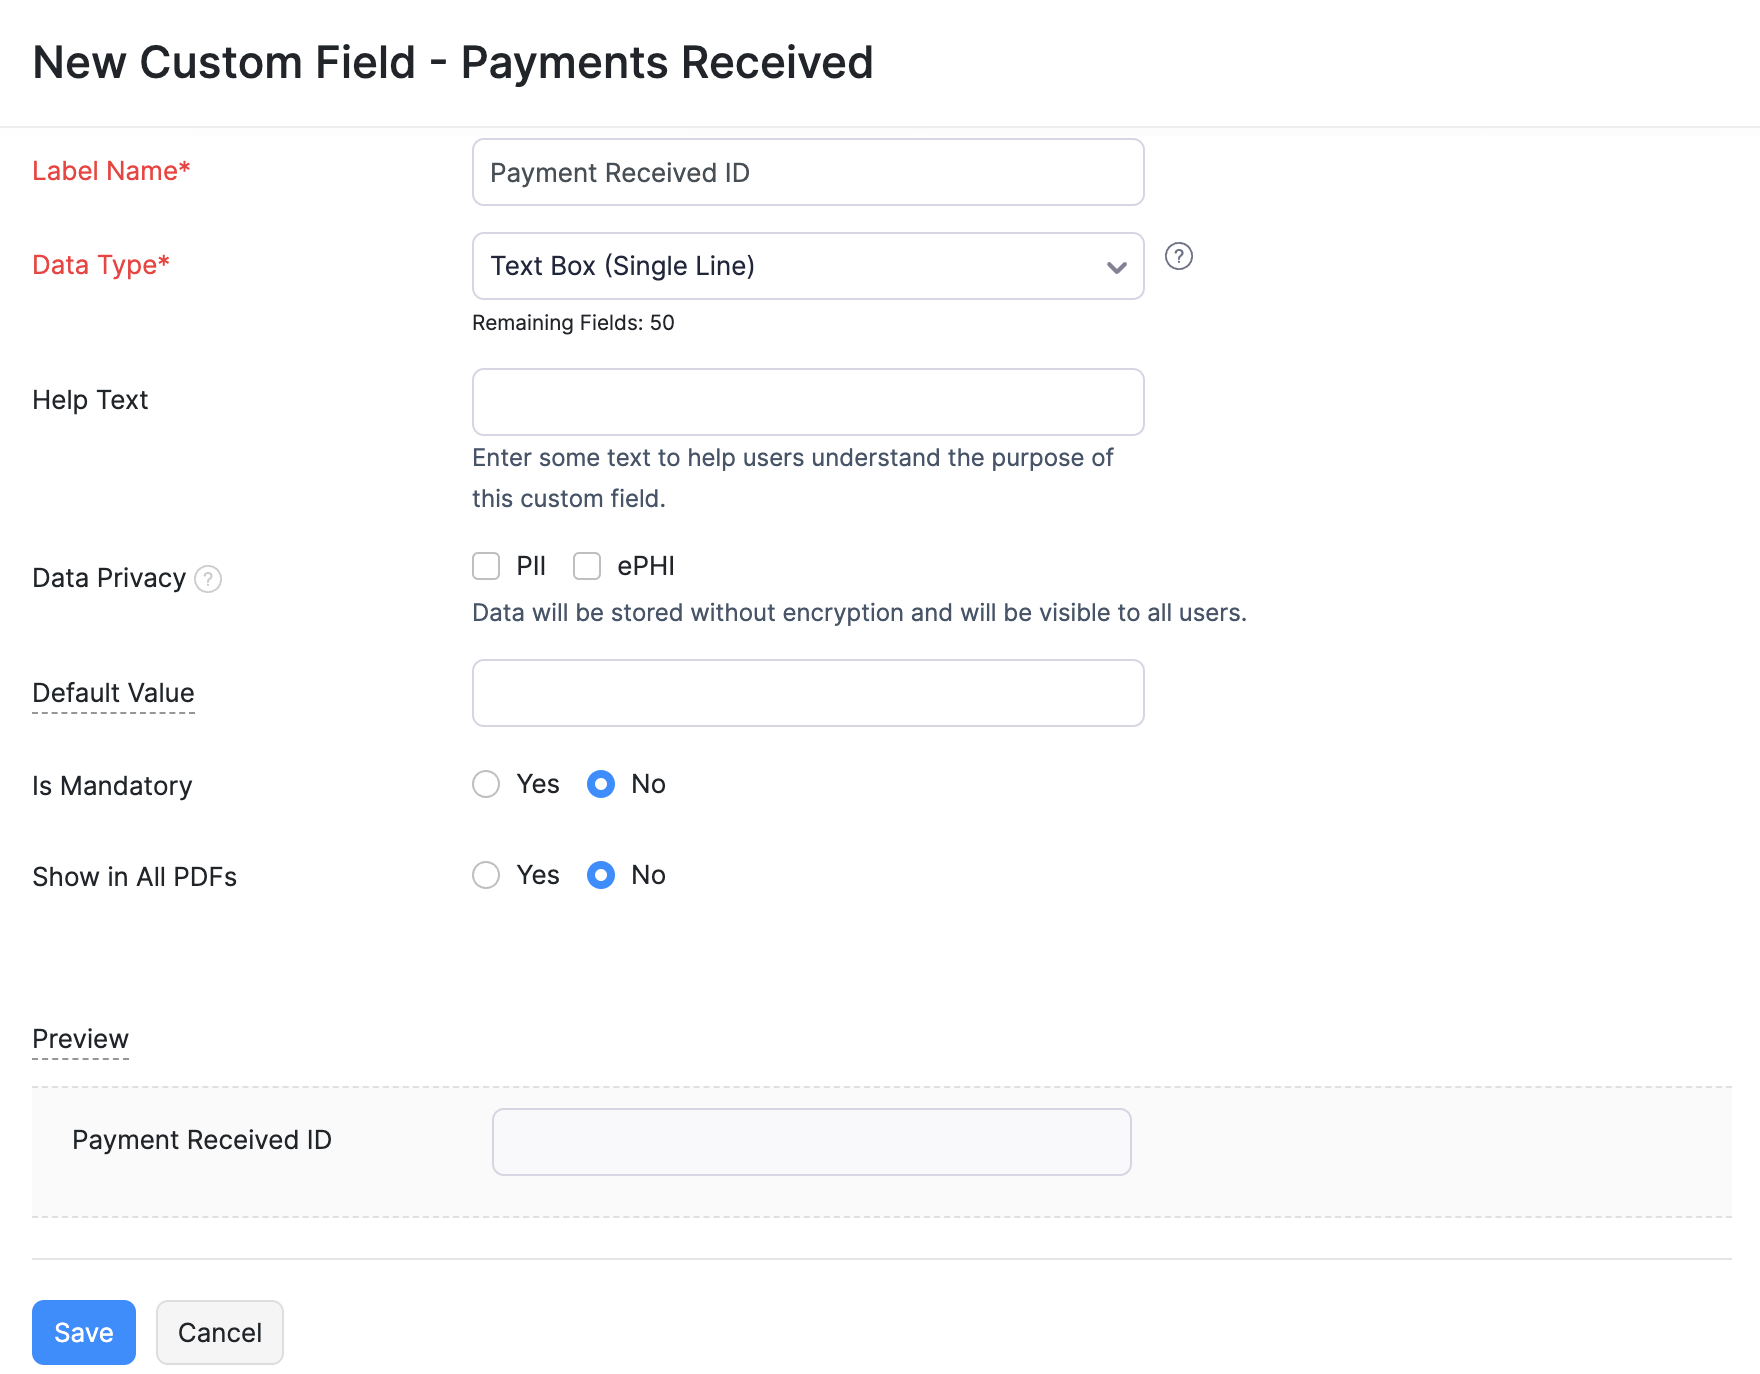
To add a custom field:
- Go to Settings on the top right corner of the page.
- Select Payments Received under Sales.
- Switch to the Field Customization tab.
- Click + New Custom Field on the top right corner of the page.
- Fill in the required details.
| Fields | Description |
|---|---|
| Label name | Enter a name for your custom field. |
| Data Type | Select the appropriate data type for your custom field. |
| Is this PII? | If the field is a Personally Identifiable Information (PII), then select the appropriate method to store it. |
| Is Mandatory | Select this option if the custom field is mandatory. |
| Show in all PDF | Select this option if you want the field to be displayed in your transaction PDFs. |
- Click Save.

You can perform various functions on the custom field by hovering over it and clicking Edit or the drop-down icon.

Next >
Delete Invoice


 Yes
Yes