Custom Domain
If your business has its own domain, you can map it with your Zoho Expense organisation using Custom Domain. This will allow your users to access Zoho Expense with your business’s domain name.
Scenario:
Patricia runs a company named Zylker, and her website’s domain name is https://zylker.com. She uses Custom Domain in Zoho Expense to map her business’s domain. Zylker’s employees can now access Zoho Expense with the custom domain name https://expense.zylker.com instead of https://expense.zoho.com.
Map Your Custom Domain to Zoho Expense
Prerequisites:
- A paid plan of Zoho Expense.
- A domain that you own.
To map a custom domain with Zoho Expense, add it in Zoho Expense and use the generated CNAME to create a CNAME record on your domain name provider’s website (for example, GoDaddy). Then, submit the domain to Zoho Expense for verification.
Insights:
- A Canonical Name (CNAME) is a type of DNS (Domain Name System) record that allows you to create an alias for an existing domain name.
- A CNAME record is used to map one domain to another.
To add your domain in Zoho Expense:
- Go to Admin View on the left sidebar.
- Click Settings on the left sidebar.
(OR)
Click Settings in the top right corner of the page. - Click Branding under Organisation.
- Click the Custom Domain tab.
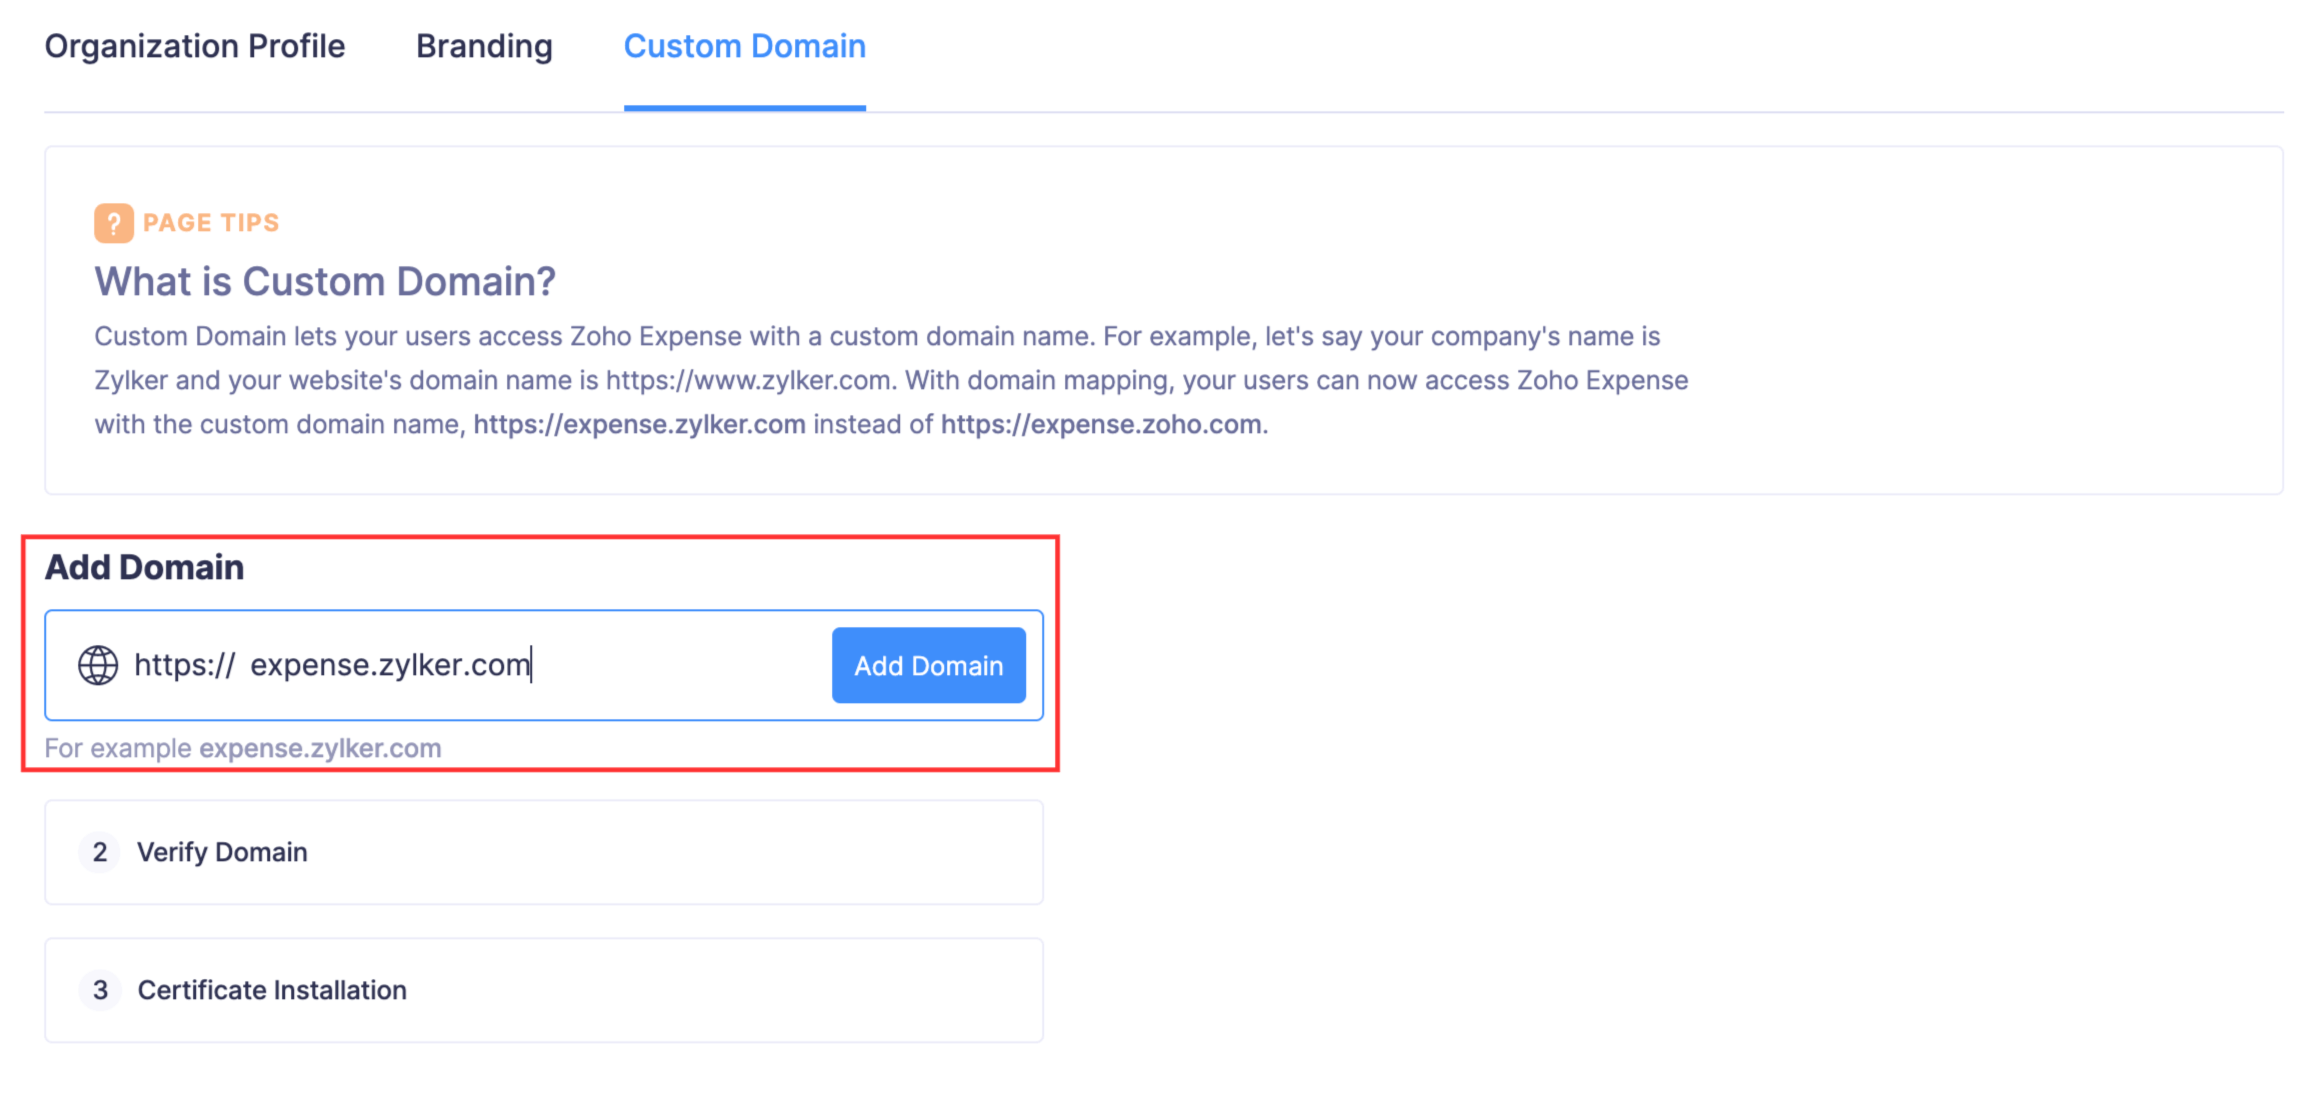
- Enter the name of your custom domain (For example, expense.zylker.com) and click Add Domain.

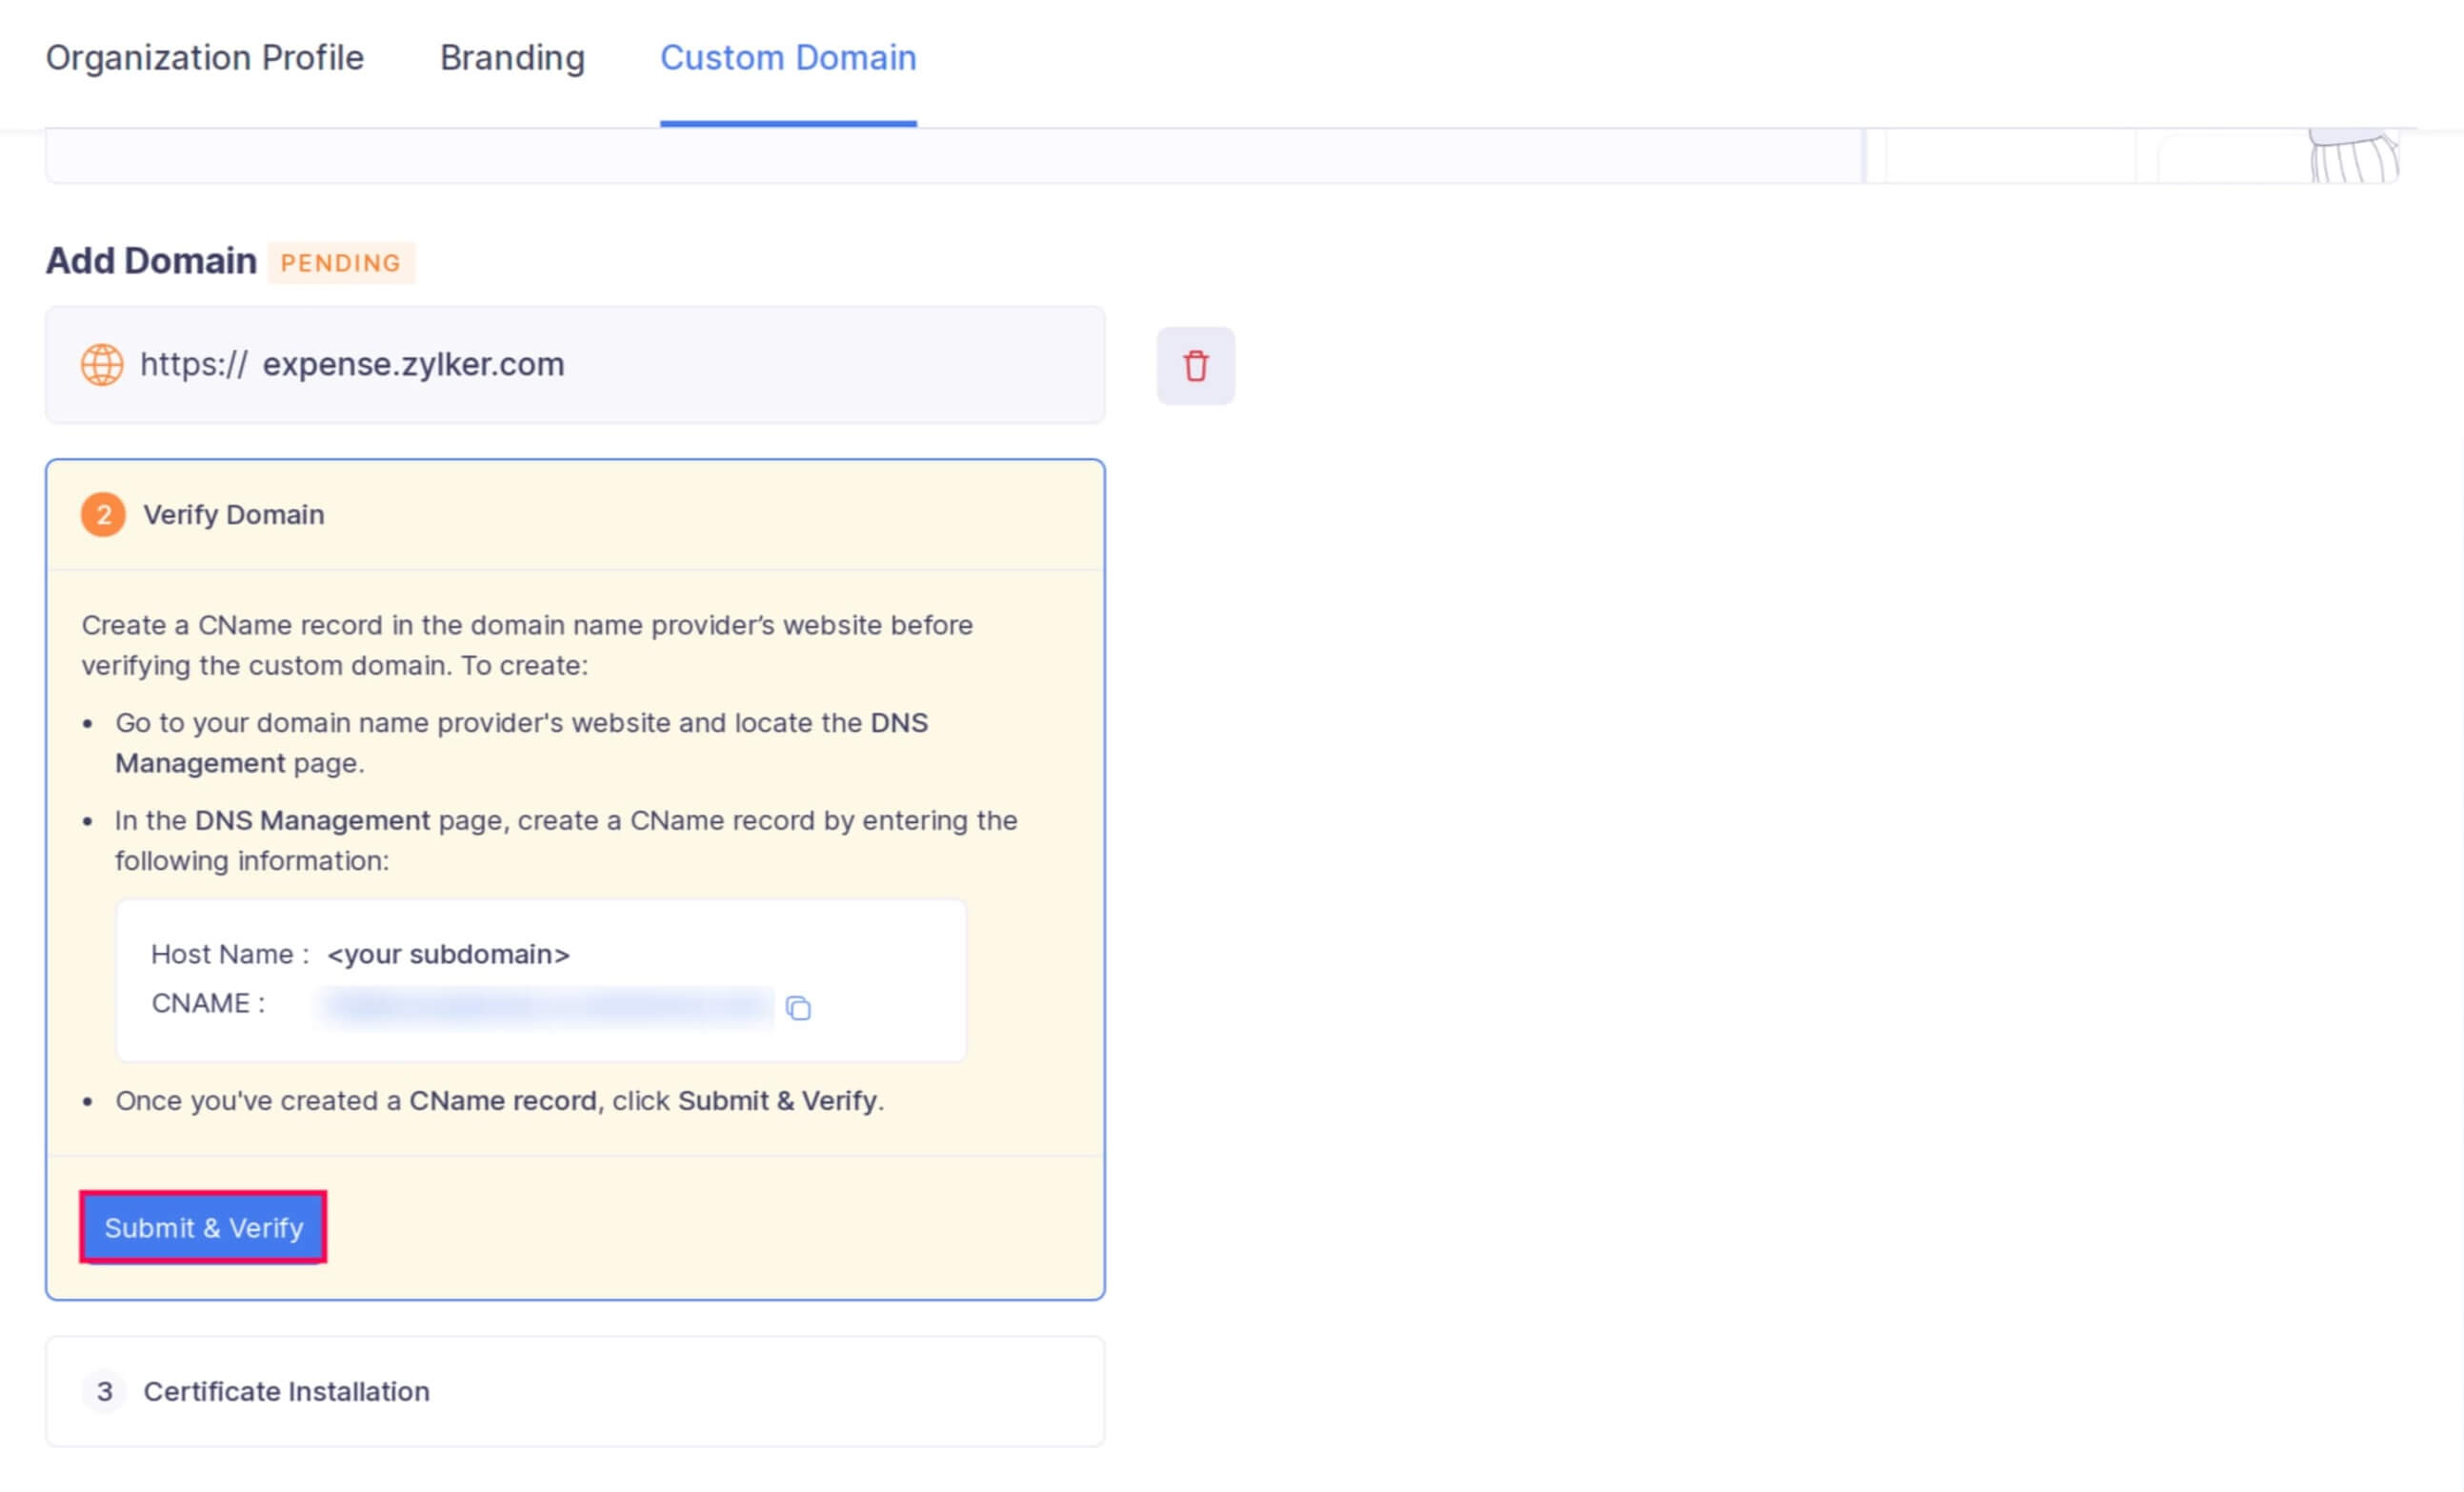
- Copy the CNAME by clicking the Copy button next to CNAME.
- Go to the DNS Settings page of your domain name provider’s website to create a CNAME record.
- Paste the CNAME provided by Zoho Expense and enter your host name to create a CNAME record.
Insight:
The host name is usually your subdomain name. For example, if your custom domain name is expense.zylker.com, your domain name is zylker.com and your subdomain name is expense.
- Once you’ve created a CNAME record on your domain name provider’s website, click Submit & Verify in Zoho Expense. Zoho Expense will verify your domain.

You won’t be able to proceed until we verify that your CNAME record reflects on the DNS server. A newly created CNAME record could take a while to reflect on the DNS server. This depends on your domain name provider’s TTL (Time to Live) settings. You can contact your domain name provider’s support if you need further assistance with adding a CNAME record.
Certificate Installation
SSL certificates help create a secure connection between a web server and a user’s web browser. Having an SSL certificate installed for your custom domain will prevent access errors for your users.
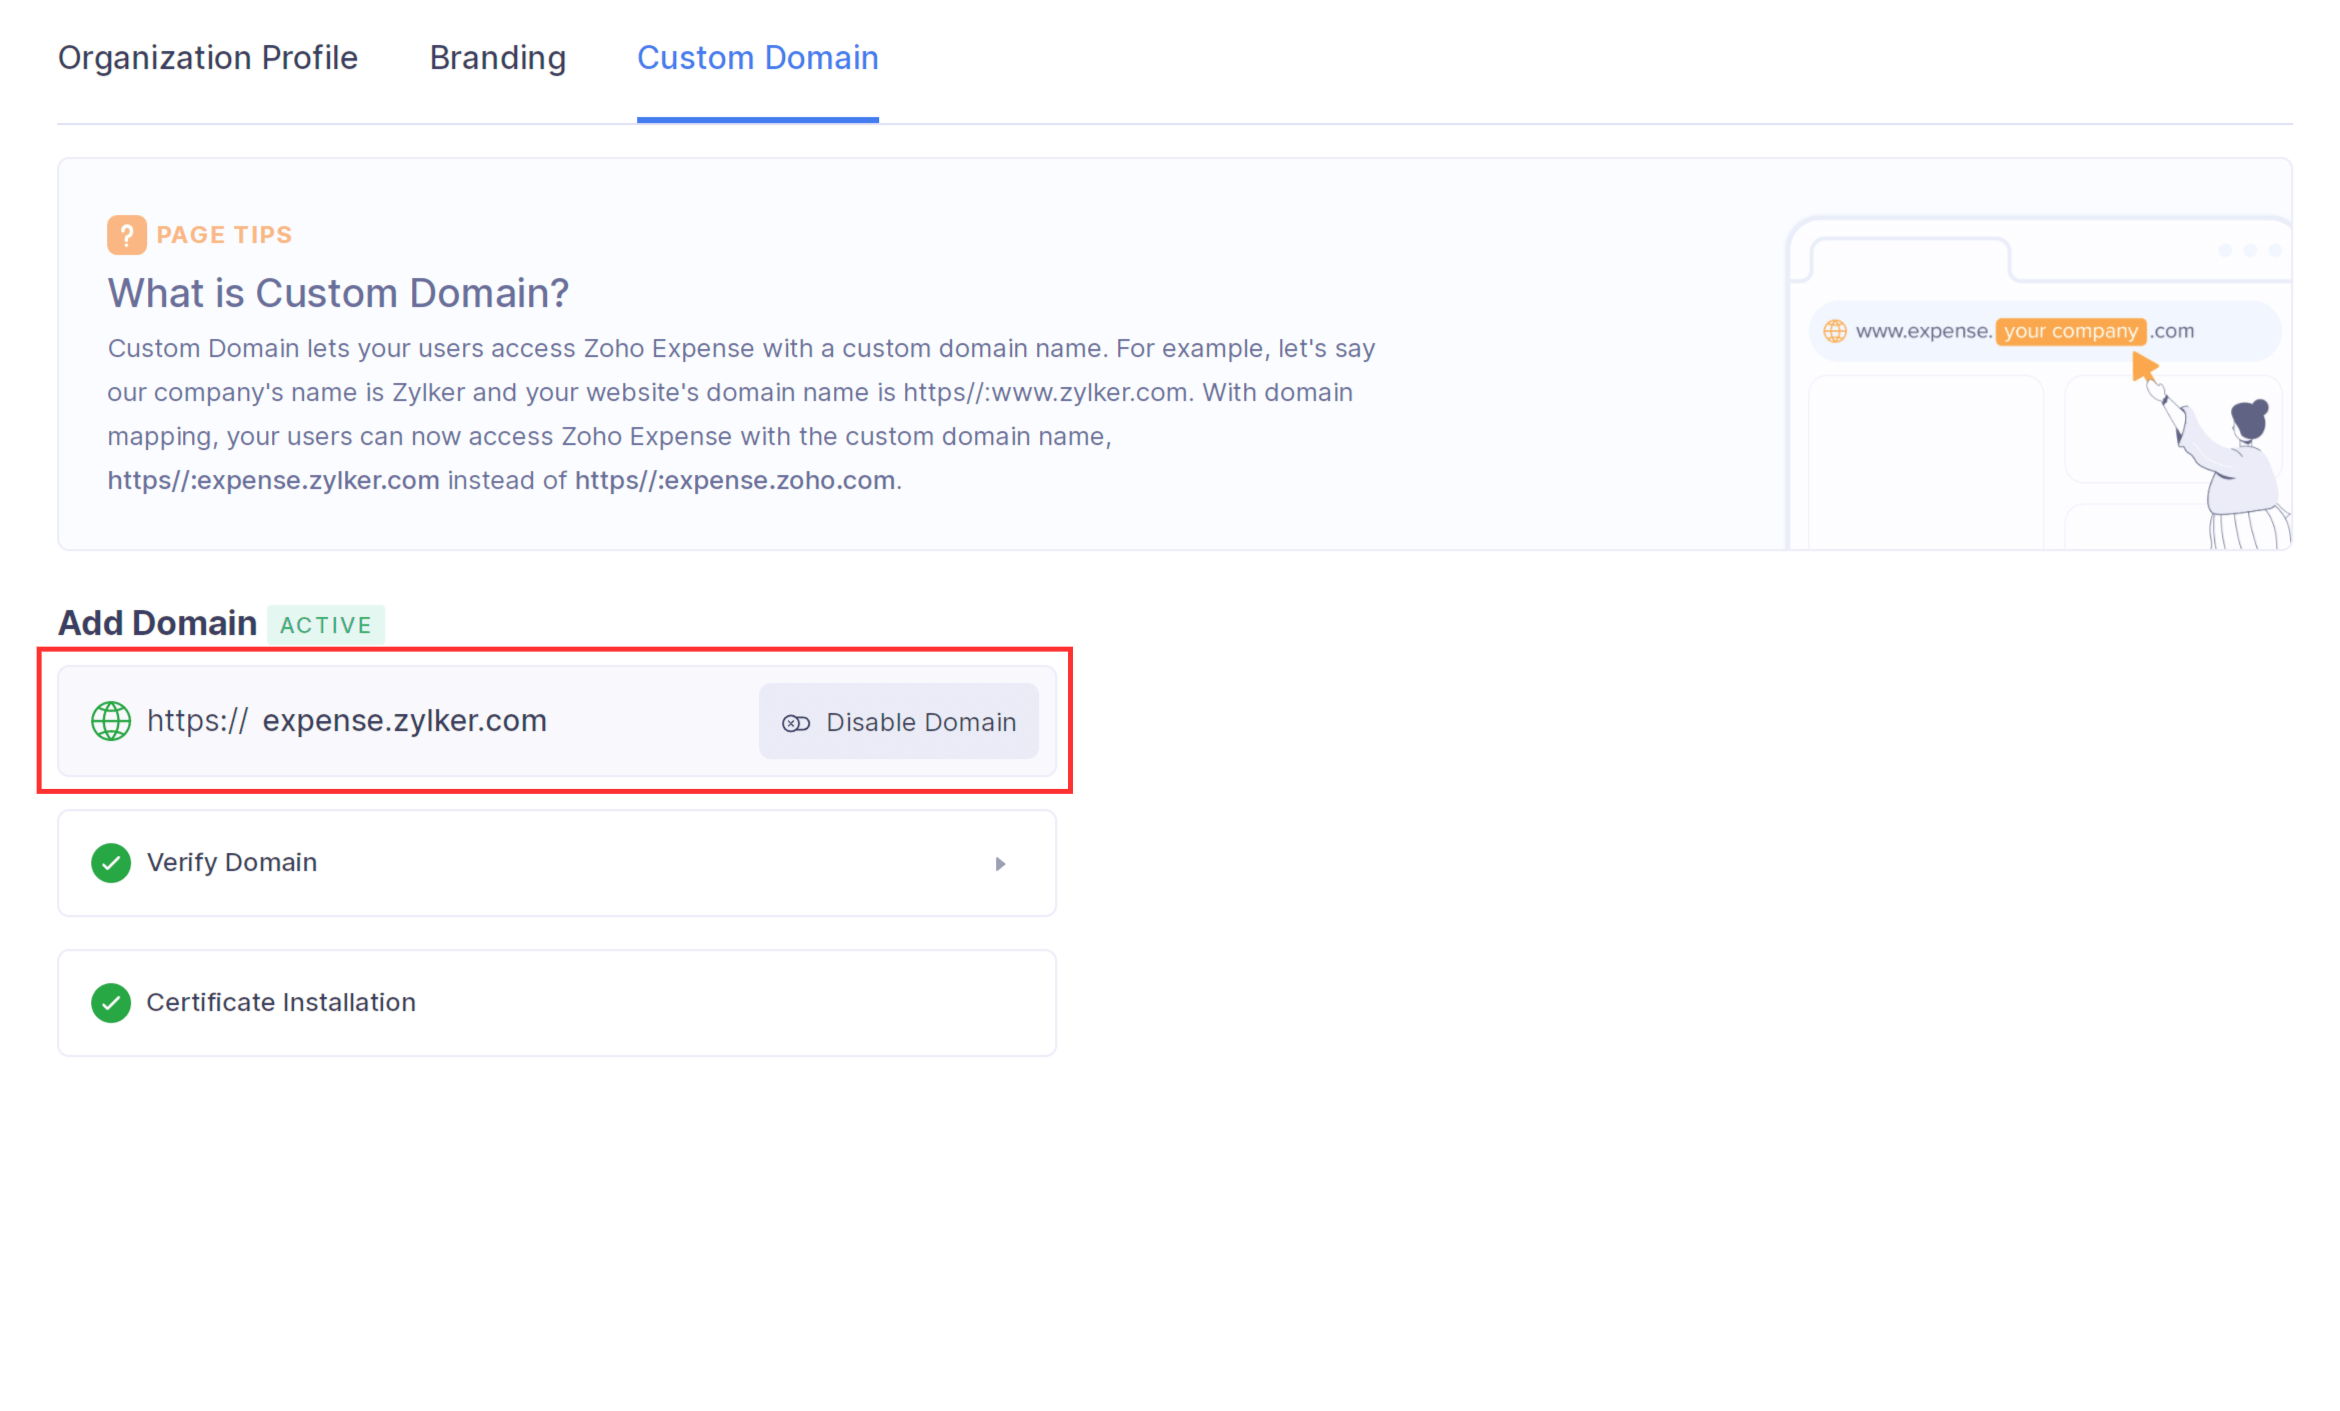
As soon as your domain name is verified, we’ll start installing a multi-domain SSL certificate for your custom domain. This usually takes around 3-5 business days. Once this is done, you can access Zoho Expense with your custom domain name. Zoho Expense will notify you via email when the SSL certificate has been installed.
Disable Custom Domain
You can choose to disable your custom domain temporarily. To disable:
- Go to Admin View on the left sidebar.
- Click Settings on the left sidebar.
(OR)
Click Settings in the top right corner of the page. - Click Branding under Organisation.
- Click the Custom Domain tab.
- Click Disable Domain.

- Read through the pop-up that appears, and then check Yes, I want to disable my custom domain.
- Click Disable.
Your custom domain will be disabled and your customers will have to access Zoho Expense from the default domain, which is https://expense.zoho.com/. Any Zoho Expense links that have the custom domain will be redirected to the default Zoho Expense domain.
Note:
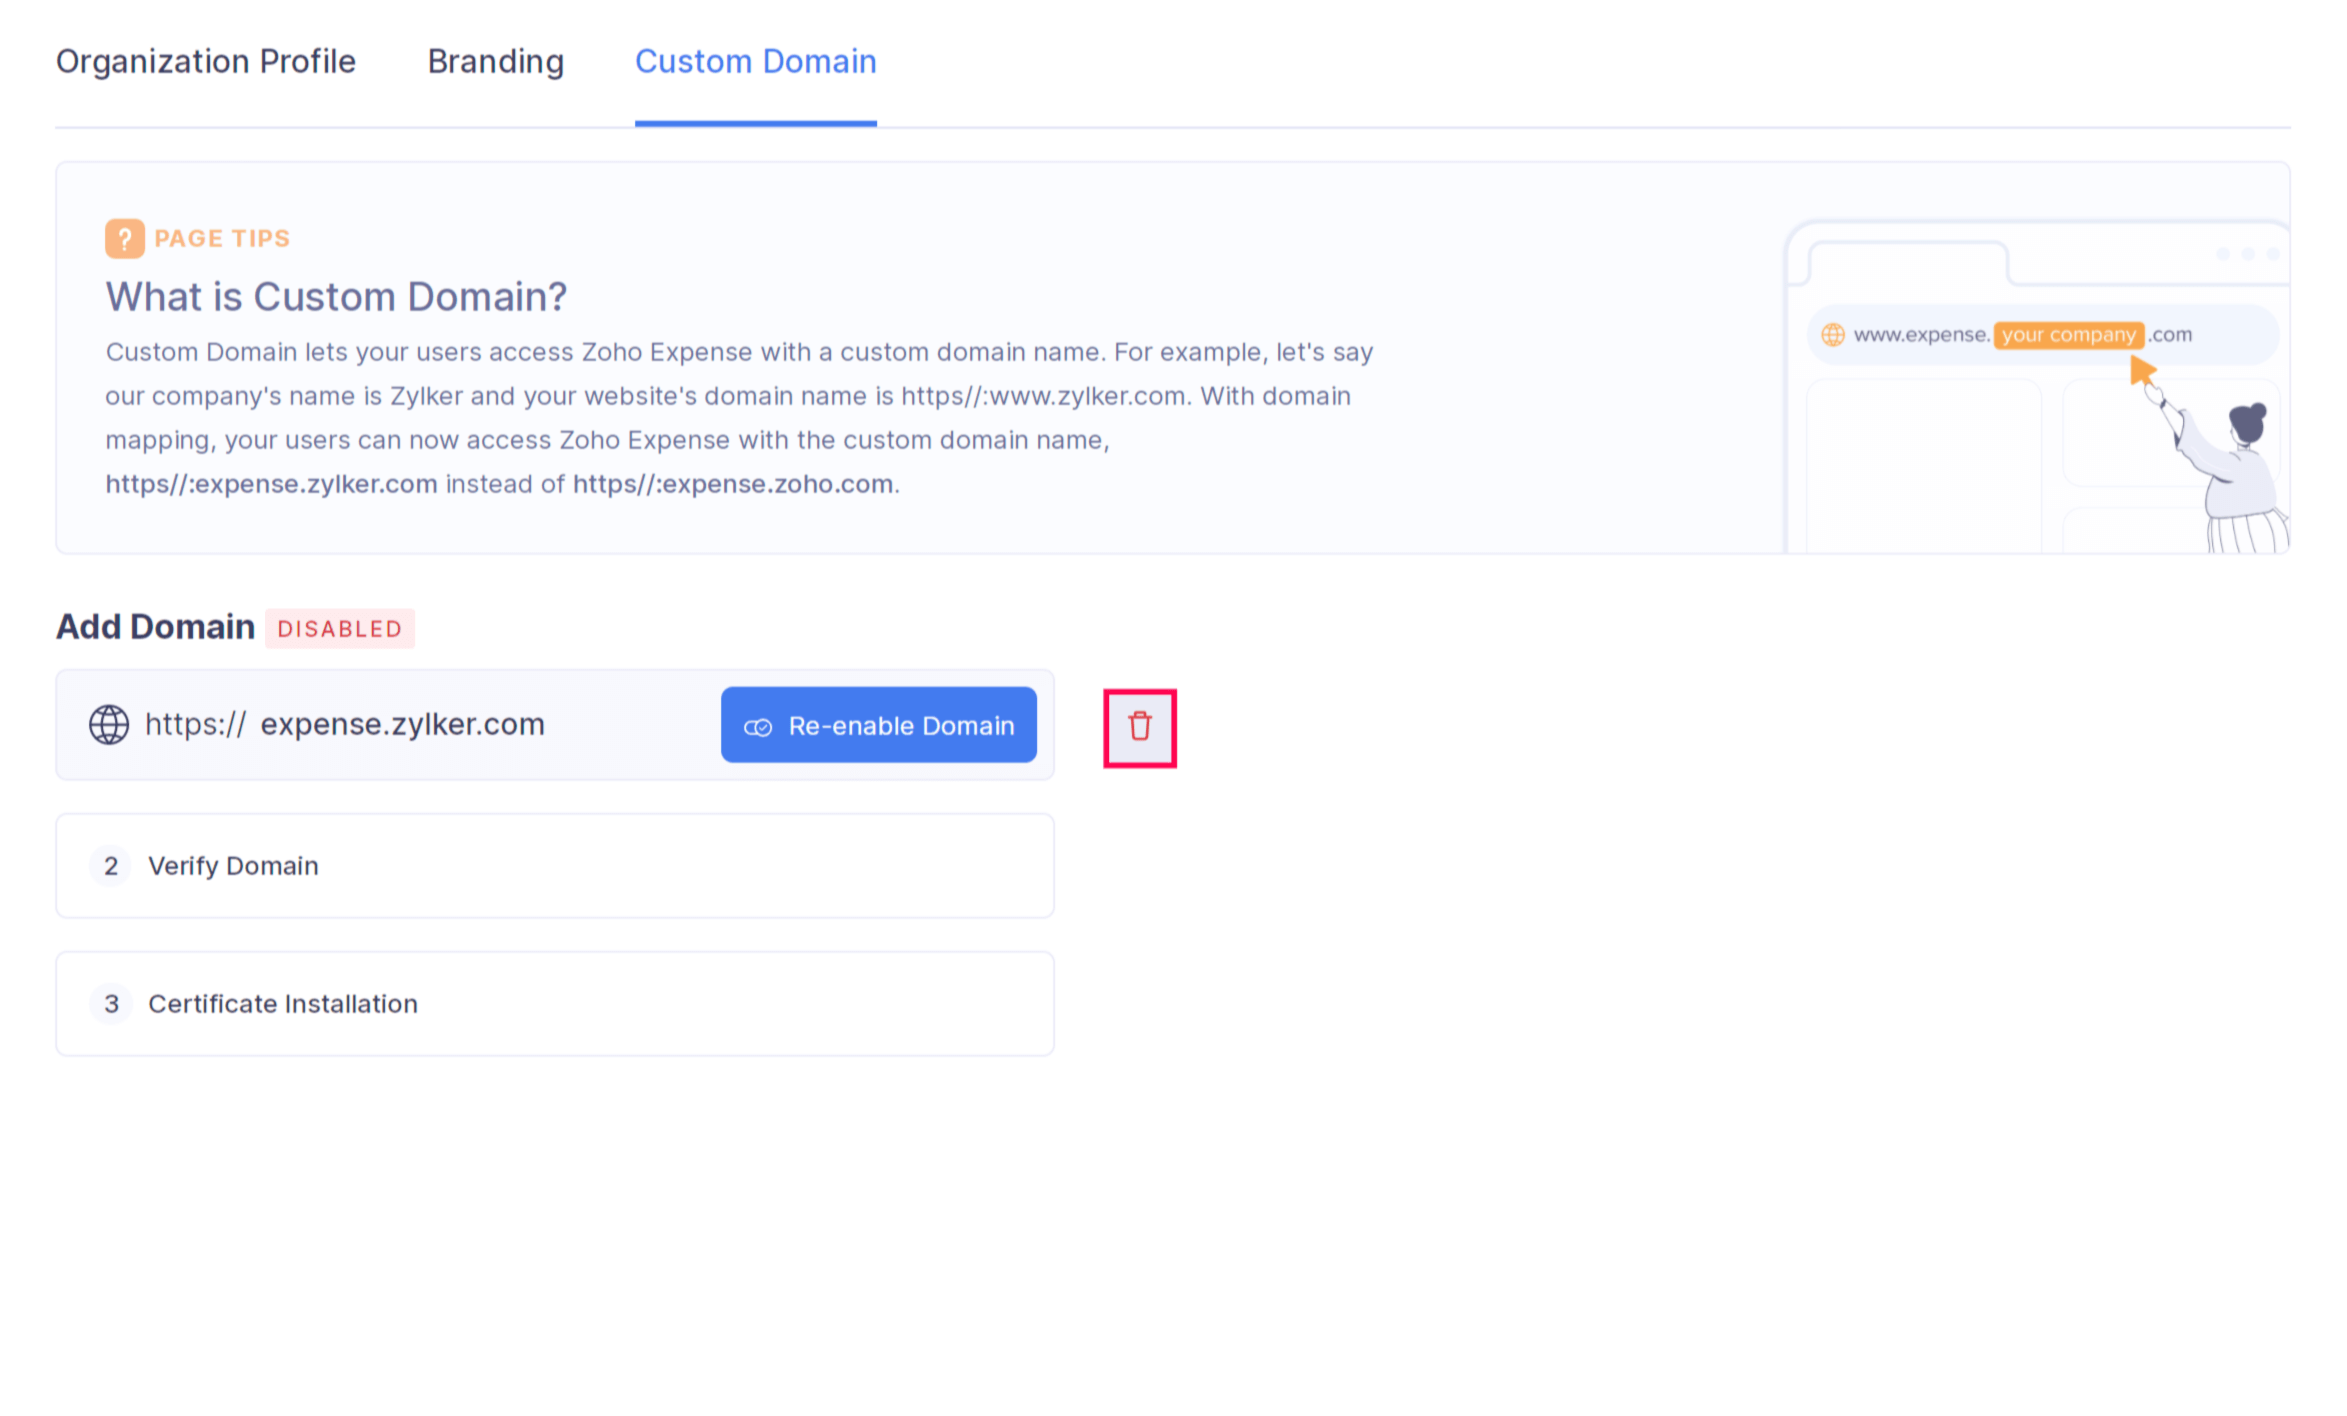
A disabled custom domain can be enabled again by clicking Re-enable Domain.
Delete or Change Your Custom Domain
You can delete your custom domain if you want to switch back to the default Zoho Expense domain permanently. Also, if you would like to change to a different domain, you can delete your custom domain and start the domain mapping process again.
Prerequisites:
- Your custom domain must be disabled.
- The CNAME record must be deleted from your domain name provider’s website.
To delete your custom domain:
- Go to Admin View on the left sidebar.
- Click Settings on the left sidebar.
(OR)
Click Settings in the top right corner of the page. - Click Branding under Organisation.
- Click the Custom Domain tab.
- Click Disable Domain.
- Read through the pop-up that appears, and then check Yes, I want to disable my custom domain.
- Click the Delete button after disabling the custom domain.

- Read through the pop-up and then check Yes, I want to delete my custom domain permanently.
- Click Delete.
Now, your custom domain will be deleted permanently. Your users will no longer be able to access Zoho Expense with your custom domain name and will have to use the default Zoho Expense domain, which is https://expense.zoho.com/.
Once you’ve deleted your custom domain, you can start the mapping process again and associate it with a different domain name if you want to do so.


 Yes
Yes