
Managing Webhooks
Once you’ve configured your webhook, you can perform the following actions to manage your webhooks and handle event notifications.
View Signing Key
A signing key in webhooks is used to verify the authenticity of the request and ensure it hasn’t been tampered with during transmission.
To view the signing key:
- Go to Zoho Payments, click Settings and select Developer Space.
- Switch to the Webhooks tab and click the More icon near the webhook.
- Click View Signing Key.
You can now view the signing key associated with your Zoho Payments account.
Regenerate Signing Key
If the original signing key is compromised or leaked, you can regenerate a new key to maintain security and ensure secure verification of webhook events.
To regenerate:
- Go to Settings and select Developer Space.
- Switch to the Webhooks tab and click the More icon near the webhook.
- Select Regenerate Key.
Ensure the updated key is stored securely for continued verification of webhook events.
View Webhook Logs
Webhook logs lets you you track all activity and view data related to your webhooks. This makes it easier to monitor your setup and quickly fix any issues.
To view webhook logs:
- Select a webhook.
- Switch between tabs to view succeeded and failed events.
- Click on a specific log to view the log details on the right.
- Scroll down to view the Response Message and the Request Data to verify the exact event details sent and the endpoint’s response.
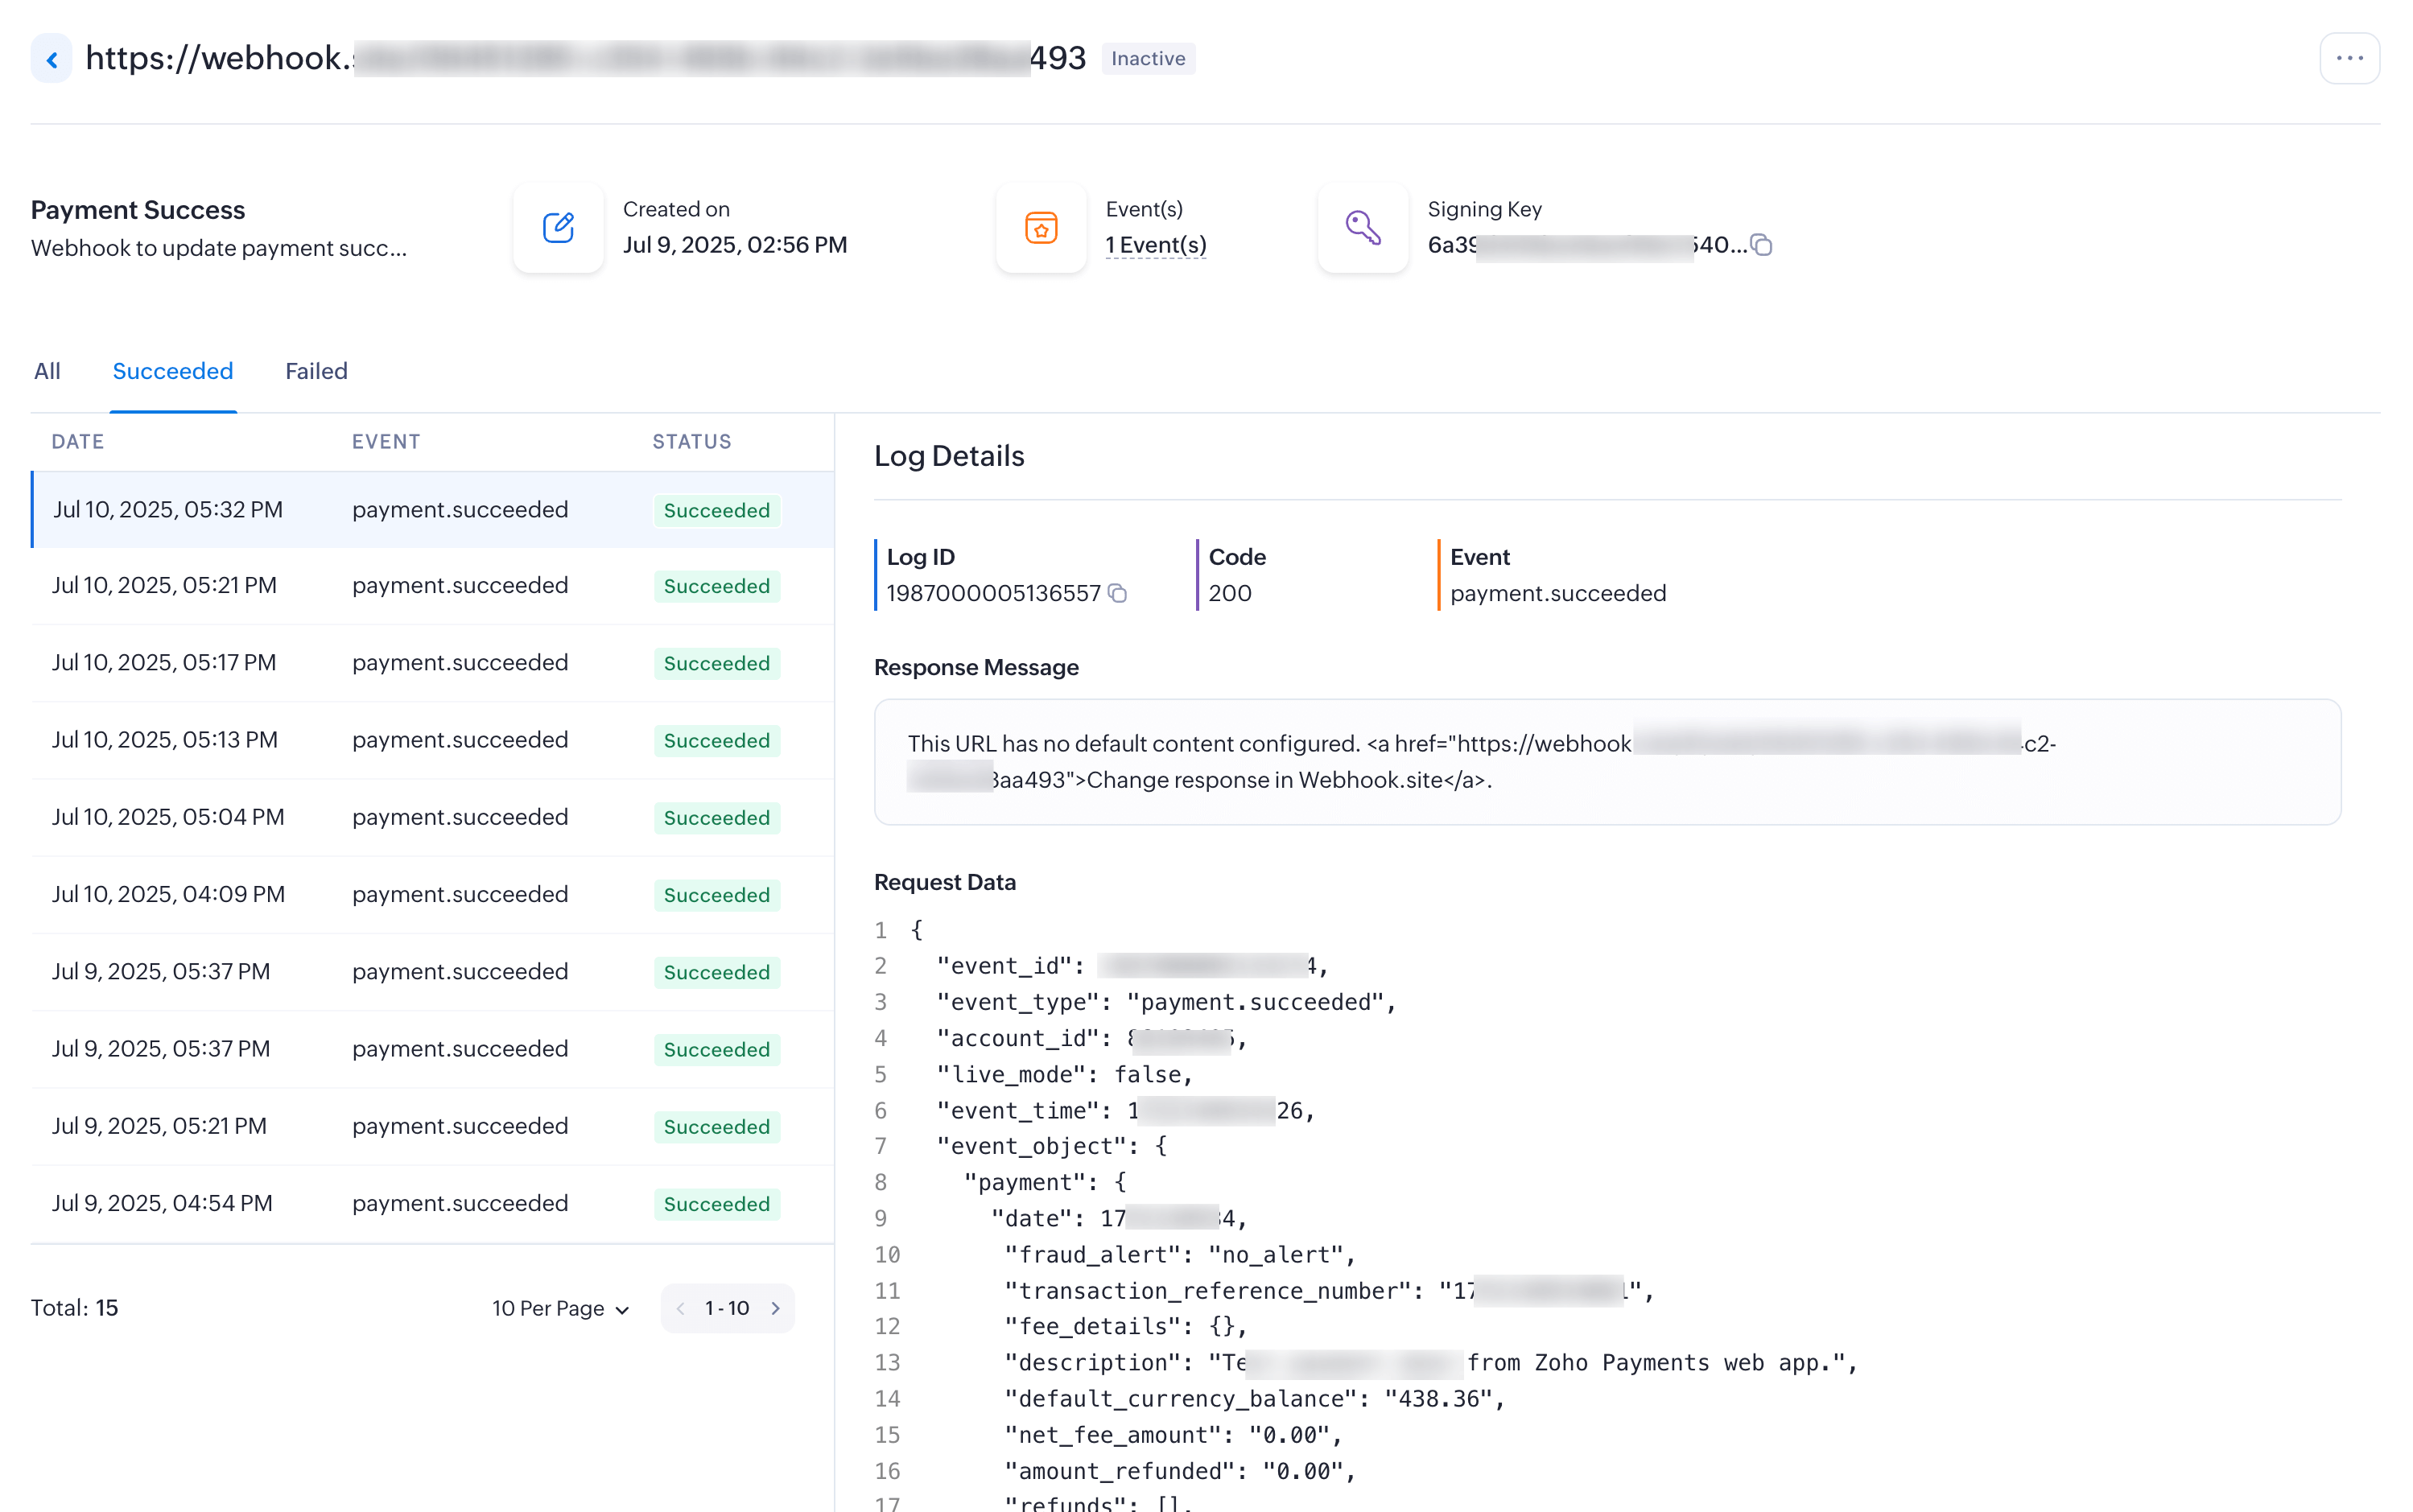
Insight: If an event has failed, you can use the error code to identify and resolve the issue by referring to the errors section.
You can access all information related to webhook events, including when the webhook was created, number of configured events, signing key, detailed logs, response message, and request data.
Enable or Disable Webhook
Enable or disable the webhook to start or temporarily pause event notifications for your application. This is useful for troubleshooting or resolving temporary issues on your end while listening to events.
To do this:
- Go to Settings and select Developer Space.
- Switch to the Webhooks tab and click the More icon near the webhook.
- Click Enable Endpoint or Disable Endpoint.
Once disabled, the webhook will stop sending event notifications. If you want to receive notifications again for the configured events, you can enable the endpoint at any time.
Edit or Delete Webhook
You can update the configured events, modify the webhook’s name and description, or permanently remove the webhook from the application by deleting it.
To do this:
- Go to Settings and select Developer Space.
- Click the Edit icon to modify the webhook URL or webhook.
or - Click the More icon near the webhook and select Delete.
Your webhook will be deleted, and you will no longer be able to authenticate requests using the deleted webhook.
 Walkthrough of Zoho Payments personalized to your business needs