DKIM - DomainKeys Identified Mail
DKIM is an authentication method, which uses email encryption with public/ private keys, to validate whether the emails are generated from the authorized servers, recognized and configured by the administrators of the sending domains. This authentication method enables secure email communication and prevents spam.
Why should you configure DKIM for your domain?
Spammers often send out emails that claim to be from authentic email senders. These emails are mostly sent with the intent to make the recipients view the email, or sometimes to collect sensitive information (passwords, email addresses etc.) from the recipients under the pretext of being a legitimate sender. Two methods that are commonly used by spammers include email spoofing and backscattering.
What is email spoofing and how DKIM prevents it
Email spoofing is a cheating method used by spammers to make emails appear to be sent from a legitimate domain/ email address, that does not belong to them. This is done by forging the email headers, to make it seem legit so that the recipients trust and open the emails.
Spammers follow this approach as it makes more people view the email since the sender appears to be authentic. But, sometimes, it may pose serious consequences if they try to retrieve sensitive information from the user. Spoofed emails can be detected and avoided by configuring SPF and DKIM. If DKIM is configured, the domain name identity associated with each message is validated.
If this DKIM validation fails, such emails are quarantined or rejected based on the conditions set by you when DKIM validation fails.
What is email backscattering and how DKIM prevents it
Spammers spoof a domain name and send emails using the tampered email address. If the recipient domain rejects the email, it will send bounce messages to the domain that was spoofed. Such bounce messages which a user receives for emails that they never sent are called Email Backscatter.
Consider a case where a spammer has spoofed your email address and sent spam emails to another domain. When these spam emails are sent to invalid email addresses, the recipient domain sends a bounce message to the spoofed domain. This bounce message, instead of being sent to the spammer will be sent to the spoofed domain from which the user is claiming to send the email. The spoofed domain will also be blocked by the recipient domain. If DKIM is configured, the authenticity of your domain can be validated and your domain blocking can be avoided. In case you're on the receiving end of these spam emails, DKIM can help detect the authenticity of the emails, and those emails that are not genuine will not be delivered to your mailbox.
Email spoofing and backscattering, two methods that are commonly used by spammers, can be prevented to a certain extent by configuring SPF and DKIM for your domain.
How DKIM authentication works in Zoho Mail
In the DKIM process, a public key is published as a TXT record for the domain's DNS Manager(registrar of the domain or DNS Provider). Every outgoing email includes a unique signature generated using the private key for the particular domain. The receiving email server uses this private-public key combination to validate the email source. If there is a validation failure, the recipient server may reject the email or classify it as Spam/ Forged email, based on the server behavior.
Enabling and using DKIM for your domain, ensures that valid emails sent using Zoho, are not classified as Spam at the recipient end.
What is a DKIM selector and how it works
The selector is used to identify the public DKIM Key details of the Domain. It is an attribute for the DKIM Signature and is included in the DKIM header of the email. You can use multiple selectors for a single domain in cases where you need to provide Special Signatory Controls for different sets of users.
Once you have added a selector and verified the selector, you need to make it as default and enable it for the domain. Once enabled, all the outgoing emails based on the domain will be signed by the default selector, unless the users have been associated with a different selector in the Users section.
How to add a DKIM signature for your domain in Zoho Mail
You can enable DKIM for your domain from Zoho Mail's control panel, after creating the required text record in your domain's DNS manager. The DKIM configuration has three major steps:
- Generate unique public DKIM Key-value using a default selector in Zoho Mail.
- Create a TXT record in your Domain's DNS Manager (Domain registrar/ DNS Provider).
- Validate the selector and Enable DKIM in Zoho Mail.
Step 1: Generate a unique DKIM key
- Log in to Zoho Mail Admin Console as administrator or super administrator.
- Go to Domains from the left menu, and choose the domain for which you want to configure DKIM.
- In the Email Configuration tab, select DKIM.
- Click on Add to add a new selector for the domain.
- Provide the selector name, for the domain to be used with Zoho Mail. Ex: zoho
- Select key length as 1024 bits or 2048 bits.
- Click Add. The selector will be added and a TXT record will be generated and displayed across the added selector.
- You can copy the text in the TXT value field.
- You need to create a TXT record with this value in the DNS Manager before you click Verify.
- You can also share the DKIM configuration instructions to your DNS admin to make the configurations on your behalf.
Step 2: Create a DKIM TXT record in your DNS manager
- Login to the domain's DNS Manager where your domain's name server is pointed.
- Create a TXT record in your DNS with the title as <selector>._domainkey.<yourdomainname.com>
Ex: zoho._domainkey.zylker.org should be the name of the TXT record if the selector you choose is zoho and the domain name is zylker.org. Replace the text with your custom values without the brackets.
If your DNS is hosted with GoDaddy/ WIX/ Squarespace/ Namecheap etc, provide the TXT record name as zoho._domainkey (These providers append the domain name automatically) - In the TXT record value, paste the entire content you copied from the text field TXT Record Value in Zoho.
- Save the TXT record in the DNS Manager.
- You can check the validity of the DKIM using this DKIM checker.
Note:
- The process to create a TXT record varies based on the DNS Provider/ Manager you use.
- Some DNS providers (like GoDaddy, Wix, Squarespace, Namecheap, etc) append the domain name automatically. In such cases, you can just provide <selector>._domainkey as the TXT record name.
- Certain DNS providers expect the subdomain to be created instead of a TXT record.
Steps to add TXT record in GoDaddy domain manager
- Log in to your GoDaddy DNS Manager. Select the My Account menu and choose Domains.
- Expand Domains and click the Manage DNS button for the domain you want to verify.
- The DNS Manager page will open with information about existing DNS records.
- Scroll down to the Records section and click the Add button to add a DNS record.
- Select TXT from the Record Type drop-down menu.
- In the Host field, enter <selector>._domainkey
- In the TXT Value field, enter the TXT Record value generated in your Zoho Mail control panel.
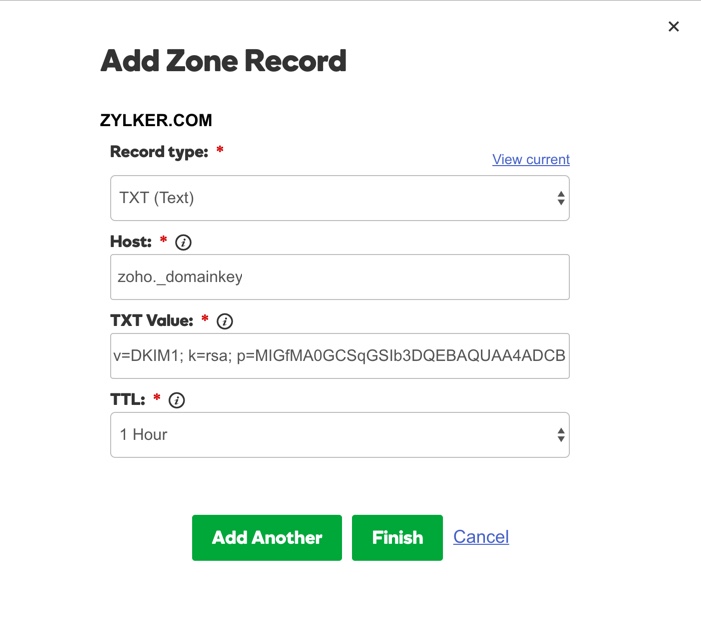
- Click Finish.
Step 3: Enabling DKIM for your domain
- If the Validation of the DKIM is successful on the third-party site, log in to Zoho Mail Admin Console.
- Click Verify across the particular selector. The text record will be modified to the verified state.
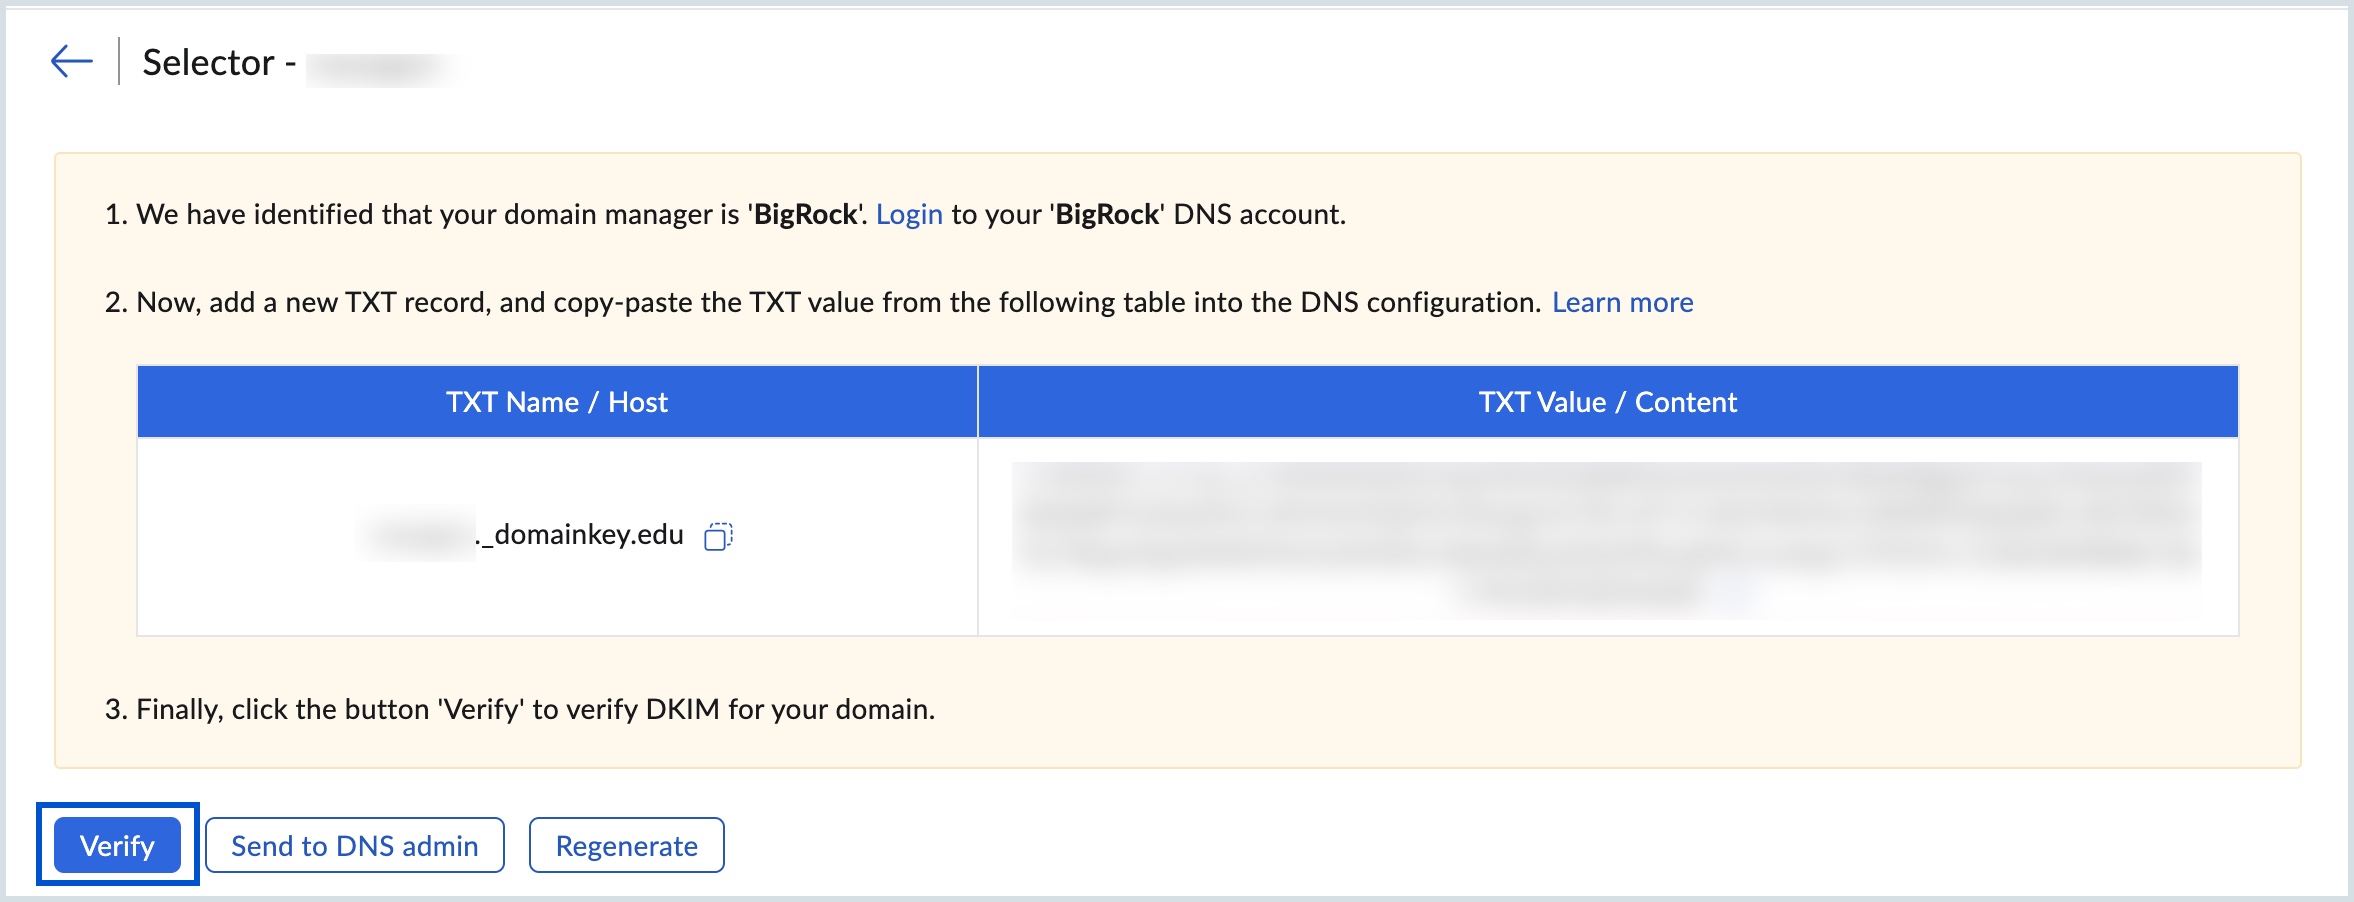
- Once verified, you will see a prompt to Enable DKIM immediately or later. You can enable DKIM immediately to start signing DKIM signatures for the emails from your domain.
- Once you enable, the DKIM signatures will be added to all the emails generated from the domain.
Share DKIM configuration instructions
You can send the DKIM configuration details to the IT team, technical team, domain registrar, or hosting provider to perform the DNS configuration on your behalf.
Follow the below steps to delegate the DKIM configuration steps:
- Log in to Zoho Mail account as Administrator or Super Administrator.
- In the Admin Console, select the Domains section from the left pane.
- All the domains in the organization will be listed.
- Select the domain for which you'd like to delegate/share the DKIM configuration steps.
- Go to Email Configuration, select DKIM.
- Click Send to DNS admin button and enter a valid email address.
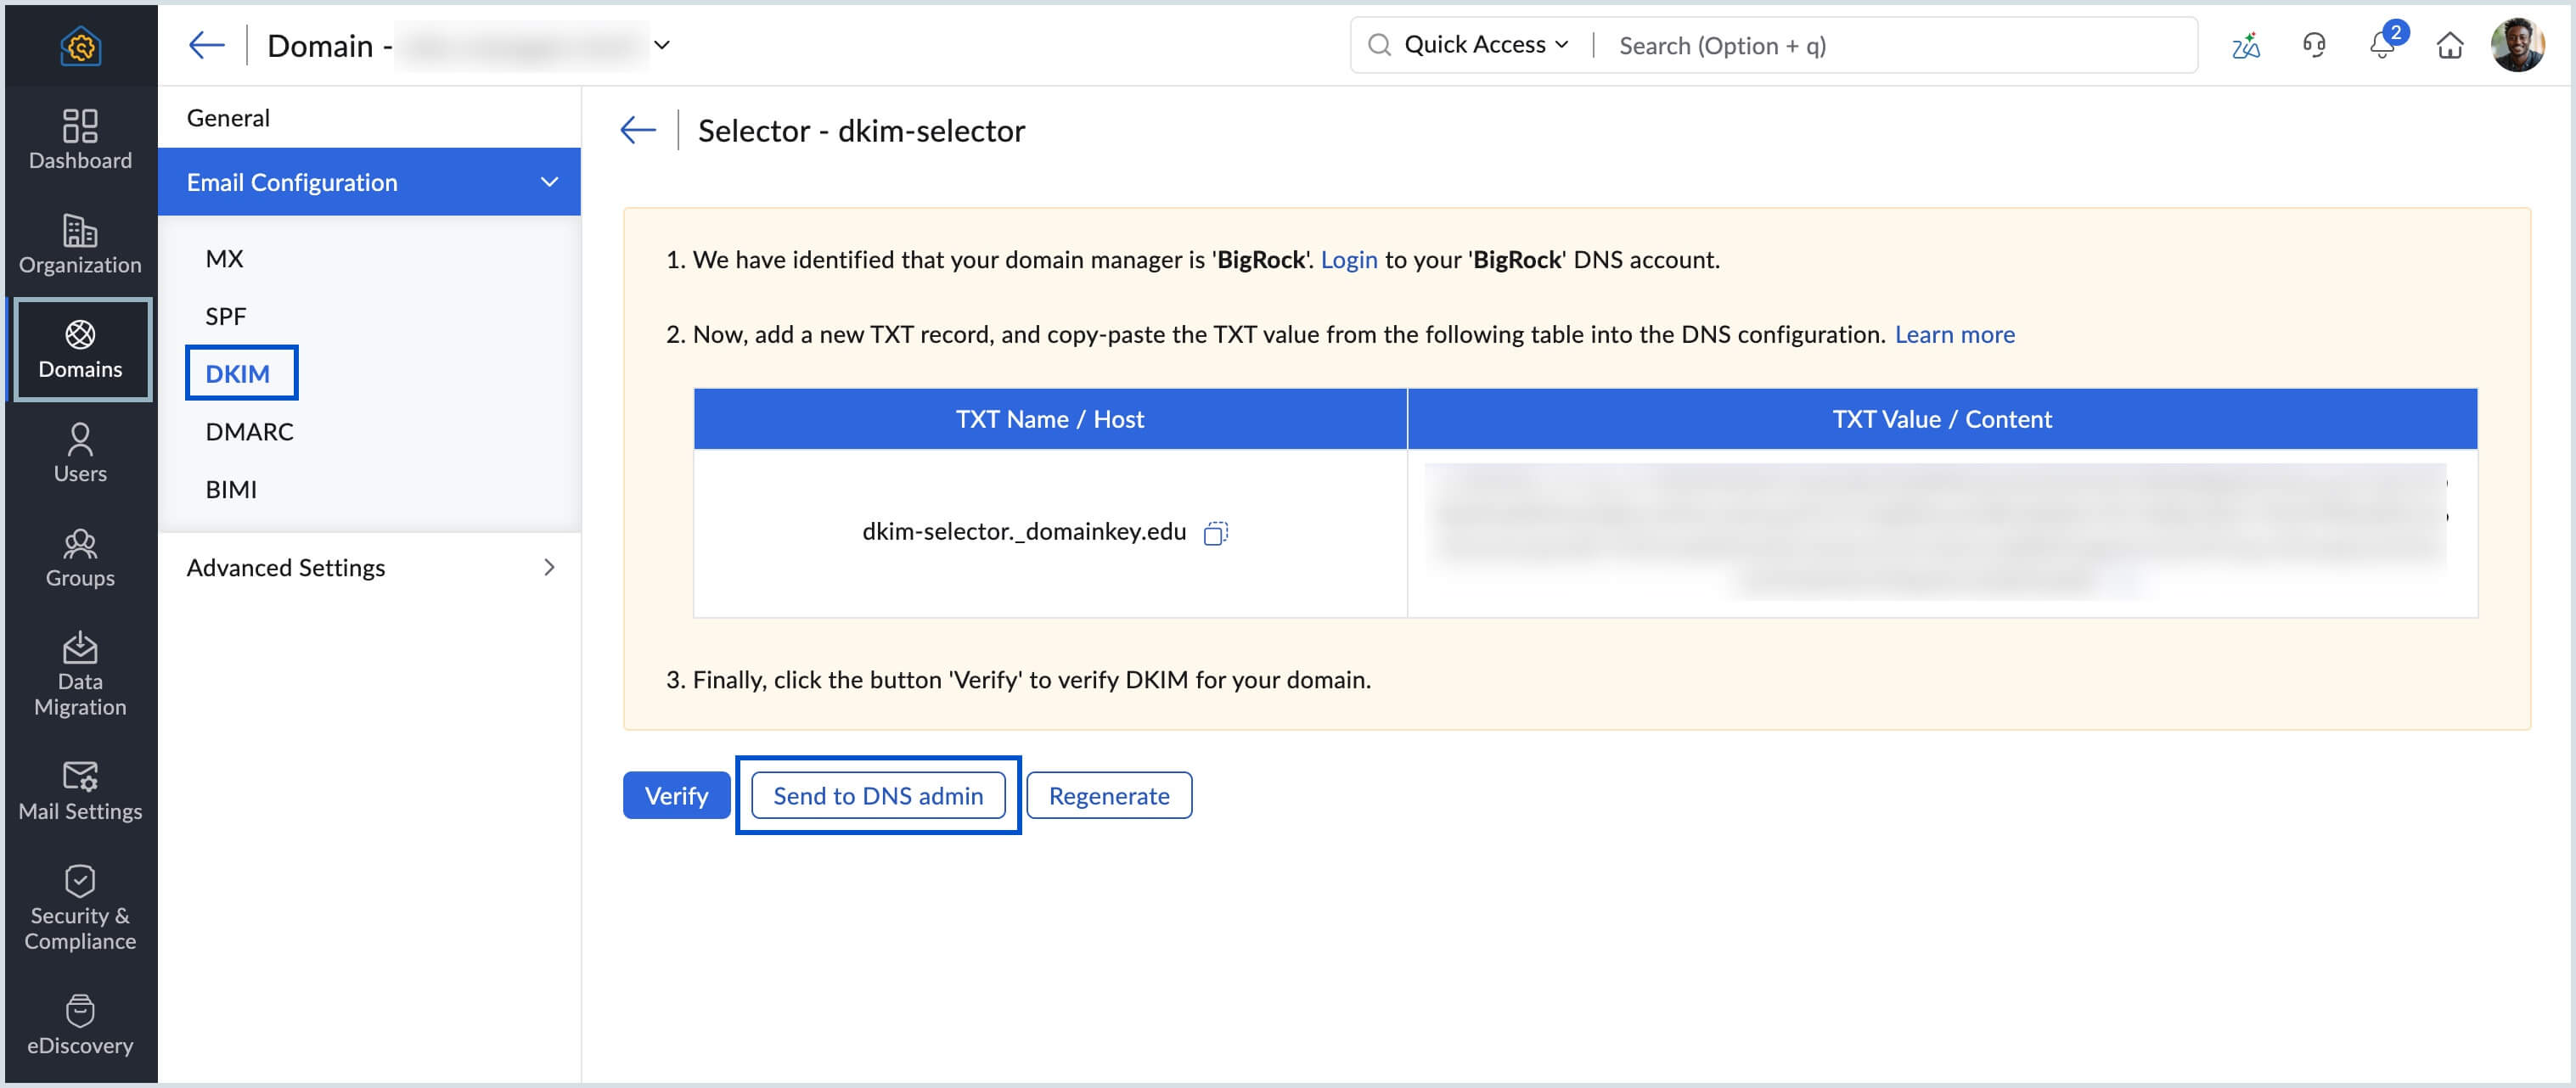
- Click Send Instructions. The email will be sent to the chosen member with DKIM details to complete the configuration.
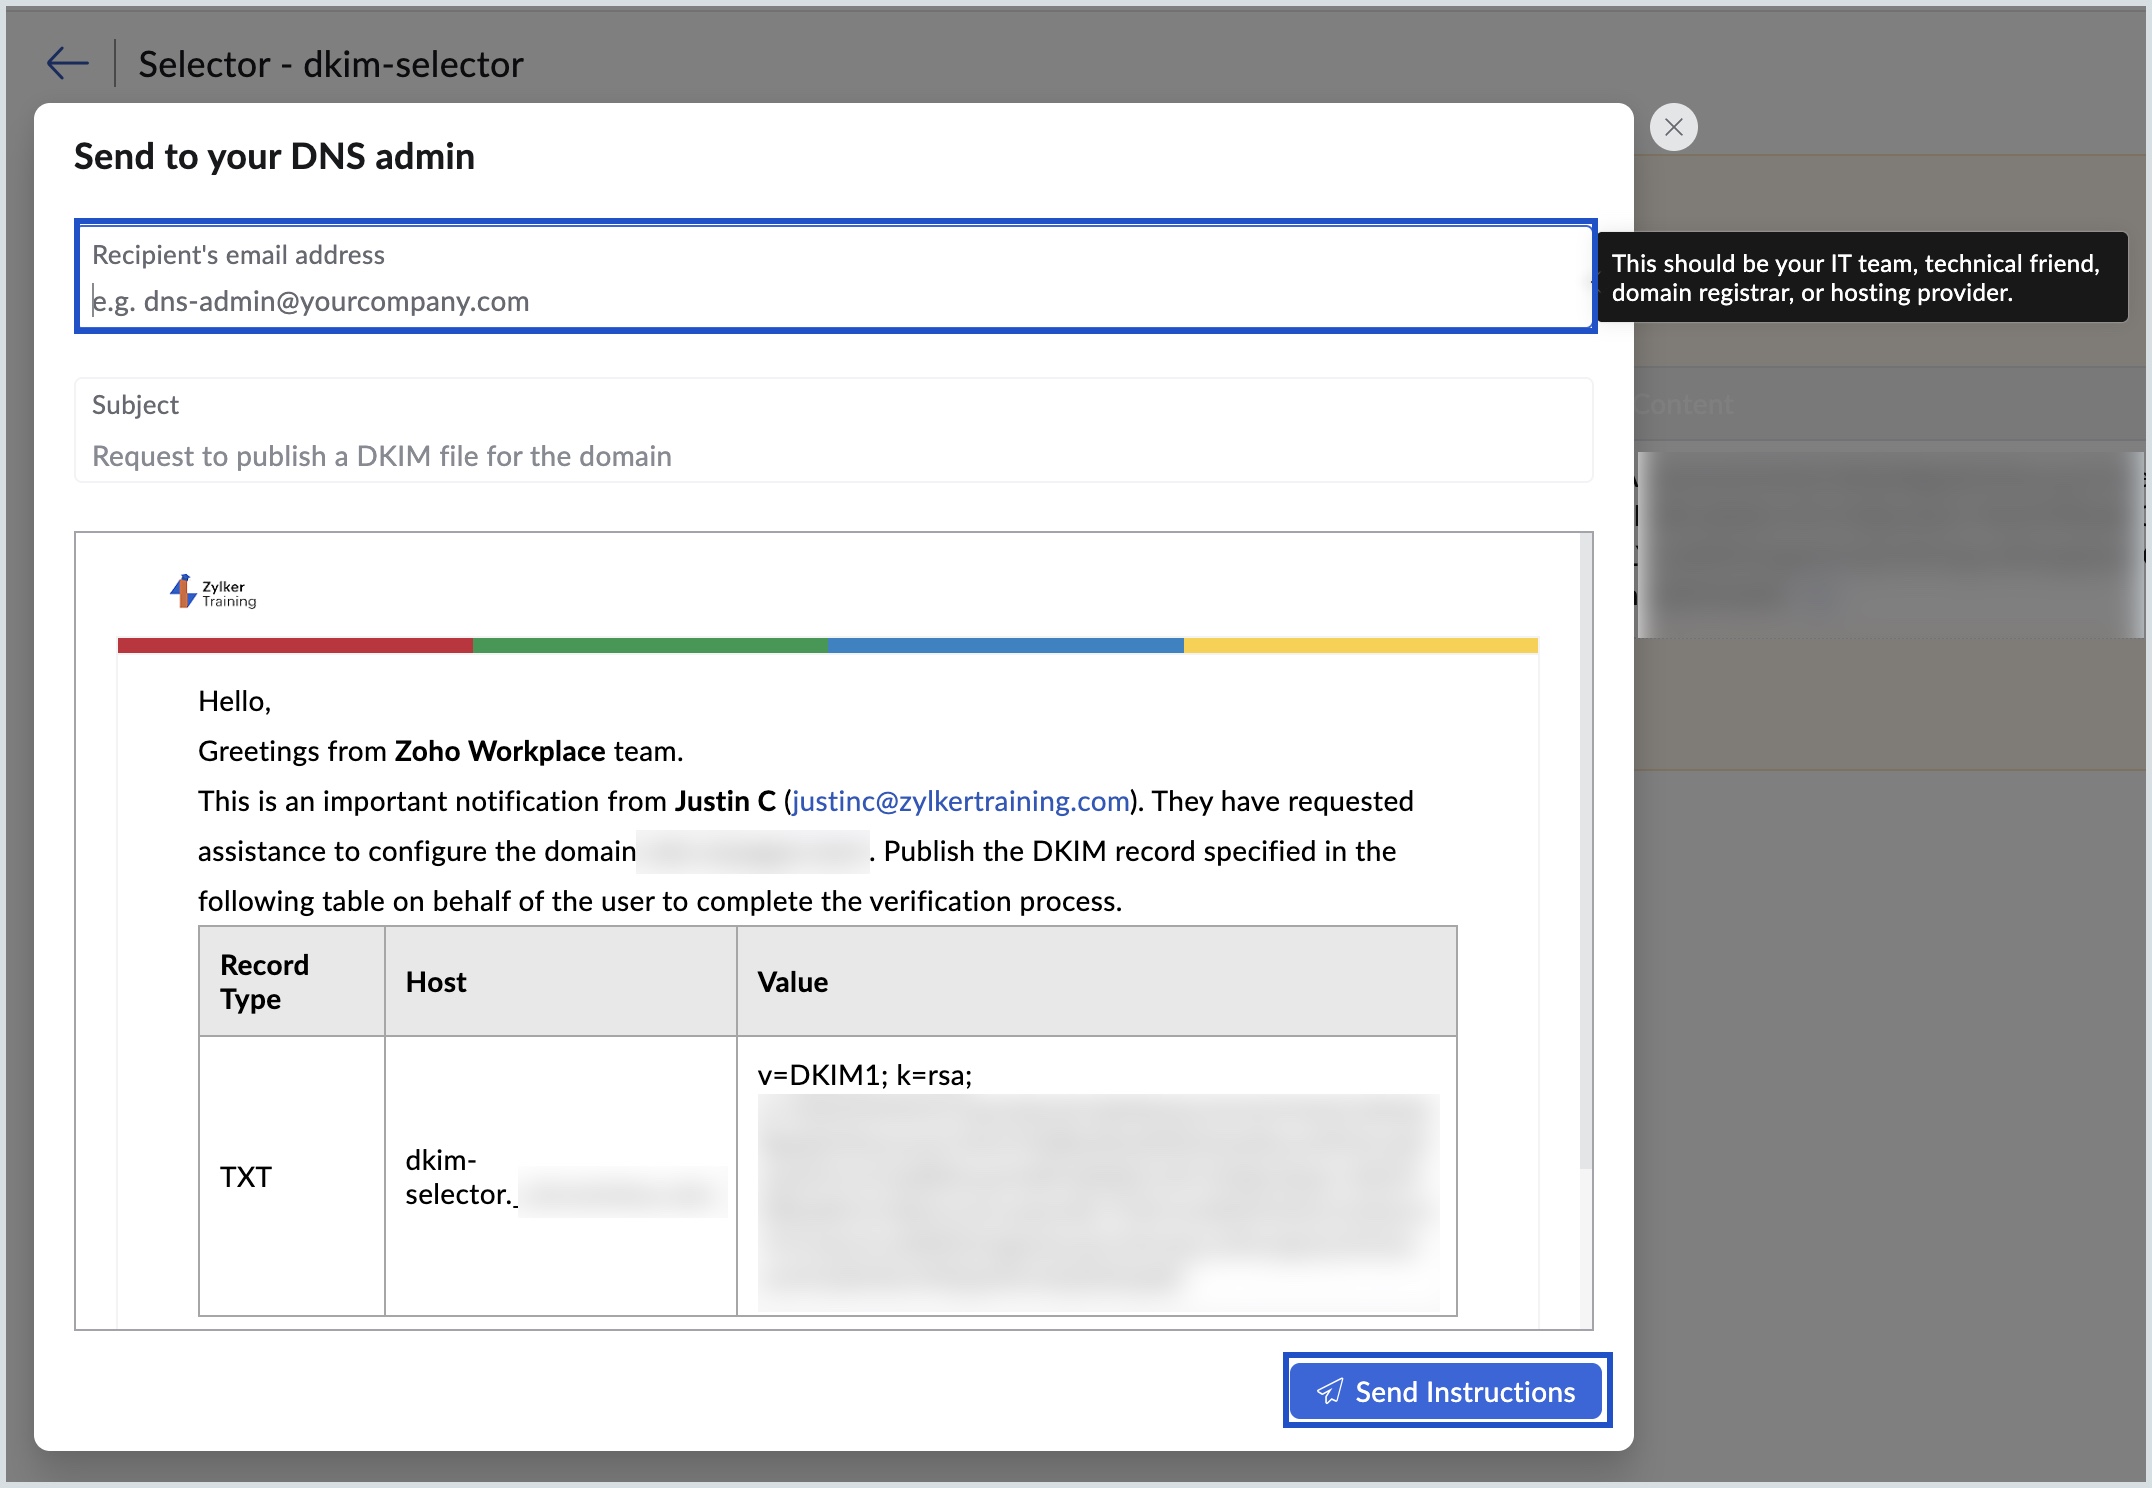
The instructions to configure DKIM values will be shared with the intended recipient via email. Ensure the recipient has the necessary access to update DNS records at your domain provider.
Note:
- Delegating the DKIM configuration only shares the DKIM record details and configuration instructions via email. It does not grant the recipient access to your Zoho Mail organization or authorize them to make changes within your account.
- Once the configuration is completed at the domain provider, you (the admin) must still verify the DKIM record in the Zoho Mail Admin Console.
Using multiple DKIM selectors for a single domain
You can use multiple selectors for a single domain to provide separate DKIM signatures for multiple offices in different locations or provide separate DKIM signatures for a set of accounts.
Example:
- ukoffice._domainkey.zylker.com
- usoffice._domainkey.zylker.com
- hrteam._domainkey.zylker.com
- marketing._domainkey.zylker.com
You can add more selectors for specific DKIM keys for different sets of users or for different locations of offices.
Associate users with specific DKIM selectors
When you have multiple selectors, you can associate the different sets of users with the selectors based on your requirements. The default selector is automatically applied for all users and hence it will not be listed in the drop-down.
Once you add an additional selector, you can associate for a specific set of users from the User List section.
Troubleshoot SPF and DKIM configuration issues in Zoho Mail
DKIM not working due to longer TTL or TTL delays
TTL (Time To Live) is the time specified in your DNS for each change in your DNS to be effective. If you have a huge TTL value (24 hrs/ 48 hrs), then the TXT/ SPF Records might take a while to get propagated. It might take up to 12 - 24 hours for DNS changes to take effect, based on the TTL set.
Fixing incorrect DKIM or SPF record values
The way the SPF records need to be added often varies with different DNS Providers.
Fixing typos and errors in DKIM record configuration
Check if you have copy-pasted the correct information from Zoho Setup pages. In the case of DKIM, you need to copy the entire key displayed and provide it as a value of the TXT Record. The TXT Record name should follow the suggested naming conventions
Note:
- Any alterations to the email content by the email servers which transit the emails in-between, might alter the signature and make the DKIM as invalid during verification at the recipient end.
- Currently, the DKIM is supported only for emails generated in Zoho and directly delivered to external servers. For domains configured with Email Routing and Outbound Gateways, where the emails are not directly delivered or emails generated from other servers, DKIM is not supported.