

Netting

The Netting module in Zoho Books lets you offset Accounts Receivable (AR) and Accounts Payable (AP) balances for customers and vendors who are linked in your organization. When you offset the balances, the Accounts Payable amount you owe the vendor is deducted from the Accounts Receivable amount the vendor owes you. This lets you settle both balances through a single netting entry instead of creating separate customer and vendor payments.
Scenario: Lily at Zylker has issued invoices totaling $5,000 to ABC Supplies for services rendered. ABC Supplies is also a vendor and has sent bills totaling $3,000 to Zylker. Instead of creating separate payment transactions for the customer invoices and vendor bills, Lily creates a netting entry to offset the $3,000 accounts payable (AP) balance against the $5,000 accounts receivable (AR) balance. After netting, Zylker has a net receivable of $2,000 from ABC Supplies.
Enable the Netting Module
To enable the Netting module:
- Go to Settings.
- Navigate to General under Setup & Configurations.
- Check the Netting option under Select the modules you would like to enable.
- Click Save.
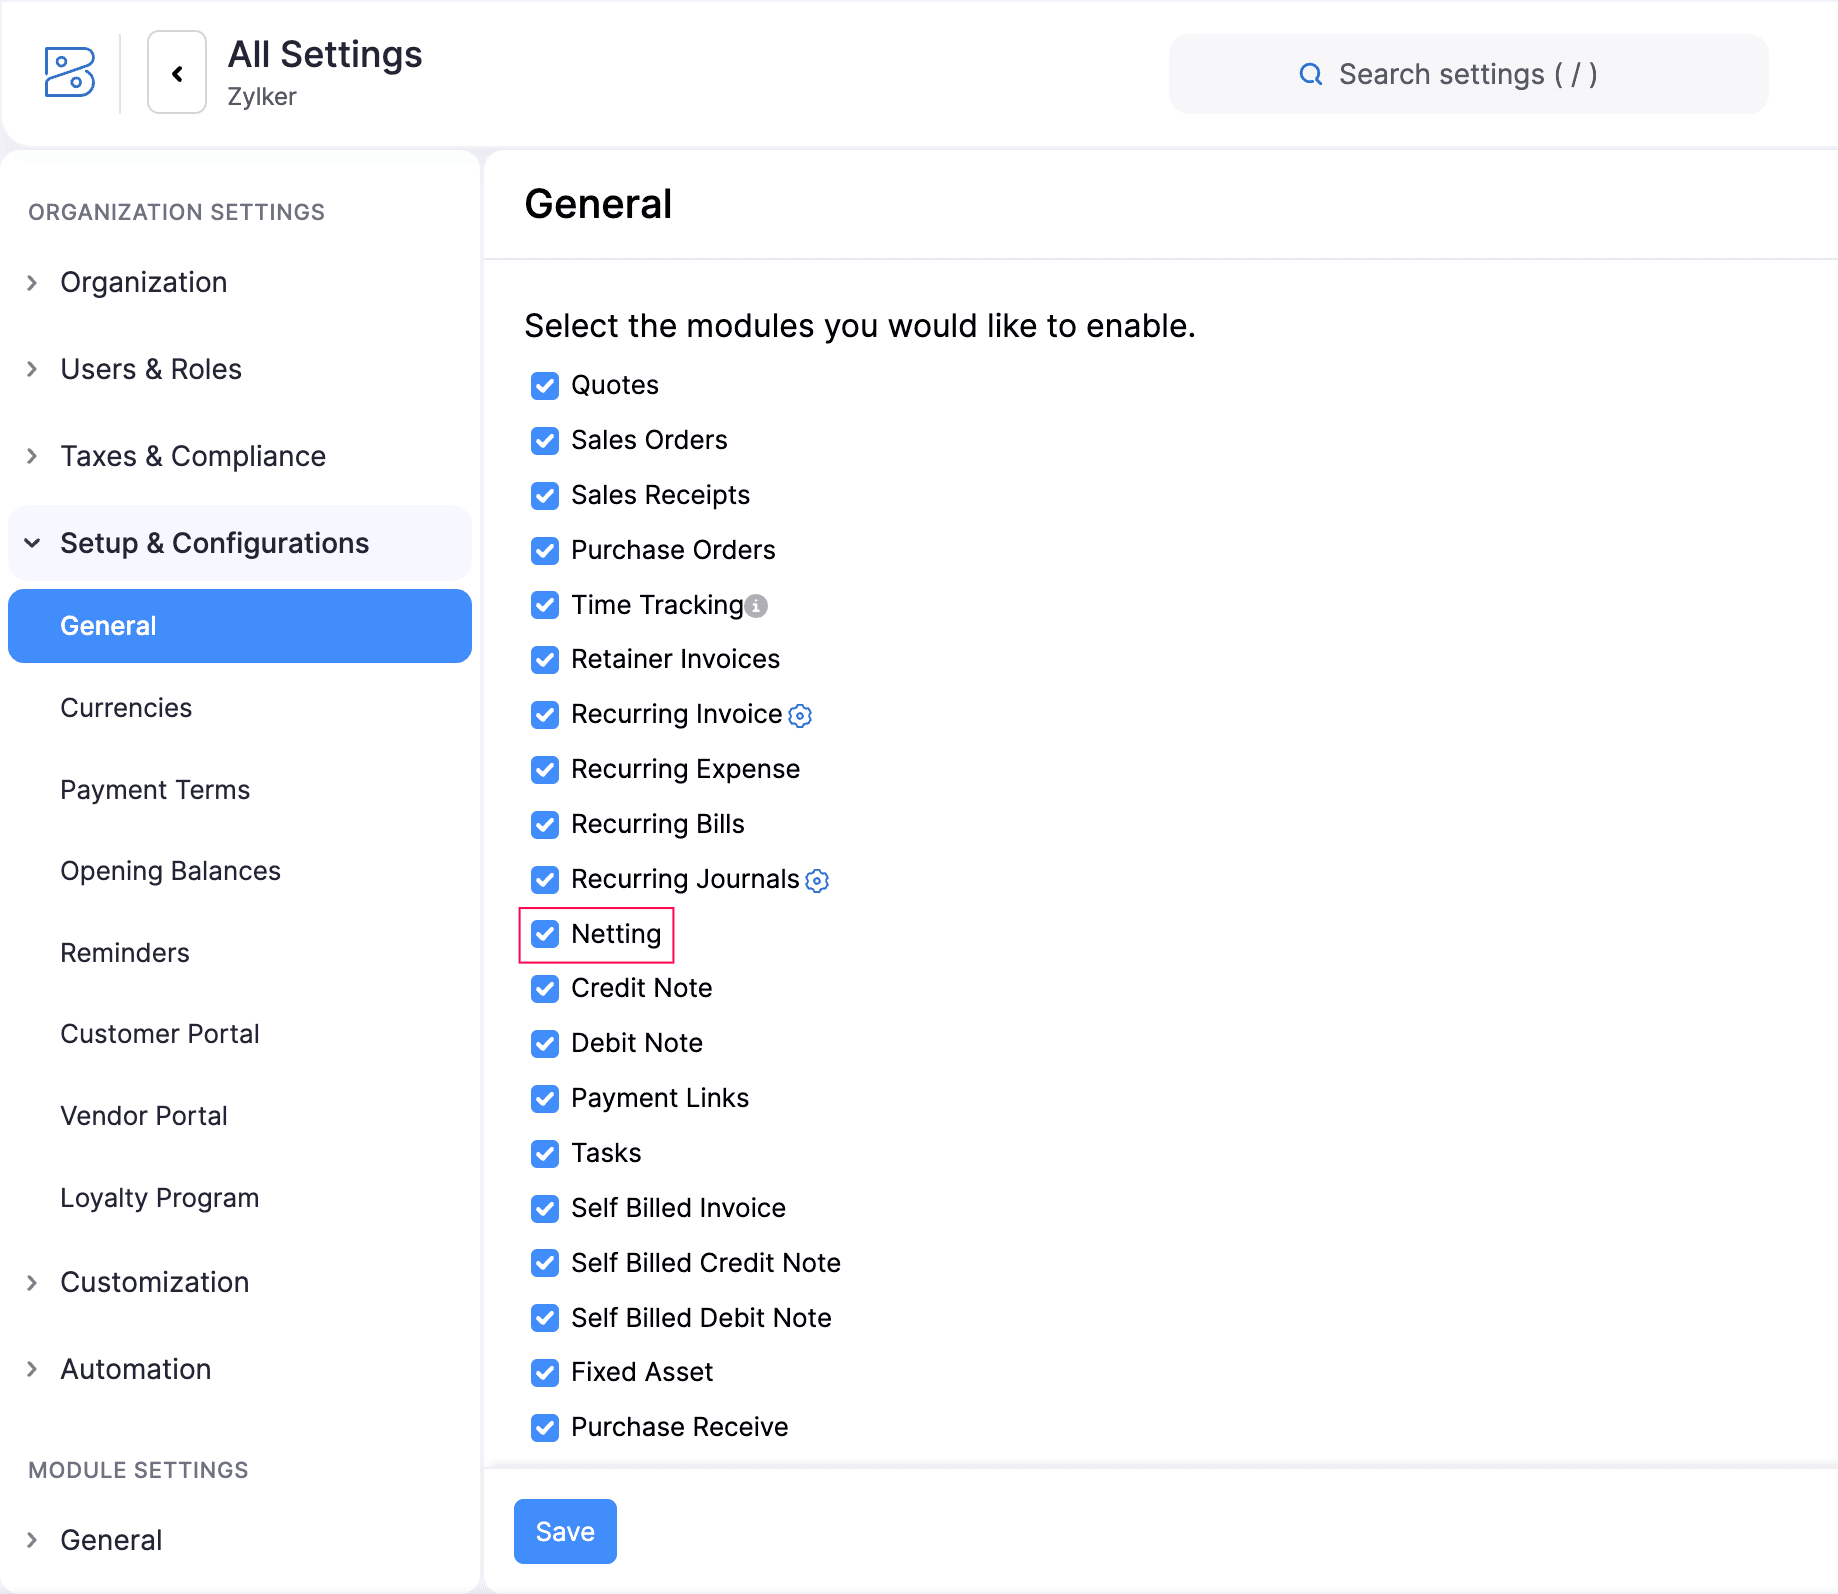
Once enabled, the Netting module will be available under Accountant in the left sidebar.
Create a Netting Entry
To create a netting entry:
- Go to Accountant on the left sidebar and select Netting.
- Click + New in the top right corner of the page.
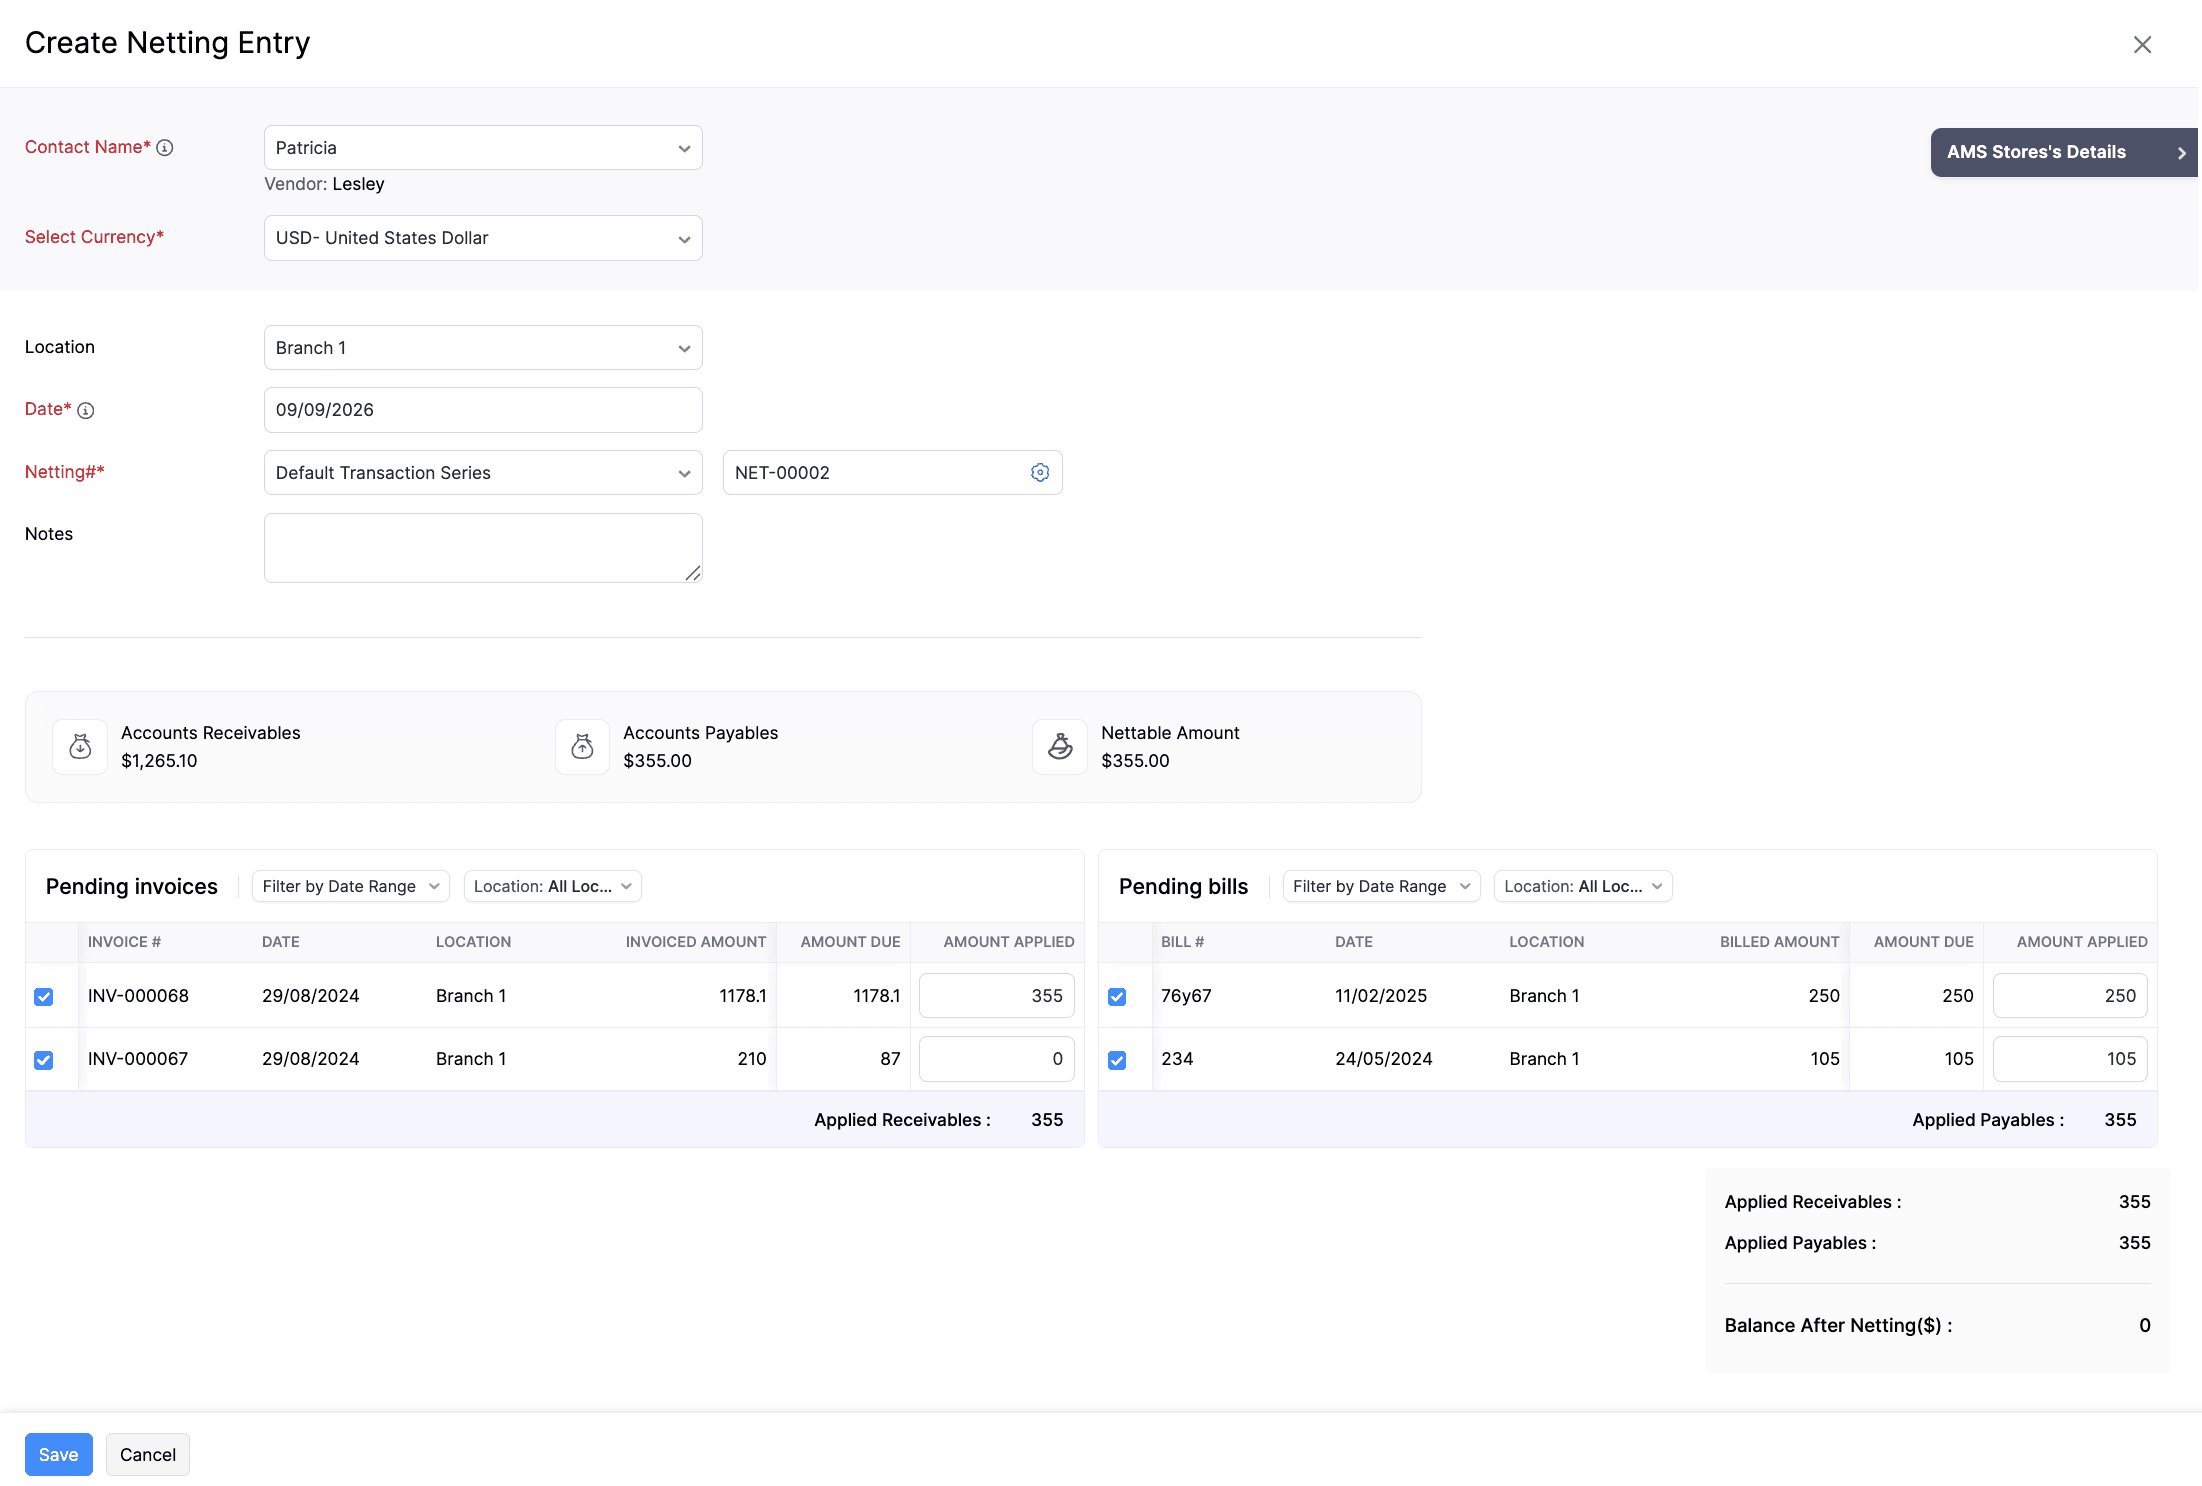
- In the Create Netting Entry page, fill in the following details.
| Field | Description |
|---|---|
| Customer Name | Select a contact who is linked as both a customer and a vendor. Once selected, the associated vendor record is identified automatically. You can also view the current Accounts Receivables, Accounts Payables, and maximum Nettable Amount for the contact. |
| Select Currency | Select a currency to view transactions in the selected currency. |
| Date | Select the netting date. All outstanding invoices and unpaid bills created on or before this date are listed in the Pending Invoices and Pending Bills sections. |
| Netting# | The netting reference number, auto-generated based on your transaction series. Click the Gear icon next to the field to configure the number series or enter a number manually. |
Once you fill in the details, the Create Netting Entry page will display two sections side by side, Pending Invoices and Pending Bills. Both sections list the outstanding transactions for the selected customer/vendor as of the netting date.
- Click the Filter by Date Range dropdown, select a start date and an end date, and then click Apply Filter to view transactions within the selected date range.
- Click the Location dropdown and select a location to view its transactions, or choose All Locations to view transactions across all locations.
- Select the checkbox next to an invoice or bill to include it in the netting entry.
Note: A maximum of 20 transactions, combining invoices and bills, can be included in a single netting entry.
- Enter the amount to apply in the Amount Applied field for each selected transaction.
The Applied Receivables and Applied Payables totals are displayed at the bottom of their respective sections and update automatically as you select transactions and enter amounts. To save the netting entry, the Applied Receivables and Applied Payables totals must be equal.
The Balance After Netting displays the net balance that will remain after the entry is applied.
- Click Save.
Note: You can also create a netting entry directly from a contact that is linked as both a customer and a vendor. To do this, go to Sales/Purchases > Customers/Vendors > select a customer or vendor > click More > select Create Netting Entry.
After you save a netting entry, it is marked as Published, and the selected invoices and bills are marked as Paid as of the netting date.
Delete a Netting Entry
Warning: Deleting a netting entry is permanent and cannot be undone. The invoices and bills that were marked as Paid through the entry will revert to their previous outstanding status.
To delete a netting entry:
- Go to Accountant on the left sidebar and select Netting.
- Select the netting entry you want to delete.
- Click the Delete icon in the details page of the netting entry.
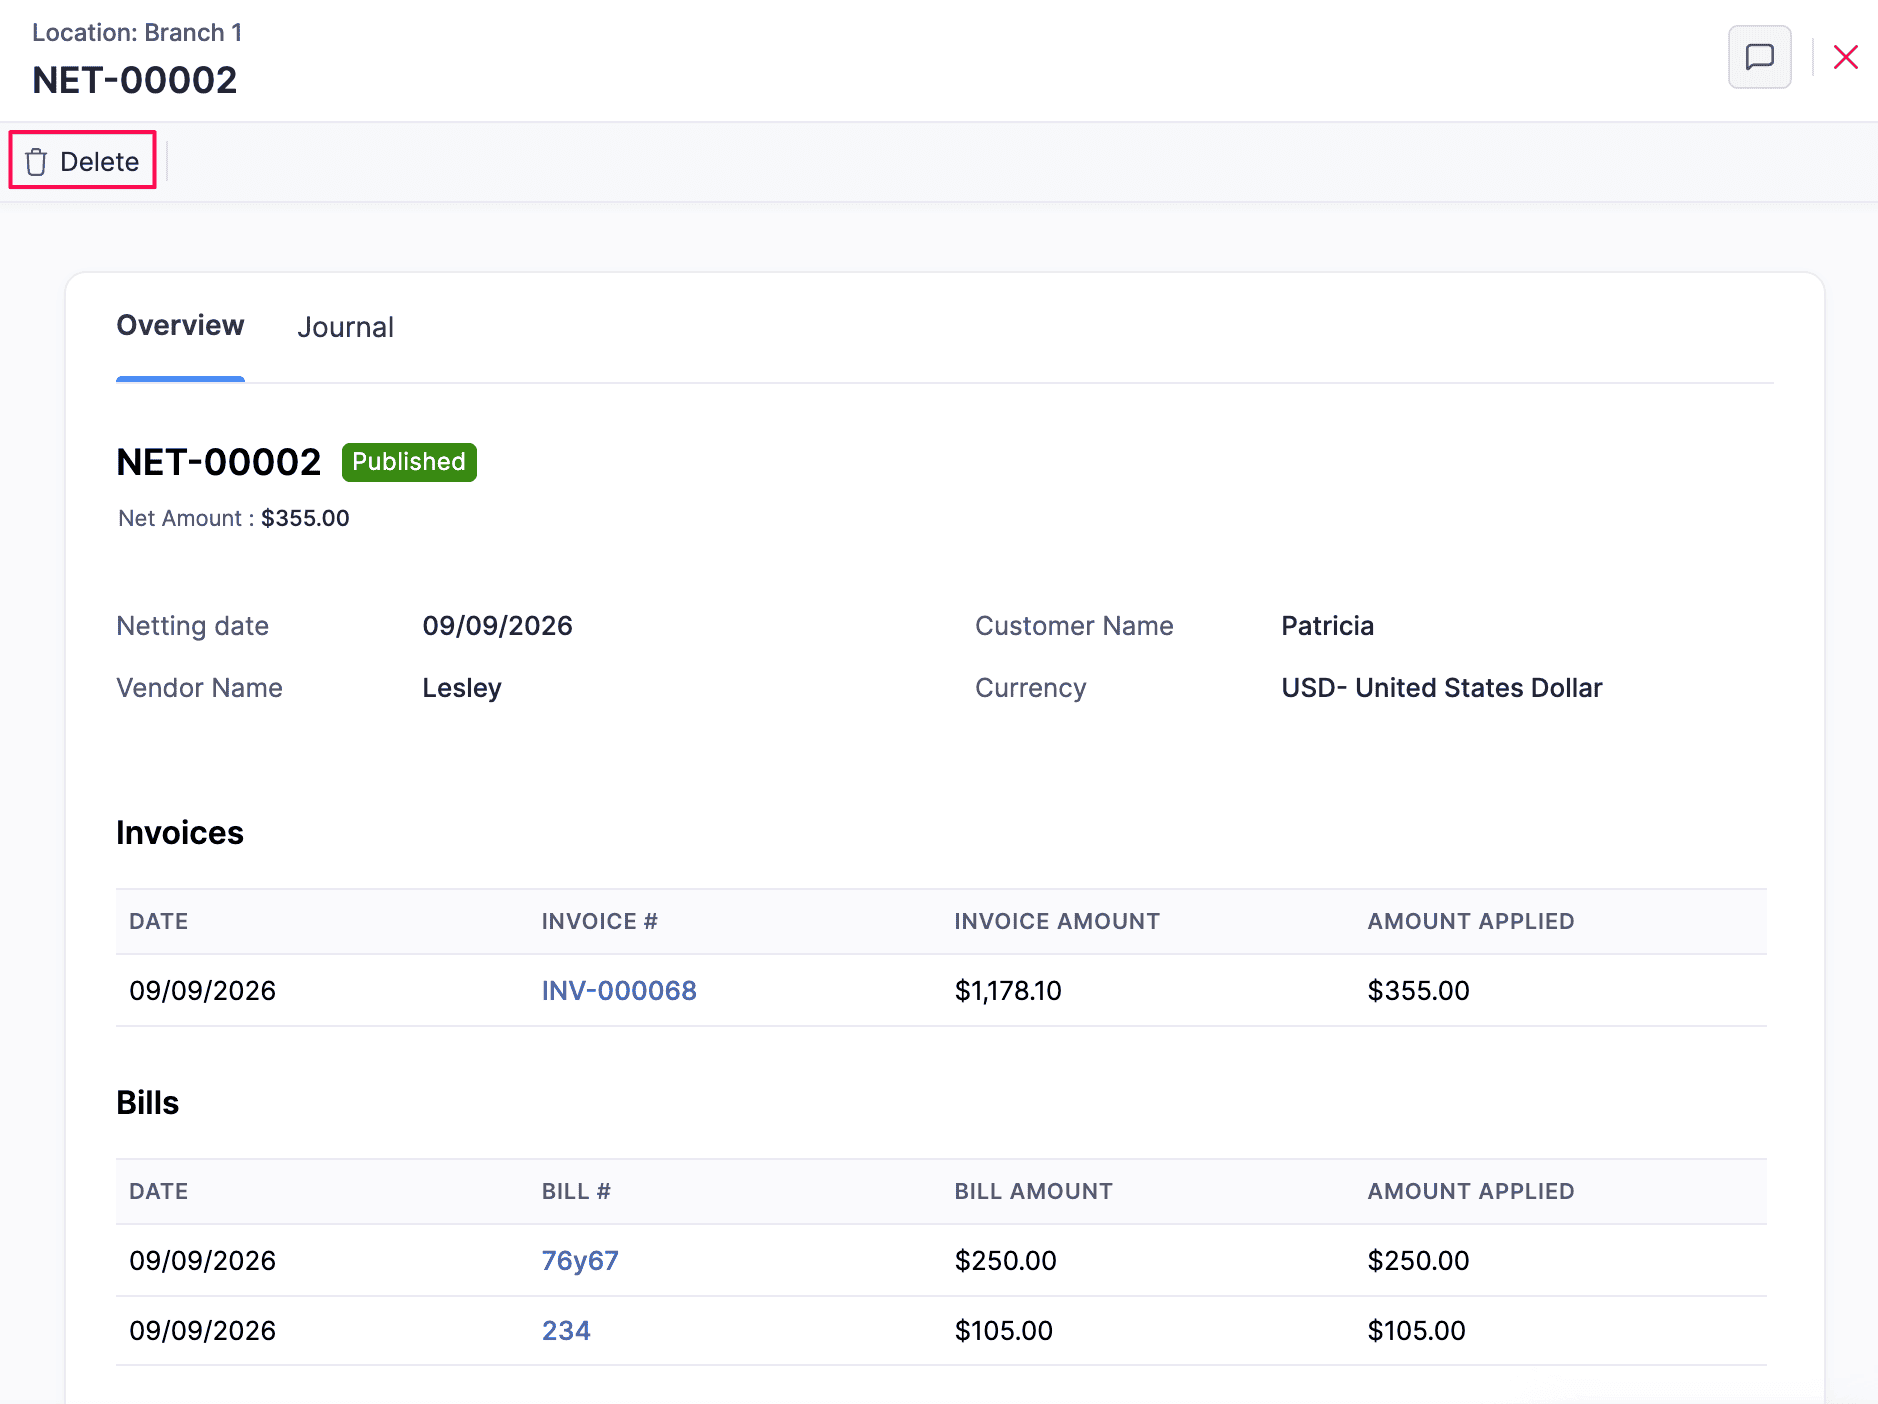
- In the confirmation pop-up, click Delete to confirm.
The netting entry will be deleted.
 Yes
Yes