Manage Vendor Credits
Filter Vendor Credits
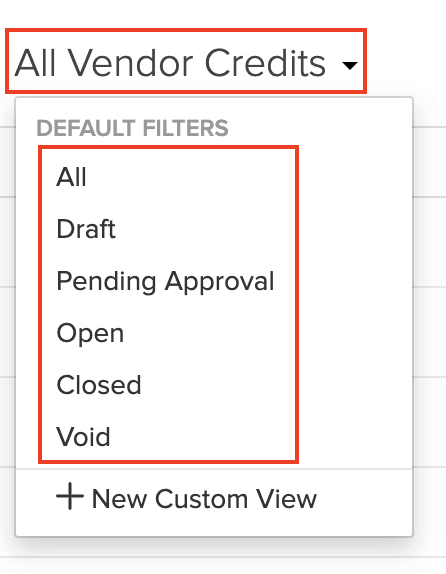
You can filter vendor credits based on their status. Here’s how:
Go to the Vendor Credits module in the sidebar.
Click the All Vendor Credits menu on top of the page.
Select the filter type from the dropdown.

If you want to filter the vendor credits based on certain parameters of your own, you can do it through custom views.
Custom Views
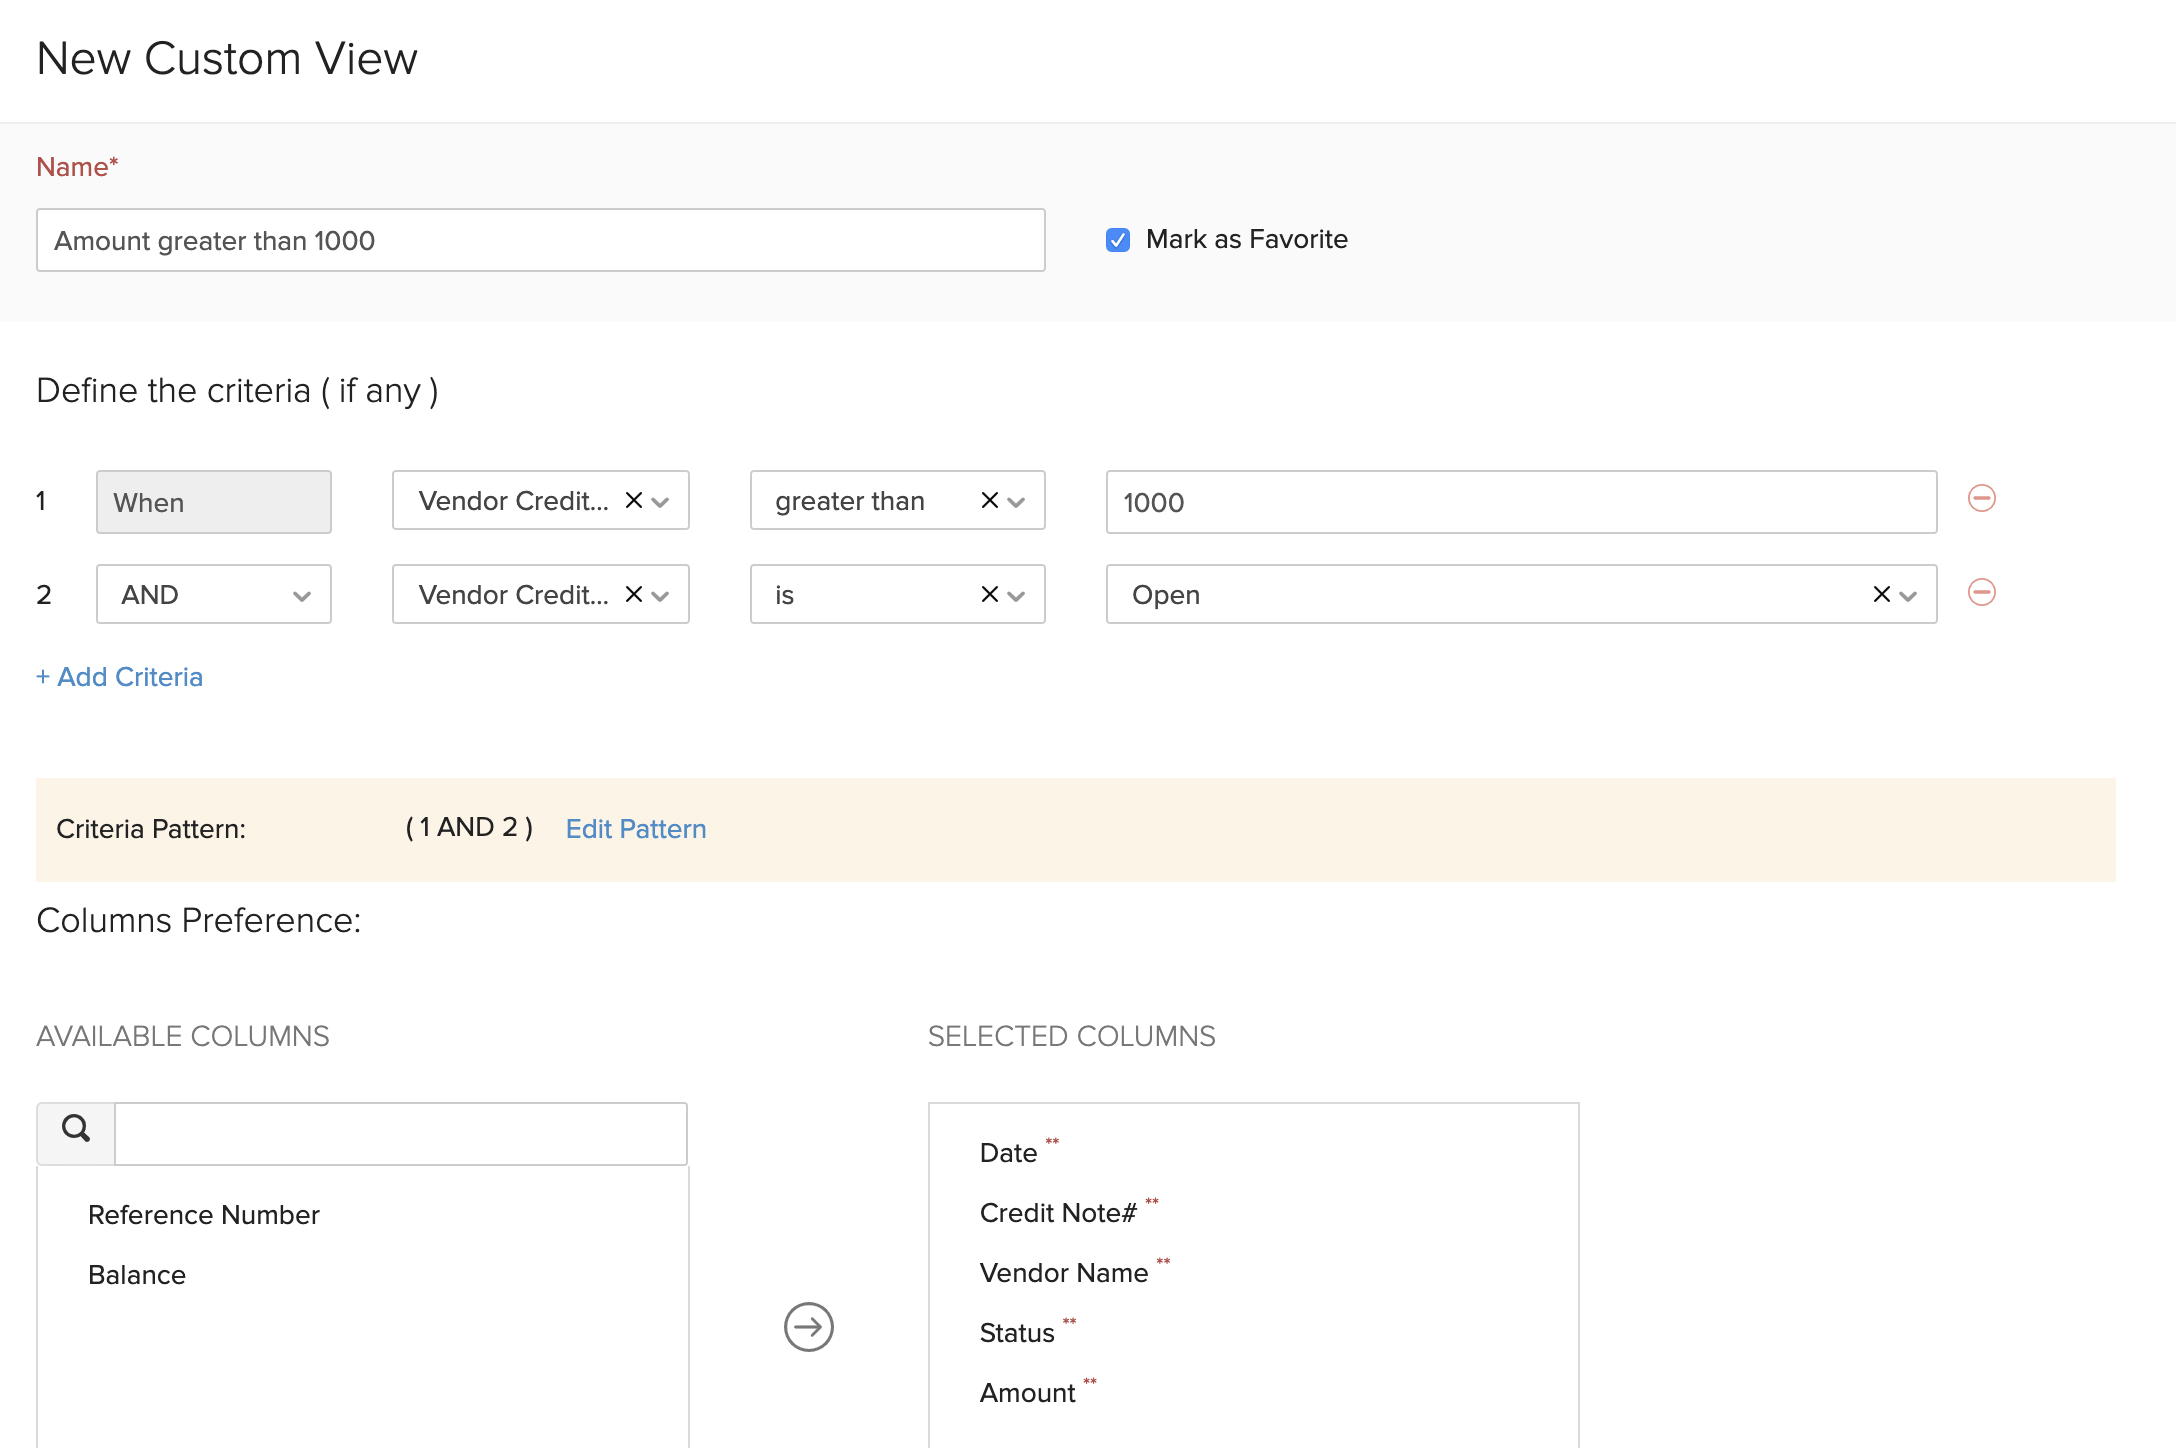
Custom Views can be used to filter your vendor credits based on certain criteria you have set. To create a custom view:
Go to the Vendor Credits module in the sidebar.
Click the All Vendor Credits on top left corner.
Select + New Custom View from the dropdown.
Set the criteria and select the columns to display.
If you use this custom view frequently, you can select the Mark as Favorite option.
Select the users who can access this custom view.
Click Save.

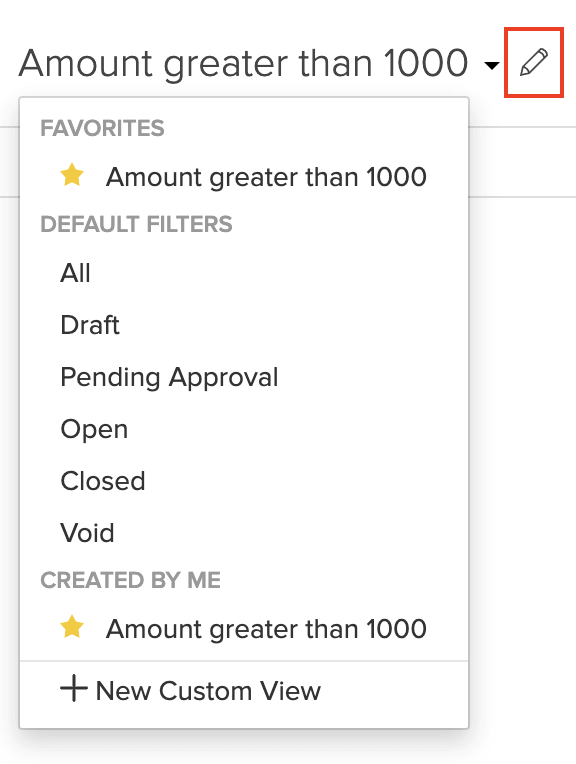
The custom views get saved under the Created by Me section in the filters dropdown. To delete a custom view:
Click on the custom view.
Click the Pencil icon next to the the custom view name.

Scroll to the bottom of the page and click Delete.

Click Yes to confirm.
Export Current View
If you have filtered your vendor credits, or rearranged the columns in your retainer invoices, then you can export that particular view. Here’s how:
Go to the Vendor Credits module in the left sidebar.
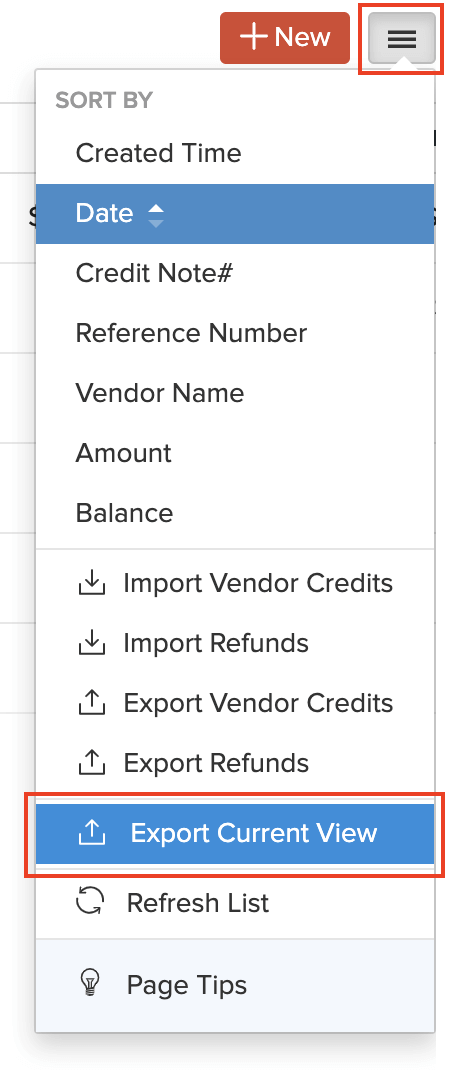
Click the More icon in the top right corner of the page.
Select Export Current View from the dropdown.

Select the export format and enter a password to secure your export file.
Click Export.
Sort Vendor Credits
To sort your vendor credits:
Go to the Vendor Credits module in the sidebar.
Click the More icon button in the top right corner.
Choose how you want to sort your list of vendor credits.
Alternatively, you can also click some of the column names directly to sort them. For example, click the Date column to sort the records from newest to oldest (indicated by the arrow). Click again if you want them sorted the other way round.

More Actions
You can perform a host of actions from the menubar available on the top of each vendor credit. Click the following icons to perform their respective actions.
- Pencil icon: To edit the vendor credit.
- PDF icon: To download a PDF of the vendor credit.
- Printer icon: To print the PDF of the vendor credit.
- Mail icon: To email the vendor credit.
- Paper clip icon: To attach documents to the vendor credit.
- More Button:
- Clone: Creates a duplicate of the vendor credit. You can modify the details if needed.
- Void: Invalidates the vendor credit. You can also make it active any time you want. This is a better alternative to deleting the vendor credit.
- Delete: Deletes the vendor credit permanently.
- Add Comments: Add internal comments that other users can refer to while viewing a retainer invoice.


