Create a Zobot for your website
- In the Zoho SalesIQ dashboard, navigate to Settings > Bot, and click Zobot.
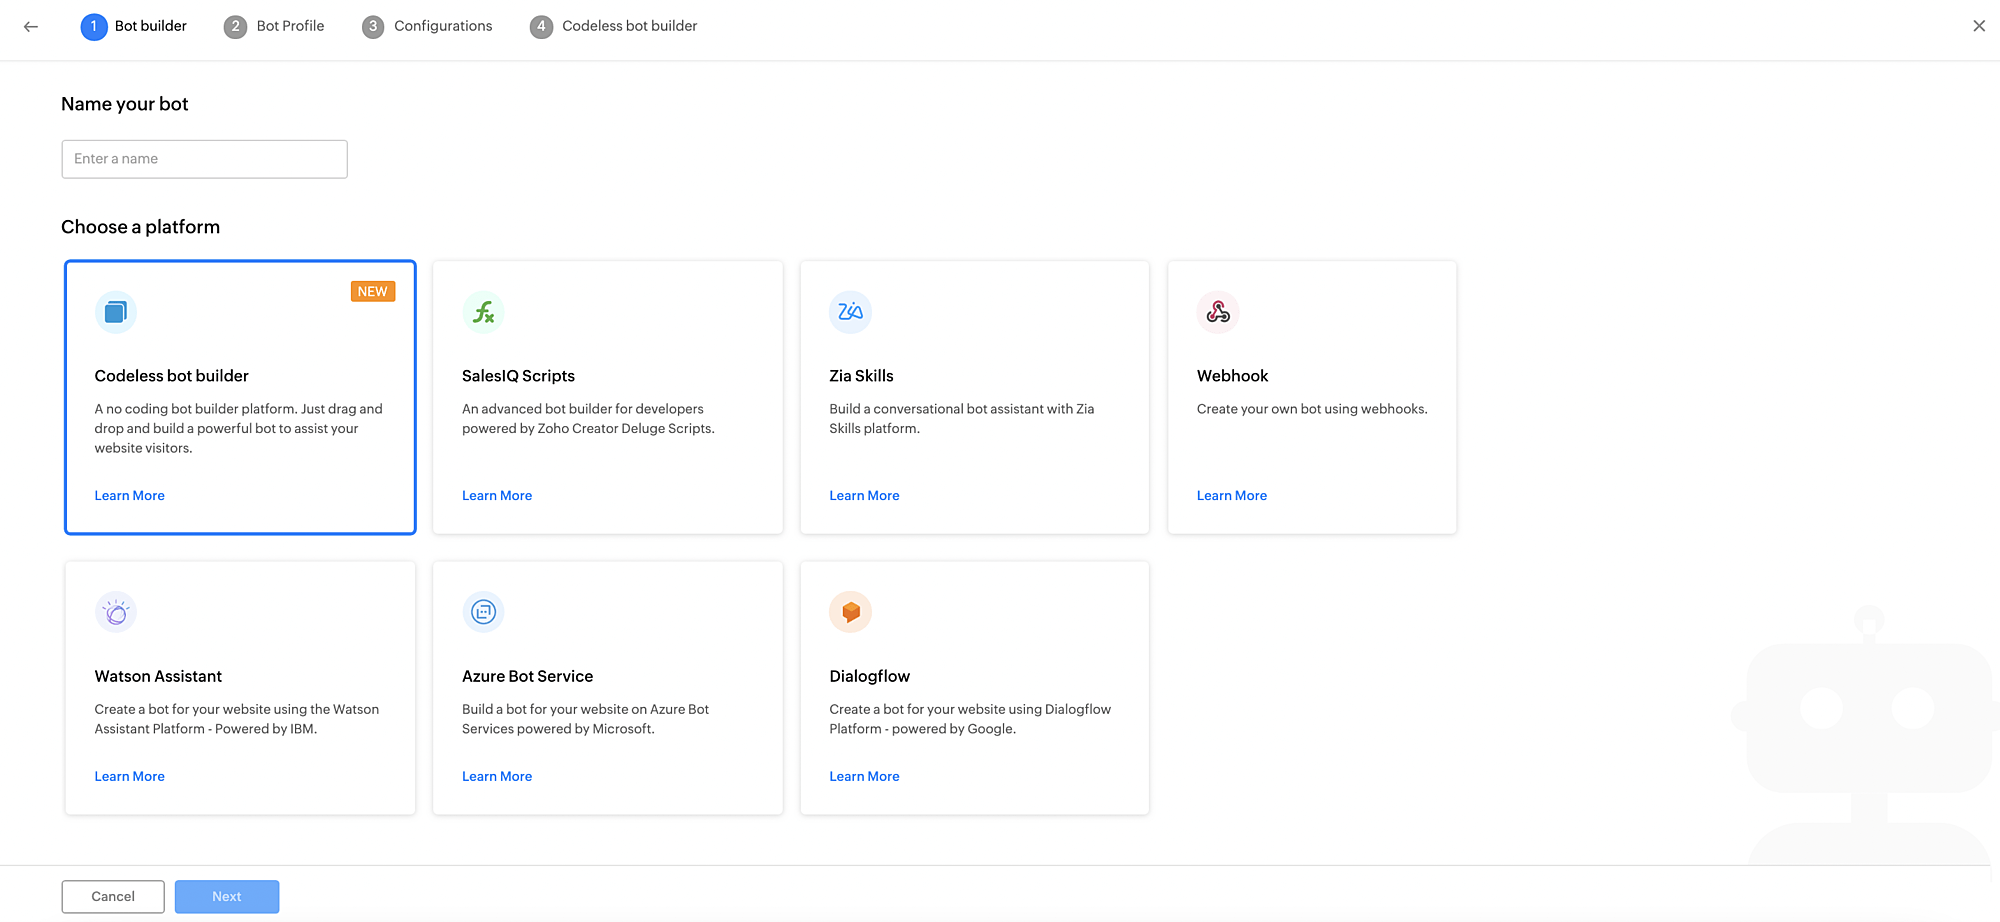
- Inside the bot builder, give your bot a Name.
- Then, Choose a platform to structure, configure, and create your bot. The available platforms are Codeless Bot Builder, SalesIQ Scripts, Zia Skills, Webhooks, Watson Assistant, and Azure Bot Service.
- Click Next.
Set up your Zobot profile
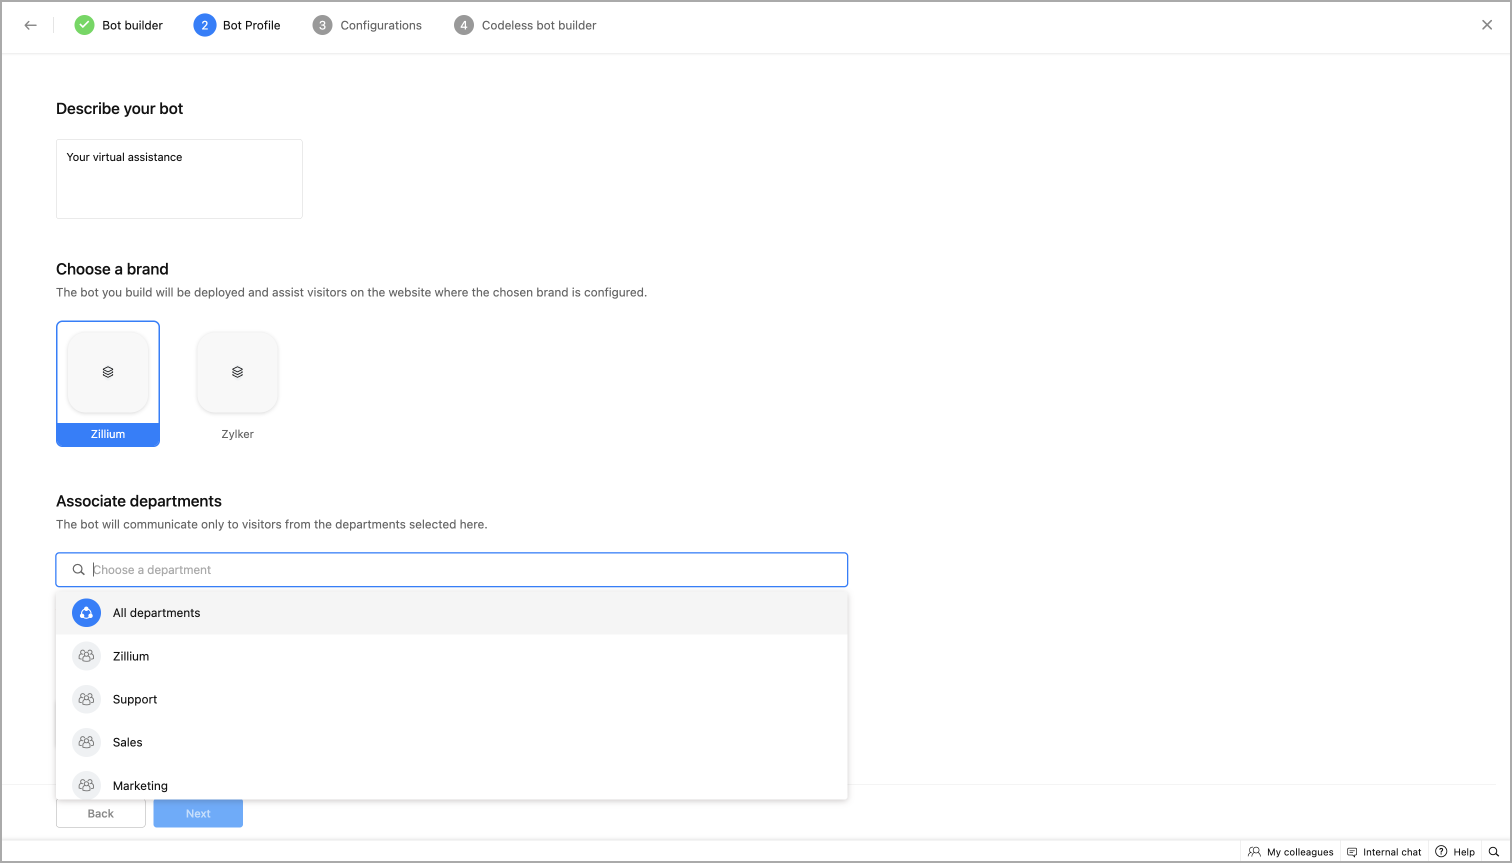
- Write a description for the bot that will help visitors understand the characteristics of the bot.
- Choose the brand on which you would like to deploy the bot.
- Next, associate the department with the bot. All the departments of the selected brand will be listed here.
- Choose where the bot should be active. The bot can be deployed on websites, mobile SDK, Facebook Messenger, Instagram, WhatsApp, Telegram, and LINE.
- Choose the languages in the drop-down you want the bot to converse. Currently, SalesIQ supports 30 different languages.
Note: Multi-language support is only available for the Codeless bot-building platform.

- Select the default languages from the chosen languages.
- You have to configure the bot's flow separately for the chosen languages
- The bot chooses the language based on the visitor's first message.
- Then, Set Working Hours for your bots. The bot's working hours can be chosen based on your business hours and the operator's availability.

Click Next.
Zobot Configuration
- Choose the Bot Audience, and the visitors you want the bot to interact with. You have the following options,
- All visitors - The bot assists all your website visitors.
- Custom Visitors - The bot only assists the selected audience based on your custom action.
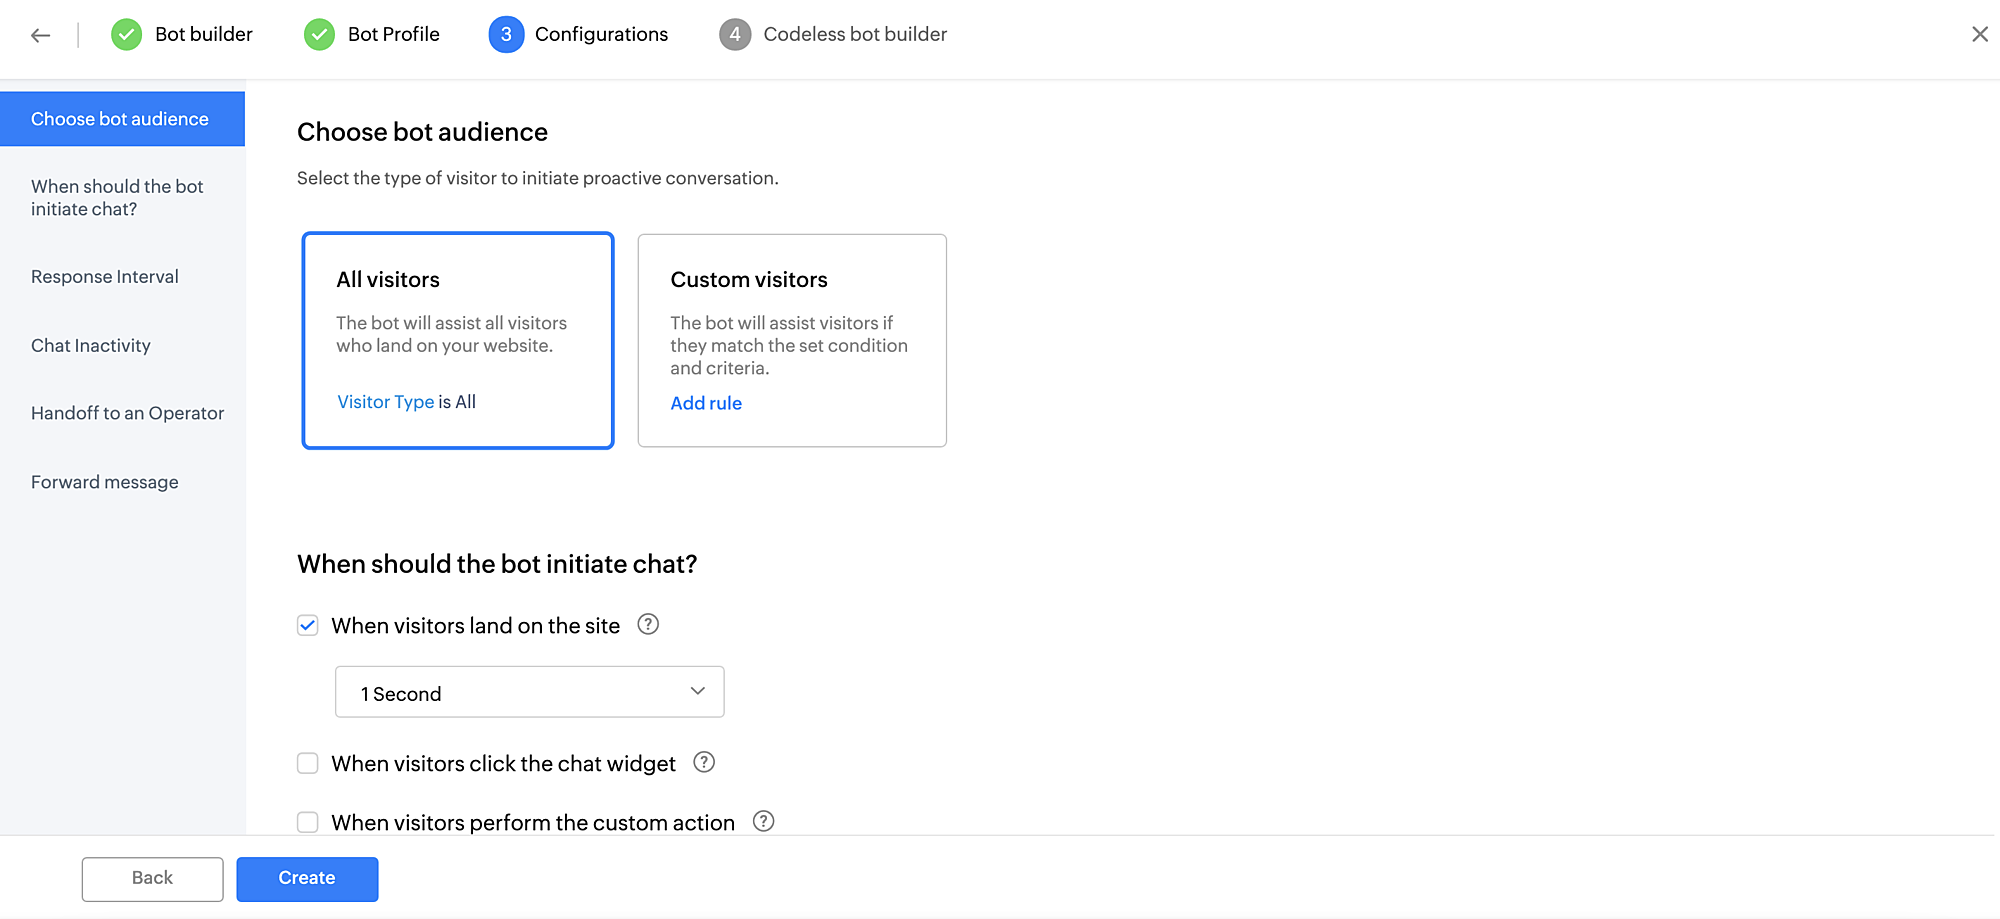
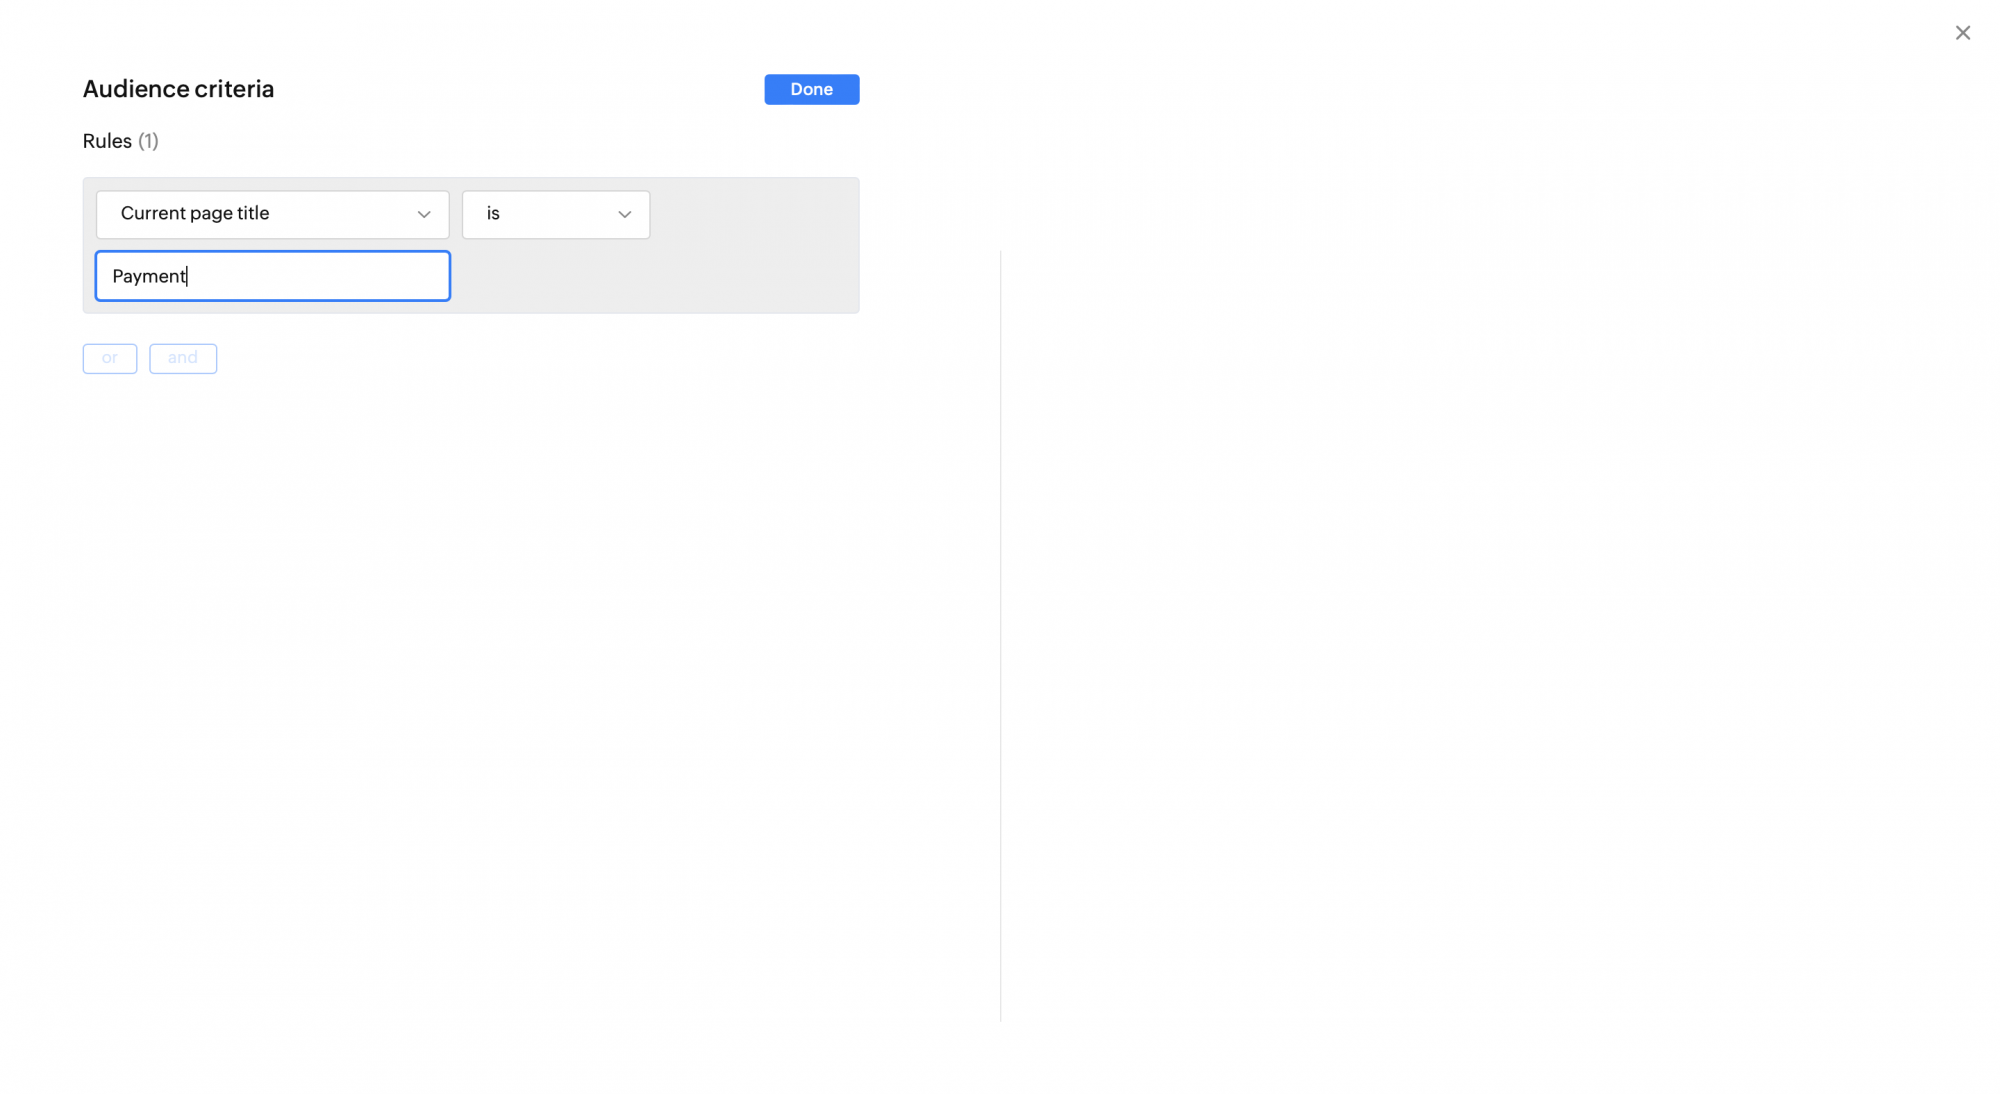
- To create custom visitors for the Zobot, click on Add rule and configure rules to enable your bot to assist custom visitors.
- In this case, if the current page title is Payment, the Zobot will get activated.
- Then, choose when should the bot initiate chat with your website visitors. You can initiate the trigger:
- When the visitor lands on your site
- Navigate through the website pages
- When the visitor performs a custom action.
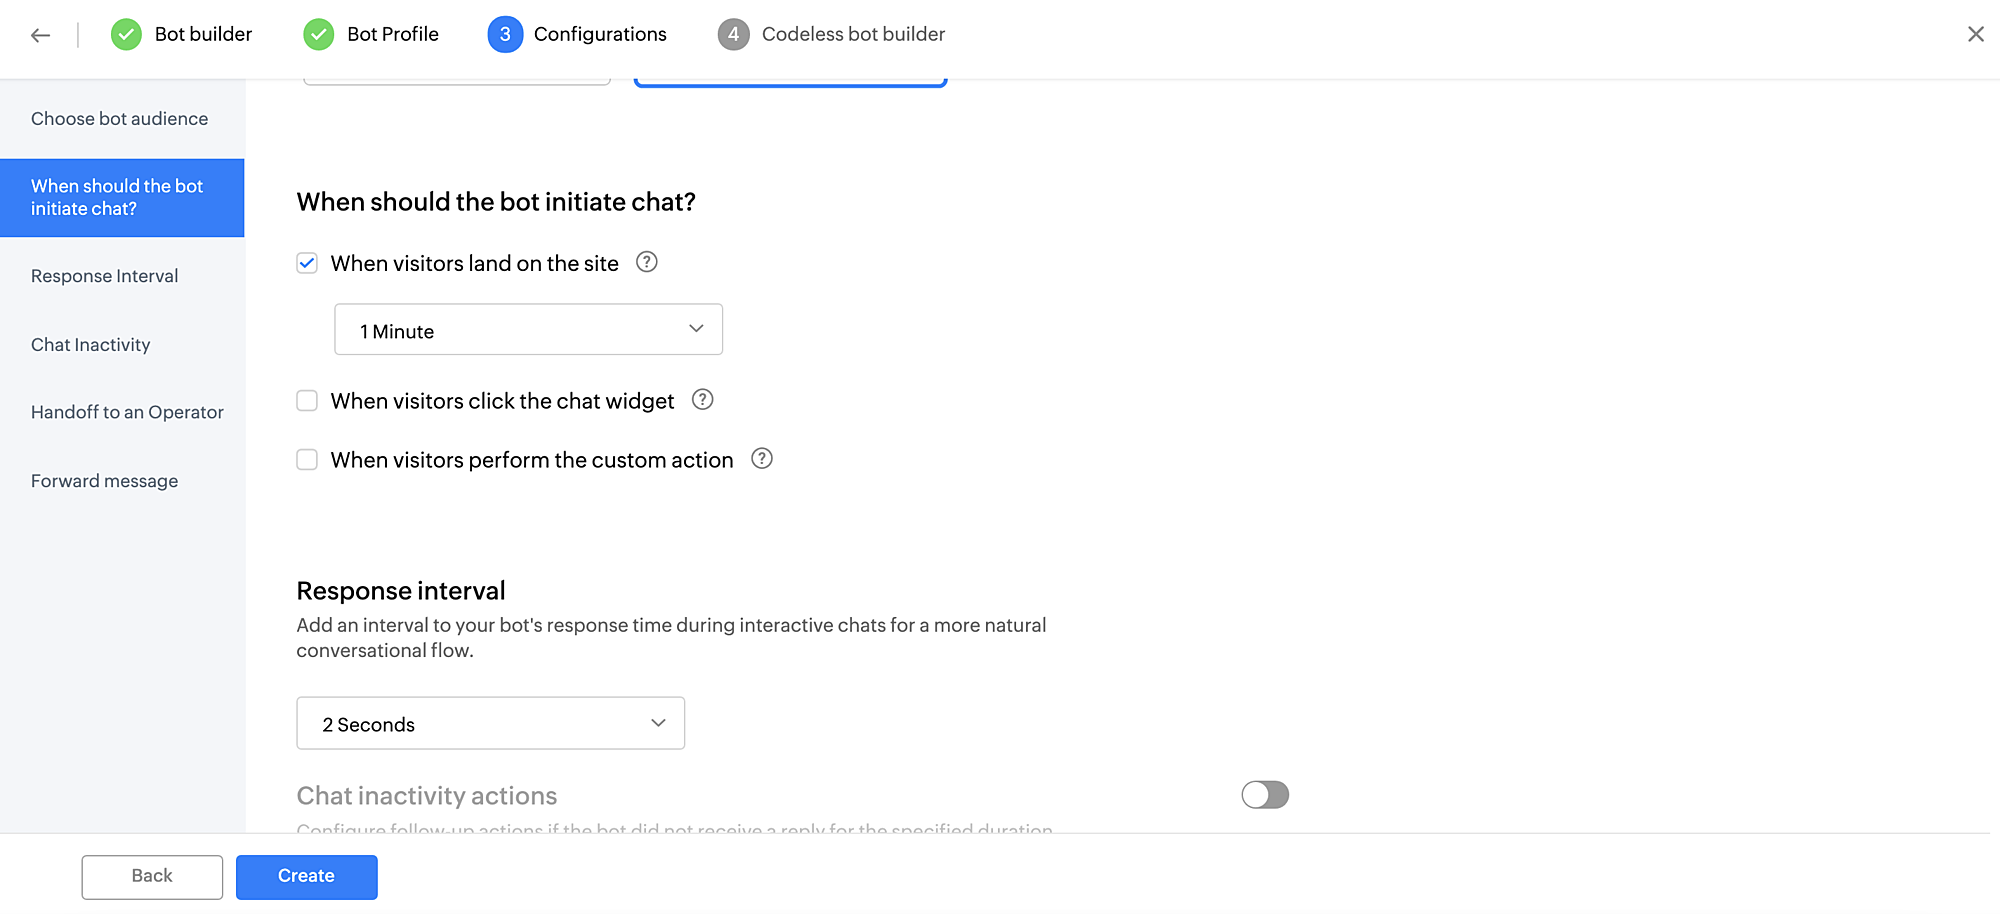
- Then, set the Response interval to Zobot's reply to provide a natural human-like conversation.
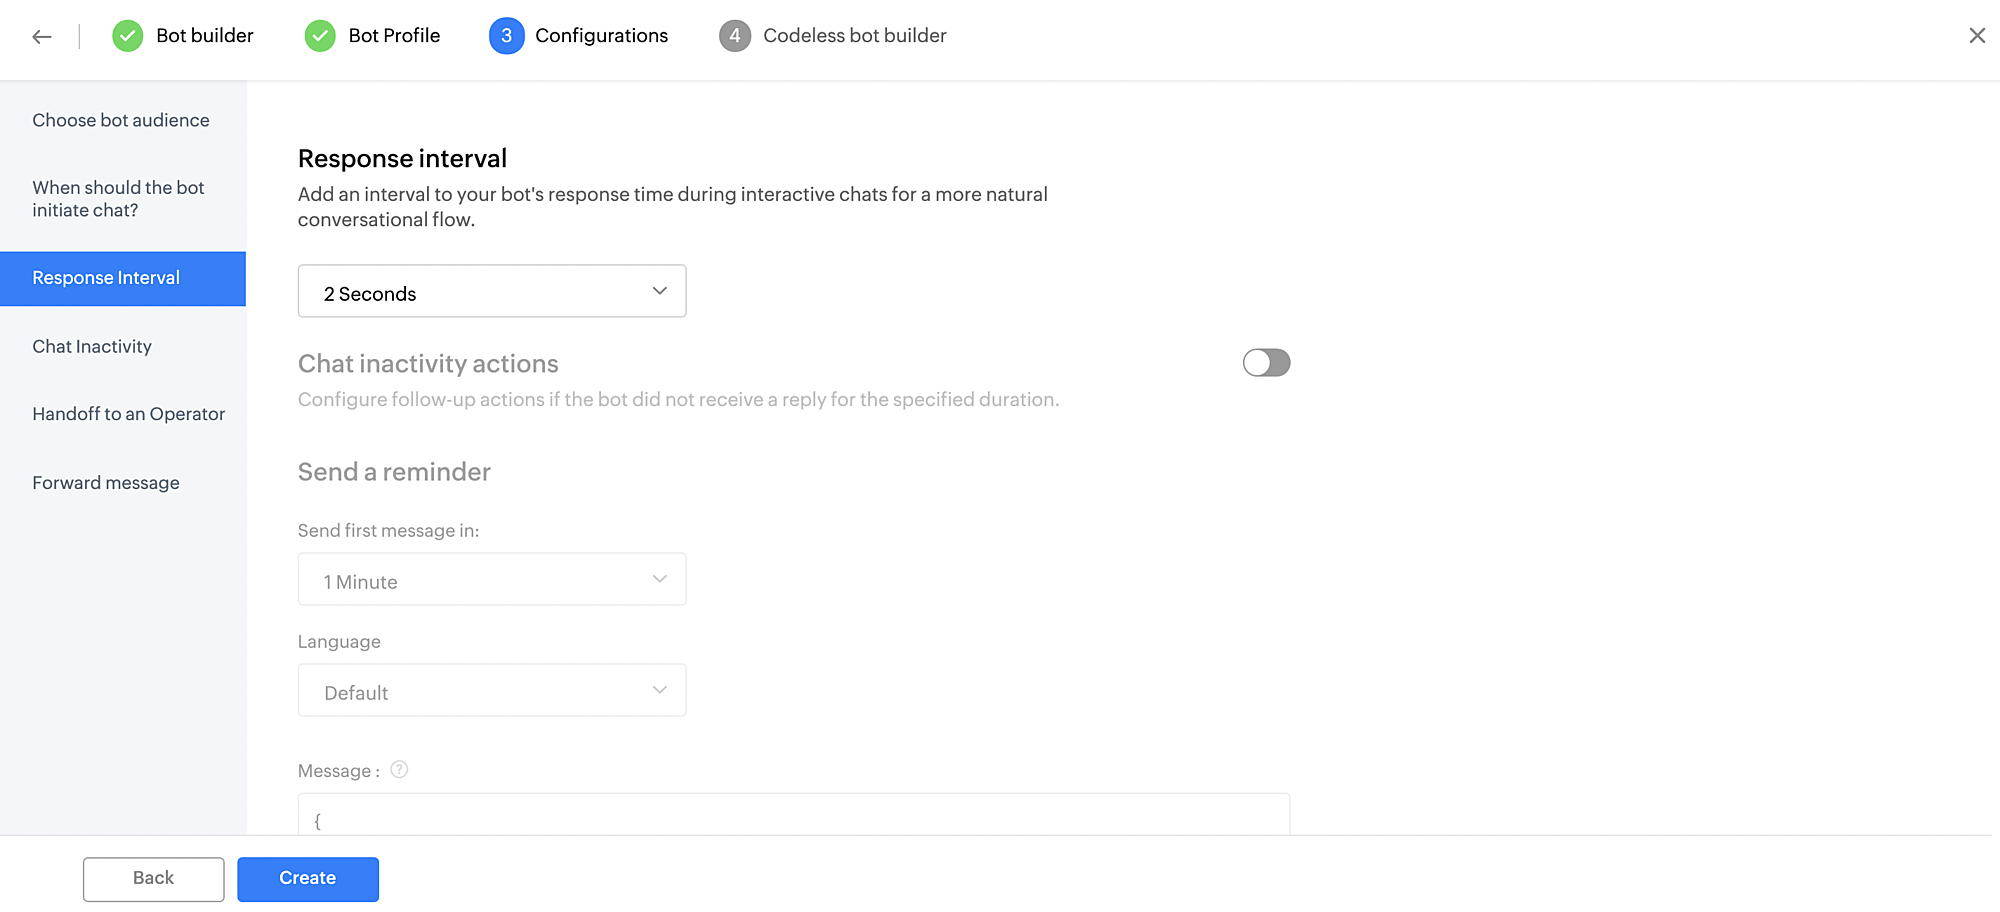
- Chat Inactivity Rules: Following this, you can set up chat inactivity rules to notify the visitor that he has been idle on the website for a considerable amount of time during the chat. Based on the inactivity time set in this section, Zobot can send out messages to visitors and end corresponding conversations. You can choose a language and set the time after which a message will be sent to the visitor saying that the chat will end soon because he/she has been idle. Then, you can set the time after the chat ends and configure the message to be displayed when the Zobot does so.
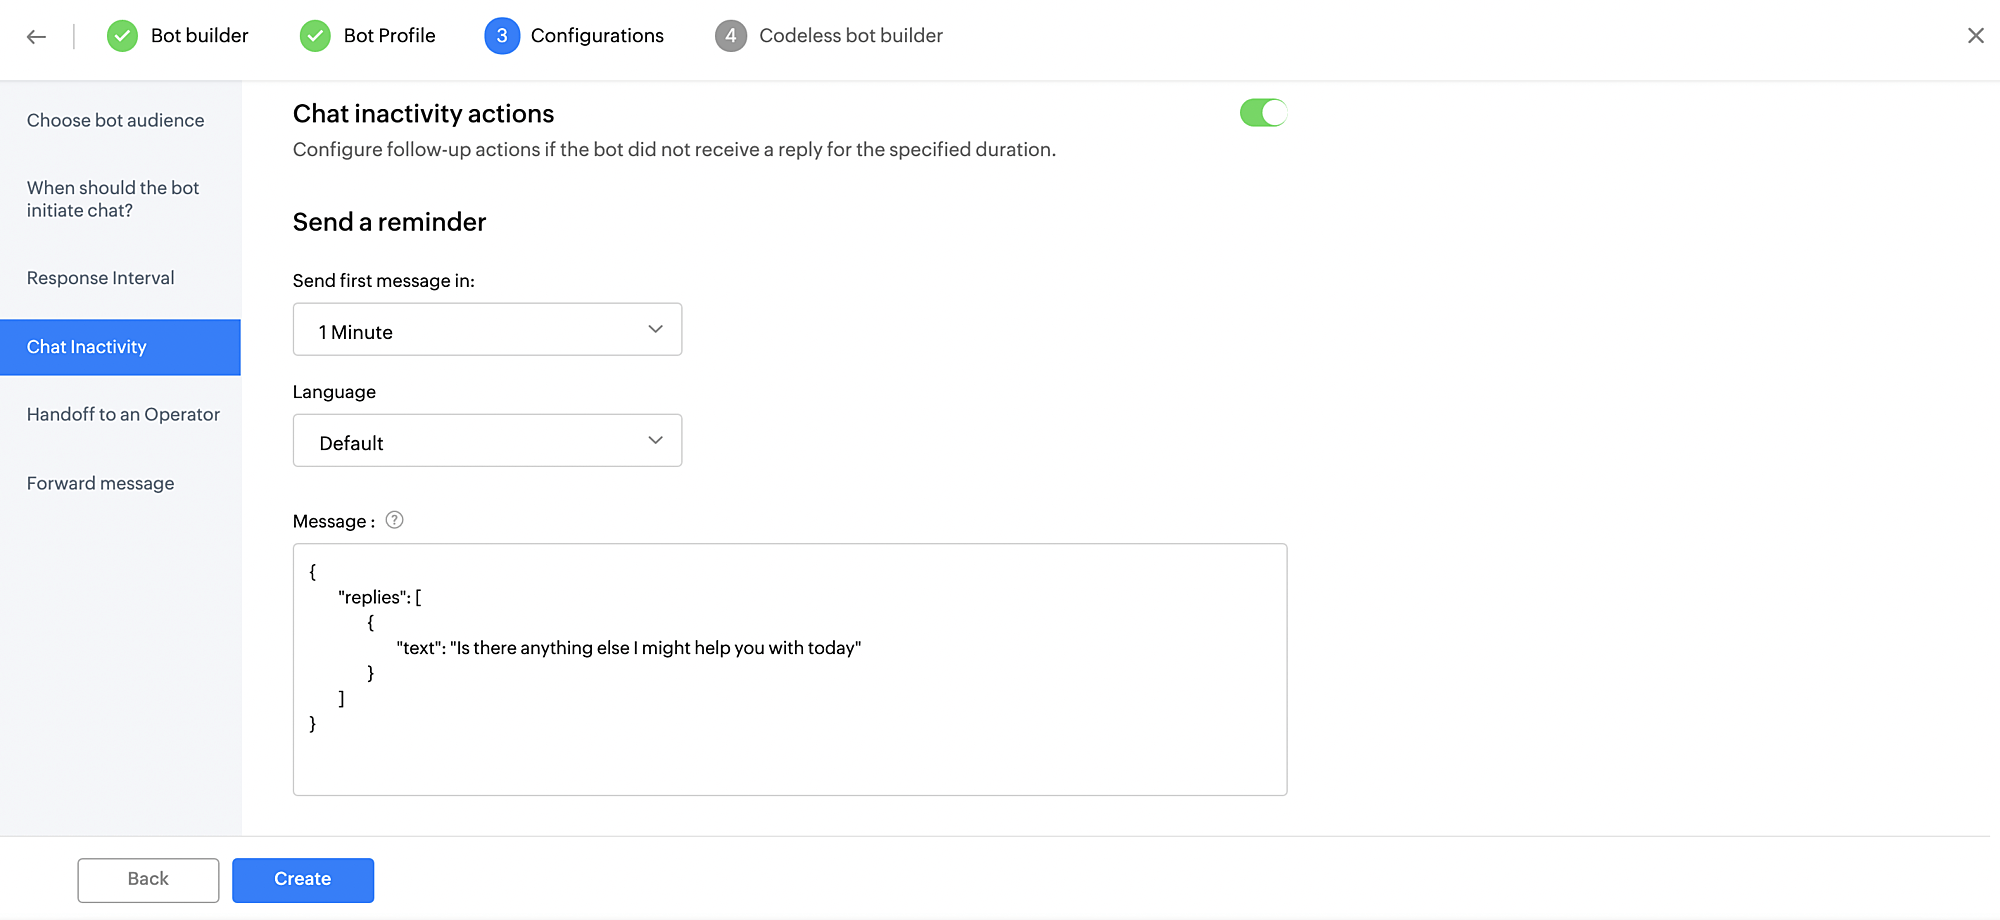
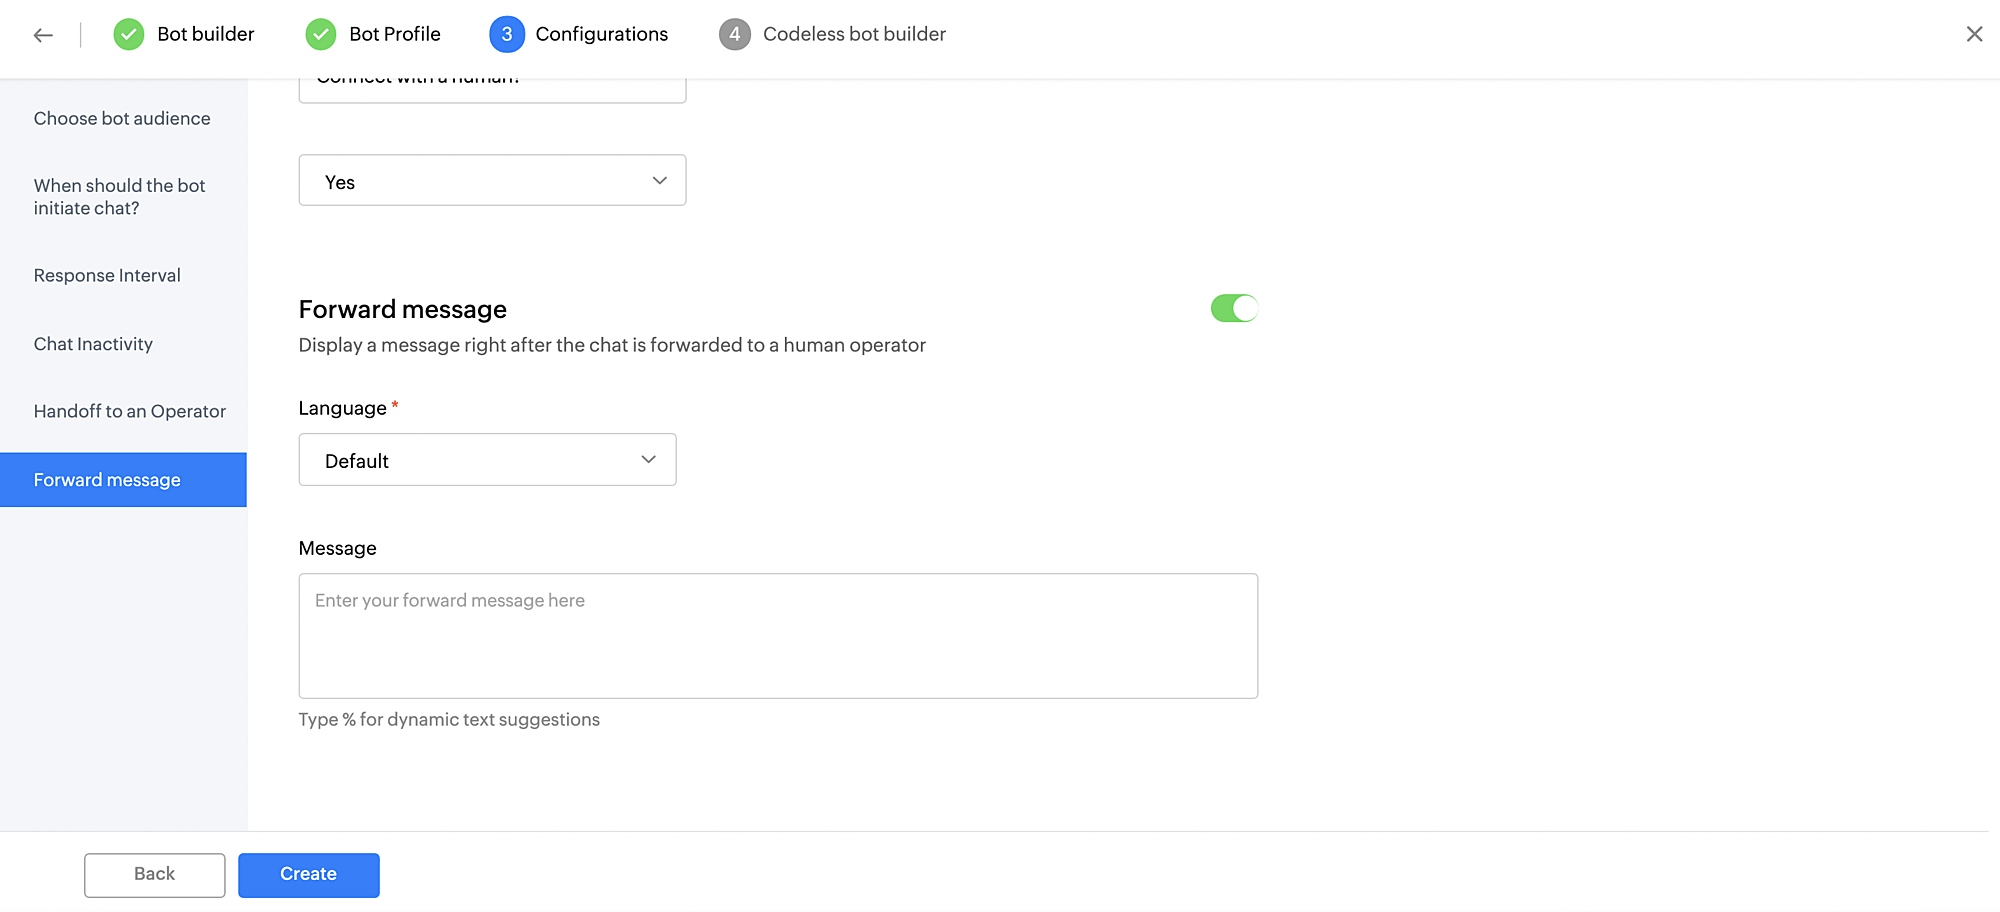
- Handoff to Operator: You can enable this option to let your visitors connect to a human operator in the middle of their conversation with the Zobot. You can configure the message to be displayed during the chat to connect with the operator. This will allow the Zobot to display the Handoff label "Connect with a human?" with the option ("Yes") during an ongoing chat. When the visitor clicks on Yes, they will be connected to the operator.
- Note: Select the Hide outside business hours check box to display the handoff label to the visitor only during the brand's business hours.
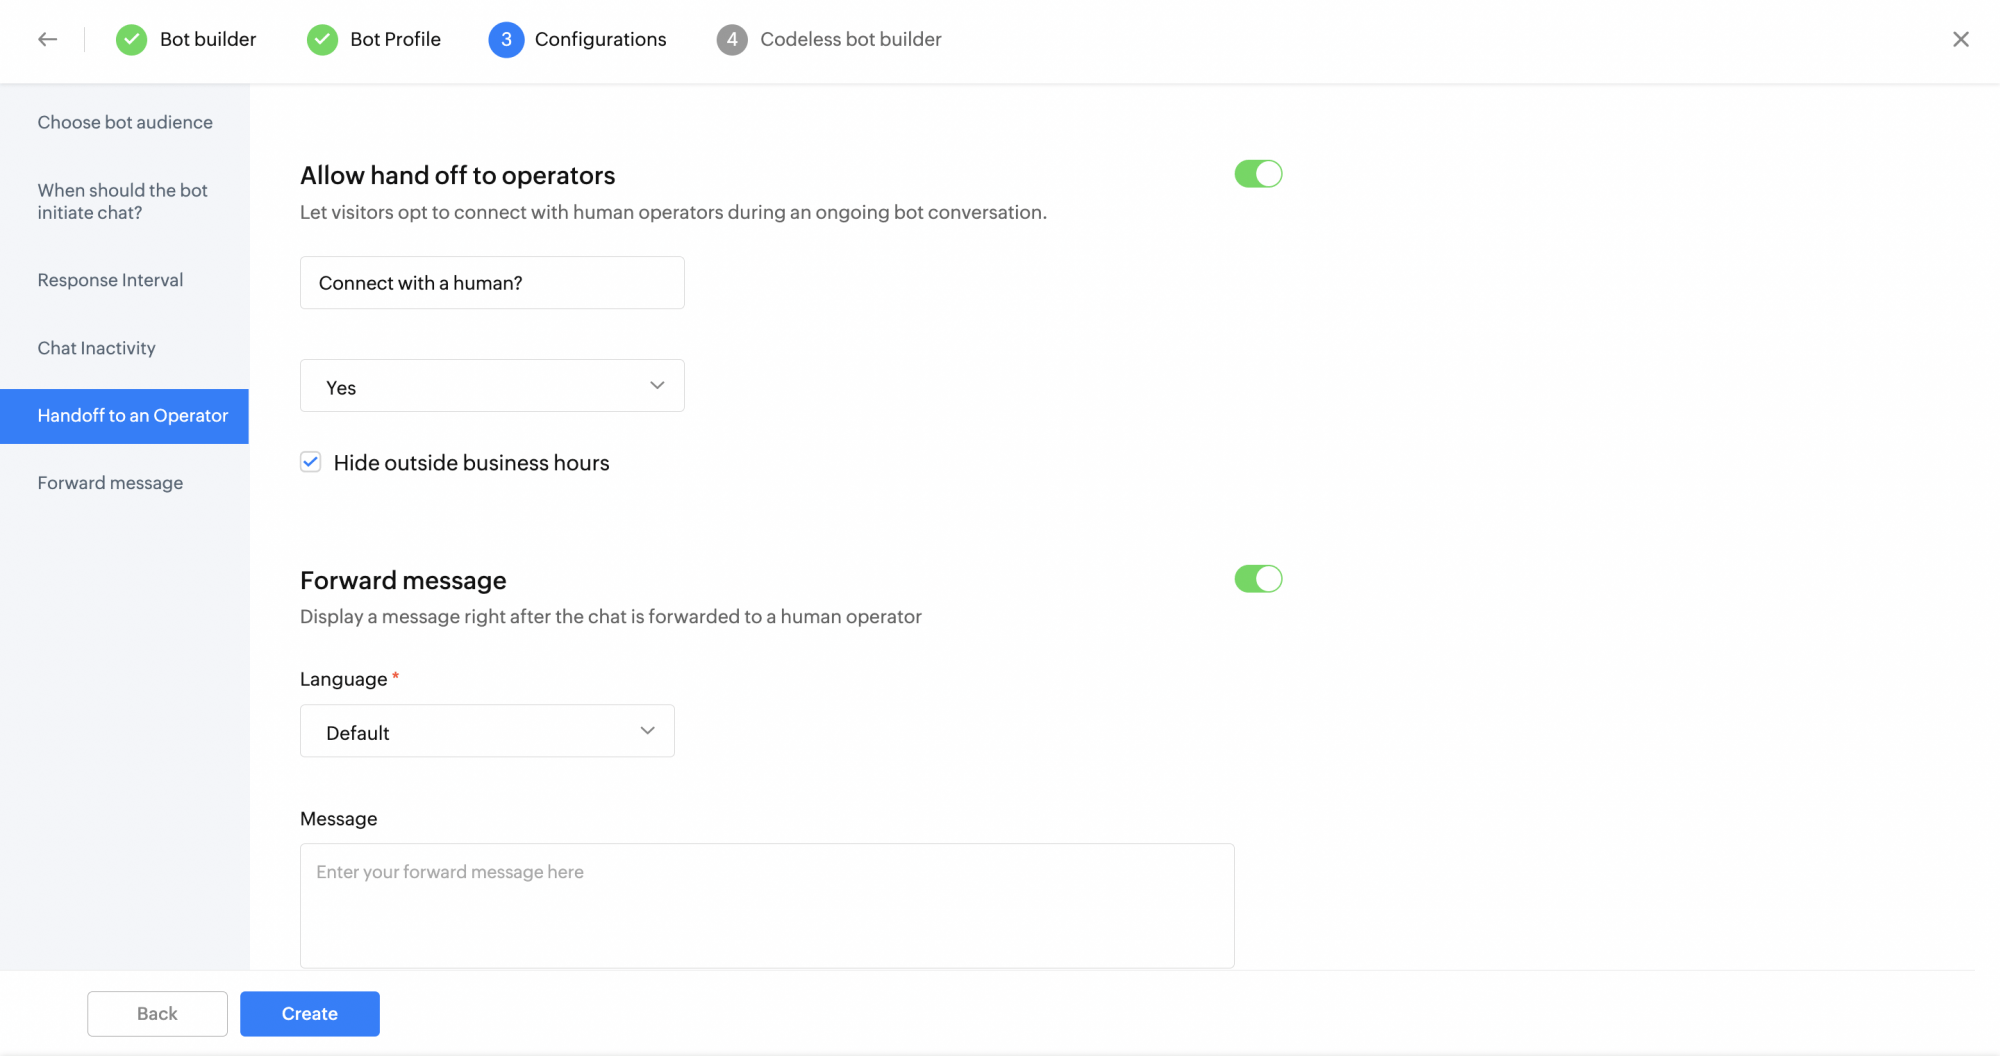
- Forward Message: You can send visitors a custom message while the bot forwards the chat to a human operator.
- Actions: The bot action allows the visitor to go back to the previous step or restart the whole chat conversation.
Note:
- This action is only available for the Codeless bot builder.
- It is not supported on Facebook, Instagram, WhatsApp and Telegram.

- Finally, click Create. You will be directed to the respective platform to build your Zobot. After creating the bot, click Save and test it.
- Then, click Publish to deploy the bot in the chosen brand.