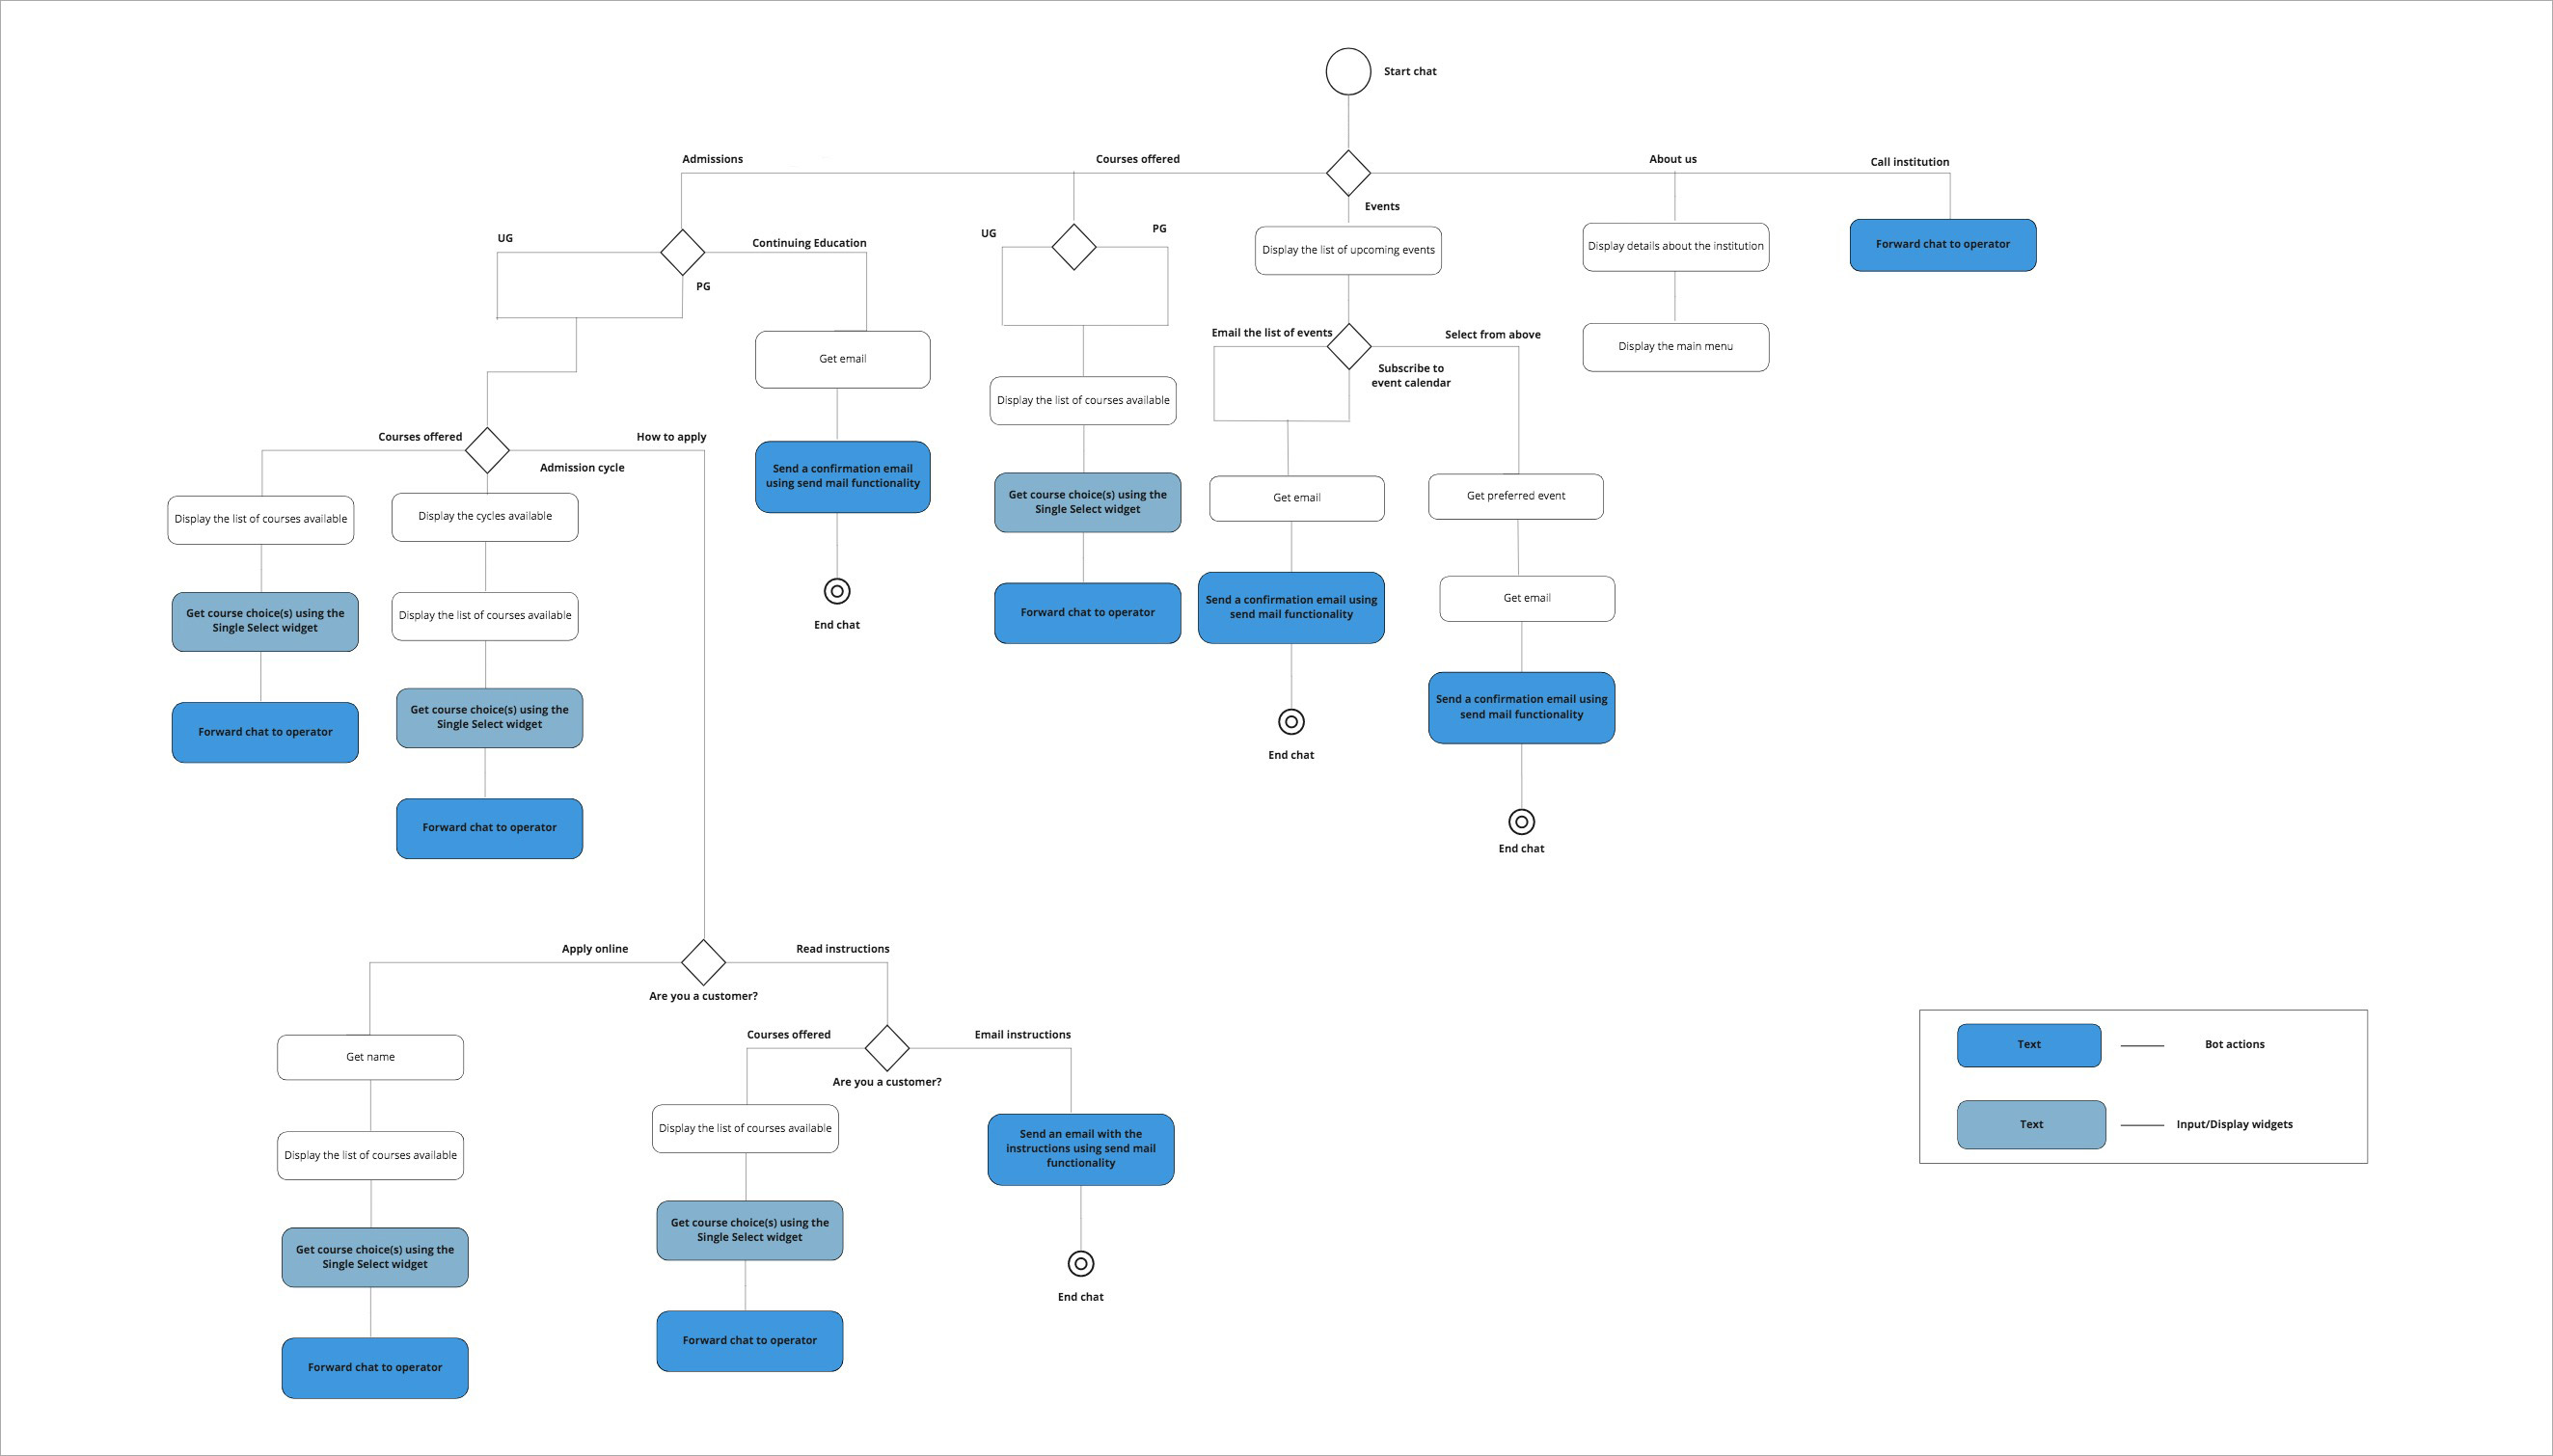
Students these days have a lot of questions about choosing courses that suit their likes and dislikes and they need immediate assistance with respect to this. Assigning a dedicated human staff to address this may not be effective as human resources have certain limitations. This Zobot for educational websites reaches out to students, gives them a wide range of choices based on their requirements, helps them with admissions, gives suggestions about institutions they can choose from, keeps them informed about events and addresses student queries on-the-go. It also helps them connect with representatives of the institutions.
Bot Requirements:
- Initiate chat/ Trigger a welcome message.
- Get student qualifications
- Displays the list of institutions and the courses available to choose from
- Schedule counseling appointments using Calendar widgets.
- Send emails to visitors who want to be part of events
- Forward visitor chats to the representatives of the institution.
Zobot Capabilities:
It can collect visitor details and connect the visitors on your website to the different departments available inside your organization based on the type of problem they're facing.
- Live Chat Transfer: Your prospects can ask the bot to transfer their chats to one of the support representatives of your organization at any time. The Zobot provides an option to do so inside the chat window itself.
- Schedules meetings: The Zobot can get your visitors' details and preferred time slots and fix counseling appointments for them with representatives.
- Keep prospects updated: The Zobot captures the prospects' information like name and email address, and based on the requirements, it updates prospects as and when there are updates on the events that you conduct. The info can be about education fairs, course counseling, etc.
Bot flow:

How to create this bot?
- Navigate to Settings > Zobot > Create bot. Add a name, description, choose the website and preferred departments.
- Set trigger criteria and enable business hours and operator handoff based on your requirements.
- Now, copy the code and paste it inside each handler- Trigger, Message, and Context.
- Save and Publish each handler separately and then publish the bot.