Get started with Zoho TeamInbox
Zoho TeamInbox is a shared inbox tool that helps teams have better collaboration. Direct your group emails and other relevant communication channels to Zoho TeamInbox and make it accessible to the entire team in one collaborative space.You can link your emails, Business WhatsApp, Telegram numbers, Facebook Messenger, and Professional Instagram channels to the shared inboxes you create here. Your teams can collaborate over these channels and send out informed, personalized, and consistent responses to your customers.
Hierarchies in Zoho TeamInbox
Every Zoho TeamInbox account comprises three hierarchy entities: Organization, Team, and Inbox.
- Organization: Organization is your workspace that holds all of the teams and inboxes you create and the people you add as members inside Zoho TeamInbox.
- Teams: Teams are separate spaces created to manage conversations related to a specific group of people of your organization.
- Inboxes: Zoho TeamInbox allows you to manage both your personal and shared conversations within a single platform via personal and shared inboxes.
Let’s say your organization, Zylker, has nine team members. With Zoho TeamInbox, you can organize them into different teams based on their roles. For example, your Marketing Team handles both email and social media communication with customers. You can create a Marketing team in Zoho TeamInbox, add all the marketers to it, and set up shared inboxes for their group email accounts and social media channels.
Similarly, you can create separate teams and shared inboxes for your Customer Support and Sales teams. Each team will be able to send and receive messages from their respective inboxes—all in one central platform. No more switching between tools or forwarding emails.
Access Zoho TeamInbox
If you have a Zoho account, you can access Zoho TeamInbox directly from the home page. Not yet signed up? No problem! Follow these simple steps to create your Zoho TeamInbox account:
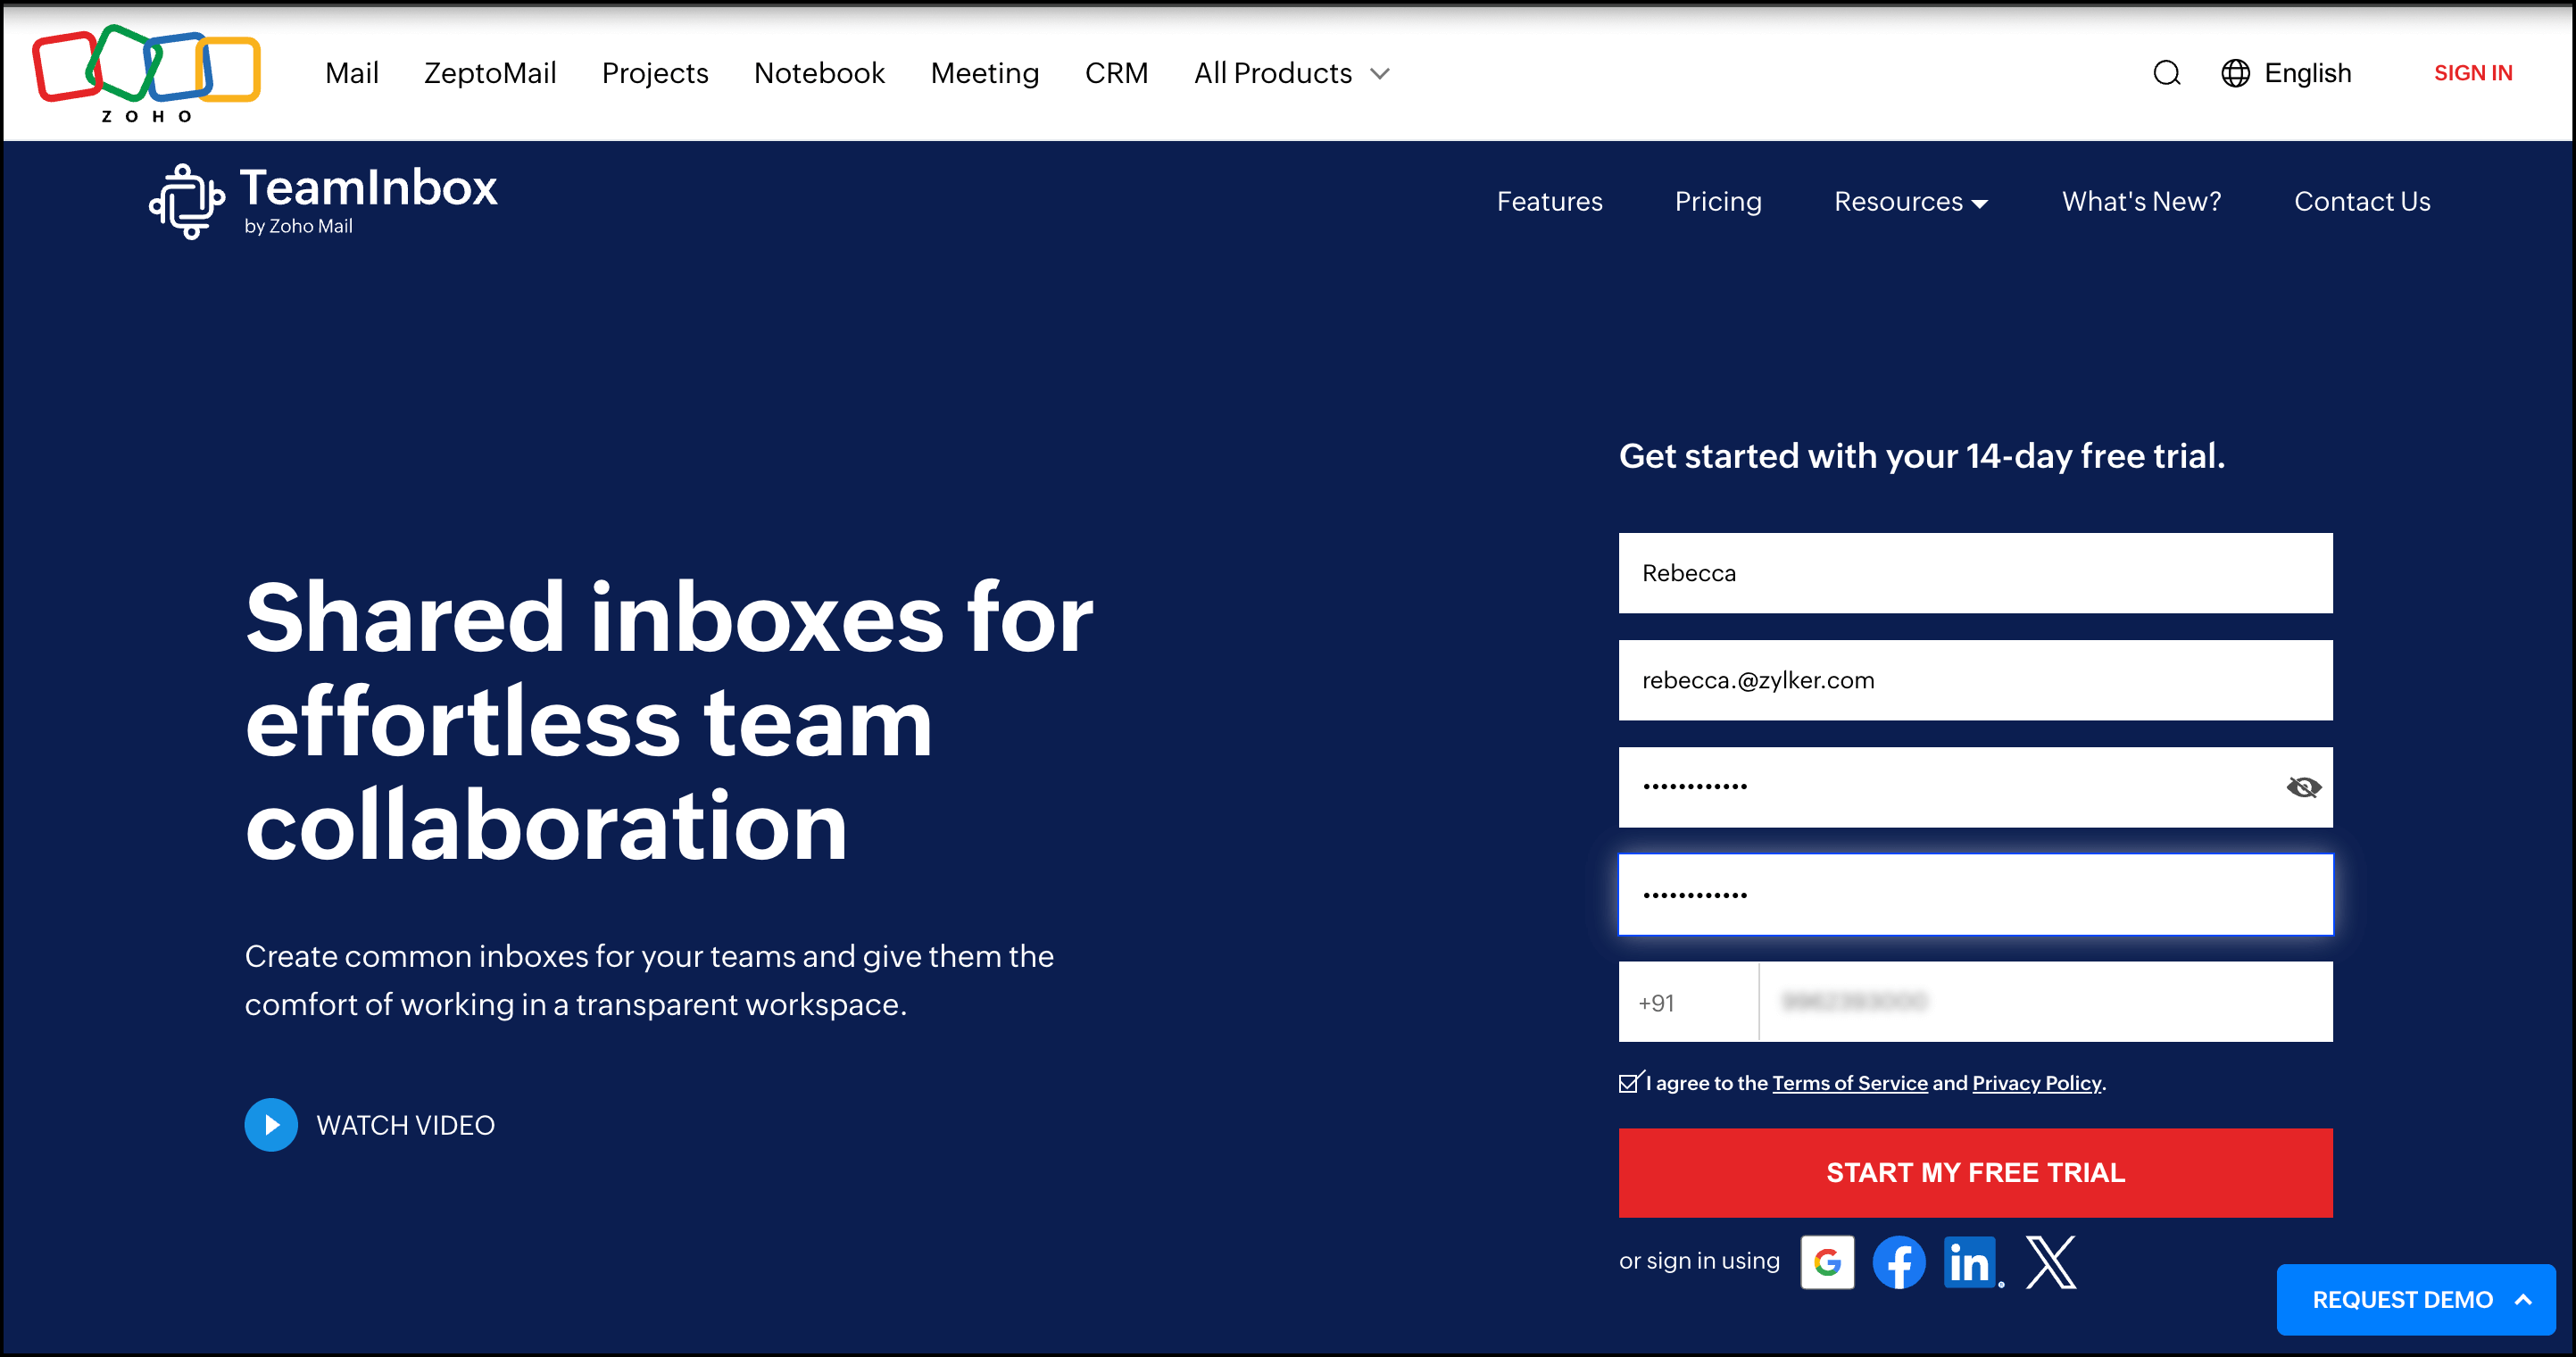
- Visit the Zoho TeamInbox website and click the Sign Up button.
- Fill in the necessary details to sign up. If you want to update your phone number, you can choose your country code from the drop-down and then enter your phone number.
- Read and accept the Terms of Service and Privacy policy, and click Start My Free Trial.

You will get a prompt for OTP. Enter the OTP sent to your registered mobile number to verify your account.

Once verified, you’ll be taken to the onboarding page of Zoho TeamInbox to set up your organization.
Set up your organization
Organization is your workspace that'll hold all the teams and inboxes you create and the people you add as members. Enter the name of your organization in the prompt and click the Next icon.

Add members to your organization
After you've set up your organization, invite people to work in it. Enter their email addresses and click Send Invitation and Take me in. An invitation email is sent to the invited users, from which they will be able to join your organization. You can skip this step now and add members later.

You will now be taken into your workspace. Here you can start by creating your first team.
Create your team
Set up your teams by adding members to specific groups such as Marketing, Customer Support, or Sales. For each team, you can also create dedicated inboxes to keep communications organized. Think of these as separate spaces where each team can manage their own messages and work more efficiently.
To create a team
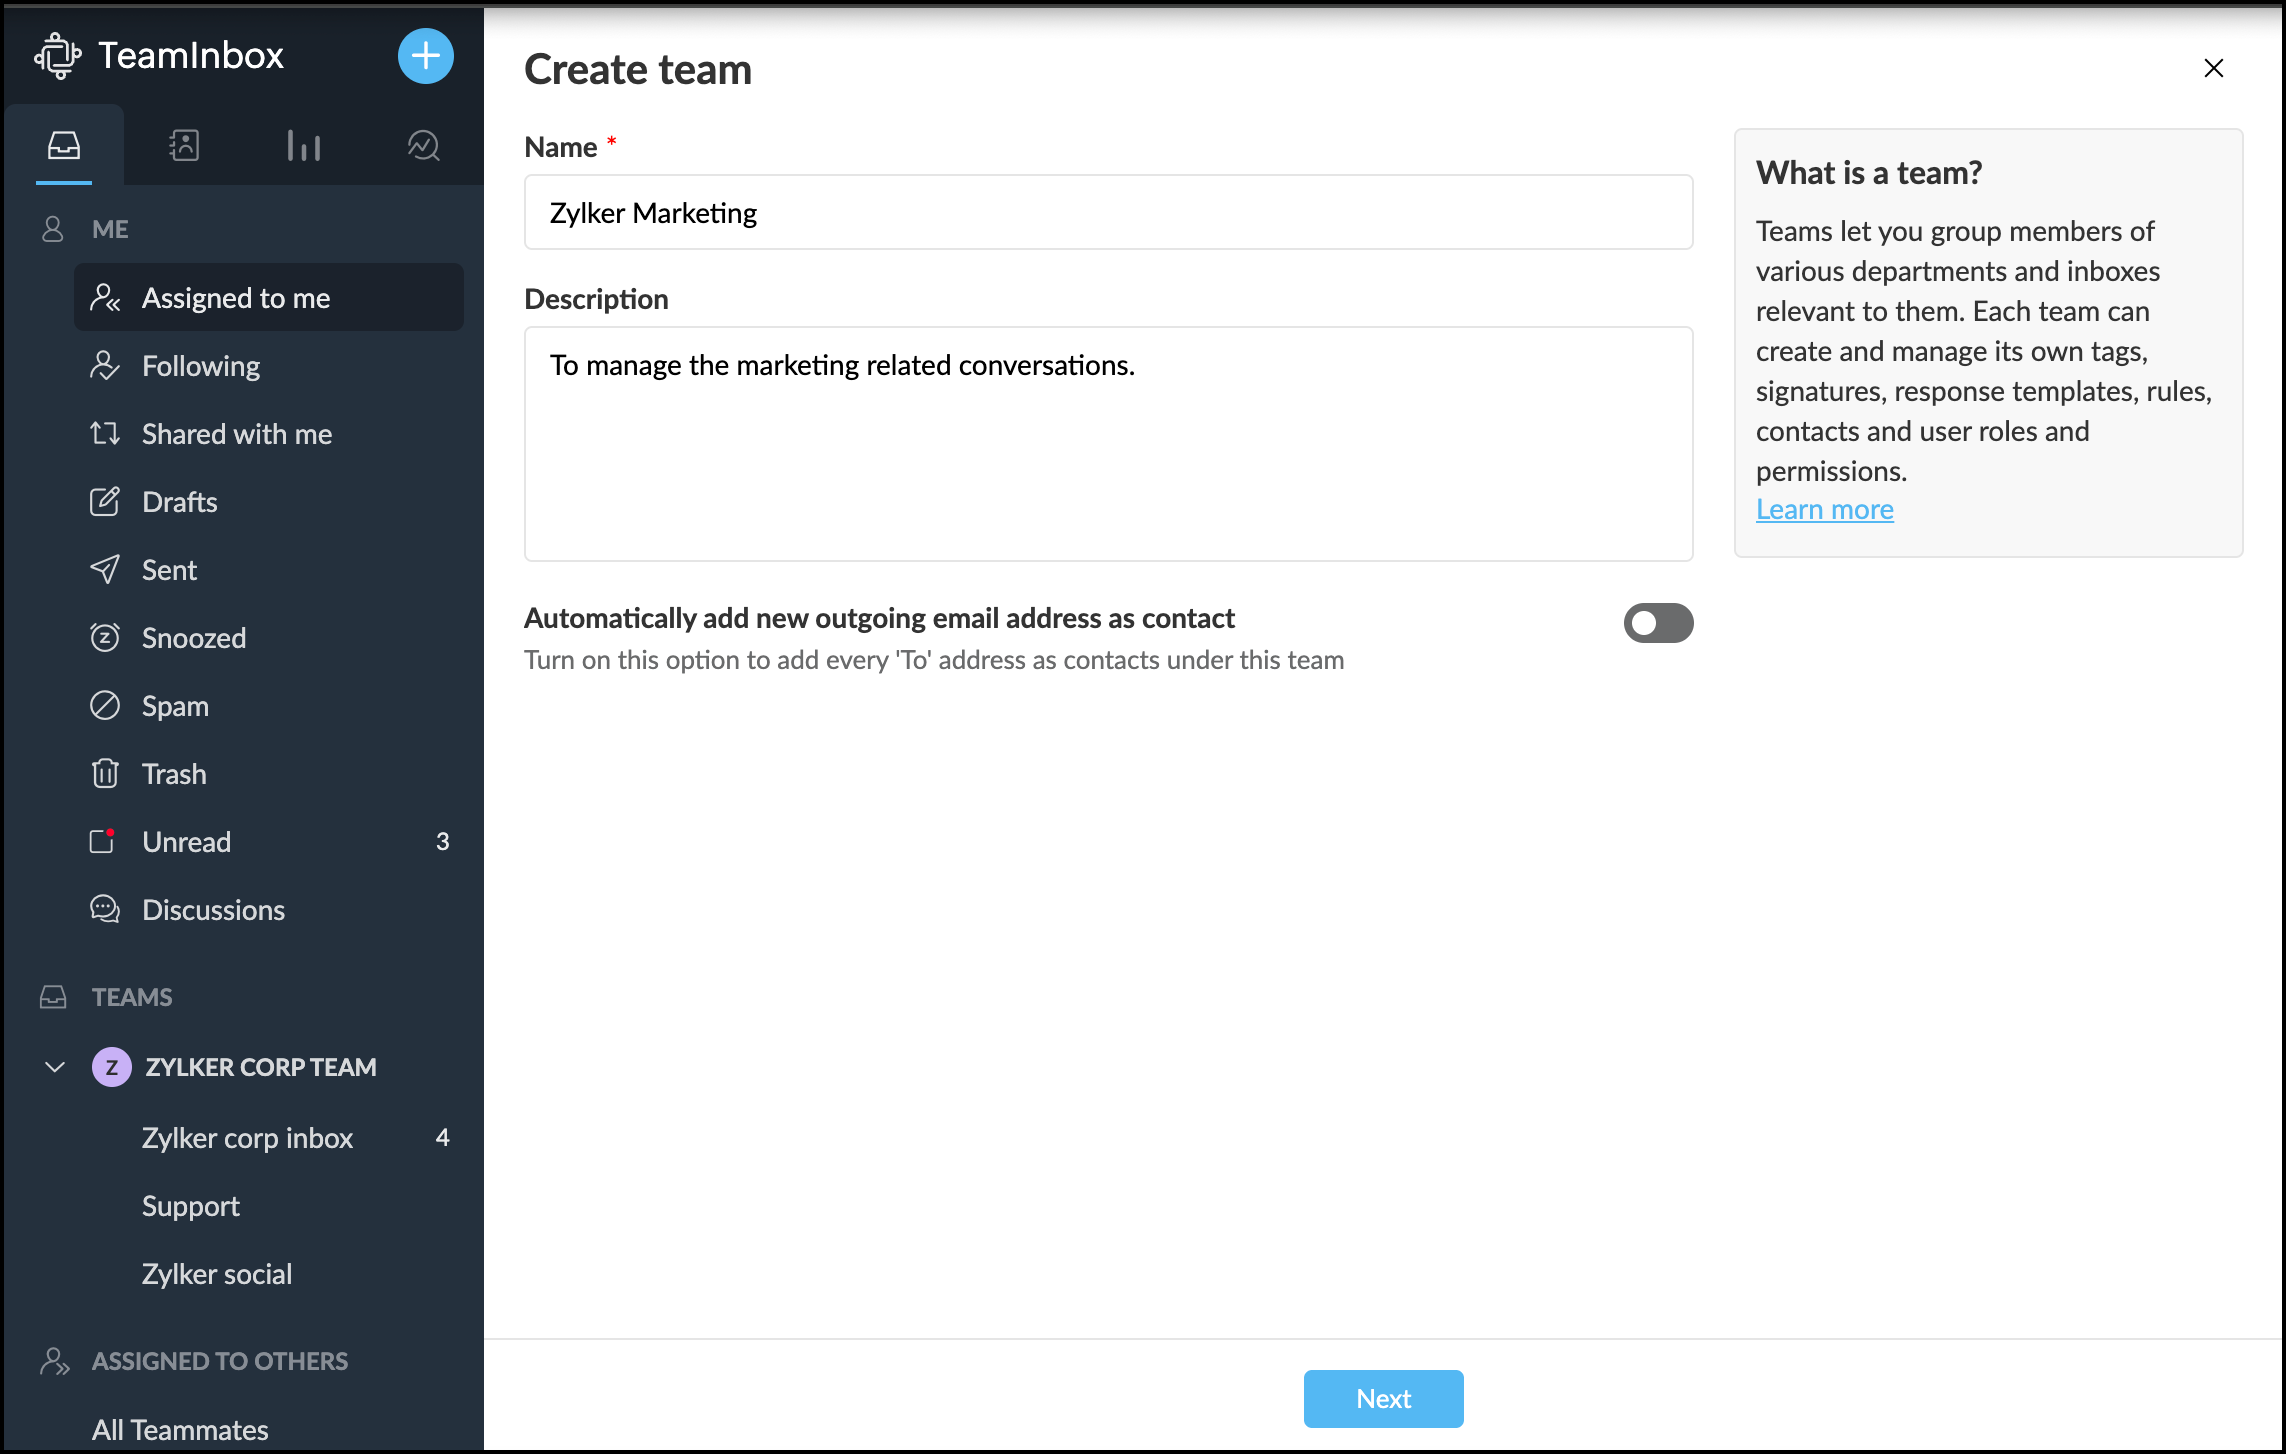
- In your Zoho TeamInbox account, click the Plus icon in the top right corner in the left pane.
- Select Team .
- Enter a name for your team. You can also add a description (optional).
- To automatically save any new outgoing email addresses as contacts under this team, turn on the toggle.
- Click Next to proceed.

- Next, add people to work in your team. If you want to add members who are already added to the organization, you can just select them from the list of users.
- If you want to invite new users, enter their email address and click Invite. They’ll receive an invitation email and will be added to the team once they accept it.
- You can also import users from other Zoho groups that you've created. Click Import users, and all the groups for which you have admin or moderator permission will be listed. Choose from the groups and click Import.
- Click Create .
The team you've created will be listed in the left pane; click it to view all the messages received in the inboxes created under this team.
Create shared inboxes
Create a shared inbox for your teams, connect various communication channels, and manage incoming messages regardless of the source channel alongside your emails. You can create multiple inboxes under each team and add multiple channels to a single inbox. Alternatively, you can keep the inbox empty by not linking any channels, it's like an organizational space into which you can move threads from other inboxes.
To create an inbox
- In your Zoho TeamInbox account, click the Plus icon from the top right corner.
- Select Inbox > Shared Inbox
- Enter a name for your inbox and select the team under which you want to create this inbox.
- You automatically add all team members to this inbox or manually add them later.
- Enable or disable the additional inbox settings as per your need, and click Create Inbox.

Associate channels to the inboxes
A channel is any medium that brings messages in and out of Zoho TeamInbox. Your email addresses, Business WhatsApp numbers, Telegram numbers, Facebook Page, and Instagram professional account are the examples of Channels. Zoho teamInbox offers multichannel shared inboxes, allowing you to connect multiple channels to a single inbox and access all your conversations alongside emails in one place.
Create channels in Zoho TeamInbox
- Log in to Zoho TeamInbox, click the Plus icon from the left pane, and select Channel > Shared Channel.
- Select the channel type to create the channel. You can create multiple channels to a single shared inbox for your teams.
- Click Next to create the channel.

You can create the following shared channels and connect to your team's inboxes.
- Email channel: Set up an email channel using email forwarding or POP/IMAP. This lets your team manage all incoming and outgoing emails from a single, organized inbox.
- WhatsApp channel: Bring WhatsApp business conversations into Zoho TeamInbox. View and reply to messages right alongside your emails and other channels—no app switching needed.
- Telegram channel: Connect your Telegram account so your whole team can access and respond to messages directly from Zoho TeamInbox, making collaboration faster and easier.
- Facebook channel: Link your Facebook Page to Zoho TeamInbox. All messages sent to your Facebook Messenger will show up in your shared inbox, ready for your team to respond.
- Instagram channel: Connect your Instagram account to Zoho TeamInbox. Make sure it’s a professional account linked to a Facebook page you manage. Once connected, your messages from Instagram will be routed to your shared inbox.
Reading and responding to messages
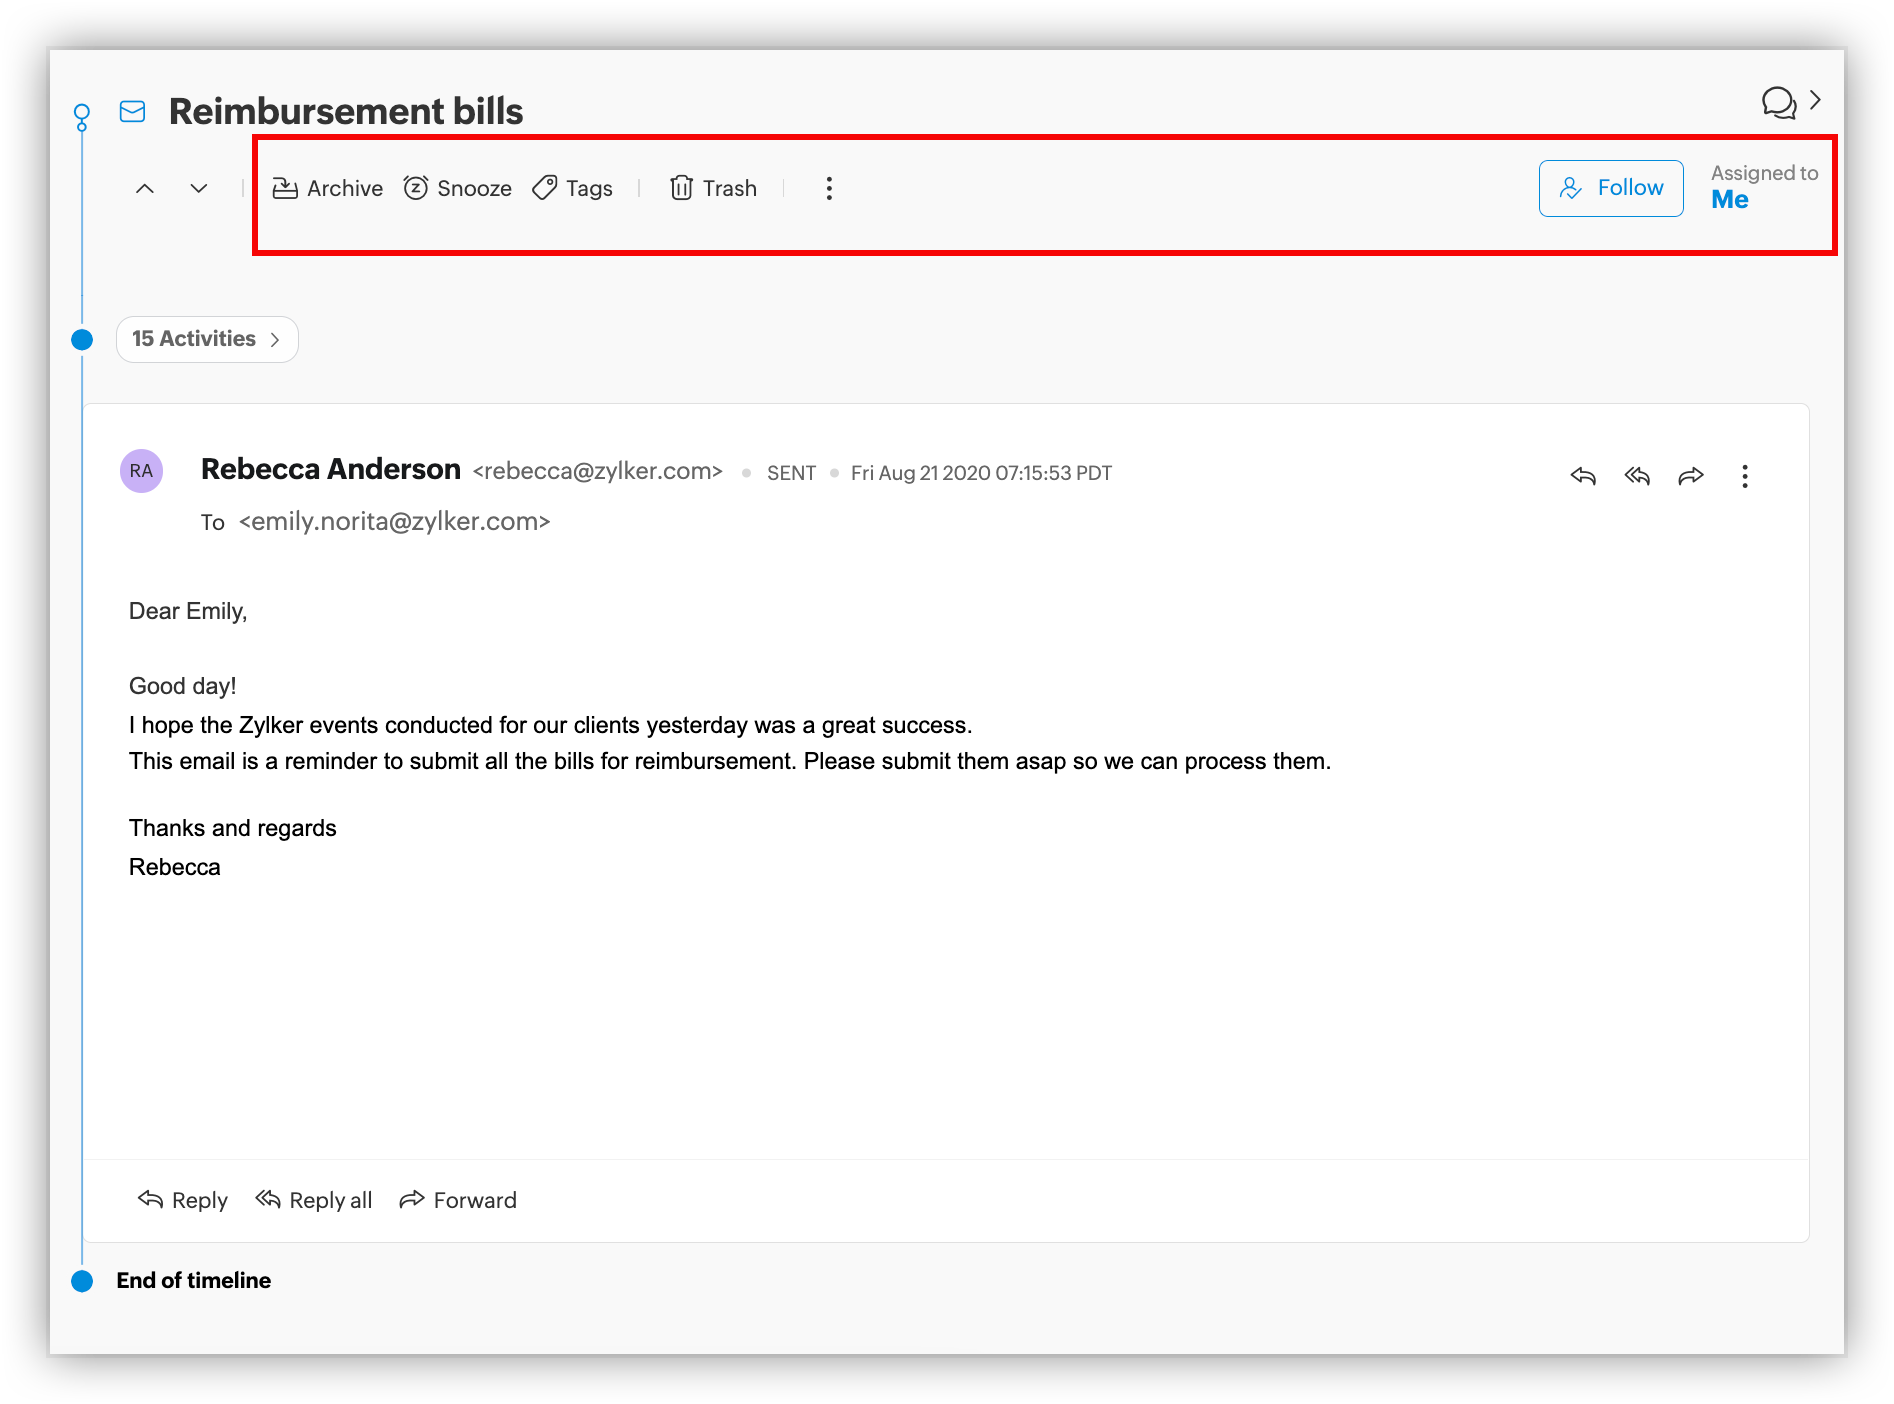
After you've added and verified your inboxes, you will start receiving your messages in Zoho TeamInbox. You can reply to all the messages right from here and also do the following:
- Archive messages: Once you’ve completed a conversation, you can archive the thread to remove it from your active inbox view. Archiving helps you clear out finished conversations, so you can focus on messages that still need your attention.
- Apply shared tags: Tags let you organize your threads based on topics. Create tags and apply them to threads across inboxes and access information with much ease.
- Comment on threads : To have internal discussions on a thread with your team, you can use comments. Click the Comment icon
from the top-right corner of the thread and add your comment there. @mention the team members you want to include in the discussion so they will be notified about your comment.
- Assign messages : Based on the subject, messages can be rightly assigned to people who are responsible. Click Assign on the top-right corner of the thread and select the person to whom you want to assign it. Click Assign to me if you want to assign the thread to yourself.
- Snooze messages : When there are messages that do not need your immediate response or that needs to be saved for later follow-up, you can snooze them for a definite time period. On snoozing a message, it will be hidden from the inbox until the snooze time you've set. Click Snooze from the top bar and select the snooze time.
- Follow thread : If you are interested in the matter of any thread you can follow it to be notified about the activities happening in the thread. Click Follow from the top-right corner of the thread. This thread will then be moved under your Following view.
Create Response time goals : Response time goal ensures that responses to incoming messages go out within a set time. Team admins can set the time from the Rules that the entire team should adhere to. If the response is not made within the set time, you can choose to perform an action automatically, like sending an auto-response or delegating the thread to another member.

- Move thread to another inbox: You can move a thread from one inbox to another either manually or by setting up rules. Rules let you define specific conditions for incoming messages, so they’re automatically routed to the appropriate inbox.
- Mark duplicate threads: If a client sends the same email to multiple addresses, it will appear in more than one inbox—potentially leading to duplicate replies. To avoid this, mark the email as a duplicate so your team knows it’s already been received and handled.
Manage your team's inboxes
You can edit the inbox settings and manage it if you have the admin permission for the inbox. You can change the inbox name, manage communication channels, add or remove users from your inboxes, and change their roles.
- Login to Zoho TeamInbox.
- From the left pane, mouse over the team that is holding your inbox, click the More icon, and click Manage team. You can also reach here by clicking Settings under User profile.
- Click on your inbox from the list under the team overview.
- Click the Members tab. You can see the list of members in your inbox.You can change inbox member roles or add or delete an inbox member.

Integration and extensions
Integrations and extensions in Zoho TeamInbox allow you to access and perform actions in Zoho Applications and other third-party applications without having to leave your shared inbox.


