

Record Deposits

When you record a customer payment in Zoho Books using a cash or bank account, you may need to deposit that amount in your actual bank account. If the payment was recorded using the same bank account, you don’t have to record a separate deposit. If it was recorded using a cash account, you must record a deposit for that amount into your bank account.
Zoho Books lets you transfer the amount from the cash account to your bank account. Once the deposit is recorded, you can match the bank statement entry with the corresponding transaction in Zoho Books. This lets you maintain accurate financial records and simplifies reconciliation.
Prerequisite: When you record a customer payment Zoho Books, ensure that you select a cash account in the Deposit To field if you plan to deposit it later.
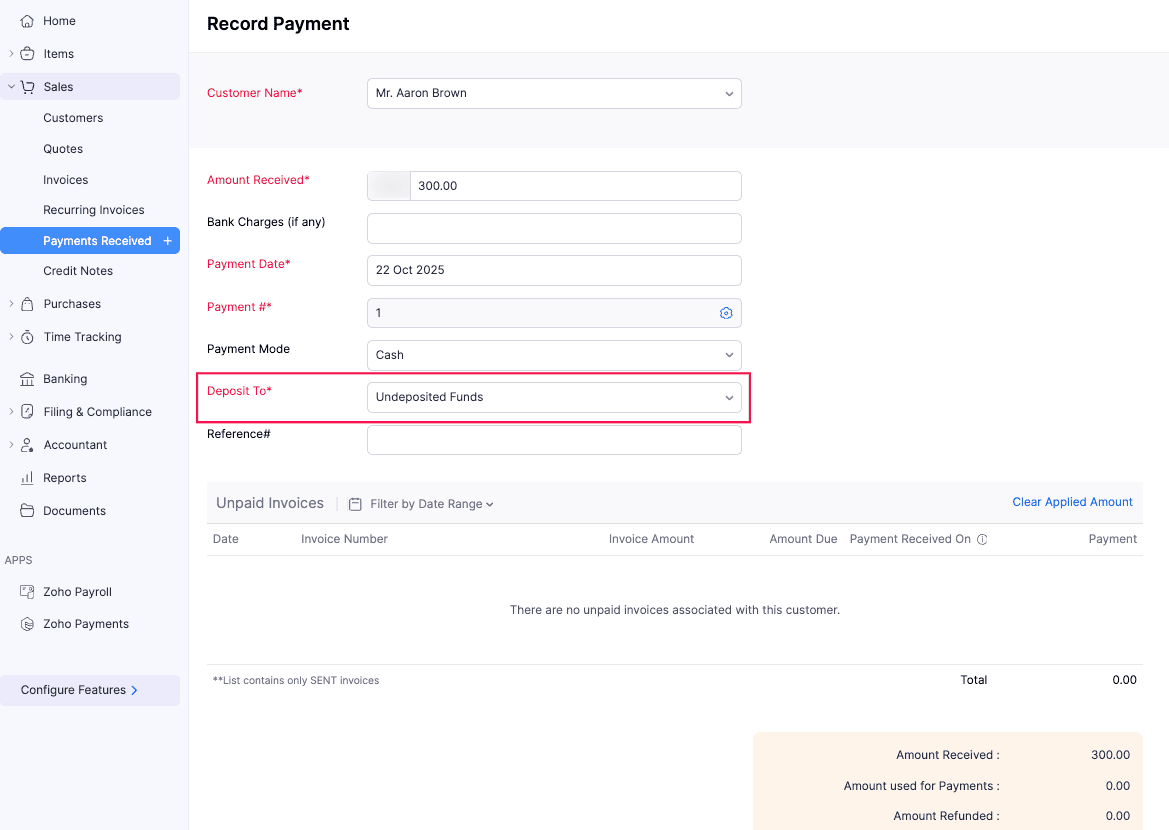
Once the payment is recorded, you must record a deposit slip for this payment under the respective cash or bank account in the Banking module. Here’s how:
Go to Banking on the left sidebar.
In the Banking Overview page, under Active Accounts, select the respective cash or bank account where you want to record the deposit slip.
In the next page, click Record Deposit in the top right corner.
In the Record Deposit pop-up, fill in the following fields:
Date: Select the date when you want to record the deposit slip.
To Account: Select the bank account to which you want to transfer the deposit amount. Note that this field appears only when you record deposit slips from a cash account.
Paid Via: Choose how the amount will be transferred to the bank account.
Reference#: Enter a unique reference number to track this transaction internally.
Bank Charges (if any): If the transfer included any charges, mention them here.
Description: Enter a short description on recording the deposit slip.
Filters: Choose how you want to filter the list of transactions available under this account. Once you’ve selected the required filters, click Apply Filter.
- Received From: Select the customers based on whom you want to filter the transactions.
- Transactions: Choose which transactions to display. The available options are: All, Customer Payment, and Sales Receipt.
Other Funds: If you want to include any additional amount apart from the selected deposit transaction, click Add Funds Manually, and enter the respective amount.
Attachments: Include any attachments for internal use.
Click Save.
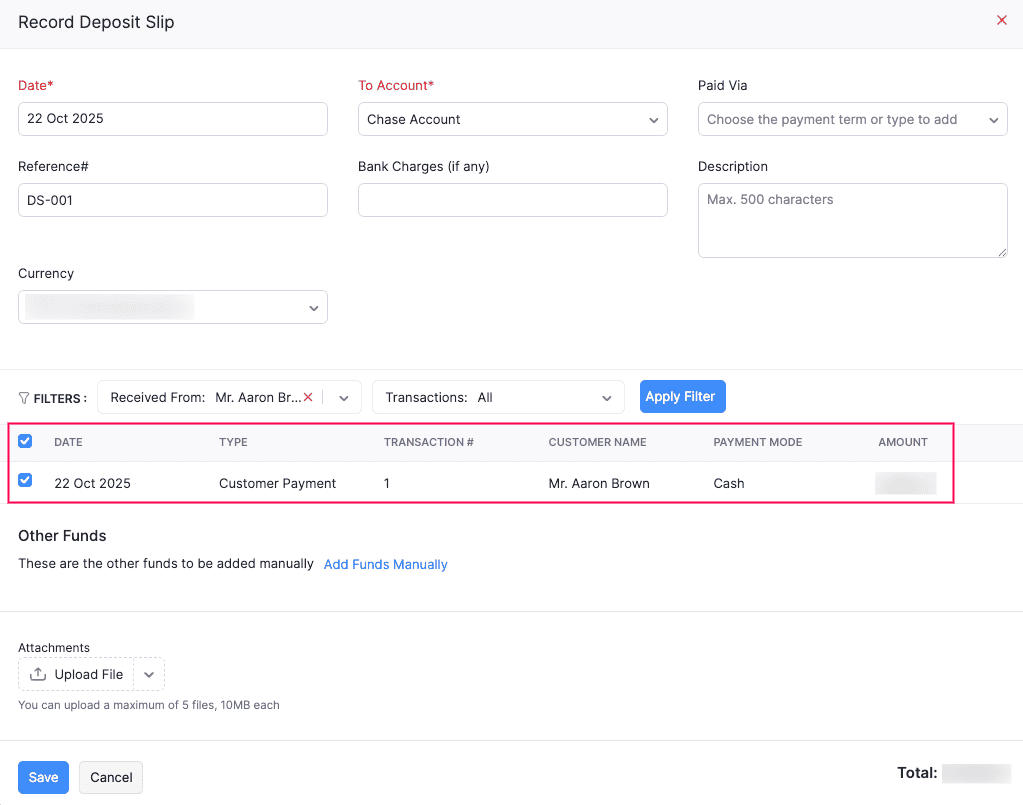
The deposit slip will be recorded.
The transaction will now be available in the respective bank account under the Banking module. You can match this statement with the transaction in Zoho Books. To do this:
- In the bank account’s page, under Uncategorised Transactions tab, select the bank statement you want to match.
- In the right pane that appears, under Best Matches, click Match next to the respective transaction.
The bank statement will be matched with the respective transaction.
Custom Fields
Custom fields in Deposits allow you to record additional information that isn’t included on the default deposit creation page in Zoho Books. You can create fields based on your organisation’s requirements to record details such as a reference number, deposit source, or any other information you need to track.
Create a Custom Field for Deposits
Scenario: Patricia Boyle at XYZ needs to record the source of each deposit for easier tracking. She creates a Deposit Source custom field with a dropdown containing options such as Rental Income, Service Fees, and Investment Returns. Her team can then select the appropriate source when recording each deposit, making it easier to identify and track where the money was received from.
You can create custom fields to capture additional information when recording deposits. To do so:
- Log in to your Zoho Books organisation.
- Go to Settings in the top-right corner.
- Under Module Settings, go to General and select Banking.
- In the Deposit Fields tab, click + New Field in the top-right corner.
- Enter the required details:
- Label Name: Enter a name for the custom field.
- Data Type: Select the type of information the field should capture. You can choose from options such as Text Box (Single Line), Text Box (Multi-line), Number, Decimal, Date, Dropdown, and Checkbox.
- Help Text: Enter a description to help users understand what to enter the field.
- Is Mandatory: Select Yes to make the field mandatory when recording a deposit.
- Default Value: Enter a value that should be pre-filled when a new deposit is created.
- Prevent Duplicate Values: Enable this option if the field must contain a unique value for each deposit.
- Click Save.
Once saved, you can view the custom field on the Record Deposit creation page.
Note: The number of custom fields you can create depends on your Zoho Books subscription plan. To check your usage, click Custom Fields Usage in the top-right corner of the Deposit Fields tab.
Once a custom field is created, you can edit it, mark it as active or inactive, configure access, and delete it. Learn more about Custom Fields.
Validation Rules
Validation Rules in Deposits let you set conditions for the data entered when recording a deposit. When a user enters deposit details, Zoho Books checks them against the validation rules you’ve configured. If the entered data violates a rule, an alert message is displayed and the deposit cannot be saved. You can also set multiple criteria for a single validation rule to apply it only to specific deposits.
Create a Validation Rule for Deposits
- Log in to your Zoho Books organisation.
- Go to Settings in the top-right corner.
- Under Module Settings, go to General and select Banking.
- Go to the Validation Rules tab.
- Click + New Validation Rule in the top-right corner.
- Enter a Validation Rule Name.
- Click + Add Rule and set the required condition.
- Enter an Alert Message to display when the rule is violated.
- Click Continue.
- Add more rules if required by clicking + Add Rule.
- Click Save.
Insight: Validation rules created for deposits in Zoho Books also apply to integrated Zoho applications.
Learn more about the validation rules.
 Yes
Yes