Progress Invoice
Progress invoicing is an invoicing method that allows businesses to invoice and receive payments in smaller, manageable amounts as work is completed or products are delivered rather than waiting for full payment at the end of a project. This approach splits the total agreed-upon price into several payments, helping businesses maintain cash flow throughout the project.
In Zoho Billing, you can easily set up and manage these progress invoices, ensuring you get paid incrementally until the full amount is collected. This method helps you avoid financial strain and keeps both the business and the customer on track.
Scenario: Zylker Construction starts a $500,000 office project for Aaron Brown and sends progress invoices at key stages. First, they bill 10% upfront, then 20% after the foundation, 30% when framing is complete, and the final 40% upon completion. This way, Aaron Brown pays Zylker Construction at different stages of the project.
How Progress Invoice Works in Zoho Billing?
Once you enable Progress Invoice, you can create a quote and choose to invoice a custom amount, a percentage, or for specific amounts for each line item. Once the invoice is created, the quote is marked as Partially Invoiced. You can then keep creating invoices periodically until the entire amount is invoiced.
Enable Progress Invoice in Zoho Billing
Note:
- If you created quotes before enabling Progress Invoice, you cannot create progress invoices for them. You can only create progress invoices for quotes you create after enabling Progress Invoice.
- After enabling Progress Invoice, you can only associate price lists with its Price List Type as Individual Items to a quote.
Prerequisite: To enable Progress Invoice, ensure Don’t Convert Accepted Quotes Automatically is selected. If this isn’t set, you can enable it by going to Settings > Sales > Quotes > General > Automate accepted quotes to invoices conversion > check Don’t Convert accepted quotes automatically, and click Save.
To enable Progress Invoice in Zoho Billing:
Log in to your Zoho Billing account.
Go to Settings.
Select Quotes under Sales.
In the General tab, check Allow creation of progress invoice from a quote under Progress Invoice.
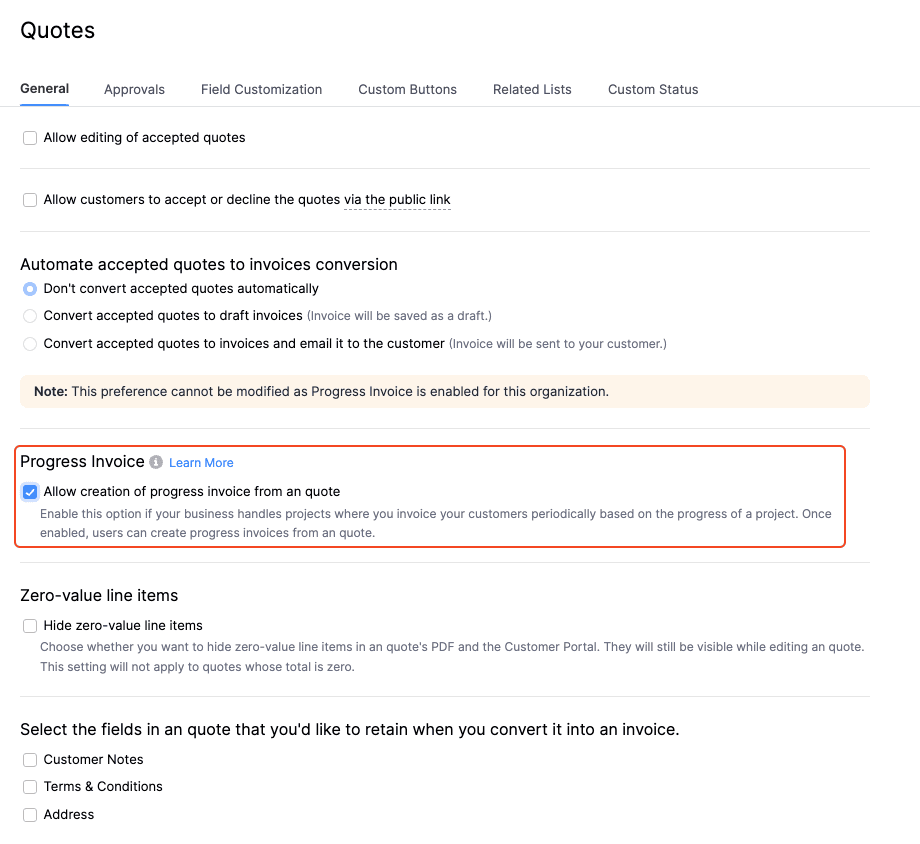
Scroll down, and click Save.
Now, Progress Invoice will be enabled, and you can start creating progress invoices from an accepted quote.
Note: You can create progressive invoices only for accepted quotes, that are created after enabling Progress Invoices.
Create a Progress Invoice From a Quote
Prerequisite: The quote must be accepted by the customer or marked as accepted.
To create a progress invoice:
Go to Sales on the left sidebar.
Select Quotes.
Select the accepted quote for which you want to create a progress invoice.
In the Details page, click Convert to Invoice.
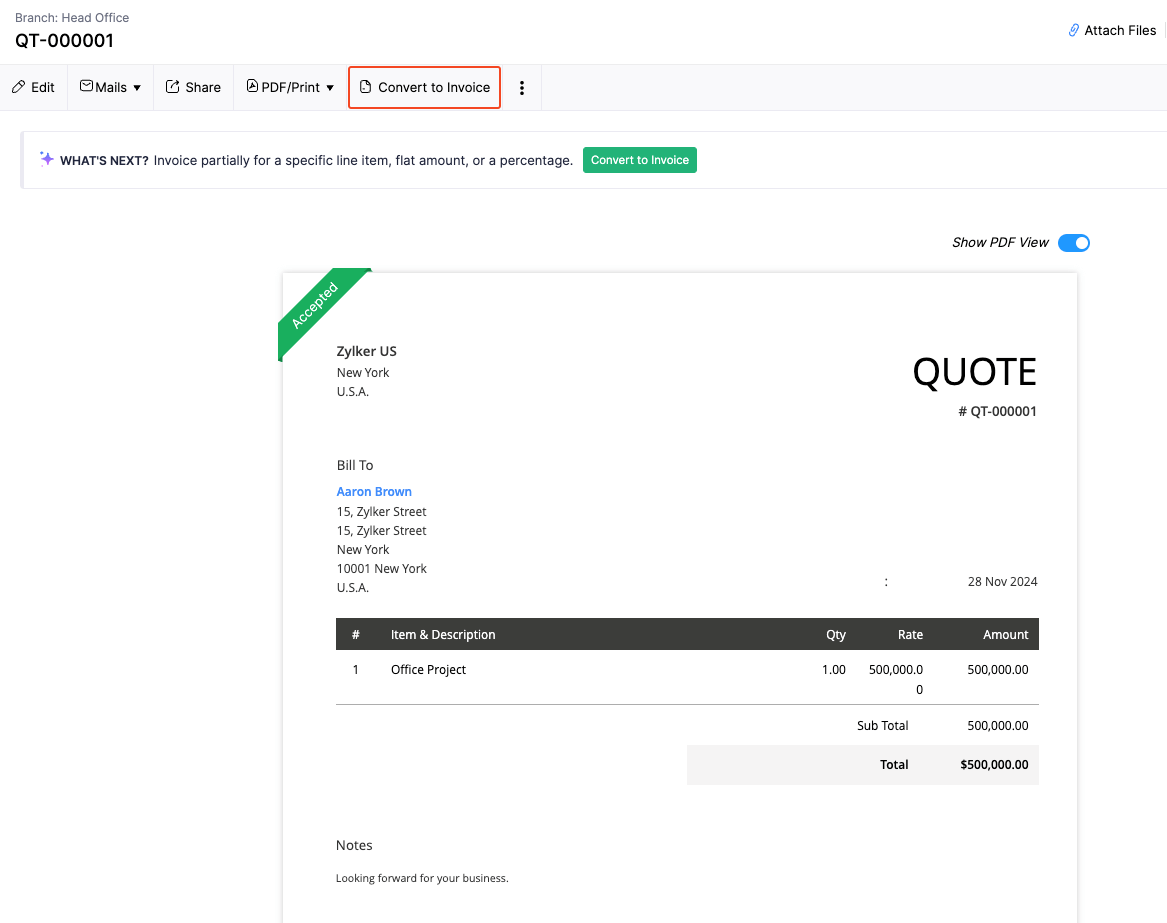
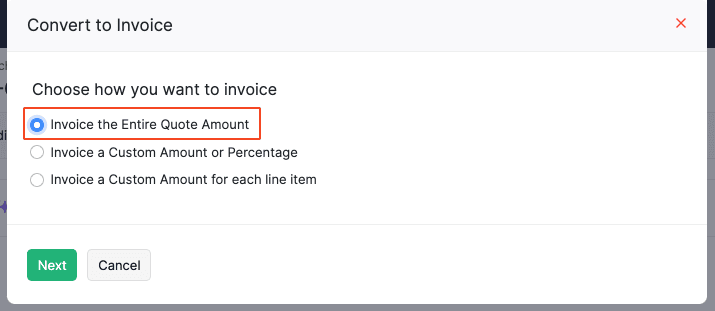
In the Create Progress Invoice popup, choose how you want to invoice the customer from the following options:
Invoice the entire amount: Select this option if you want to create an invoice for the entire quote amount instead of using progress invoices.
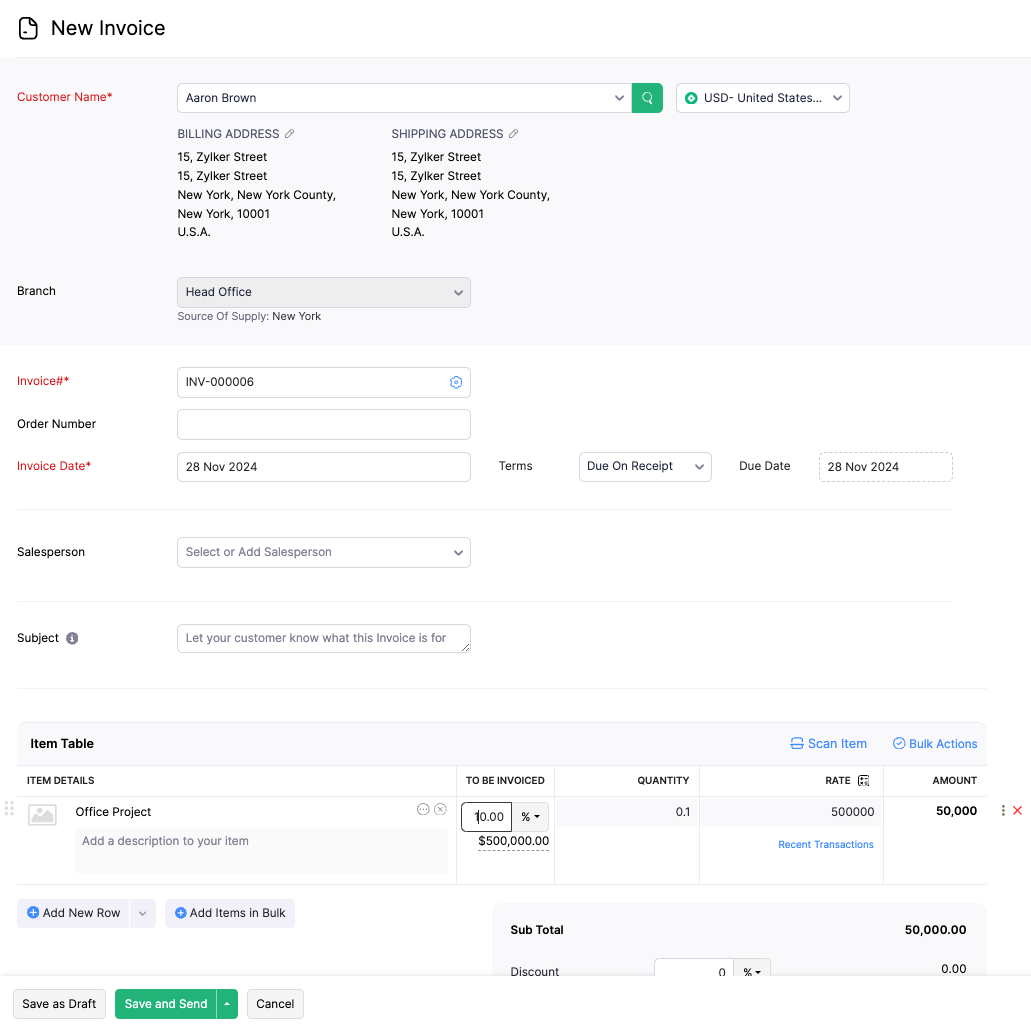
Invoice a Custom Amount or Percentage: Select this option to invoice a custom amount or percentage. After you select this option:
In the popup, choose the % icon to apply a percentage or the Currency icon to enter a specific amount.
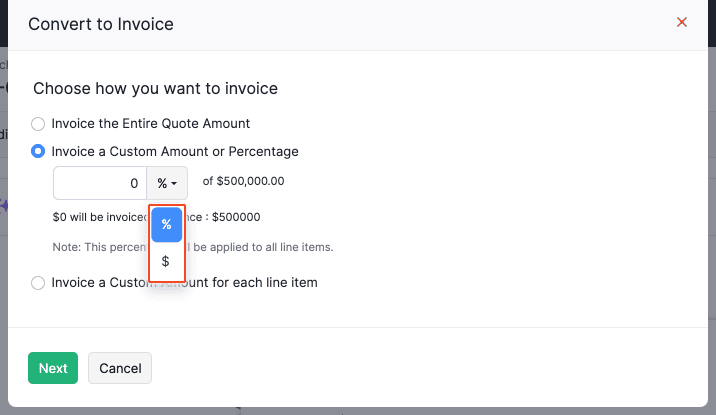
Enter the amount or percentage you want, and click Next.
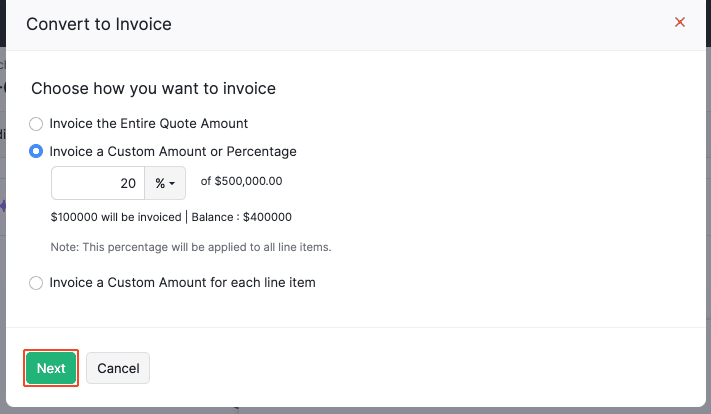
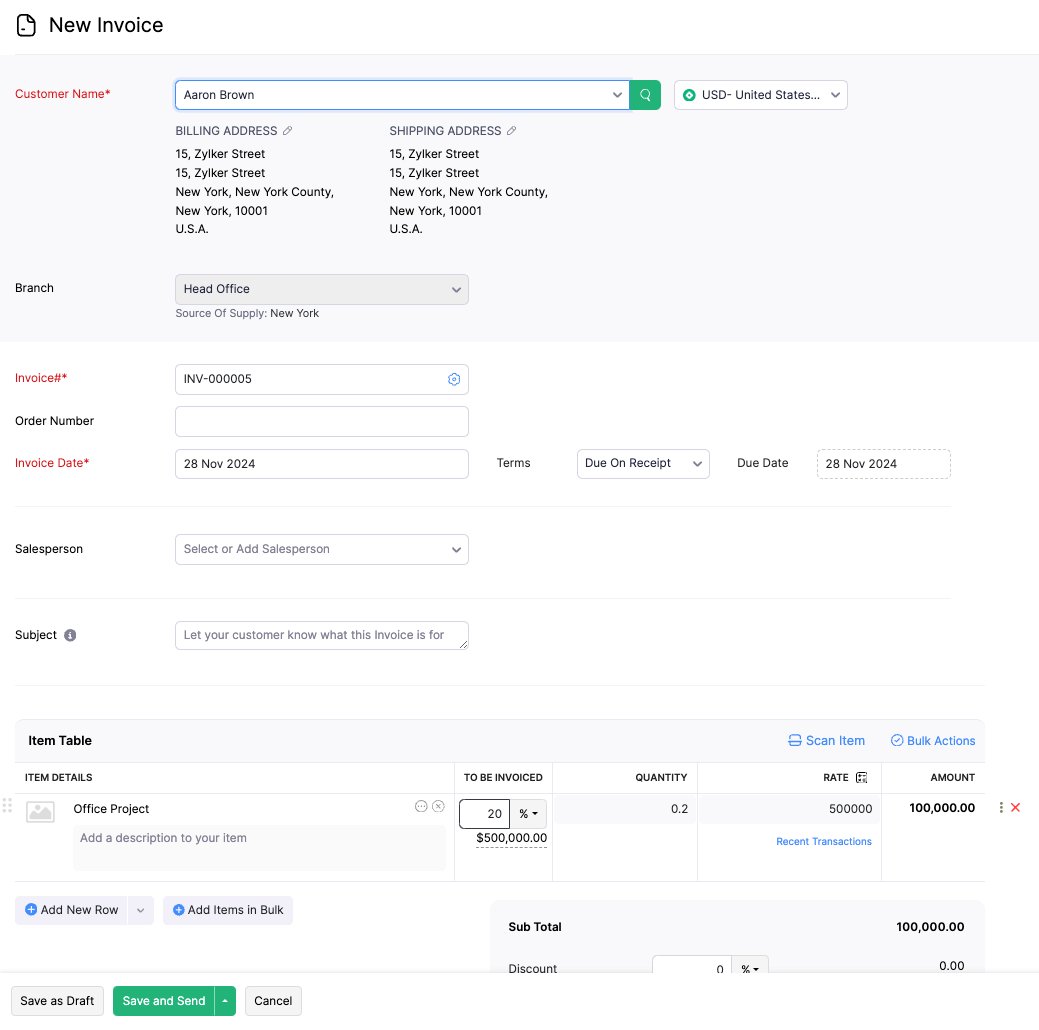
You’ll be redirected to the New Invoice page, where the specified amount or percentage is applied to the items in the Item Table. To add more items, click + Add New Row or + Add Items in Bulk.
Fill in the other necessary fields, and click Save as Draft or Save and Send.
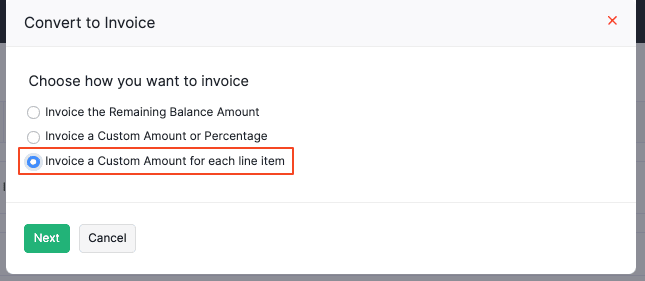
Invoice a custom amount or percentage for each line item: Select this to invoice a custom amount or percentage for each line item. After you select this option:
You’ll be redirected to the New Invoice page, where you’ll need to enter the amount or percentage for each line item in the Item Table. Select the % icon to apply a percentage or the Currency icon to enter a specific amount.
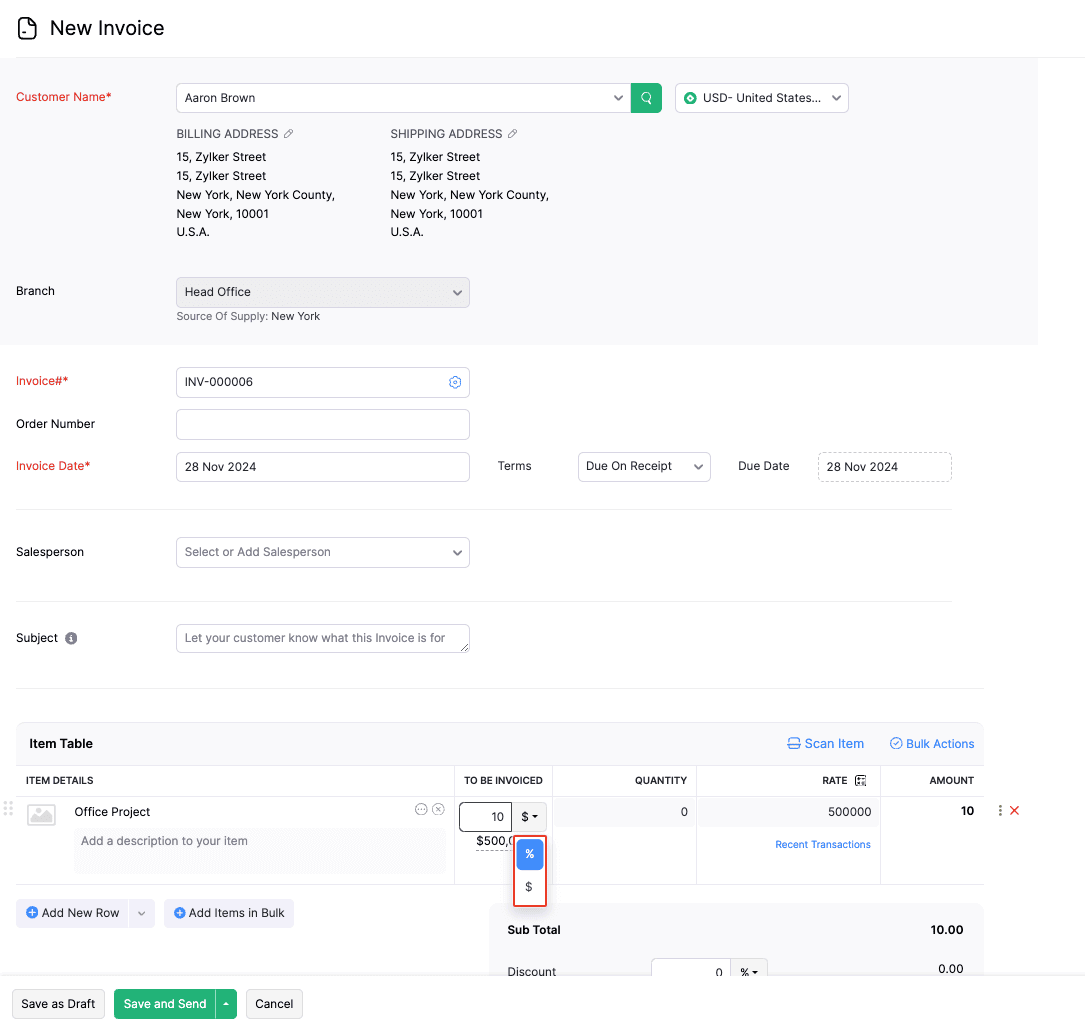
Enter the amount or percentage you want.
To add more items, click + Add New Row or + Add Items in Bulk.
Fill in the other necessary fields, and click Save as Draft to save it as a draft or Save and Send to send the invoice to the customer.
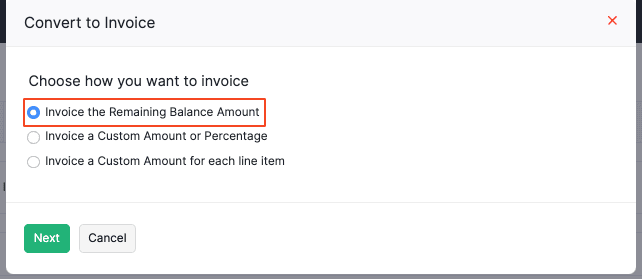
Invoice the Remaining Balance Amount: If you’ve already created progress invoices, select this option to invoice the remaining balance of the quote. After you select this option:
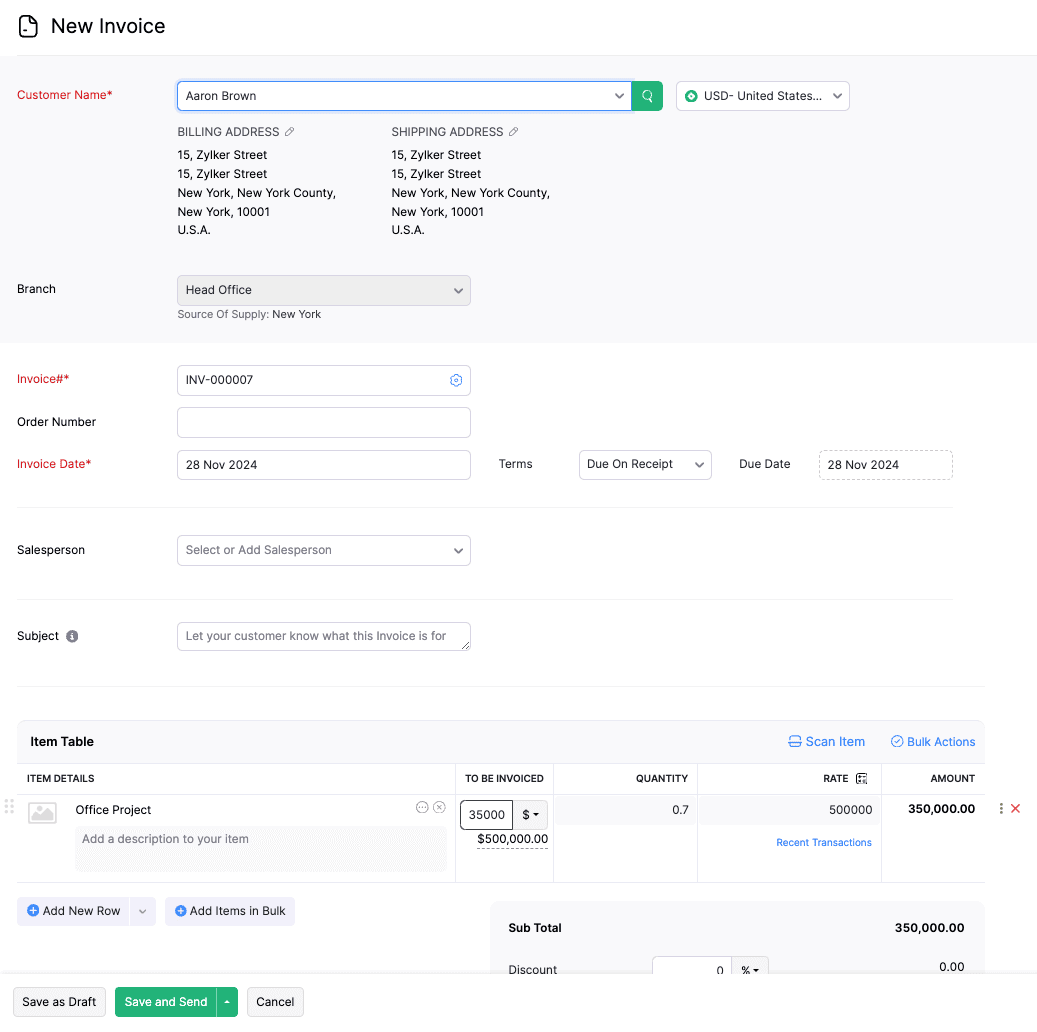
- You’ll be redirected to the New Invoice page, where the customer is invoiced for the remaining quote amount.
- Review the details, and click Save as Draft to save it as a draft, or Save and Send to send the invoice to the customer.
Now, an invoice will be created for the custom amount or percentage you entered, and the quote will be marked as Partially Invoiced. You can create additional invoices from the quote until the full amount is invoiced.
Note: If you edit an invoiced quote, and add more items, the quote status will revert to Partially Invoiced. You will need to create new invoices for the full quoted amount, after which the quote’s status will change to Invoiced.
View Progress Invoice Details for the Quote
After creating progress invoices for the quote, you can view the item details, amounts, and remaining balances for each item. Here’s how:
Go to Sales on the left sidebar, and select Quotes.
Select the quote for which you want to view progress invoice details.
In the Details page, disable Show PDF View.
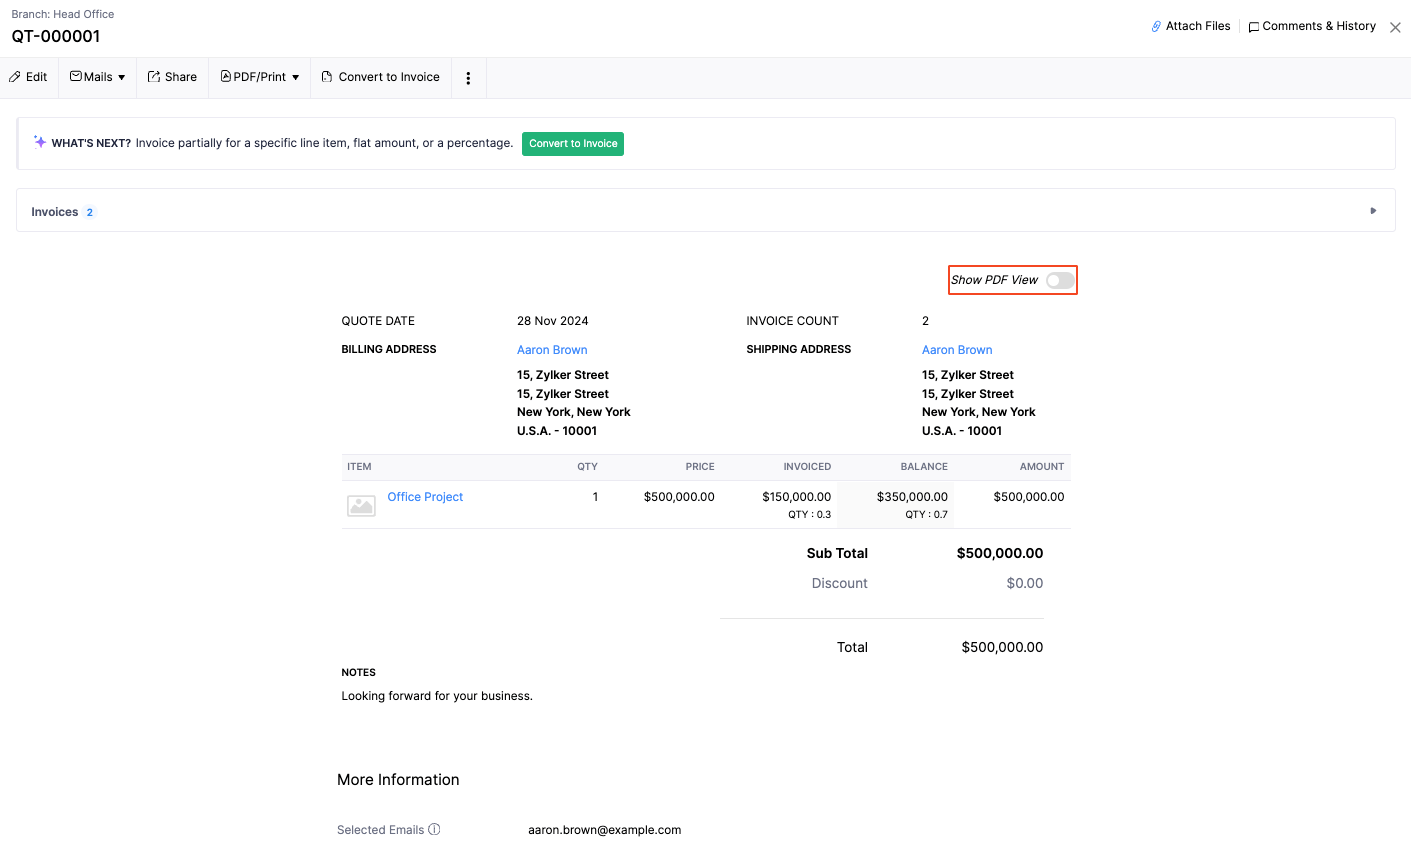
Now, you can view details such as Item Information, Invoiced Amounts, Discounts, Remaining Balances, and the Total Amount for each item in the quote.


 Yes
Yes