
Integrate Zoho Books with Microsoft 365
Microsoft 365 is widely used by businesses to manage their daily operations. By integrating it with Zoho Books, you can quickly invite users from your Microsoft 365 account and import all your customers information. Additionally, the integration allows you to:
- View emails you’ve sent to your customers in your Zoho Books organization
- Include email attachments in transactions
- Add email conversations to a transaction’s activity history
Prerequisite:A Microsoft 365 account is required to integrate with Zoho Books.
Integrate Microsoft 365 with Zoho Books
To integrate your Microsoft 365 account with Zoho Books:
- Log in to your Zoho Books account.
Note: You can also log in to your Zoho Books account using your Microsoft 365 account. To do this, click Sign in at the top right of the page, then click the Microsoft icon to continue with your Microsoft 365 account. Enter your email ID or phone number and click Next on the sign in page. Then, enter your account password and click Sign in.
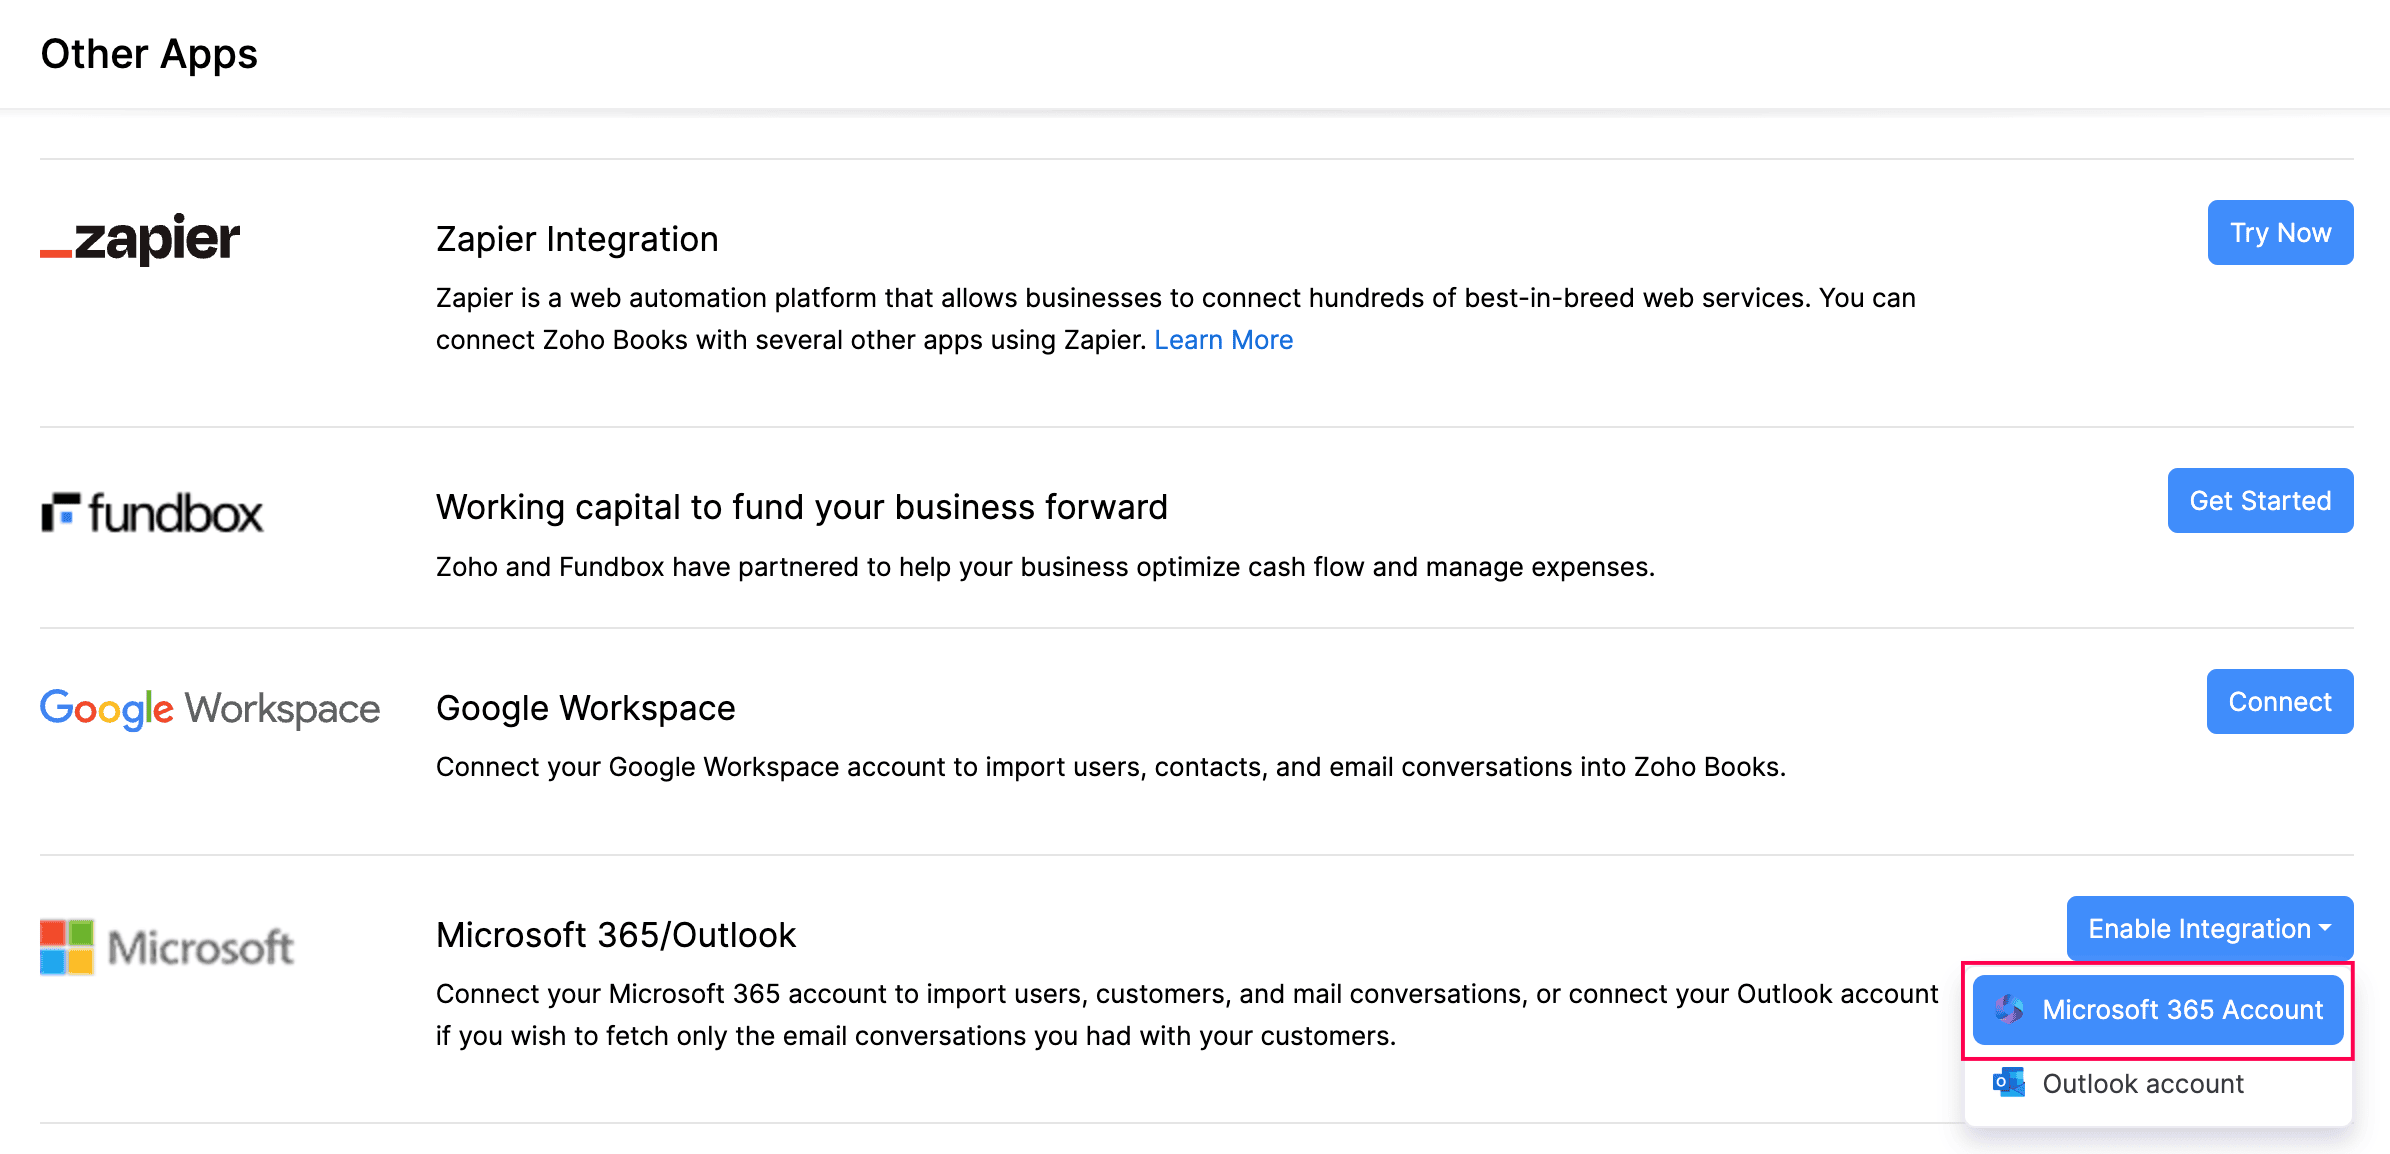
- Go to Settings in the top-right corner.
- Select Other Apps under Integrations & Marketplace.
- Navigate to Microsoft 365/Outlook and click Enable Integration.
- Click Microsoft 365 Account in the dropdown.
- Click Proceed in the pop-up.
- Enter your email ID or phone number and click Next on the Microsoft Sign In page.
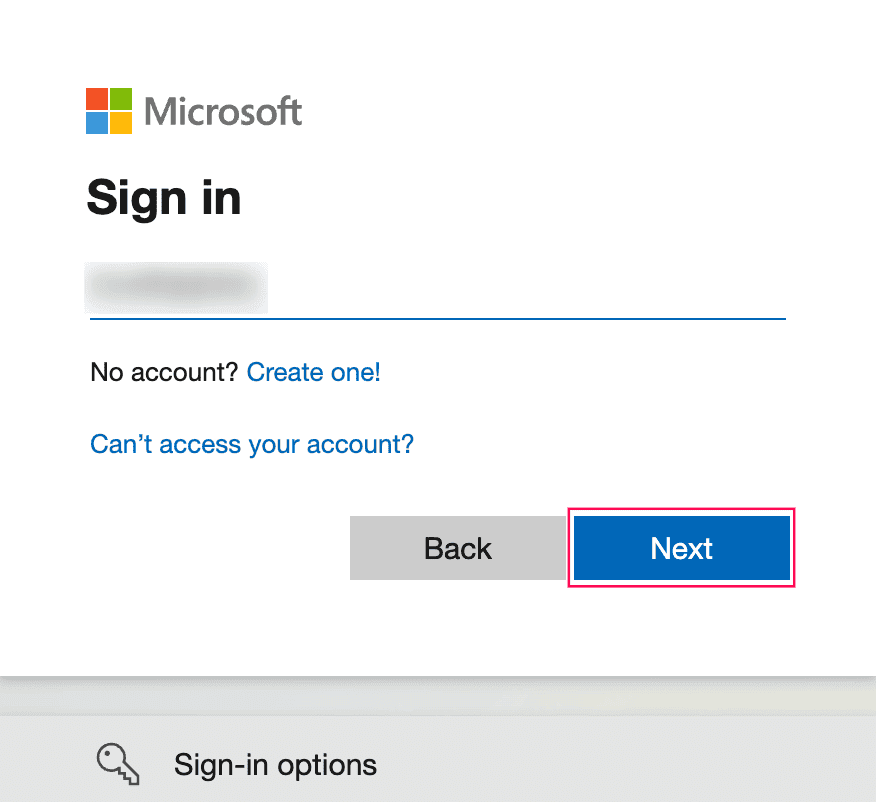
- Enter your account password and click Sign in.

Your Zoho Books organization will be integrated with your Microsoft 365 account.
Import Customers From Microsoft 365
By integrating your Zoho Books account with Microsoft 365, you can seamlessly import all your customers from Microsoft 365 in one go. Here’s how:
- Log in to your Zoho Books account.
- Go to Sales on the left sidebar and select Customers.
- Click the More icon in the top right corner of the page.
- Click Import and select Import Customers From Microsoft 365.
- Click Add next to the contacts that you want to import, and click Continue.
- On the Map Fields page, match the fields in Zoho Books with the corresponding fields in your Microsoft 365 account.
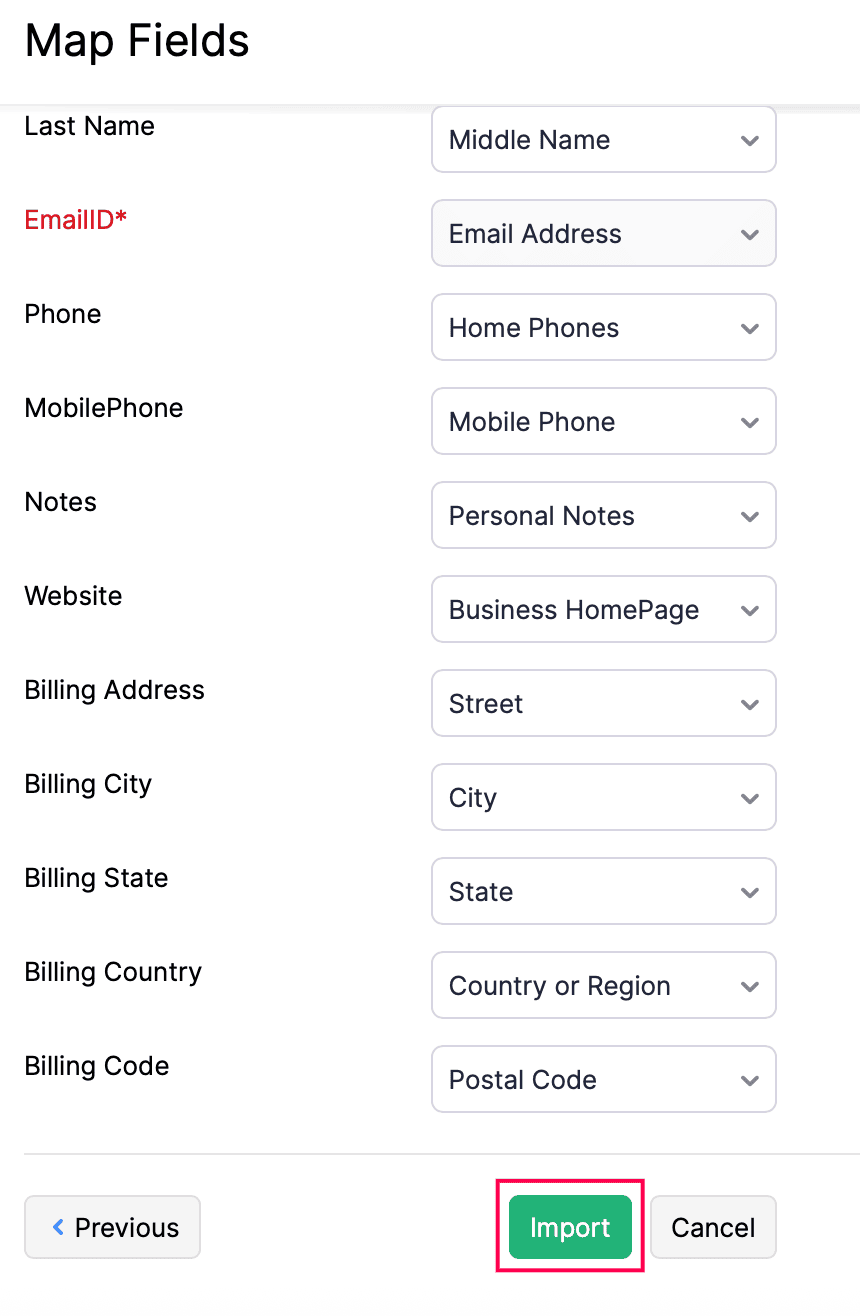
- Click Import.
The selected contacts will be imported from your Microsoft 365 account into Zoho Books. You can then record additional details such as tax information, credit limits, opening balances, and more, and start creating transactions for them.
Sync and View Emails of Imported Customers
To sync and view emails of your Microsoft 365 customers in Zoho Books:
- Go to Sales on the left sidebar and select Customers.
- Select the customer whose email you wish to sync into Zoho Books.
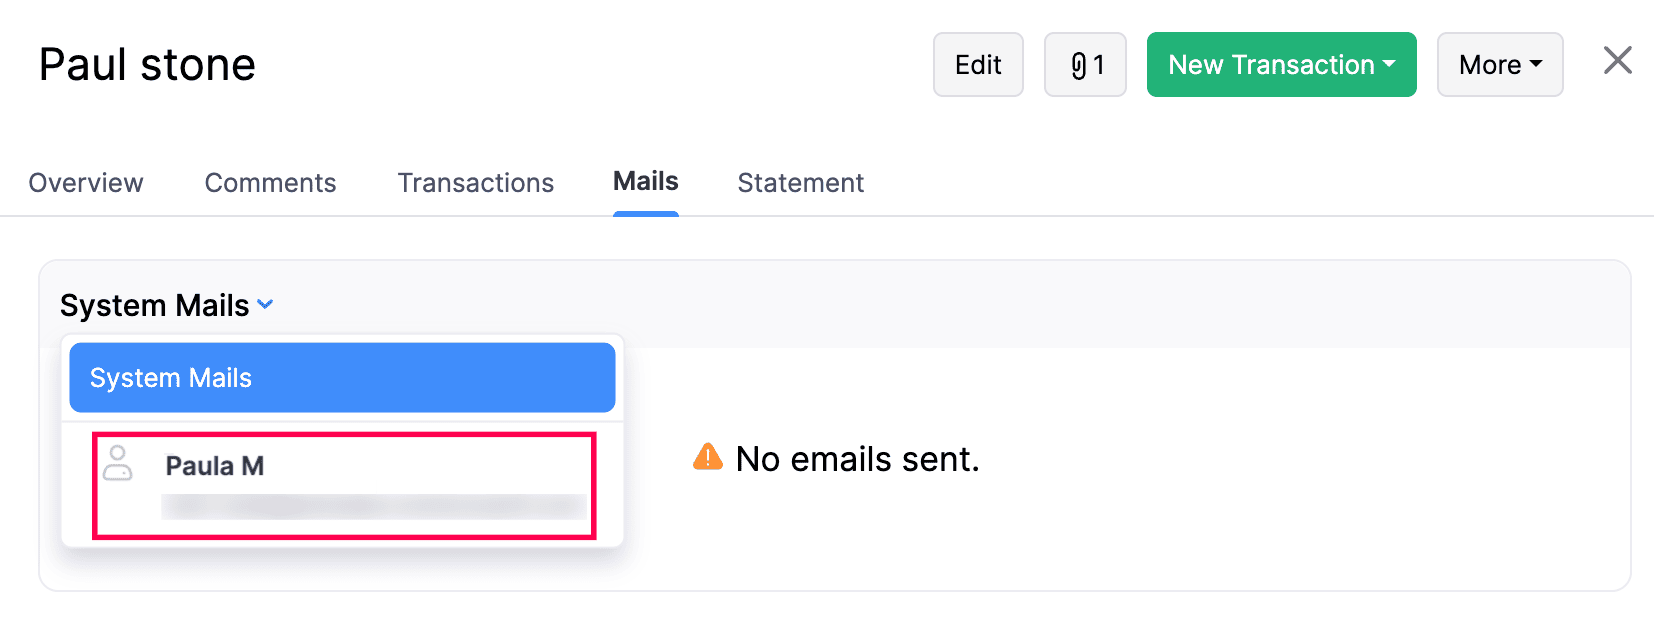
- Navigate to the Mails tab on the customer’s details page.
- Click the System Mails dropdown, and select the required email.
You can now view all email conversations with the customer, including any attachments.
Add Email to Invoices and Quotes
To associate an email and its attachments when recording quotes or invoices for a Microsoft 365 customer:
- Go to Sales on the left sidebar and select Customers.
- Select the customer whose emails you want to attach to a quote or invoice.
- Navigate to the Mails tab.
- Click the System Mails dropdown and select the required email.
- Select the email conversation that you want to associate with an invoice or quote.
- In the pane that appears, click the Add Email To dropdown, and select Invoice or Quote, based on your preference.
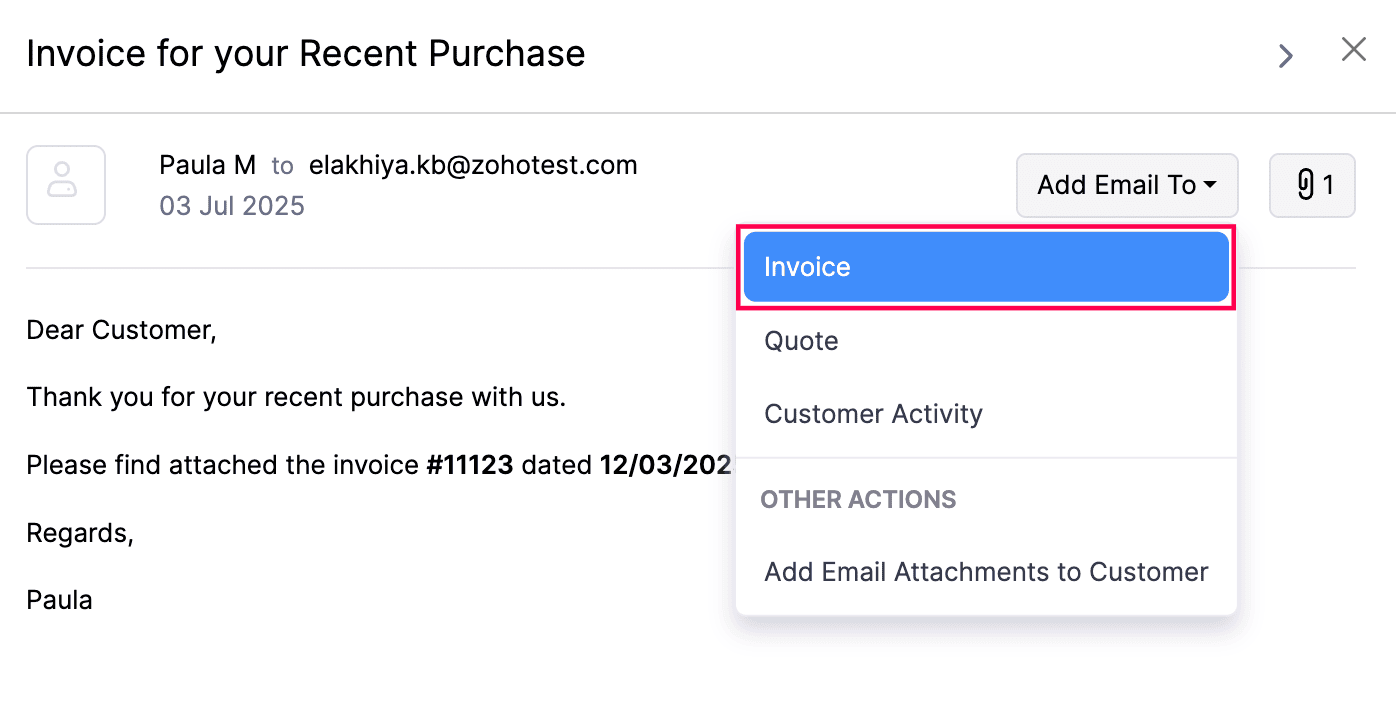
You’ll be redirected to the respective transaction’s creation page, where the email will be attached. You can enter the required details and save the transaction.
Add Email to Customer Activity
To add your customer’s email conversations as customer activity:
- Go to Sales on the left sidebar and select Customers.
- Select the required customer.
- Navigate to the Mails tab.
- Click the System Mails dropdown and select the required email.
- Select the email conversation that you want to add as customer activity.
- In the pane that appears, click the Add mail to dropdown, and select Customer Activity.
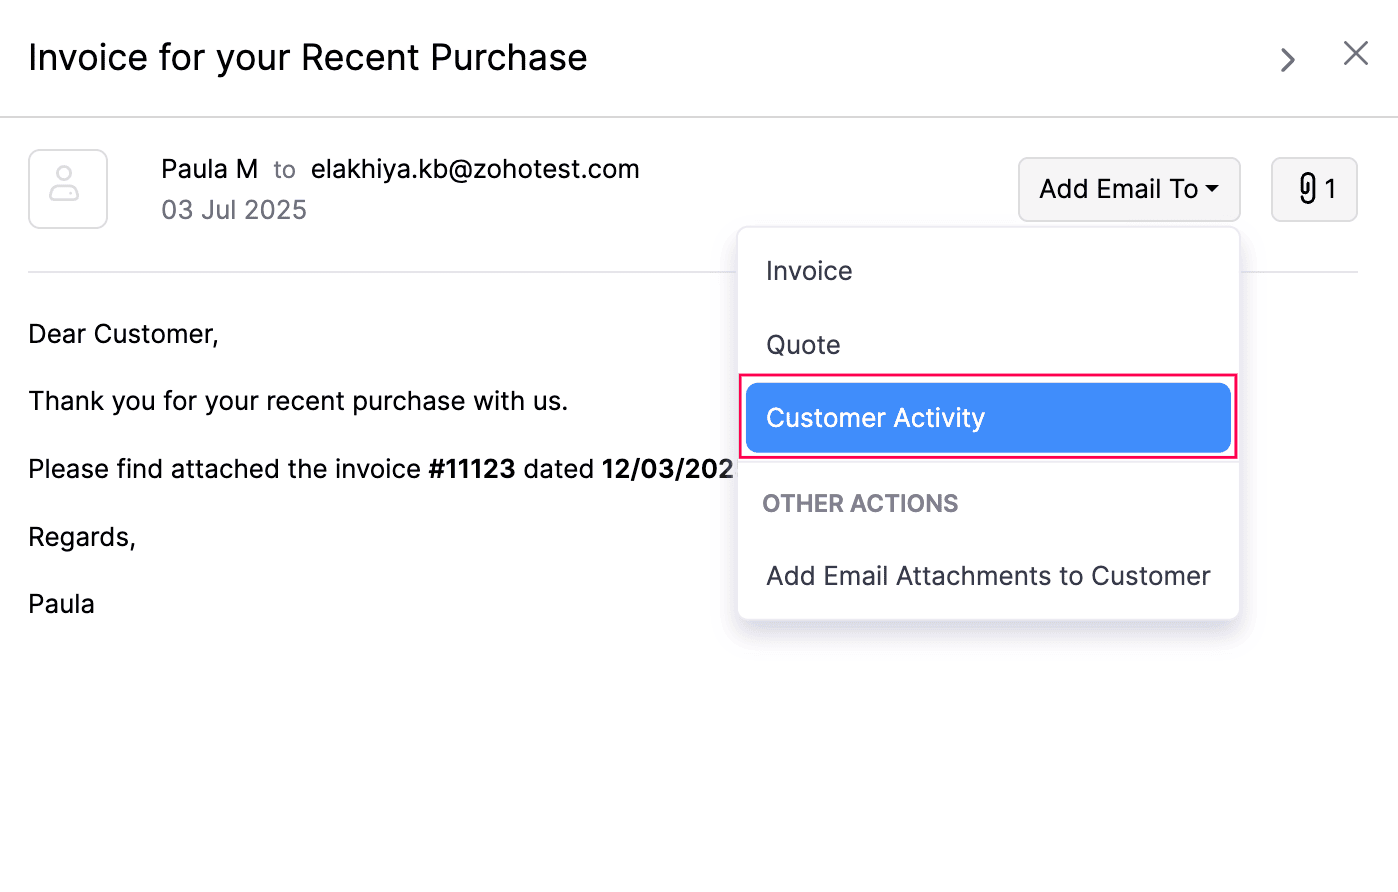
The respective email will be associated with the customer, and you can view it at the bottom of the customer’s details page.
Add Email Attachments to Customer
You can add your customer’s email conversations and their attachments as part of the customer’s activity. Here’s how:
- Go to Sales on the left sidebar and select Customers.
- Select the required customer.
- Navigate to the Mails tab.
- Click the System Mails dropdown and select the required email.
- Select the email conversation to attach to the customer’s activity.
- In the pane that appears, select the Attachment icon, or click the Add Email To dropdown, and select Add Email Attachments to Customer under Other Actions.
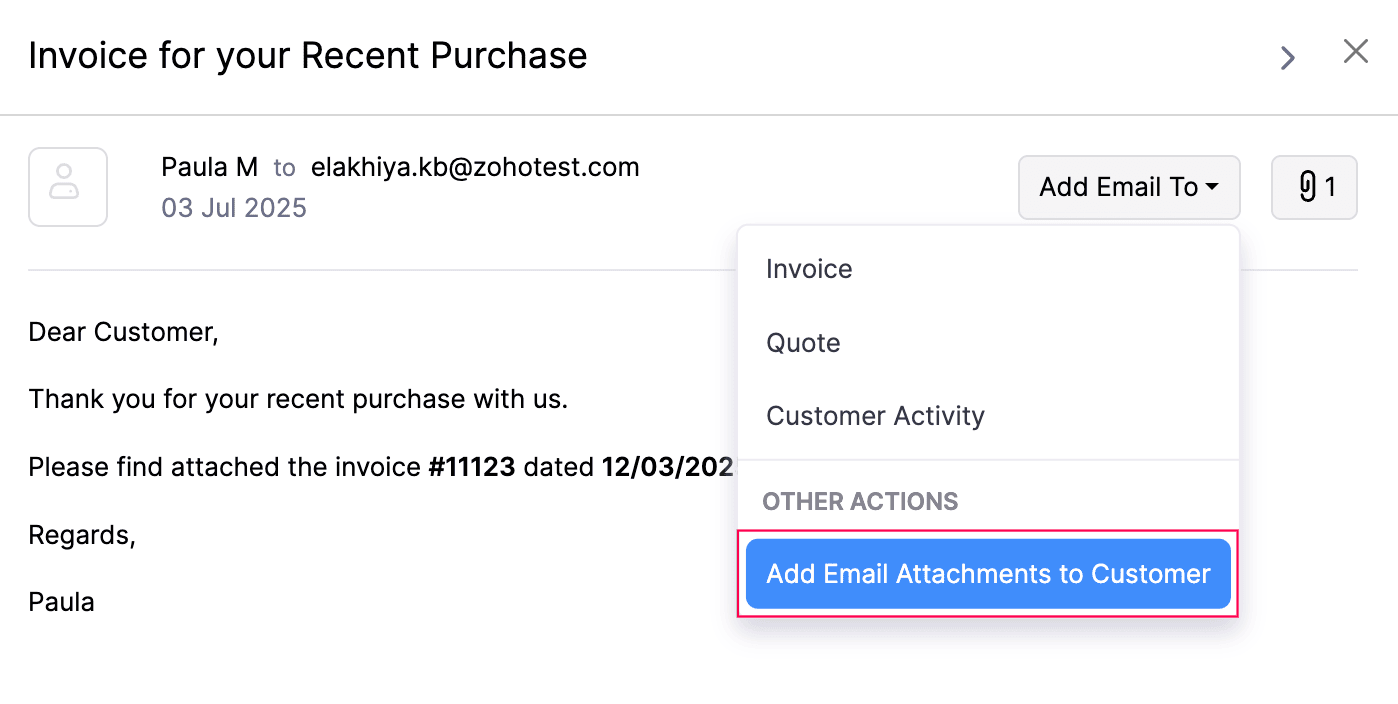
- In the pop-up that appears, select the required attachment, and click Attach.
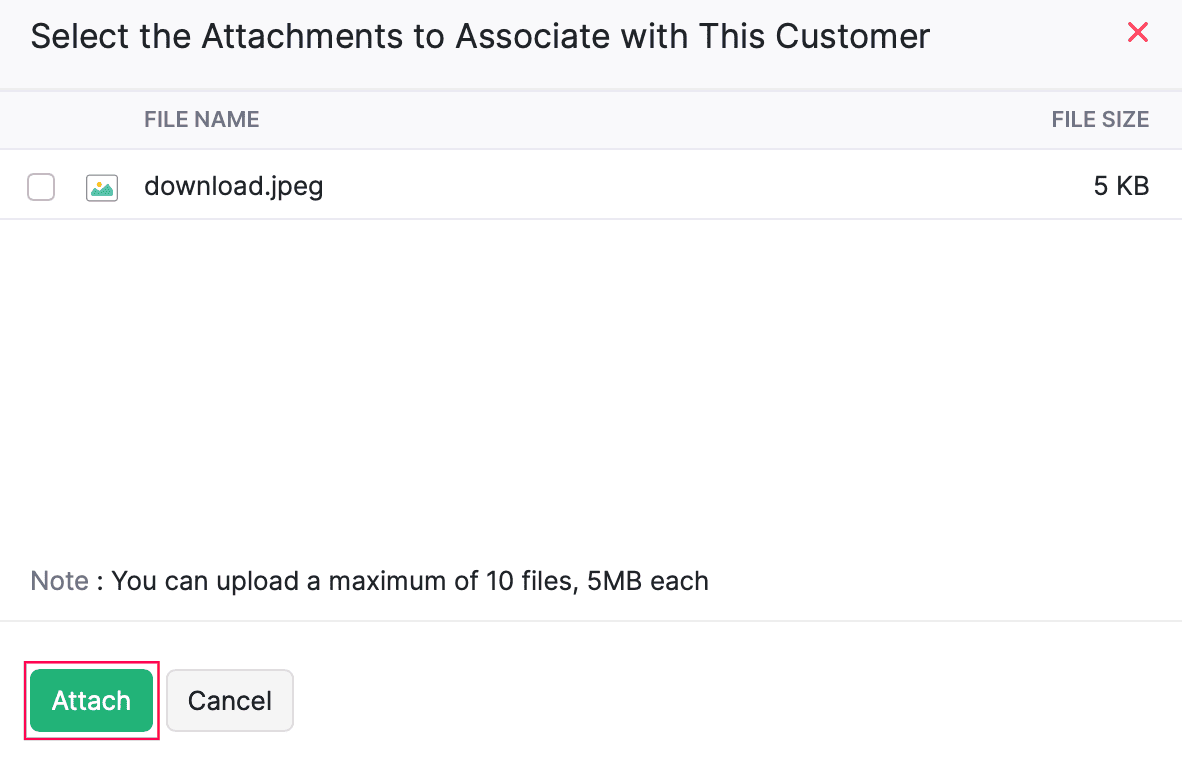
The selected attachments in the email will be associated with the customer in Zoho Books, and you can view them by clicking the Attach icon in the top right of the customer’s details page.
Invite Users From Microsoft 365
You can import and invite users directly from your Microsoft 365 account into Zoho Books. Here’s how:
- Log in to your Zoho Books organization.
- Go to Settings in the top right corner.
- Select Users under Users & Roles.
- Click the dropdown next to Invite User at the top right corner of the page, and select Invite Microsoft 365 User.

- In the pop-up that appears, select the user that you want to invite and click Next.
- Assign a role to the user and click Send Invite.
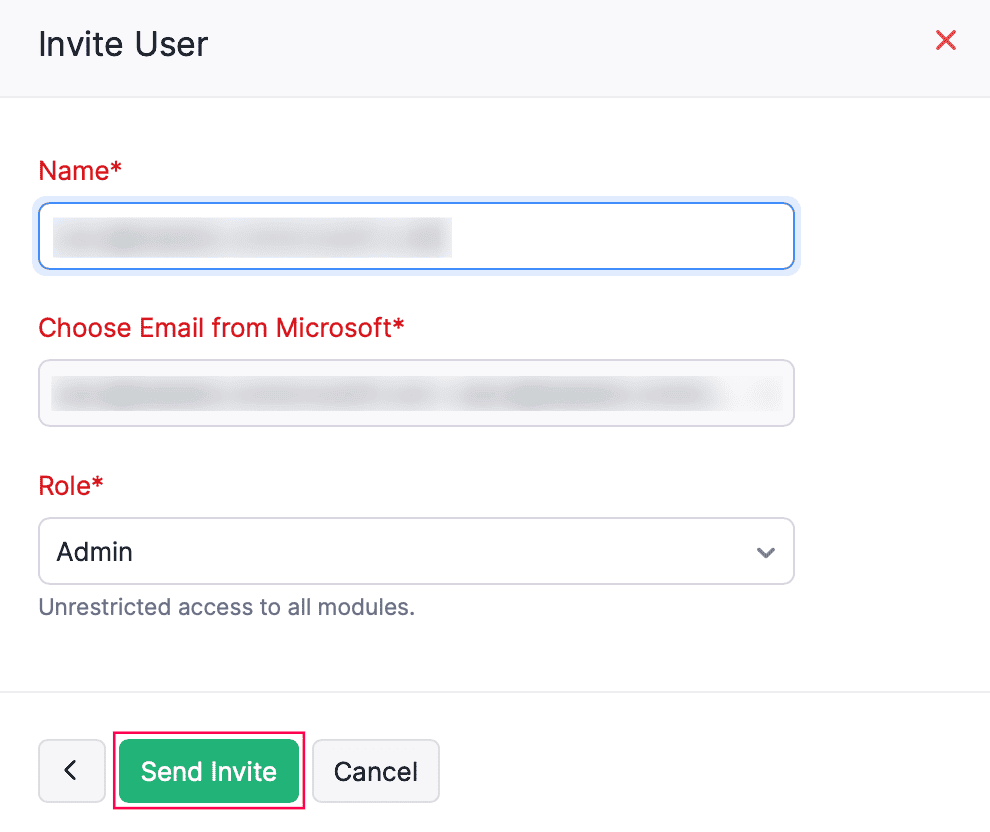
The invited users will receive an email with a link to join your Zoho Books organization.
Disable Integration
To disable the integration with Microsoft 365:
- Go to Settings in the top right corner.
- Select Other Apps under Integrations and Marketplace.
- Click Disable Integration next to Microsoft 365/Outlook.

- In the pop-up that appears, click Disable Integration to confirm.
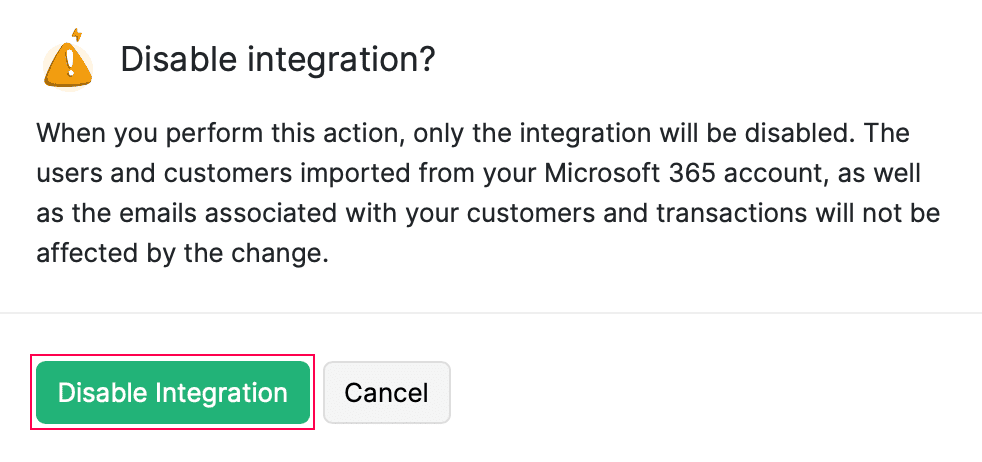
The integration with Microsoft 365 will be disabled. However, any customers and users imported from Microsoft 365 will remain as standalone customers and users in your Zoho Books organization.
 Yes
No
Yes
No
Thank you for your feedback!