Roles
Based on the designation of your employees, you can create different user roles and define the required access permissions for those roles. Once this is done, you can assign these roles to the users as and when you invite them to Zoho Expense.
Add New Roles
Apart from the predefined roles (Submitter, Approver, and Admin), Zoho Expense lets you add custom roles that suit your business needs.
Prerequisite: You can add new roles only if you’re using a paid plan in Zoho Expense.
To create a new role:
- Click Admin View on the left sidebar.
- Go to Settings on the left sidebar.
(OR)
Click Settings in the top right corner of the page. - Go to Roles & Permissions under Users and Control.
- Click + New Role. You can also clone an existing role and define the access permissions as required.
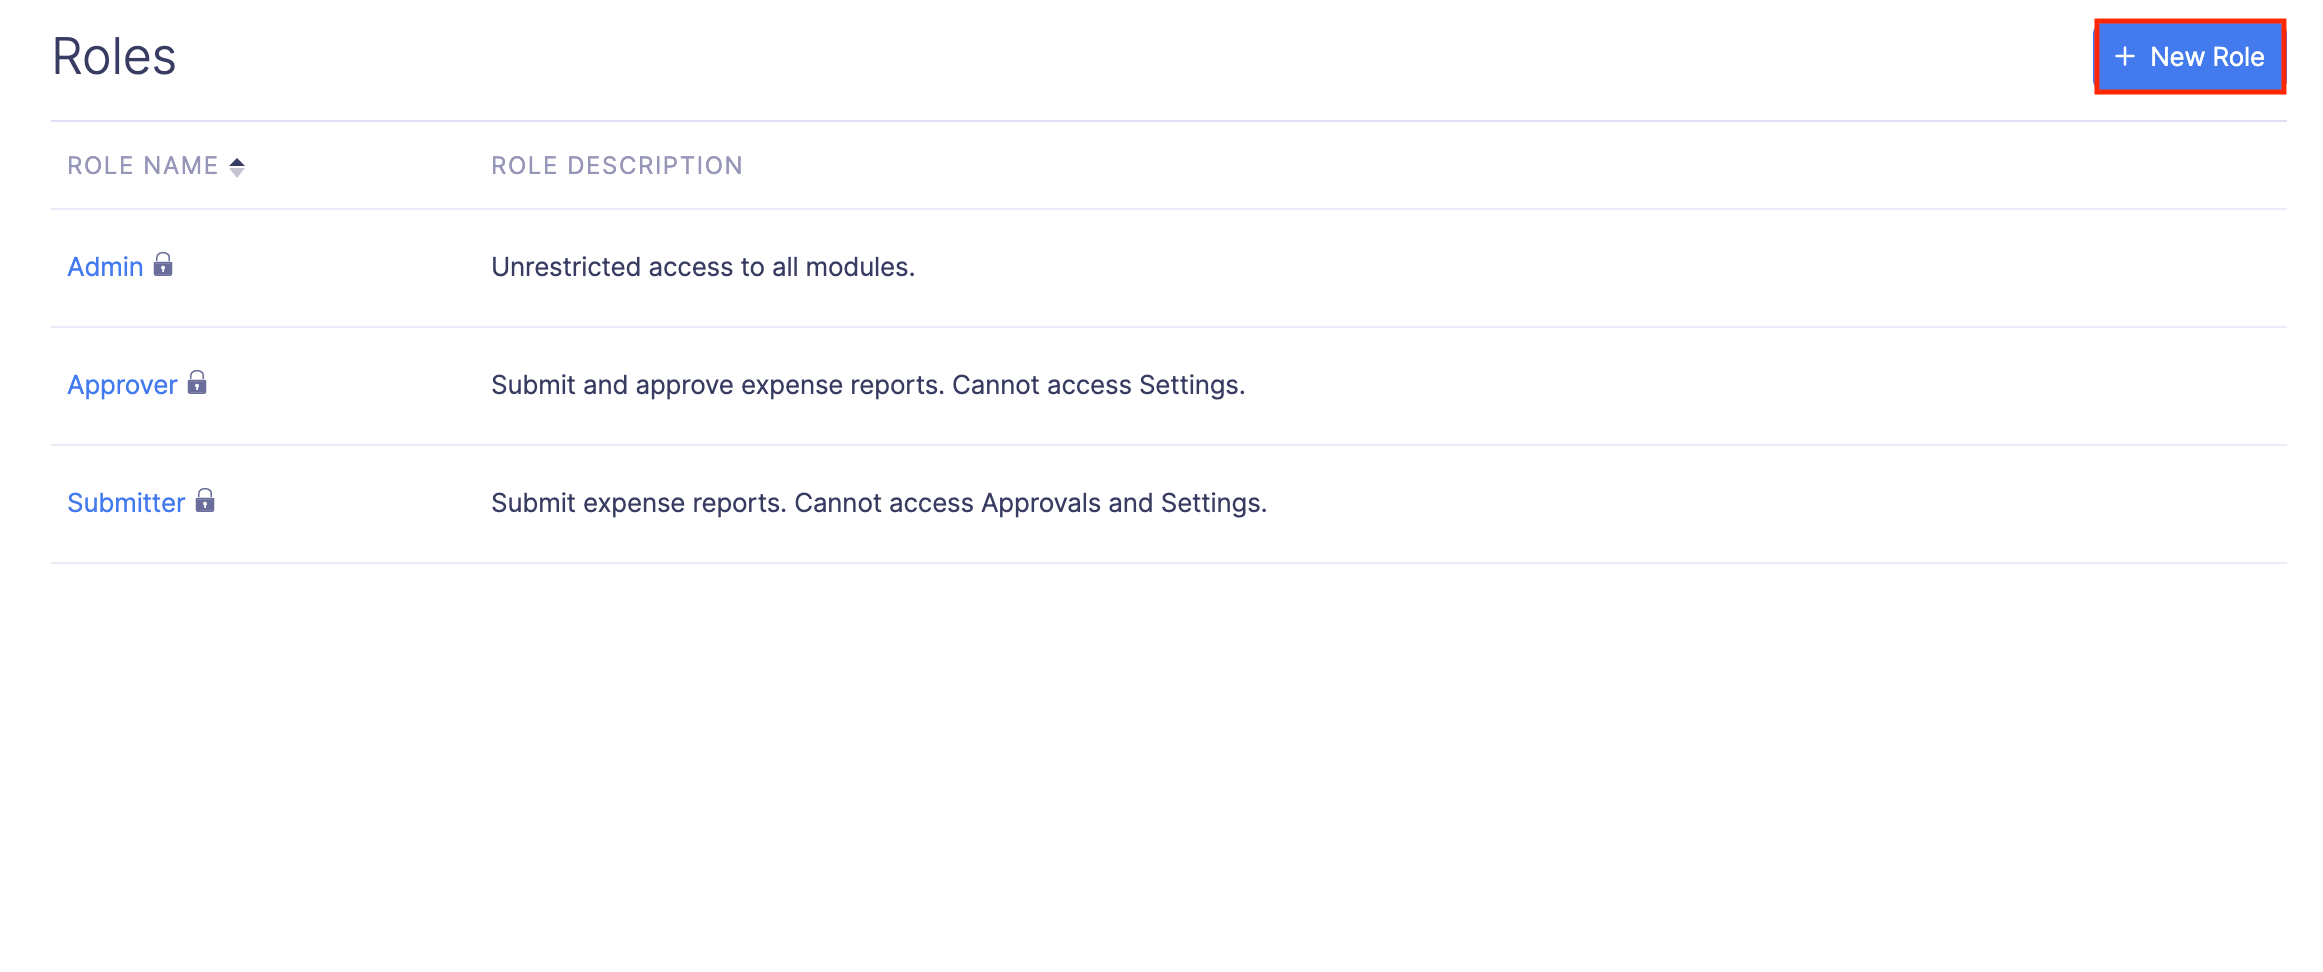
- Enter the Role Name and customize the permissions based on the nature of the role.
- Click Save. A new role will be created and you can assign the role to the users.
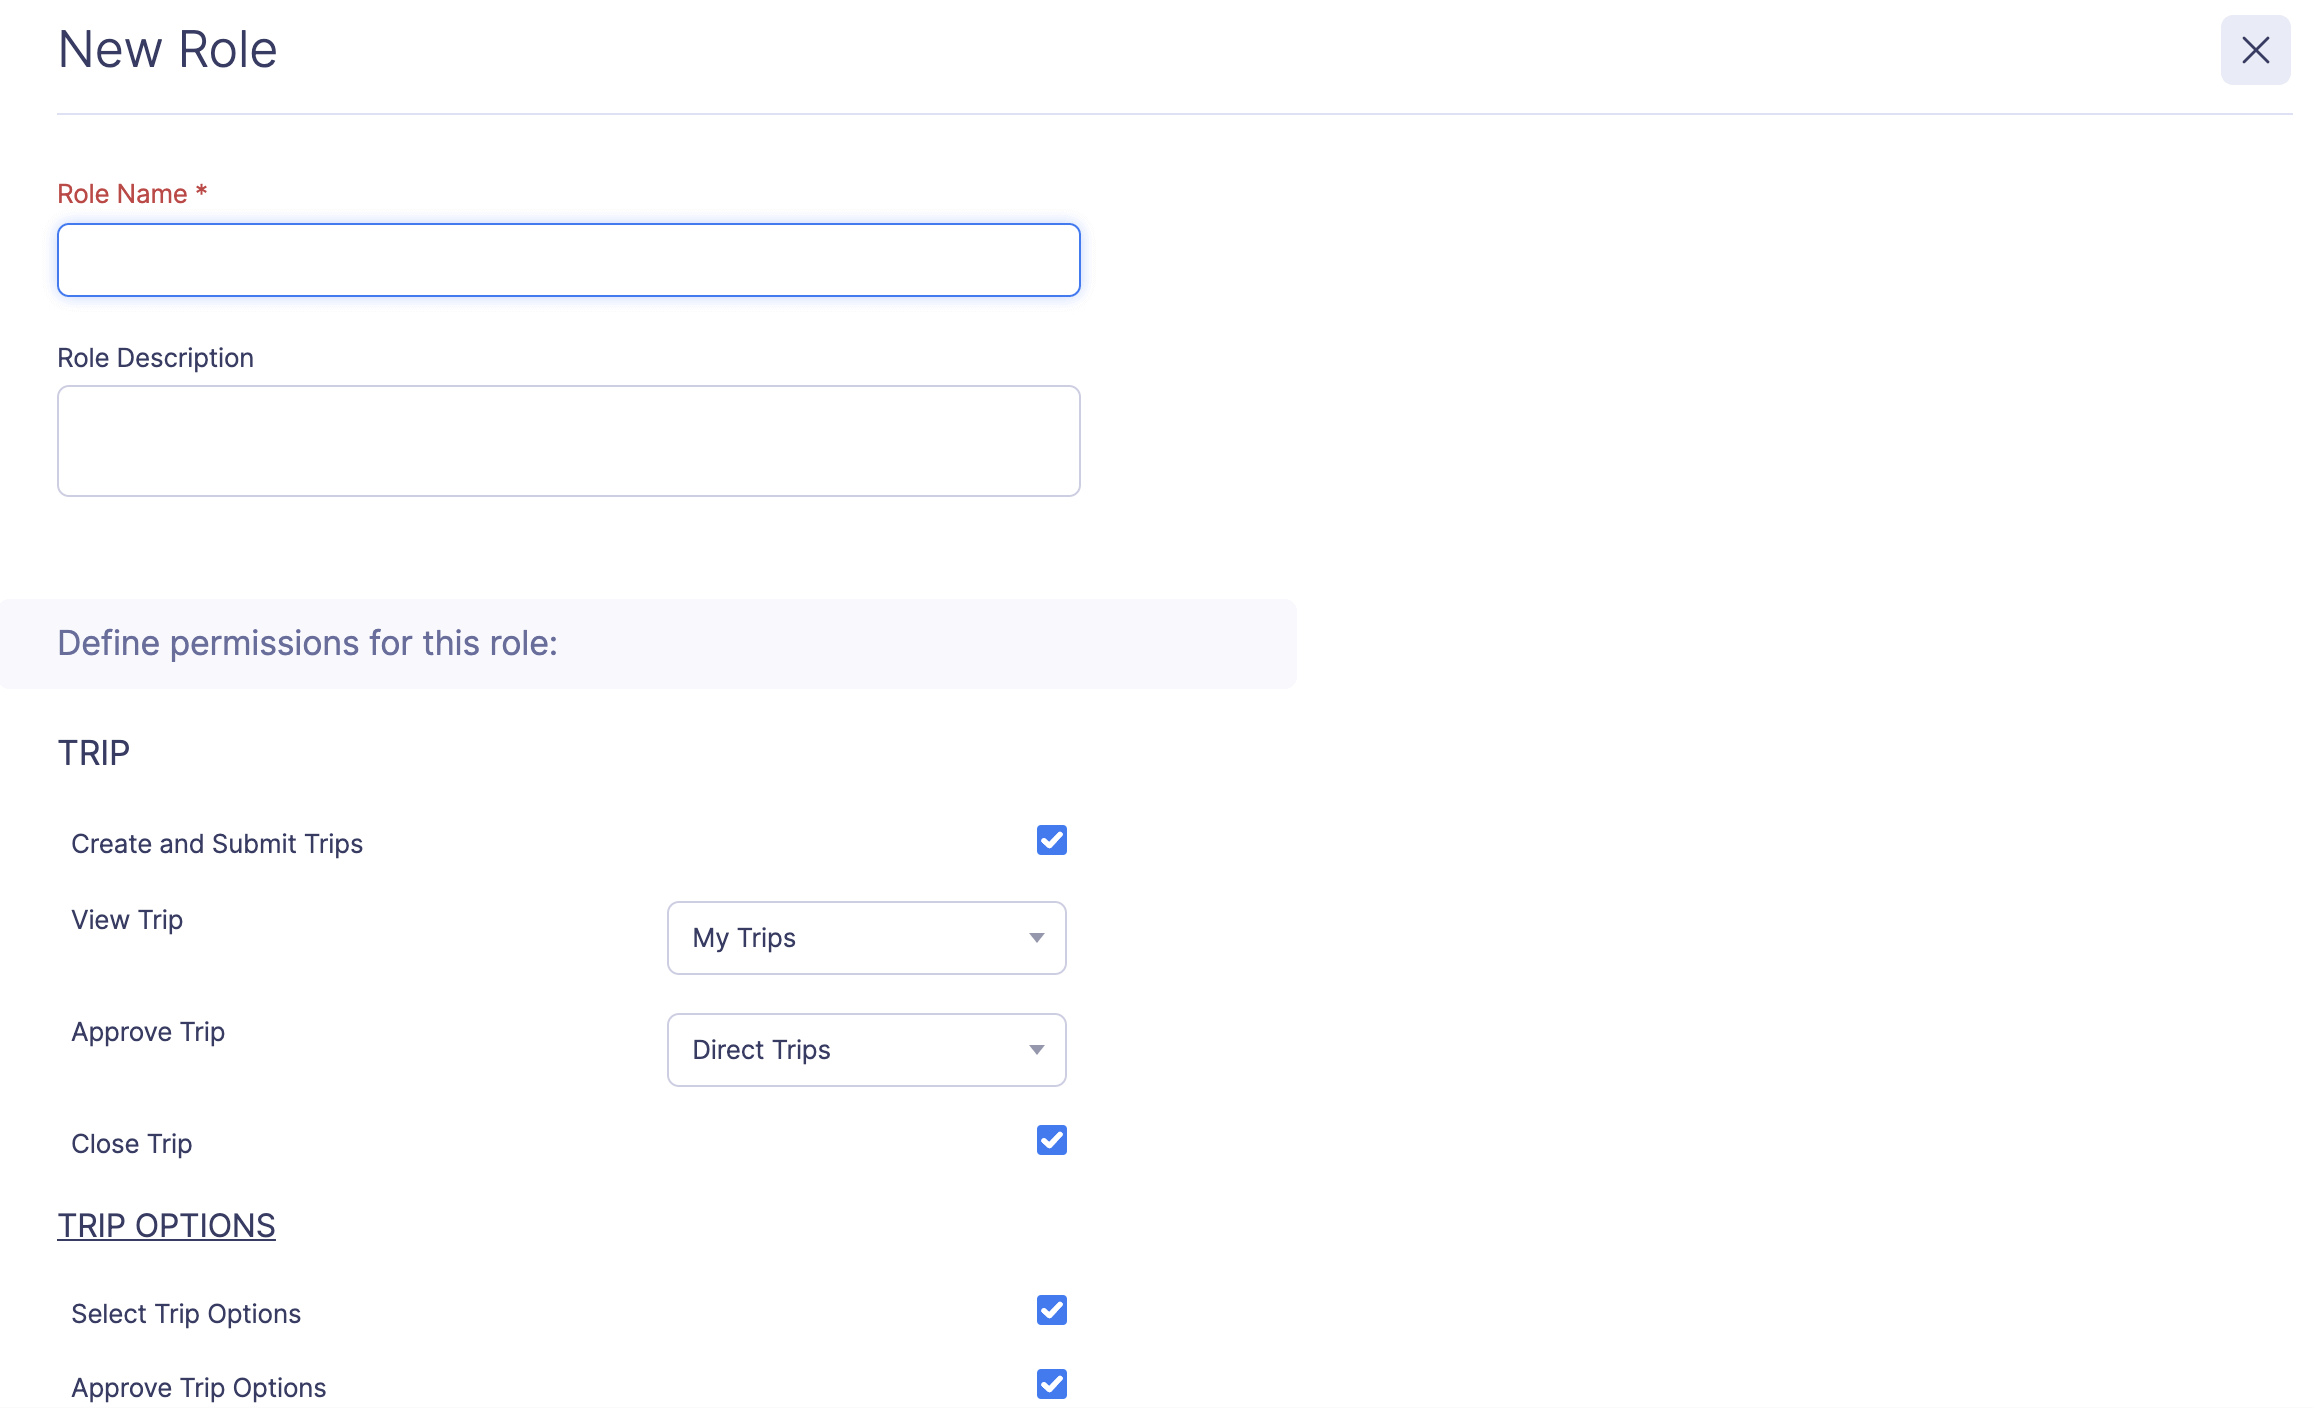
Scenario: Harry has created an organization Zylker Global in Zoho Expense, which makes him an Admin by default. He wants to add the Finance Manager, James, and the Accountant, Louis as users to this organization. Since, the nature of their jobs are quite different from the default user roles, Harry decides to create custom roles for these users.
Let’s start with the Finance Manager, James, who should be given access to approve all company reports, keep track of the exchange rates and taxes, choose the ideal payment mode for reimbursement, and handle Zoho Expense subscription.
Let’s see how that’s done:

- Define Permissions:
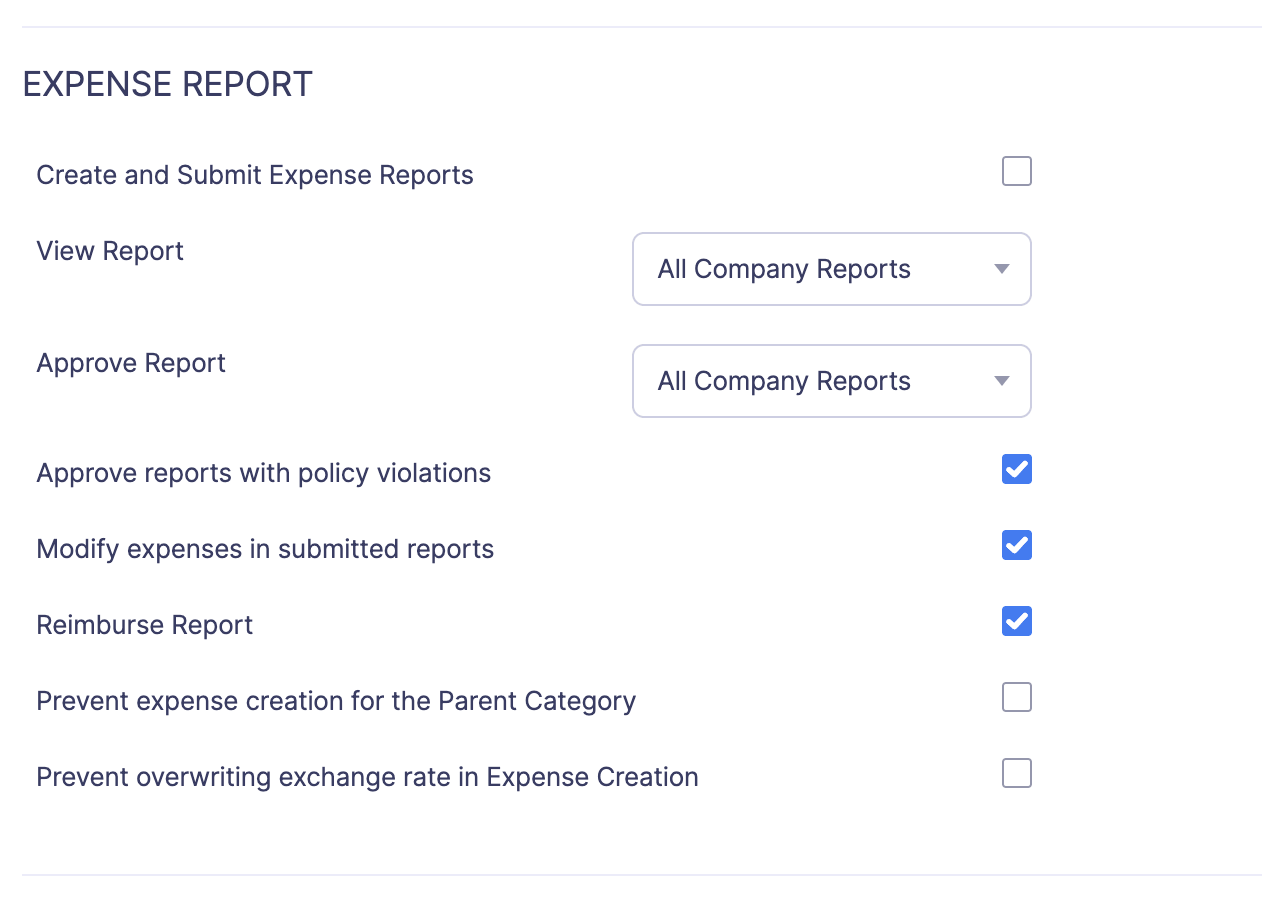
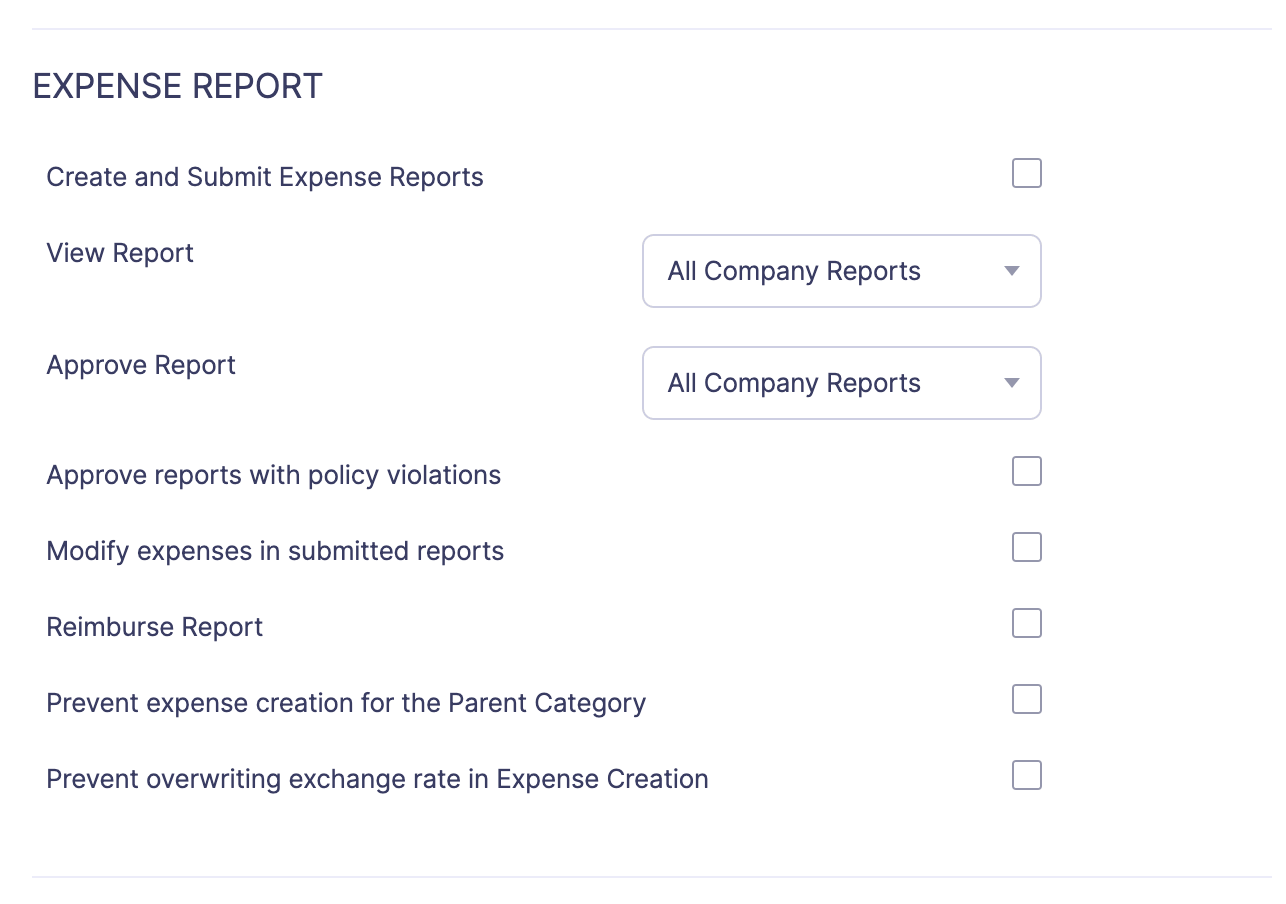
Since James doesn’t have to create or report expenses, we can disable this permission. However, James requires permission to approve and view reports. Hence, the following permissions are given:
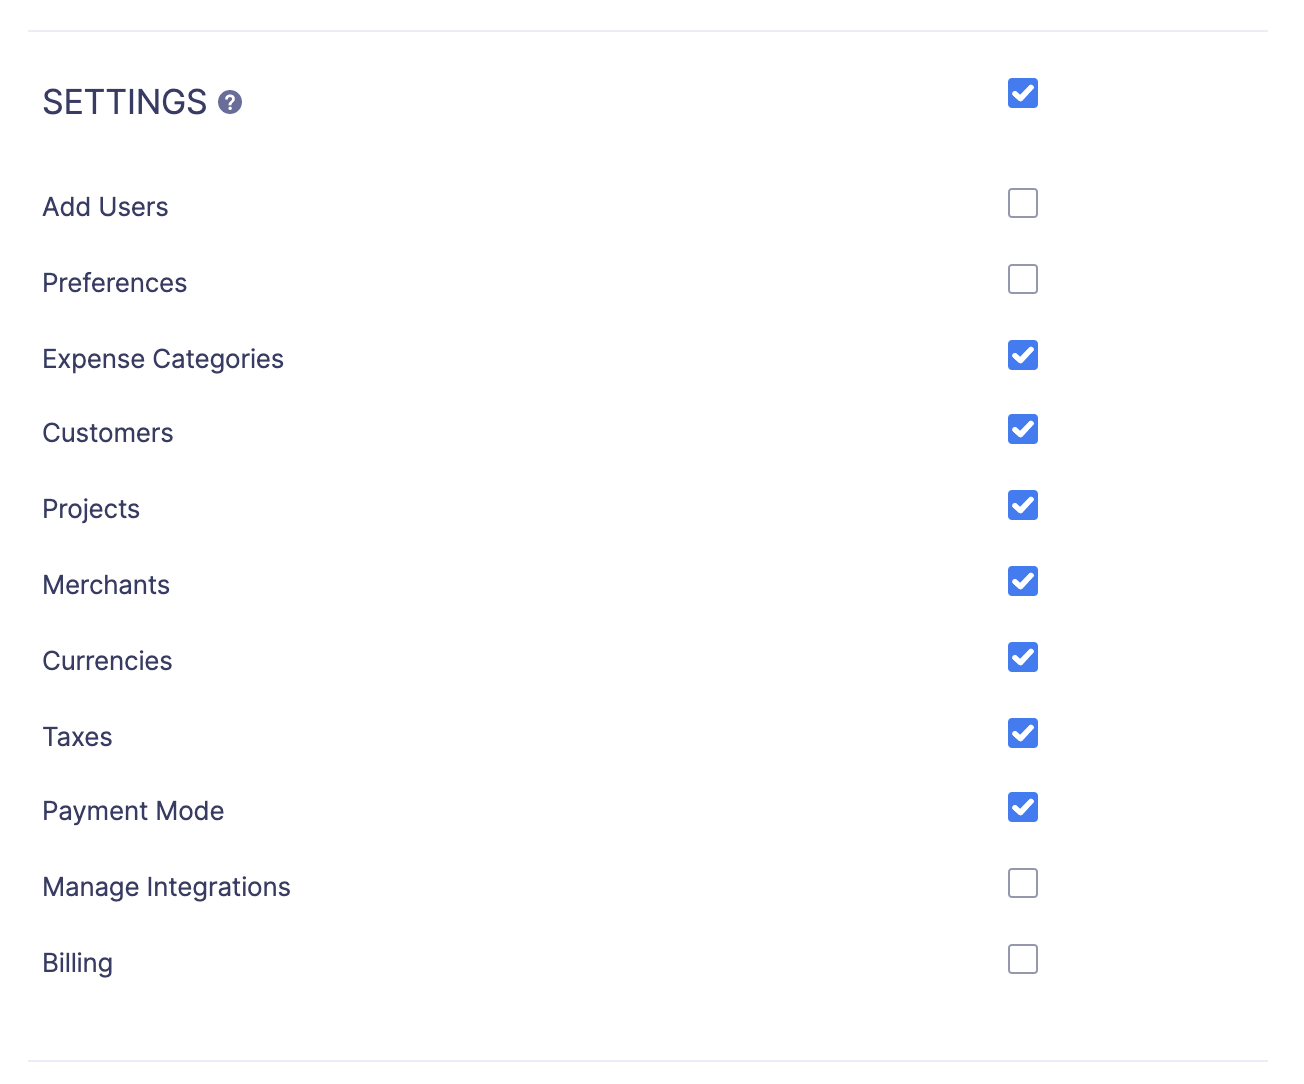
James needs to remain updated about the exchange rates and taxes. He should also know about the Projects undertaken by the company and the customers associated with them, since his job also involves monitoring accounts and handling reimbursements.
Similarly, Accountant Louis is given the permission to view all Company reports. He won’t have access to other modules.
Assign the Newly Created Roles to Users
The roles that you have created can be assigned to the respective users. To assign the role to a user:
- Click Admin View on the left sidebar.
- Go to Settings on the left sidebar.
(OR)
Click Settings in the top right corner of the page. - Go to Users under Users and Control.
- If you want to assign a custom role while inviting a user, click + New User at the top right corner.
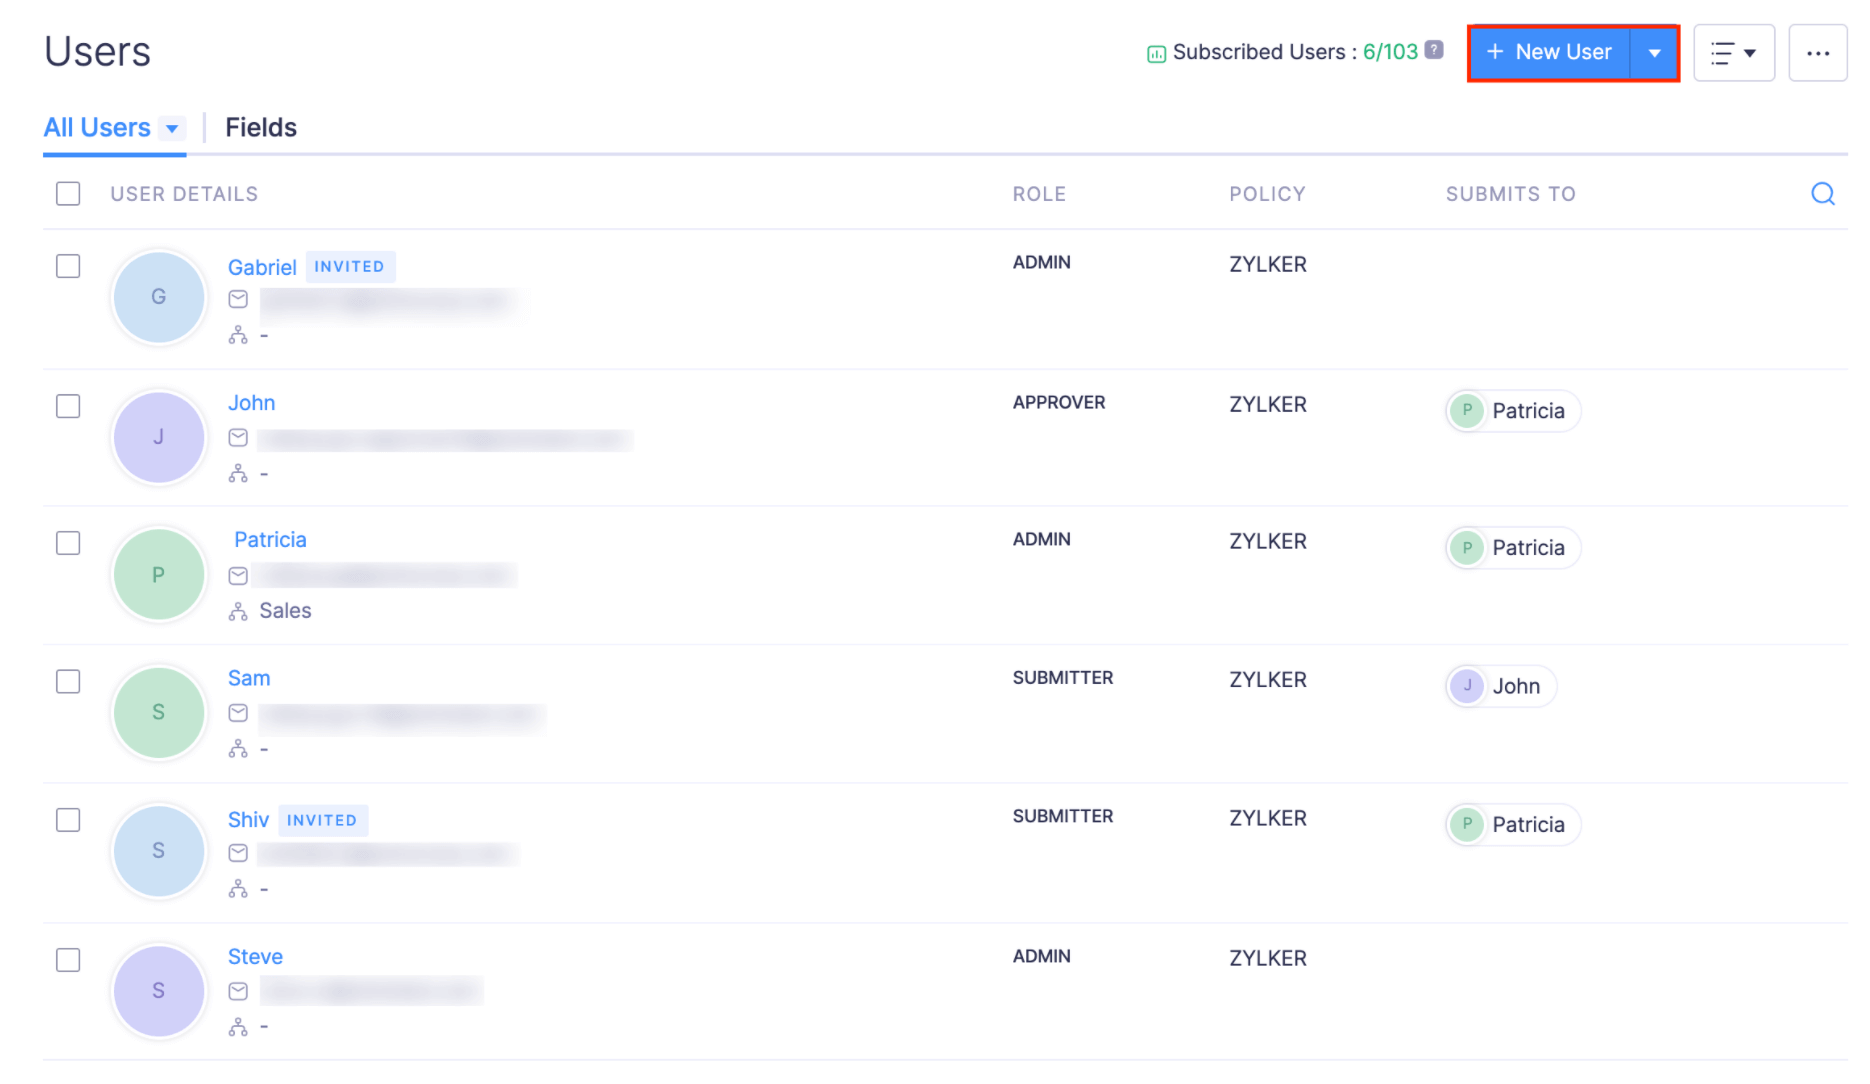
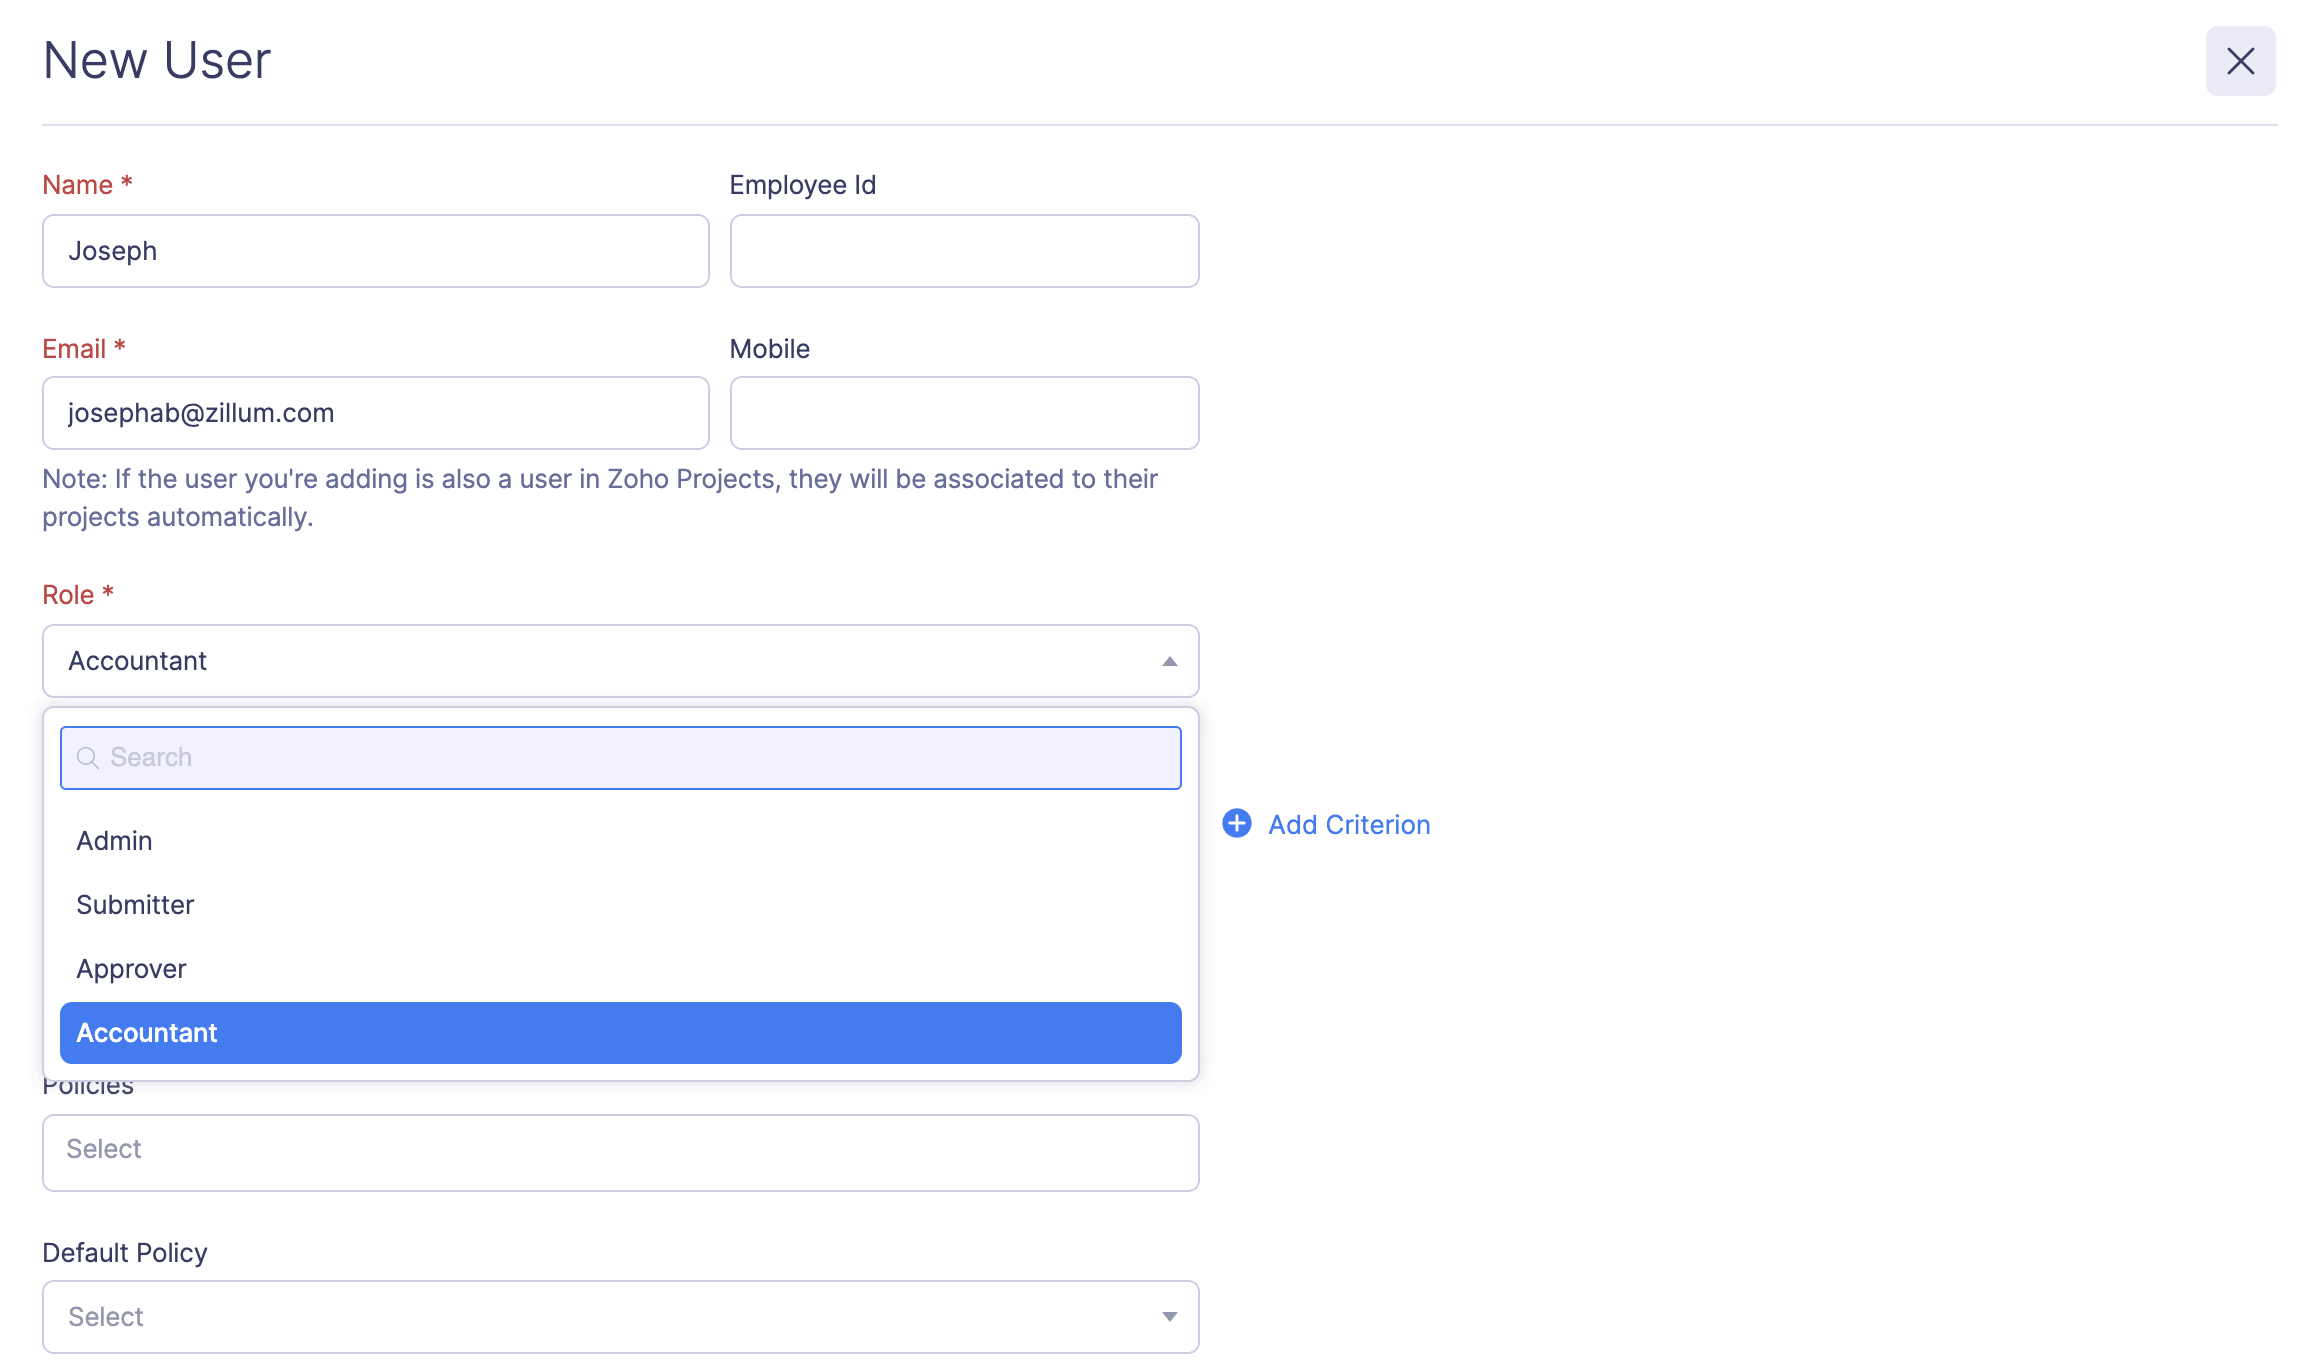
- Enter the Name, Employee ID, and Email Address of the user. Select a custom role for the user from the Role dropdown. Click the Add button. An invitation will be sent to the user’s email address.
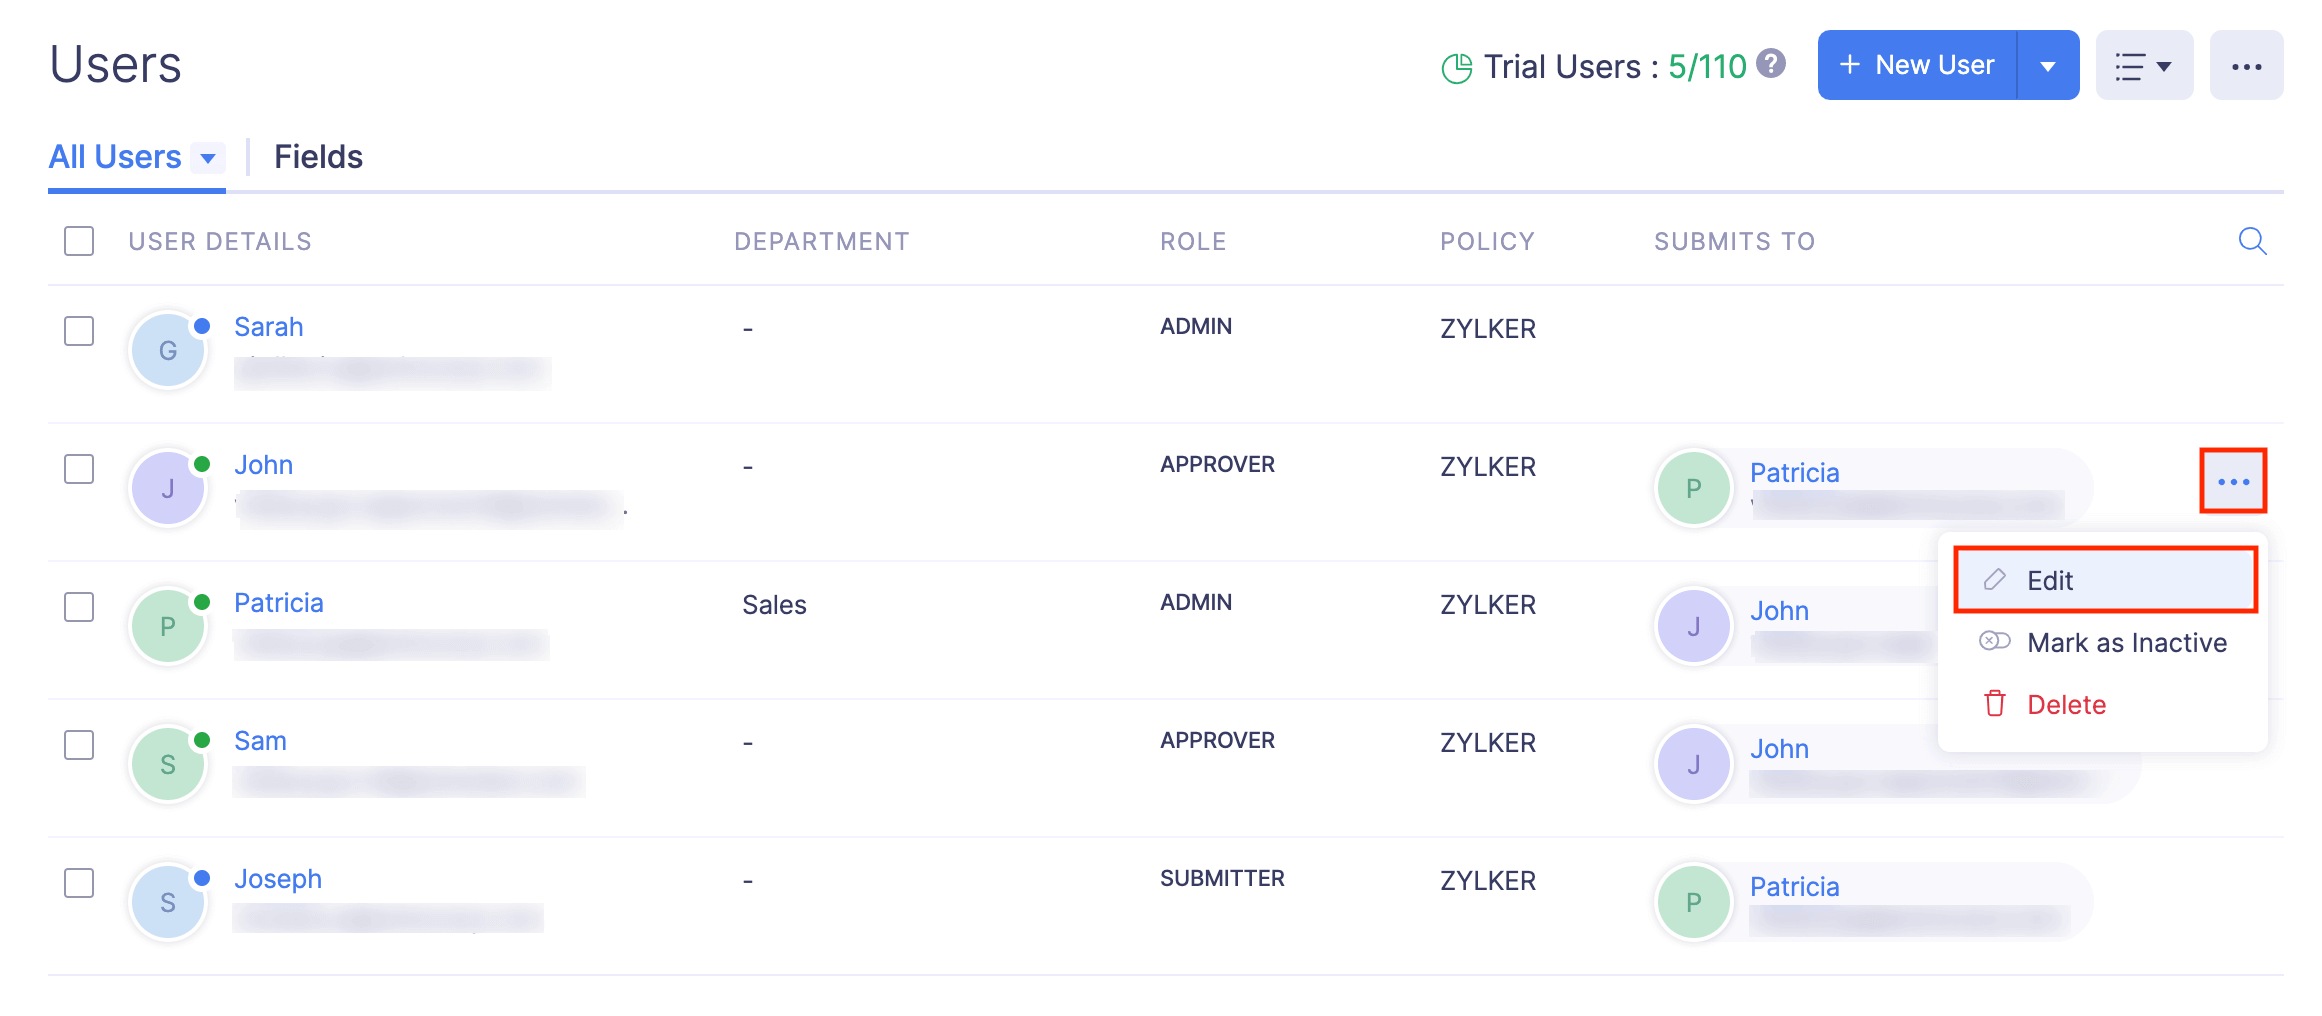
- If you want to assign a custom role to a user who has already been invited, click the More icon at the right corner of the user for whom you want to assign the role.
- Select Edit.
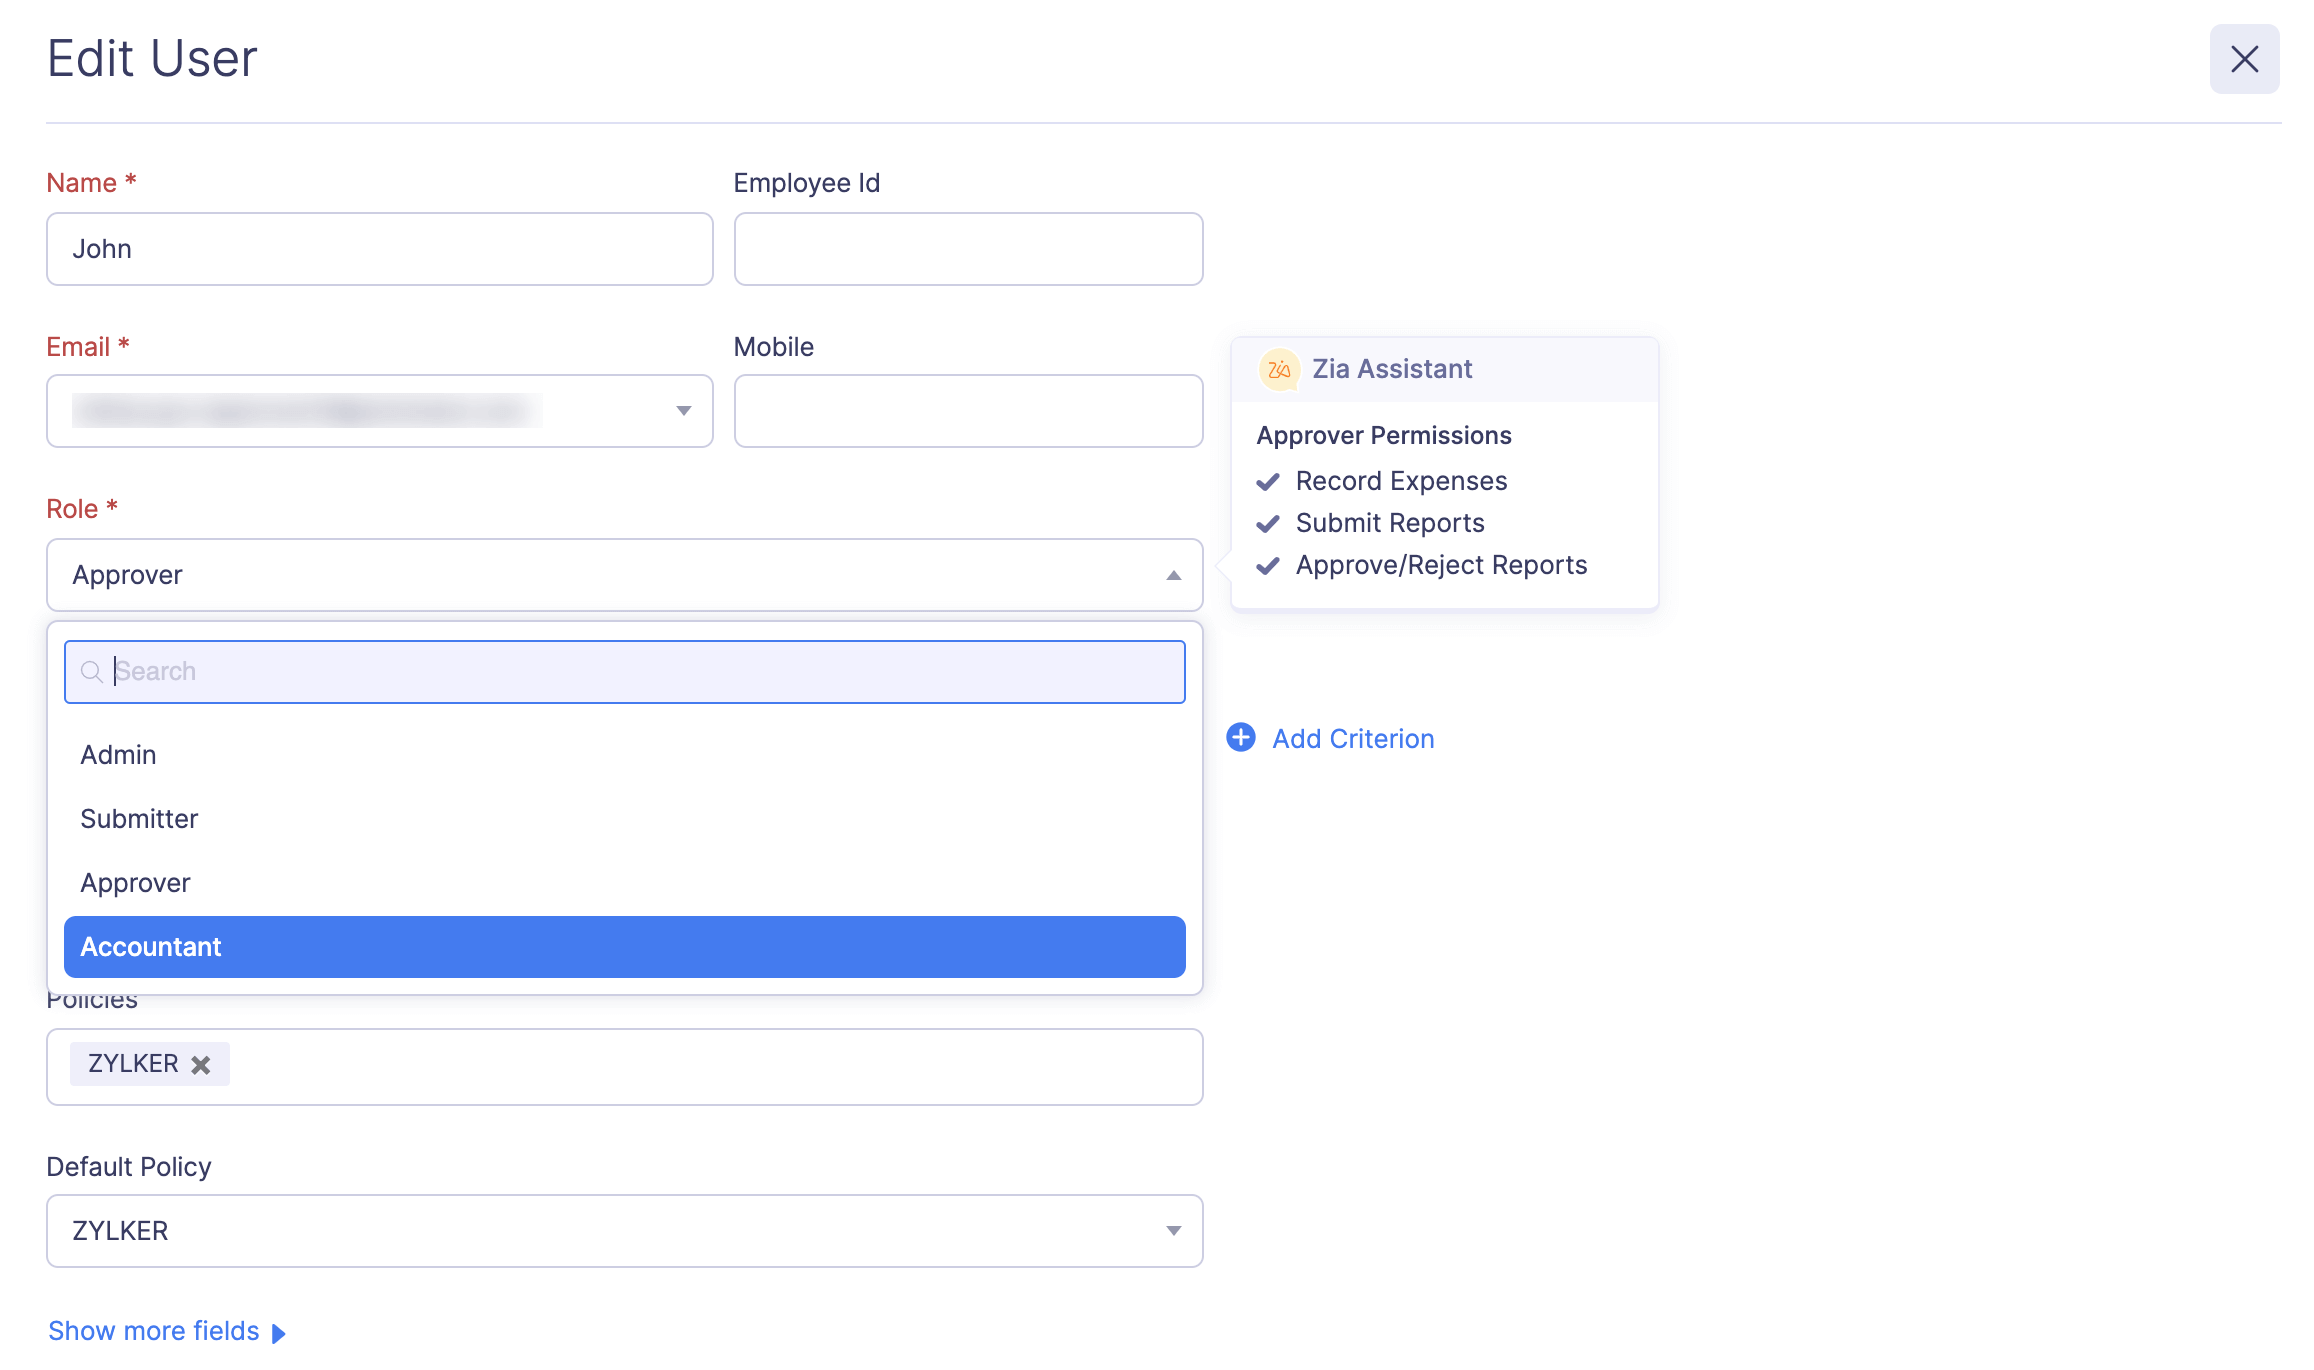
- Assign a role from the Role dropdown.
- Click Save. The user will be assigned to the selected role.
Note: You cannot change the role of a user who has approval permission to a role without approval permission when there are transactions waiting for their approval. Only when the user approves the pending transactions, you will be able to change that user’s role.
Assign Roles to the Users in Bulk
You can assign a role to more than one user at a time. To assign roles to the users in bulk:
- Click Admin View on the left sidebar.
- Go to Settings on the left sidebar.
(OR)
Click Settings in the top right corner of the page. - Go to Users under Users and Control.
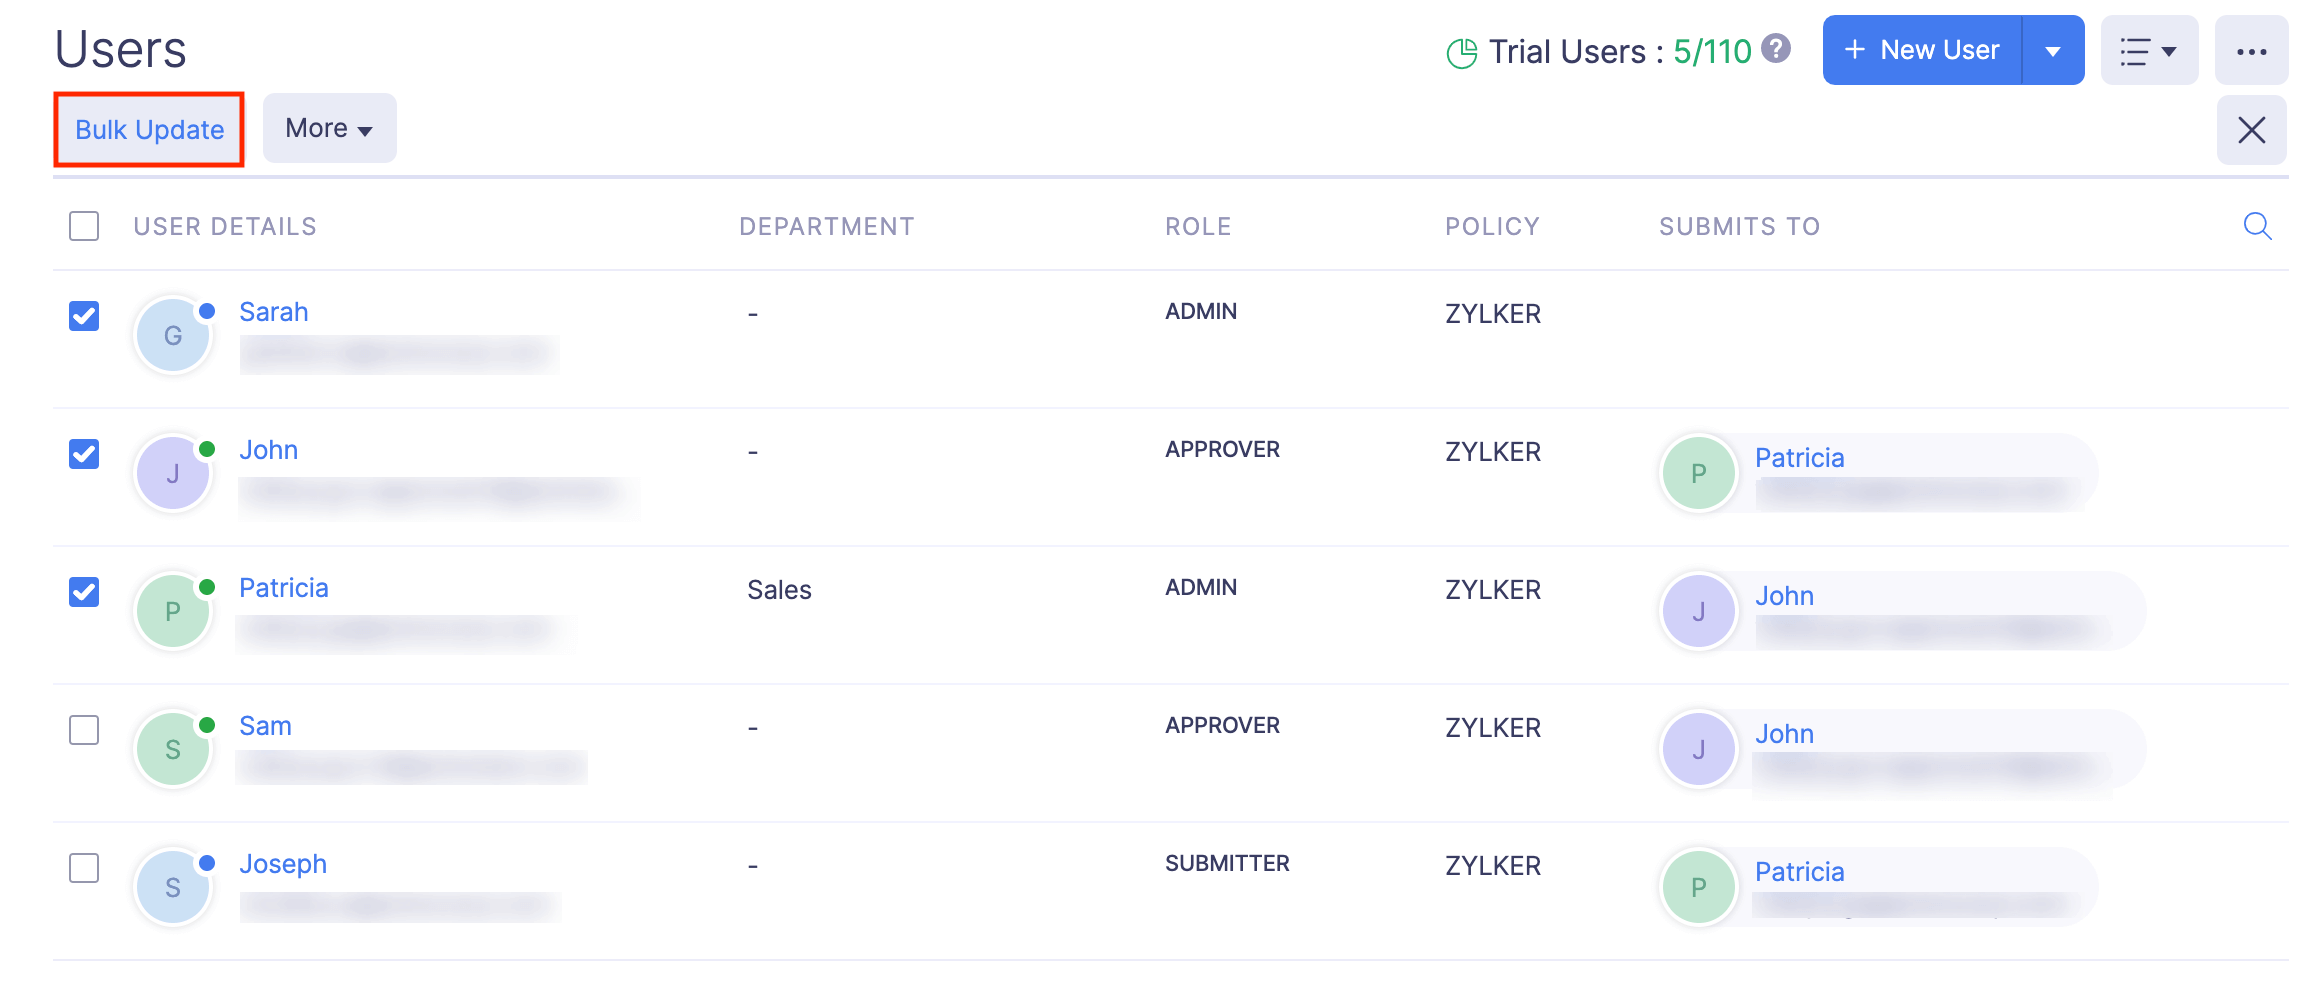
- Select the required users and click Bulk Update.
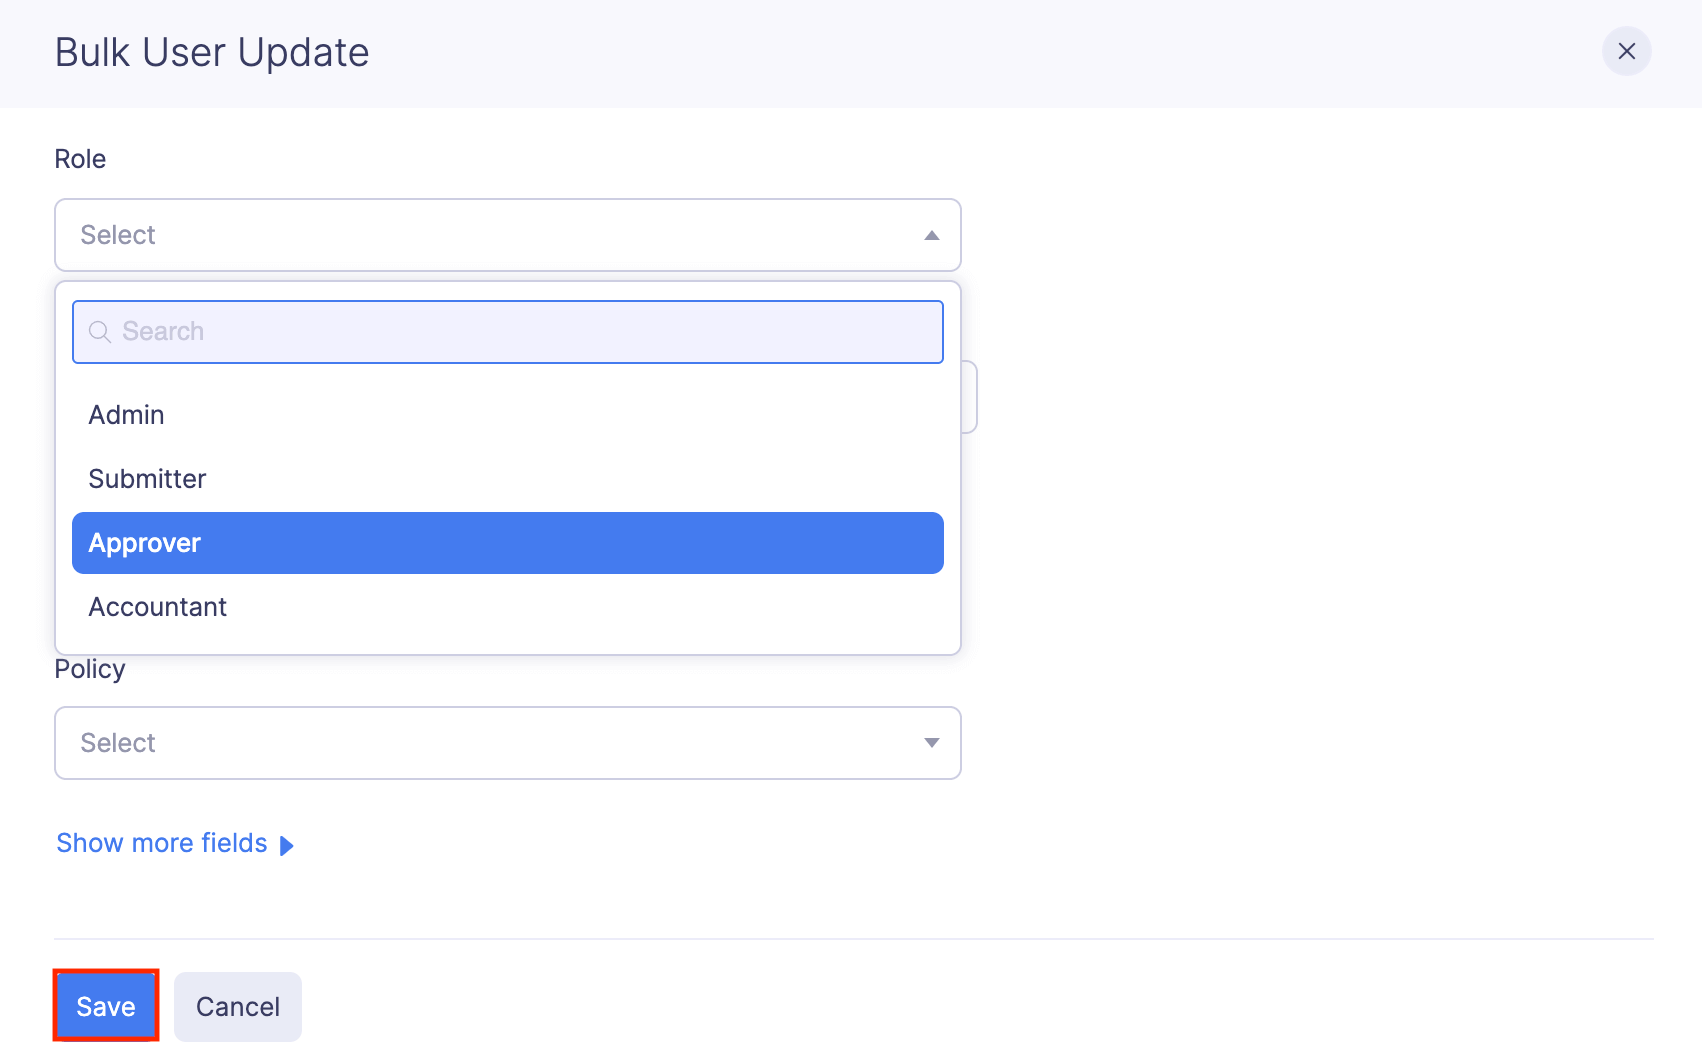
- Select a Role.
- Click Save. All the users will be assigned to the selected role.
Note: You cannot change the role of a user who has approval permission to a role without approval permission when there are transactions waiting for their approval. Only when the user approves the pending transactions, you will be able to change that user’s role.
Clone a Role
While creating new roles for users, you can clone the existing roles of Admin, Approver or Submitter and customize the permissions as required. To clone a role:
- Click Admin View on the left sidebar.
- Go to Settings on the left sidebar.
(OR)
Click Settings in the top right corner of the page. - Go to Roles & Permissions under Users and Control.
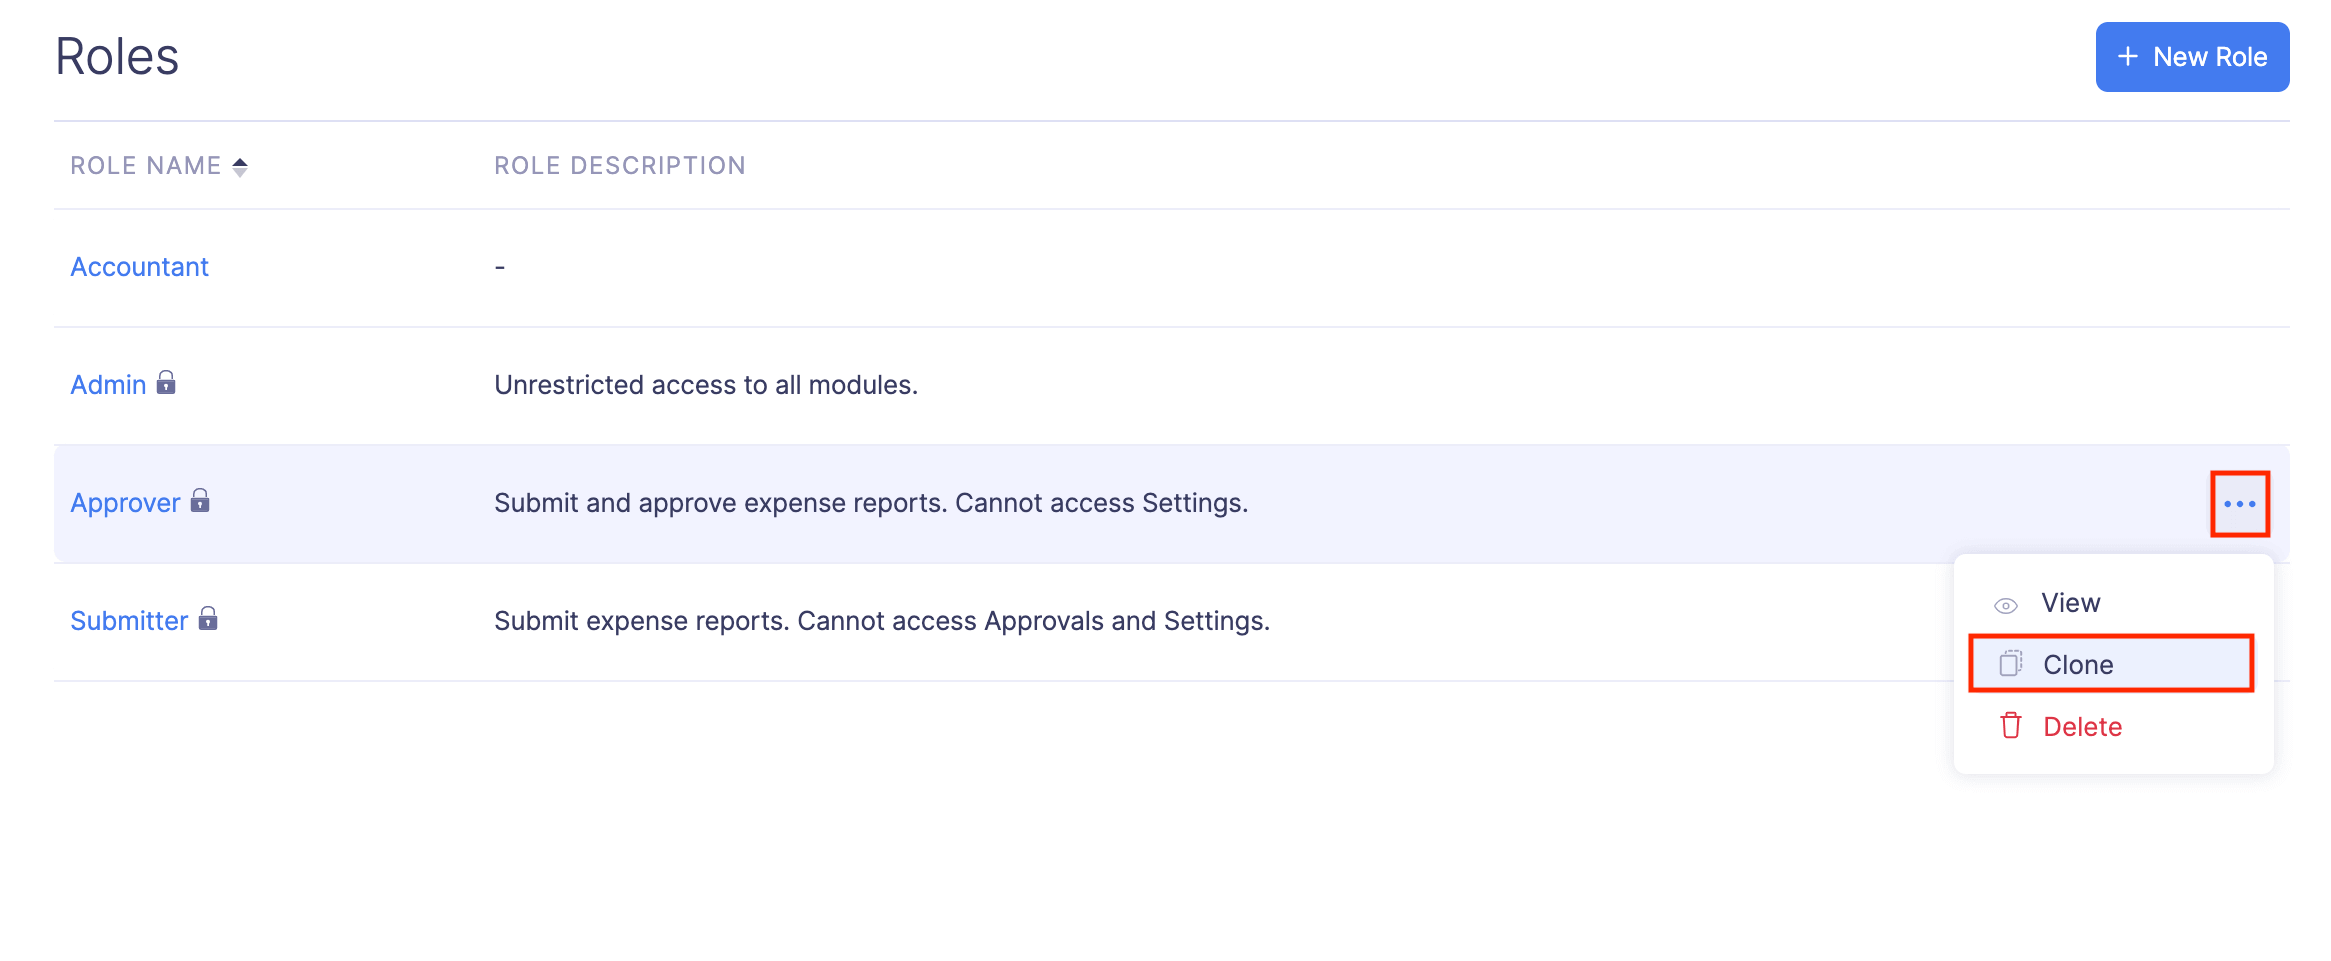
- Hover over the user role you want to clone and click the More icon at the right corner of the role.
- Select Clone.
- Enter the Role Name. Customize the permissions of the role, if required.
- Click Save. The role will be cloned and you can assign the role to the users.

Edit Role
You can customize the access permissions given to the user roles you’ve created, by editing them.
Note: You cannot edit the default user roles such as Admin, Approver, and Submitter.
To edit a role you have created:
- Click Admin View on the left sidebar.
- Go to Settings on the left sidebar.
(OR)
Click Settings in the top right corner of the page. - Go to Roles & Permissions under Users and Control.
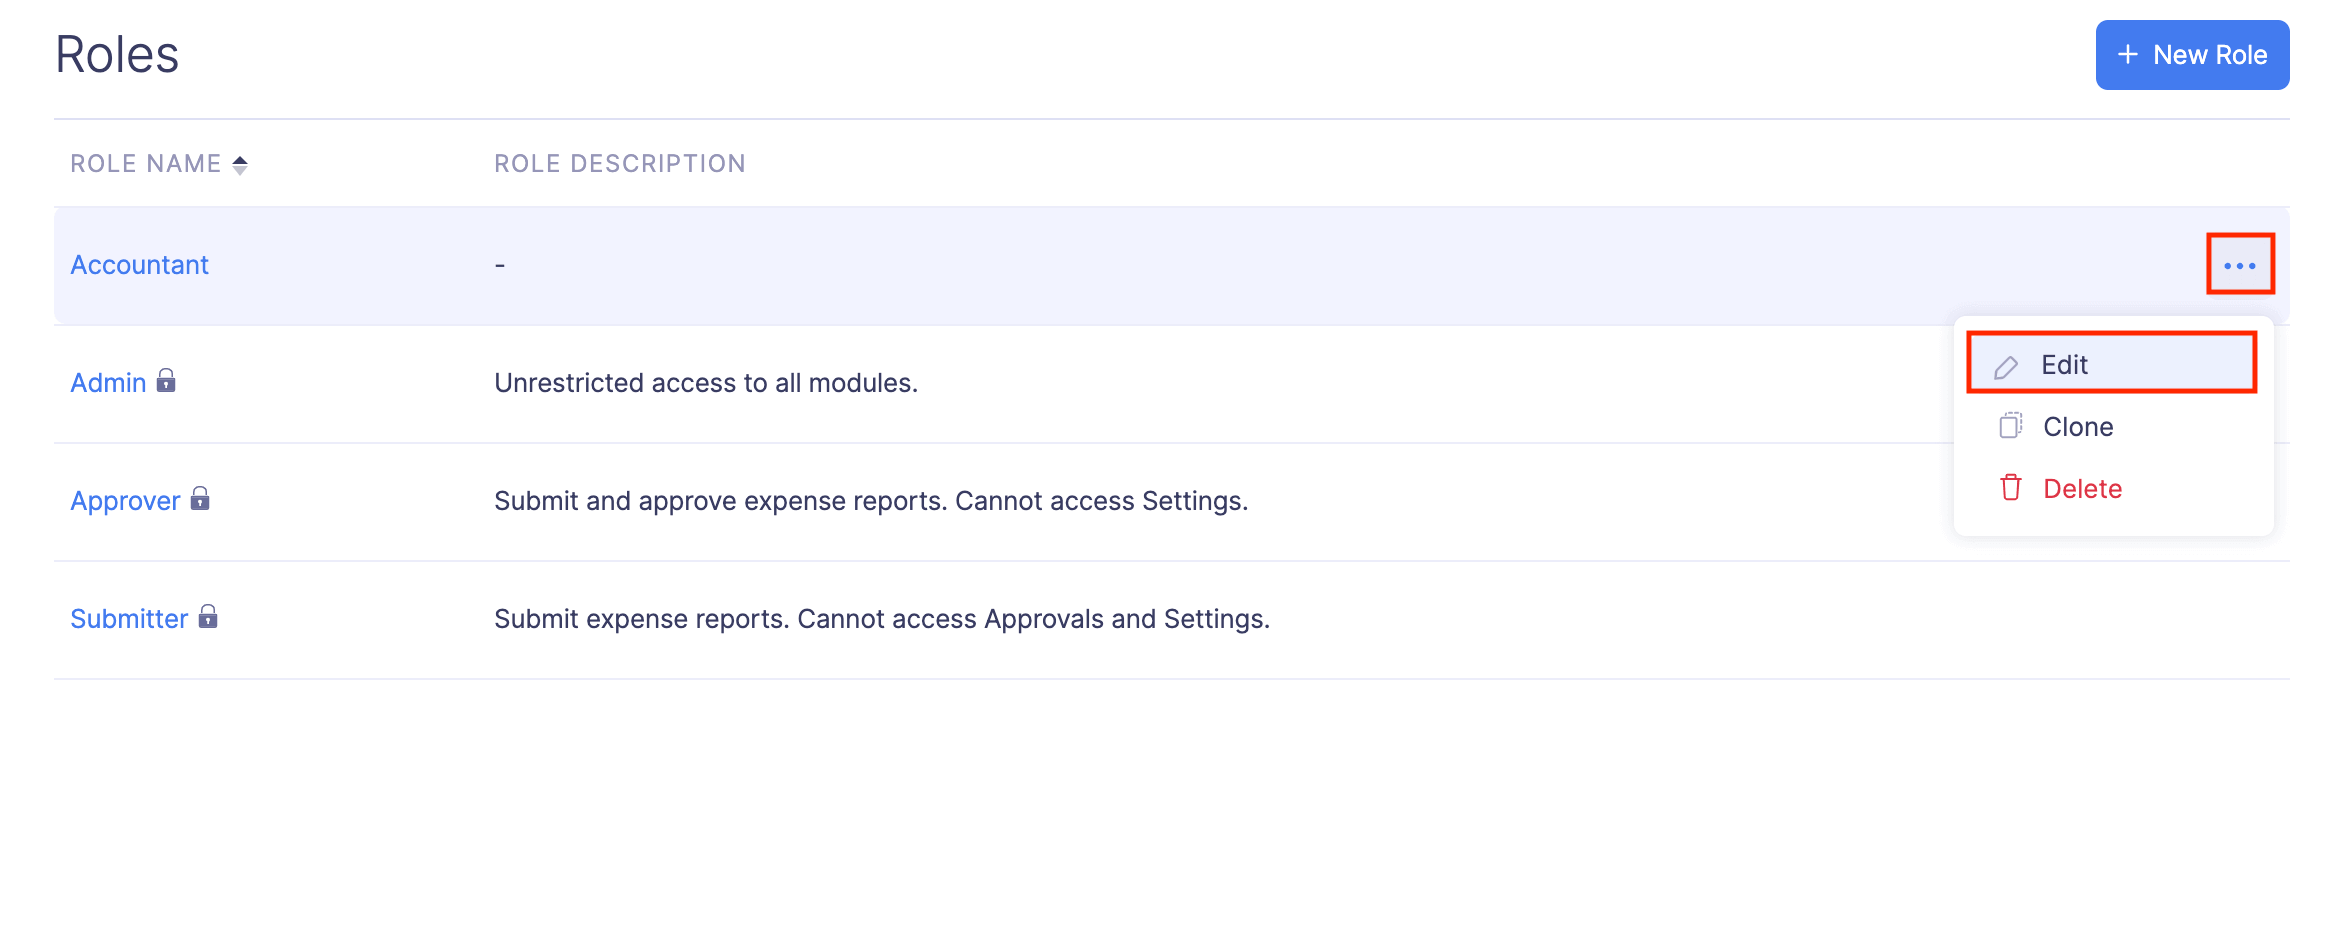
- Hover over the user role you want to edit and click the More icon at the right corner of the role.
- Select Edit.
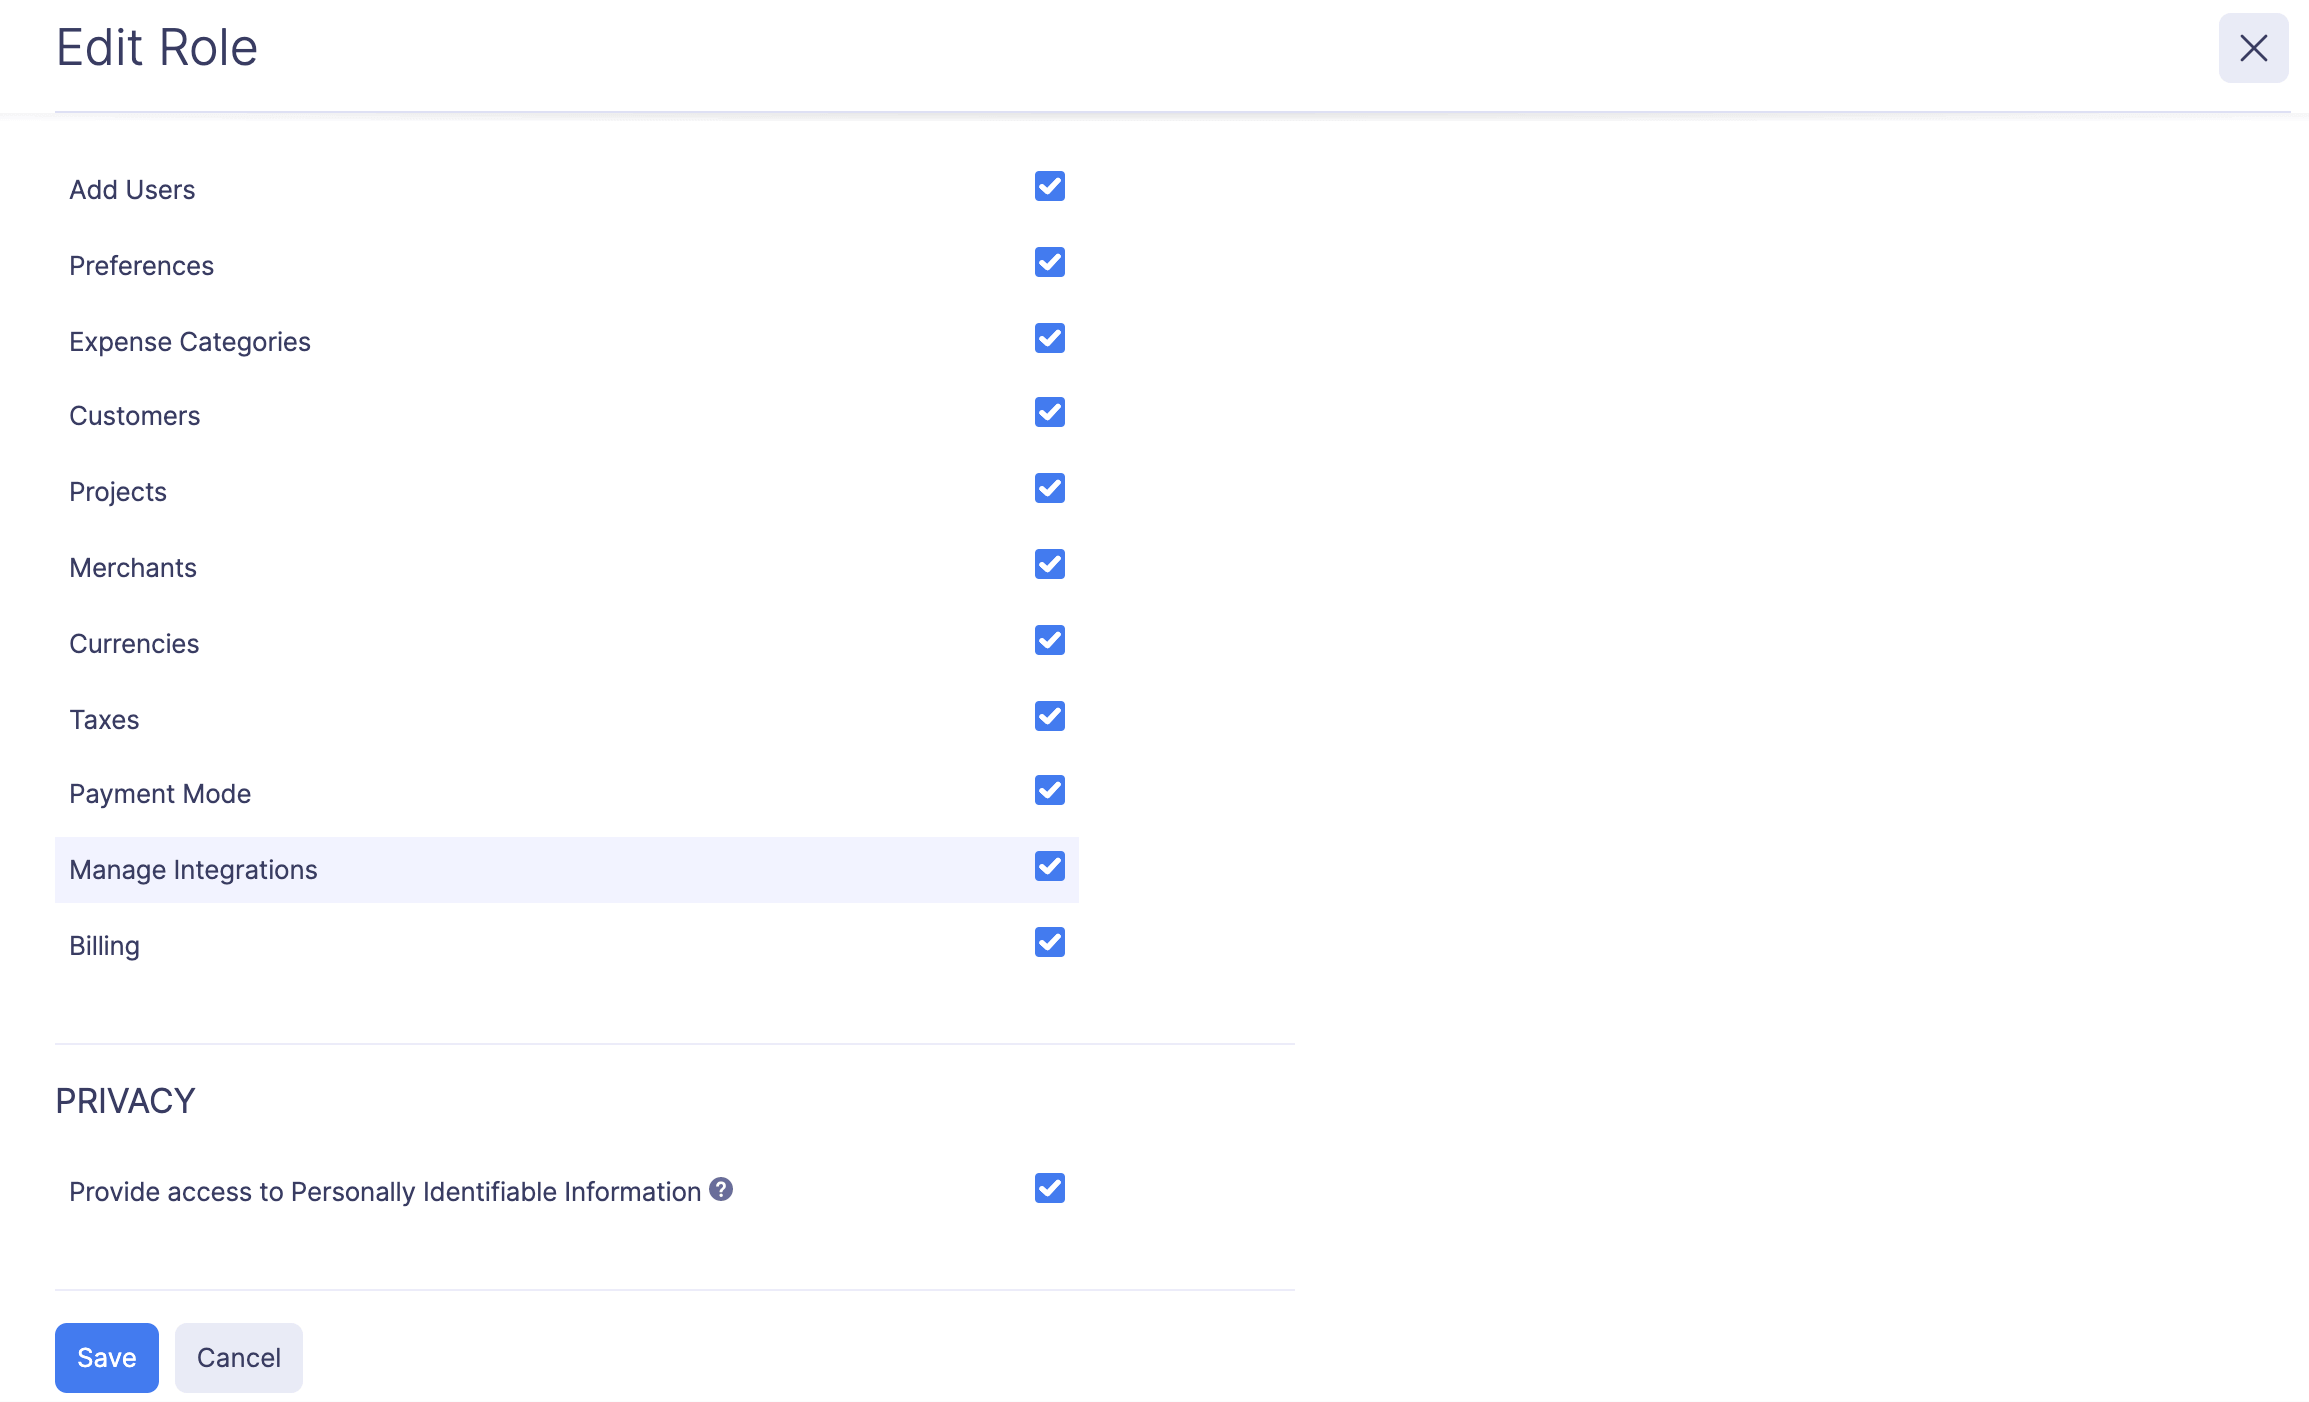
- Make the necessary changes and customize the permissions, as required.
- Click Save. The user role will be updated with the new permissions.
Delete Role
You can delete the roles you have created in Zoho Expense when you no longer need them.
Prerequisite: You cannot delete the user roles that are already assigned to users. However, you can assign another user role to those users and delete the desired user role.
To delete a role:
- Click Admin View on the left sidebar.
- Go to Settings on the left sidebar.
(OR)
Click Settings in the top right corner of the page. - Go to Roles & Permissions under Users and Control.
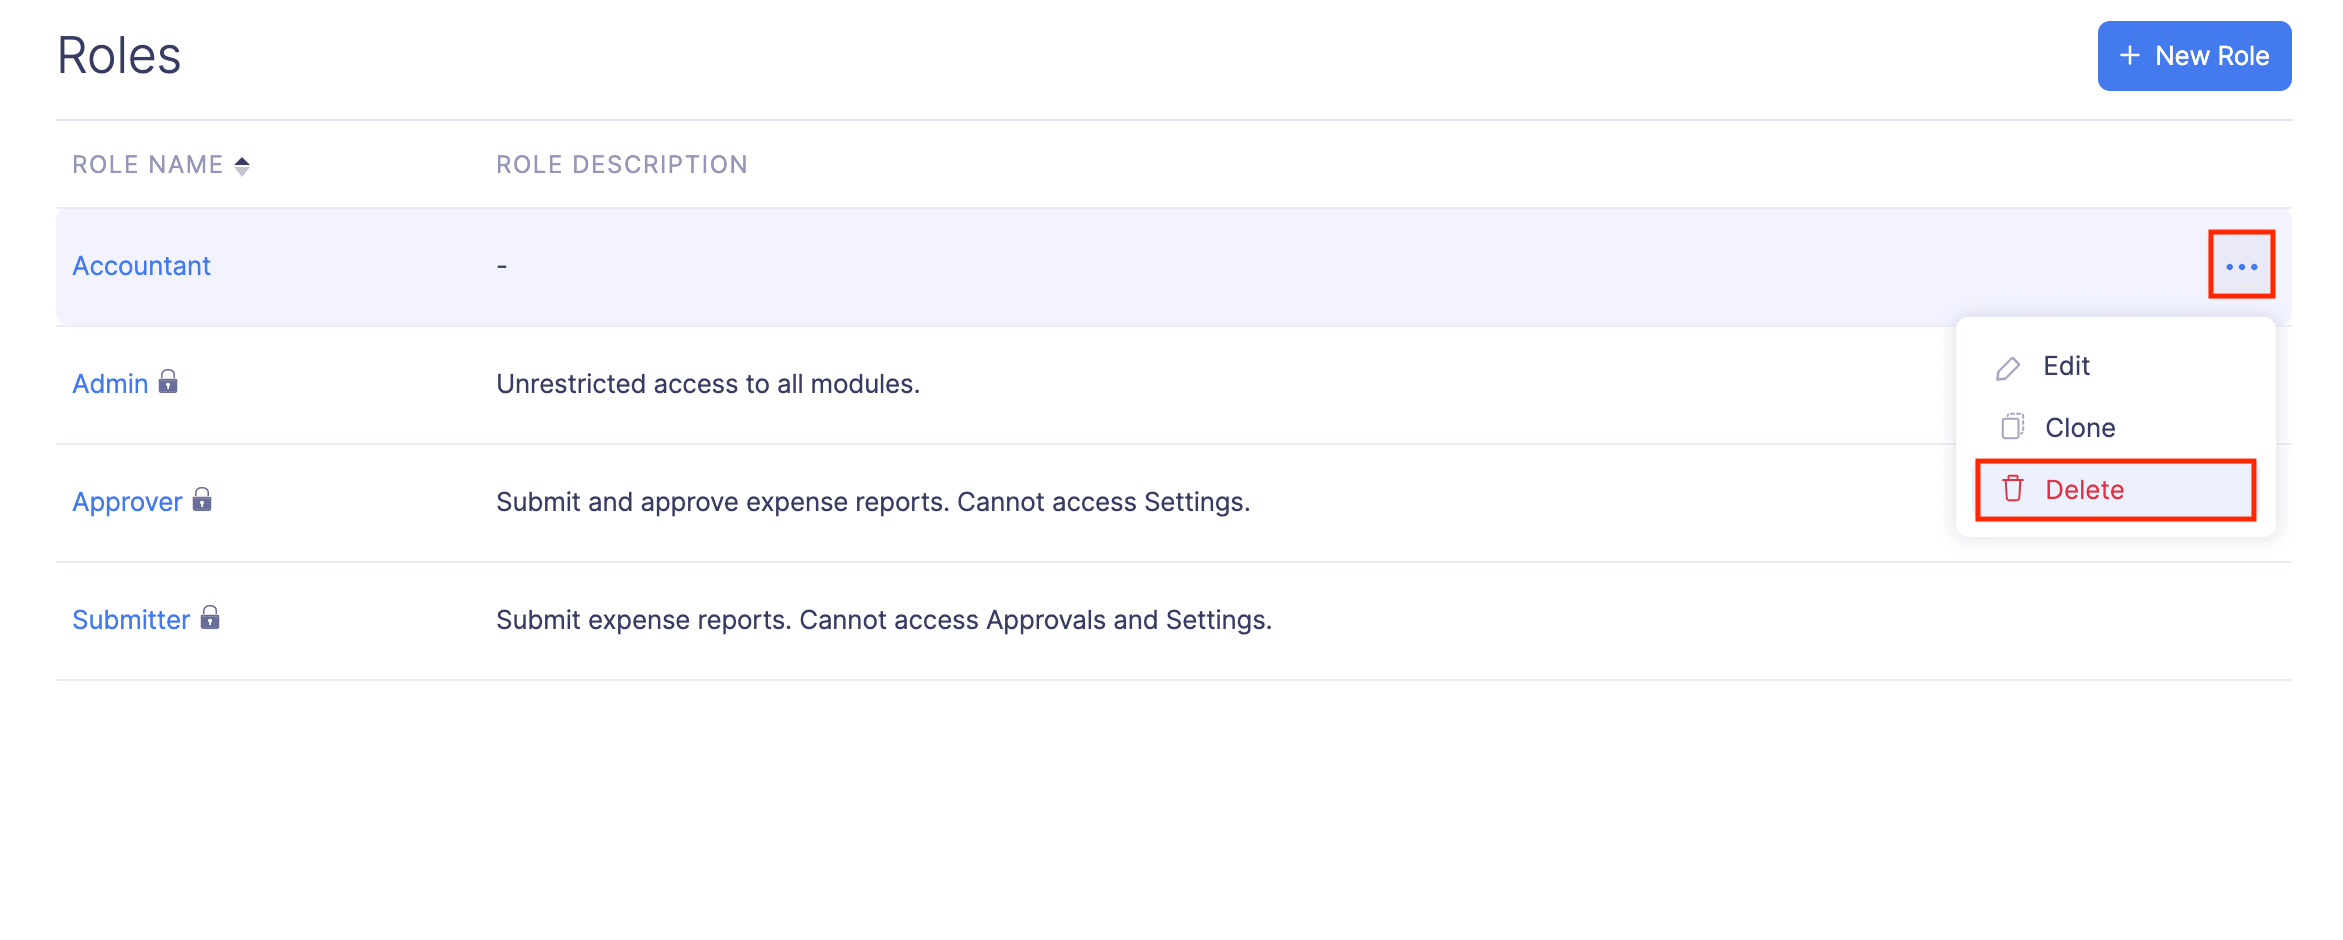
- Hover over the user role you’ve created that you want to delete and click the More icon at the right corner of that role.
- Select Delete.
- In the popup that opens, click Delete to delete the user role.


 Yes
Yes