Compile and Schedule SMS/MMS
Once your number is SMS/MMS-enabled, you can send and receive SMS and MMS messages from the Messages module and carry out chat-like conversations with your customers and prospects using text and multimedia files.
Note
- Unregistered 10DLC numbers are blocked from sending SMS. Learn more about 10DLC registration.
- MMS is supported only when sent from a US number to another US or Canada number.
To send a new SMS/MMS message:
Go to Message module, then click the New Message button at the top-right corner.
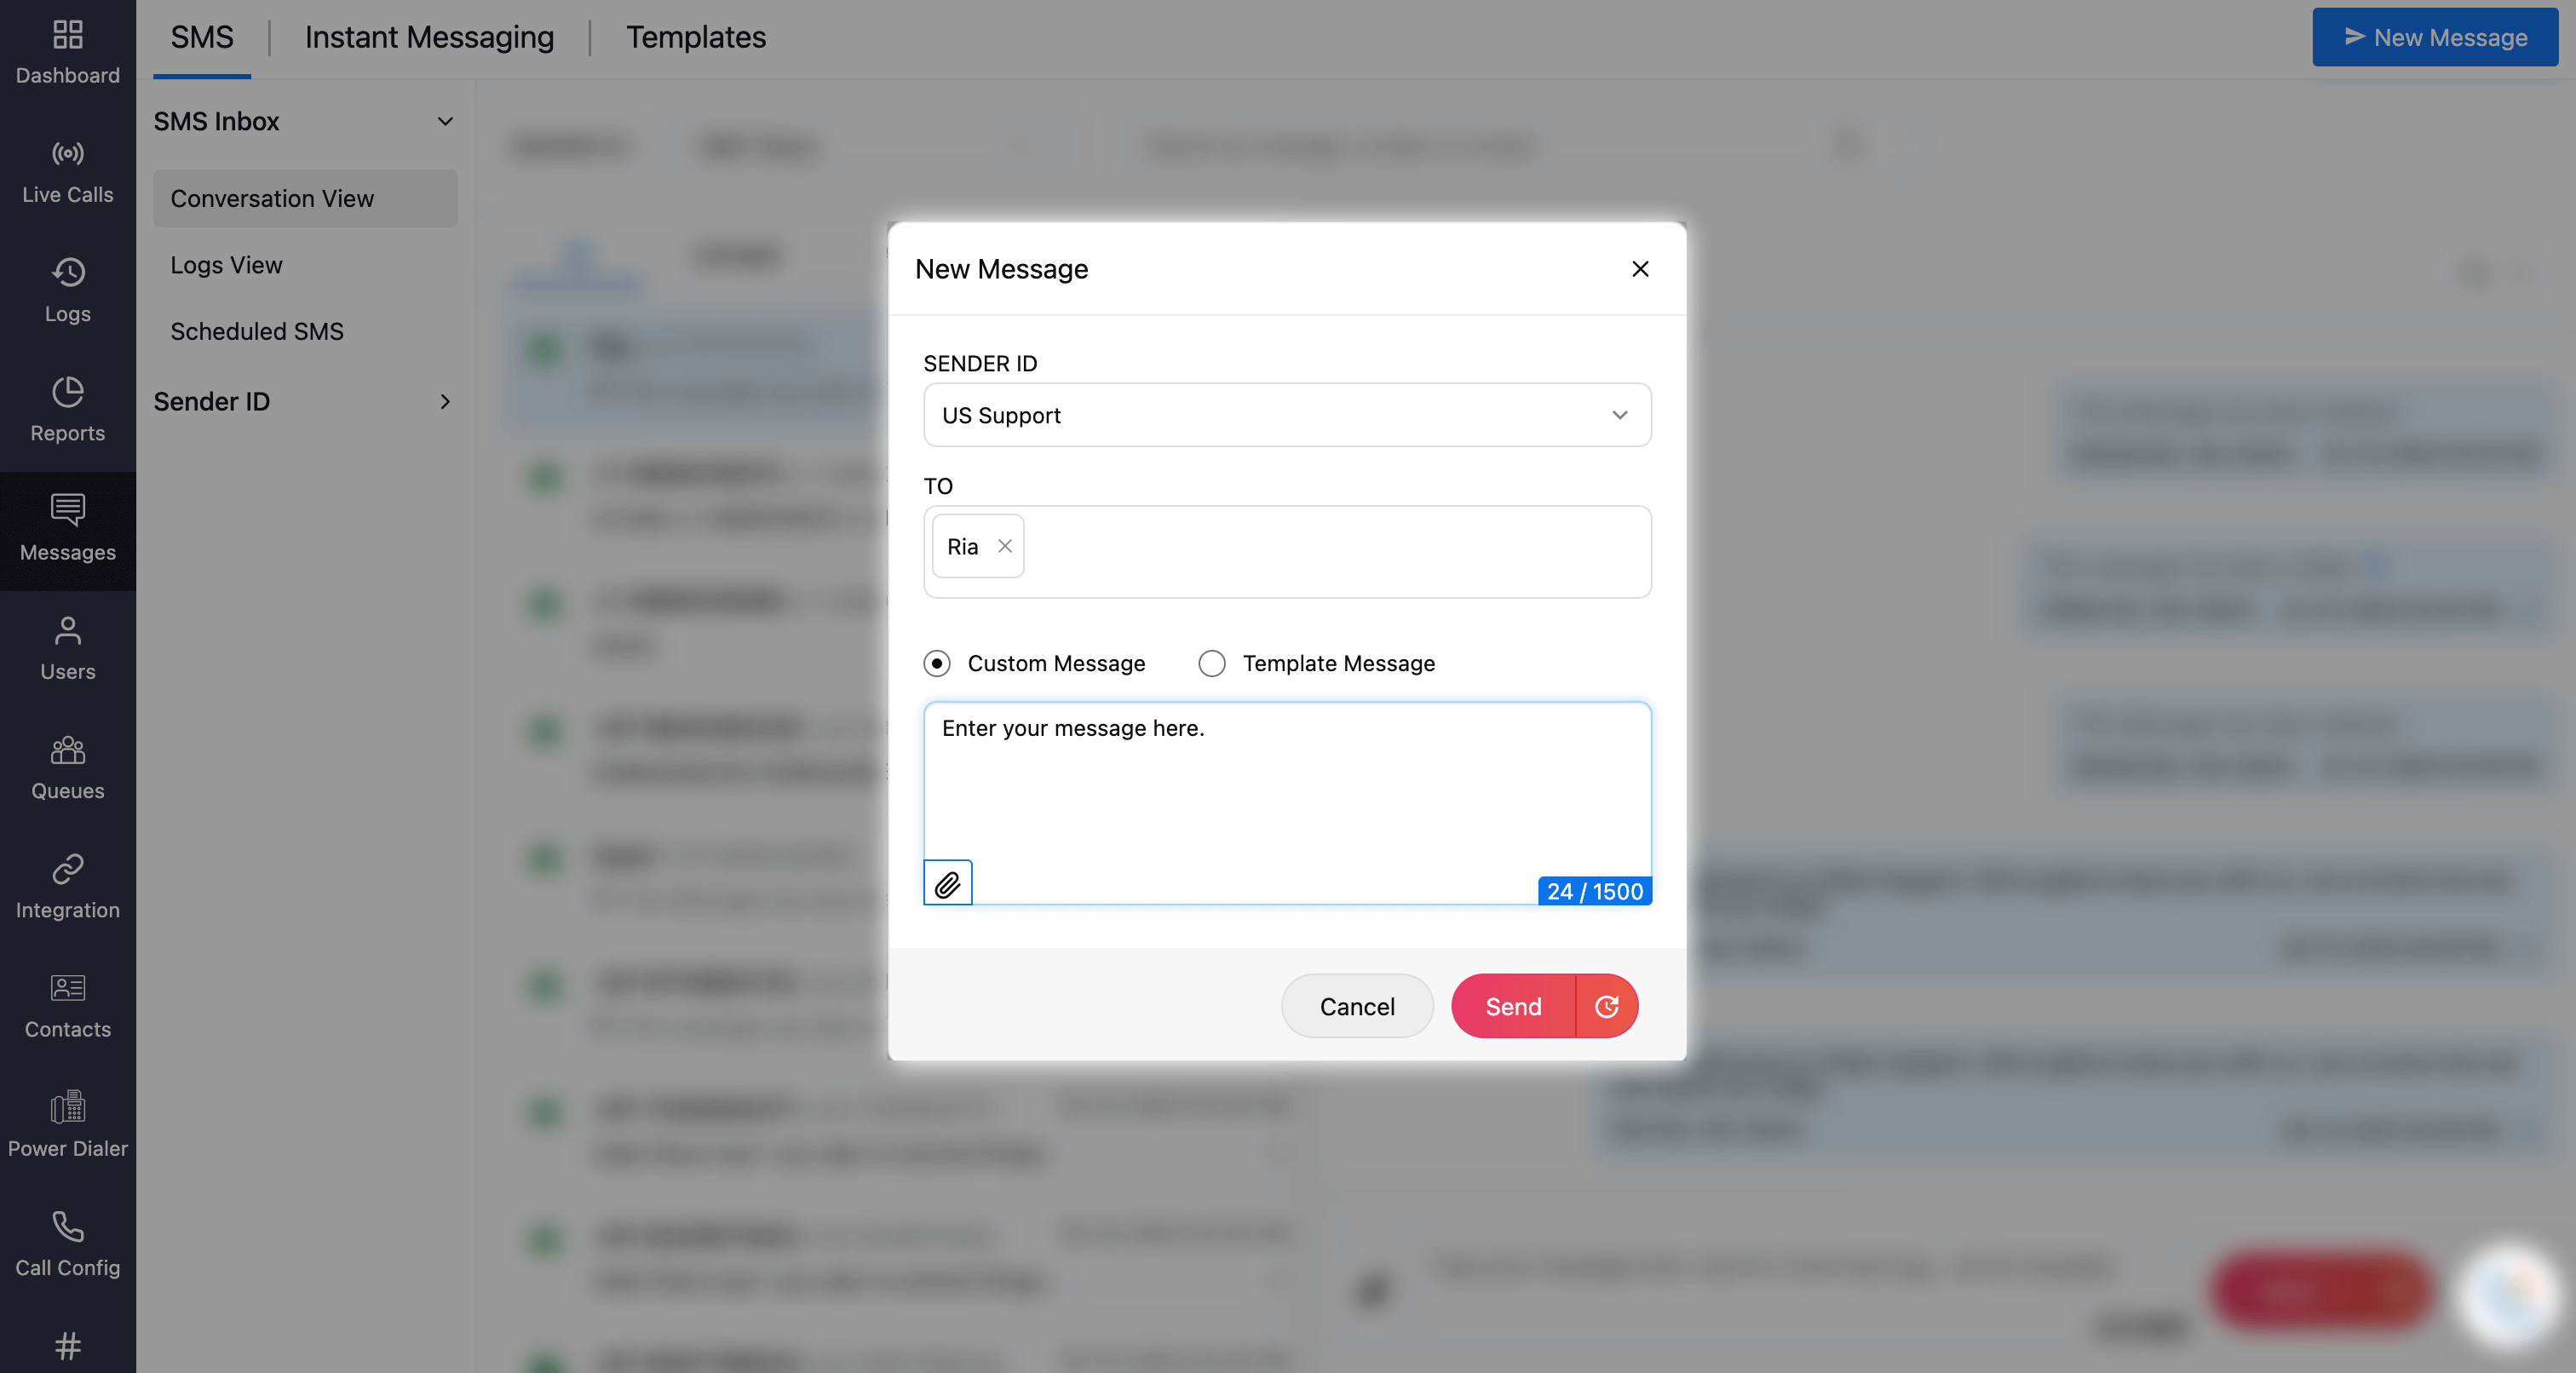
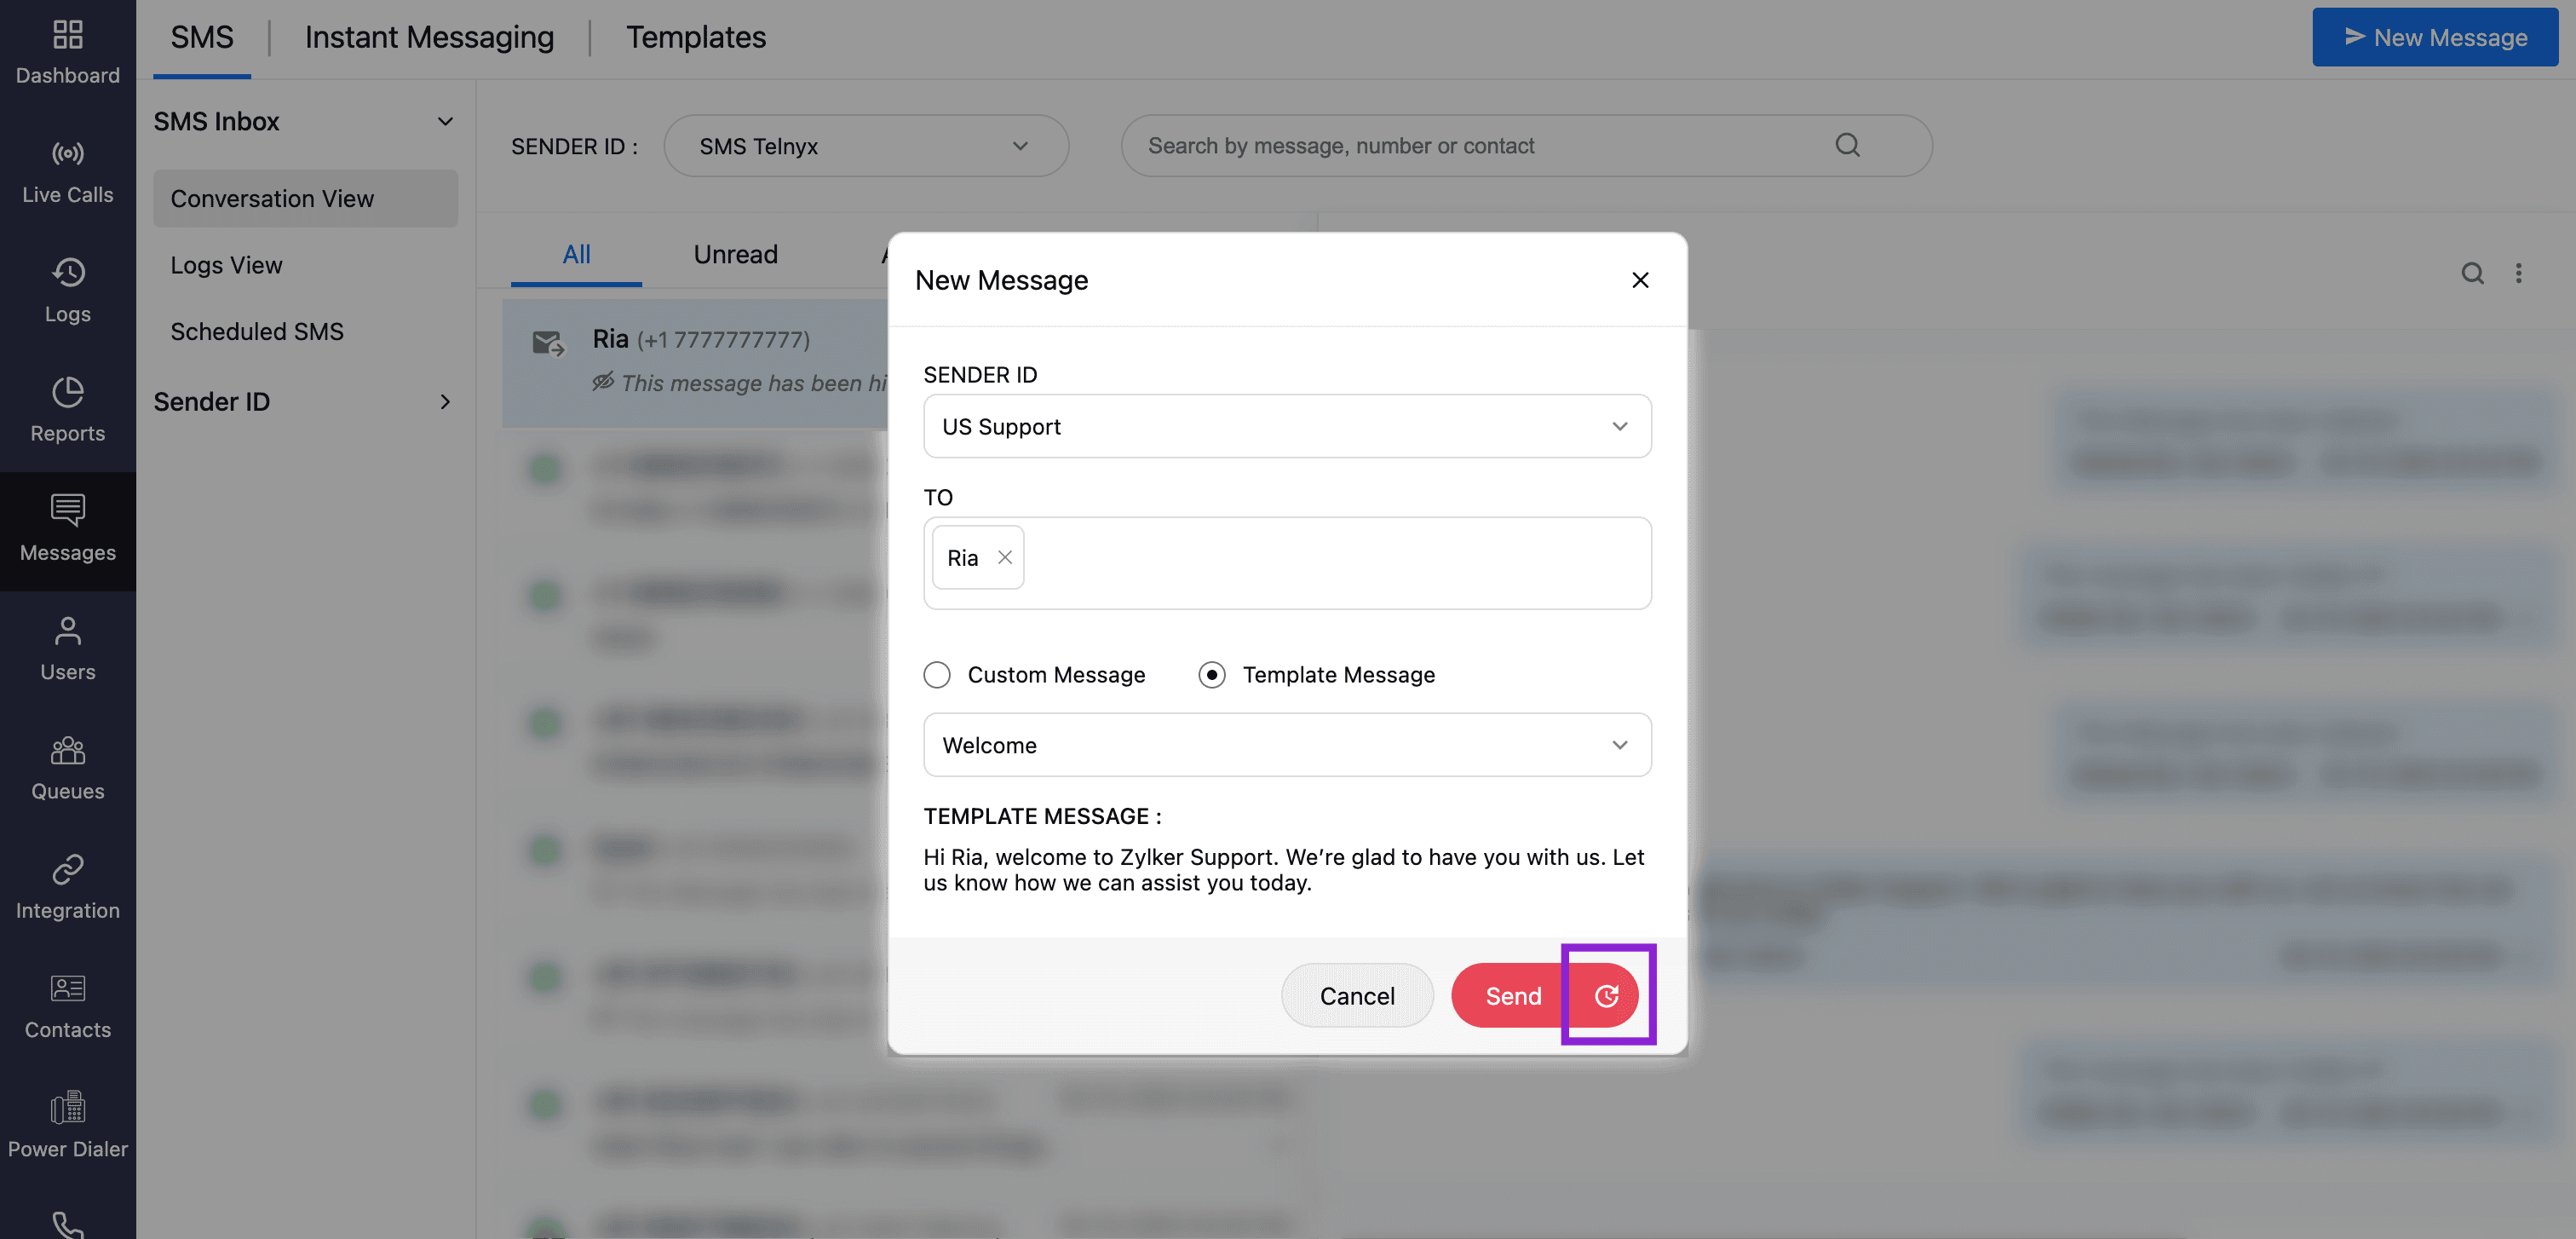
Select the Sender ID from your list of SMS enabled numbers.
Enter the recipient’s phone number or search for and select the contact(s) you want to send the message to. You can add multiple recipients if needed.
Note
Maximum of 10 recipients can be added.
Type the message and attach files if necessary. You can enter your message in two ways:
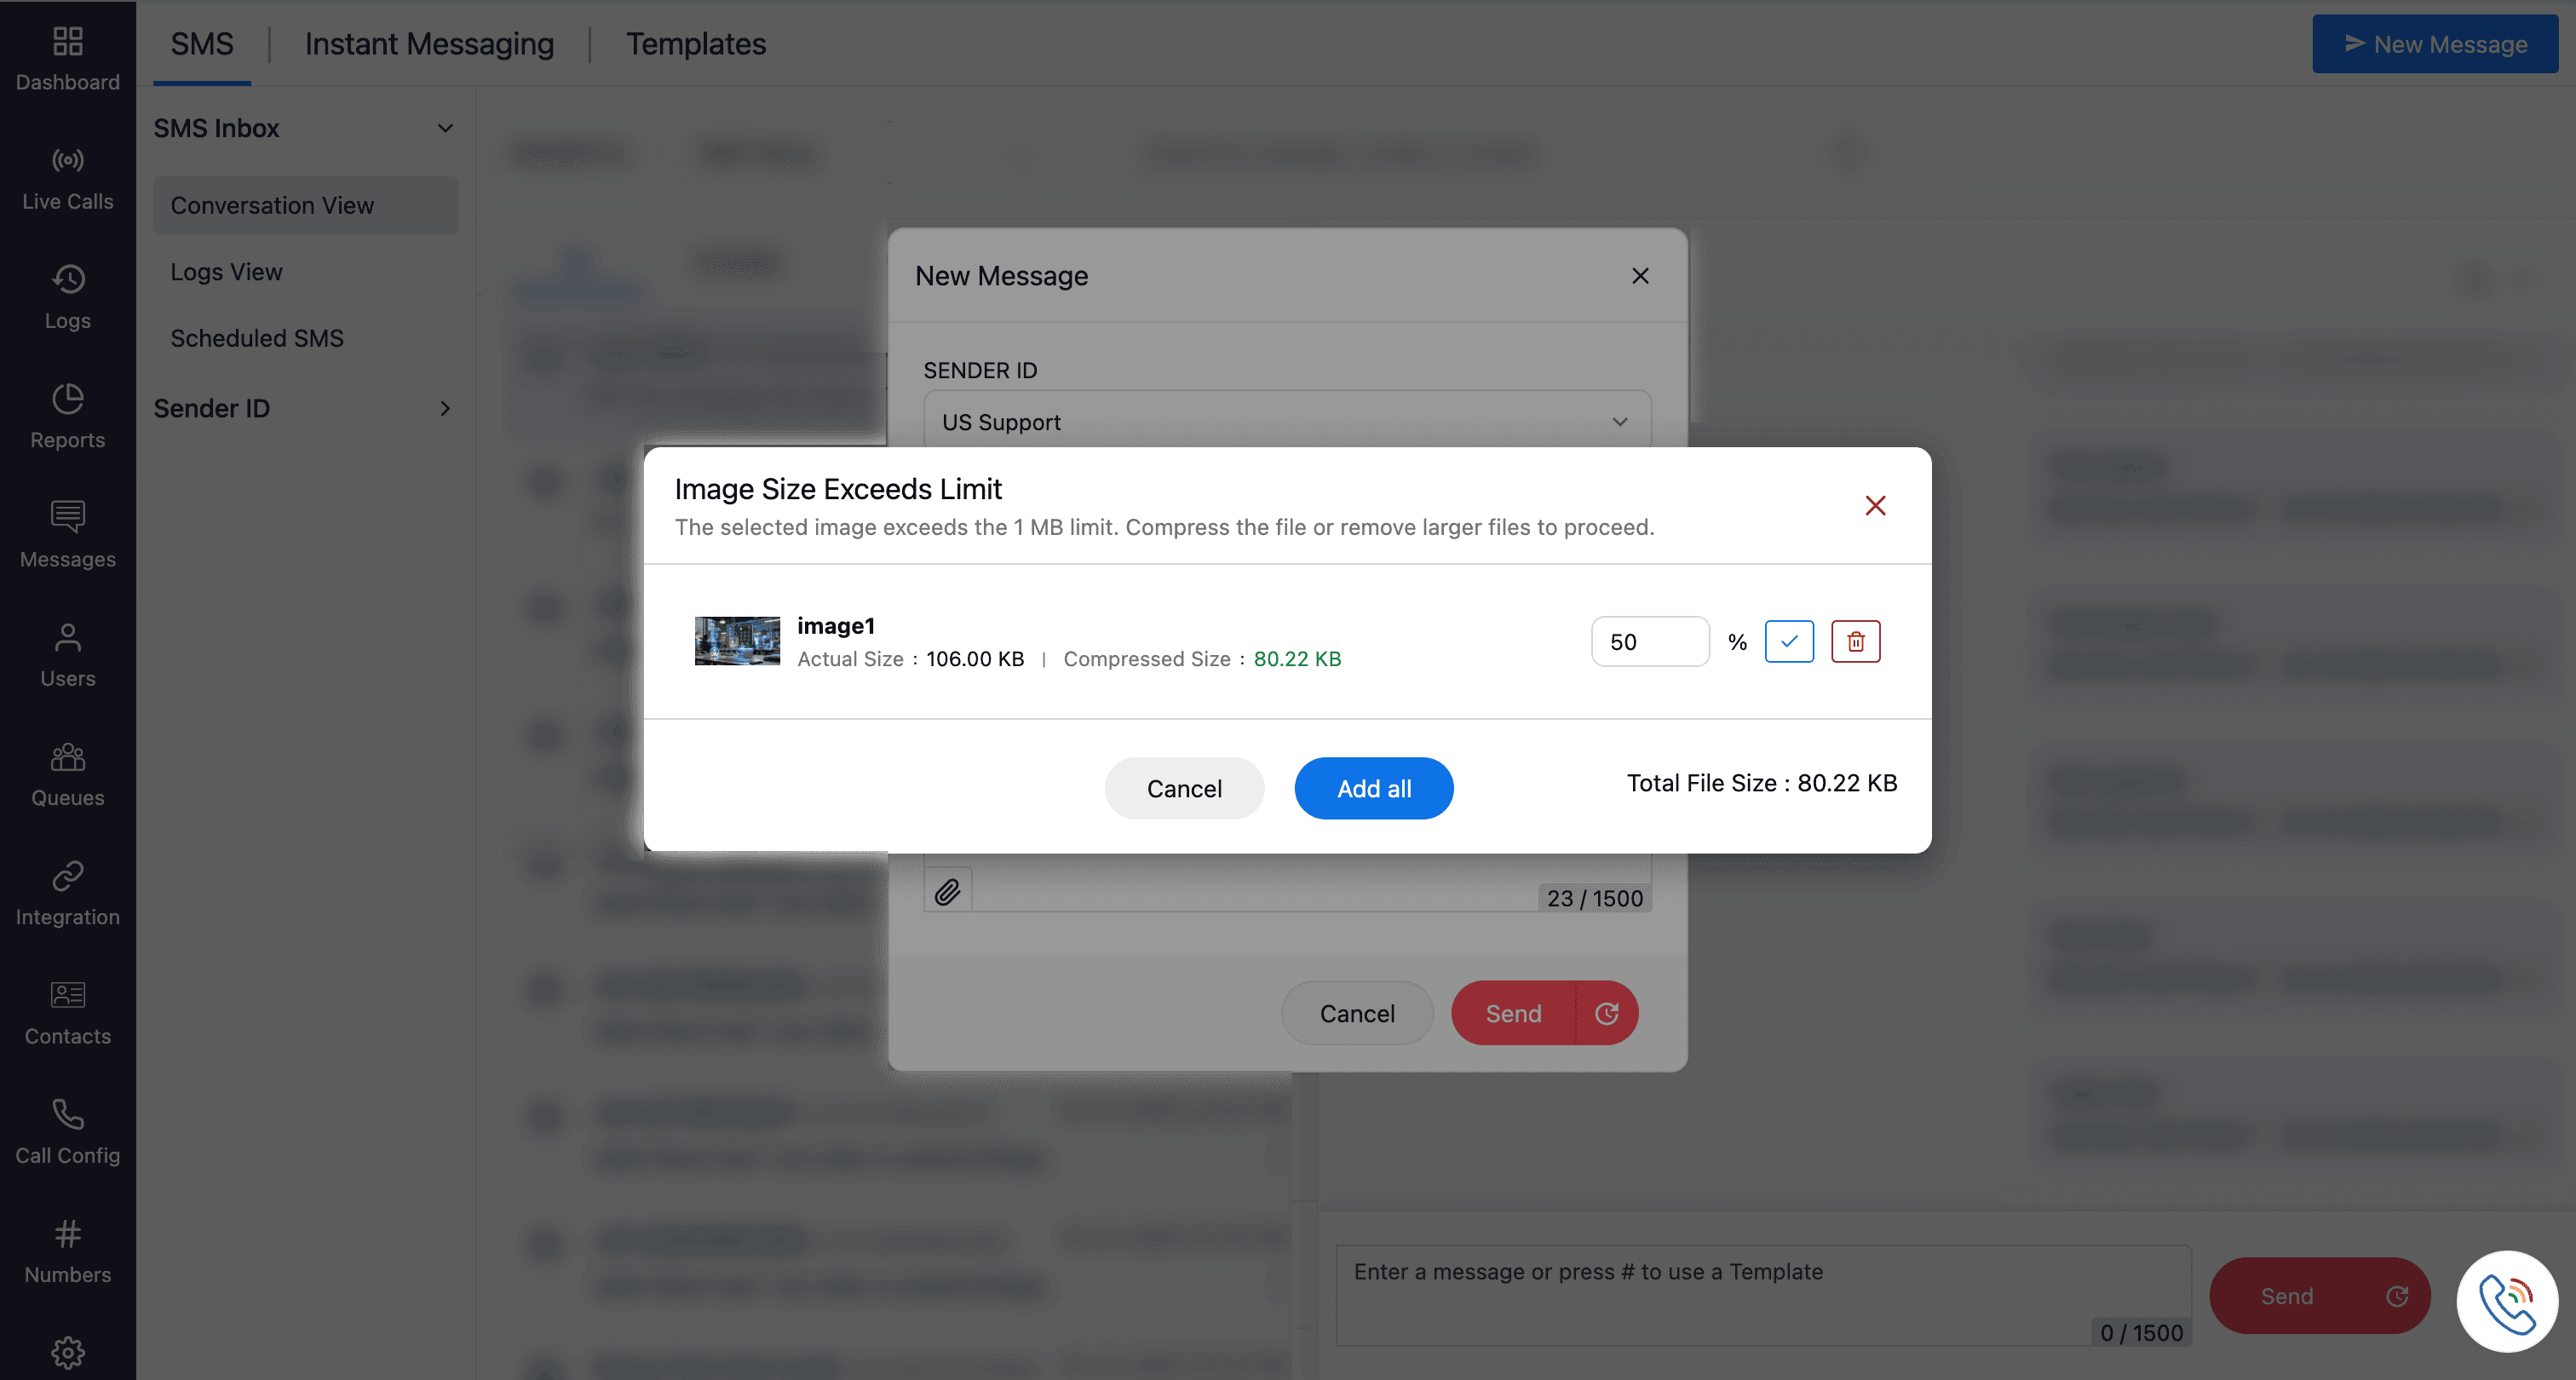
Custom Message: Create and send a personalized message. You can also attach files if required. Attachments must be under 1 MB. If the file size exceeds this limit, you can compress it using the pop-up box that appears before uploading (see screenshot for reference).
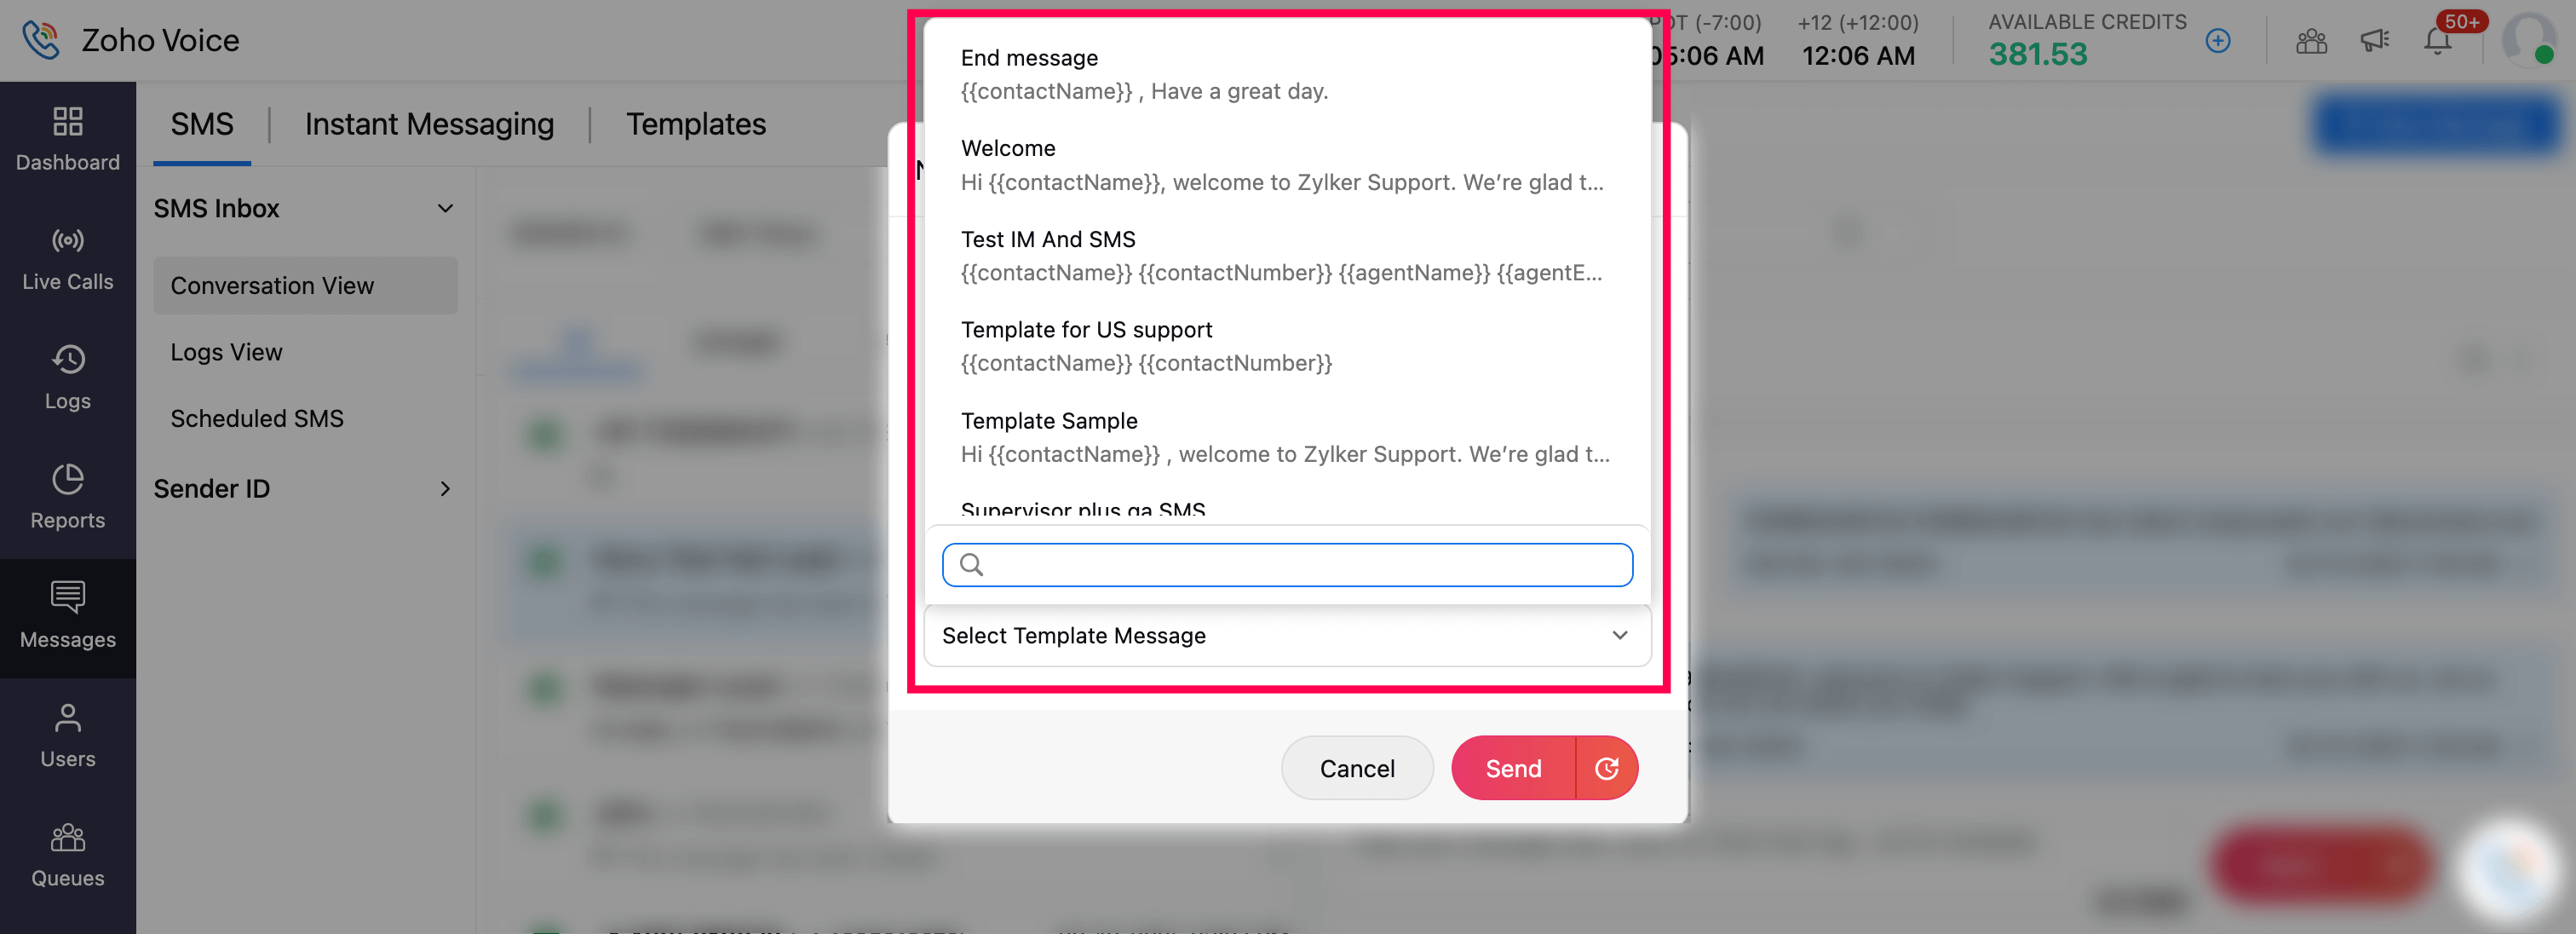
Template Message: Select from the pre-created templates available under the Templates tab. Only Canned and SMS template categories will appear in this list. Learn more about templates
Click Send to send the message immediately.
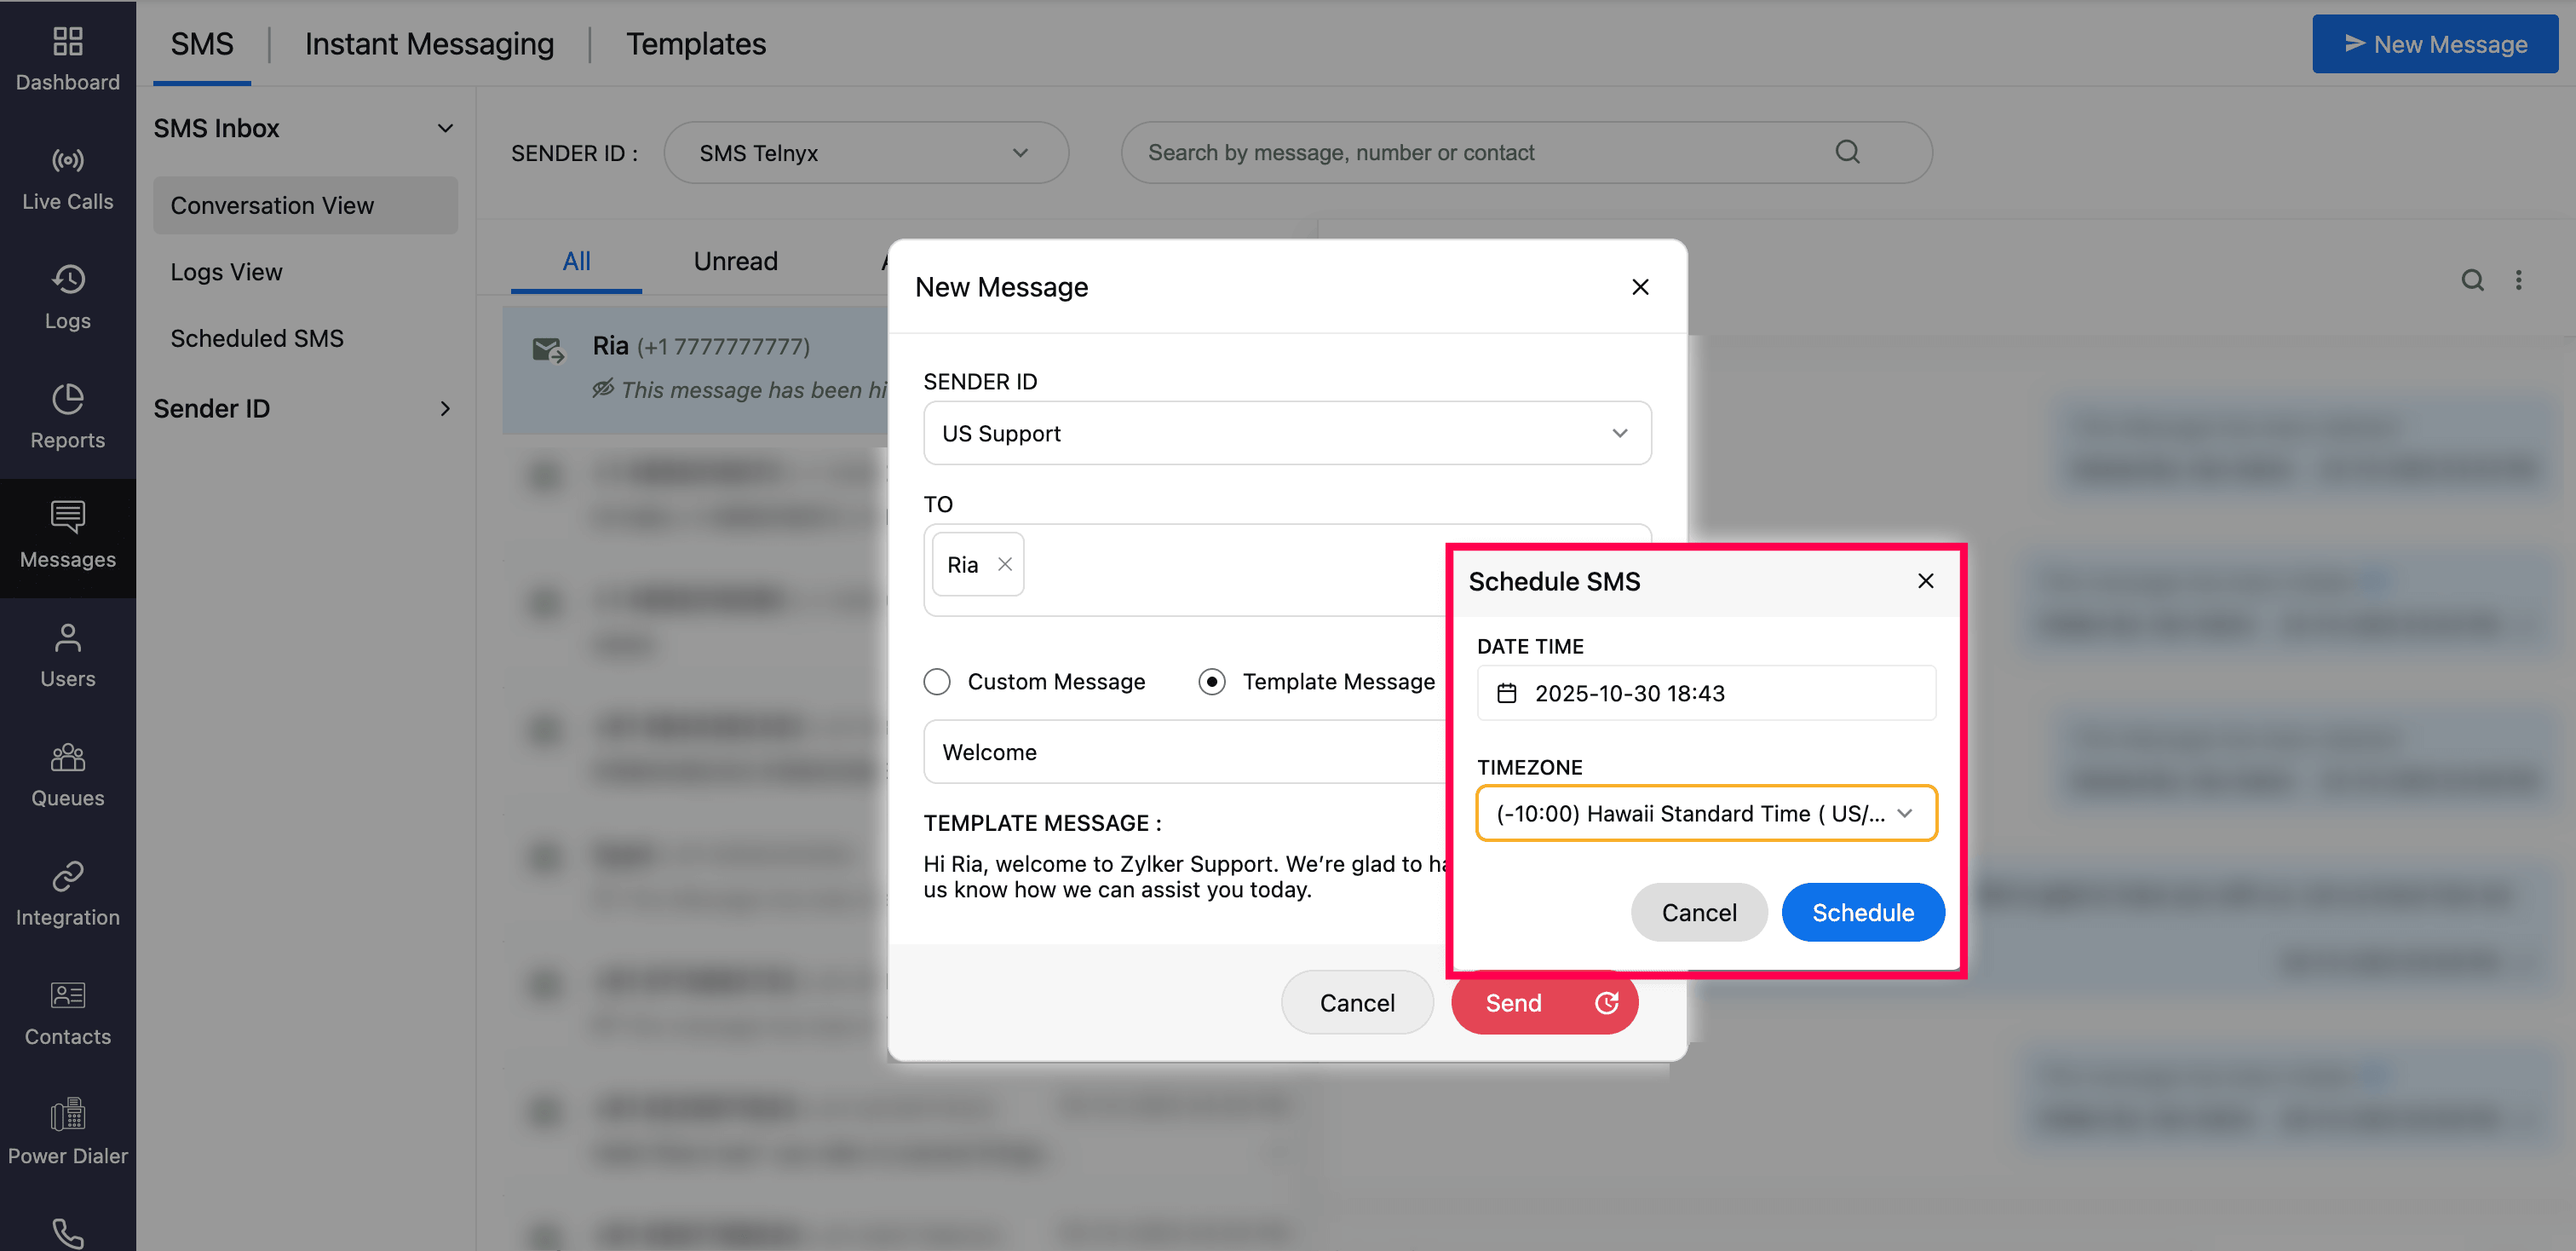
Click the Schedule Later icon to send the message at a future time.
When scheduling, choose the date, time, and time zone, then click Schedule.
Note
An SMS message can contain up to 1500 characters. Messages are automatically split into segments of 160 characters each, and each segment is charged as one SMS. If your message exceeds 1500 characters, you must break it into separate messages and send them individually. A character counter is available in the message box to help you track and manage your content.


Inbox
Conversation View
Once you send an SMS or MMS, it will appear in the SMS Inbox in a conversational view. Click on any contact to open the conversation thread for that contact. Incoming SMS and MMS messages will also appear within the same thread, allowing you to view your entire message history in one place.
The inbox includes three tabs:
All: Displays all SMS and MMS conversations.
Unread: Displays all messages that haven’t been read yet.
Archived: Displays conversations that have been archived for future reference.
Managing conversations
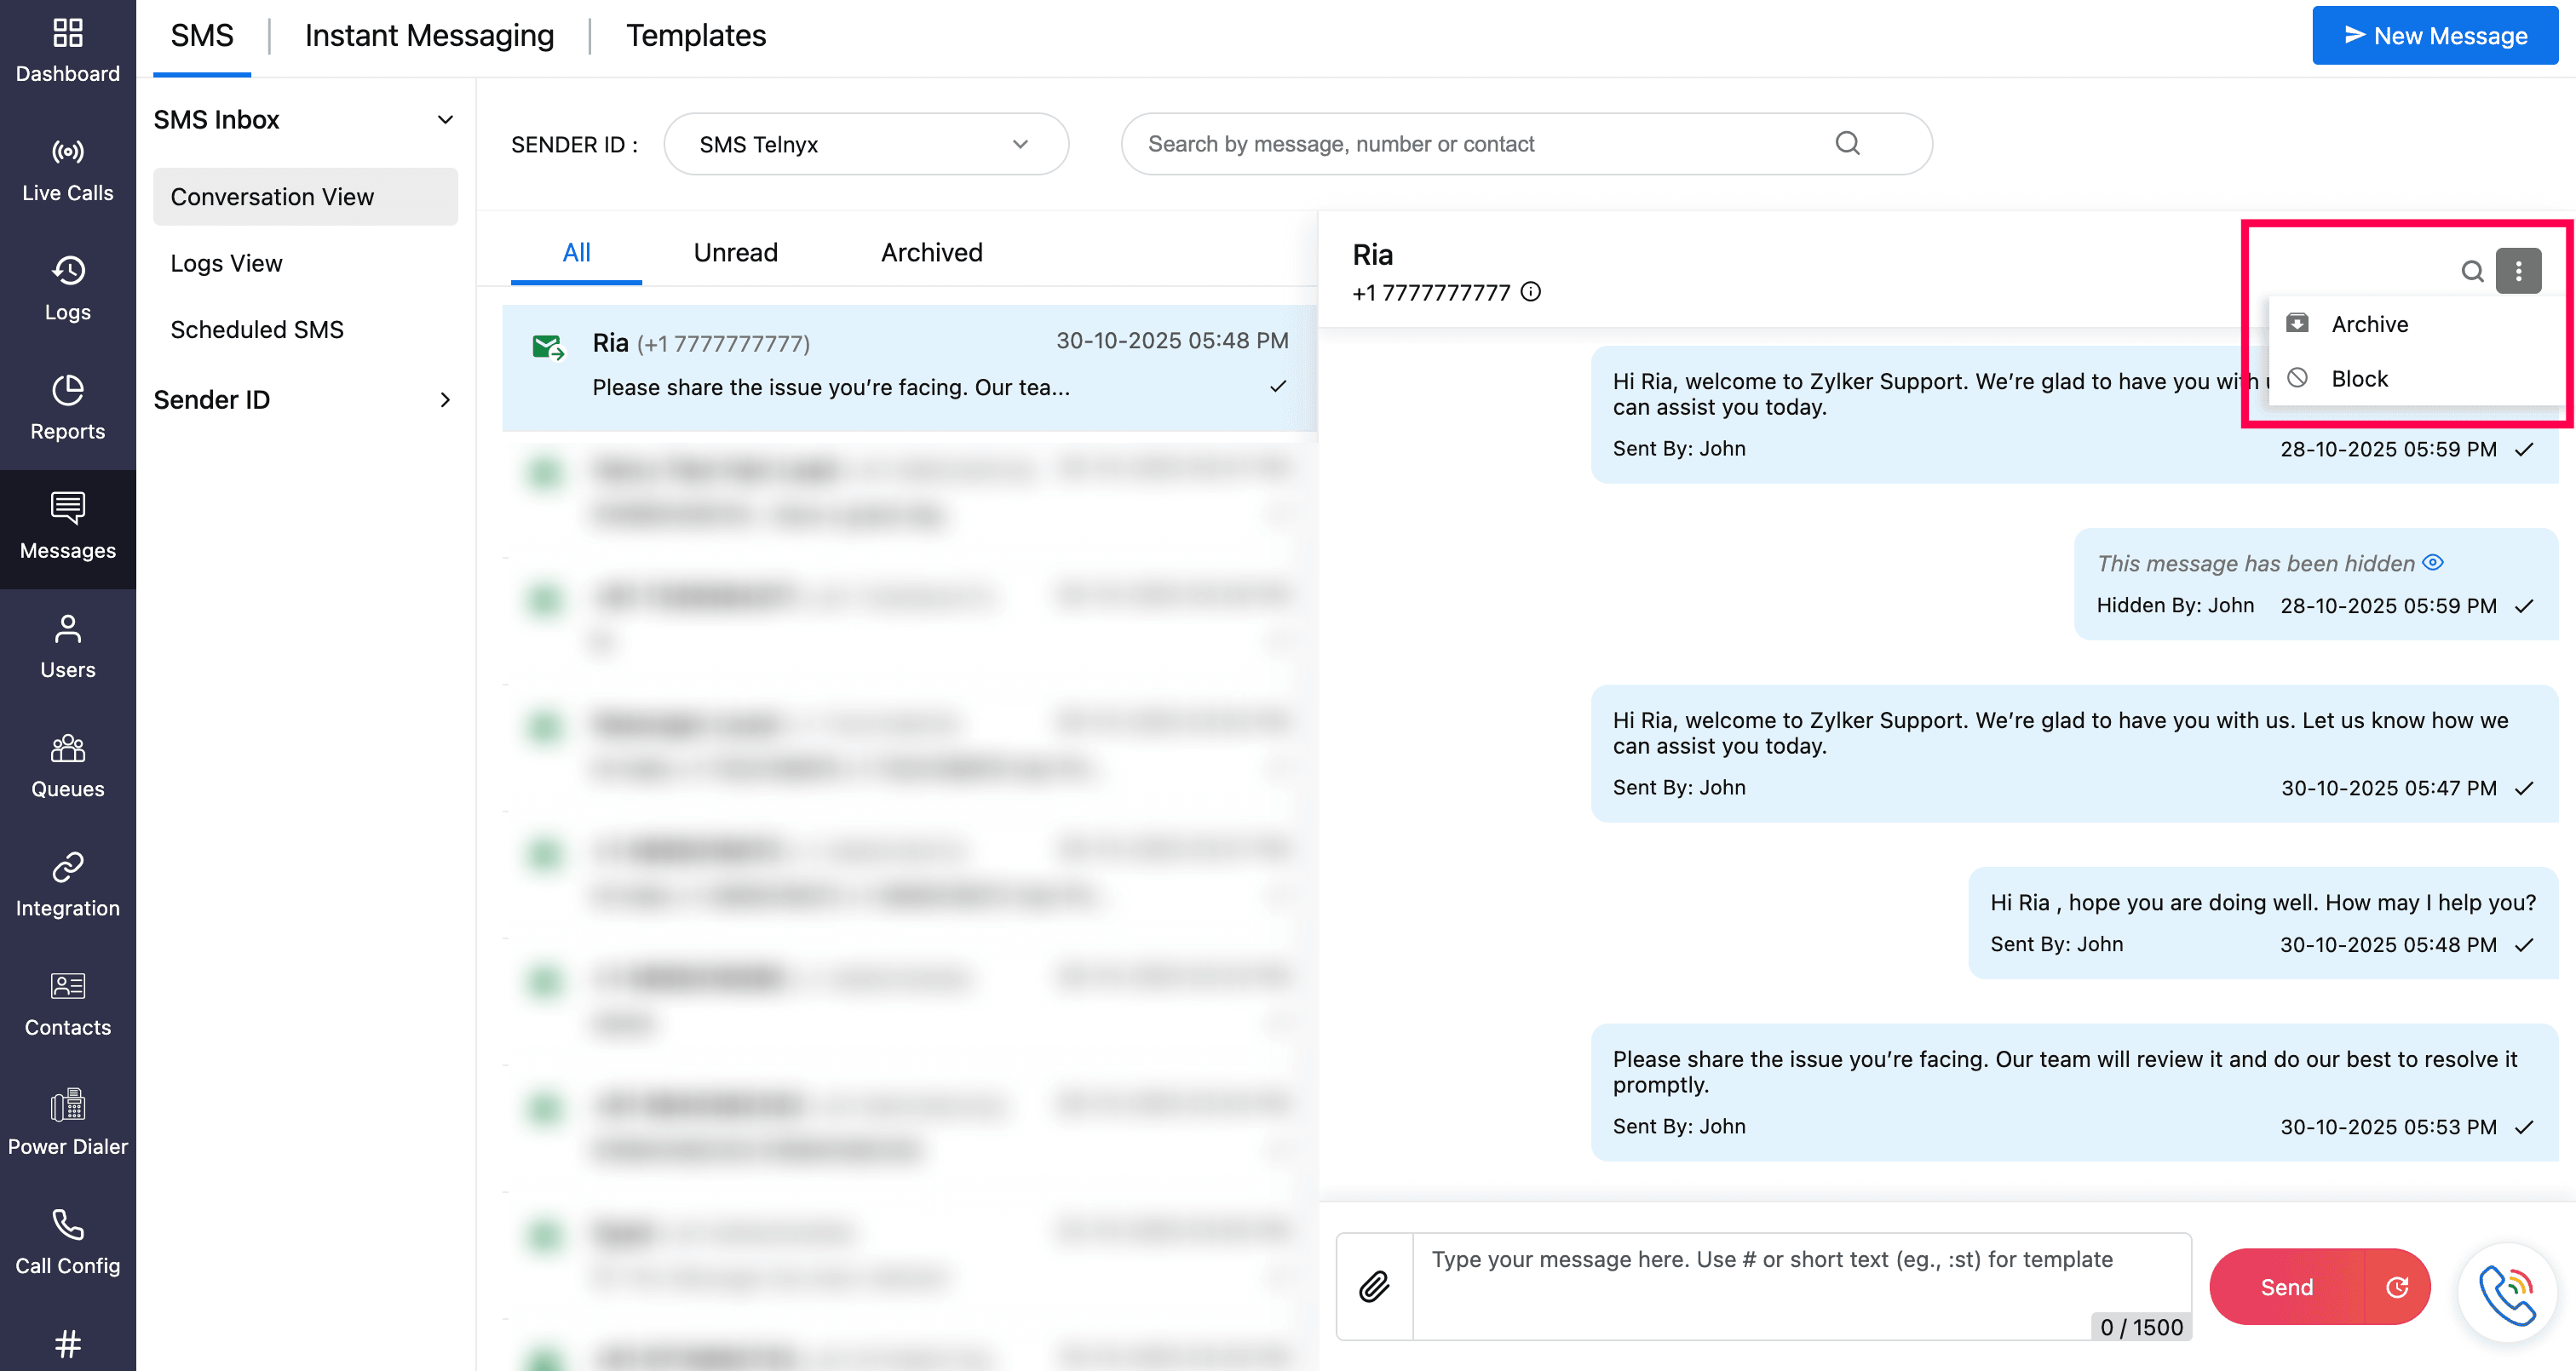
Within a chat, you can manage conversations using the ellipsis (⋮) menu at the top-right corner of the chat window:
Archive: Move the entire conversation to the Archived tab.
Block: Prevent further incoming messages from that contact. This number will be added to the blocklist (Settings --> Blocked Numbers).

Managing individual messages
You can also manage individual messages by hovering over a specific message and clicking the ellipsis (⋮) icon:
Hide Message: Temporarily hide the selected message. Hidden messages can be retrieved by selecting Unhide.
Mark as Unread: Mark the selected message as unread. When a message is marked unread, all subsequent messages in the thread will also appear as unread.
Delete Message: Permanently delete the selected message.
Note
Deleted messages cannot be retrieved.


Logs View
The Logs view provides detailed information on the delivery status of each SMS/MMS message.
Hover over any log entry to preview the SMS content.
MMS messages are indicated with an attachment icon.
Use basic filters such as Date, Number, and Message Content to locate specific messages.
Use advanced filters to narrow down results by Sender ID, Type (All or MMS), Direction (Incoming or Outgoing), Status (Received / Delivered, In Queue, Not Delivered) , View (All, Archived), Agents, Contacts, and Customer Country.
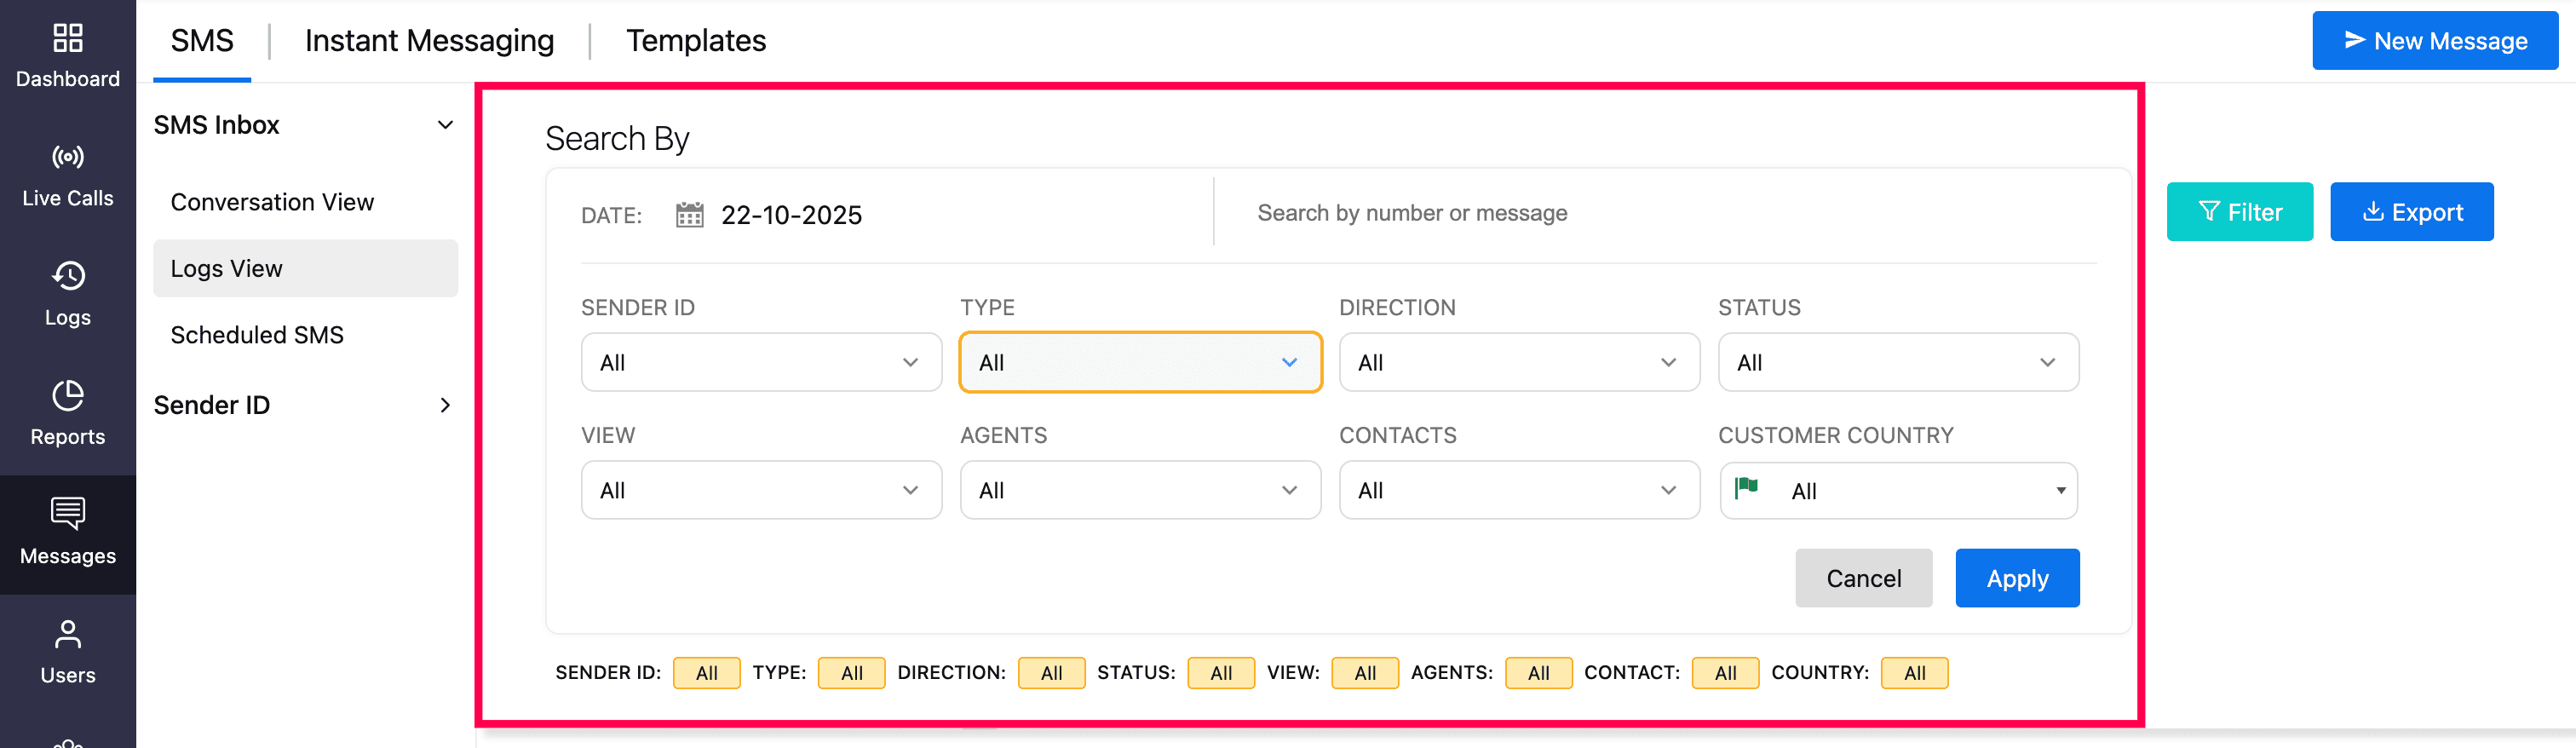
After applying the desired filters, you can export the report in CSV format by clicking the Export button. If required set password and click Download Now.


Scheduled SMS
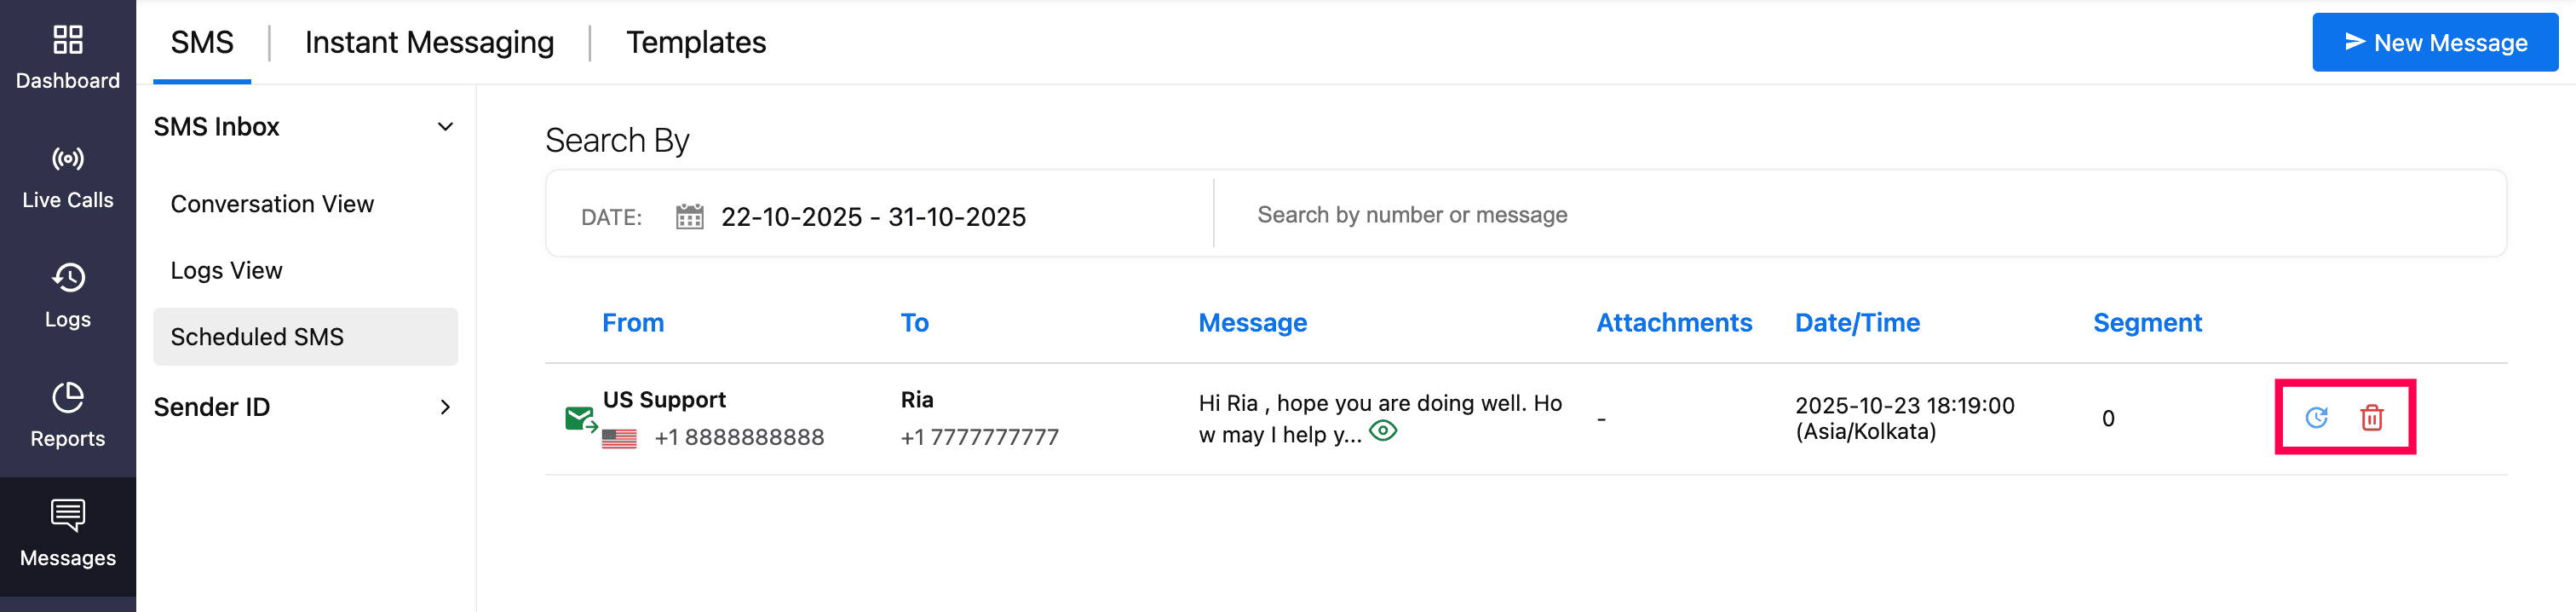
The Scheduled SMS section displays all SMS messages that have been scheduled but are yet to be delivered.
Managing scheduled messages
You can perform the following actions:
Search and Filter: Use basic filters such as Date, Number, and Message Content to locate specific messages.
Reschedule: Hover over the scheduled message and click the Clock icon to modify the delivery date and time.
Preview: Hover over the message and click the Eye icon to preview its content before it is sent.
Delete: Click the Delete icon to permanently delete a scheduled message.

Where can I send SMS/MMS from?
You can send SMS/MMS messages from the following locations in Zoho Voice:
The Messages module using the New Message button.
The chat in Conversation View.
The Logs view in SMS Inbox via the Message button.
The Zoho Voice dial-pad via the Message button.
The ZDialer browser extension using the Message button.
The Contacts page by clicking the Message icon.
The Logs page via the Message icon.
The Notification Center by clicking a missed call notification, then selecting the Message button.
Who can send SMS and MMS?
SMS and MMS messaging is available across all Zoho Voice plans for users with access to SMS-enabled numbers. However:
Only users in the US and Canada can send and receive MMS messages using local numbers.
In the Solo plan, SMS/MMS is supported only if an additional user (Add-on) is added to the account.
Zoho Telephony agents on the Standard plan can also send SMS and MMS via the ZDialer browser extension.
Supported files in MMS
You can send and receive MMS in Zoho Voice only using these file types:
.txt
.vcf
.jpeg
.png
.gif
.3gp
.mp4
.ogg
.mpeg
.vorbiz
.amr
File size limit for MMS
You can send MMS with a file size of maximum 1000KB at once. It can be a single file or multiple files up to 10 files within the size limit.