


Approval Groups
An Approval Group lets you assign multiple users as approvers for a single level in a custom approval, instead of routing a transaction to just one person. When a transaction reaches this level, it is sent to every member of the group, and you can specify the minimum number of approvals needed for the transaction to be approved or move to the next level.
Note: Approval Groups is currently available in early access. Write to us at support@zohoexpense.com to enable it for your organization.
Scenario: Patricia is an admin at Zylker. The finance team has four members, and she does not want expense reports to go through each of them one by one. She creates an Approval Group called Finance Team with all four members and assigns it as the approver in the approval flow. She then creates a custom approval for the Reports module and adds the Finance Team approval group as the approver. Now, when an employee submits a report, it is sent to all four members of the finance team. Patricia sets the minimum number of approvals required from the group to 2. As soon as any two members approve the report, it is approved.
Create an Approval Group
To create an approval group:
- Go to Settings on the left sidebar.
(OR)
Click Settings in the top right corner of the page. - Click Approval Groups under Setup and Configurations.
- Click + New Approval Group.
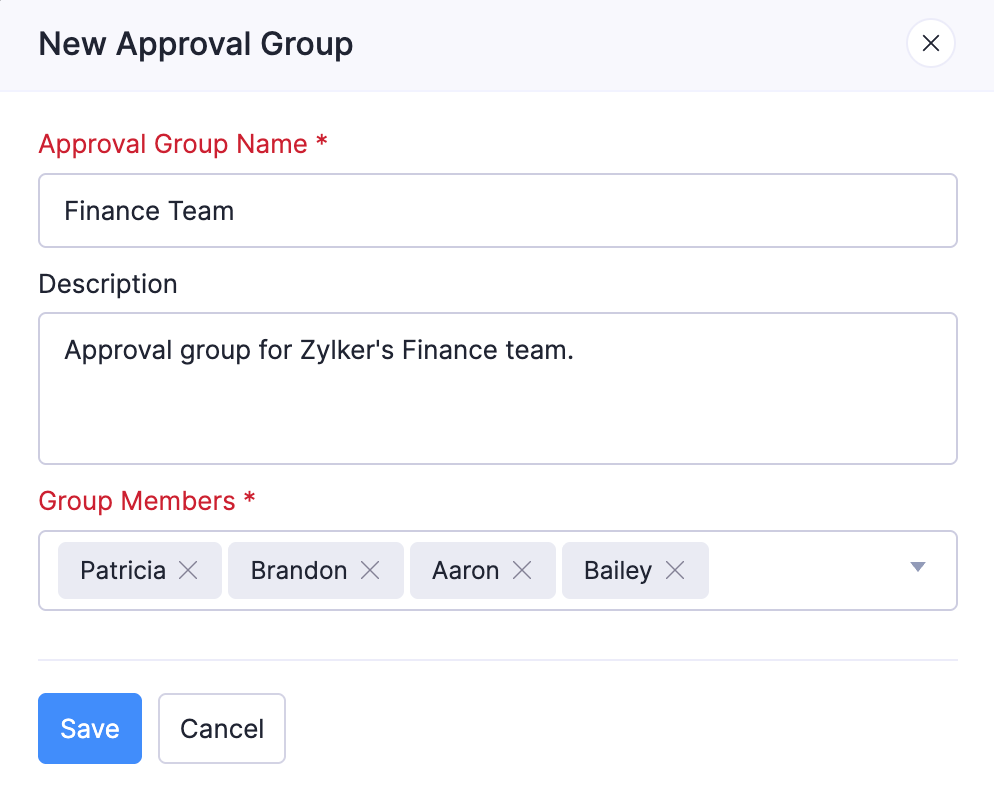
- Enter an Approval Group Name.
- Enter a Description if required.
- Click the dropdown in the Group Members field and select the users to add to the group. You can add a minimum of 2 and a maximum of 10 members.
- Click Save.
Use an Approval Group in a Custom Approval
After you create an approval group, you can use it in any custom approval. You also set the minimum number of approvals required from the group at that level.
To use an approval group in a custom approval:
- Go to Settings on the left sidebar.
(OR)
Click Settings in the top right corner of the page. - Select the module containing the custom approval.
- Go to the Approvals tab.
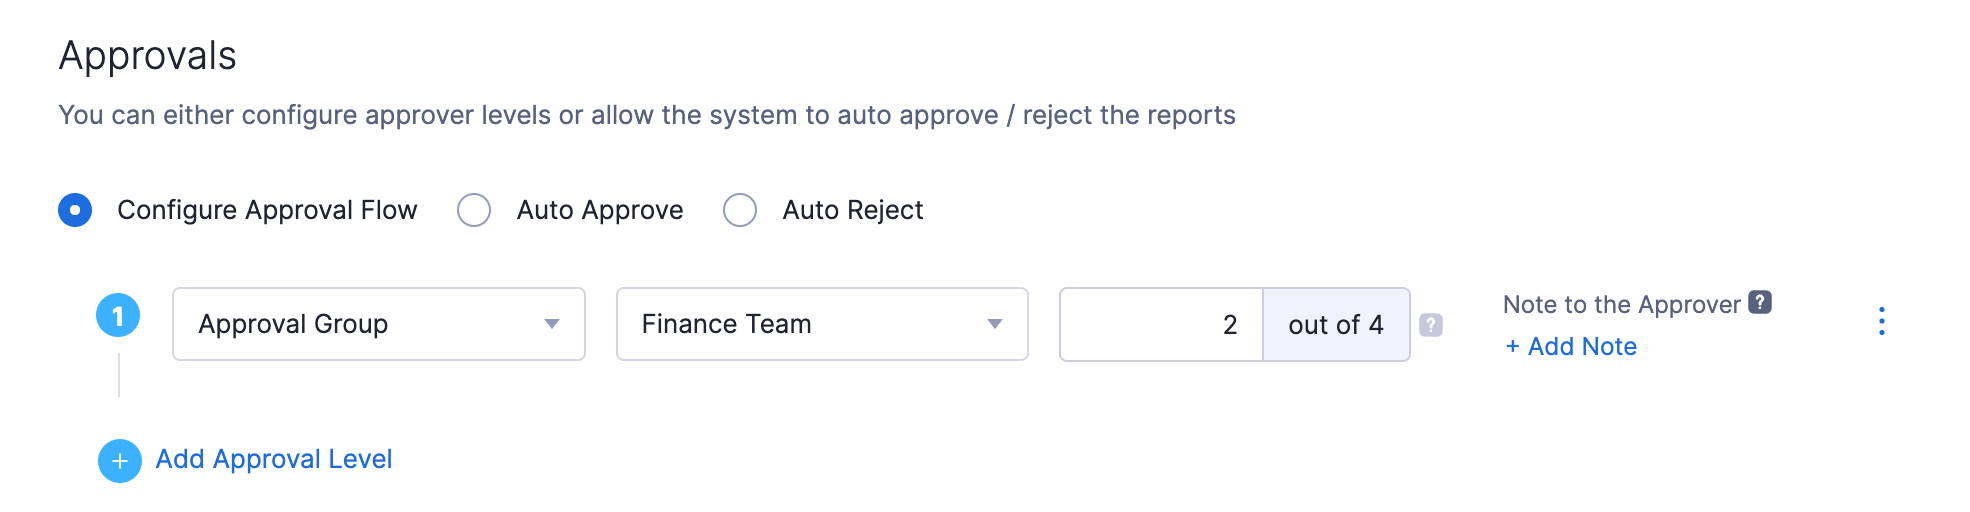
- In the approval level where you want to assign the group, click the first dropdown and select Approval Group.
- Select the group from the second dropdown that appears.
- In the Minimum Approvers field, enter the minimum number of group members who must approve the transaction for that level to be complete.
- Click Save.
When a transaction reaches this level, all group members receive notifications. The transaction is fully approved or moves to the next level as soon as the minimum number of members approve it, based on the custom approval configuration.
To track the approval status of a group in a transaction, open the transaction and click View approval flow. The Approval Details pane opens and shows all levels. Click View Details next to the group to see:
- Total Approvers Count: How many members have approved out of the minimum required. For example, 1 / 3 means one approver has approved and 2 approvals are required.
- Pending Approvers: All group members who have not yet taken action.
- Approved: Members who have approved (shown only when at least one member has approved).
- Rejected: Members who have rejected (shown only when applicable).
For more information on setting up custom approvals, see Configuring Approvals.
Edit an Approval Group
To edit an existing approval group:
- Go to Settings on the left sidebar.
(OR)
Click Settings in the top right corner of the page. - Click Approval Groups under Setup and Configurations.
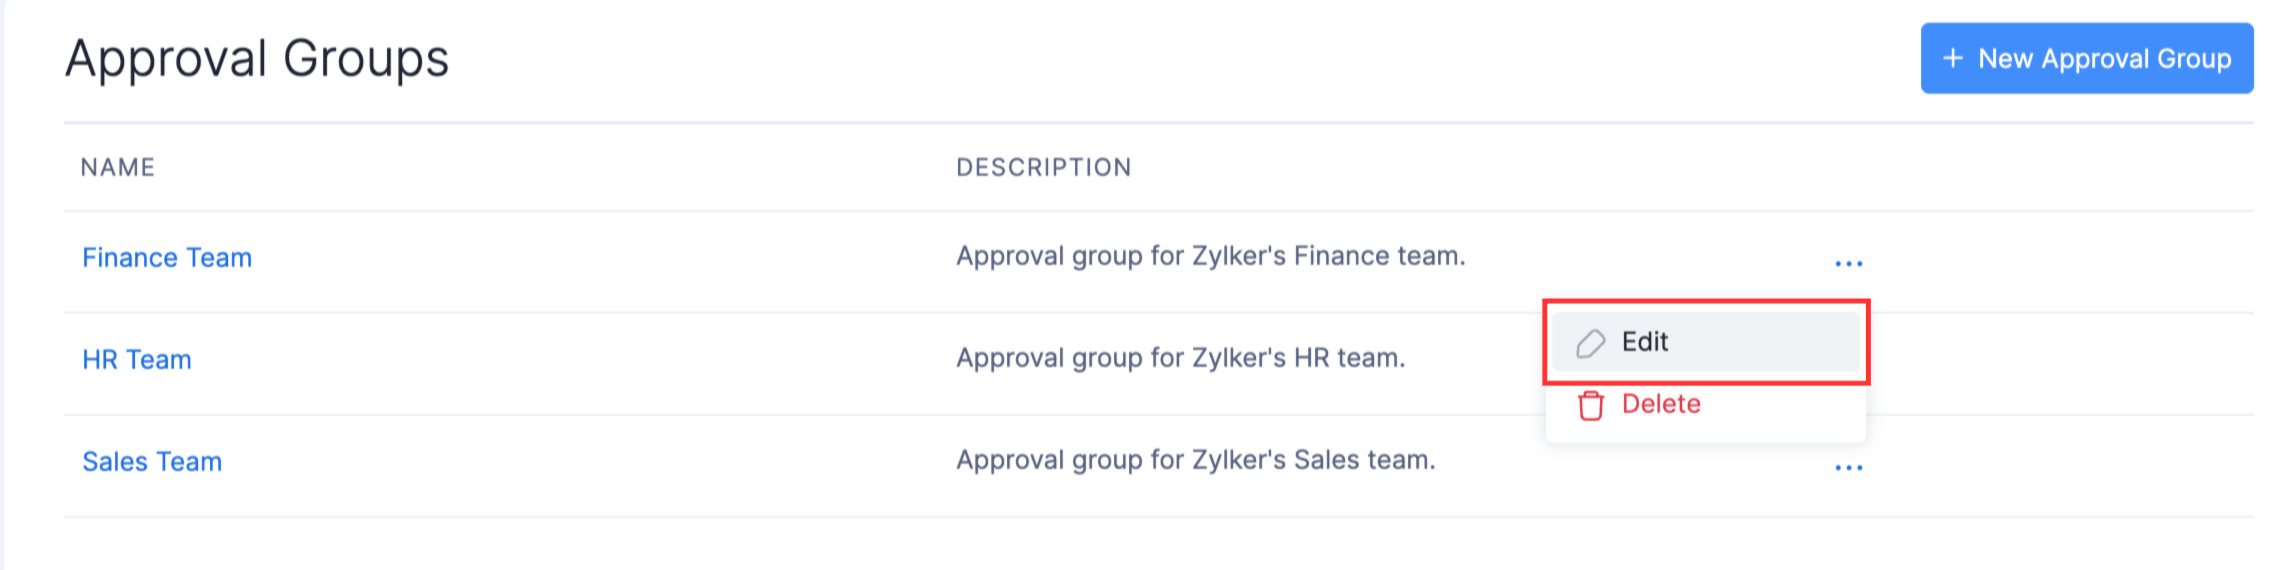
- Click the More icon next to the group you want to edit and select Edit.
- Update the group name, description, or members as needed.
- Click Save.
Delete an Approval Group
Note: Before you delete an approval group, remove it from any custom approval levels that use it. Deleting a group that is actively used in an approval flow may affect pending approvals.
To delete an approval group:
- Go to Settings on the left sidebar.
(OR)
Click Settings in the top right corner of the page. - Click Approval Groups under Setup and Configurations.
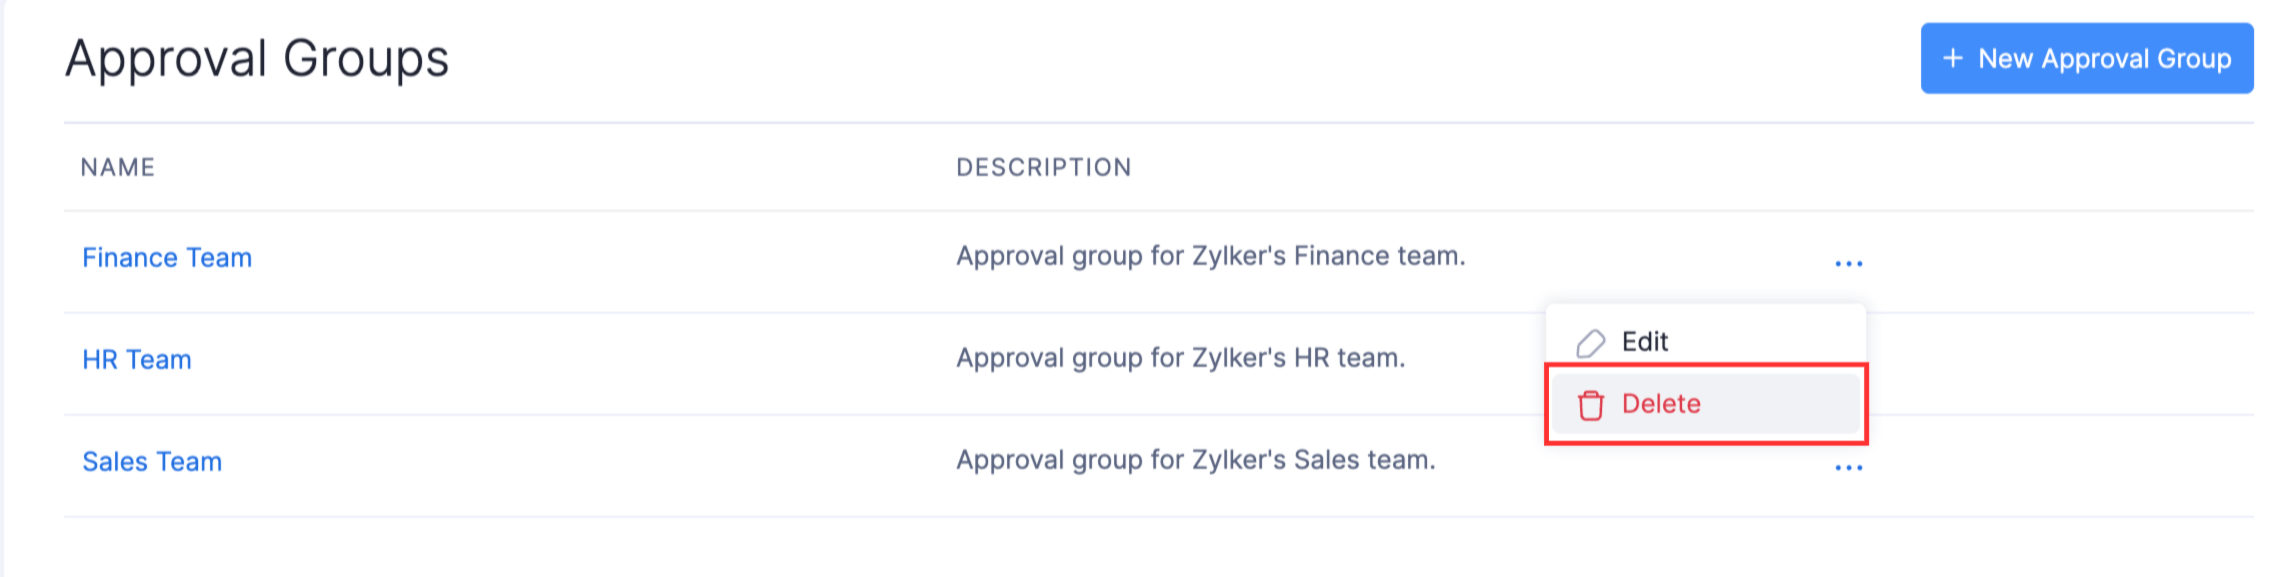
- Click the More icon next to the group you want to delete and select Delete.
- Click Delete again to confirm.