WhatsApp channel
WhatsApp is one of the most widely used messaging platforms across the world, making it an effective channel for business communication. Through Zoho CPaaS, you can connect your WhatsApp Business Account (WABA) and use it to send transactional notifications, authentication messages, and updates to your customers.
Prerequisites
Before you can integrate WhatsApp Business into your Zoho CPaaS, you must meet the following prerequisites:
- A Facebook Business Manager account.
- A verified business.
- A WhatsApp Business account.
- A registered phone number to access the WhatsApp Business API.
- The phone number must meet the requirements mentioned here.
Once connected, you can manage phone numbers, create message templates, and track delivery all from within Zoho CPaaS.
Pricing
WhatsApp messaging in Zoho CPaaS is credit-based. You purchase message credits and each message sent deducts from your balance.
- ₹180 per message credit
- Credits are valid for 6 months from the date of purchase.
- Both Utility and Authentication message types are supported.
Each message is charged at Meta's per-message rate for your destination country, plus a 10% platform fee. Note that message rates vary by country and message category. Check Meta's pricing page for the applicable rate before sending.
Adding a WhatsApp business account
WABA represent a business on the WhatsApp Business Platform. Before you can send any WhatsApp messages, you must connect a WABA from Meta. This links your Meta-approved business to Zoho CPaaS and imports your phone numbers and WABA details.
- You can connect one or more WABAs from Meta.
- Add and manage phone numbers linked to your WABA.
- Create and submit message templates for Meta approval.
- Send approved templates to your customers via agents.
- Track message delivery through channel usage analytics.
To add a WABA in Zoho CPaaS:
- Log in to your Zoho CPaaS account.
- Go to Configuration > WhatsApp.
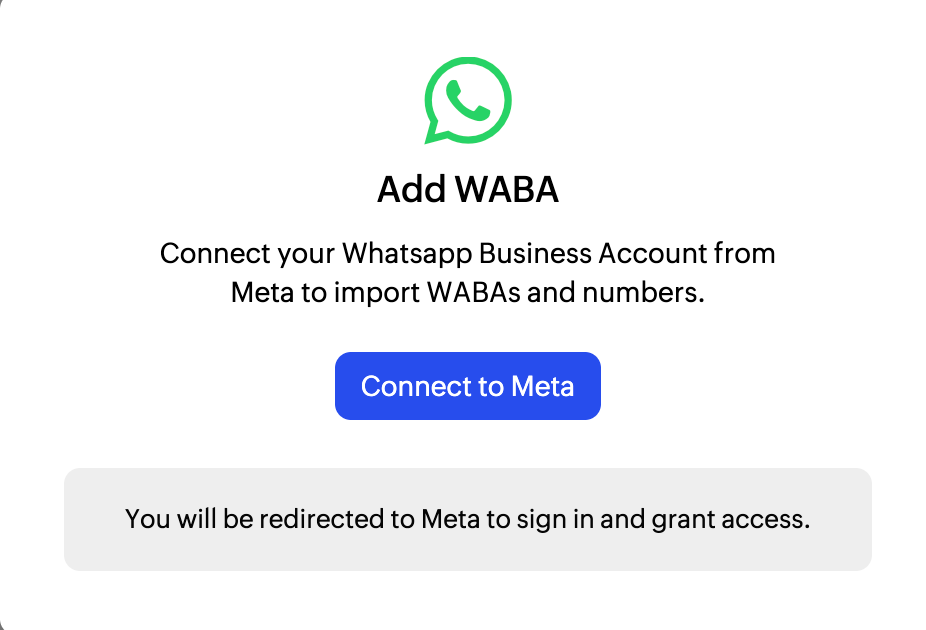
- Click Add WABA in the top-right corner.
- You will be redirected to Meta to sign in and grant access.
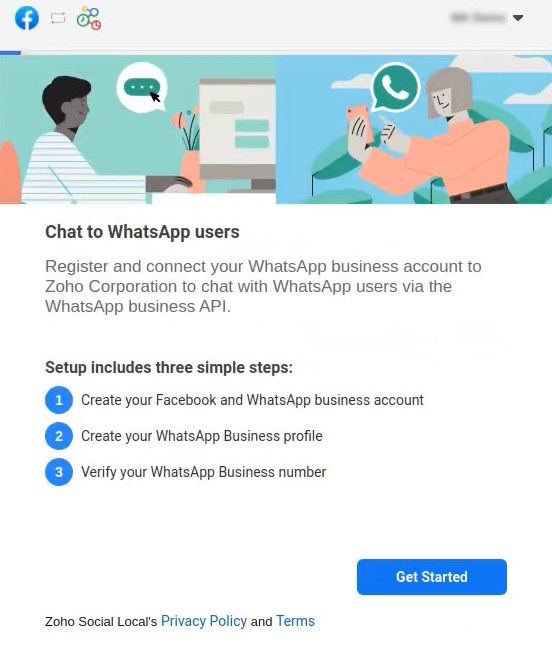
- Log in with your Facebook Business Manager's credentials.
- Click Get Started.
- Select or create your new WhatsApp Business Account.
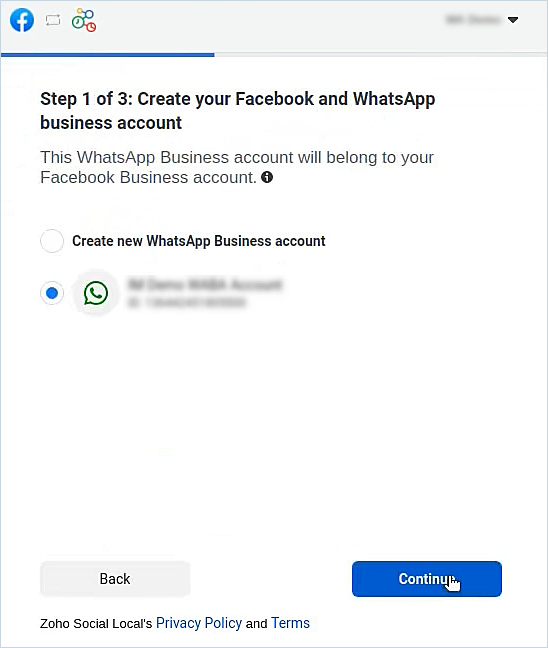
- If you already have an account, select the account from the drop-down, then click Next and adhere to the on-screen instructions to link your account.
- If not, select Create a new WhatsApp Business profile, then click Next and proceed further with the given instructions to create a new account.
- Finally, verify your WhatsApp Business number.
- Click Ok on the next screen.
- You can connect multiple WABAs to the same Zoho CPaaS account.
- Only Meta-approved WABAs can be used to send messages.
- The phone number used for your WABA must not be in use on any other WhatsApp product.
WhatsApp accounts
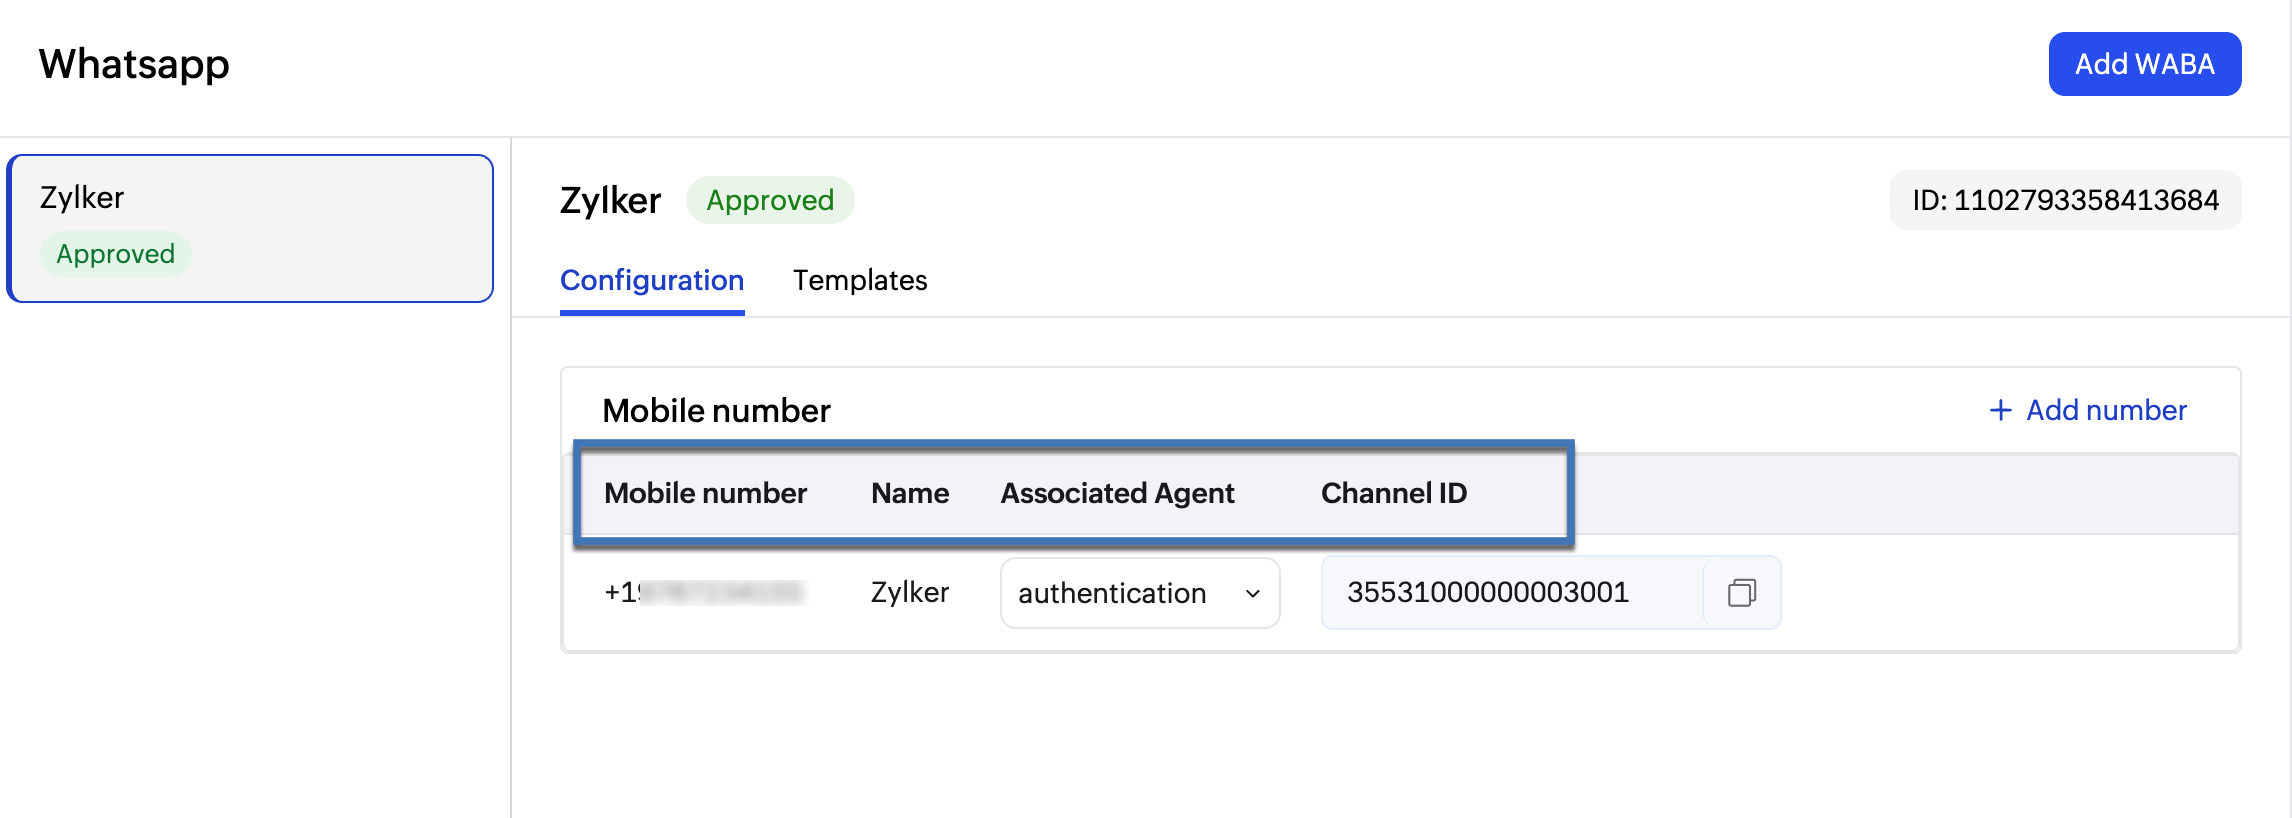
Once a WABA is connected, you can view and manage it from the WhatsApp section. Each WABA card shows the account name and its current approval status.
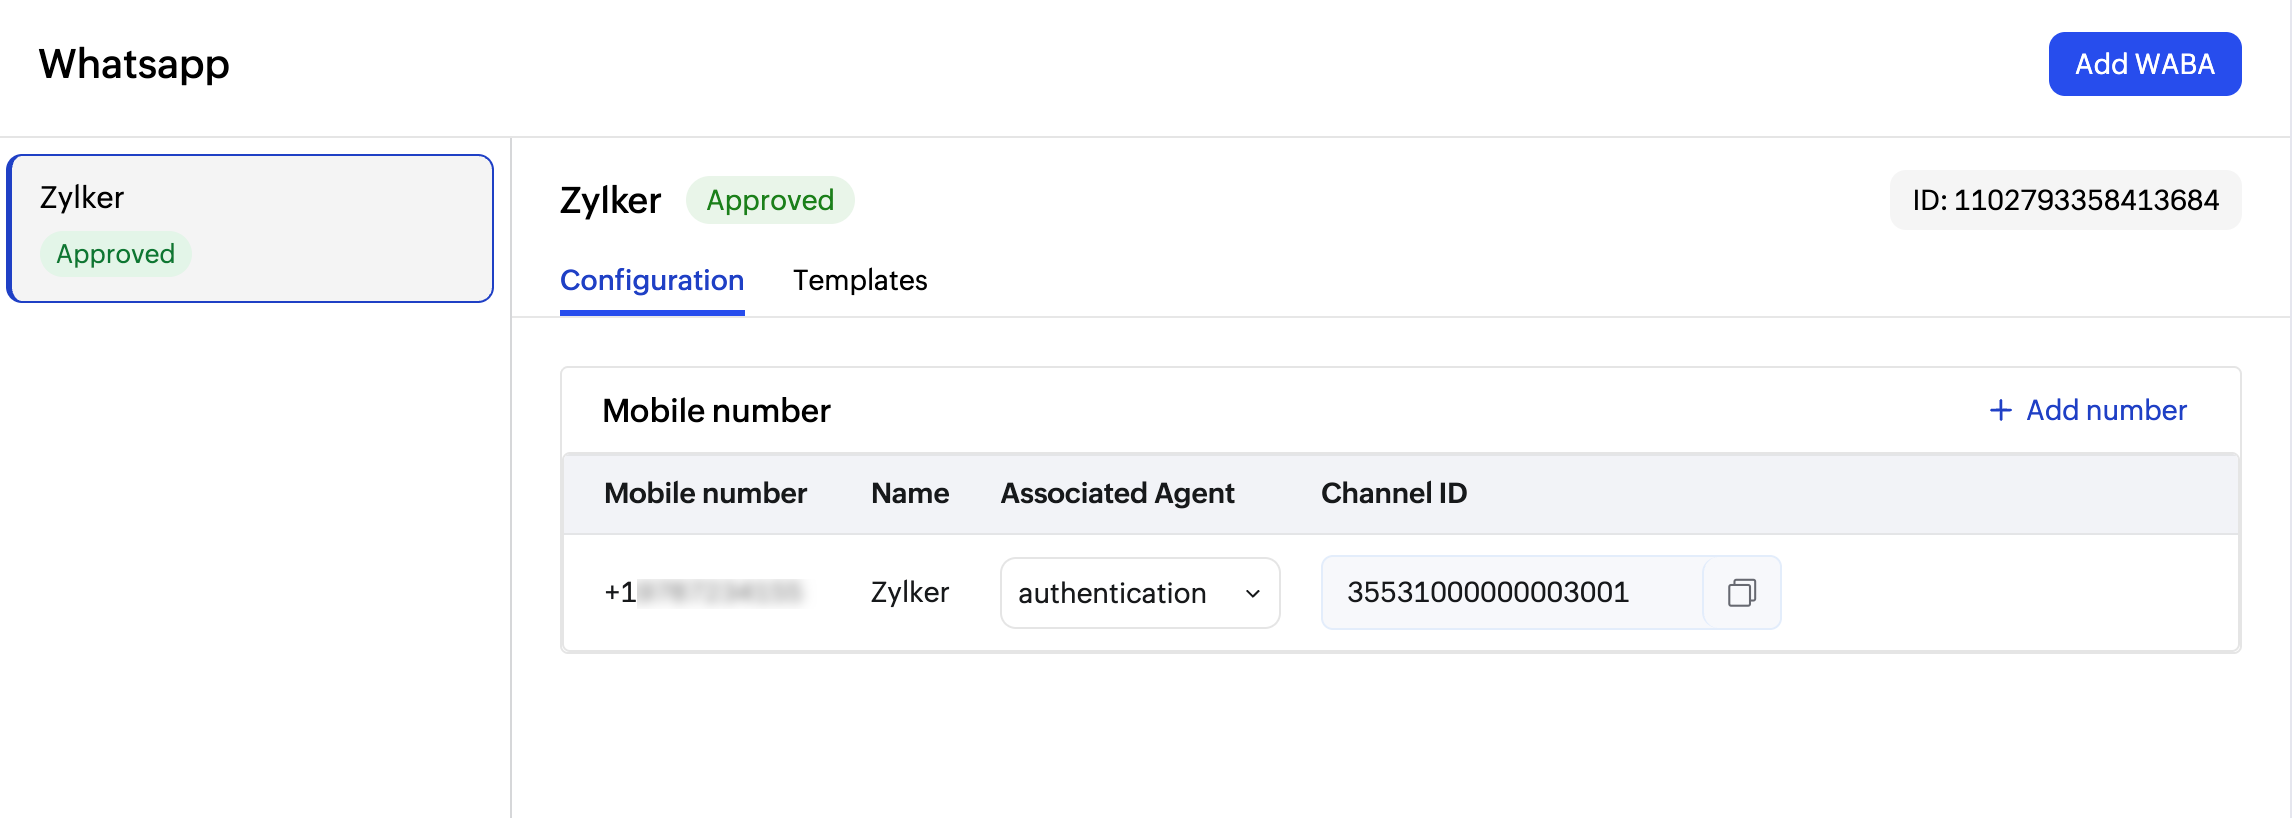
Configuration
The Configuration tab shows the phone numbers linked to your WABA. For each number, you can see:
- Mobile number: The registered WhatsApp phone number.
- Name: The display name associated with the number.
- Associated Agent: The agent currently handling this number. You can change the agent using the dropdown.
- Number ID: A unique identifier for this number.
Templates
The Templates tab lists all message templates associated with your WABA. For each template, you can see:
- Template name: The name you gave the template when you created it.
- Template key: A unique system-generated identifier used for API references.
- Template alias: An optional alternate name for the template. Shown as - if not set.
- Type: The template category, either Utility or Authentication.
- Status: the current approval status from Meta.
Learn more about WhatsApp templates in CPaaS
Messaging using WhatsApp
WhatsApp Business messaging works through pre-approved message templates. You cannot send a free-form message to initiate a conversation, Meta requires all business-initiated messages to use an approved template.
The basic workflow is:
- Add a phone number to your WABA.
- Create a message template.
- Submit the template for Meta's approval.
- Once approved, use the template to send messages through your agent.
Add number
To send WhatsApp messages through CPaaS, you'll need to add your WhatsApp business number here. You cannot use WhatsApp phone numbers being used on other products.
To connect a number
- Log in to your CPaaS account.
- Go to Configuration > WhatsApp from the left navigation menu.
- Click Add number, from the right corner.
- Choose from the available numbers associated with your WhatsApp Business Manager profile.
- Associate an Agent to this number and add it.
Usage overview report
Next to the phone numbers you will find WhatsApp channel usage overview. This shows a breakdown of message activity for the selected number over a chosen time period. Use this to monitor the performance of your WhatsApp channel at a glance.
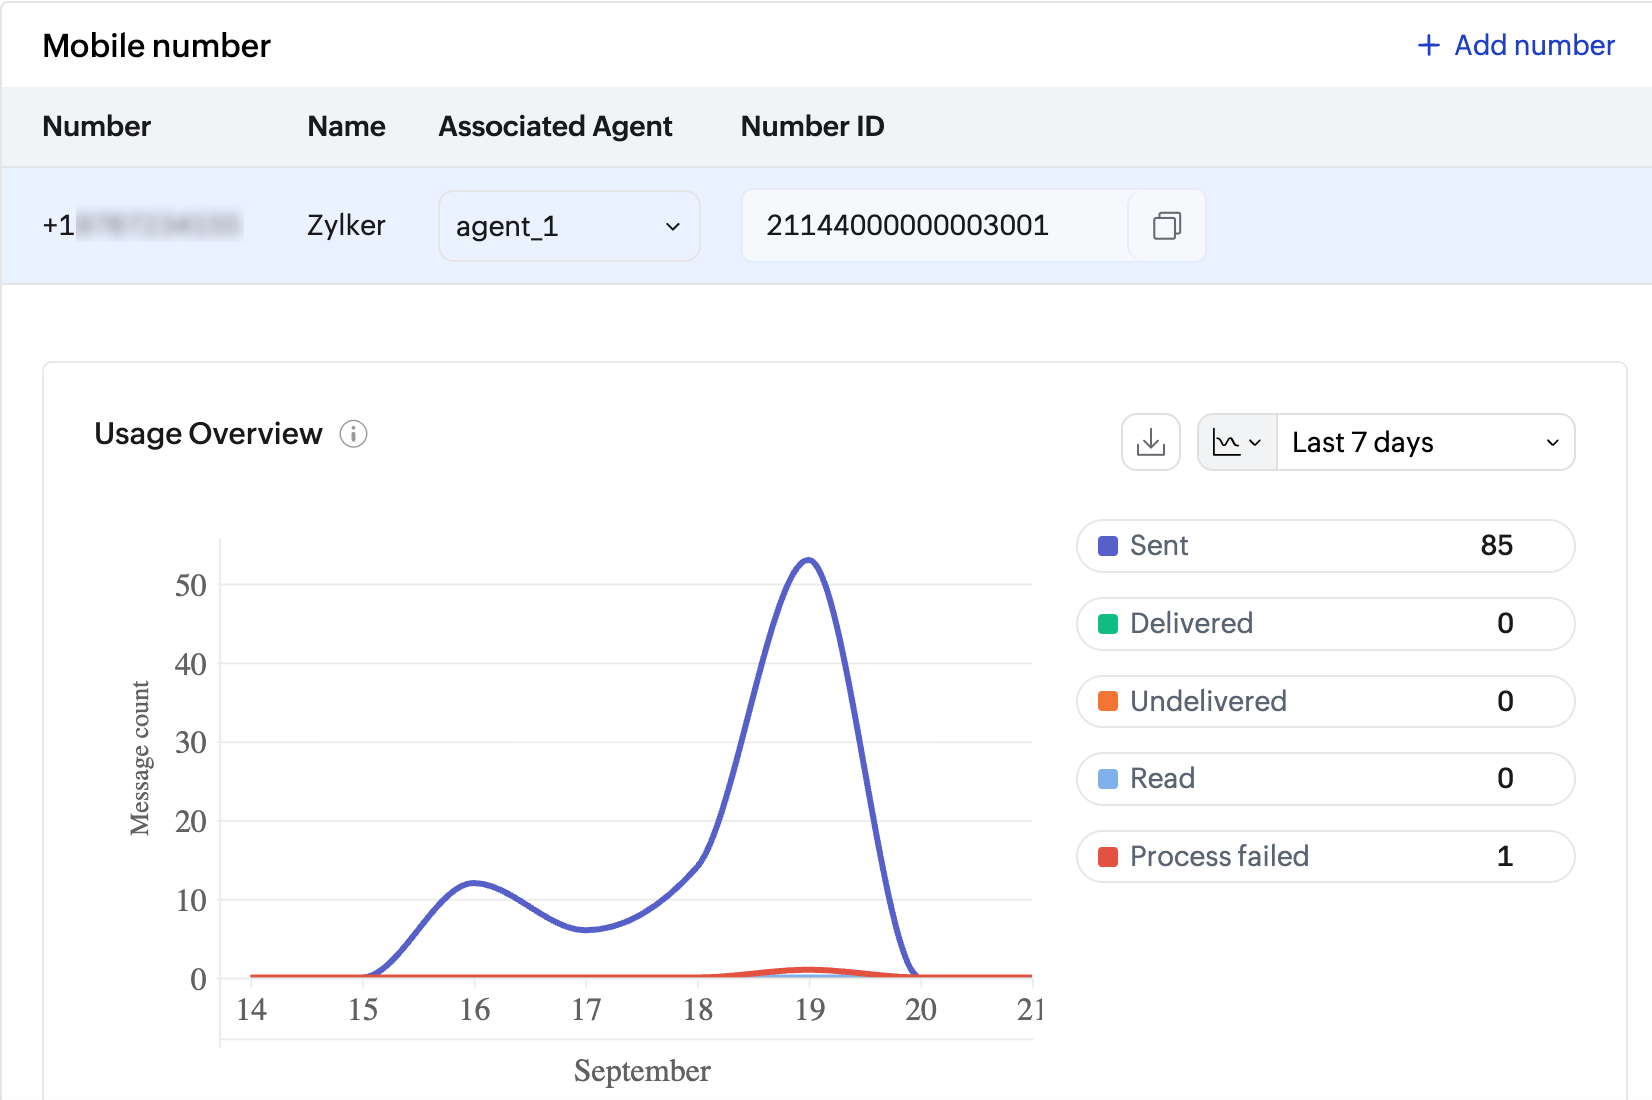
The chart displays:
- Sent: Message has been successfully sent from your WhatsApp number.
- Delivered: Message has reached the recipient's device.
- Undelivered: Message could not be delivered to the recipient's device.
- Read: Recipient has opened and read the message.
- Process failed: Message could not be sent due to an error. This typically indicates a configuration issue such as an invalid number, unapproved template, or insufficient account credits.