Best Practices of Client Script
Follow the below best practices for better Client Scripting.
1. Use Static Resources for repeated scripts
2. Use the available arguments of event types in your script
3. For multiple actions on the same page, create a single script with 'If' or 'Switch' conditions
4. Debug using log statements
5. Use the Terminal to try out ZDKs
6. Create separate scripts for each layout
7. Whitelist API calls
8. Use reorder option to change the order of scripts
9. Use the right event type for your requirement
10. Use Loaders to manage timeout limits
1. Use Static Resources for repeated scripts
If you want to use the same script on multiple pages for multiple events, upload the code as a static resource , add the static resource to Client Script, and reference it in the script.
Consider that you want to validate the SSN Number. If you have the same requirement or functionality in multiple layouts or multiple pages of the same module or in multiple modules, you can use a single line of script instead of repeating the same set of code across multiple Client Scripts. This way we can achieve reusability of code using static resources.
Js file:
function is_socialSecurity_Number(str) {
regexp = /^(?!000|666)[0-8][0-9]{2}-(?!00)[0-9]{2}-(?!0000)[0-9]{4}$/;
if(regexp.test(str)) {
return true; }
else {
return false;
 } }
Create a Javascript file and upload the above static file, and add the static file to the Client Script. Refer to Static Resources for more information. You can call the method from the static resource and use them in your script as shown in the below script.
//Get the field value that has to be validated
var ssn = ZDK.Page.getField("SSN");
//*Check if the value is a valid SSN using function in js file.*/
if(is_socialSecurity_Number(ssn))
{
//If it is a valid SSN, display confirmation box that "The lead details are validated".
ZDK.Client.showConfirmation('The lead details are validated');
}
else
{
//If it is not a valid SSN, display error message that " The lead values are not validated".
ZDK.Client.showMessage('The lead details are not validated', { type: 'error'
});
}
Note:
You can upload only up to 5 static resources for a particular page.
2. Use the available arguments of event types in your script
Refer to the below table to know the arguments that can be used inside the script for a particular event type.
| Page | Event Type | Event Name | Arguments |
|---|---|---|---|
| Clone Page / Edit Page | Page | onChange | field_name |
| onLoad | __ | ||
| onSave | __ | ||
| Field | onChange | value | |
| Detail Page (Canvas) | Page | onLoad | __ |
| Field | onBeforeUpdate | value | |
| Mandatory Fields Form | onBeforeMandatoryFormSave | value | |
| onMandatoryFormLoad | field | ||
| Blueprint Event | beforeTransition | transition | |
| Tag Event | onTagChanged | tag, added and removed | |
| Canvas | onClick | __ | |
| Icon | onClick | __ | |
| Text | onClick | __ | |
| Create Page | Page | onChange | field_name |
| onLoad | __ | ||
| onSave | __ | ||
| Field | onChange | value | |
| Detail Page (Standard) | Page | onLoad | __ |
| Field | onBeforeUpdate | value | |
| Mandatory Fields Form | onBeforeMandatoryFormSave | value | |
| onMandatoryFormLoad | field | ||
| Blueprint Event | beforeTransition | transition | |
| Tag Event | onTagChanged | tag, added and removed | |
| List Page (Standard) | Page Event | onCustomViewLoad | custom_view |
| onBeforeCustomViewChange | custom_view | ||
| Create Page (Wizard) | Wizard Event | onLoad | __ |
| onChange | field_name | ||
| onTransition | screen | ||
| onBeforeTransition | source_screen, target_screen | ||
| onBeforeSave | __ | ||
| Field Event | onChange | value | |
| Edit Page (Wizard) | Wizard Event | onLoad | __ |
| onChange | field_name | ||
| onTransition | screen | ||
| onBeforeTransition | source_screen, target_screen | ||
| onBeforeSave | __ | ||
| Field Event | onChange | value |
For example, value is the argument for field onChange event type and so the Client Script will hold the value of that field in value. You can just use value instead of ZDK.Page.getField("field_name").getvalue();
3. For multiple actions on the same page, create a single script with 'If' or 'Switch' conditions
In the case of multiple field events on the same page, you can create a single script with an if or switch.. case statement to check which field is updated.
For example, to add validation for fields Product, Phone Number, Country, and Category in create page you can create four Client Scripts on create page with field events for each of the fields separately. But it is a best practice to create one Client Script on create page with onChange page event instead of multiple Client Scripts. In page event, you can use conditions to check which field is being changed and add actions inside those conditions. Below is the sample script which has multiple conditions for multiple fields.
switch (field_name)
{
case 'Product':
var product_name = ZDK.Page.getField('Product').getValue();
var category_field = ZDK.Page.getField('Category');
if (['Sparking cable', 'Ignition box', 'Ignition coil', 'Spark plug'].includes(product_name)) {
category_field.setValue("Ignition system"); ZDK.Page.getField('Number_of_Boxes').setMandatory(true); }
else if (['Speedometer', 'Odometer', 'Voltmeter', 'Temperature gauge'].includes(product_name)) { category_field.setValue('Gauges and meters'); }
break;
case 'Phone_Number':
var phone_field = ZDK.Page.getField('Phone_Number');
if (phone_field.getValue().length < 10) {
phone_field.showError('Enter a valid phone number'); }
break;
case 'Country':
ZDK.Page.getField('Phone_Number').setMaxLength(10); break;
case 'Category':
if(ZDK.Page.getField('Category').getValue() === 'Ignition system') { ZDK.Page.getField('Number_of_Boxes').setMandatory(true); }
break; }
Note:
You can create up to 30 Client Scripts per page.
4. Debug using log statements
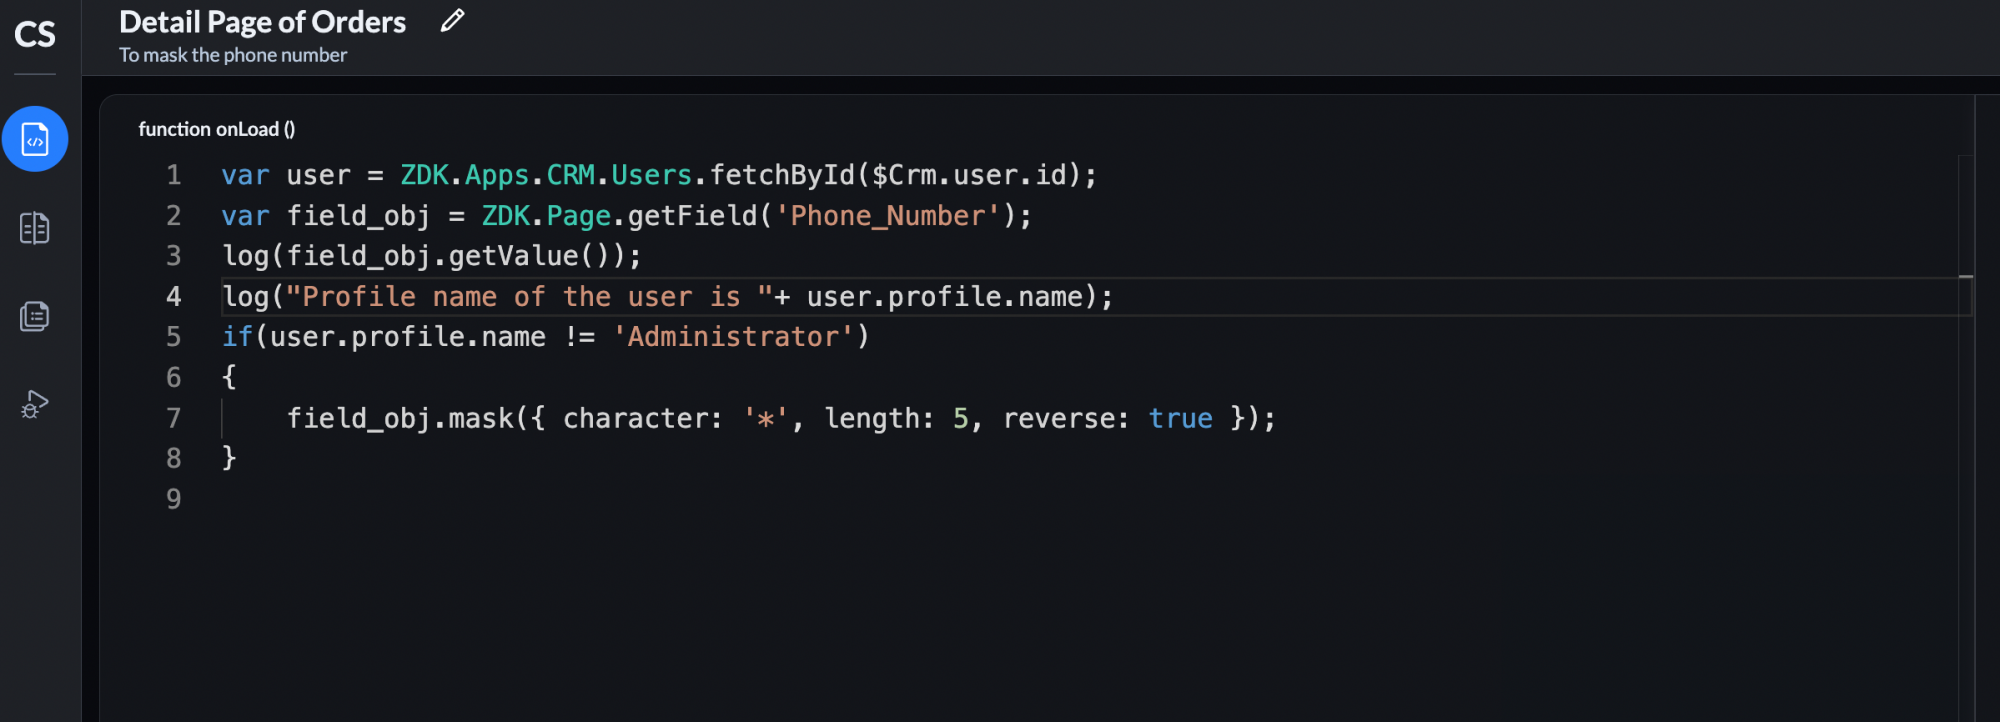
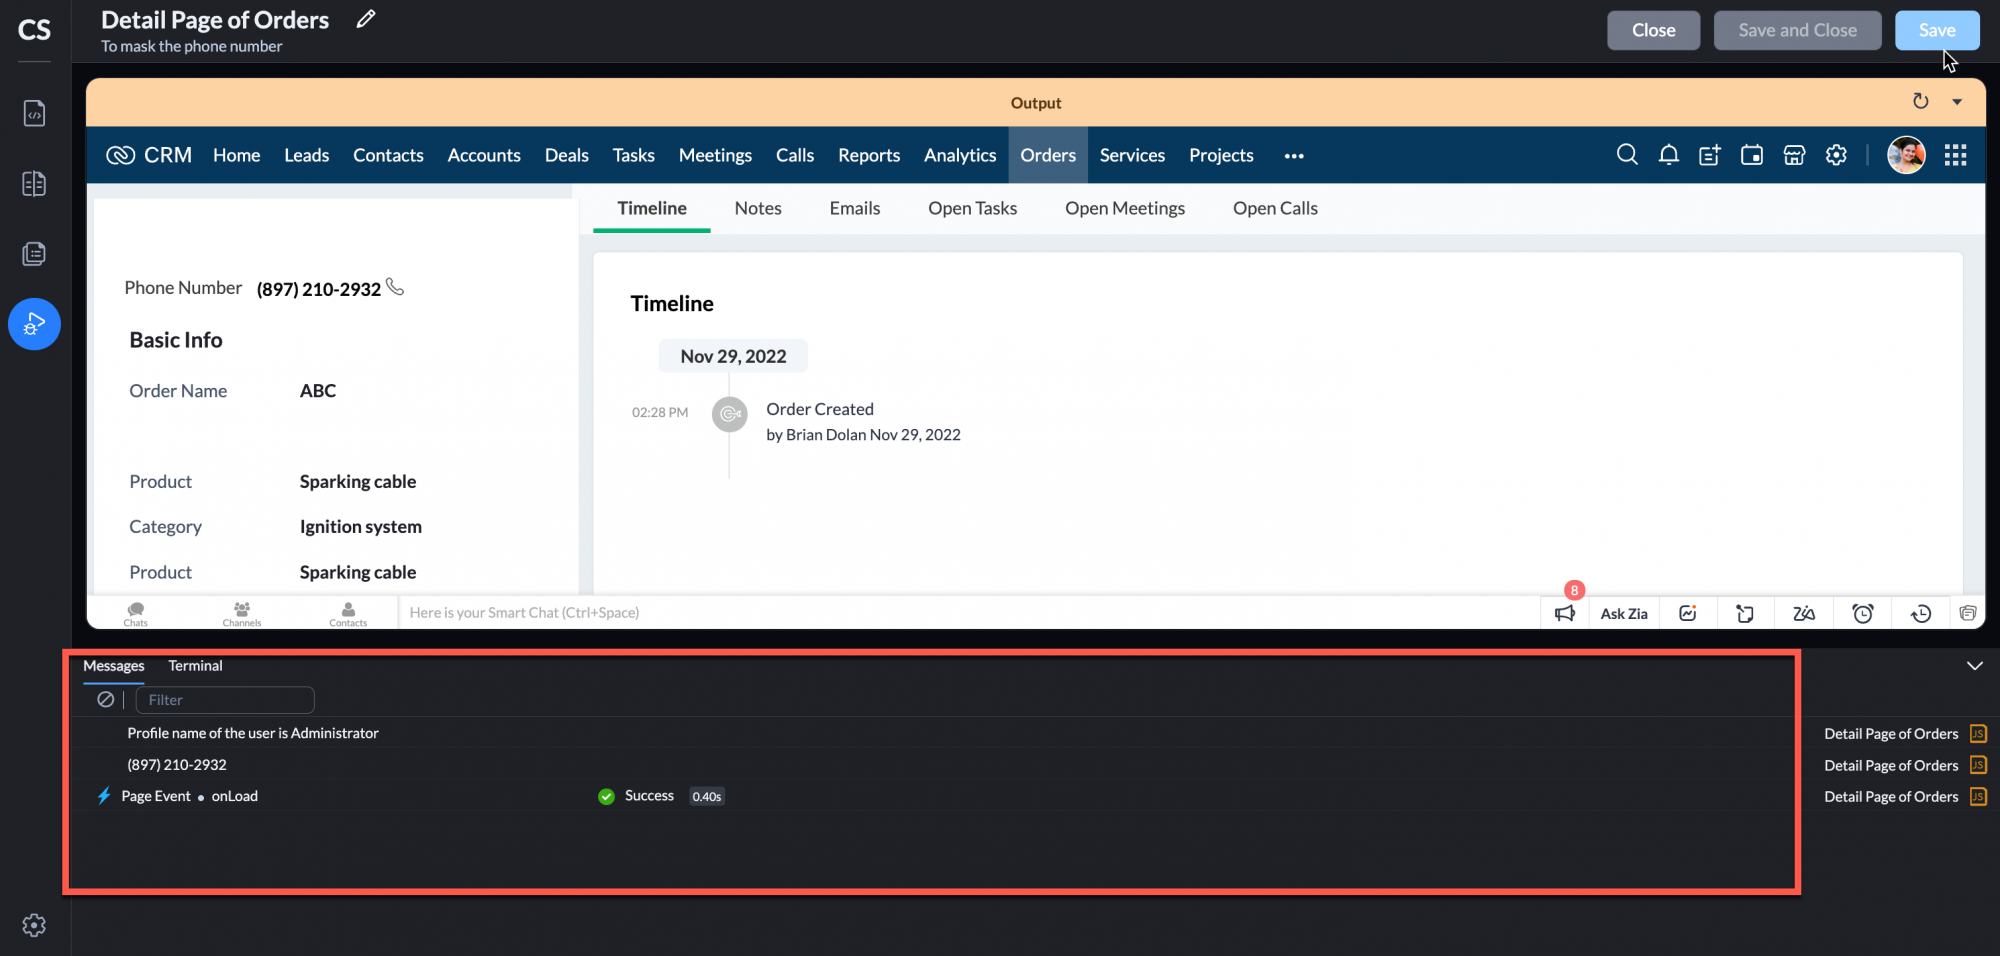
Use the log statement to debug the script wherever required and run the script using the Run option in Client Script IDE. The logs will be available in the Messages panel of Run option. Here is the screenshot of how you can add log statements in your script and where you can see the logs when the script executes.


5. Use the Terminal to try out ZDKs
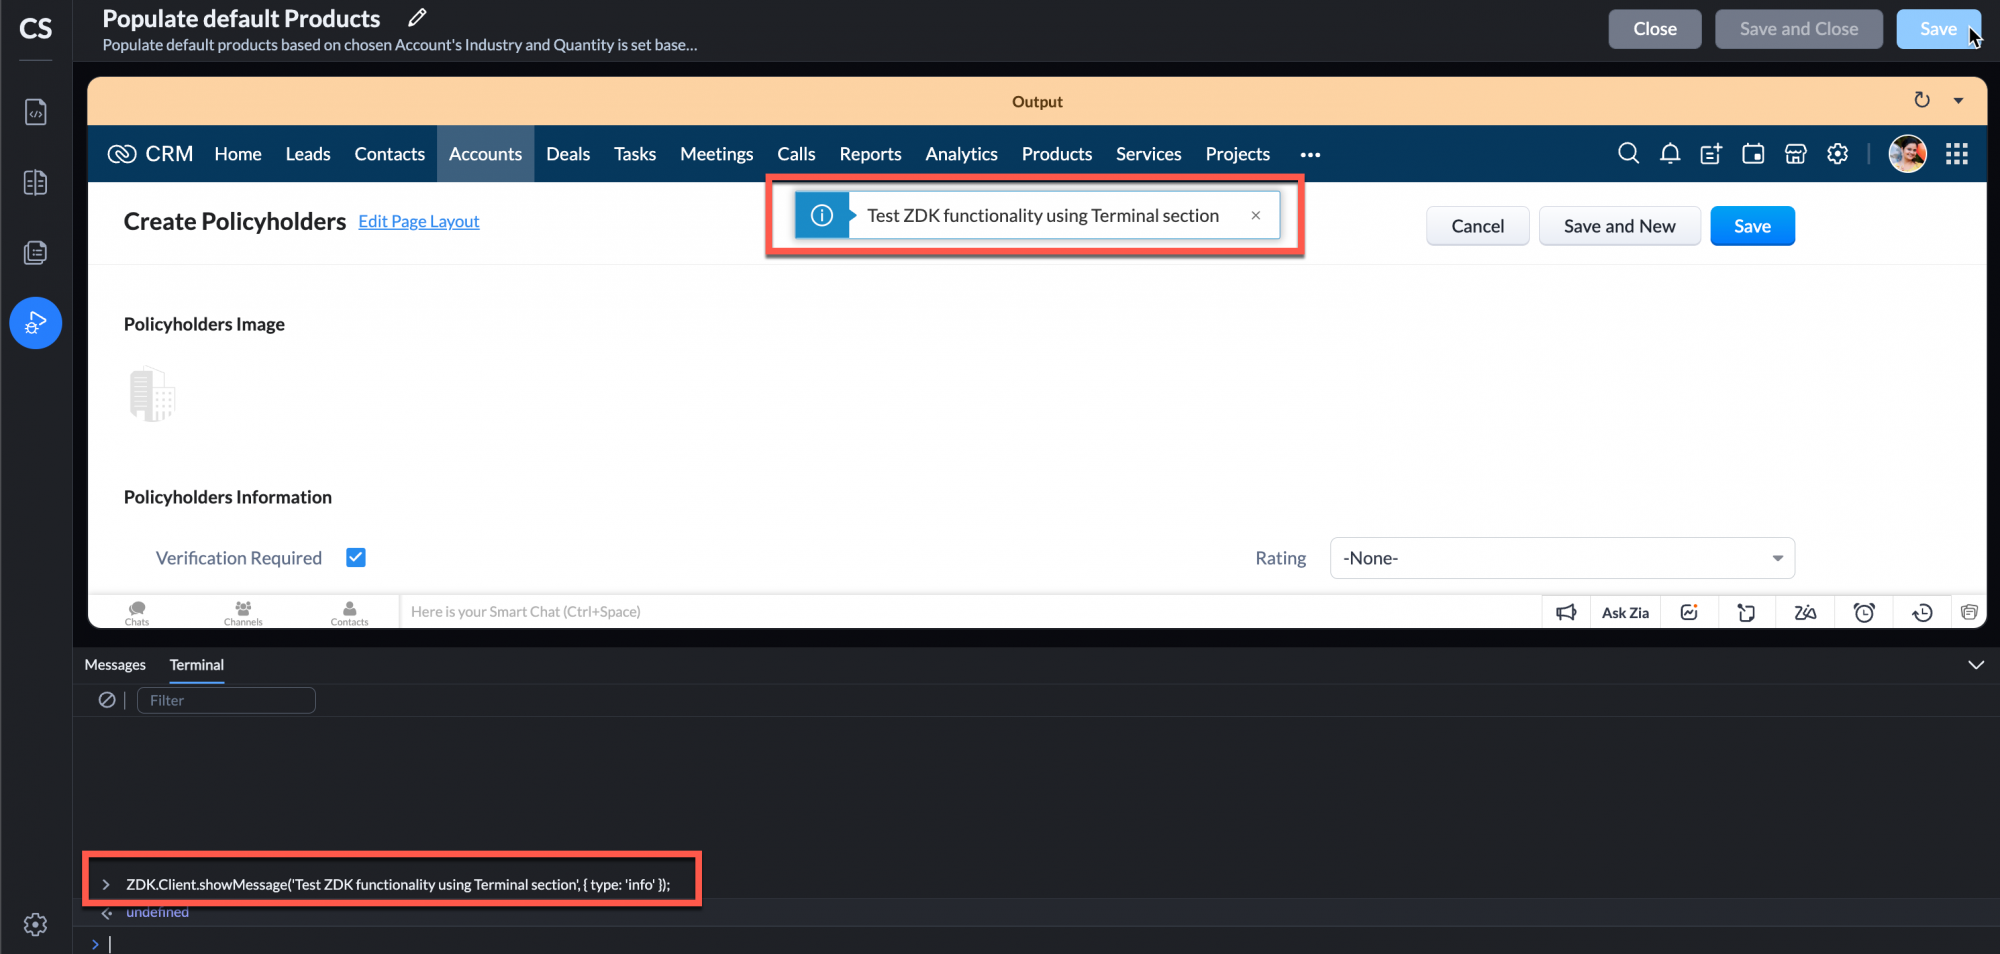
Whenever you want to try our ZDKs instantly, you can do it in the Terminal Section available in the Run option of Client Script IDE. For example, when you type the below script in the Terminal section and hit enter, you can see the alert message on the screen.
ZDK.Client.showMessage('Test ZDK Functionality using Terminal section', { type: 'info' });
6. Create separate scripts for each layout
Client Scripts will execute only for the layout you specify while configuring the Client Script. If you want the script to execute for other layouts or all the layouts of a module, you should create a separate script for each layout.
7. Whitelist API calls
Make sure that the API calls from a Client Script to other domains are whitelisted in Trusted Domains.
For instance, consider that you want to populate the field Distance with the distance between the Seller Location and the Manufacturer Location fields. In order to achieve this you can write a script onChange page event.
Script:
//Check if the Location fields are updated
if (field_name === "Seller_Location" || field_name === "Manufacturer_Location") {
//Assign the third party API key to a variable
var api_key = "2Ty9CbowZU8Nu3pl3LQb*********";
//Assign the field "Distance" to a variable
var distance = ZDK.Page.getField("Distance");
//Make the field "Distance" read-only.
distance.setReadOnly(true);
//Get form values
var formObj = ZDK.Page.getForm(); var form = formObj.getValues();
if (form.Manufacturer_Location && form.Seller_Location) {
/*Third party API call with the Location fields values. The domain of the API call should be added to Trusted Domains of Zoho CRM */
var response = fetch("https://api.***/maps/api/dist**/json?origins="+form.Manufacturer_Location+"&destinations="+form.Seller_Location+"&key="+api_key);
//Populate the response in the "Distance field".
response.then(res => res.json()).then(data => { distance.setValue(data.rows[0].elements[0].distance.text); });
}
}The script will be able to get the response successfully only if the API calls to the domain used is whitelisted in Trusted Domains. Click here to know how to whitelist third party API calls.
8. Use reorder option to change the order of scripts
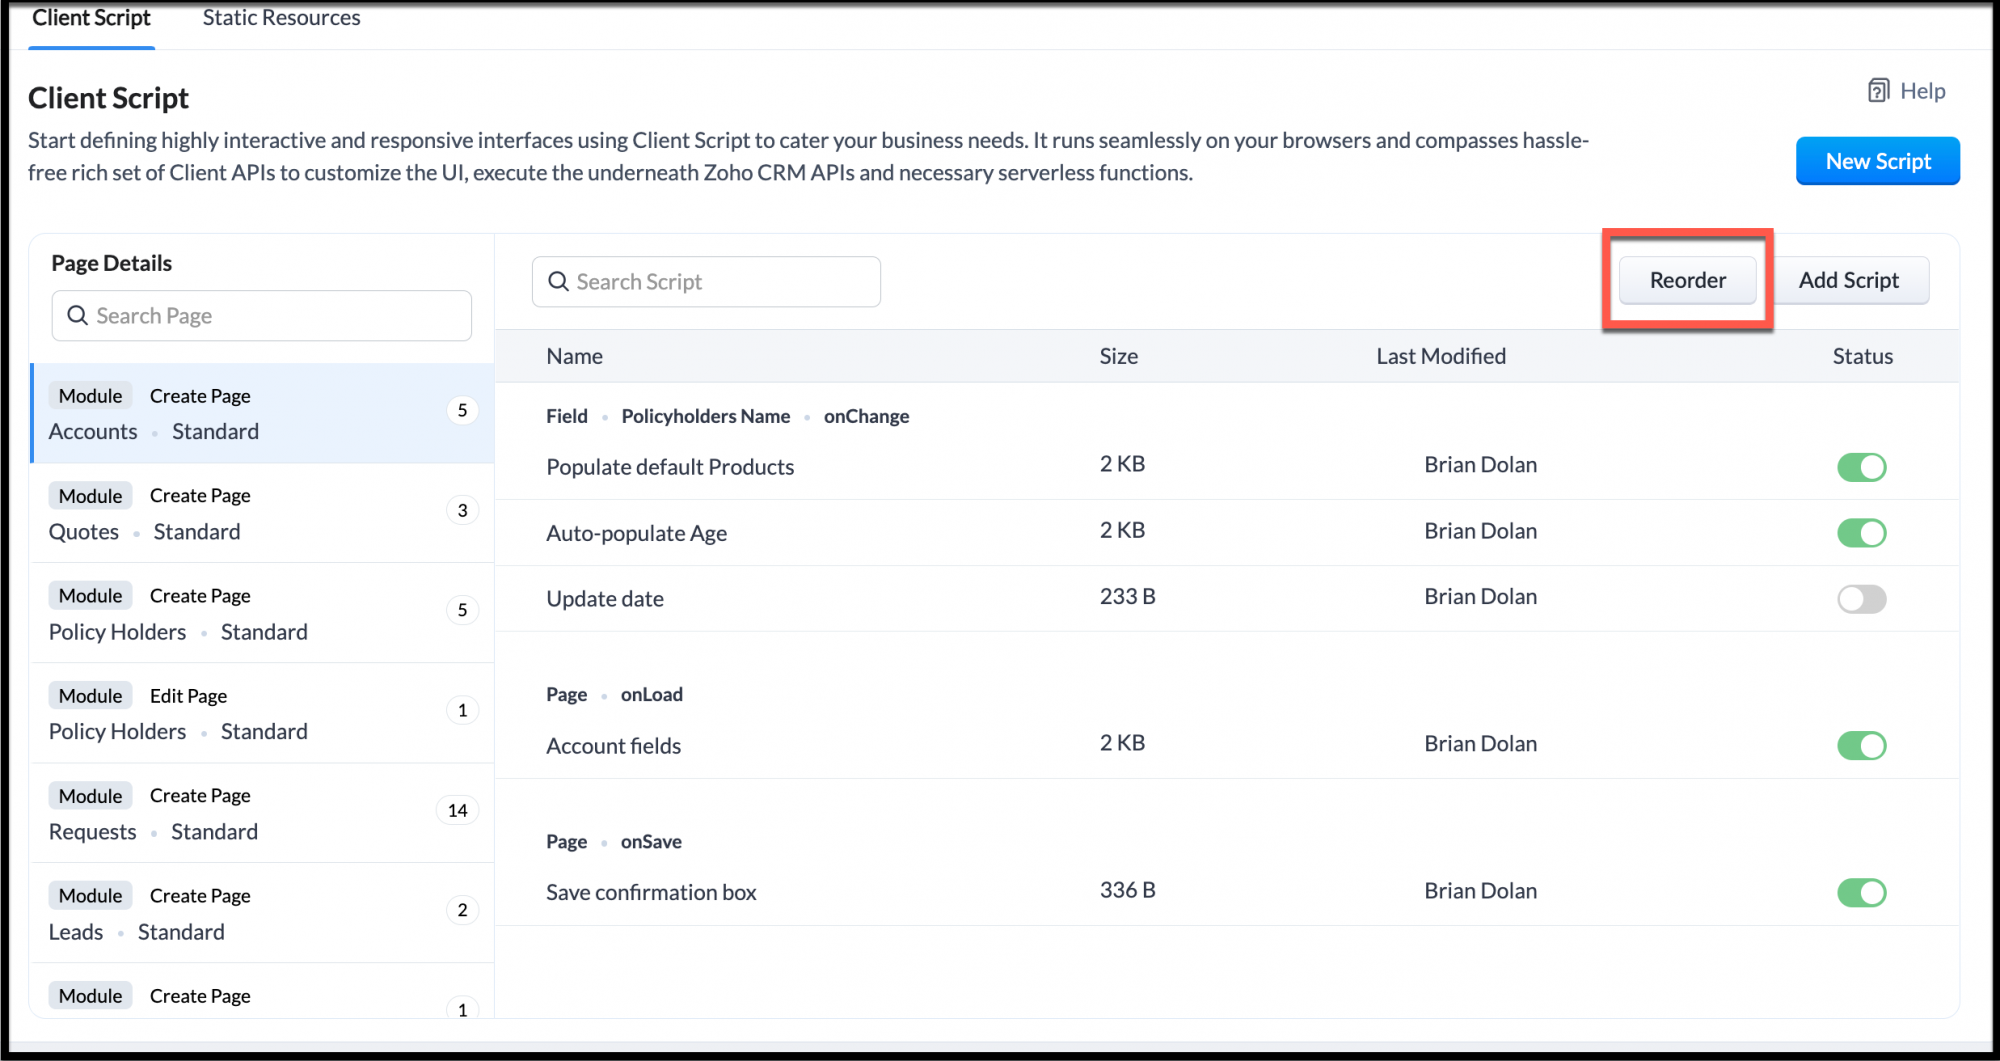
Whenever you want to change the order of execution of Client Scripts for a particular page and a particular event, use the Reorder button available in the Client Script Screen.

Remember that the order change is applicable only within a particular event for a particular page in a module.
9. Use the right event type for your requirement
- To perform validations before the record is saved, use onSave Page Event. So that after entering data for all fields, when the user hits on the save button, the script will get executed.
- To perform validation as soon as data is entered on a particular field use onChange Field Event.
- To perform validation as soon as data is entered for multiple fields use onChange Page Event.
- If you want to display a custom message/ Information box whenever a page is opened, use onLoad Page Event.
10. Use Loaders to Manage Timeout Limits
In Client Script, executions are bounded by a 10-second time out. Some API calls might take more than 10 seconds to provide response. Consequently, when they are used in Client Script, execution will get halted. In such cases, you can show a loader which will pause the execution until you receive the response from the API call.
Consider the following scenario.
Whenever the user changes the stage to 'Delivered' in the Quotes Module, a Client Script gets triggered. This script, in turn, executes a function, and this function takes more than 10 seconds to complete.
In this case, you can show a loader preceding the function's execution, after which you should hide it.
Script:
if (value == 'Delivered') {
ZDK.Client.showLoader({type:'page', template:'spinner', message:'Sending Quotation...' });
ZDK.Apps.CRM.Functions.execute("Send_Quote");
ZDK.Client.hideLoader();
ZDK.Client.showMessage('Quotation sent successfully', { type: 'success' });
}
Here is how the Client Script works.

The presence of loader on the screen will inform the user about the ongoing processes in the background.