Recurring Expenses
Some expenses are incurred on a consistent basis over a period of time, and manually recording them each time can get really tedious. Generating these expenses can be automated in Zoho Invoice, resulting in systematic tracking and quicker reimbursements.
In simple terms, an expense turns into a recurring expense only if it satisfies both these conditions,
- It is incurred at a uniform schedule e.g once a week, once a month etc.
- The expense amount is constant.
Let us say you have rented an office space for running your business. The rent you pay every month for your office space can be scheduled as recurring expense profile that will be generated every month.
IN THIS PAGE…
Creating and Automating a Recurring Expense
- Go to the Purchases tab on the home panel of Zoho Invoice, and select Recurring Expenses.
- Click on the ‘+’ icon.
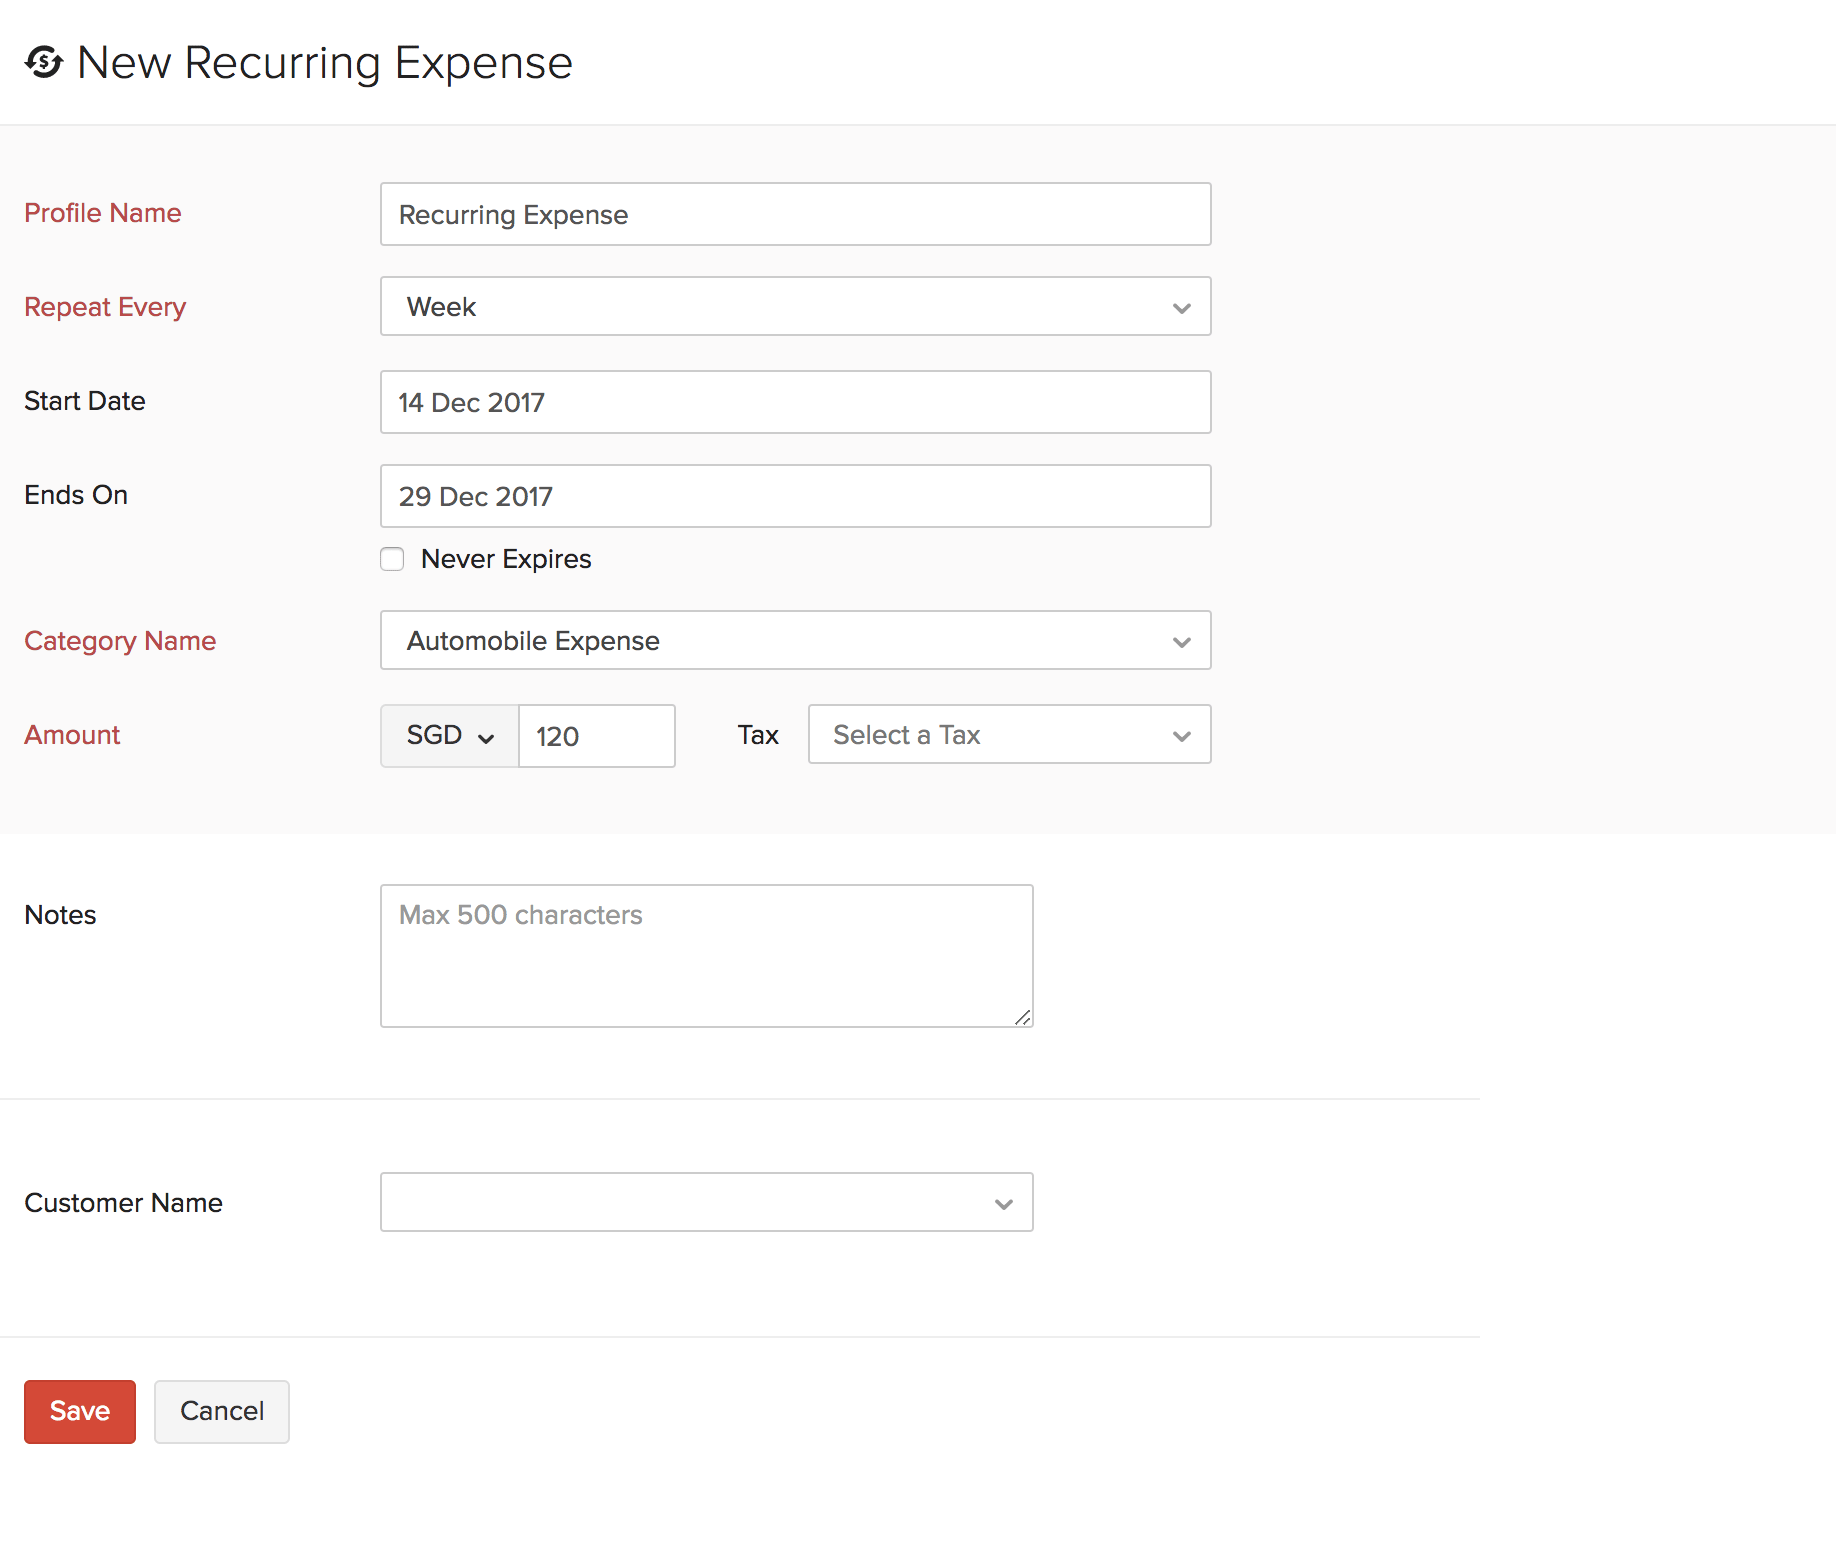
- Provide a profile name. The expense will be generated under this profile at the end of each recurring period, making it easy for you to keep track of it.
- Enter the recurring frequency. This decides how often the expense is generated. Eg: once a month.
- Select the expense category, enter the amount and click Save.

Insight: You can set the start and end date of the recurring expense. If the expense is going to be a lasting one (such as the rent you pay for your office space), you can check on the Never Expires box to ensure it always remains active like shown above.
To stop an active recurring expense, open the expense and select More - Stop. This expense will stop autogenerating right away unless resumed.
Making an Existing Expense Recurring
To convert an expense that you’ve already created in Zoho Invoice into a recurring one,
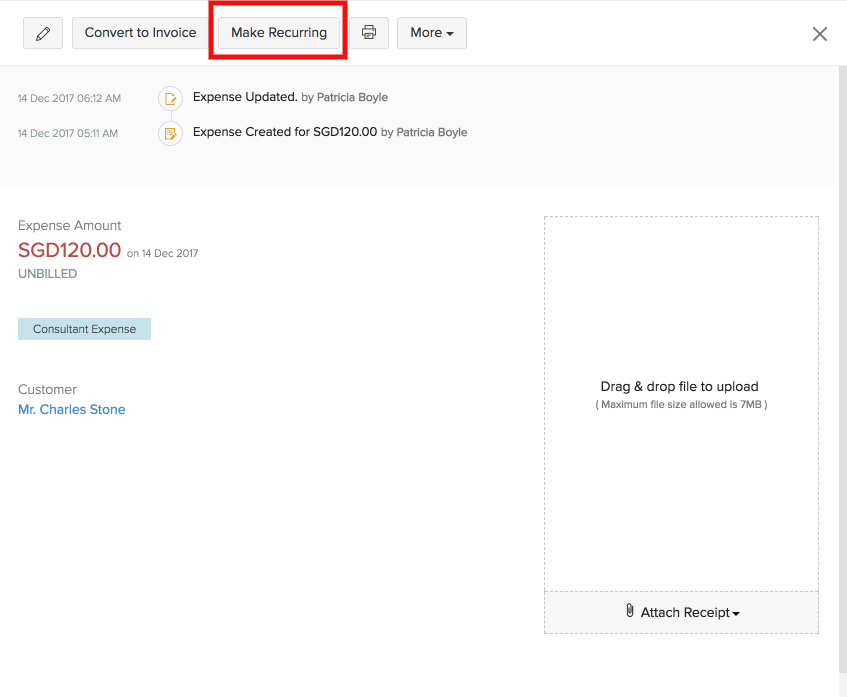
- Open the expense that you want to make recurring.
- Click on More - Make Recurring.
- Provide a profile name. The expense will be generated under this profile at the end of each recurring period, making it easy for you to keep track of it.
- Enter the recurring frequency. This decides the schedule or how often the expense is generated. Eg: once a month.
- Click on Save.
Insight: You can set the start and end date of the recurring expense. If the expense is going to be a lasting one (such as the rent you pay for your office space), you can check on the Never Expires box to ensure it always remains active like shown above.


 Thank you for your feedback!