Multiple From Addresses
The Send Mail As section in Zoho Mail enables you to send emails using various email addresses as your 'From' address. You can add your external email addresses to Zoho Mail in order to send emails from Zoho webmail.
Table of Contents
- Display Name - Outgoing Emails
- Different 'From' Email addresses
- External 'From' addresses
- Steps to Add Custom 'From' Address - Outlook/ Office 365
- Steps to Add Custom ‘From’ Address - Custom SMTP
- Update Password for External From Address using custom SMTP
- Steps to Add Custom ‘From’ Address - Zoho SMTP
- Associate Default ‘From’ Addresses for Accounts
- ReplyTo address
Display Name - Outgoing Emails
The Display Name in the Send Mail As section for each 'From' email address/ email alias/ external From address is how your name appears on the outgoing emails sent using that particular email address.
Steps to change Display Name
- Login to Zoho Mail.
- Select SettingsSend Mail As.
- Click the particular email address for which the Display Name should be changed.
- In the 'Display Name' text box, provide the preferred Display Name.
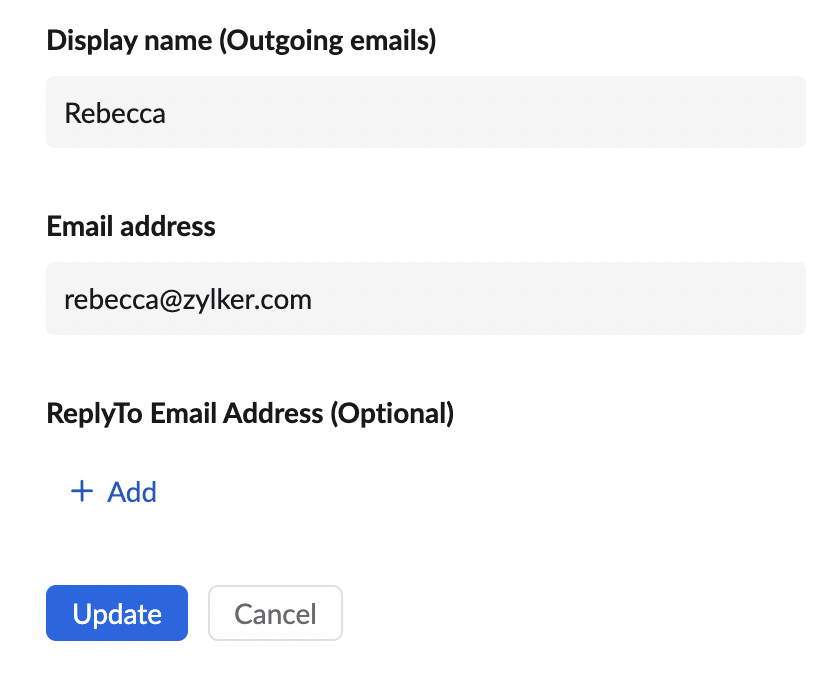
- You can also Add ReplyTo Email Address before authenticating a 'From' email address.
- Click 'Update' to save the changes.
- You may have to provide your external SMTP password, in case you are updating the Display name for an external 'From' address.
Different 'From' Email Address
By default, your Zoho account's email address will be set as your 'From' address. You may also have email aliases or group aliases as 'From' address, in case your domain email is hosted with Zoho. You will not be able to delete the email aliases and group aliases from the 'Send Mail As' list.
Apart from that, the users can also set up their email addresses of various email service providers like Outlook, Gmail, etc., as External From addresses, to send emails using those addresses from Zoho Mail itself. It is strongly recommended to use custom SMTP server settings (SMTP details provided by the other provider) to send emails from Zoho Mail.
If you choose Zoho SMTP, you may be required to verify your email address through a verification process. Also using Zoho SMTP may result in 'On Behalf Of' being displayed with your Zoho Mail email address in external email clients like Outlook, Gmail etc.
External 'From' Addresses
You can send emails using external email addresses of various service providers like Outlook, Office 365, etc., from Zoho Mail. The steps to add External From Addresses are given below.
Steps to Add External 'From' Address - Outlook/ Microsoft 365
You can use your Outlook/ Office 365 email address to send emails from Zoho Mail using the following steps.
- Login to your Zoho Mail account.
- Select Settings >> Send Mail As >> External From email address.
- Click the + icon next to External From Address section.
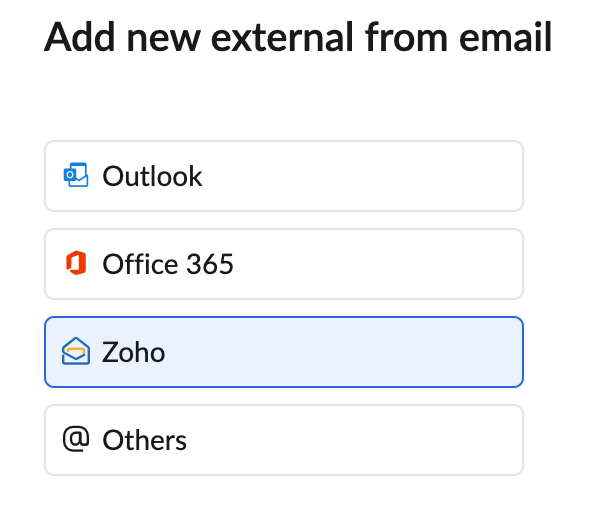
- Choose Outlook/ Office 365 in the options listed under Add new external from email in the preview pane.
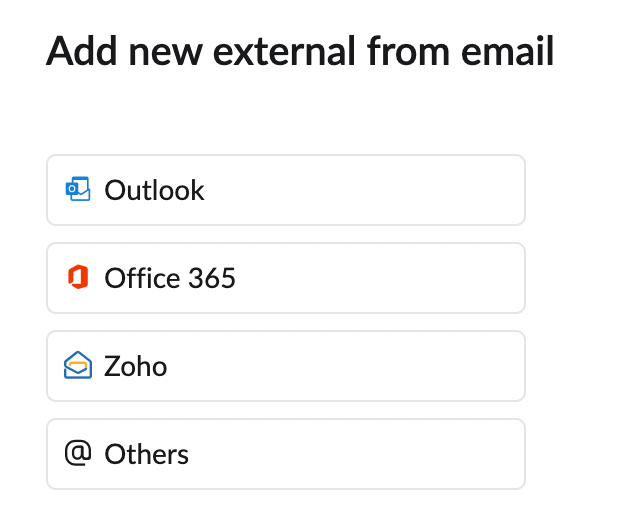
- Provide the preferred Display Name for the outgoing email address.
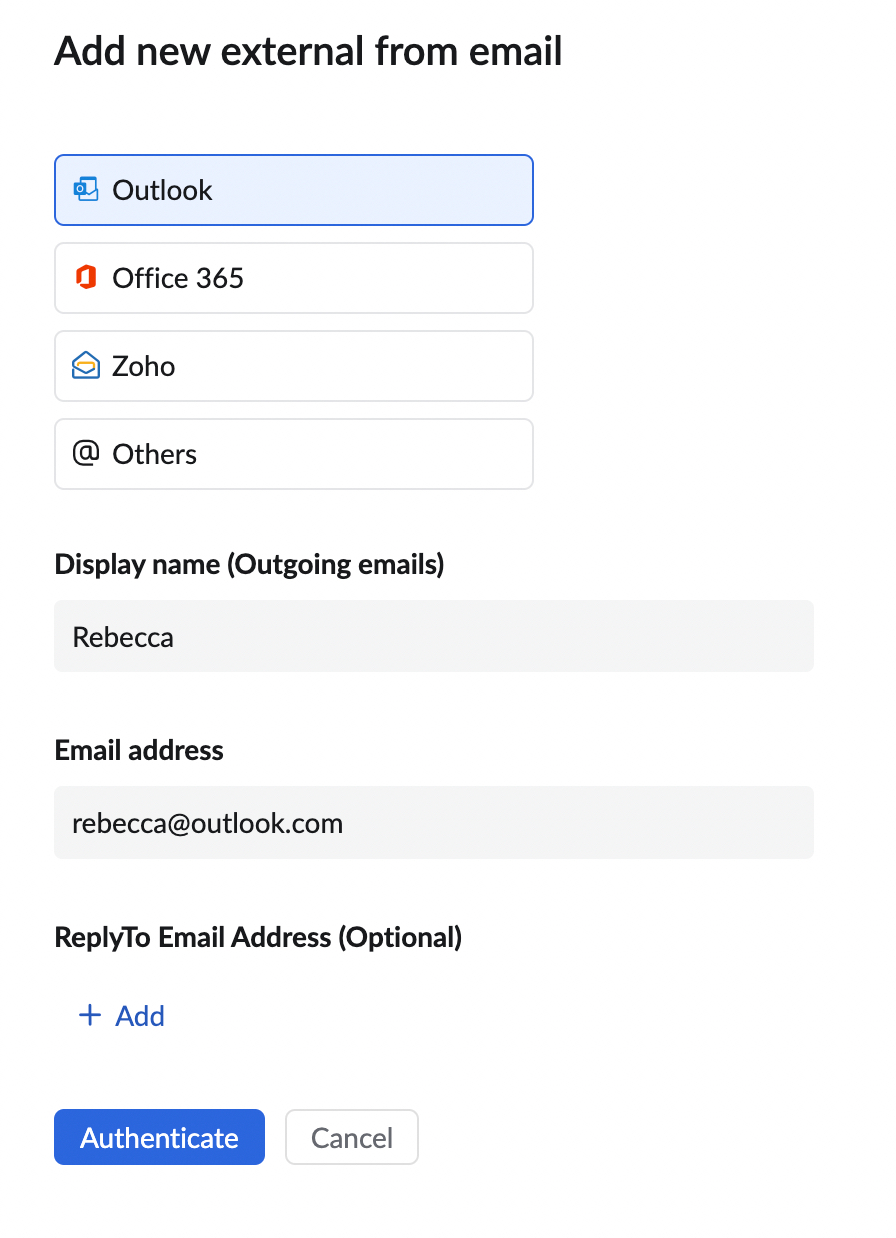
- Provide the Outlook/ Office 365 email address in the Email Address field.
- You can also Add ReplyTo Email Address before authenticating a 'From' email address.
- Click Authenticate.
- Provide the password for your Outlook/ Office 365 account in the account login window.
- Click Yes in the authenticator window and your Outlook/ Office 365 email address will be added to your External From Addresses listing.
Steps to Add Custom ‘From’ Address - Custom SMTP
You can set up your external From address to send emails using your own SMTP (Outgoing) servers. In this case, the email the recipients will not see 'On behalf of' seen in some email clients like Outlook.
- Login to your Zoho Mail account.
- Select Settings >> Send Mail As >> Add new From email address.
- Click the + icon next to External From Address section.
- Choose Zoho/ Others in the options listed under Choose your external mail account provider in the preview pane.
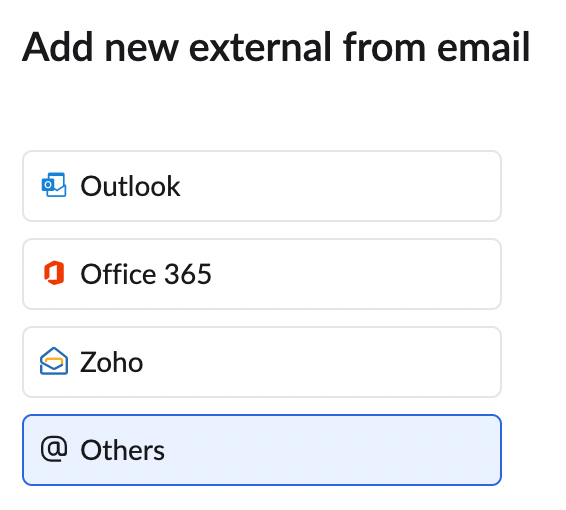
- Provide the preferred Display name for the outgoing email address.
- Provide the Email address from which you want to send the email.
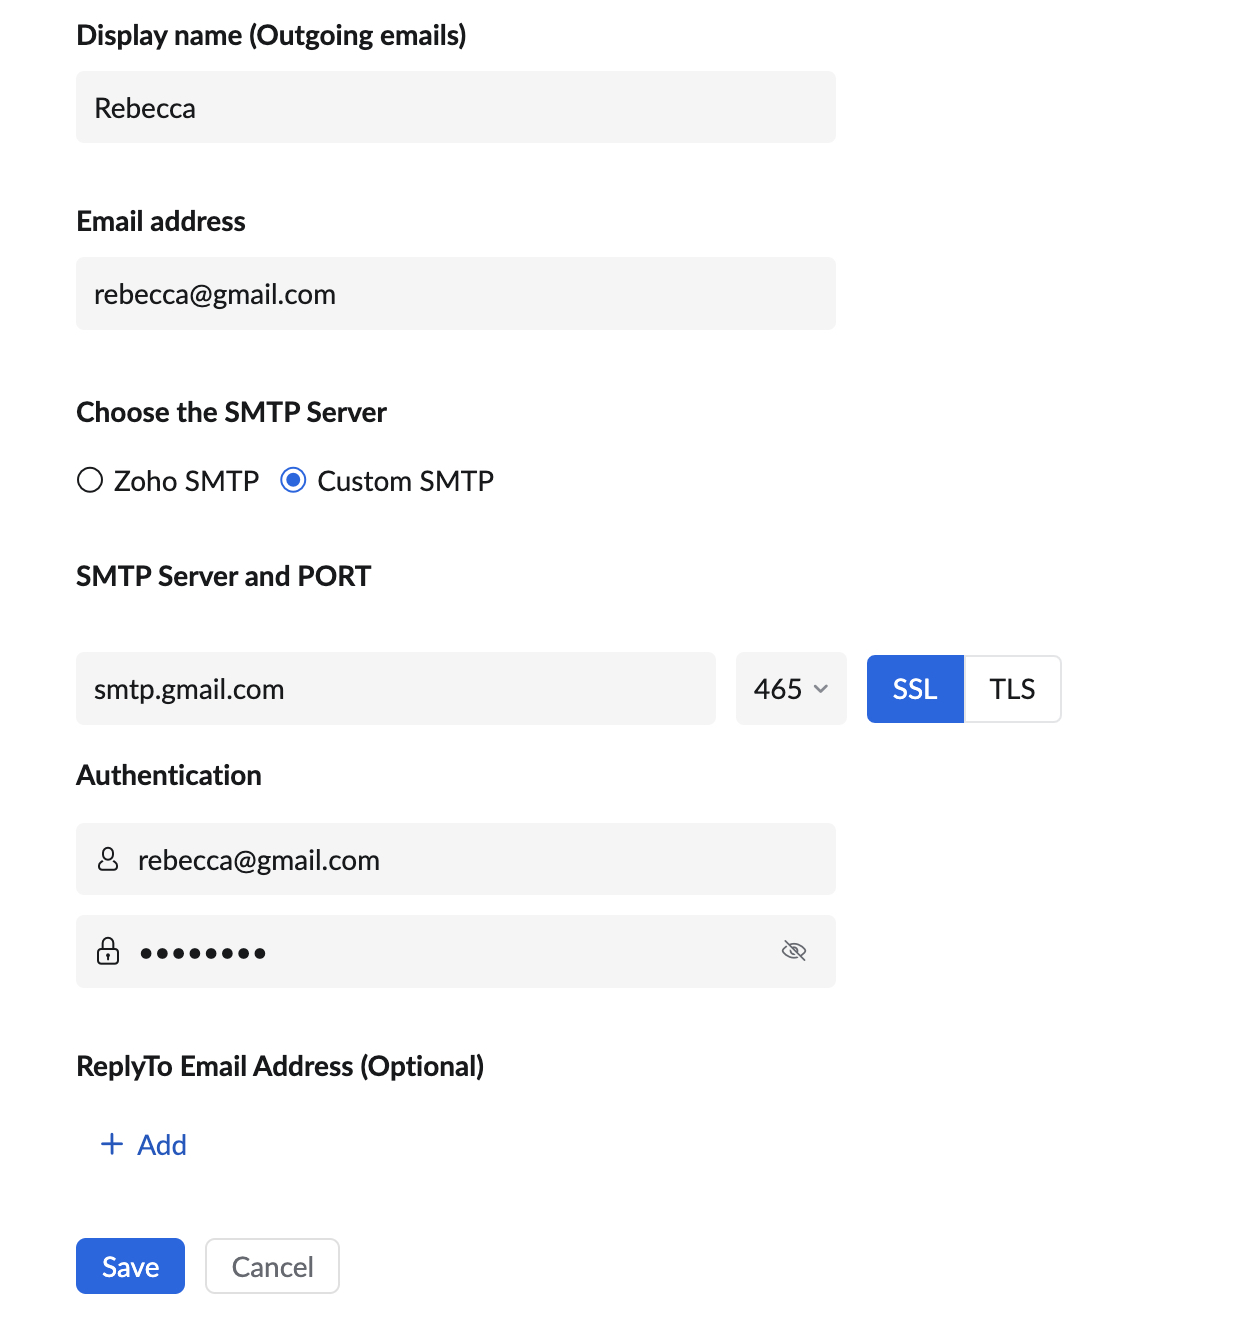
- Choose 'Custom SMTP' to provide the server details.
- Provide the SMTP server name, Port, and select the Authentication type.
- If authentication is required, provide the credentials in the Authentication section.
- You can also Add ReplyTo Email Address before authenticating a 'From' email address.
- Click Send Verification.
- If your server authenticates your credentials, the email address will be automatically added and the verification process will be automatically skipped.
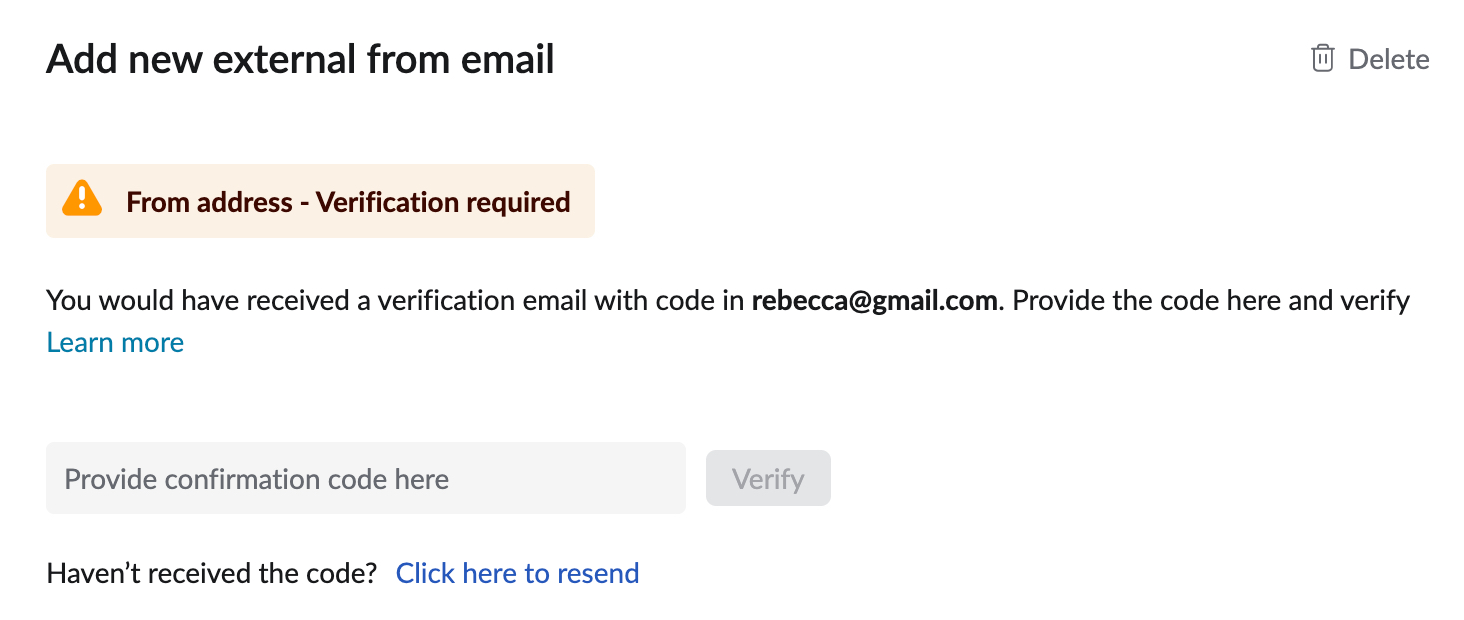
- If your server does not require authentication, you need to verify your email address using the confirmation code, before sending mail from that account.
Update Password for External From Address using custom SMTP
If you have changed your password in your source account, you will not be able to send emails, without updating the Password for the Outgoing Server.
- Login to Zoho Mail.
- Select SettingsSend Mail As.
- Click the particular email address under External from addresses for which the password should be changed.
- Make the required changes in the server details and outgoing authentication.
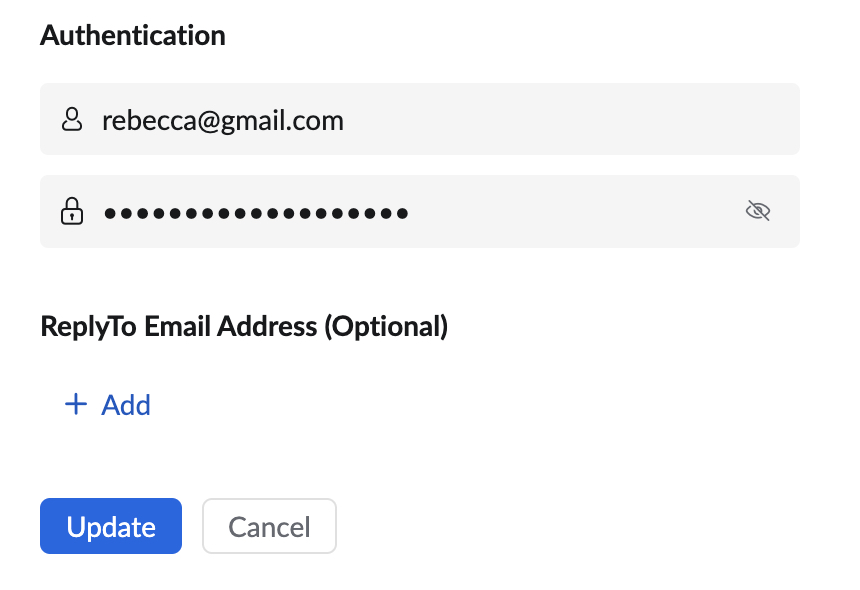
- Click Update to exit.
Steps to Add Custom ‘From’ Address - Zoho SMTP
When you add an email address to send an email using Zoho SMTP, the recipients may see an 'On behalf of' tag along with your Zoho Email address. The steps to add an email using Zoho SMTP are given below.
- Login to your Zoho Mail account.
- Select Settings >> Send Mail As >> Add new From email address.
- Choose Zoho in the options listed under Choose your external mail account provider in the preview pane.
- Provide the preferred Display name for the account
- Specify the Email address from which you want to send Email from.
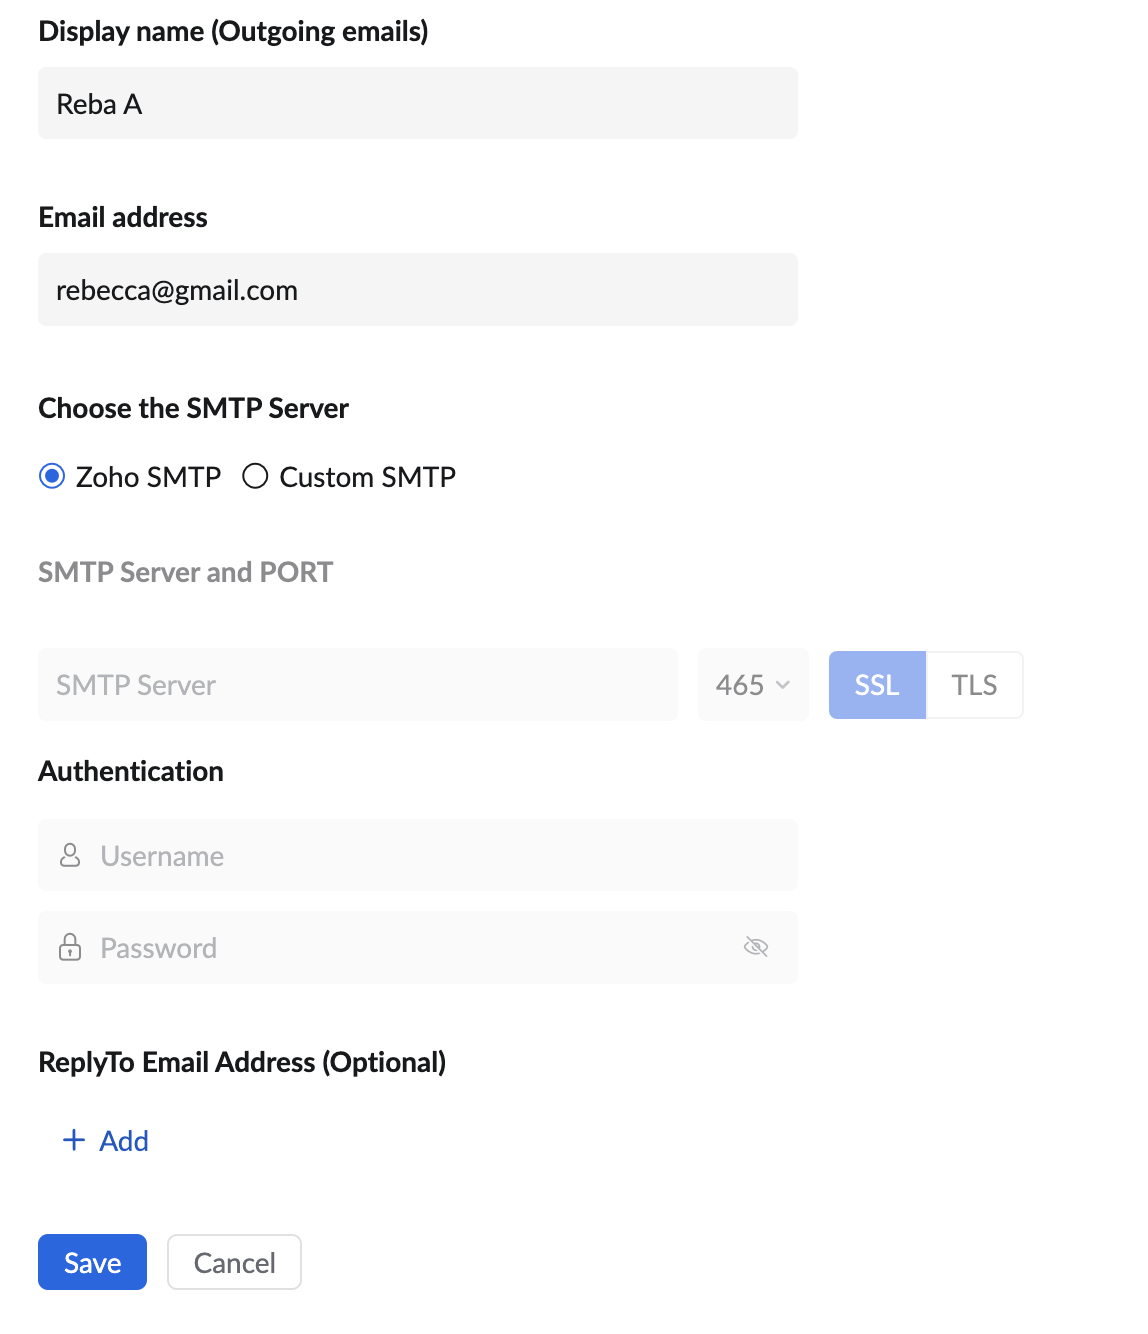
- Select Zoho SMTP to send email using Zoho SMTP server - Some email clients may display your Zoho Email address and mention 'On behalf of' in the header section.
- Click Send Verification.
- You have to verify your email address before sending mail from that account.
Steps to Verify the Custom ‘From’ Address
- Login to your Zoho Mail account.
- Select SettingsSend Mail As.
- On the Send Mail As a page, click the email address with the exclamation mark next to it.
- A dialog box requesting the confirmation code appears.
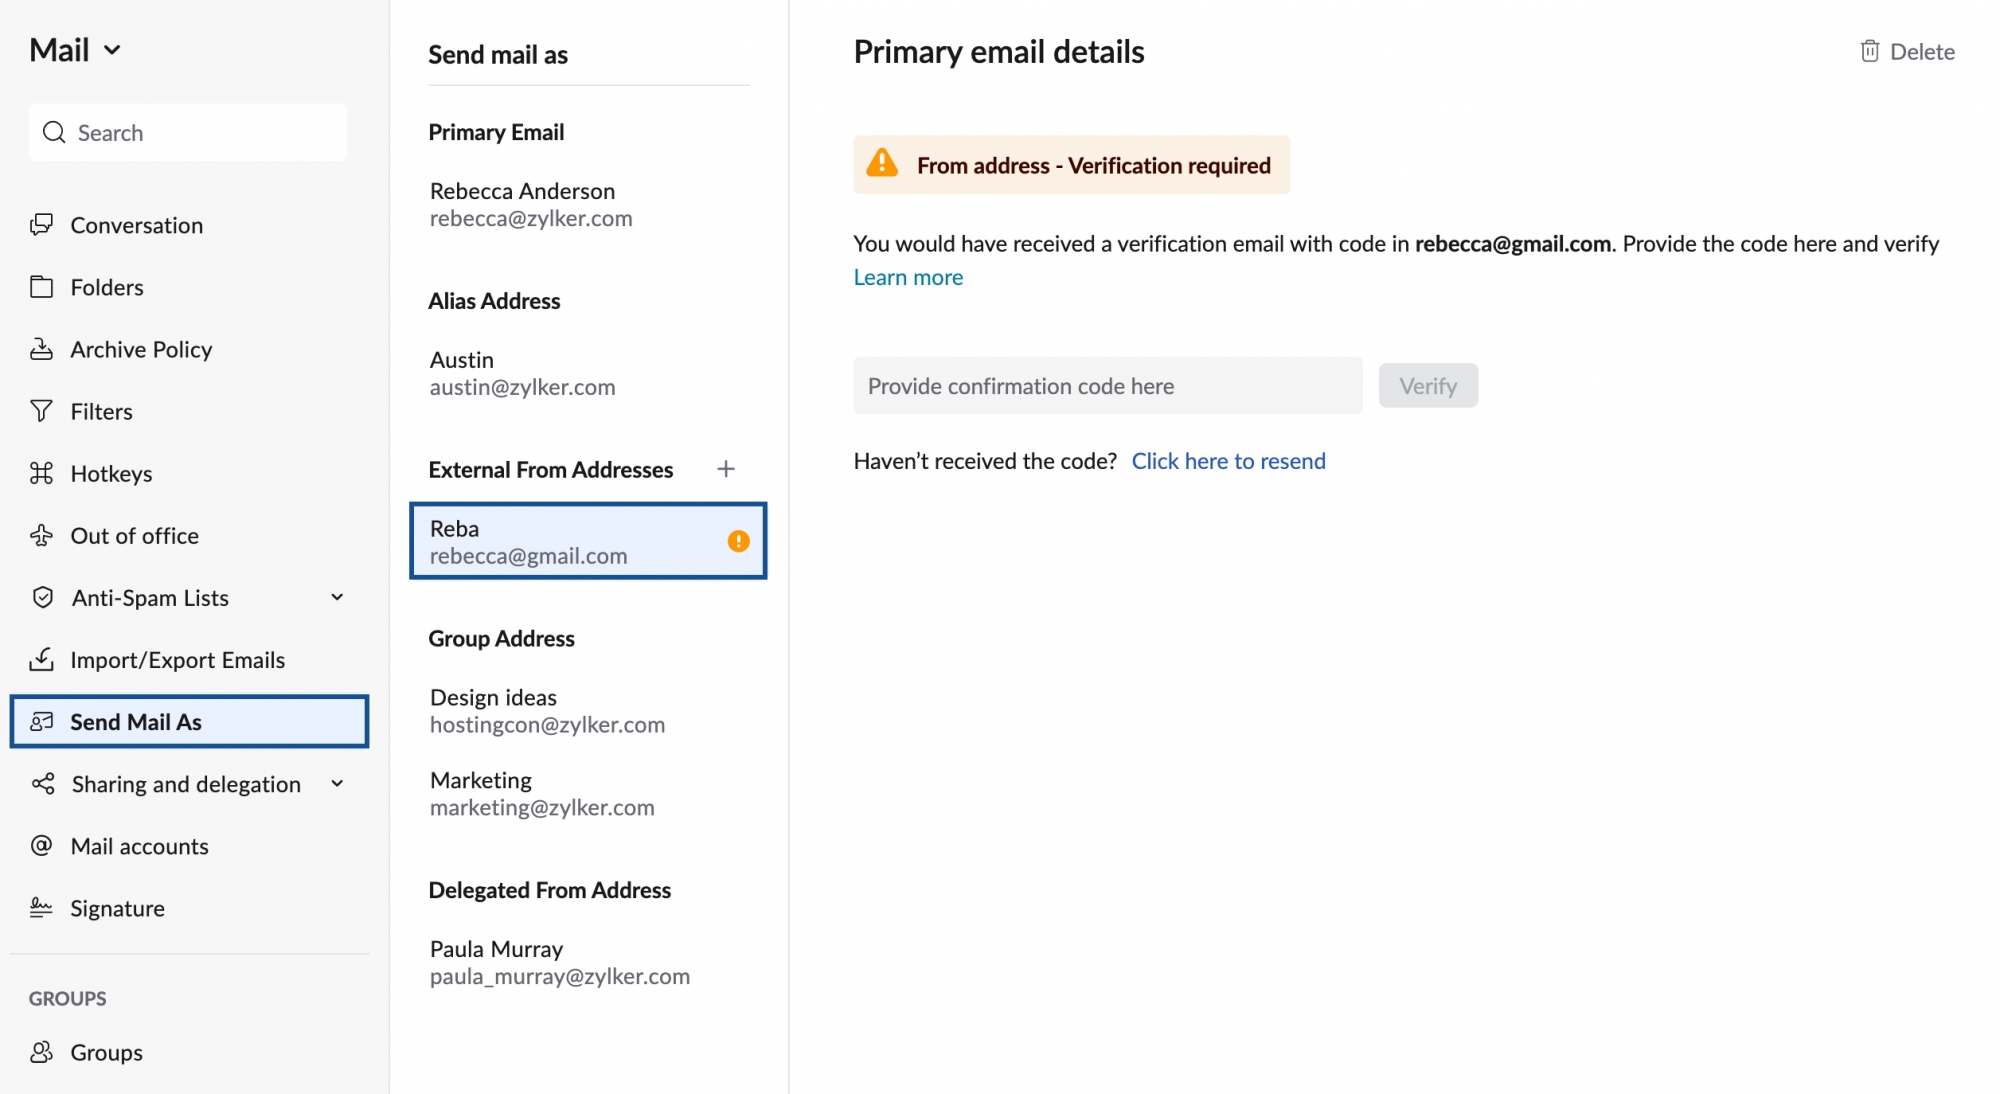
- In the specified email address, you would have received a confirmation mail from Zoho.
- In the Zoho Mail dialog box, enter the Confirmation code sent in the confirmation email.
- Click Verify to confirm and save the settings.
- You can also click resend, to resend the Confirmation code if you are unable to find the email from Zoho.
Associate Default ‘From’ Addresses for Mail Accounts
Once you have added the Custom 'From' Addresses, you can associate different Email addresses with various accounts configured. Each time you open the composer in the mail UI, the added custom 'From' address will appear as the default 'From' address for the account.
- Login to your Zoho Mail account.
- Select Settings.
- Navigate to Default From email address field under the General section.
- Click on the drop-down.
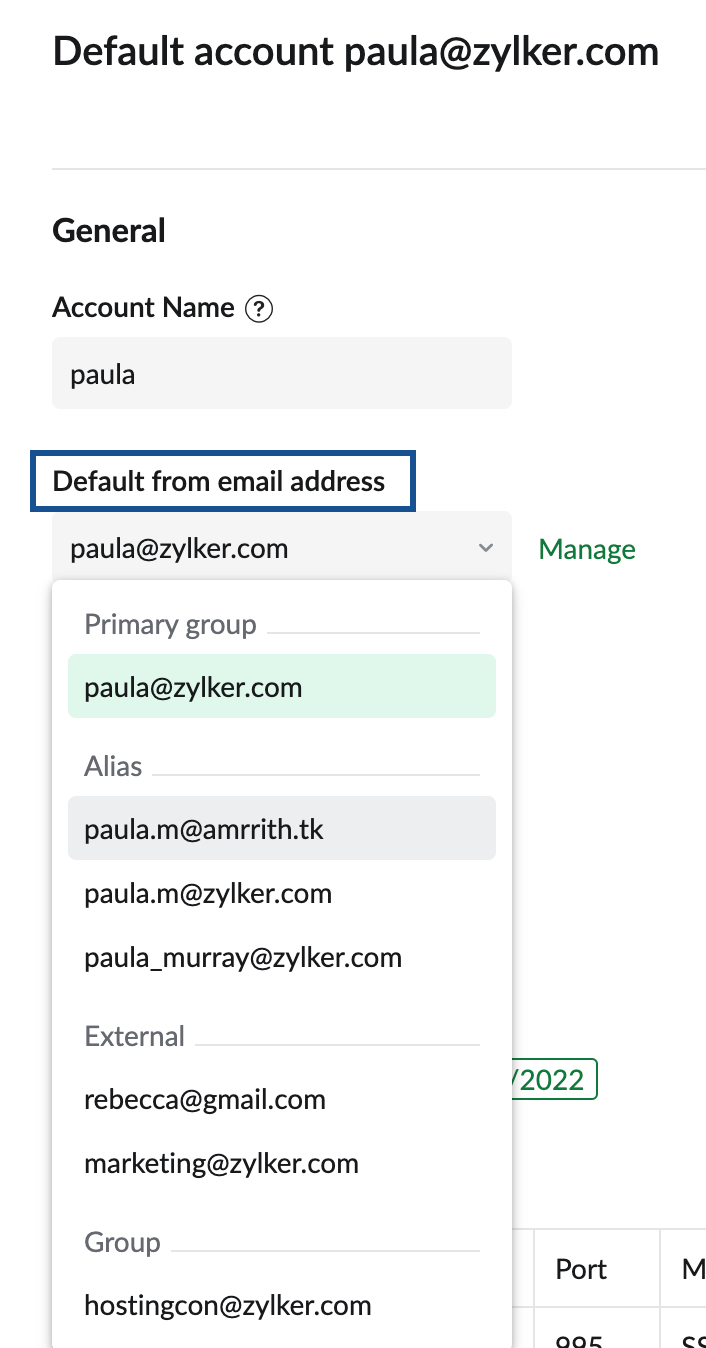
- Choose the External From Address/ Alias to be associated as the default from address for that account.
- Click Save.
ReplyTo email address
You can set a ReplyTo email address for any of the external 'From' addresses that you configure.
- Login to your Zoho Mail account.
- Select SettingsSend Mail As
- Click on the Edit button across the From address for which Reply To needs to be added.
- Click on the Add ReplyTo email address.
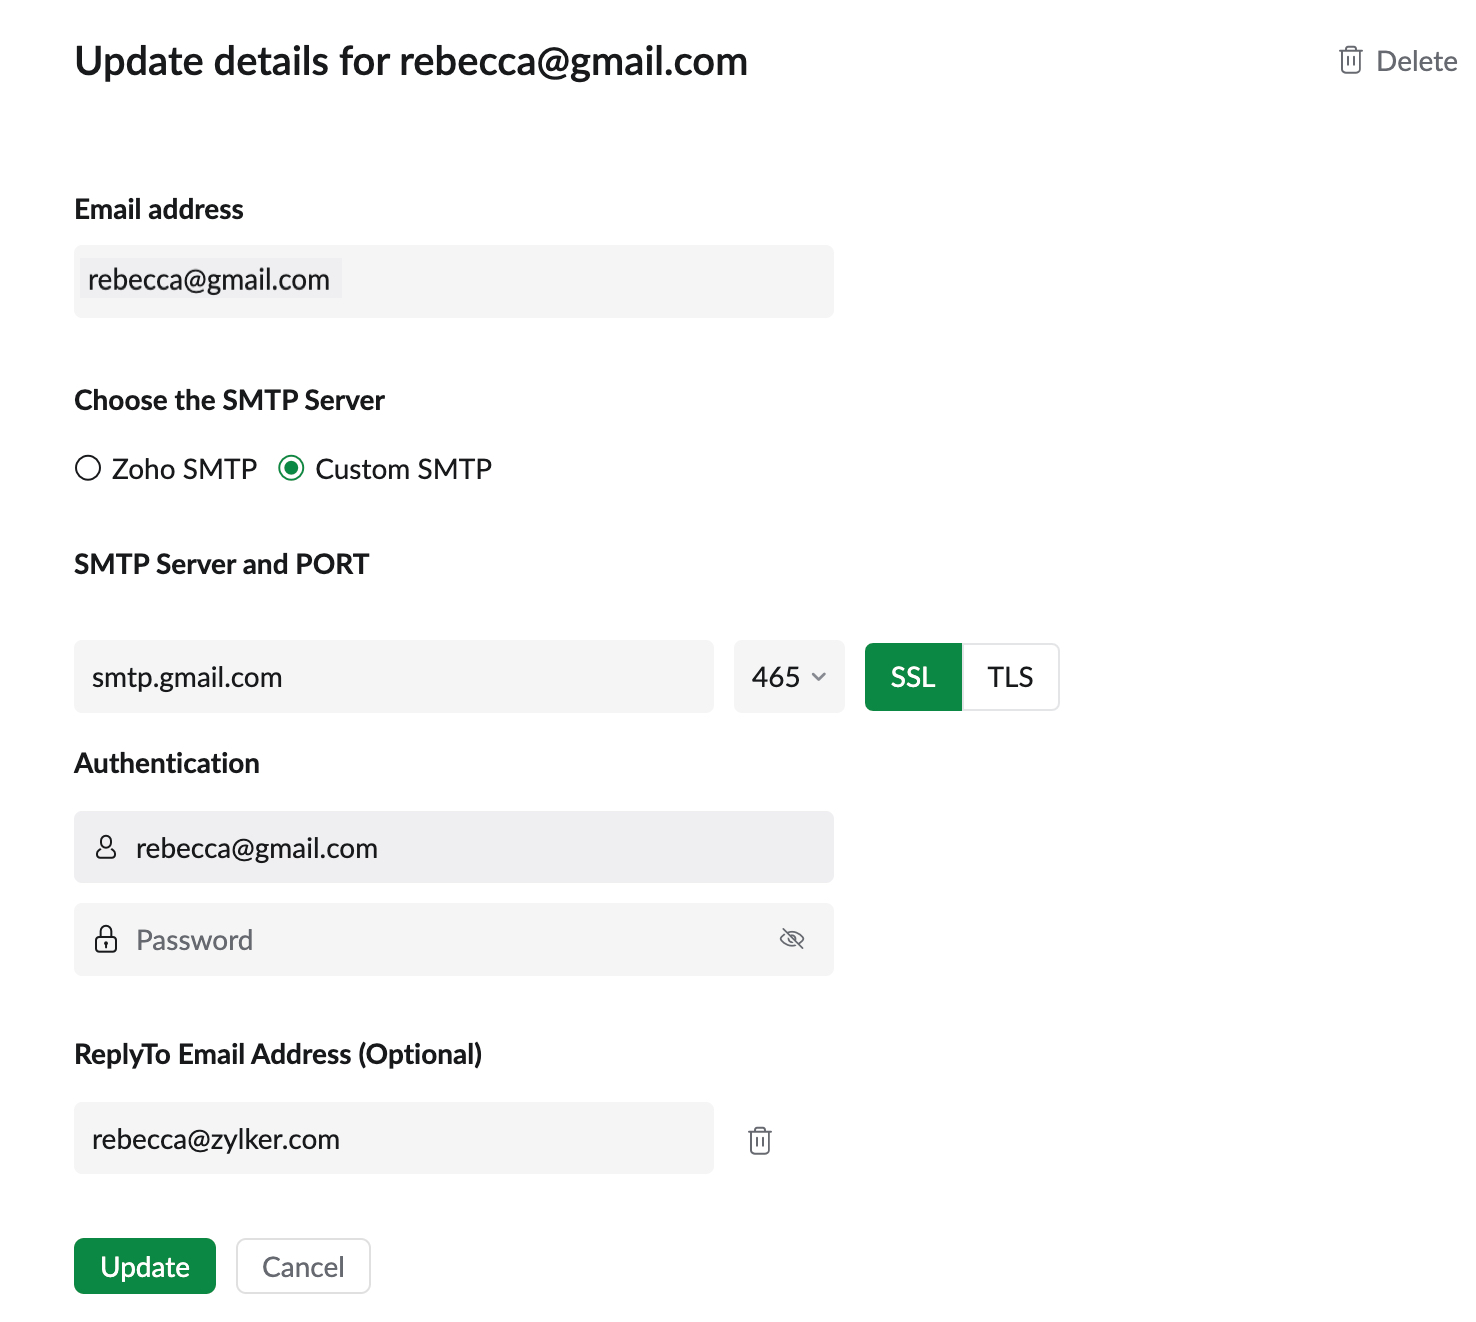
- Enter the desired ReplyTo address and click Update.
- A verification email will be sent to the ReplyTo address. Click on the Verify ReplyTo button.
- Enter the Confirmation code sent in the verification email.
- Click Verify.
The entered email will be added as the ReplyTo address for the particular From address.
Note:
Verify ReplyTo button will be available only if the associated From address is already verified.


