Branding
Zoho Payments allows you to reflect your brand’s identity during every transaction by customizing your name, logo, and colors displayed on the checkout widget and payment links. This provides a professional payment experience, enhances your brand visibility, and reassures customers that they are making the payment to the right business.
To configure your branding settings:
-
Go to Settings and click Branding.
-
Update the Business Name and Logo:
- The business name will be auto-populated from your Doing Business As (DBA). If your DBA is not available, for Individual or Sole Proprietorships, the Account Name will be displayed and for the other business types, the Legal Business Name will be displayed.
- Drag and drop or choose file under Logo. To remove the logo, click the Delete icon on your uploaded logo.
Insight: Upload a square image that is at least 256×256 pixels and under 1MB. The image should be PNG, JPG, or JPEG formats.
-
Update the theme to match your brand colors:
- Select the Brand Color, which is the primary color used for headers and other elements.
- Choose an Accent Color, which is the secondary color used for key UI elements such as buttons.
-
Choose the borders for the checkout elements: Sharp, Rounded, or Pill.
-
Use the Preview section to see how your branding will appear to customers during checkout.
-
Click Save to apply the changes.
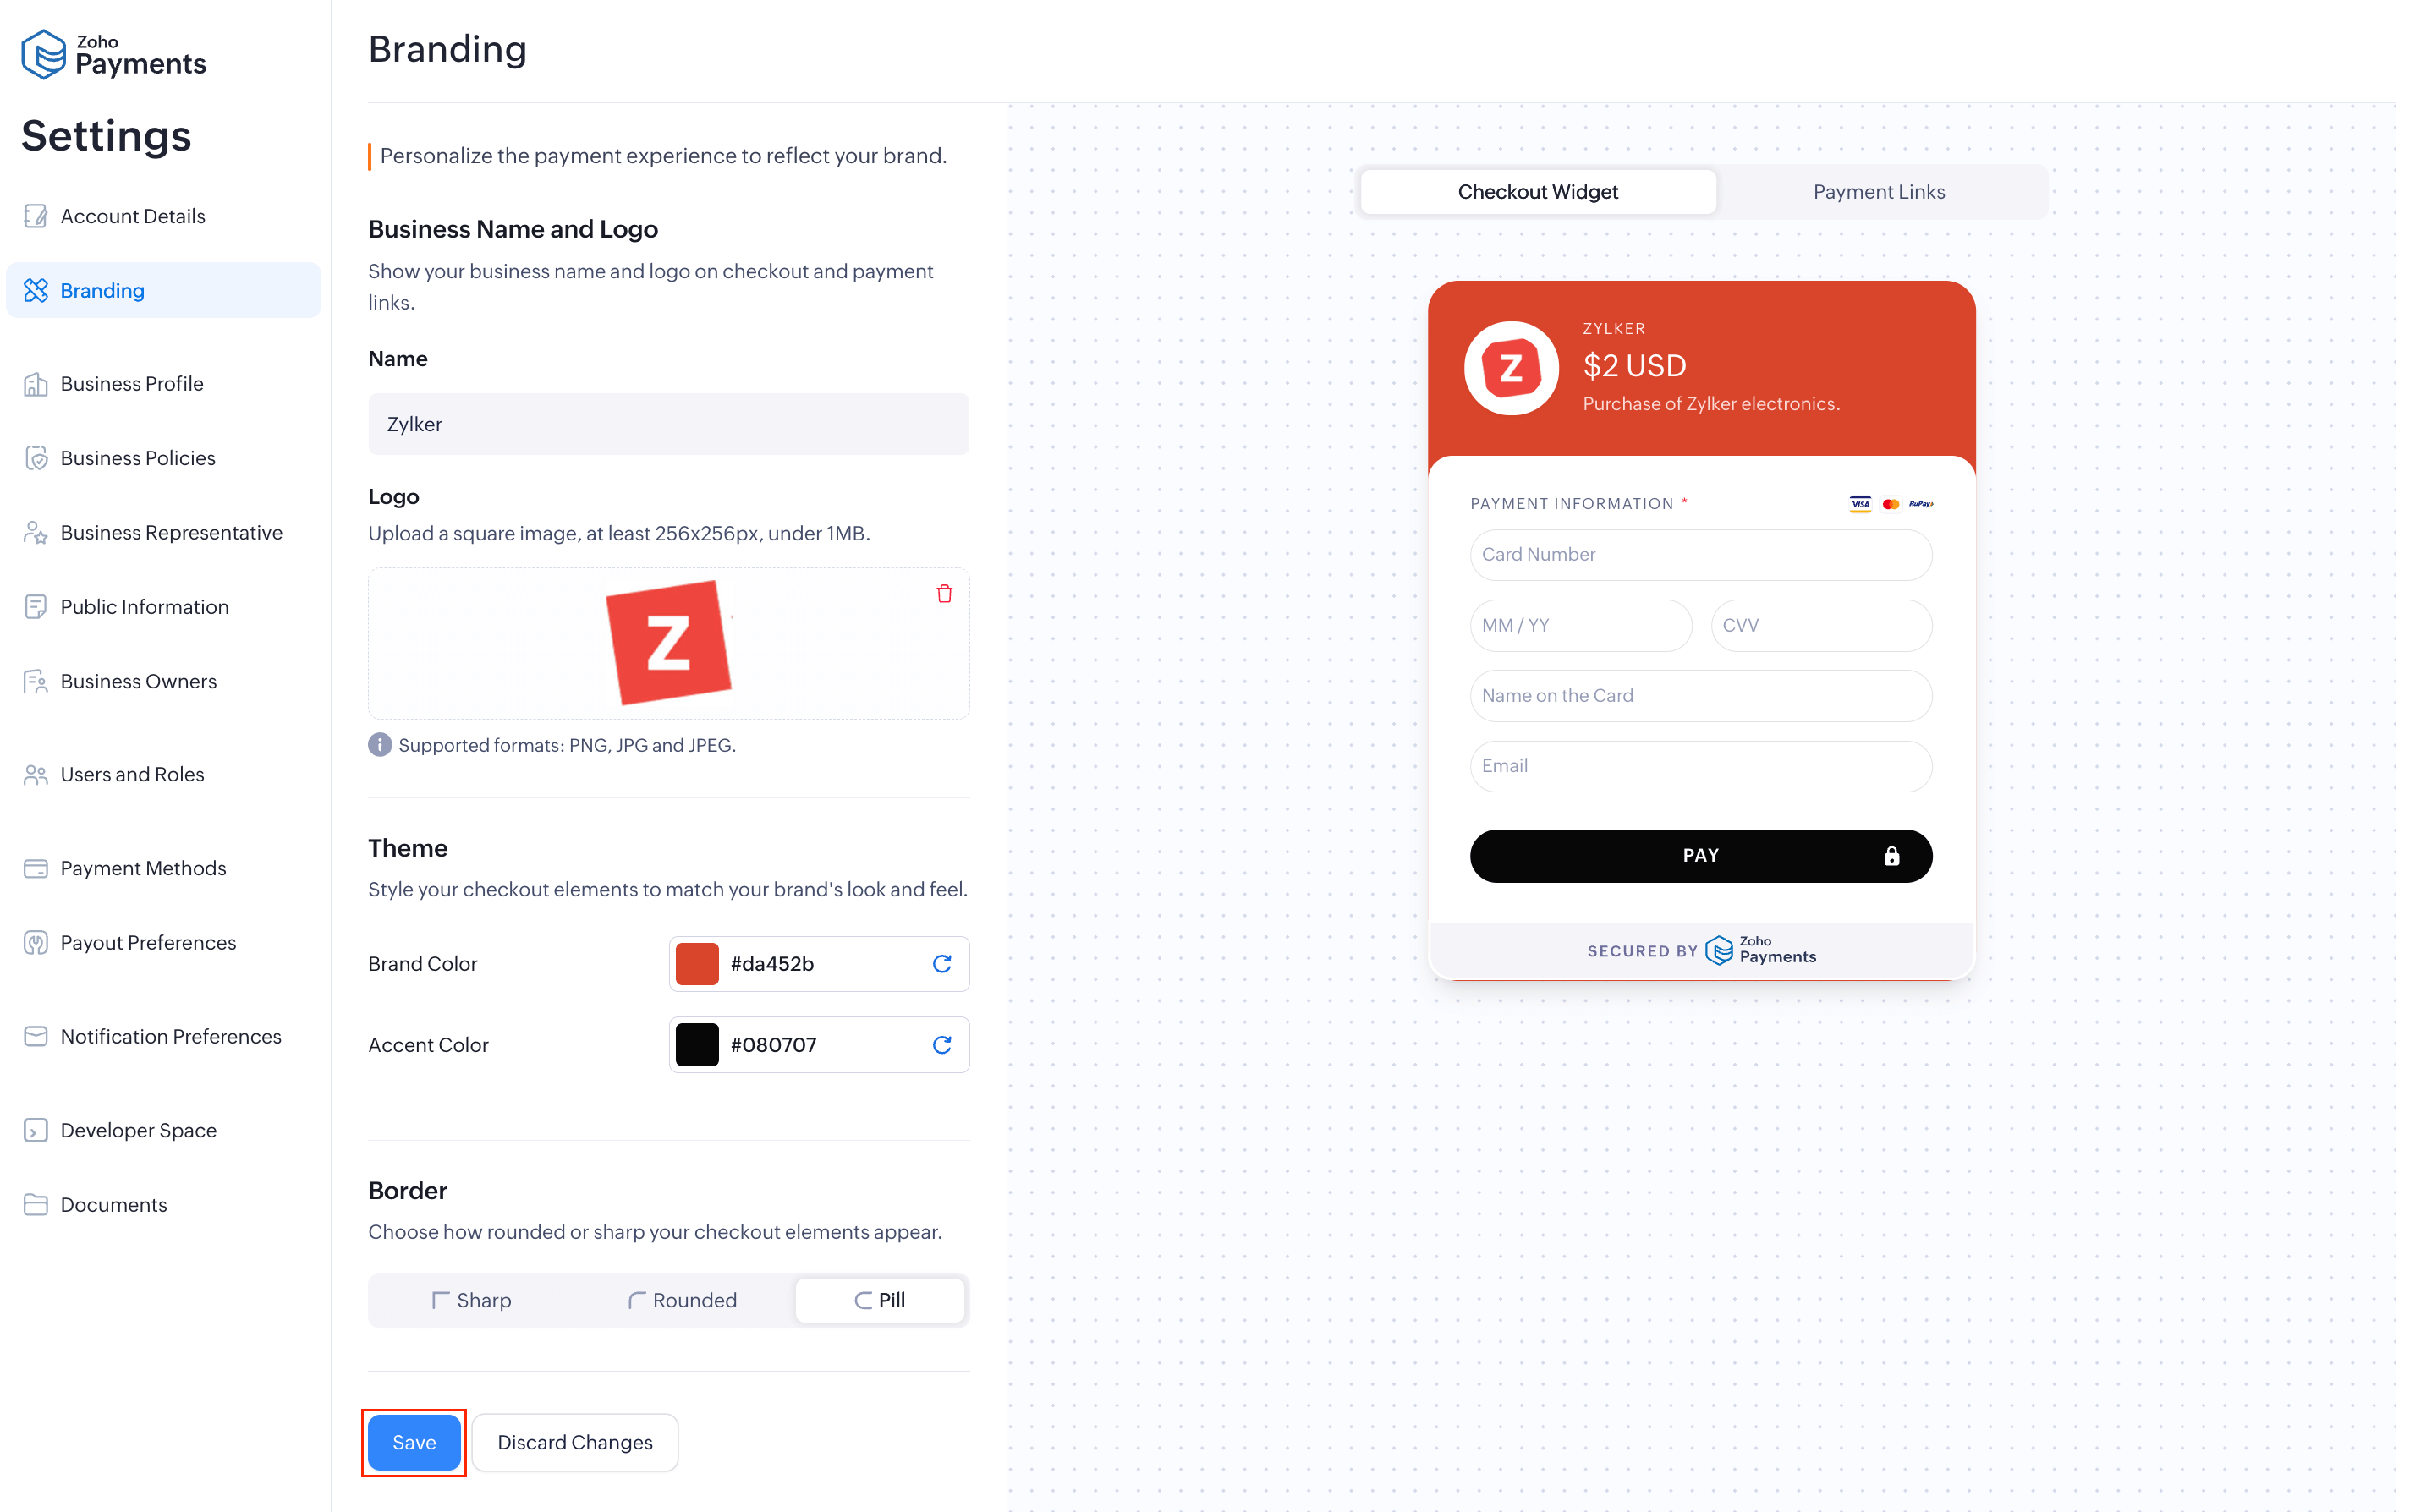
Your logo, theme, and border changes will apply to the checkout widget and payment links shared with your customers.
 Walkthrough of Zoho Payments personalized to your business needs