How to bring your personal emails to Zoho TeamInbox
- Published : August 18, 2025
- Last Updated : August 18, 2025
- 184 Views
- 3 Min Read
Managing multiple email accounts is tiring. One minute you’re replying to a customer email from your team’s shared inbox, and the next you’re switching tabs to check your personal email account.
But what if you didn't have to jump between those tabs? What if all your personal and shared emails were accessible from a single place?
That’s exactly what Zoho TeamInbox lets you do with our Personal Inbox feature.
What’s a personal inbox?
It’s like your private space within Zoho TeamInbox, where all your individual emails land. Now you don't have to leave your workspace every time you want to check your personal emails. In TeamInbox, you can find them right next to your work emails and get the same clean, collaborative experience. And don't worry; your team members can't view or access your personal inboxes. Only you can choose to share specific emails with them.
With your personal inbox, you can easily:
- Manage individual and shared emails from a single window.
- Send/reply to individual emails directly from TeamInbox.
- Use Share Draft to share email drafts with your team members.
- Perform actions like archiving, snoozing, tagging, and adding comments.
- Get one step closer to achieving Inbox Zero.
Creating a personal inbox in Zoho TeamInbox
To create a personal inbox
- Log in toZoho TeamInbox.
- Click the + icon in the top right corner of the left pane.
- Select Create Inbox and choose Personal.
- Provide a name for identification along with a description. Click Next.
- You'll see the option to Add a channel to this inbox, or you can do it later in your personal inbox settings.
- Click Create Inbox.
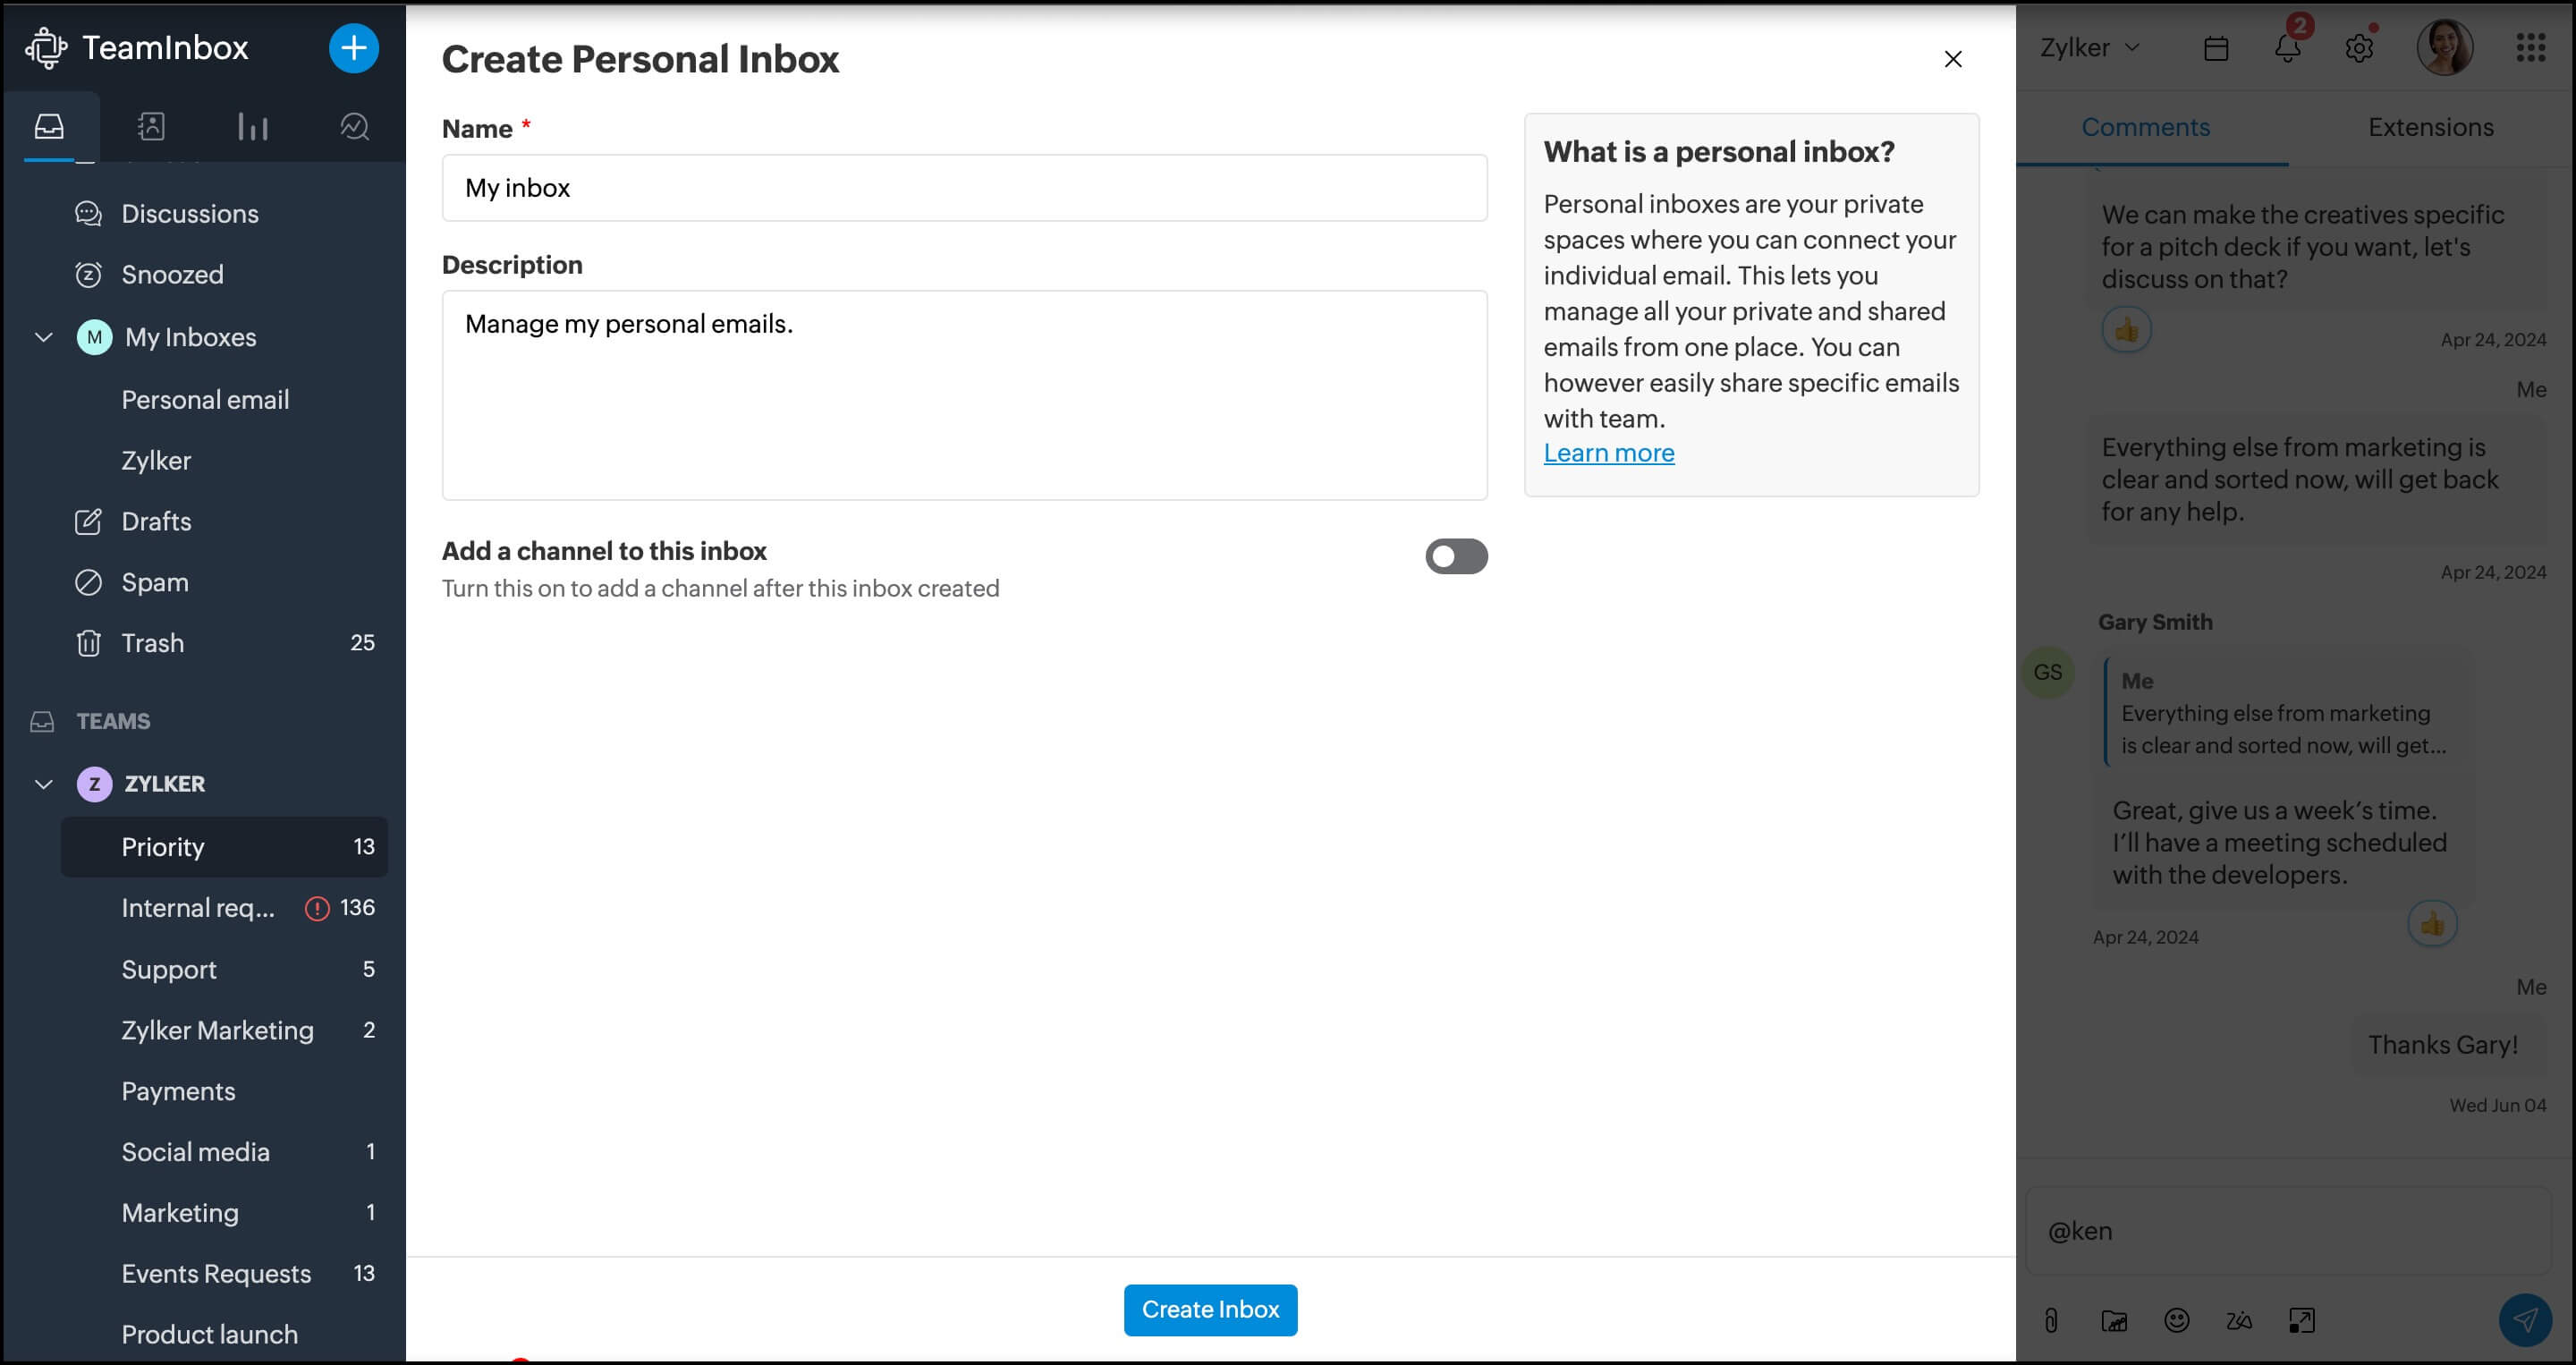
Your inbox will then be created, and you can access it from My inboxes in the left navigation panel.
Add an email channel to your personal inbox
Channels are the paths your emails take to get in and out of Zoho TeamInbox. You can add an email channel for sending and receiving emails.
To set up your email channel:
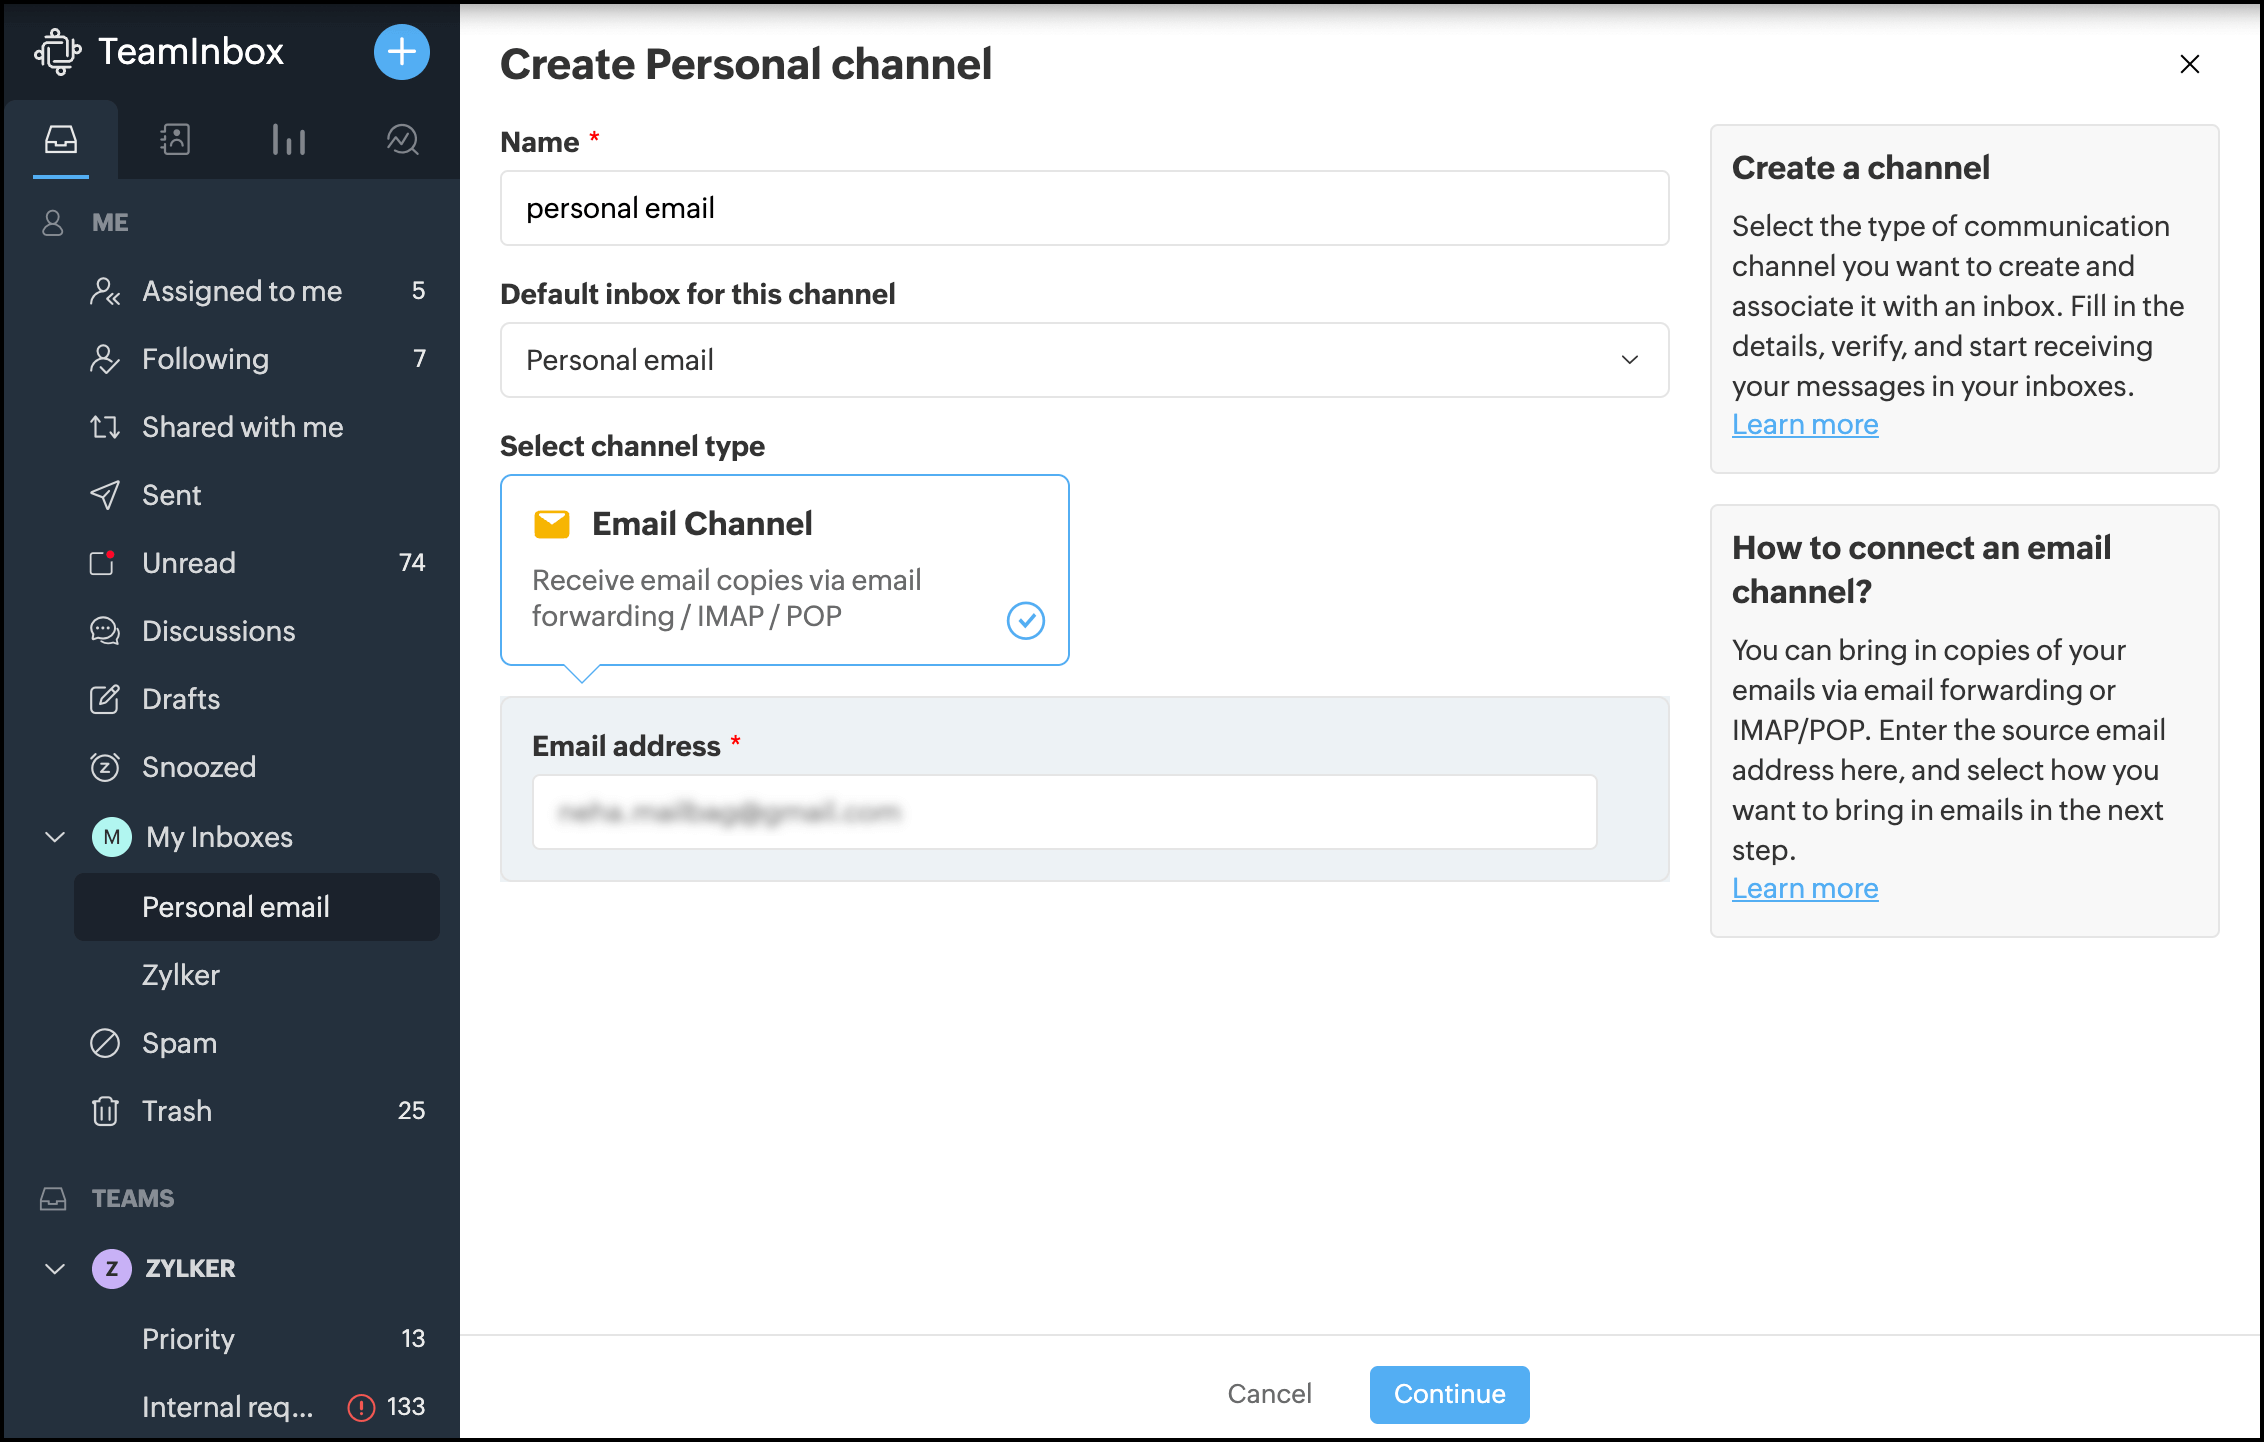
- From the left pane, click the + icon again and choose Channel > Personal Channel.
- Choose Email Channel.
- Next, enter the source email address and click Continue.
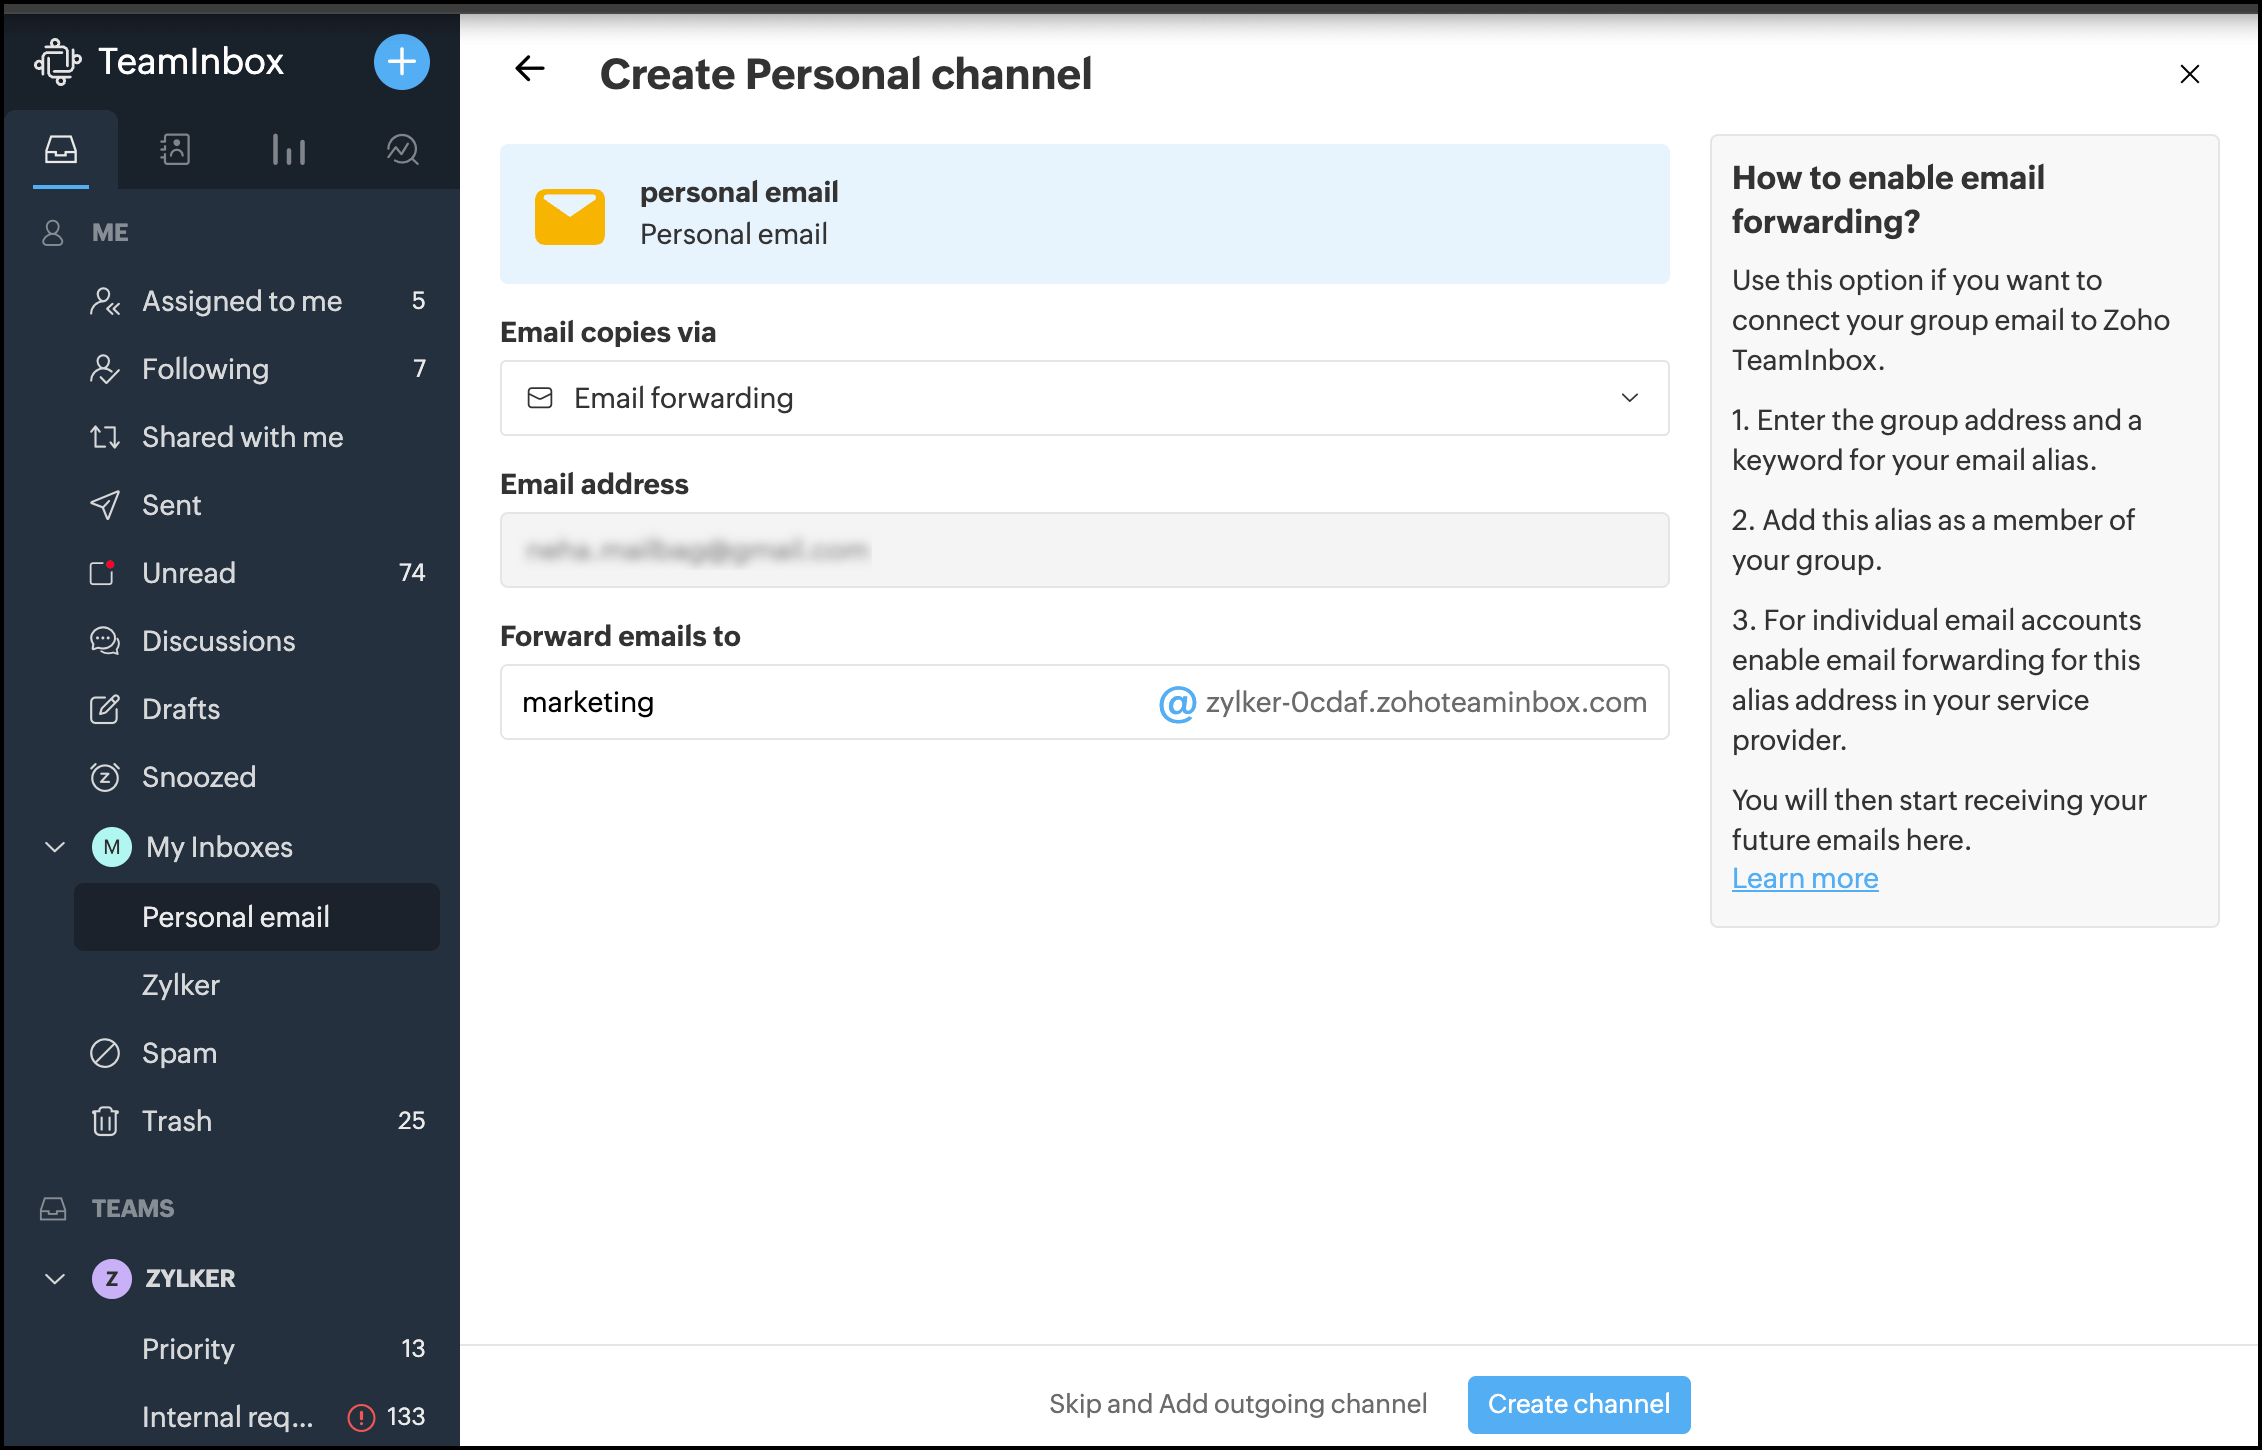
- Now pick how you'll copy your personal emails to Zoho TeamInbox.
- Email forwarding
- POP/IMAP
- Microsoft
Enter your email address and click Create channel.
Next, you'll set up your incoming configuration.
- Select the default inbox for the channel.
- Turn on/off additional settings based on your preferences.
- Next, click Save.
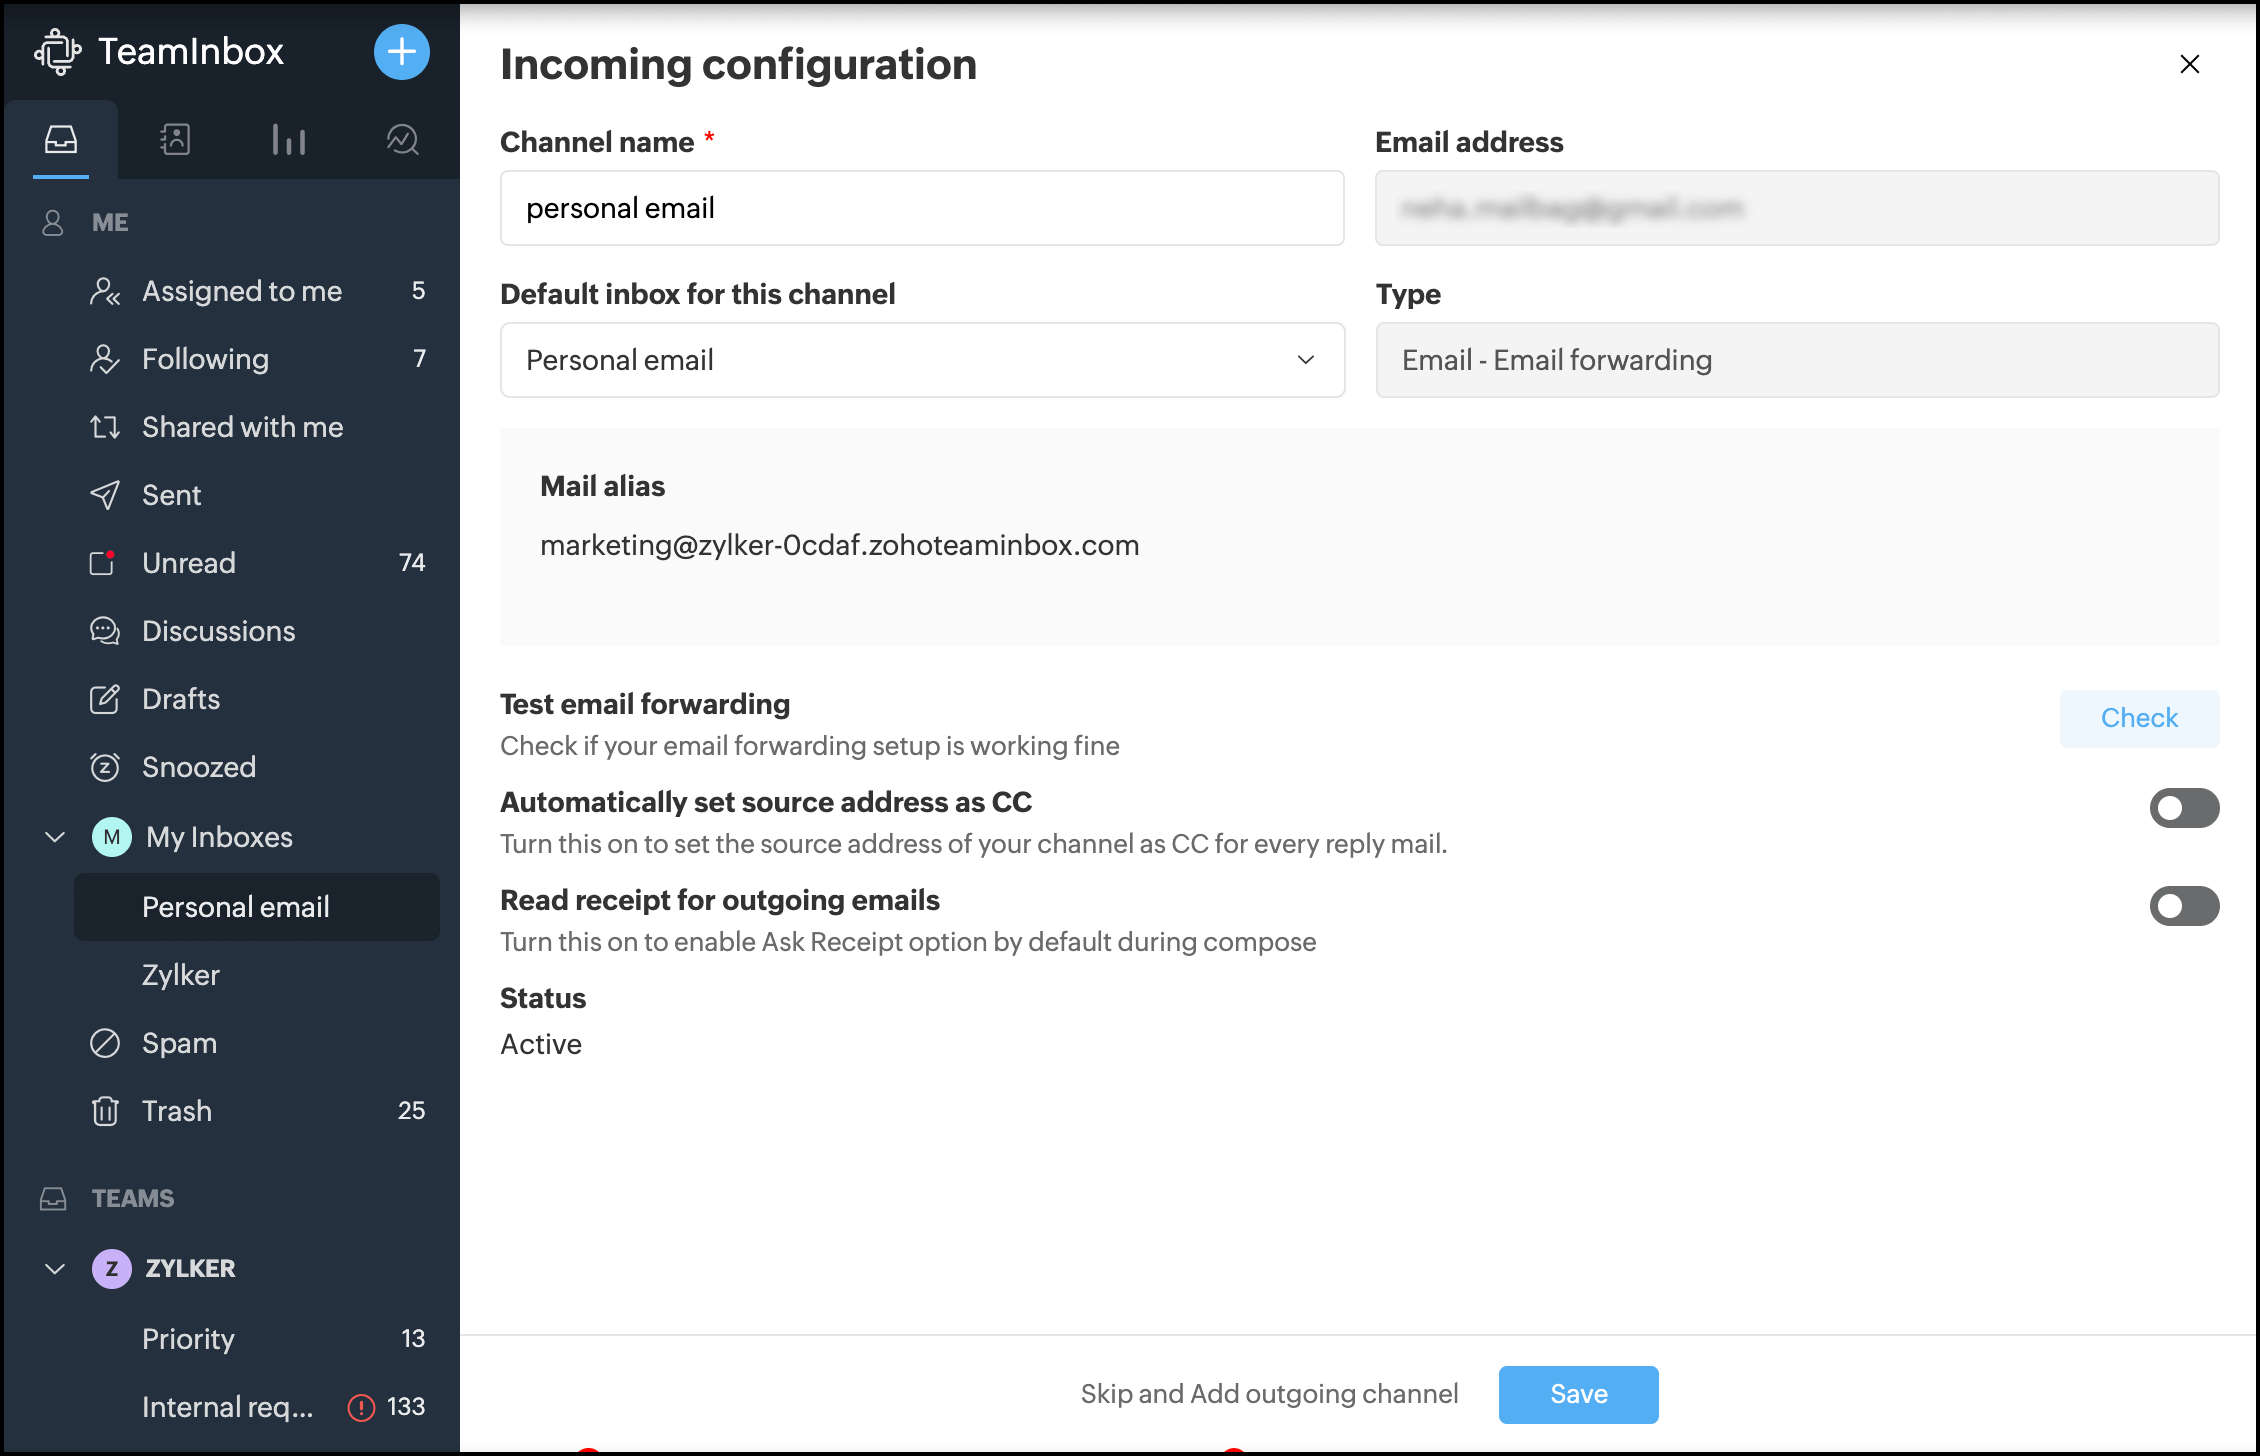
You can set up the outgoing configuration in the next window.
- Pick the outgoing mail provider. You can choose from:
- Microsoft Outlook
- Microsoft Office 365
- Others service providers
- Verify your source email address and provide any necessary permissions.
- Click Add.
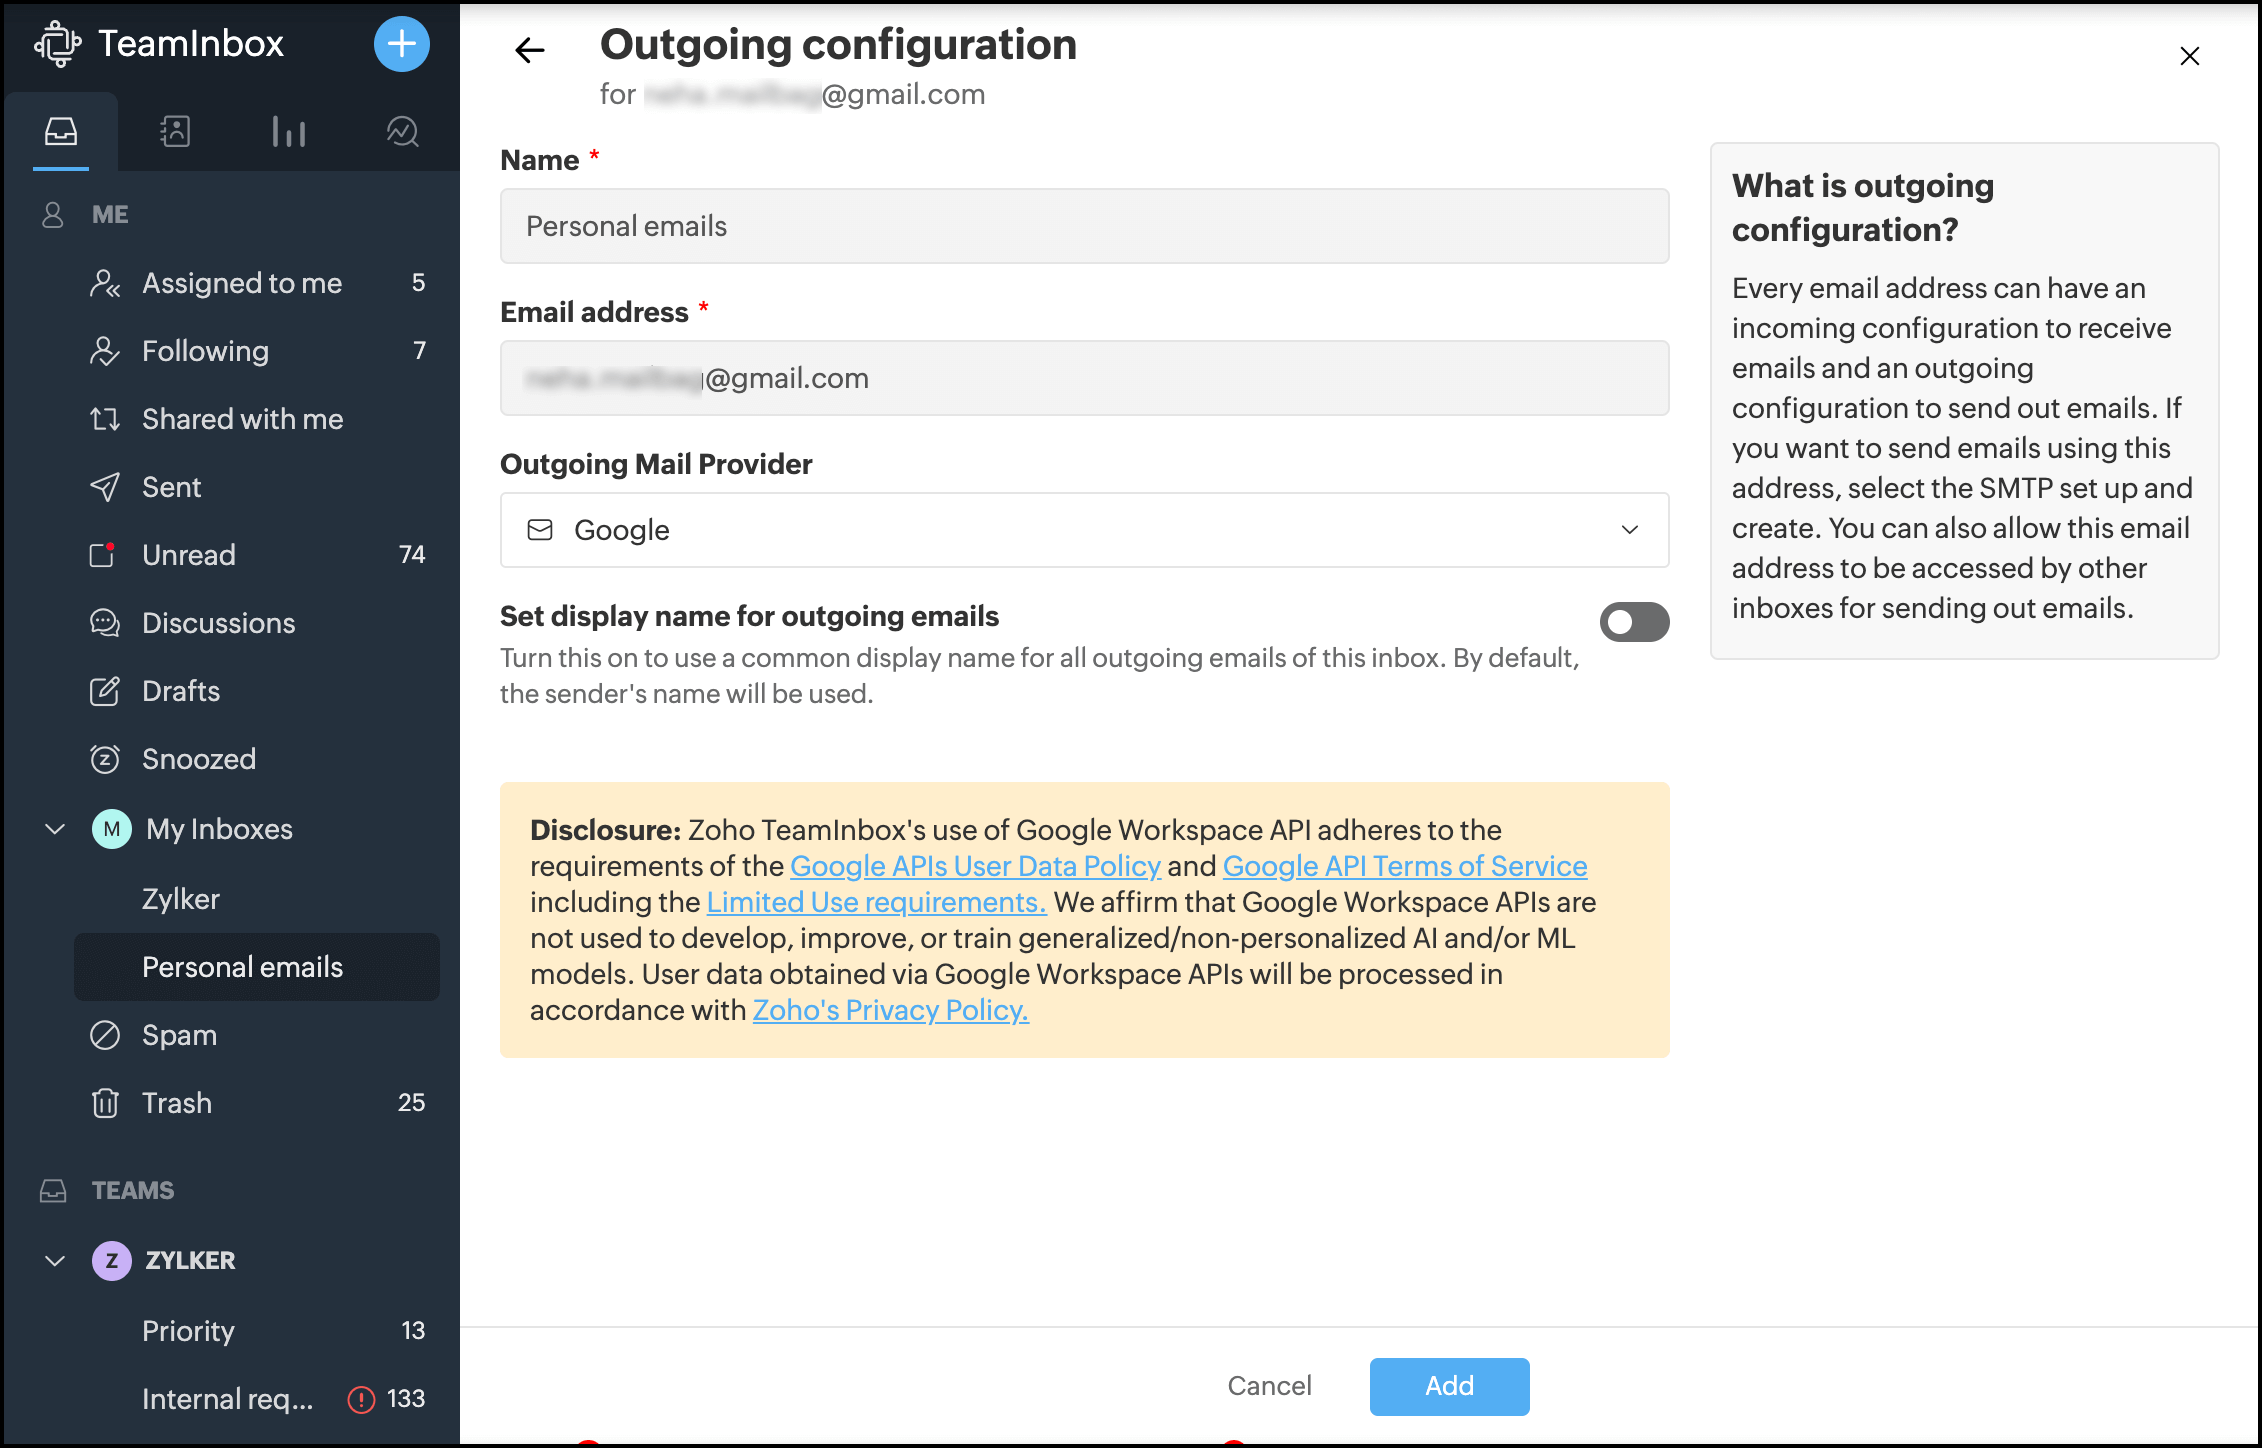
Your outgoing channel will be created, and now you can send and receive personal emails from Zoho TeamInbox.
Share specific messages with your team members
To share a thread with someone or have internal discussions on a thread with your team, you can use comments. Click the Comment icon from the top-right corner of the thread and add your comment there. Then @mention the team members you want to include in the discussion so they'll be notified about your comment.
Final thoughts
Final thoughts With the Personal Inbox feature in Zoho TeamInbox, you'll finally have the full picture of all your conversations in a single space. So create your personal inboxes today, and stay organized and on top of all your important conversations and tasks. If you're new to Zoho TeamInbox, try our 14-day free trial—and for any questions or feedback, feel free to email us at support@zohoteaminbox.com!
