
WooCommerce


WooCommerce is a free, open-source ecommerce solution that turns any WordPress website into an online store. The Zoho Payments WooCommerce plugin integrates Zoho Payments directly into your store’s checkout page, offering a secure payment experience for your customers.
Whether you’re a small business owner or an enterprise using WooCommerce, this plugin eliminates the need for manual payment setup and third-party redirection. It also provides real-time transaction tracking, automatic order status updates, and access to detailed reporting, all within your WordPress dashboard.
Prerequisites:
- Register your application in Zoho Developer Console to obtain your Client ID and Client Secret.
- The Zoho Payments WooCommerce plugin downloaded from the Github repository.
Register your Application
First, you must register your application as a server-based application with Zoho Developer Console to obtain your Client ID and Client Secret.
To register your application:
- Go to the Zoho Developer Console.
- Enter the Client Name, Homepage URL, and the Authorized Redirect URI.
| Parameter | Description |
|---|---|
| Client Name | A name to identify your application. |
| Homepage URL | The URL of your application’s homepage or main website. |
| Authorized Redirect URIs | The URL to which you’ll be redirected once access is granted. Ensure the Redirect URI is in this format: https://[Your WooCommerce base URL]/wp-admin/ |
-
Click CREATE.
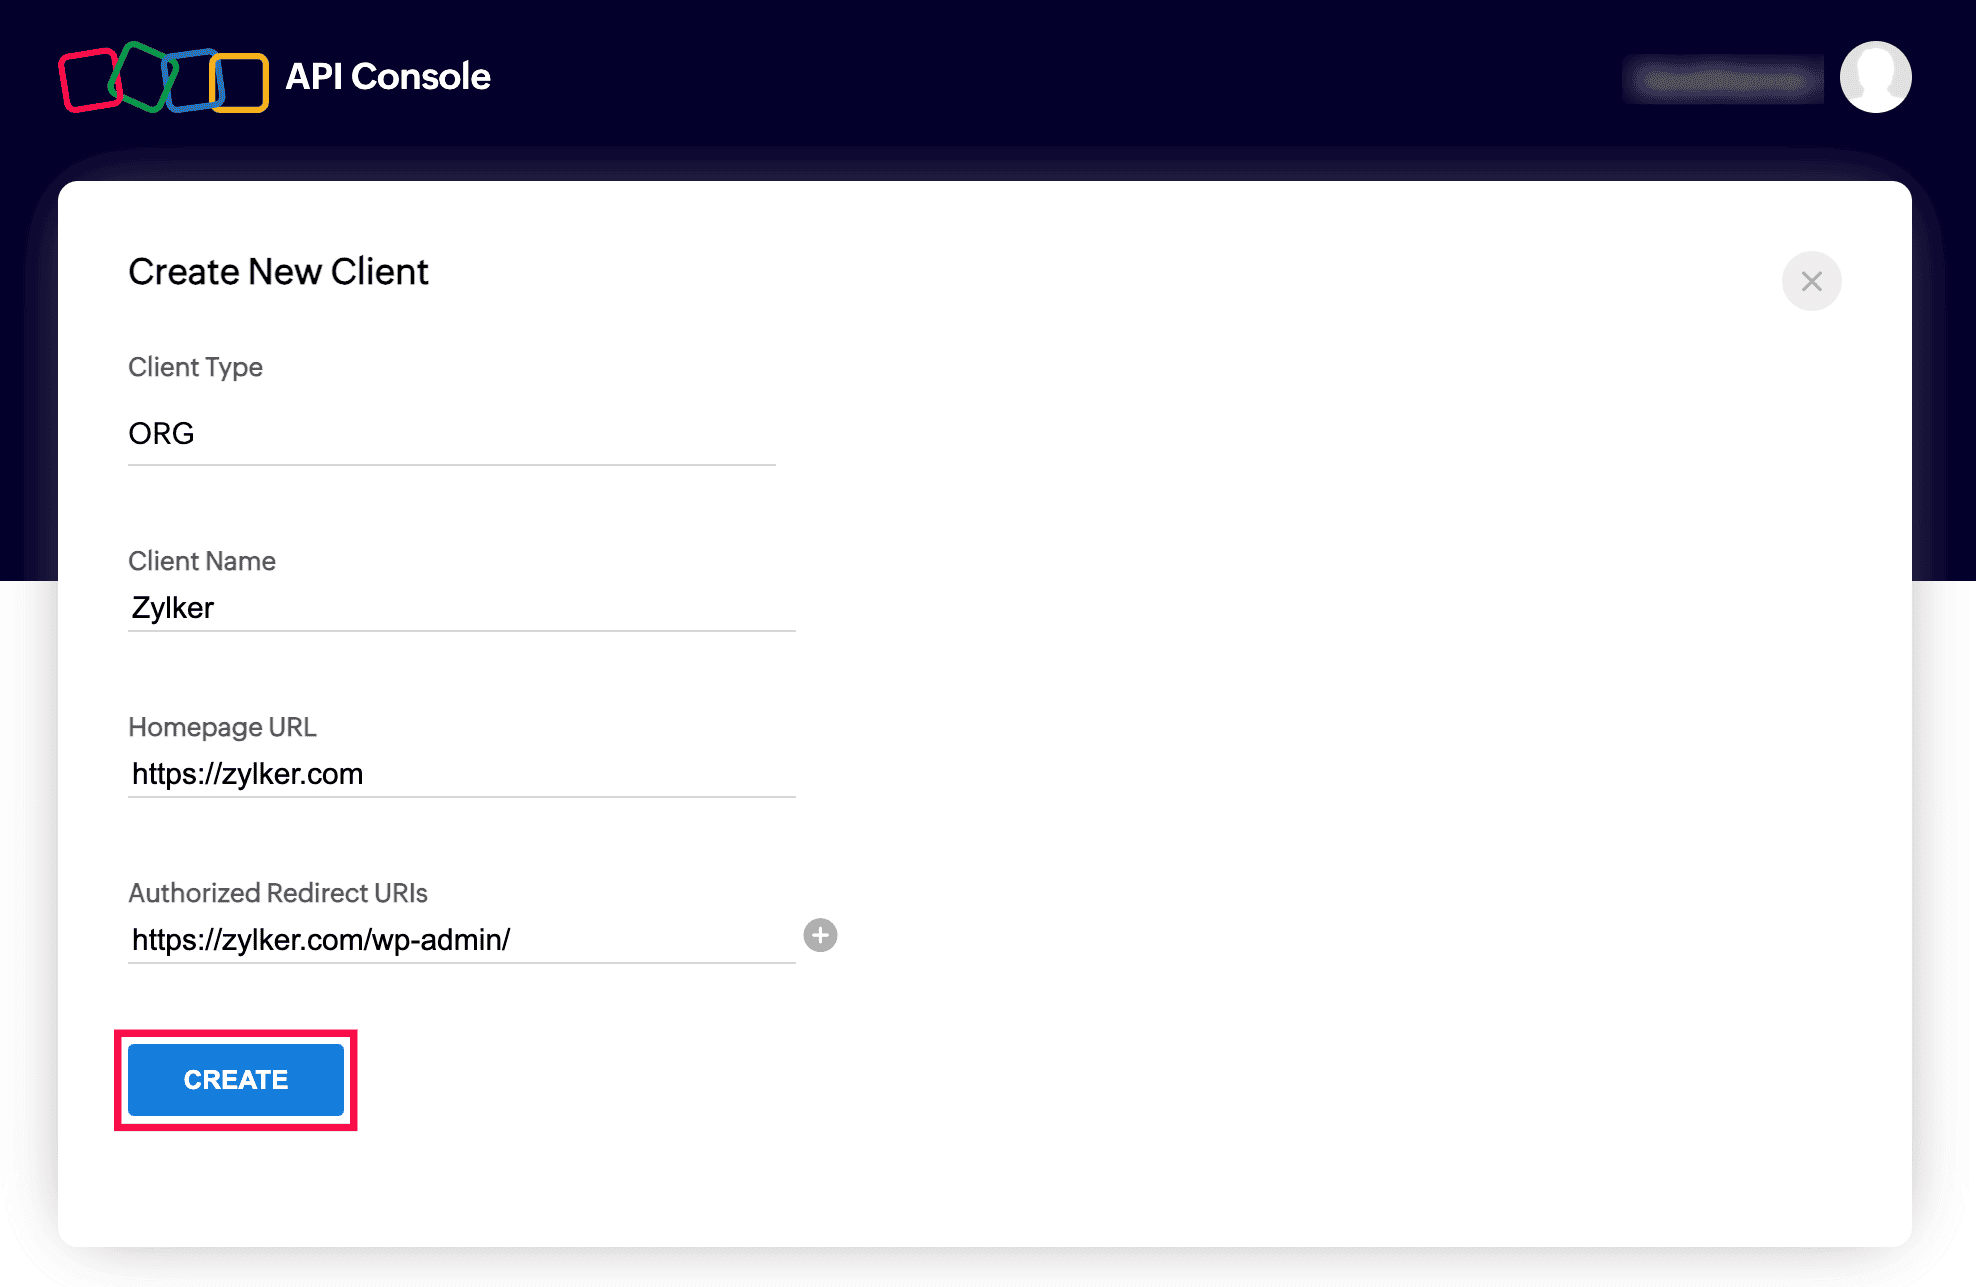
Your Client ID and Client Secret will be generated. You can access them from the Client Secret tab in the Zoho Developer Console.
Note: Keep your credentials secure and do not share them with anyone.
Set Up WooCommerce Plugin
Install the Plugin
Install and activate the Zoho Payments plugin on your WordPress site. Here’s how:
-
Log in to WordPress as an admin.
-
Go to Plugins, and click Add New.
-
Click Upload Plugin and choose the
.zipfile you downloaded from the GitHub repository.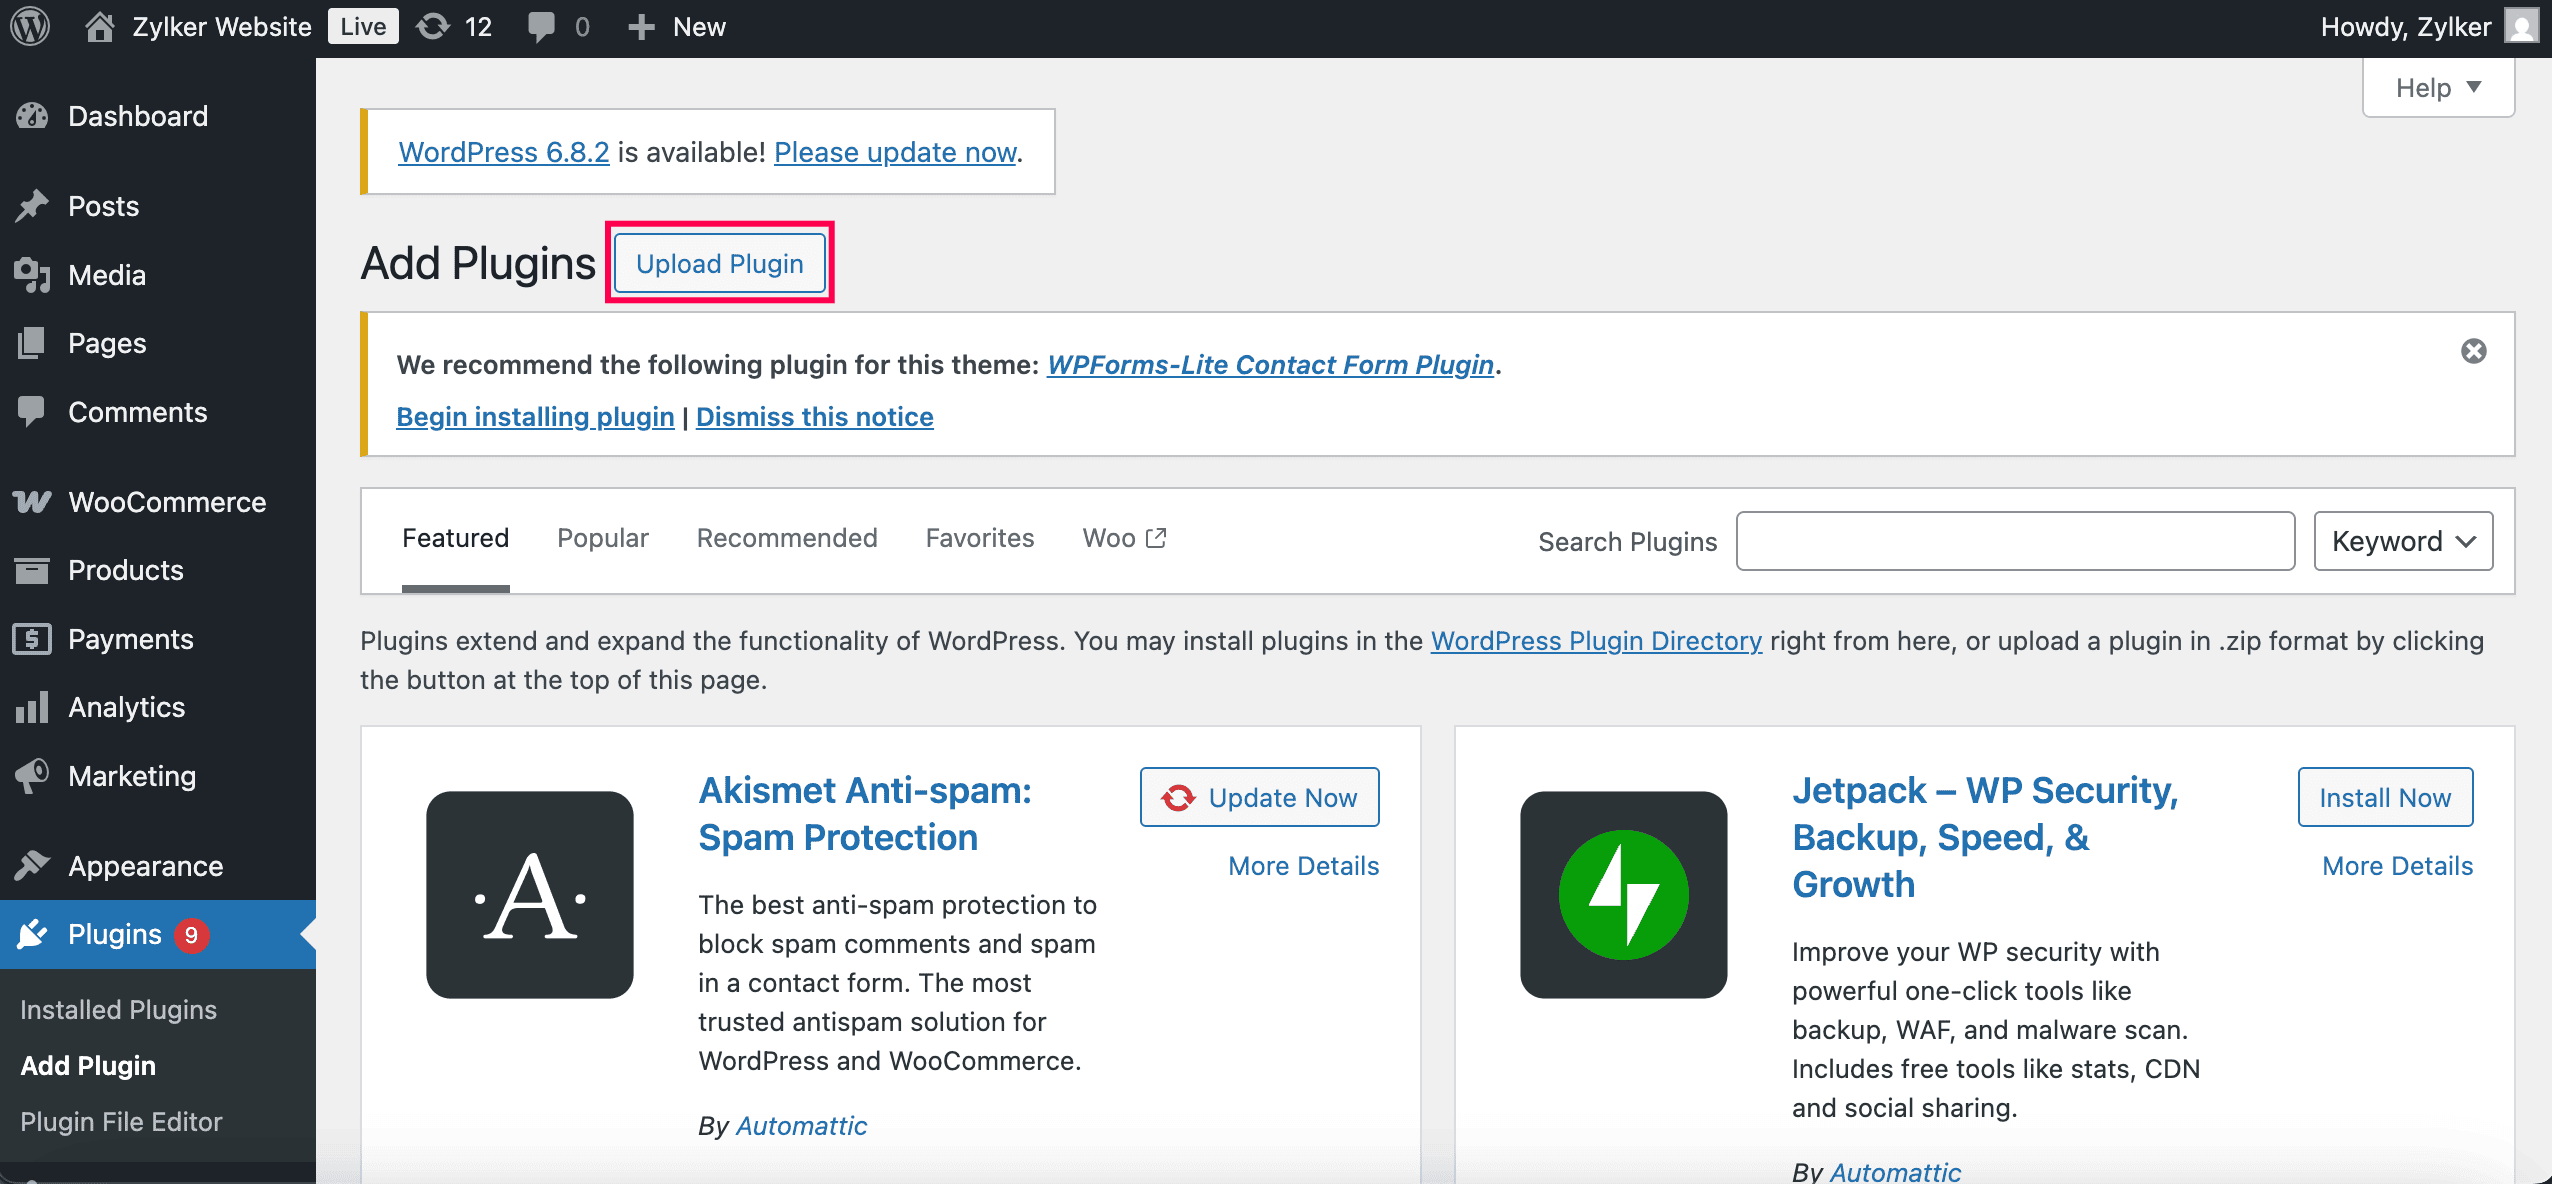
-
Click Install Now.
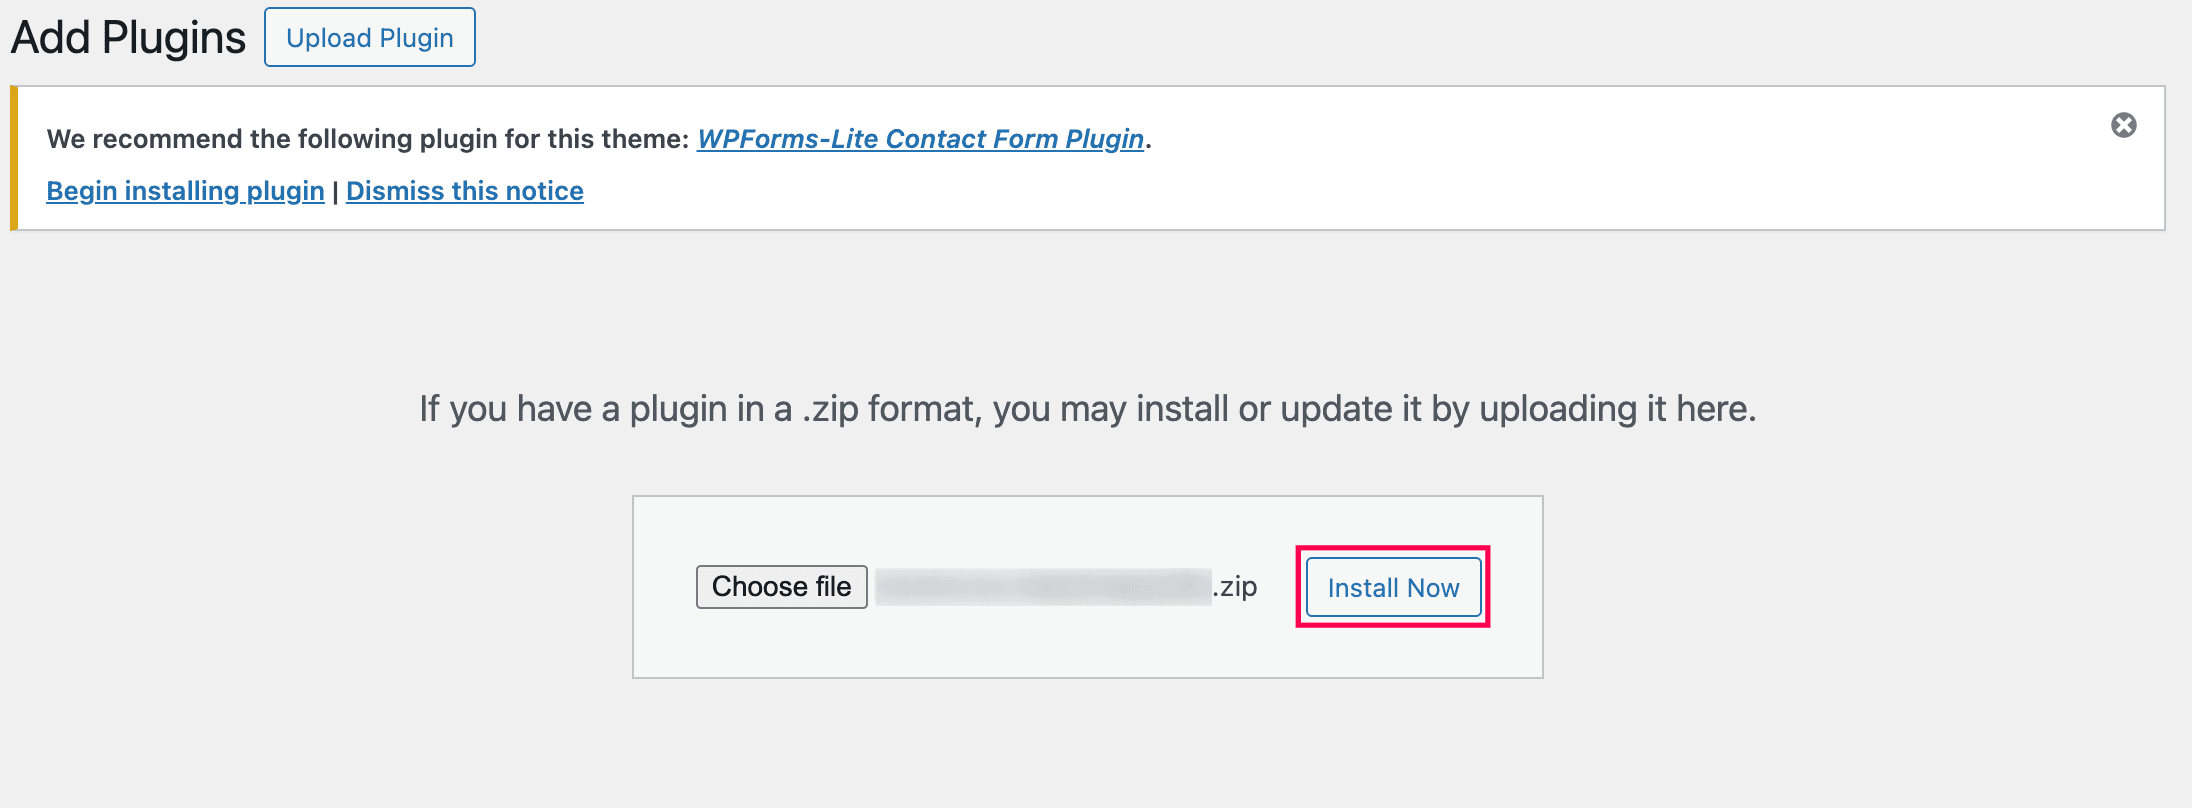
-
Scroll to the installed Zoho Payments plugin and click Activate.
The Zoho Payments - WooCommerce plugin is now installed and active on your WordPress site. You can proceed to configure it.
Enable Zoho Payments in WooCommerce
Once you have installed the plugin, enable it in your WordPress admin dashboard. To do so:
-
Go to WooCommerce from the left menu and select Settings.
-
Switch to the Payments tab.
-
Scroll down and click Enable next to Zoho Payments.
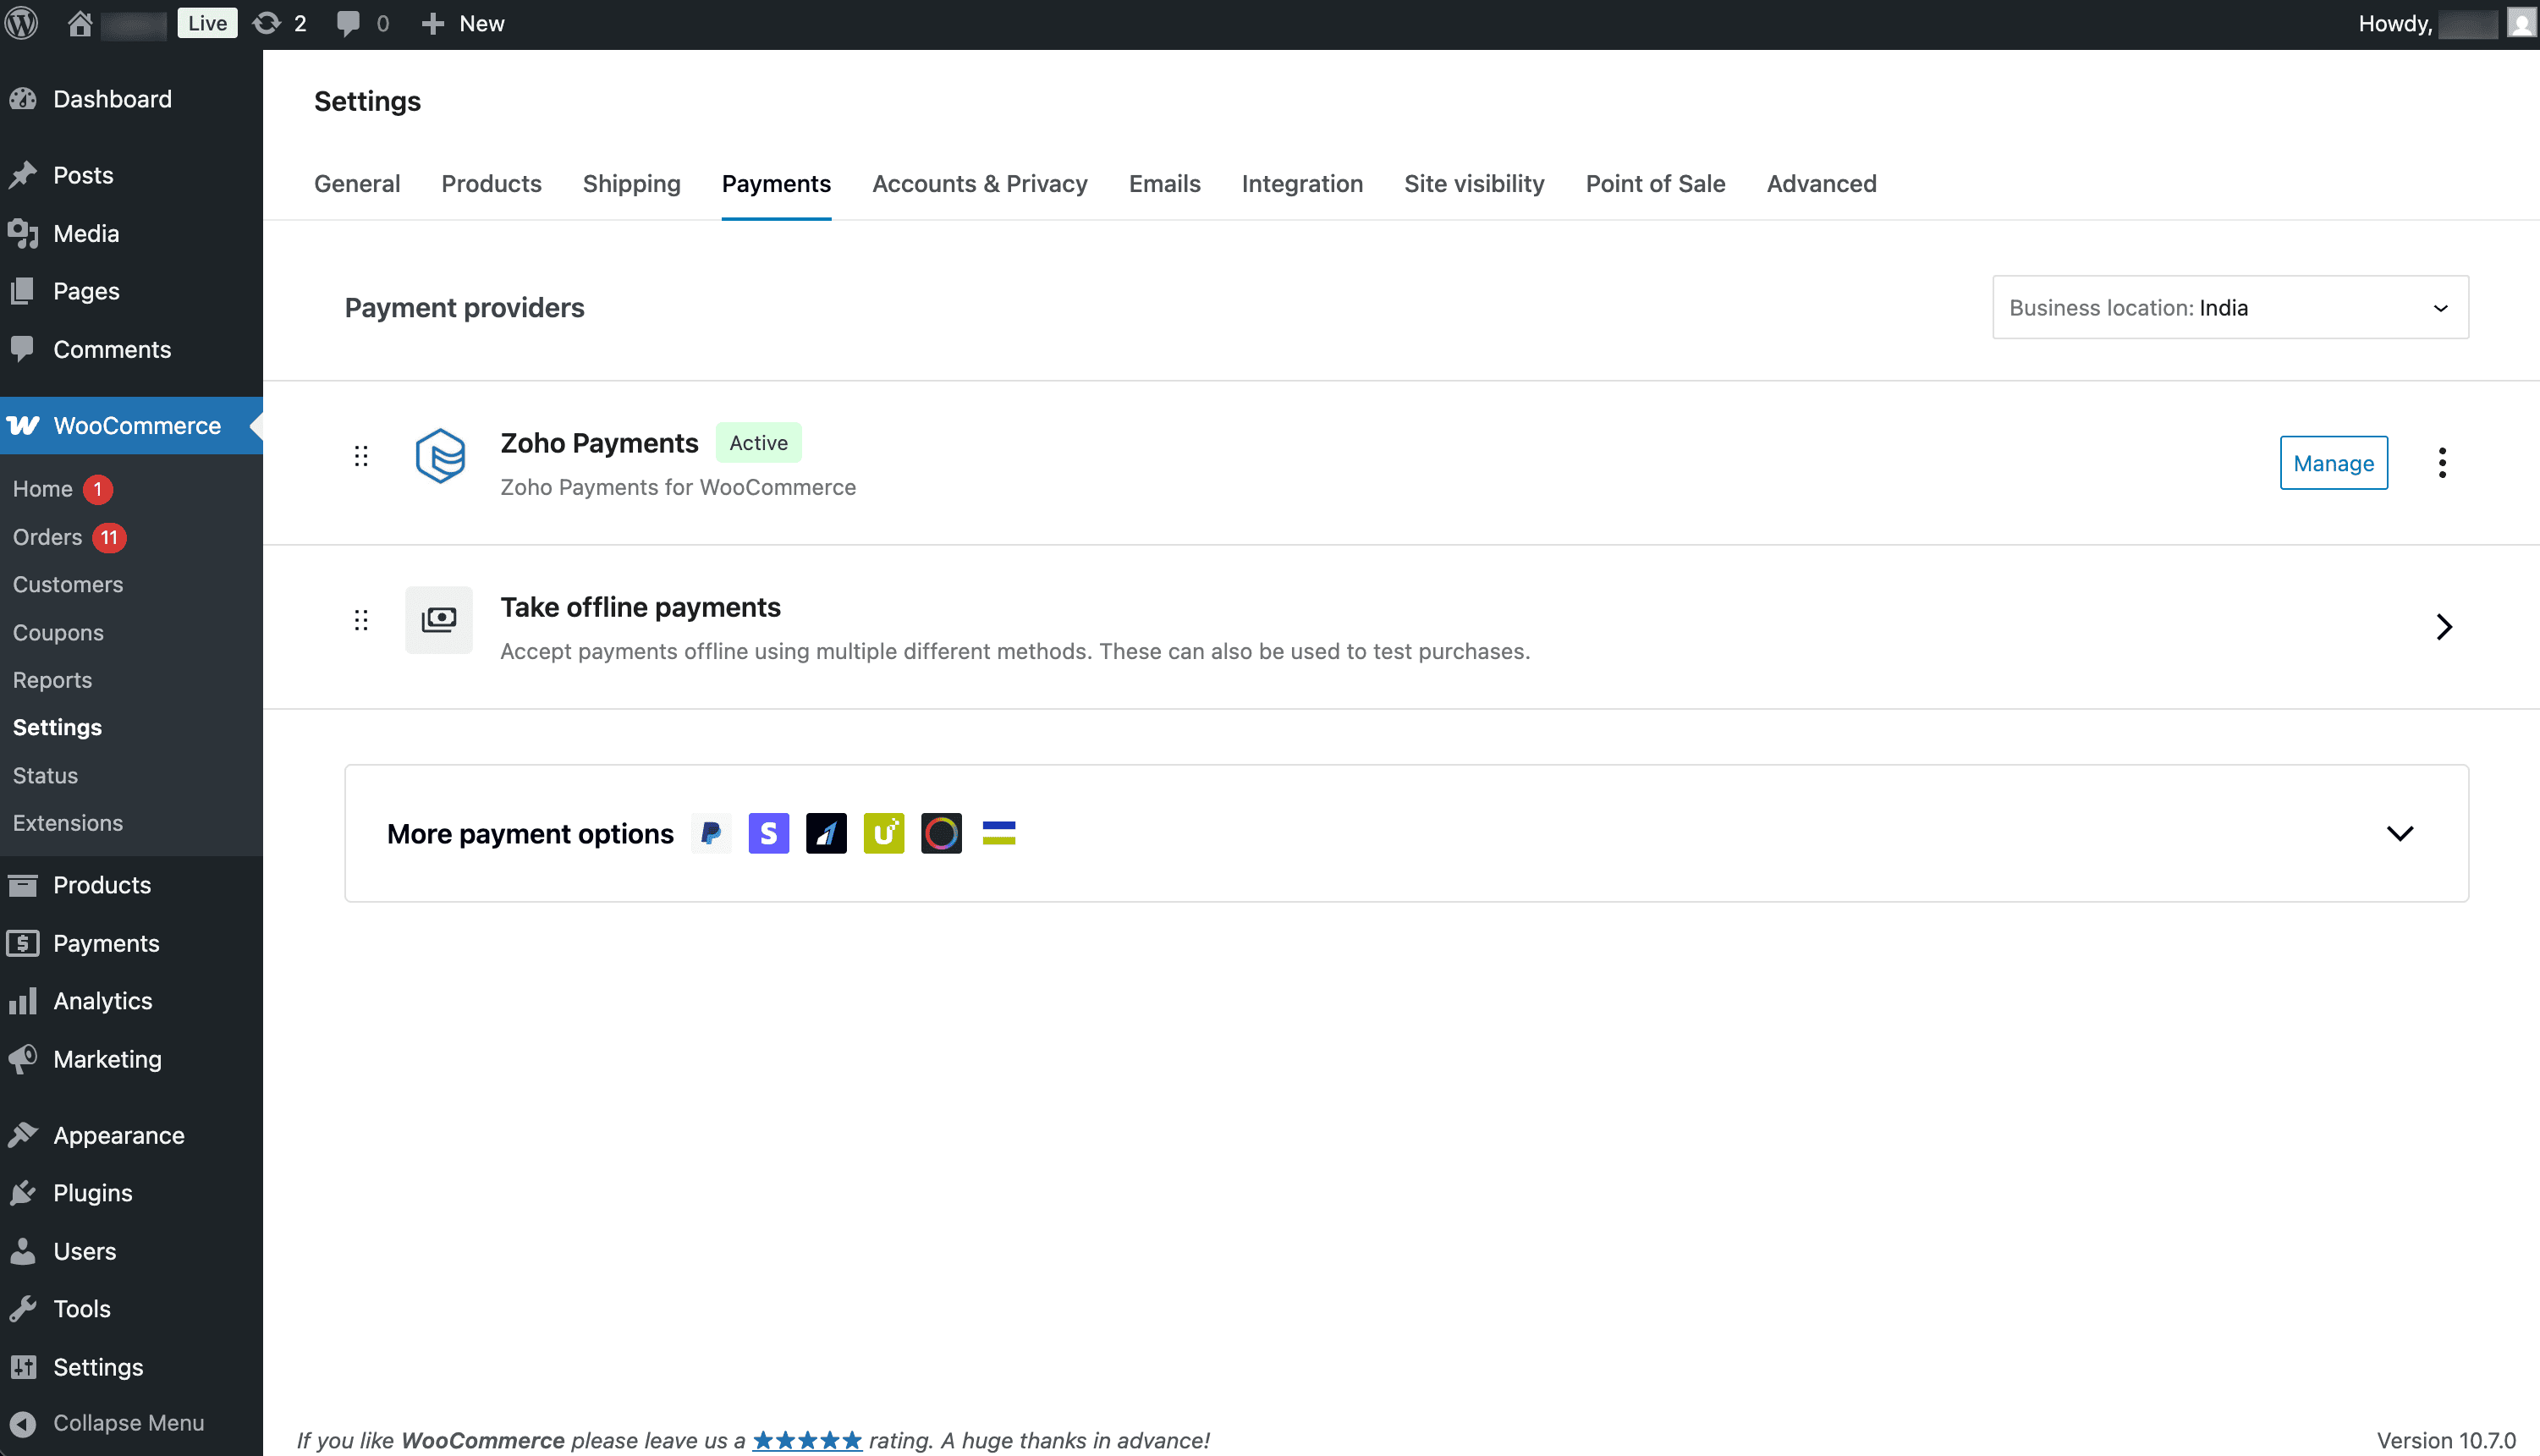
Your Zoho Payments plugin will be enabled and the status will be Active.
Connect Zoho Payments with WooCommerce
After enabling the plugin, connect your Zoho Payments account.
To connect:
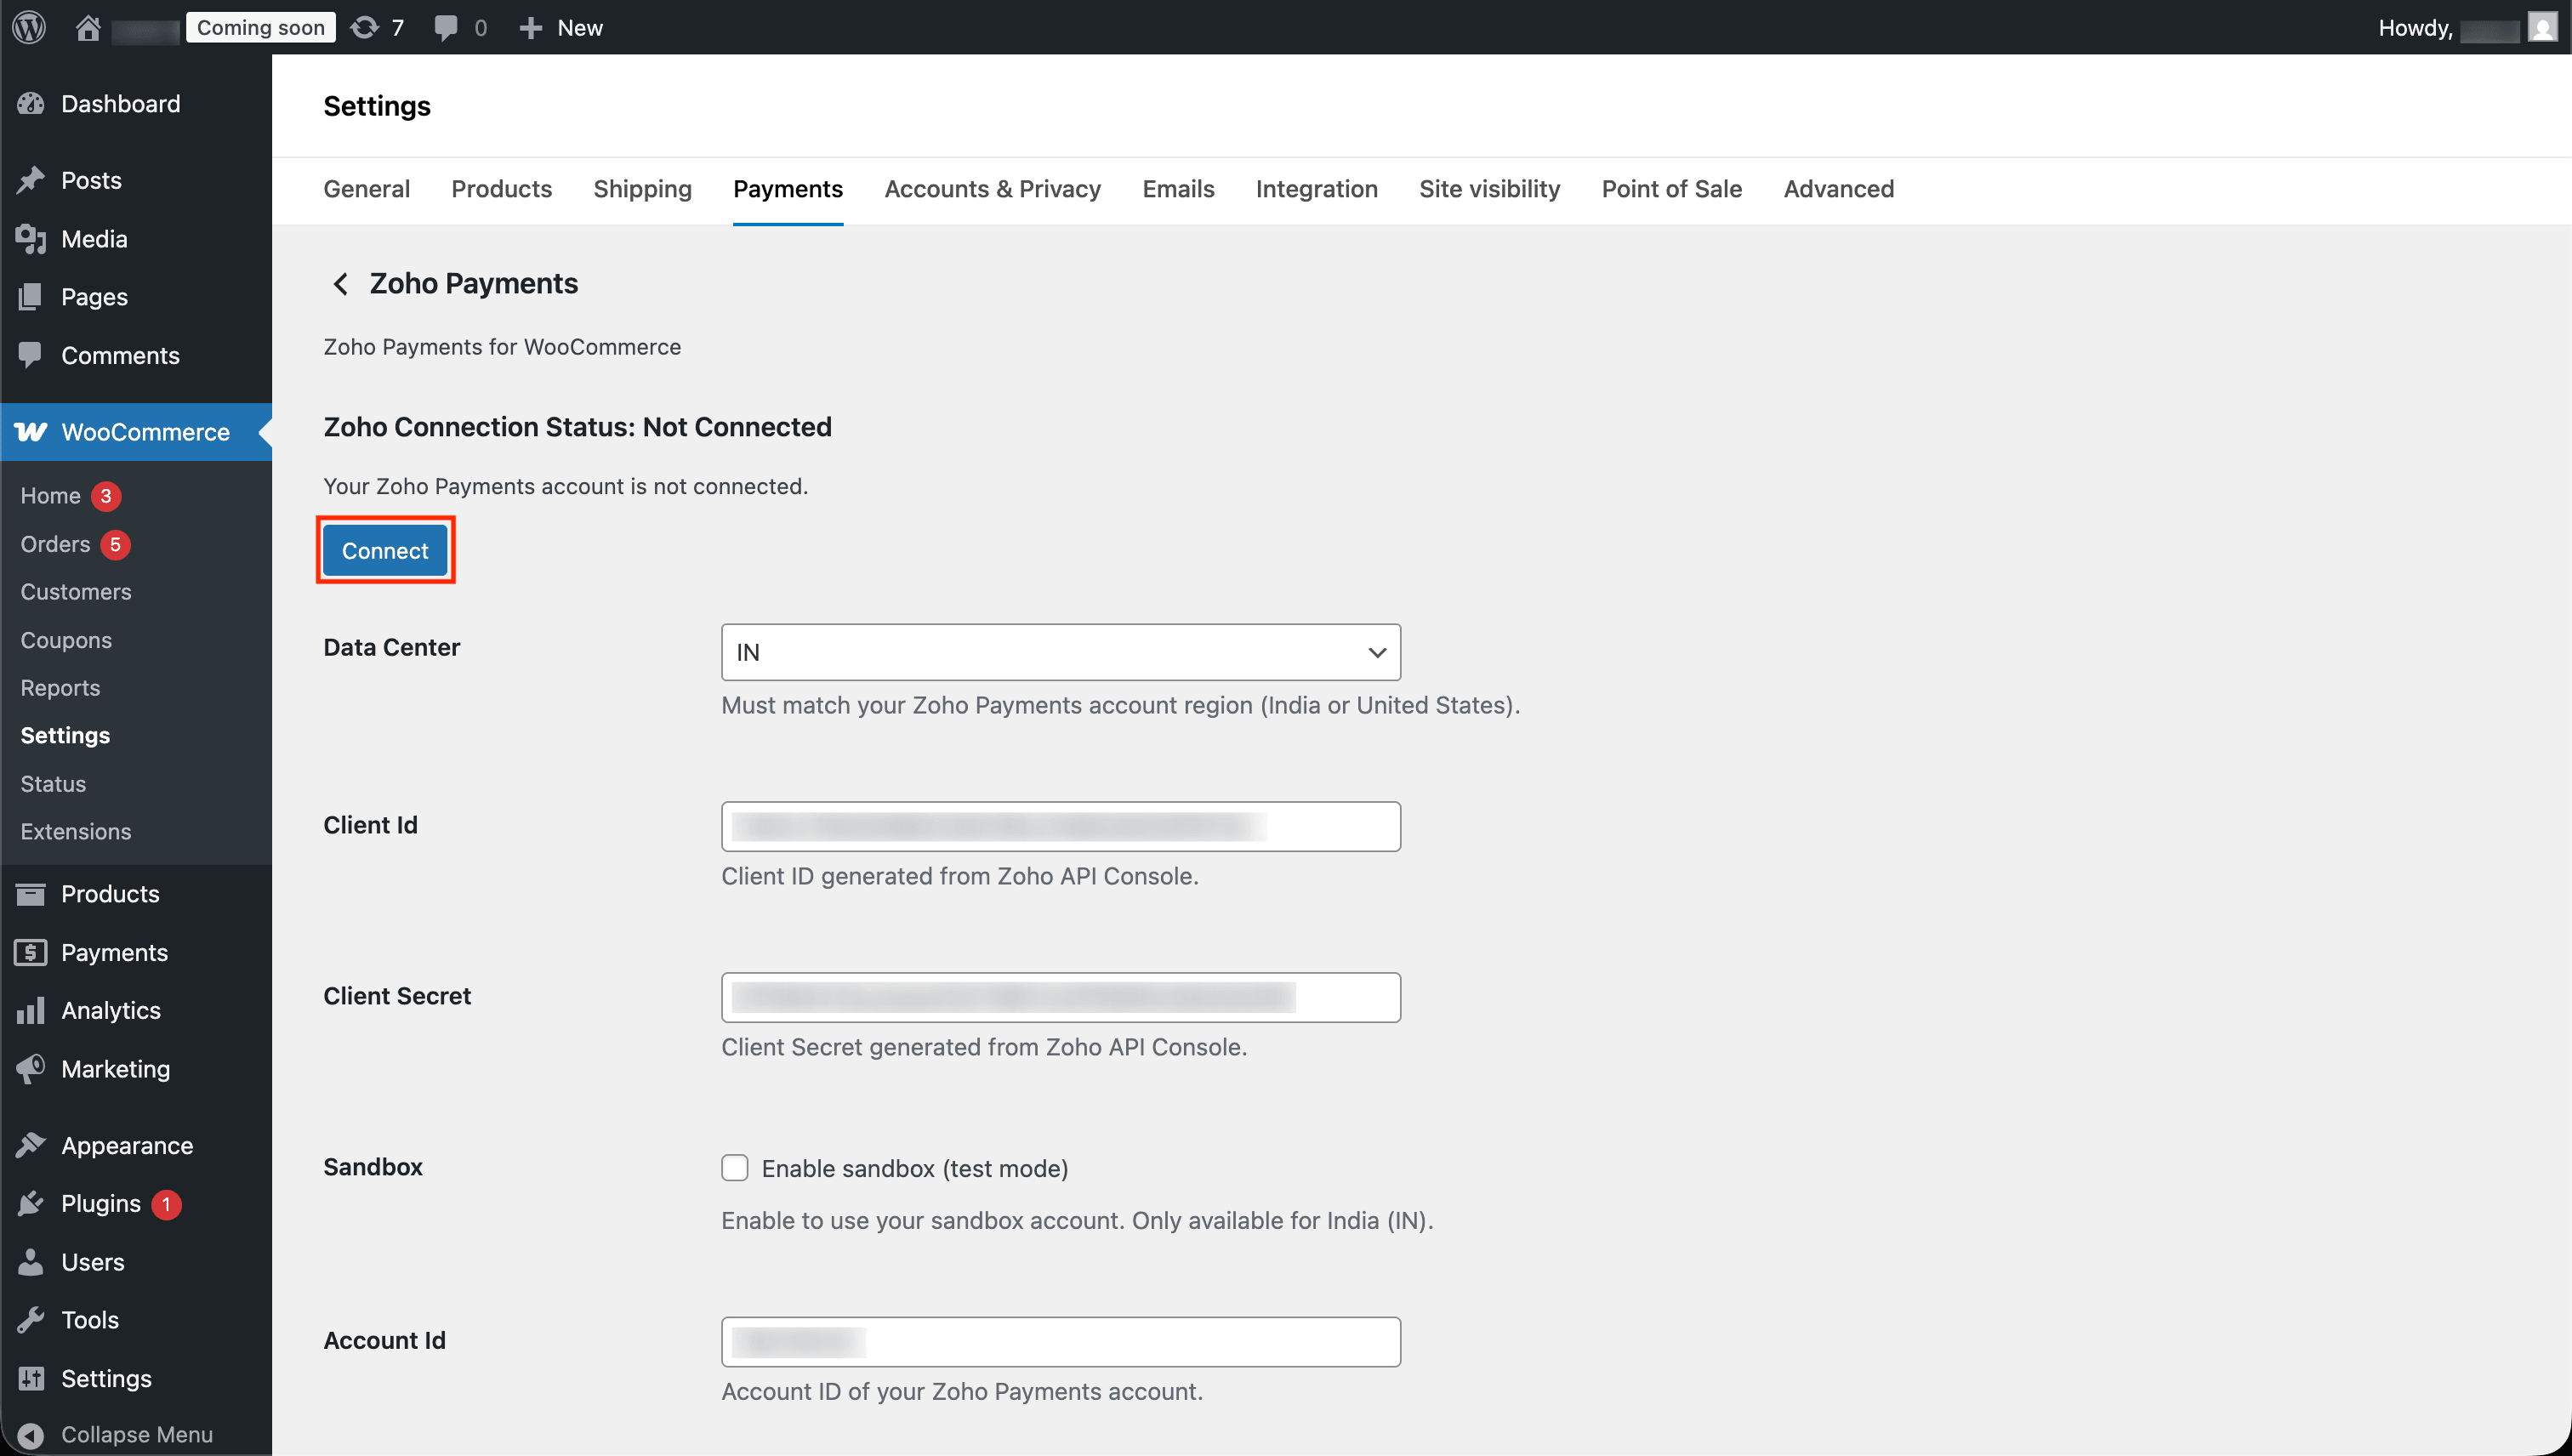
- Go to WooCommerce, click Settings, and switch to the Payments tab.
- Scroll down and click Manage next to Zoho Payments.
- Copy and paste your Client ID, Client Secret, and Redirect URI in the respective fields, and fill in the required fields:
| Field Name | Description |
|---|---|
| Data Center* | The data center where your account is hosted (e.g., US, IN). |
| Client ID* | The unique ID available under Zoho Developer Console > Your Client > Client Secret. |
| Client Secret* | A unique confidential string displayed under Zoho Developer Console > Your Client > Client Secret. |
| Sandbox | Enable this option to connect your sandbox account for testing. If you’re using the sandbox environment, use the API Key, Signing Key, and Webhook Signing Key from your Zoho Payments sandbox account |
| Account ID* | The unique identifier for your Zoho Payments account. This tells the plugin which Zoho Payments account to connect to. |
| API Key* | The key used to authenticate requests when loading the payment widget on the checkout page. This key is available under Zoho Payments > Settings > Developer Space. |
| Signing Key* | The key used to generate signatures for secure API calls between your store and Zoho Payments. This key is available under Zoho Payments > Settings > Developer Space. |
| Webhook Signing Key* | - The key used to verify that webhook notifications are from Zoho Payments. This key is available under Zoho Payments > Settings > Developer Space > Webhooks. - Configure the webhook URL in this format https://[Your WooCommerce base URL]/wp-json/zpay/v1/webhook and enable the payments.succeeded event to receive notifications when a payment succeeds. |
| Title | A display name for the payment method shown to customers at checkout. This is Zoho Payments by default, but you can customize this to match your branding. |
| Description | A brief message shown below the title on the checkout page. Use this to provide instructions (e.g., Pay securely using your UPI, cards or bank account). |
| Business Name | Your business name, displayed on the payment widget. |
| Business Description | A brief description of your business. |
* Indicates mandatory fields.
-
Click Save Changes.
-
Click Connect below Zoho Payments.
-
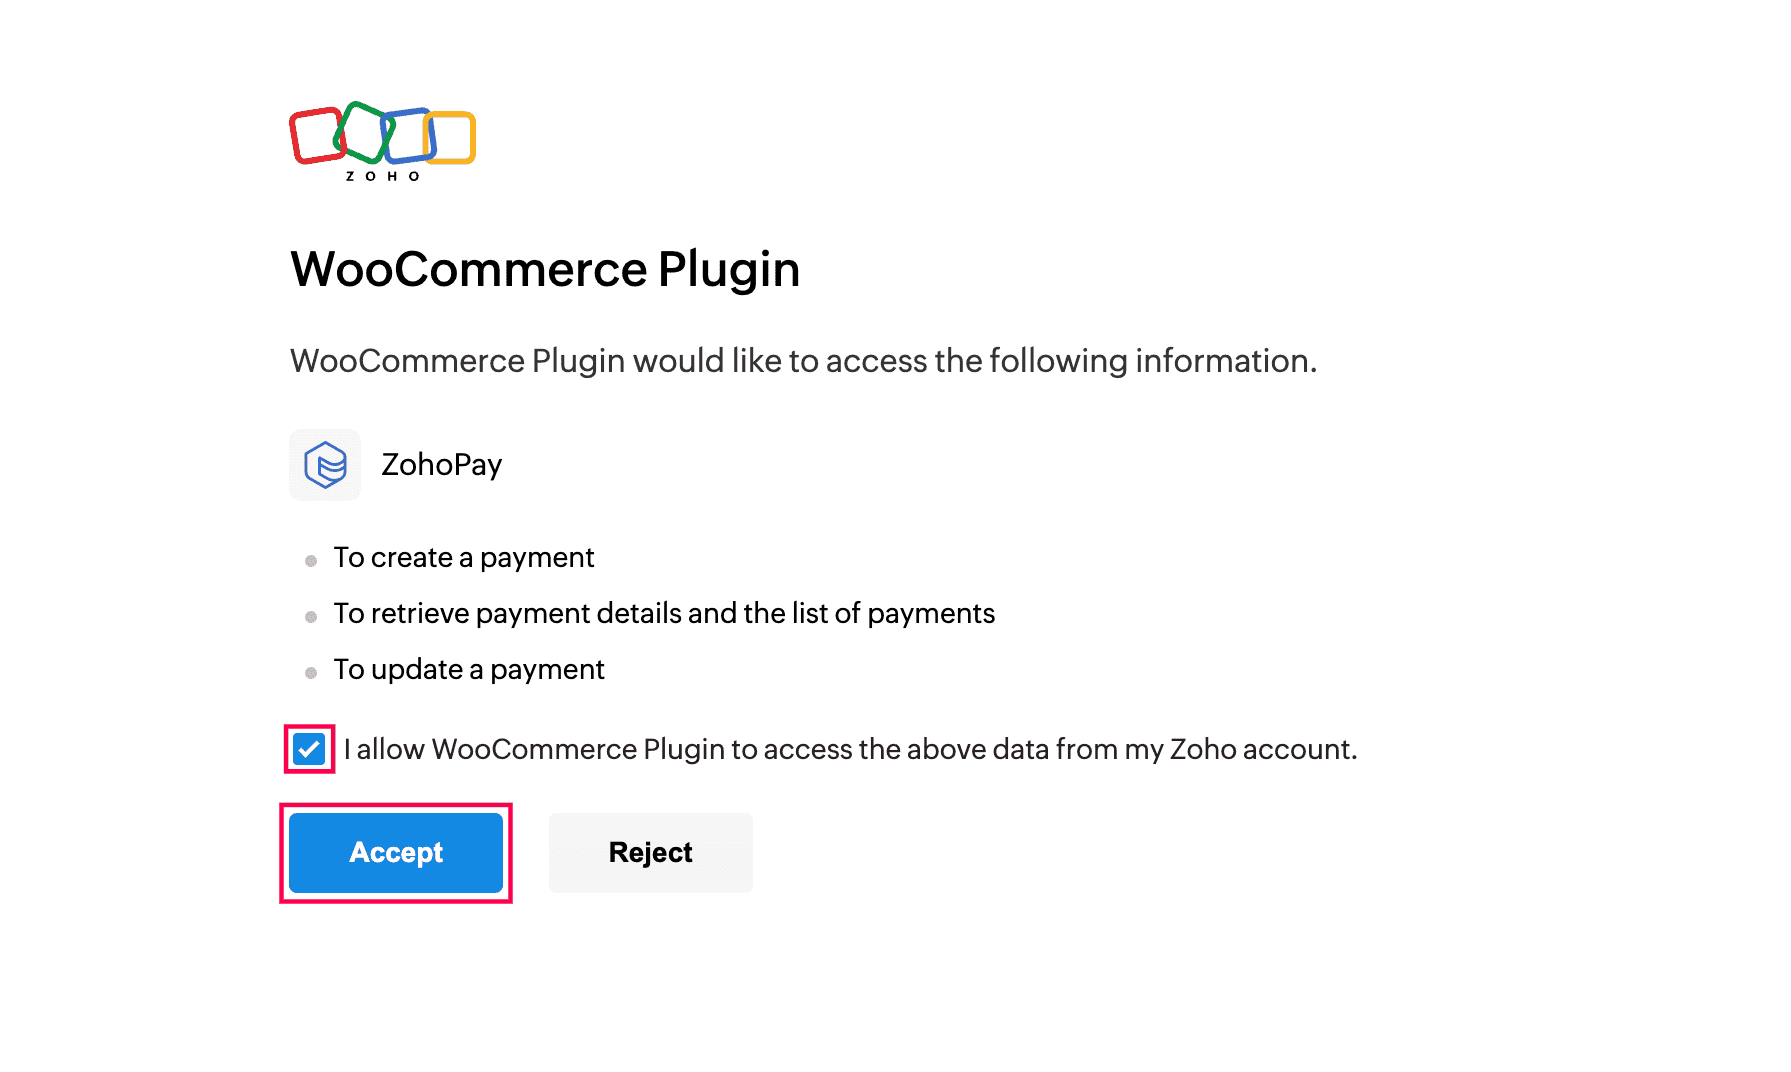
Check the box to grant access to your Zoho Payments account data and click Accept.
Your customer will get Zoho Payments as a payment option during the checkout process.
Accept Payments from Customers
Customers can now place orders and pay using Zoho Payments at checkout. Here’s how:
-
Add items to the cart and proceed to checkout.
-
Select Zoho Payments as the payment method.
-
Click Place Order.
-
Complete the payment using any of the supported payment options.
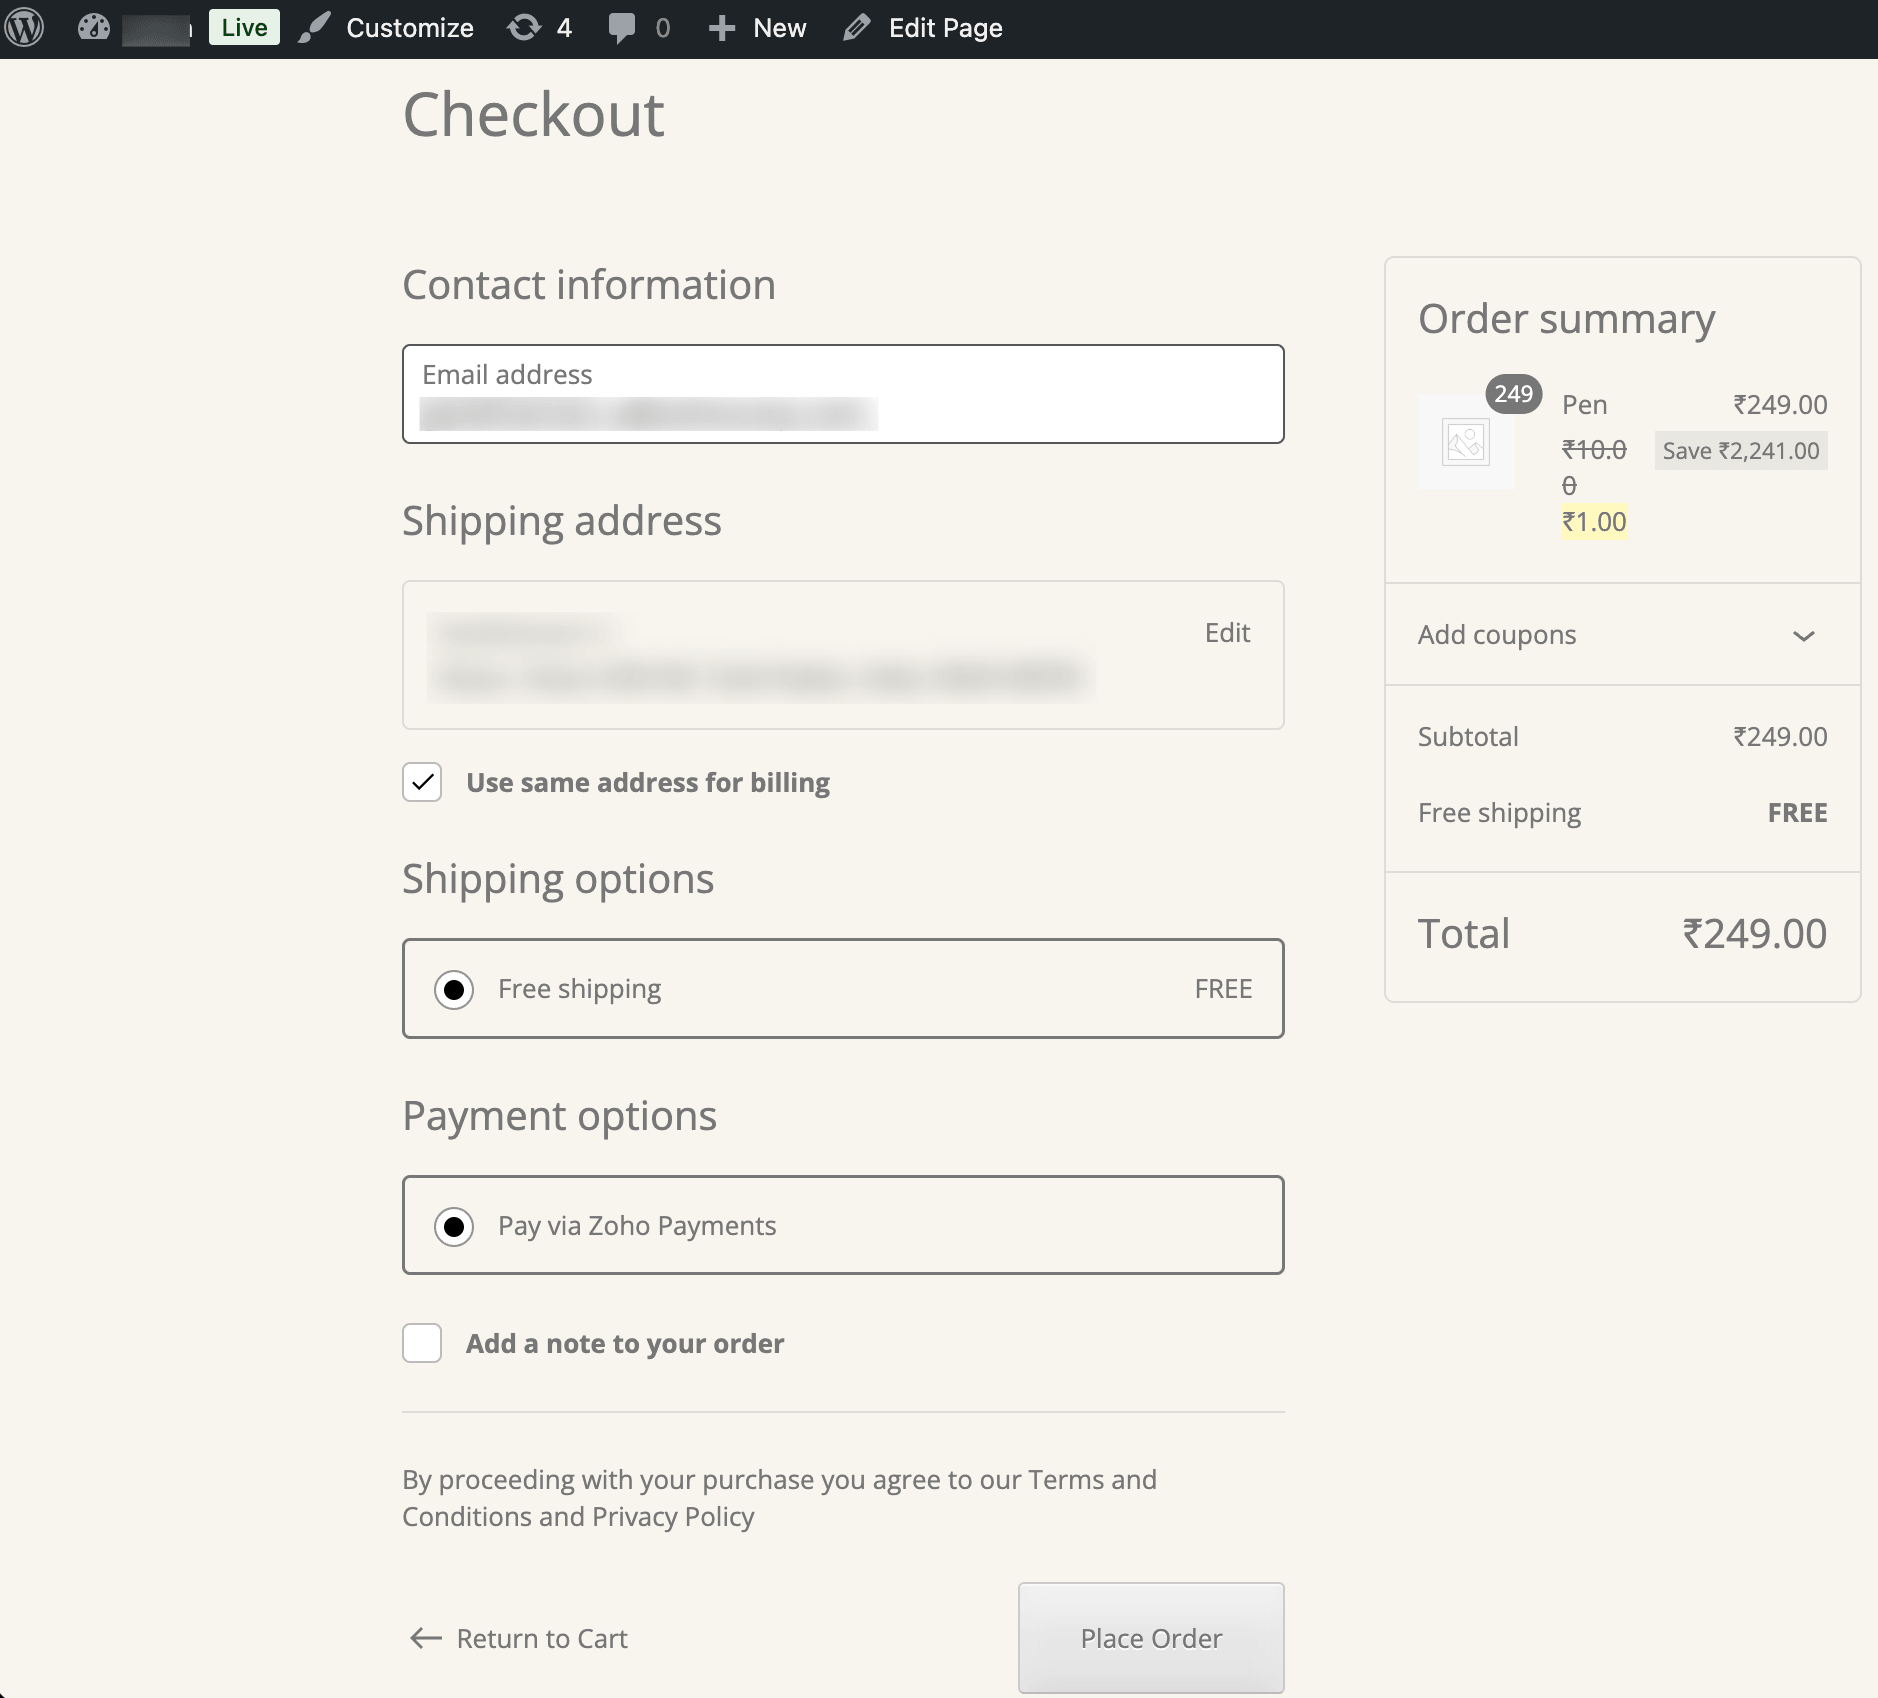
After payment, WooCommerce automatically updates the order status. In the admin dashboard, go to Orders and confirm the purchase. The status will update from Pending Payment to Processing once the payment is successful.
Disconnect or Deactivate Plugin
Disconnect Zoho Payments
Disconnecting revokes your stored credentials and unlinks your Zoho Payments account from the plugin. The plugin remains active, and you can reconnect anytime without reinstalling. To disconnect:
- Log in to your WordPress account.
- Go to WooCommerce, click Settings, and switch to the Payments tab.
- Click Disconnect below Zoho Payments.
Your Zoho Payments account will be disconnected. You can reconnect by clicking Connect and granting access again.
Deactivate the Plugin
Deactivating the plugin removes Zoho Payments as a payment option from your checkout page. The plugin stays installed on your site and can be reactivated anytime. To deactivate:
- Log in to your WordPress account.
- Go to Plugins, click Installed Plugins, and select Zoho Payments.
- Click Deactivate.
The plugin will be deactivated.

 Walkthrough of Zoho Payments personalized to your business needs