
Integrate Zoho Books with Verifone (2Checkout)
Verifone (formerly 2Checkout) offers a secure and globally recognized payment processing solution. You can integrate Verifone with Zoho Books to collect one-time card payments securely from various countries and currencies and seamlessly track received payments through reports.
Insight: Learn more about the countries and territories restricted by Verifone.
Note:
- This integration is available only for users in the United States, United Kingdom, Canada, Australia, India, United Arab Emirates, Kuwait, Oman, Saudi Arabia, Kenya, Mexico, and Global editions of Zoho Books.
- Transaction charges are applicable as per Verifone’s pricing policy. Zoho does not charge any additional fees.
Set Up Verifone
To set up the Verifone integration in Zoho Books, you must have a Verifone account. If you don’t have an account already, you can create one and proceed with the integration.
While setting up Verifone in Zoho Books, you will have to enter a secret word that can be found in your Verifone account.
To find the secret word:
- Log in to your Verifone account, click Account and select Site Management.
- In the Checkout Options column, select Header Redirect (Your URL) under Direct Return.
- Paste
https://books.zoho.com/n/2checkoutin the Approved URL field and click Save Changes to update the settings. - Copy the Secret Word from the bottom of the page.
Once you have copied the secret word, you can continue with setting up the integration.
To set up the integration:
Go to Zoho Books and navigate to Settings and select Customer Payments under Online Payments.
Click Set Up Now next to Verifone.
Enter the following details:
Field Description 2CO Account # A unique ID used to identity your Verifone account. You can find this number on the top right corner of your Verifone account. Secret Word Paste the secret word copied from your Verifone account. Bank Account Select the bank account where you will receive payments. 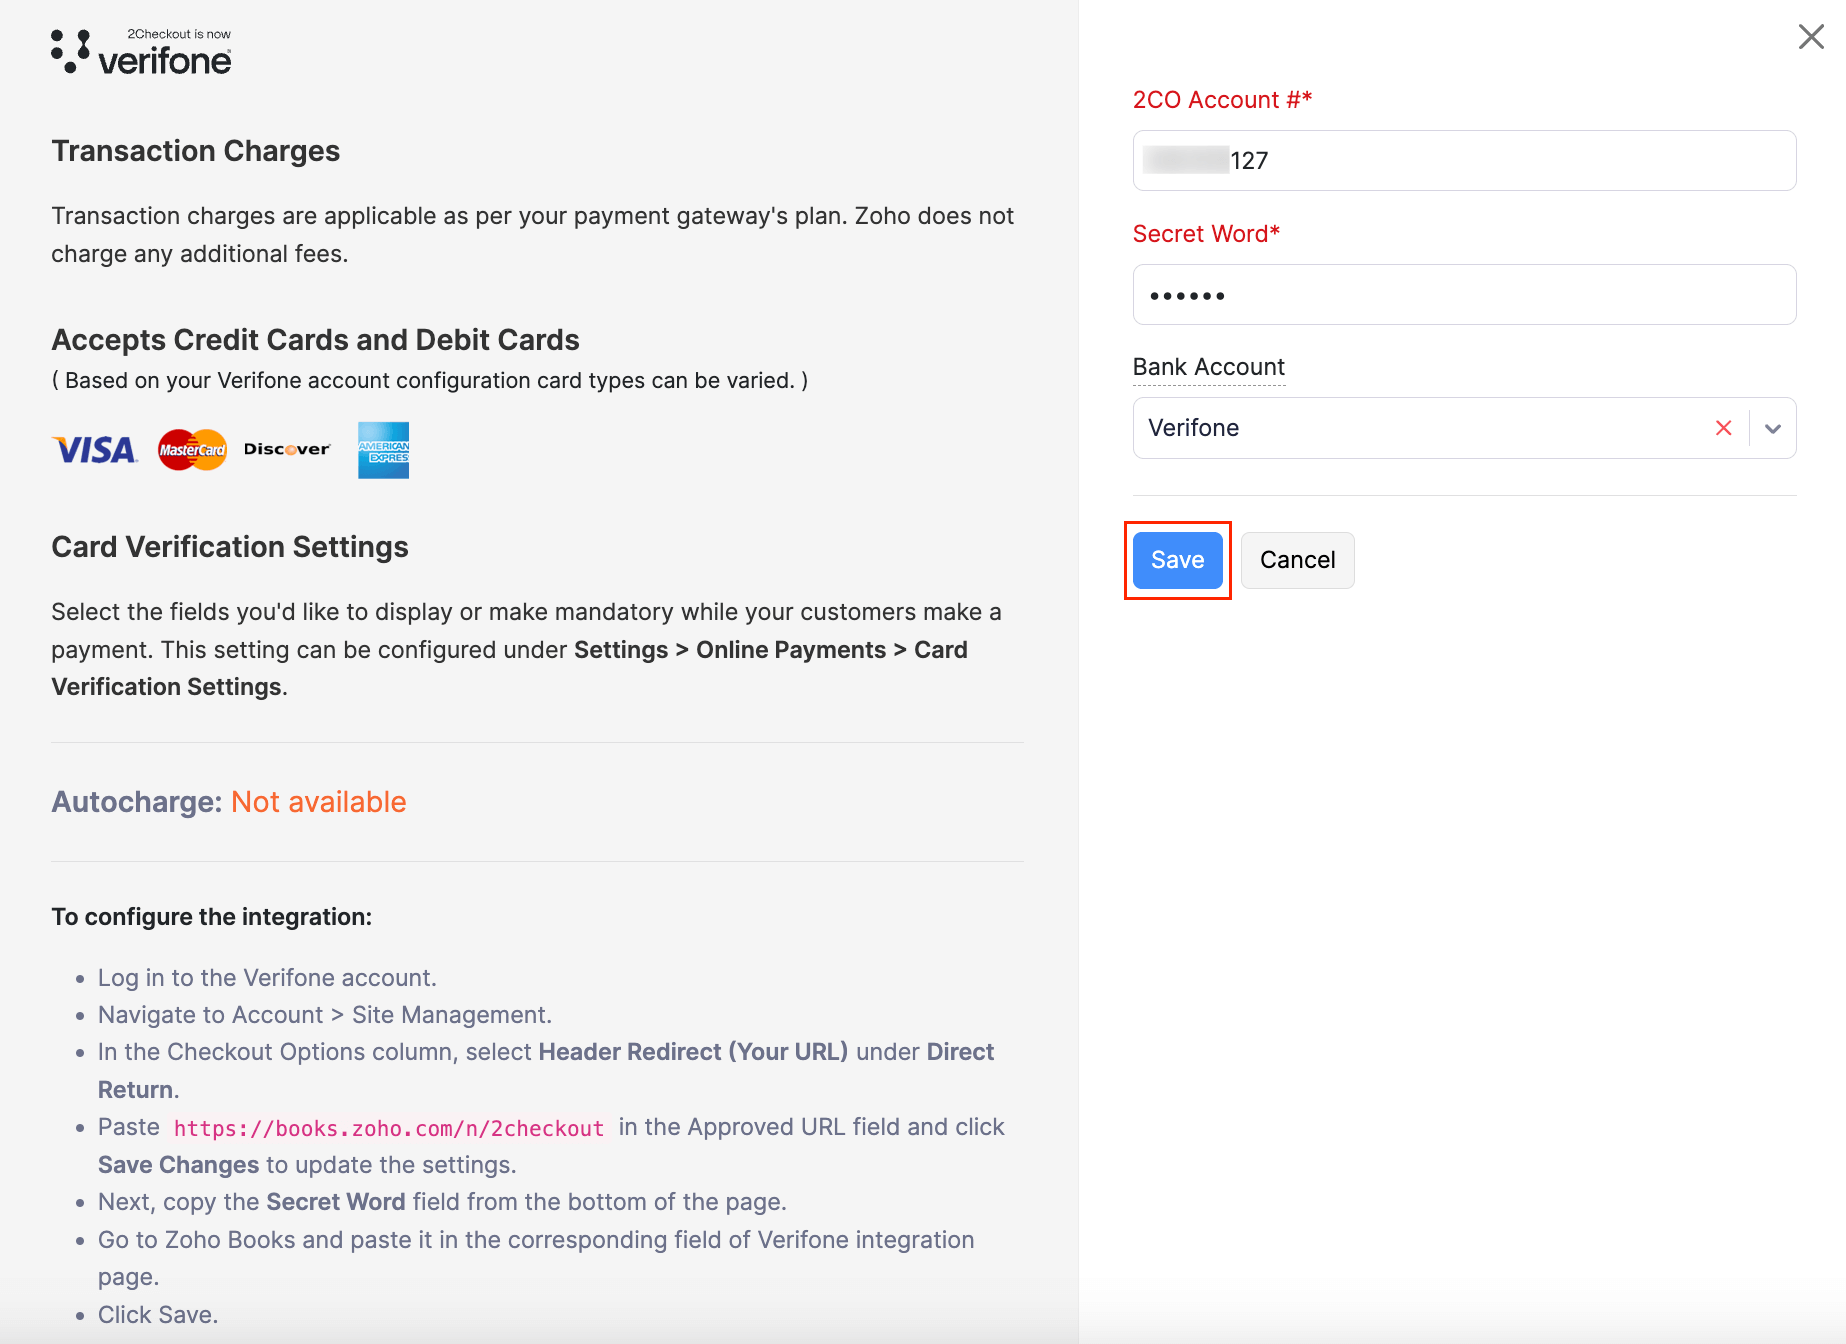
Click Save.
Verifone will be configured for your Zoho Books account.
Collect Customer Payments
Enable Payment Options
After setting up the integration in Zoho Books, enable Verifone as a payment option in invoices to receive payments.
To enable:
Go to the Invoices module.
Create a new invoice with the necessary details or click Edit on the particular invoice.
Scroll to the bottom of the page and check Verifone (Card) as a payment option.
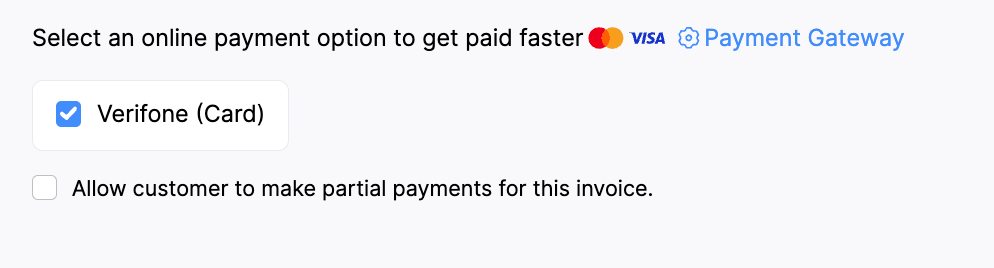
Note: If you select multiple payment gateways, the last configured payment gateway will be set as default to receive payments.
- Click Save.
Verifone will be chosen as the payment option to collect payments.
Receive Payments from Customers
Once you’ve enabled Verifone as a payment option, your customers can pay using the shared link or through the customer portal.
To make payments, your customers will have to:
View the invoice from the customer portal or email.
Click the Pay Now button, and then click PROCEED TO PAYMENT, after which they will be redirected to the Verifone payment page.
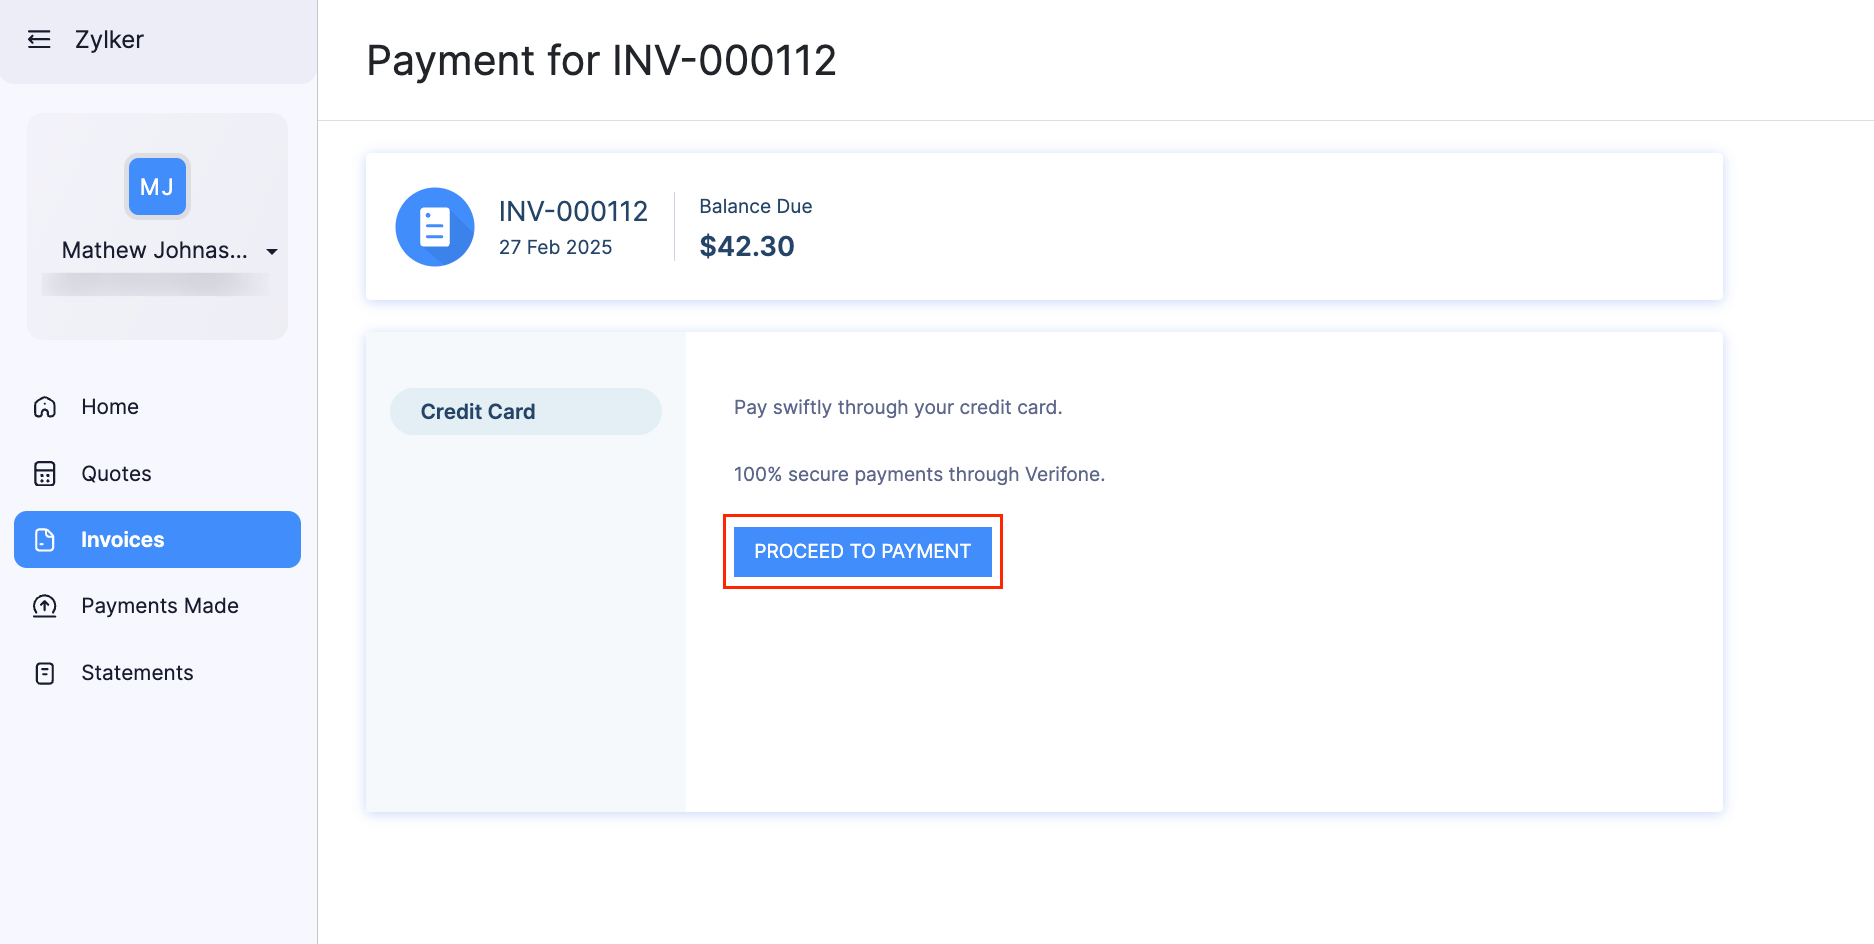
Enter their payment information and complete the payment.
Once the payment is successful, you will receive an email regarding the payment made by your customer, and the invoice’s status will be marked as paid.
Track Transactions
In Zoho Books, you can filter and track transactions related to Verifone using the Account Transactions report.
To filter the report:
Go to the Reports module and click Account Transactions under Accountant.
Click + More Filters at the top of your report.
Select Account from the field drop-down, is in from the comparator drop-down, and Verifone from the account drop-down.
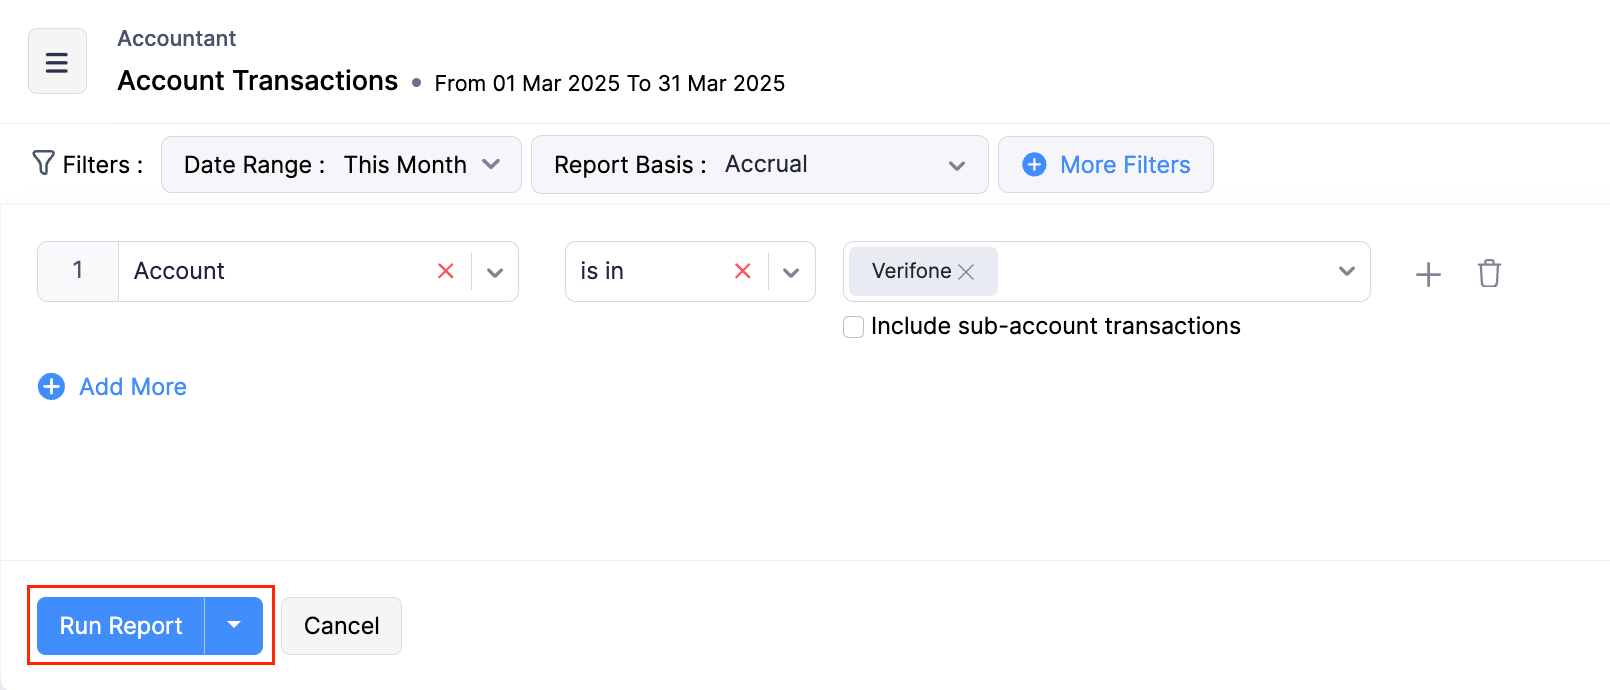
Click Run Report.
Your report with the transactions related to Verifone will be generated.
Edit the Integration
If you would like to update the associated bank account, you can edit it in your settings.
To edit:
- Go to Settings and select Customer Payments under Online Payments.
- Click Edit Settings next to Verifone and make the necessary changes.
- Click Save.
Your integration settings will be updated.
Delete the Integration
If you no longer want to use this integration, you can delete it. Before deleting, uncheck Verifone as a payment option in all unpaid invoices.
Warning: Verifone is automatically enabled in all your Zoho Finance apps, so disabling it in one app will disable it across all other Zoho Finance apps.
To delete:
- Go to Settings and select Customer Payments under Online Payments.
- Click the Delete icon next to Verifone.
- Click OK to confirm.
Your Verifone integration will be deleted in Zoho Books.
 Yes
No
Yes
No
Thank you for your feedback!