
Introduction - Customers & Vendors
In Zoho Books, you can add customers or vendors that you deal with in your business.
- For creating sales transaction like invoices or sales orders, you will have to add customers in your organization.
- For creating purchase transactions like bills and purchase orders, you’ll have to add vendors.
Create from Customer and Vendor creation page
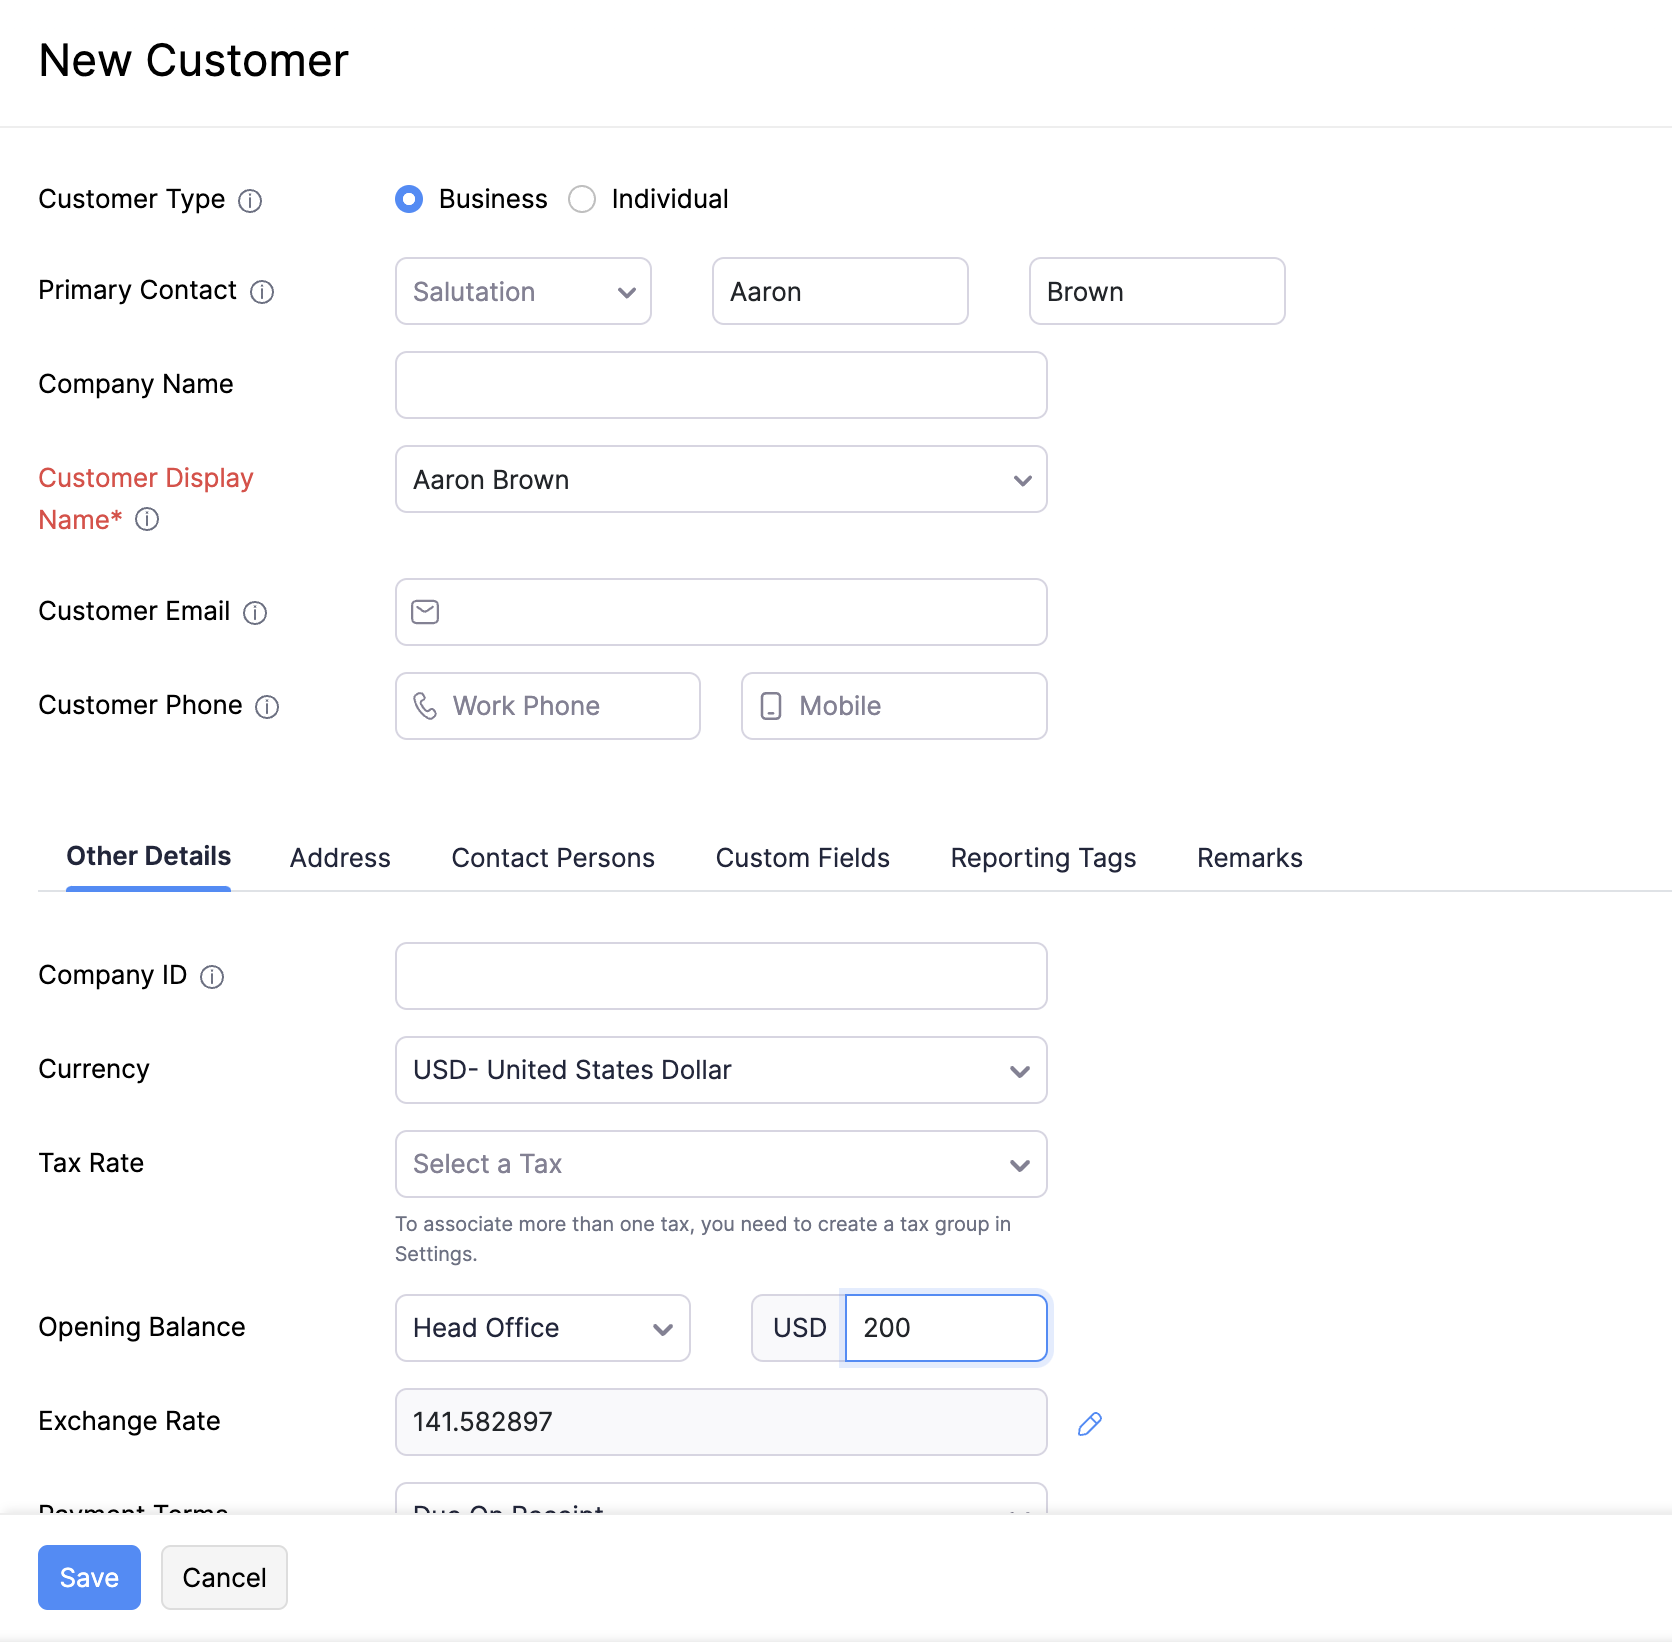
To create a new customer:
Go to Sales on the left sidebar and select Customers.
Click + New in top right corner of the page.
Select the Customer Type as Business for B2B customers, or Individual for B2C customers.
Enter the details of your customer.
Select the Currency they deal in.
Note: Setting a different currency for a customer, known as Multi-currency Invoicing, is available only in certain plans of Zoho Books. Visit the pricing page to check if it’s available in your current plan.
You can add other details such as their Billing Address and Shipping Address by navigating through the different tabs at the bottom of the page.
After entering all the details, click Save.
| Fields | Description |
|---|---|
| Customer Type | Choose Business for B2B customers or Individual for B2C customers. |
| Currency | Select the currency which the customer deals in. This currency will be used in all the customers’ transactions. |
| Credit Limit | A credit limit can be set for the customer. |
| Company ID | Enter the unique identifier assigned to your company or organization |
| Payment Terms | Select the due date by which the customer has to make the payment. |
| Address | Add a Shipping and Billing address. |
| Contact Persons | Add contact persons to be associated with the customer. |
| Custom Fields | Assign a default value for the custom fields of the customer. |
| Reporting Tags | Assign a default value for the reporting tags of the customer. |
| Company ID | Enter the customer’s (business/organization) unique identification number issued by the government or tax authority, if applicable. |
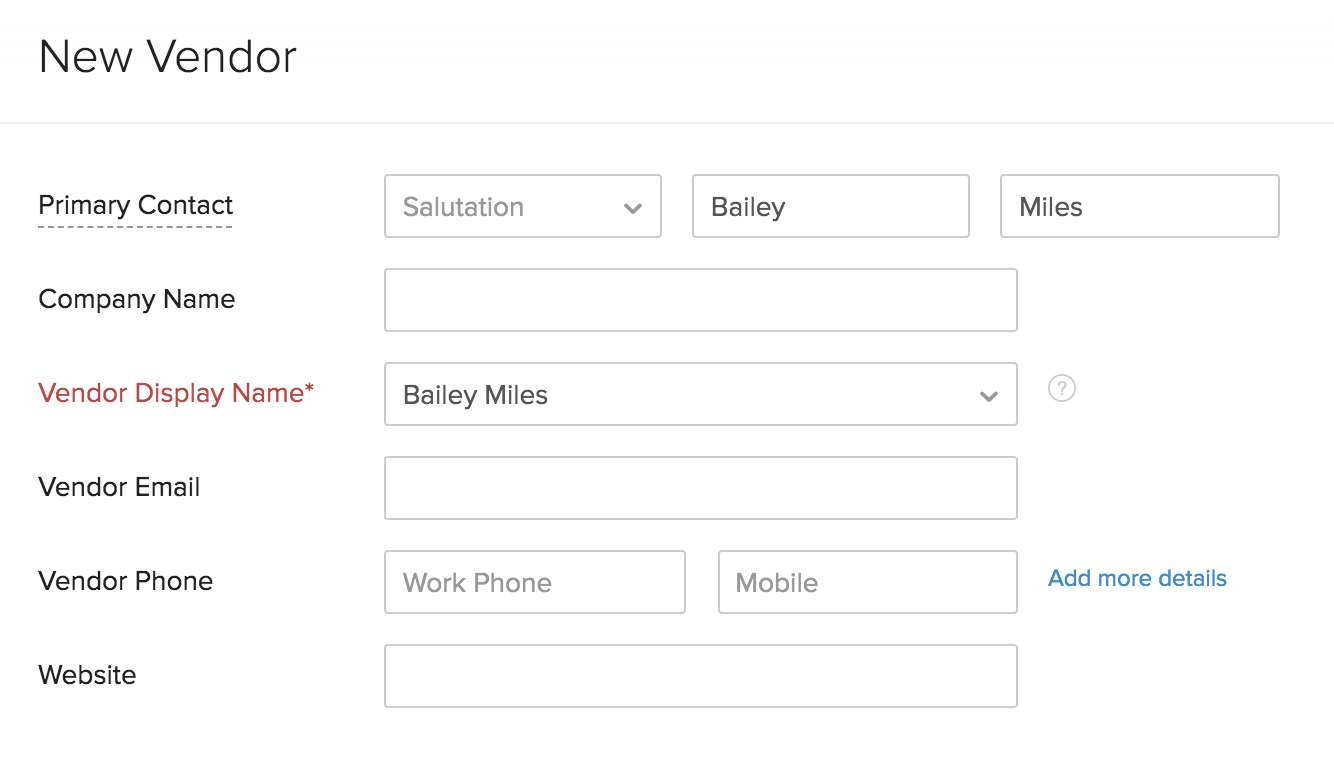
To add a new vendor:
Go to Purchases on the left sidebar and select Vendors.
Click + New in the top right corner of the page.
Enter the details of your vendor.
Select the Currency they deal in.
Note: Setting a different currency for your vendor, known as Multi-currency Invoicing, is available only in certain plans of Zoho Books. Visit the pricing page to check if it’s available in your current plan.
You can add other details such as their Billing Address and Shipping Address by navigating through the different tabs at the bottom of the page.
After entering all the details, click Save.
Import Customers/Vendors
To import customers/vendors from other systems:
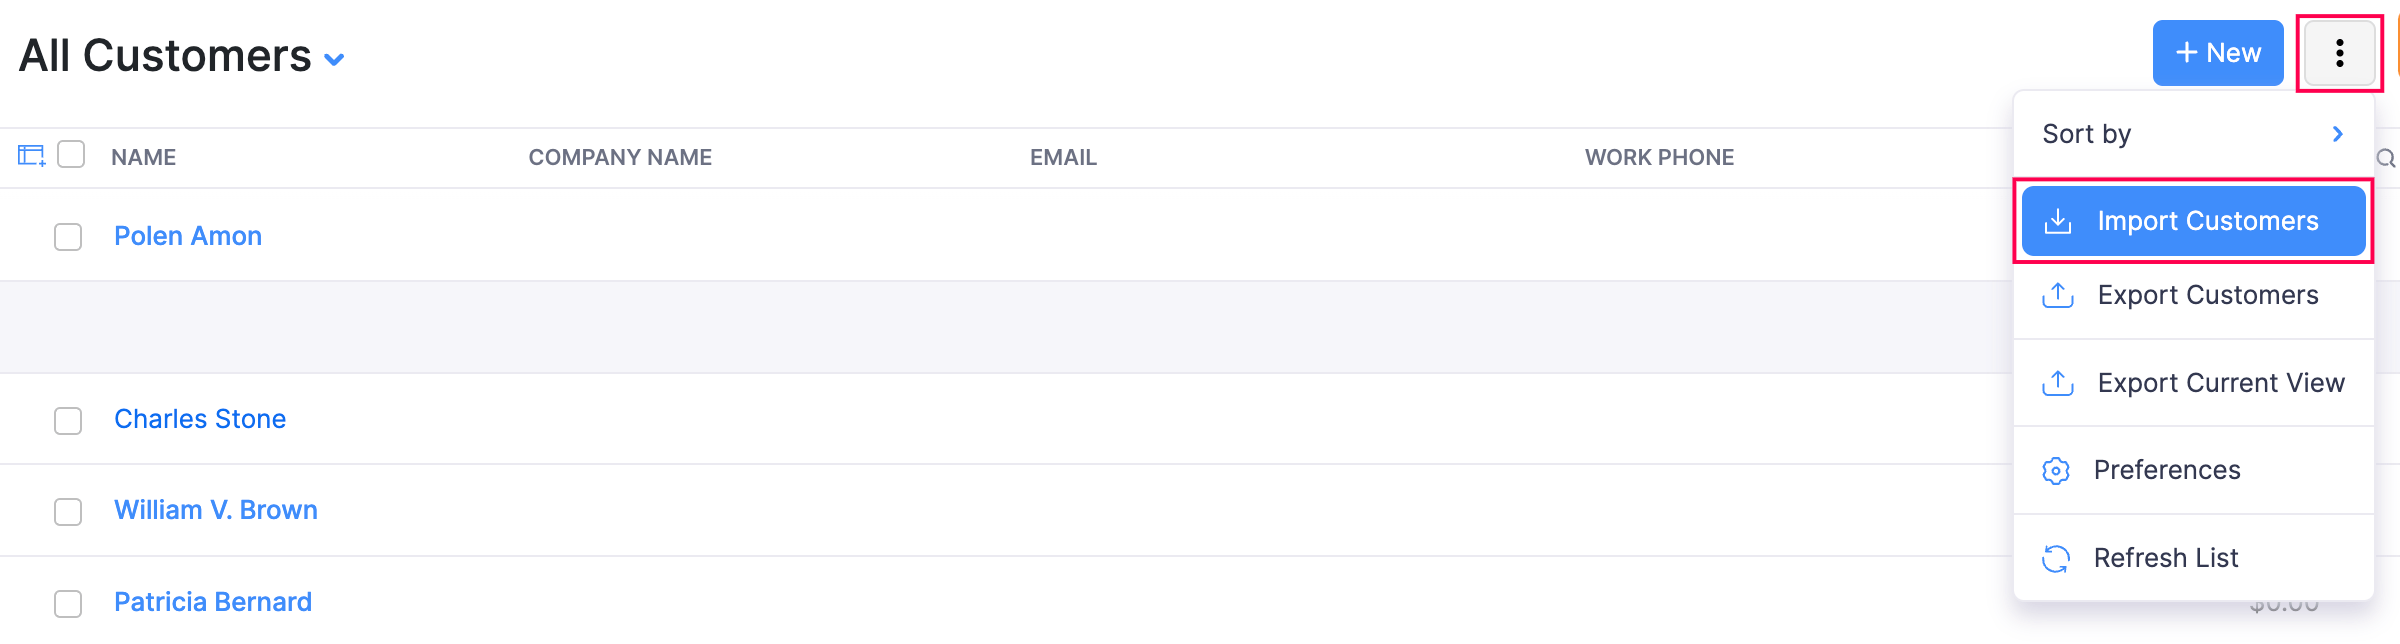
- Go to Sales on the left sidebar and select Customers (for customers) or go to Purchases on the left sidebar and select Vendors (for vendors).
- Click the More icon in the top right corner of the page.
- Select Import Customers or Import Vendors.
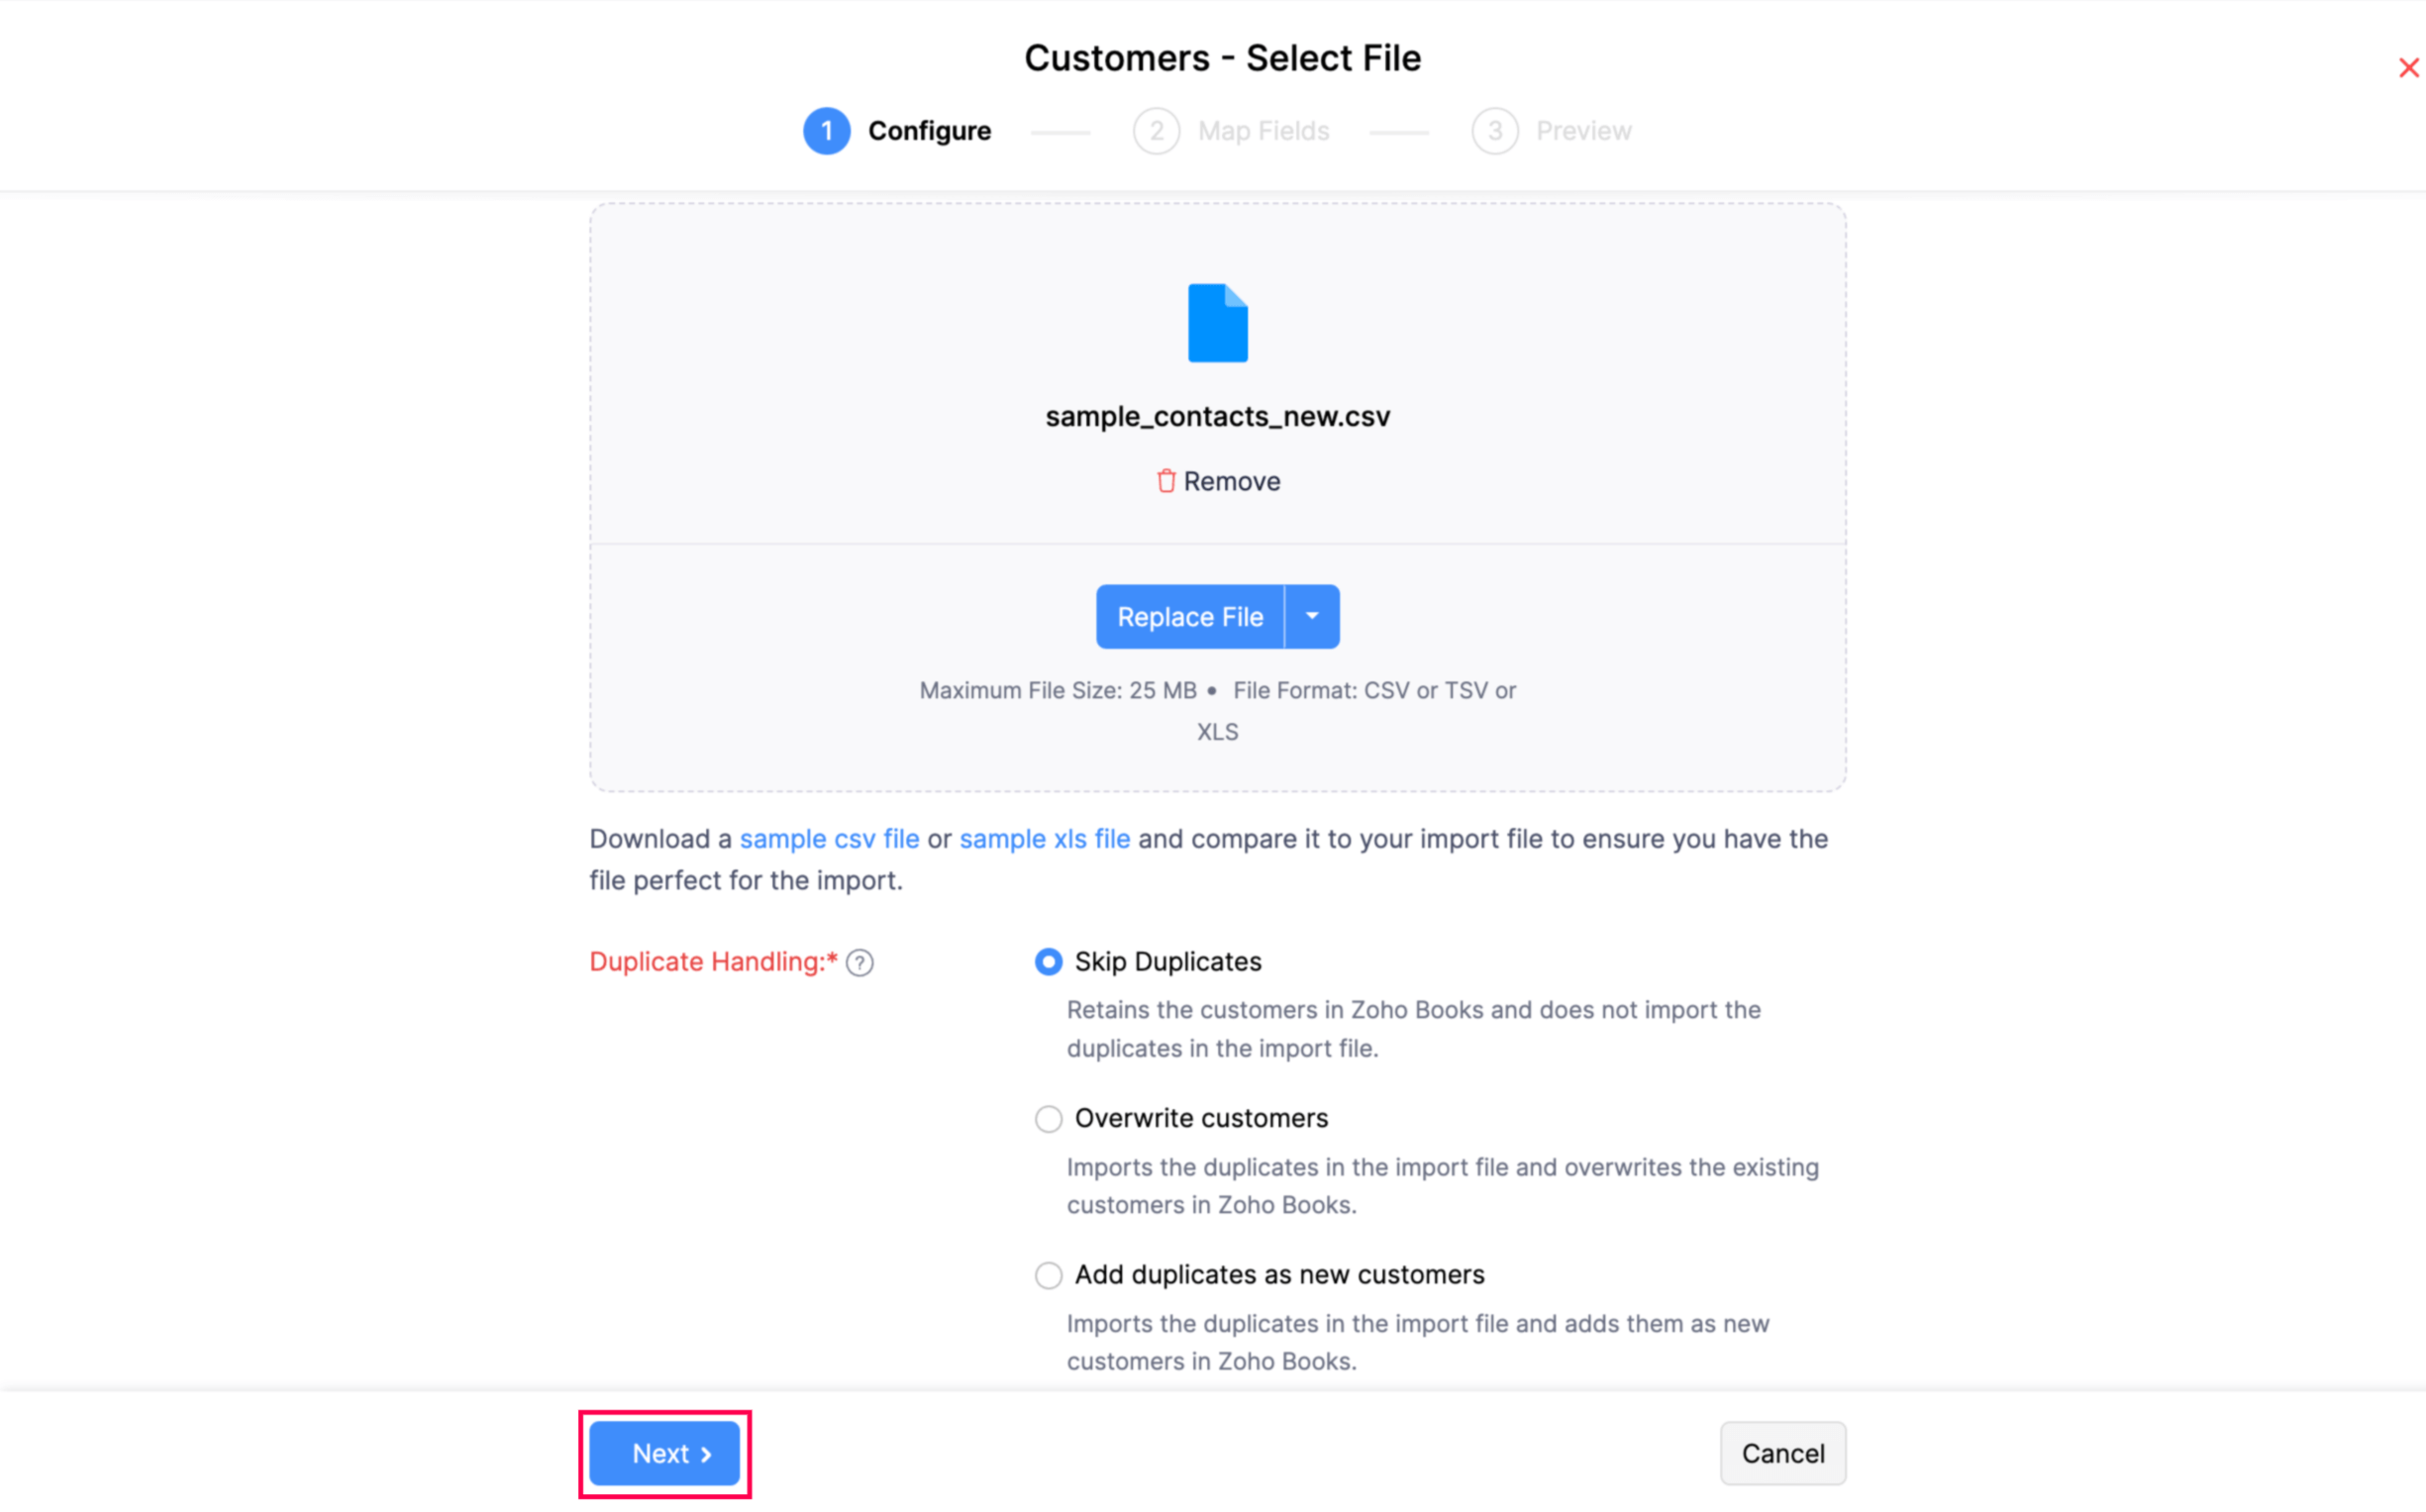
- In the pop-up that appears, Click Continue.
- Click Choose File and select the file to be imported. You can download a sample file for your reference.
- Click Next.
- Check the mapping of the fields and click Next.
- Click Import.
