
Item Preferences
Let’s have a look at the various settings you can configure for the Items module in Zoho Books.
To configure preferences for the Items module:
- Go to Settings on the top left corner of the page.
- Select Items under General.
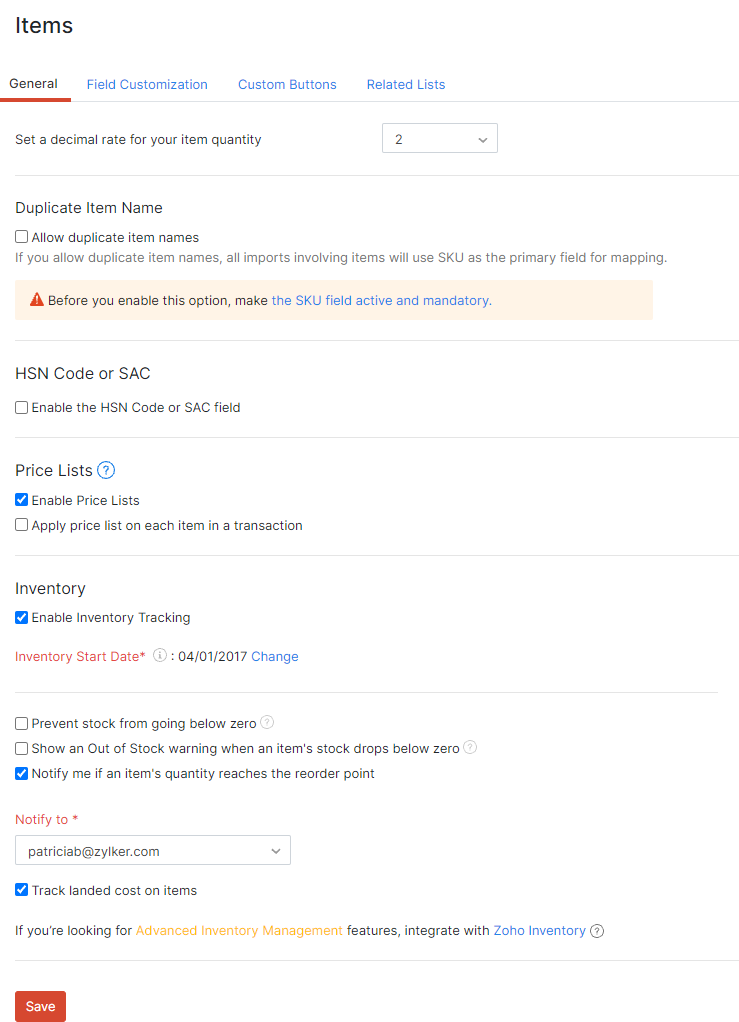
Preferences
From this page, you can configure the following preferences for your items:
- Decimal rate for item quantity
- Allow duplicate item names
- HSN Code or SAC
- Out of stock warning
- Reorder Point
Decimal rate for item quantity
The decimal rate for item quantity comes into play when you are creating transactions (like invoices). By default, this rate is two. You can select any decimal rate of your choice.
Duplicate item name
Prerequisite: Before you can enable duplicate item name, you will have to mark the Stock Keeping Unit (SKU) field as active and mandatory. Here’s how:
- Switch to the Fields tab.
- Hover over the SKU field and click the dropdown button at the right end of the field.
- Select the Mark as Active option and the Mark as Mandatory option. The SKU field will be made active and mandatory.
Enabling Allow duplicate item names allows you to create or import multiple items with the same name, that may have varied specifications like size and colour. Let’s look at a scenario to understand how this feature will help you.
Scenario: Let’s say Zylker sells a laptop with the item name Dell Precision 360, and the laptop models are in two colours Silver and Metallic Blue. While the item name is the same for both items, the colour differs. Now, each laptop model can be allotted a unique SKU to easily track each item’s movement.
Once you enable this option, you will have to enter the SKU in the SKU field to create an item which will enable you to identify each item with a unique SKU. Also, when you import items, SKU will be used as the primary field for mapping items.
If you had previously added items to Zoho Books without SKU, you can export the items, add the SKUs to the file, import the items back into Zoho Books and overwrite the existing items.
HSN Code or SAC
The Central Board of Indirect Taxes and Customs (CBIC) has mandated HSN Code or SAC for items effective from 1 April 2021. By enabling this option, a unique 4-digit/6-digit HSN code or SAC can be associated with an item based on your business’s annual turnover.
Out of Stock Warning
Every time your stock falls below zero or runs in negative, you will be sent a notification. You can view this by clicking the Bell icon on top of the page.
Reorder Point
If you have set a reorder point while creating an item, you can enable the notification option to send you a reminder when your stock drops below it. This will help you from running out of stock.
- Click Save if you’ve made changes to any of the item preferences.
Fields
You can create new fields for the Items module and assign different data types for each of them. Learn more about Fields.
Record Locking
You can lock item records to prevent unauthorized changes after they reach a specific status. Learn more about Record Locking.
Buttons
You can create new buttons in the Items module that either execute actions using deluge scripts or open external URLs when clicked. Learn more about Buttons.
Related Lists
You can view data from both the app and third-party services with Related Lists, making it easy to cross-reference information from different sources. Learn more about Related Lists.
 Yes
No
Yes
No
Thank you for your feedback!