Linked workspaces
Linked workspaces in Zoho Analytics enable you to connect two distinct workspaces in order to replicate changes. With just a click, you can update secondary workspaces with any changes made in the primary workspace, be it creating new views or modifying existing ones. This feature minimizes manual effort, keeps your dashboard and report configurations up-to-date, and organizes similar views seamlessly across workspaces.
Create linked workspaces
Follow the steps below to create linked workspaces:
- Login to your Zoho Analytics account.
- From the home page, select a workspace to act as a primary workspace.
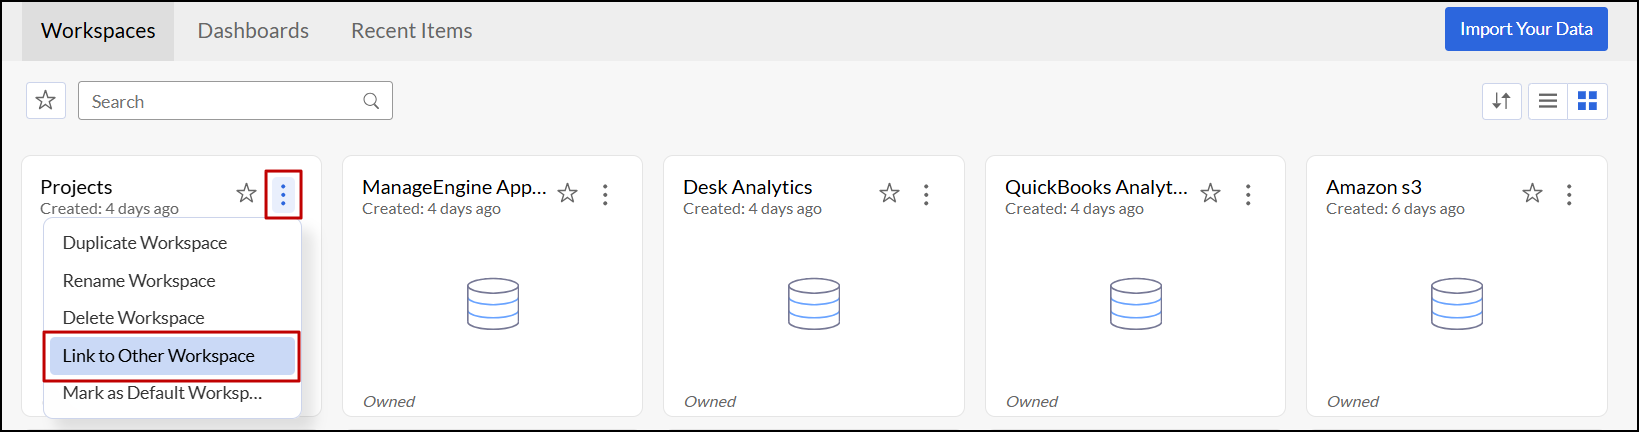
- Click the More Options icon at the top right corner of the selected workspace.
Choose the Link to Other Workspace option.
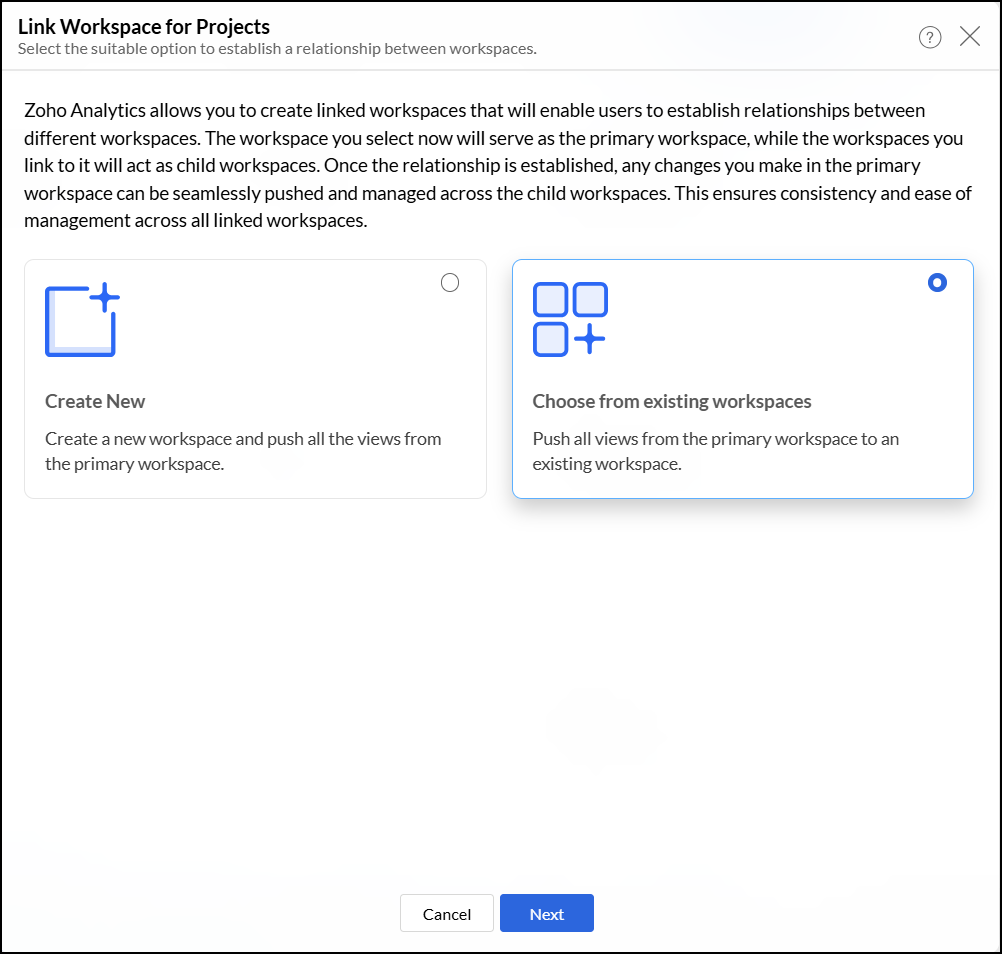
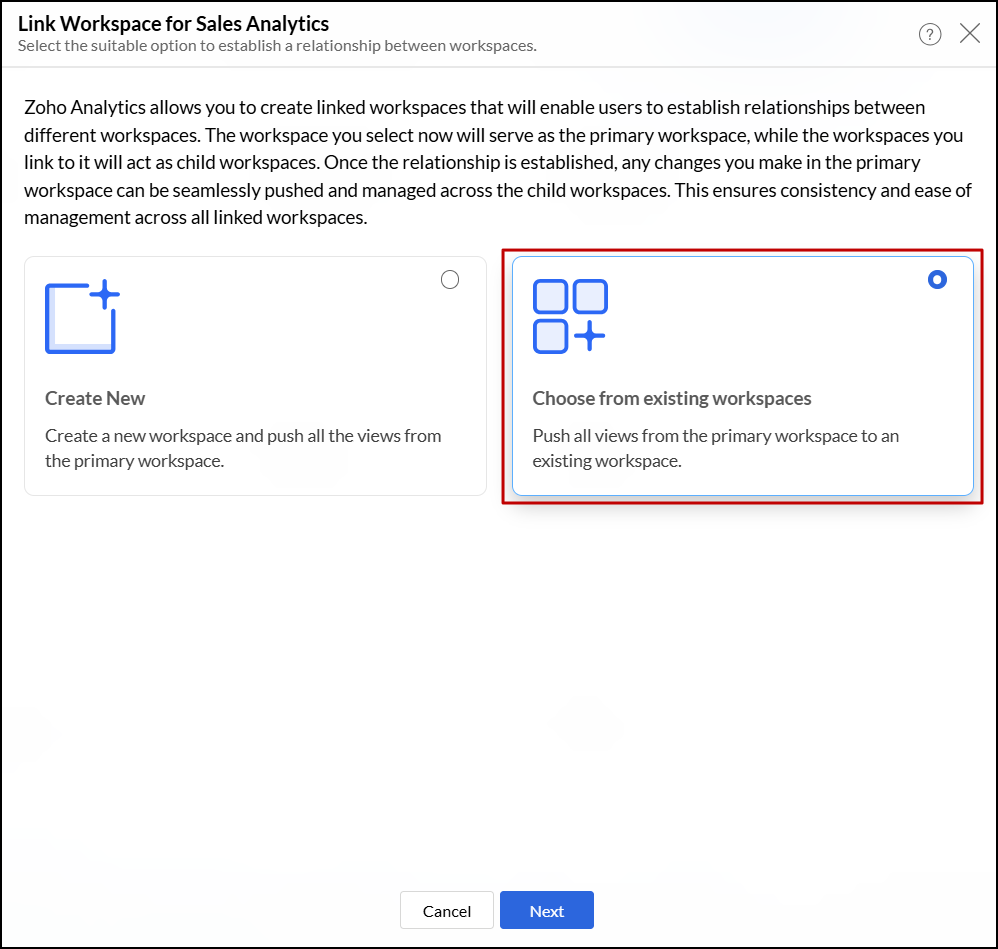
In the dialog that appears, choose one of the following options:
- Create New: This option lets you create a new workspace to act as a secondary workspace. Click here to learn more.
- Choose from existing workspaces: This option enables you to select one or more existing workspaces to act as secondary workspaces. Click here to learn more.
Click the corresponding link to learn about the subsequent steps based on the selected option.


Create a new workspace
This option lets you create a new workspace to act as a secondary workspace with all the views in the primary workspace. To create a new secondary workspace, follow the steps below:
- From the Zoho Analytics home page, select a workspace to act as a primary workspace.
- Click the More Options icon at the top right corner of the selected workspace.
- Choose the Link to Other Workspace option.
In the dialog that appears, choose the Create New option and click Next.
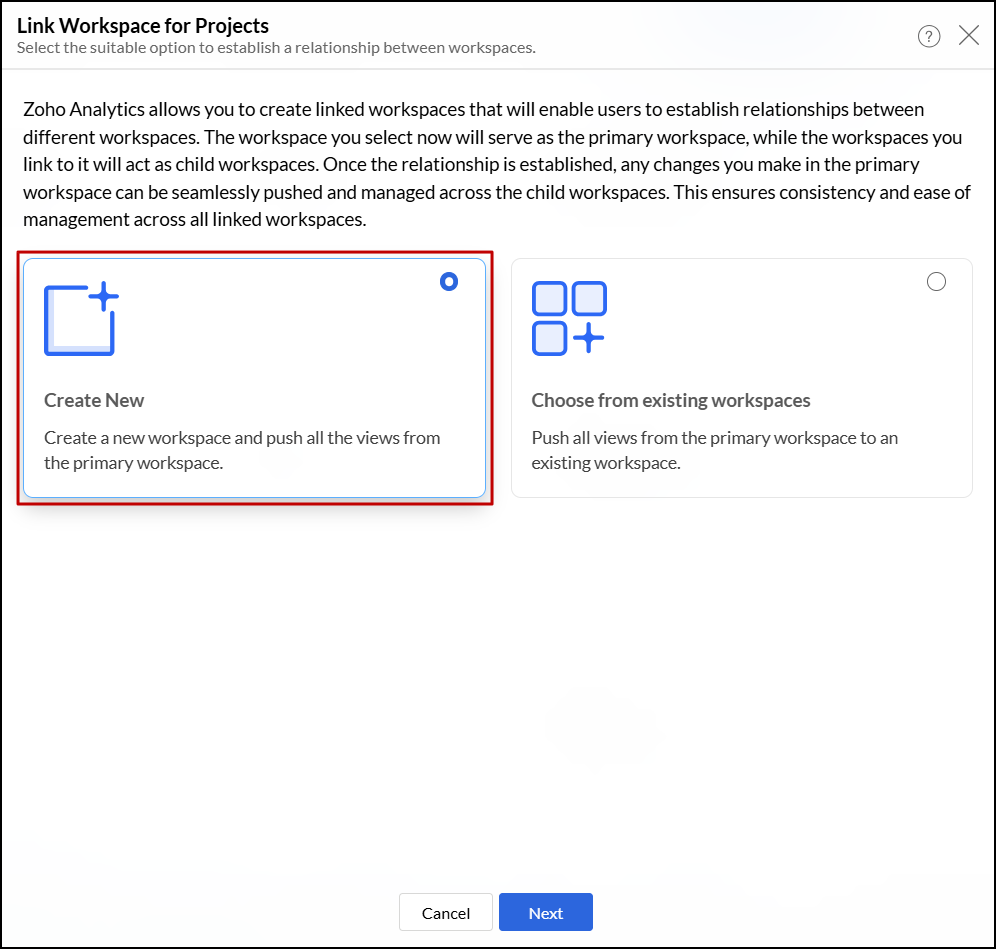
- Provide a name and description (optional) for the workspace.
Click Next.

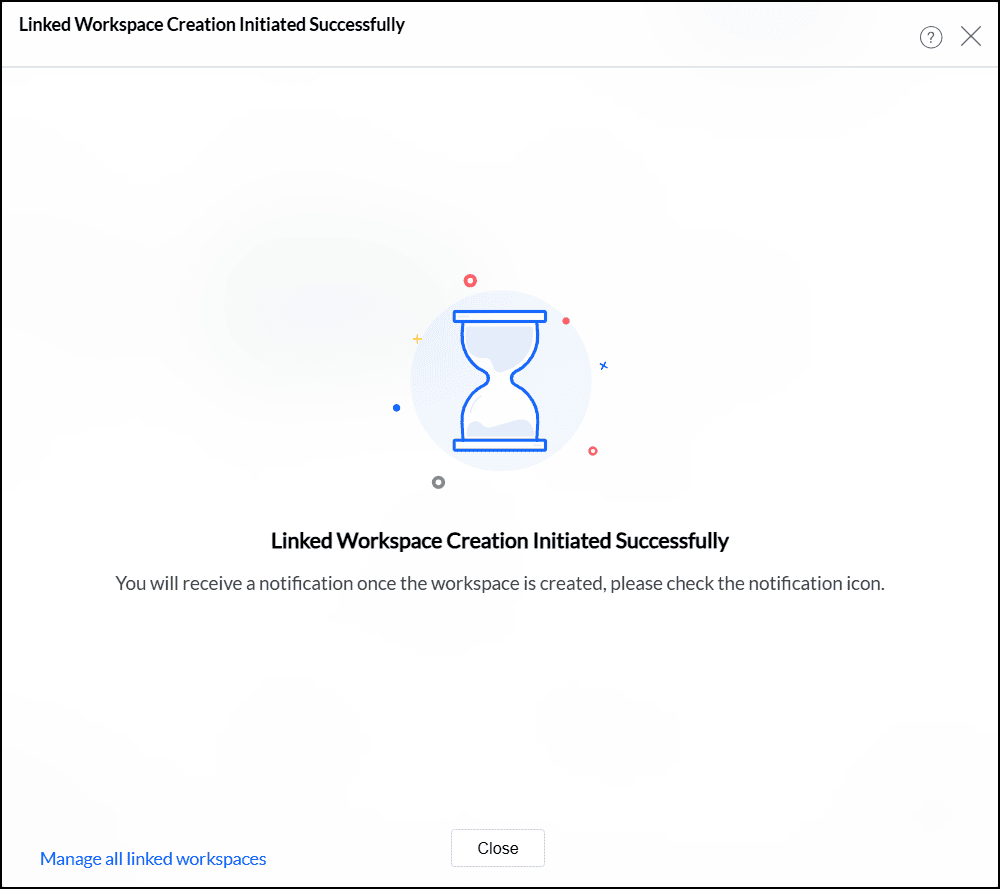
Depending on the amount of data in the primary workspace, it will take some time to create a new secondary workspace with all the views in the primary workspace.


Choose from existing workspaces
This option enables you to select one or more existing workspaces to act as secondary workspaces. With just a click, you can push the data sources, tables, reports, and dashboards from the primary workspace to multiple secondary workspaces. To do this, follow the steps below.
- From the Zoho Analytics home page, select a workspace to act as a primary workspace.
- Click the More Options icon at the top right corner of the selected workspace.
- Choose the Link to Other Workspace option.
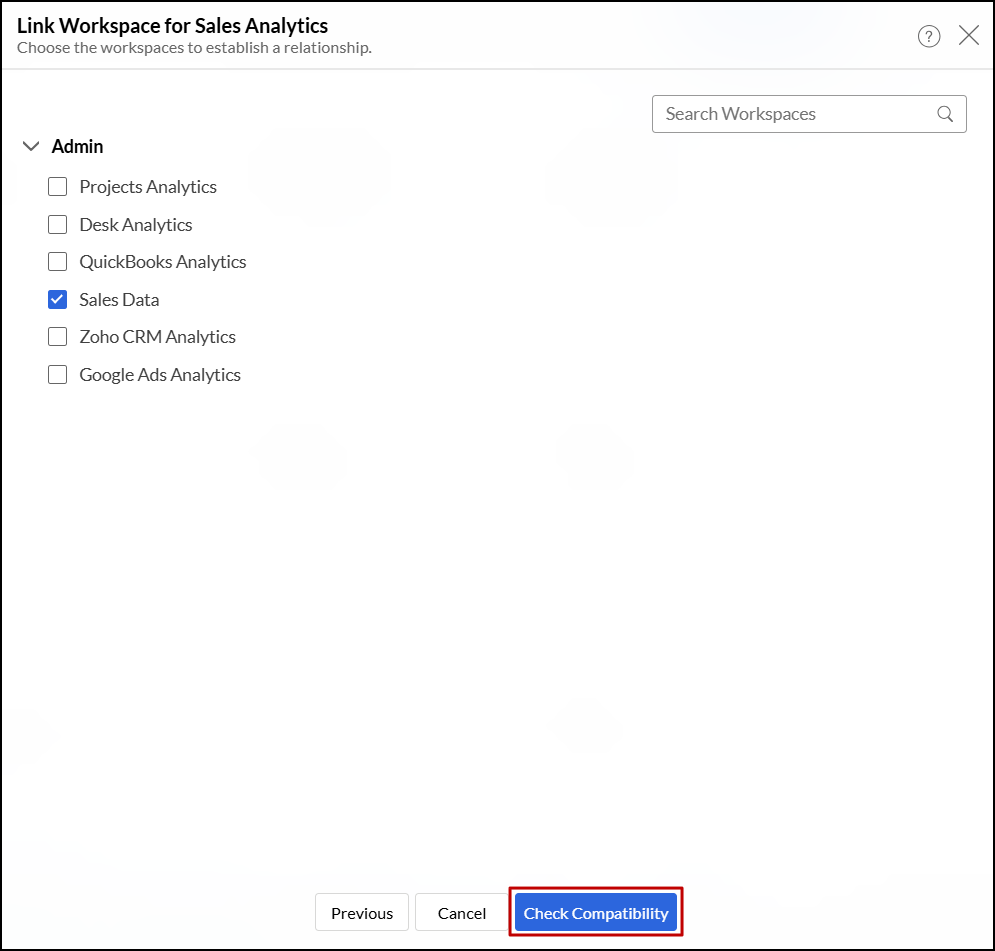
In the dialog that appears, choose the Choose from existing workspaces option and click Next.
In the page that appears, select the desired workspaces and click Check Compatibility. This verifies whether the workspaces can be linked based on the data sources, views, and configurations in the primary workspace. Click here to learn more about compatibility.
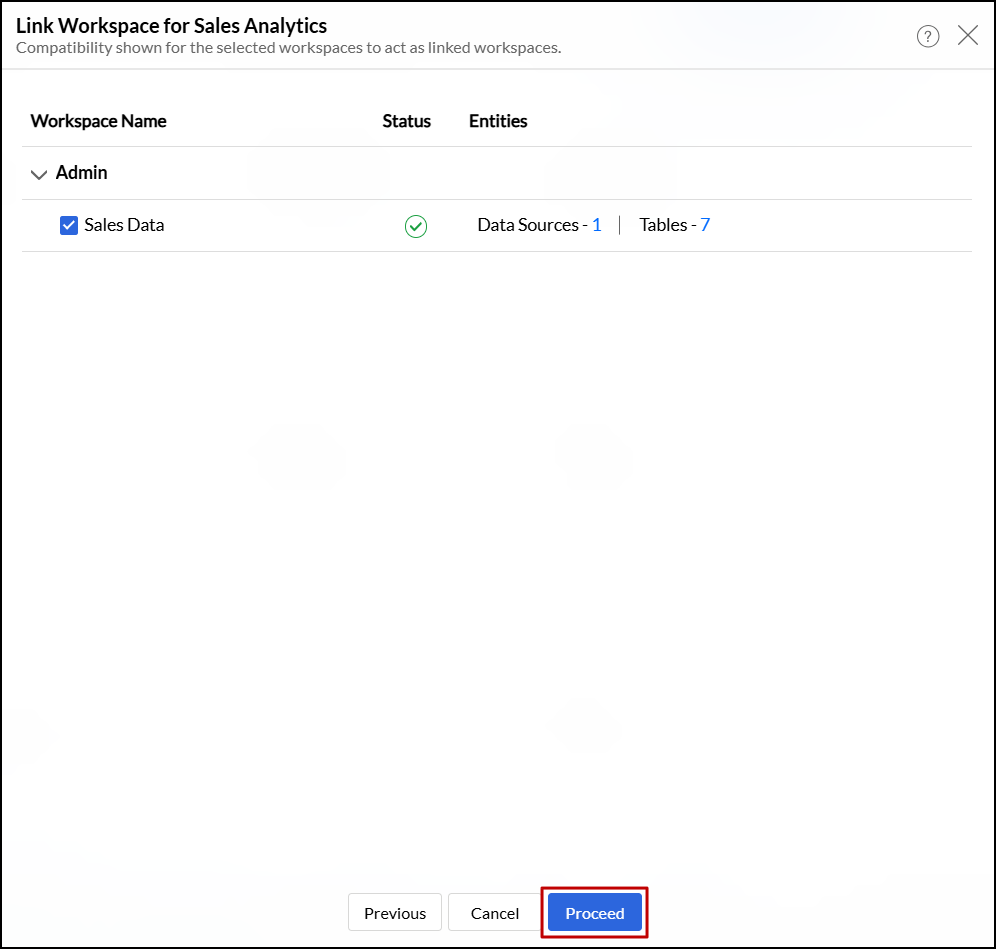
Once the secondary workspaces pass the compatibility test, select the workspaces and click Proceed to create linked workspaces.


Check compatibility
This option verifies whether the selected secondary workspaces can be linked to the primary workspace by evaluating their data sources, views, and configurations. It ensures compatibility between the workspaces before establishing the link.
Requirements for Linking Workspaces
- Data Sources: The primary and secondary workspaces must use the same data source type (e.g., both must be ITSM-based).
- Tables: Tables from both workspaces must be mapped with the same name and data source.
- Views: Views from both workspaces must be mapped with the same name and data source.
To illustrate, let’s consider a primary and a secondary workspace with a ITSM-based data source. The table below outlines how compatibility is determined in different scenarios.
| Primary Data Source | Secondary Data Source | Table Mapping | View Mapping | Push Status | Details |
| ITSM | ITSM | Yes | Yes | Success |
|
| ITSM | ITSM | Yes | No | Success |
|
| ITSM | ITSM | Yes | Yes, but views have a different data source | Partial Success |
|
| ITSM | ITSM | Yes, but tables have a different data source | No | Failure | Table name already exists |
| ITSM | ITSM | No | No | Success |
|
| ITSM | ITSM | No | Yes, but views have a different data source | Success |
|
| ITSM | NA | No | NO | Success |
|
| ITSM | NA | No | Yes, but views have a different data source | Partial Success |
|
| ITSM | NA | Yes, but tables have a different data source | - | Failure | Table name already exists |
Pending views
In a linked workspace, new views can be added, or existing views in the primary workspace can be updated at any time. Pending views refer to these newly added or updated views that need to be pushed from the primary workspace to the secondary (client) workspace.
You can update these changes (pending views) seamlessly in the secondary workspace with just a few simple steps, ensuring synchronization between the workspaces. To do this, follow the steps below:
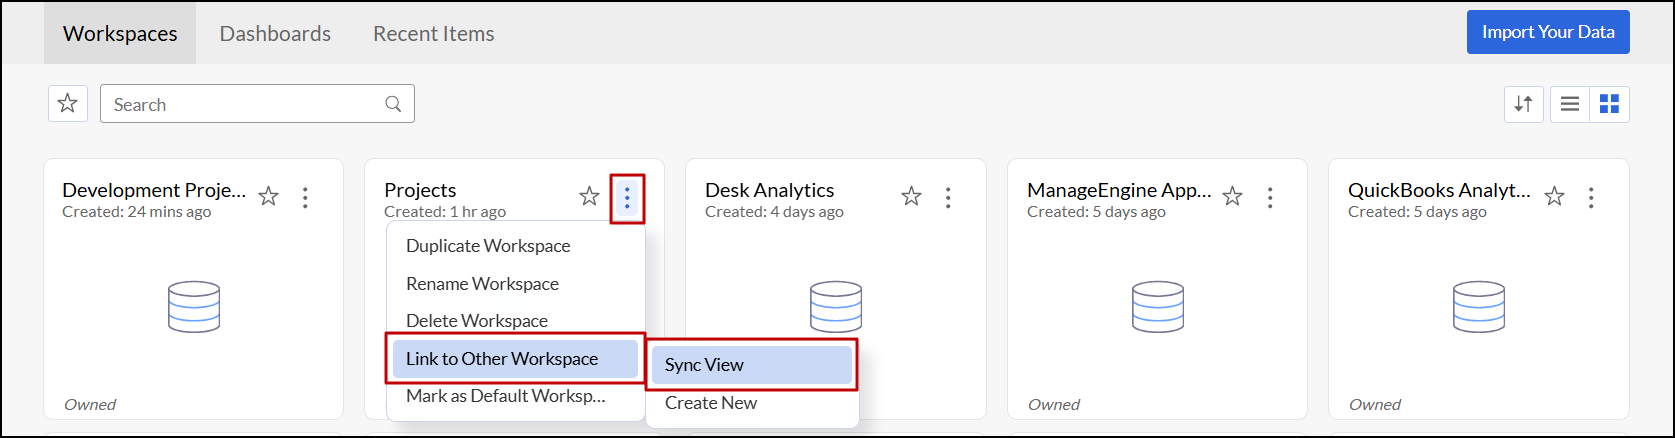
- From the Zoho Analytics home page, navigate to the primary workspace.
- Click the More Options icon at the top right corner.
Choose Link to Other Workspace > Sync View.
- In the dialog that appears, all the secondary workspaces are listed with details such as Workspace Name, Synced by, Last Sync Status, Last Sync Time, and Pending Views.
Click the Sync Views icon that appears on mouse over the desired secondary workspace to synchronize all the pending views.
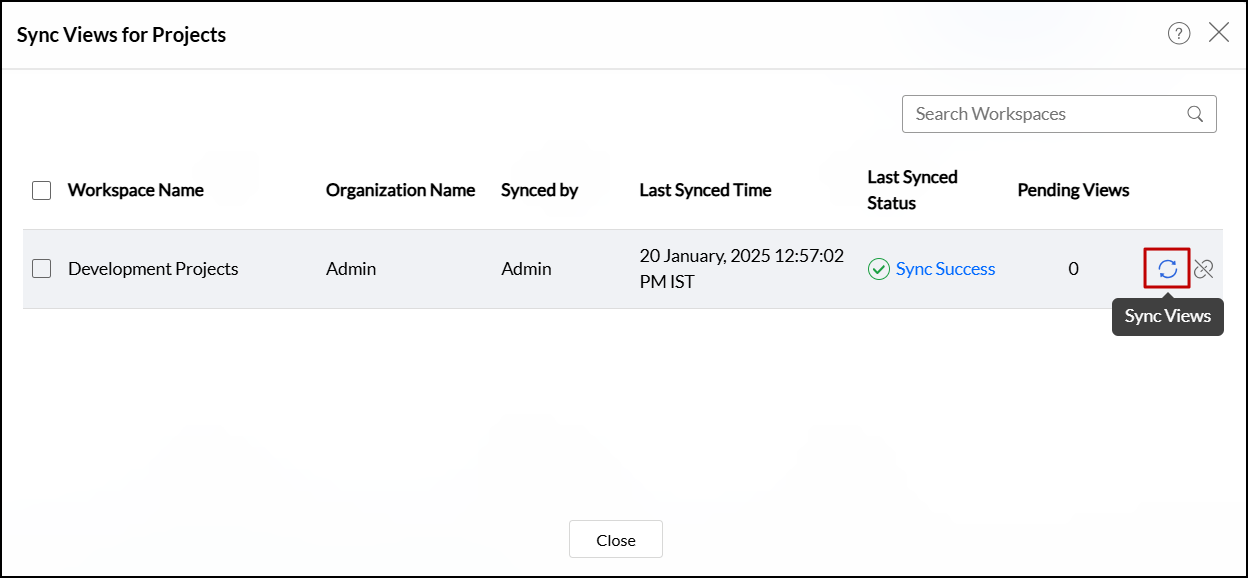
You can also select multiple secondary workspaces and synchronize all the pending views at once by clicking the Sync Views button at the top.


Manage linked workspaces
1. Can I view and manage all the linked workspaces?
Yes, you can check and manage all the linked workspaces from the Settings page. To manage linked workspaces, follow the steps below.
- Click the Settings icon at the top right corner.
- Navigate to Data Administration > Linked Workspaces.
- In the page that appears, a list of all primary workspaces and their associated secondary workspaces is displayed.
- Each secondary workspace is listed with details such as Workspace Name, Synced by, Last Sync Status, Last Sync Time, and Pending Views.
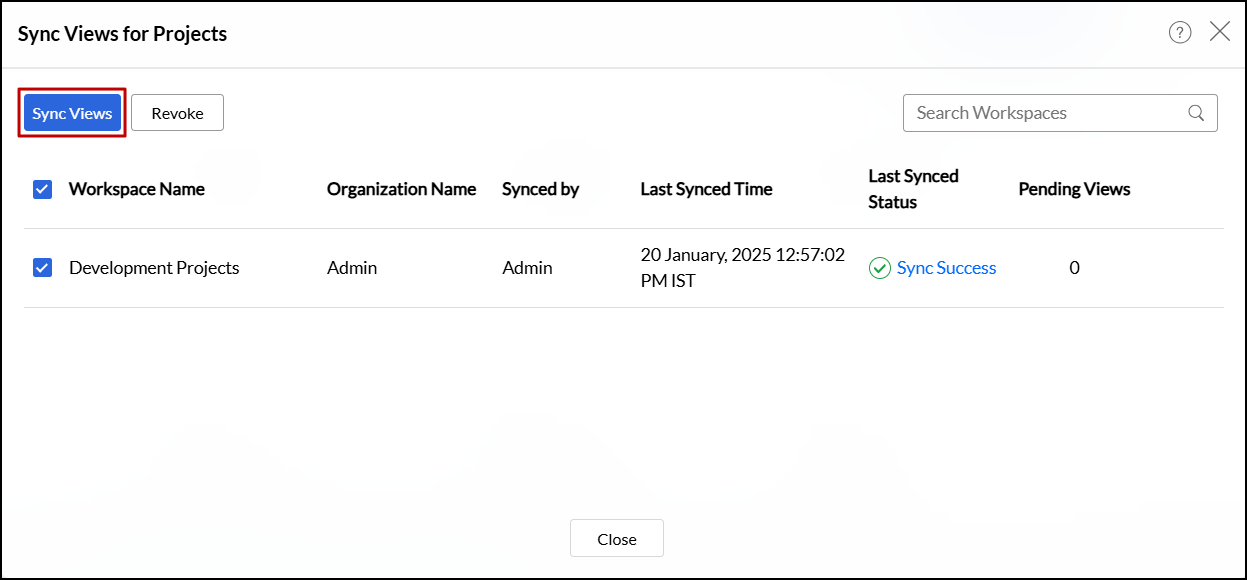
- To sync pending views, select the desired secondary workspaces and click the Sync Views button at the top.
- To revoke the link between the primary and secondary workspaces, select the workspaces and click the Revoke button at the top.
- Alternatively, use the Sync Views icon and Revoke icon next to each workspace's details to sync views or revoke the link for a specific secondary workspace.

2. Can I make changes to the views pushed from the primary workspace?
Yes, you can make changes to the views pushed from the primary workspace to the secondary workspace. You can update or delete these views in the secondary workspace, and it will not affect the views in the primary workspace. When pending views are synced, the modified views in the primary workspace will be synced to match those in the secondary workspace.