Integrate Zoho Books with Zoho Expense
Zoho Books can be connected seamlessly with Zoho Expense as they both share the same core. Though Zoho Books has a dedicated expense module, Zoho Expense provides a comprehensive expense management experience with additional features such as expense report automation and streamlined reports approvals. Integrate Zoho Books with Zoho Expense to let your accounting and expense management go hand-in-hand.
Benefits of the Integration
- Avoid double entry of expenses and reimbursements.
- Account automatically for the approved expenses and reimbursements in Zoho Expense.
- Sync customers and accounts between both apps.
Set up the Integration
Note: You can connect one Zoho Books organisation with only one Zoho Expense organisation at a time.
Warning: Once you set up the integration, you cannot disable it since both apps share the common base.
To connect Zoho Books and Zoho Expense:
- Go to Settings on the top right corner of the page.
- Select Zoho Apps under Integrations.
- On the Zoho Apps page, click Try Now next to Zoho Expense.

If you do not have a Zoho Expense organisation yet, a new one will be created automatically. A quick setup process will help you get started with the organisation.
Once both the apps are connected, the following modules will be synced:
- Customers: All your customer’s details, along with the custom fields, in Zoho Books will be available in Zoho Expense, and vice versa.
- Currencies: If you have added foreign currencies in one of the apps, it will be available in the other, automatically. Expenses will be accounted for in Zoho Books in your base currency.
- Projects: Projects in Zoho Books will be available in Zoho Expense, and vice versa.
Pro Tip: If you want to sync your vendors from Zoho Books with merchants in Zoho Expense, you can write to support@zohoexpense.com and we will enable it for you. Once the sync is enabled, all your vendors in Zoho Books will be synced as merchants in Zoho Expense, and the existing merchants in Zoho Expense will be deleted. A merchant newly created in Zoho Expense will be pushed automatically as a vendor in Zoho Books, and vice versa.
Create Expense Categories
After you connect both the apps, all your categories in Zoho Expense will be available in Zoho Books as Chart of Accounts with the Account Type as Expense.
Similarly, an expense account created in Zoho Books will be available as an active category in Zoho Expense. To do this:
- Go to Accountant > Chart of Accounts.
- Click + New Account.
- Select the Account Type as Expense, and fill in the other details.
- Mark the Show as an active account in Zoho Expense option.
- Click Save.

View Approved Expenses
When a report has been approved in Zoho Expense, all the expenses which are a part of it will be available instantly in Zoho Books. You can even filter out the list of expenses in Zoho Books to view only the expenses from Zoho Expense. Here’s how:
- Go to Purchases > Expenses.
- Click the All Expenses dropdown above the list of expenses.
- Select From Zoho Expense from the dropdown.

Insight: An expense created in Zoho Books will not be available in Zoho Expense.
Account for Reimbursements
The expenses that are reimbursed in Zoho Expense will be accounted for automatically in Zoho Books. If they are not reimbursed, you can reimburse and account for them from Zoho Books as well.
Record Reimbursements Manually
To record a reimbursement from Zoho Books:
- Go to the Banking module.
- Select the account under which you want to record the reimbursement.
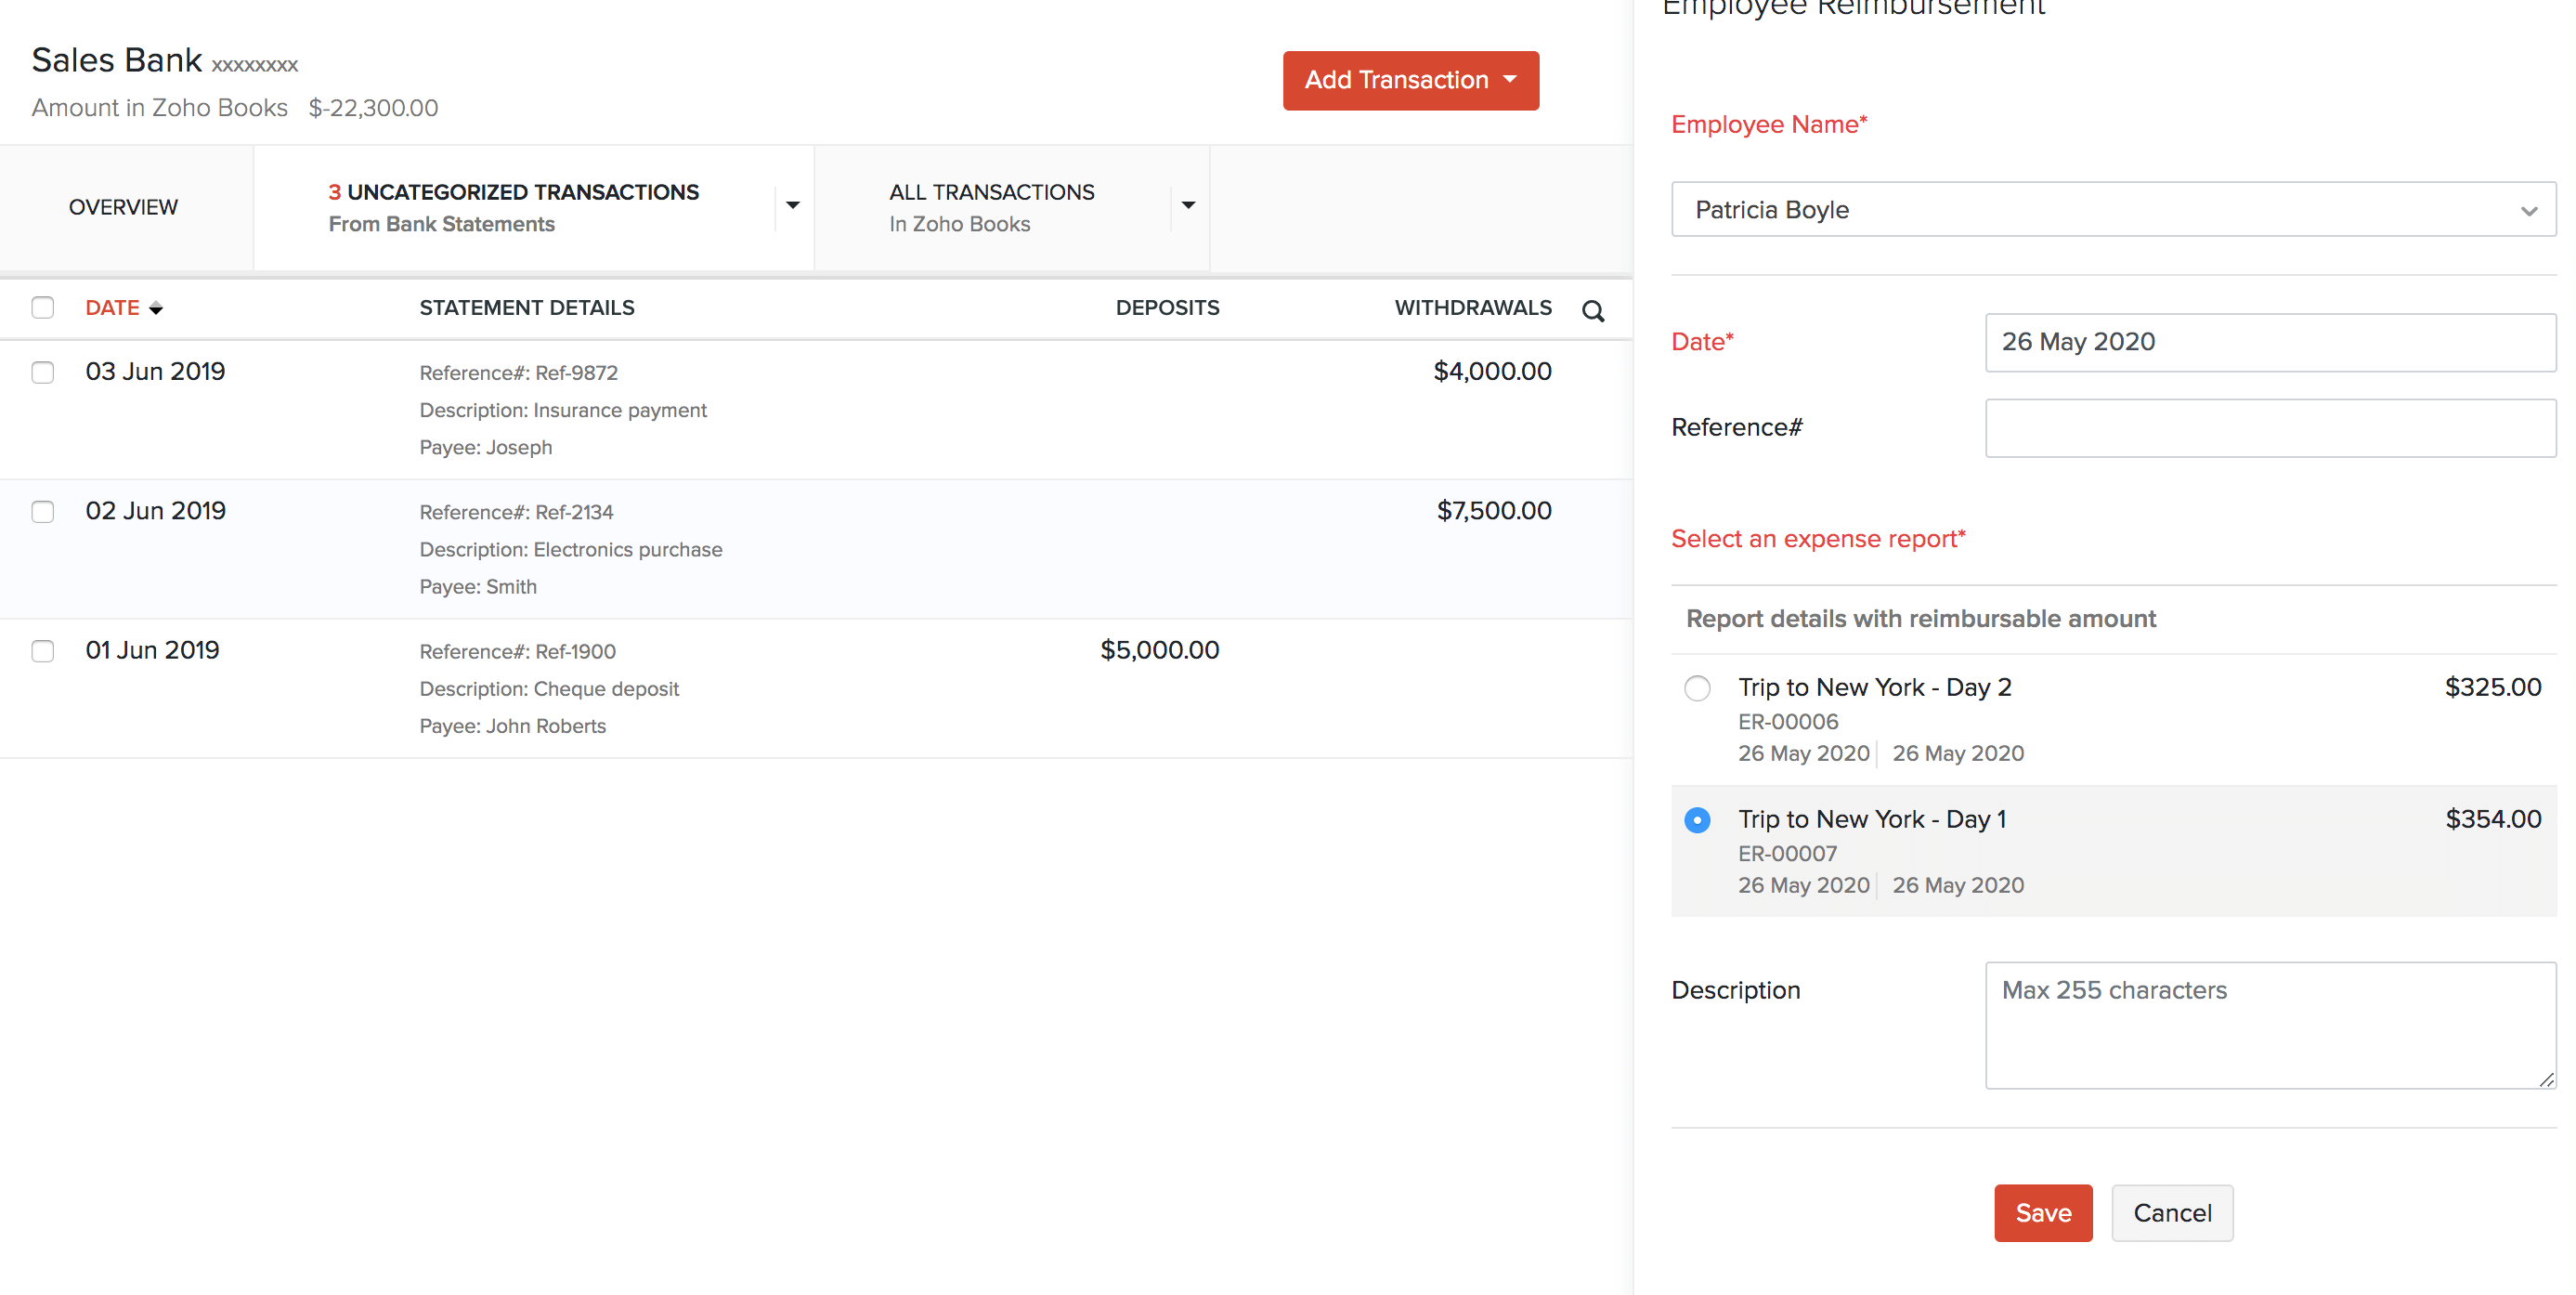
- Click Add Transaction on the top-right corner.
- Select Employee Reimbursement from the drop-down.
- Fill in the details and select the report you want to reimburse.
- Click Save.

Match Transactions
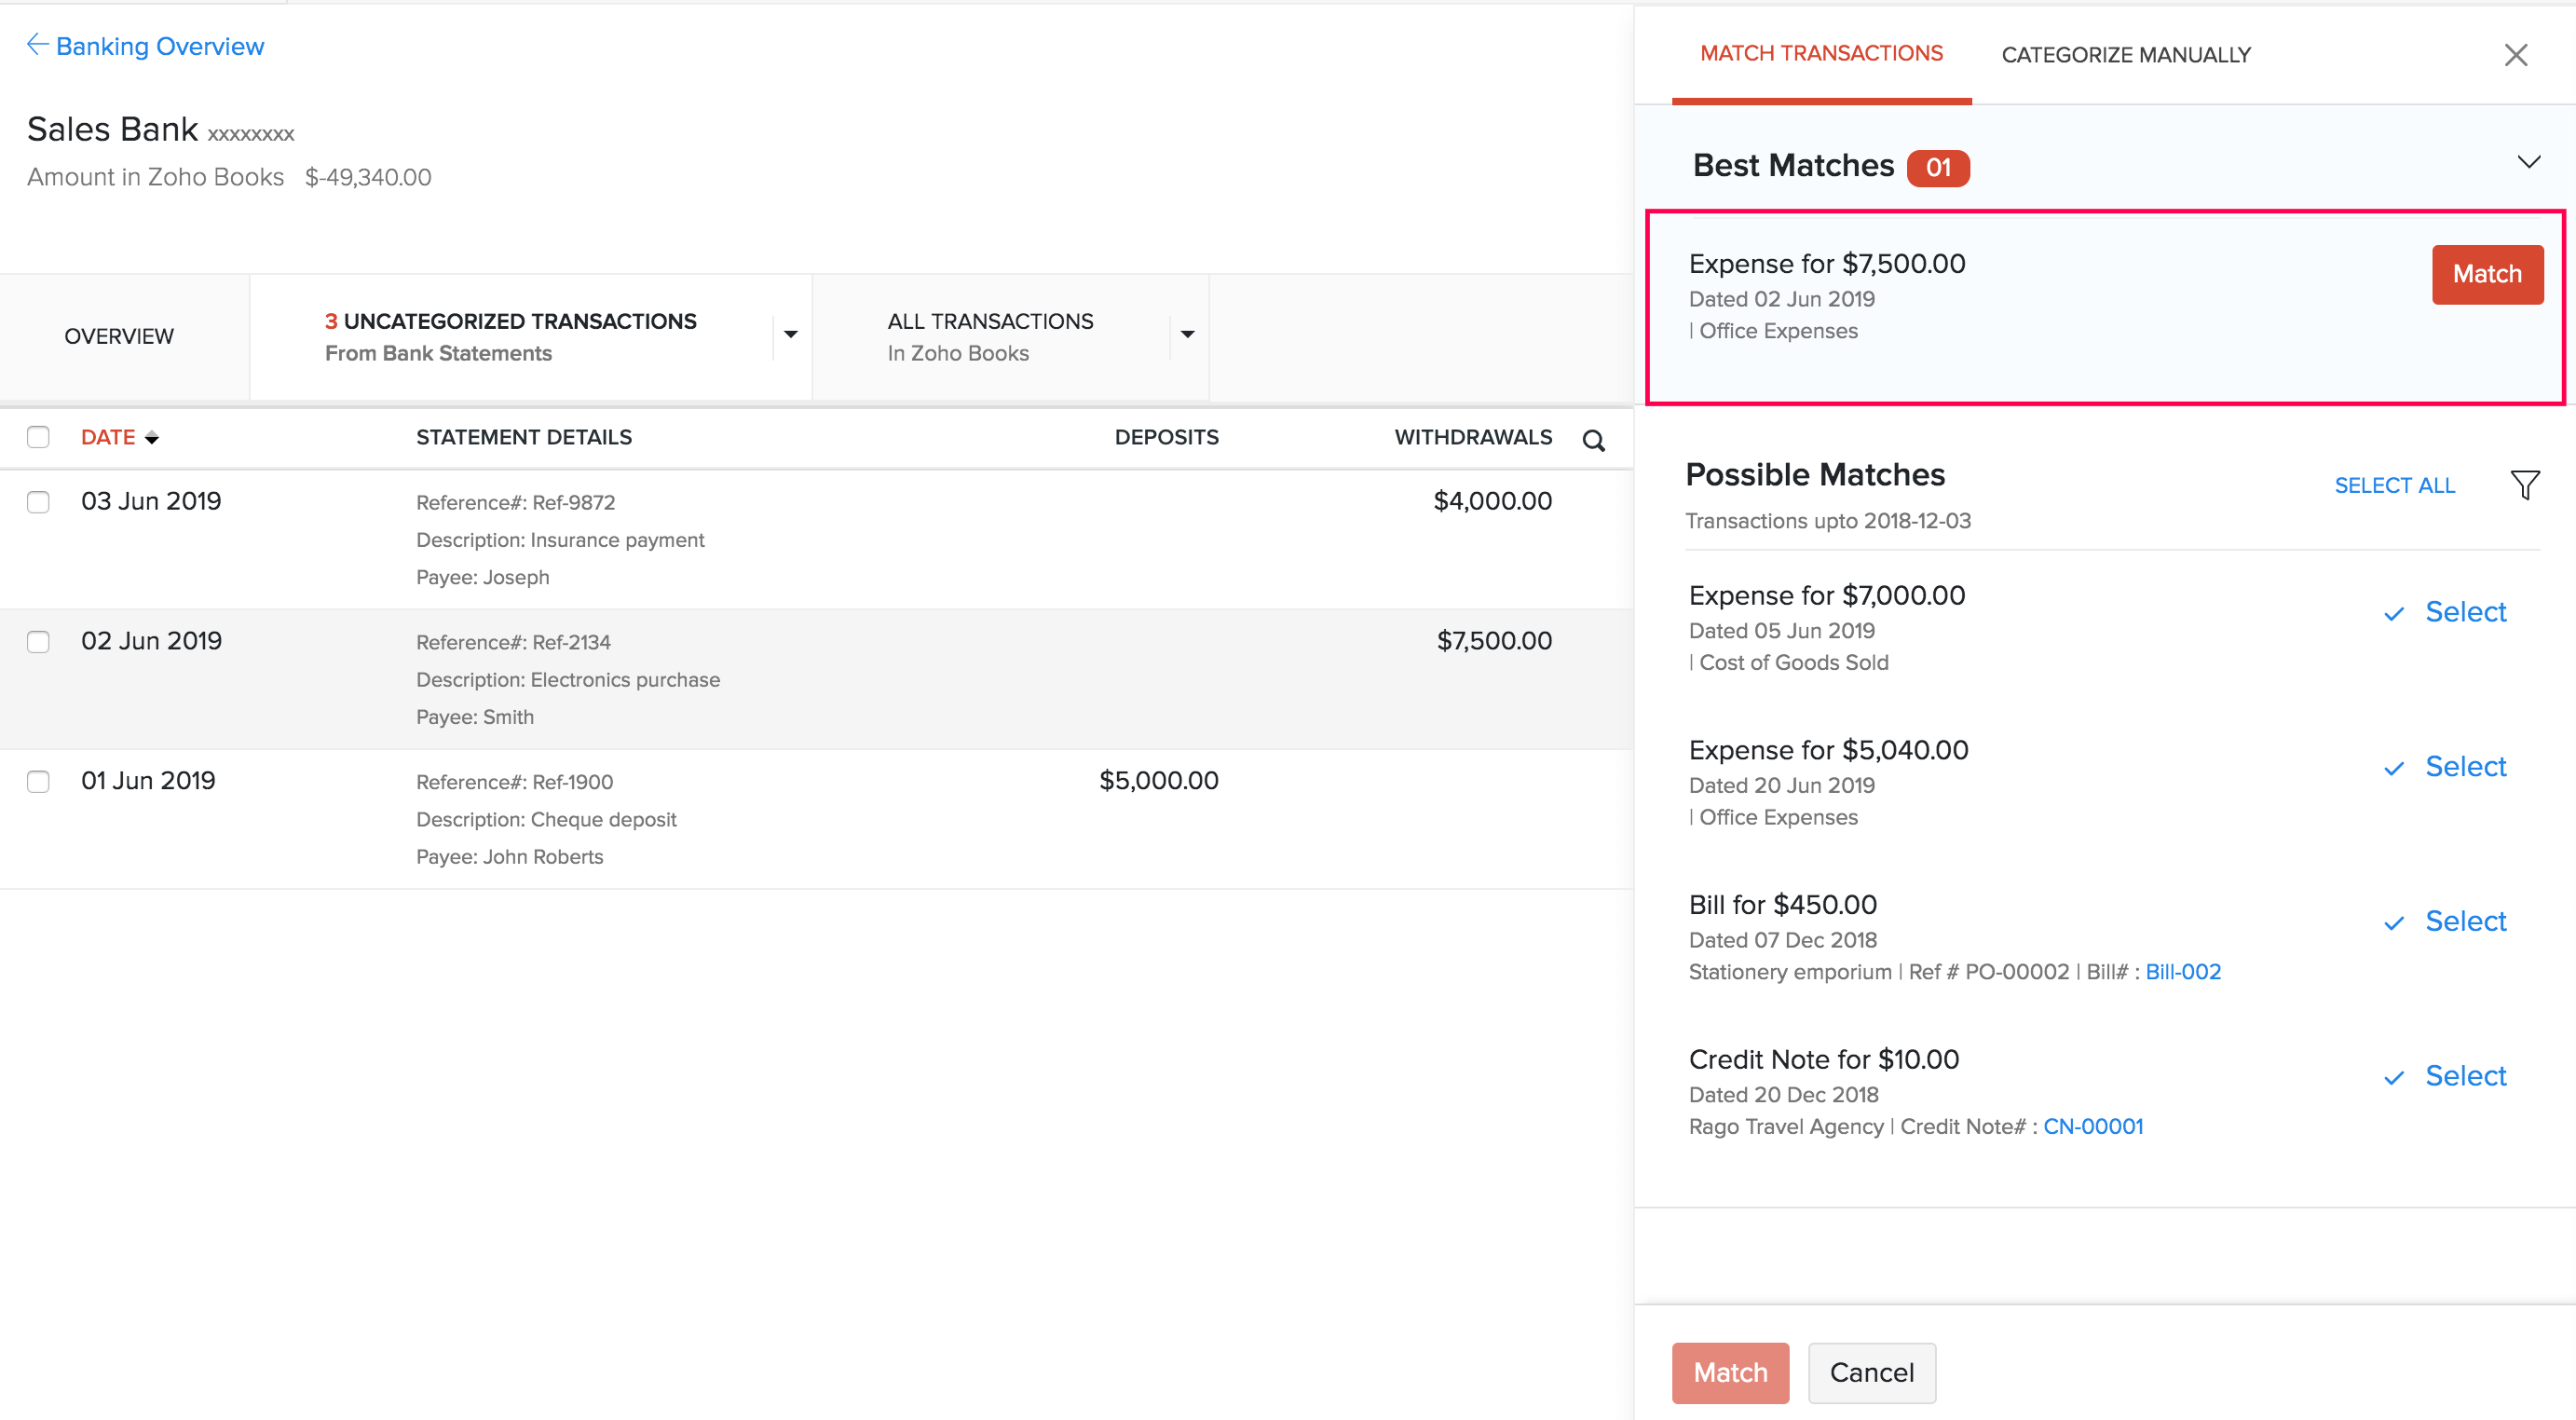
The expenses that are reimbursed in Zoho Expense or reimbursed manually in Zoho Books will be labeled as Manually Added transactions. However, when you import bank statements into Zoho Books, you might have to categorise the statement lines or match it with an existing transaction (manually reimbursed expenses). Here’s how you can do it:
- Go to the Banking module.
- Select the bank account which has uncategorised transactions.
- Click an uncategorised transaction, and Zoho Books will list out the Best Matches and the Possible Matches for that transaction.
- Select the required transactions and click Match.

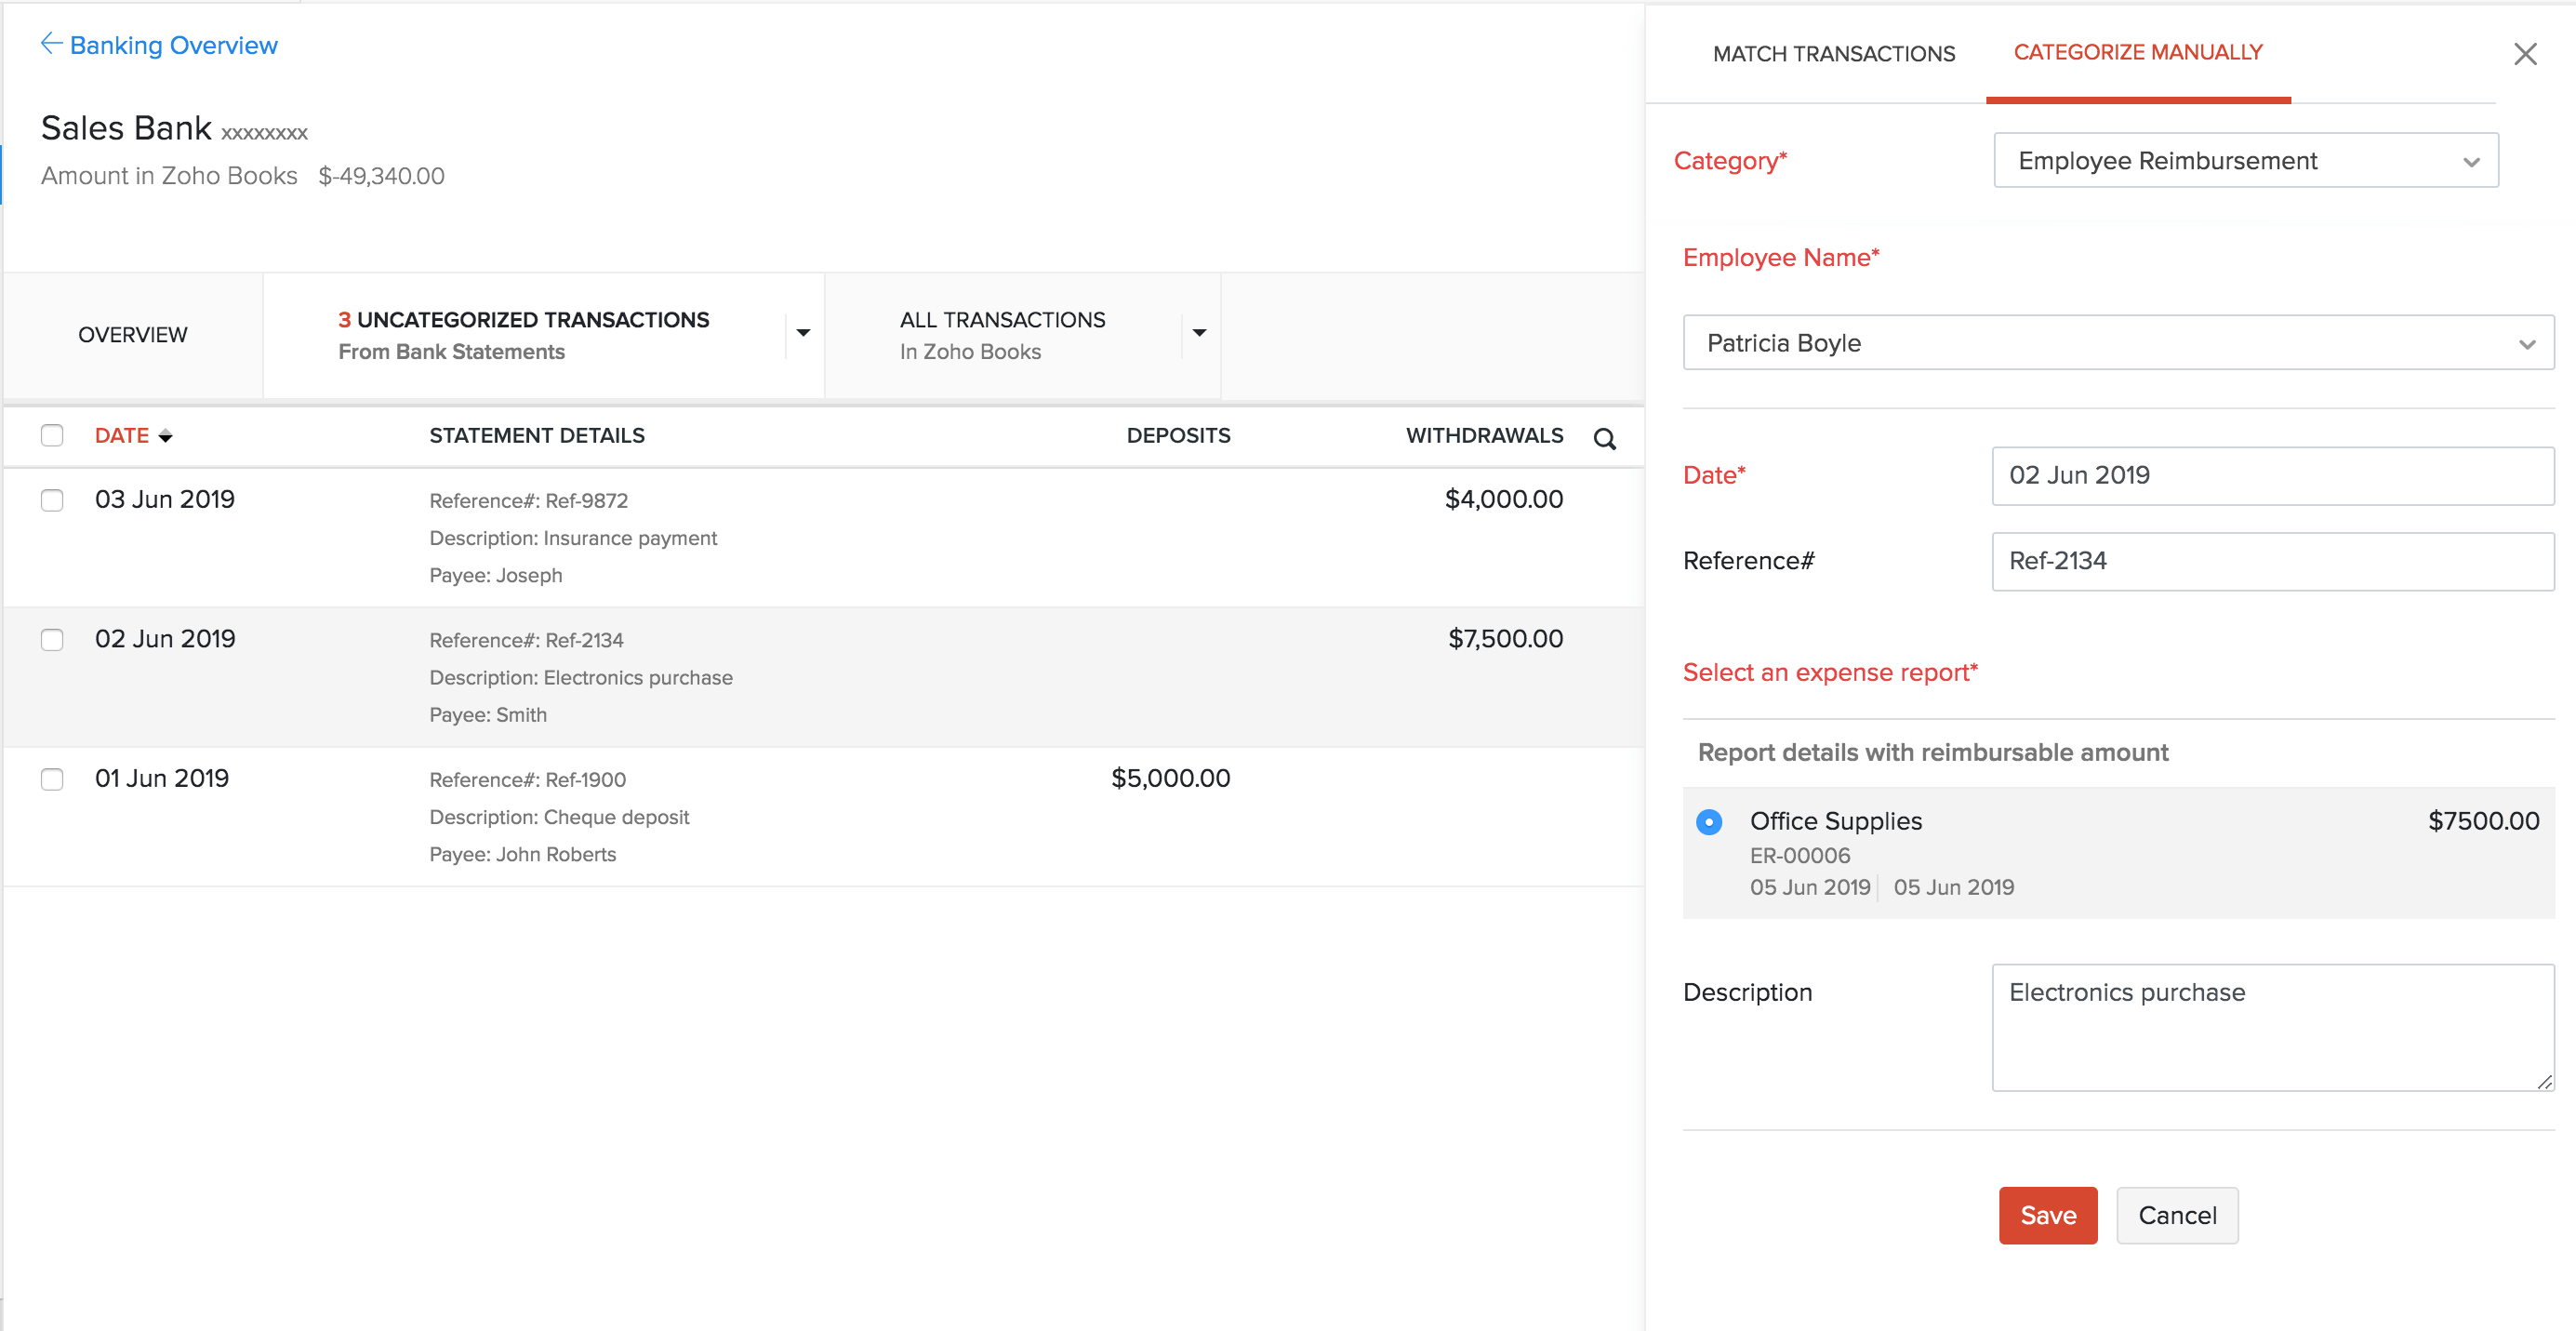
If the statement line does not have a matching transaction, or you do not want to associate it with an existing transaction, you can categorise it manually. To do so:
- Click the Categorise Manually tab.
- Select Employee Reimbursement from the Category drop-down.
- Fill in the details and choose the report with which you want to associate your uncategorised transaction.
- Click Save.

Learn more about matching and categorizing transactions in Zoho Books.
Reconcile Corporate Cards
If you have set up corporate cards for your organisation in Zoho Expense, the corporate card feeds will also be available in Zoho Books. To reconcile the corporate cards in Zoho Books:
Notes: This feature is available only in early access. To enable it, contact our support team at support@zohobooks.com.
- Go to Banking on the left sidebar.
- Select the corporate card for which you want to reconcile transactions.
- Click Reconcile Account in the top right corner.
- Click Reconcile Now in the new page that appears.
- Enter the Start Date, End Date, and the Closing Balance.
- Click Start Reconciliation.
- Select the transactions you want to reconcile.
To reconcile your corporate card, ensure that the Closing Balance and Cleared Amount are the same, resulting in a zero difference. If necessary, you can edit the Closing Balance by clicking the Edit icon next to the Closing Balance field.
Note: Only the matched, categorised and manually added transactions will be shown in the Corporate card - Reconciliation page.
- Click Reconcile. If you want to reconcile later, click Save and Reconcile Later.
Once reconciliation is successful, the status in the Corporate card - Reconciliations page will be marked as Reconciled.
View Advance Payments
Zoho Expense lets you record advance payments when you create expense reports. Once integrated with Zoho Books, you can view these employee advance payments along with the list of approved expenses. To view this in Zoho Books:
- Go to Reports > Accountant > Account Transactions.
- Click Customise Report on the top-left corner.
- Create a new filter with the Account as Employee Advance.
- Click Run Report.


 Yes
Yes