Taxes
Zoho Books lets you create and apply taxes to your transactions and stay tax compliant. In India, it is mandatory for businesses with a turnover of more than 20 lakhs per annum to be registered for GST.This section helps you configure your tax settings and keep track of all the taxes to be paid and received in your business.
Note: This document is applicable only for the Indian Edition of Zoho Books.
Note: The Government of India has revised the GST structure, effective September 22, 2025. To help you comply with the revised tax rates, Zoho Books is ready to support the new tax rates for your items based on their HSN code. Learn More
Update to GST 2.0 Rates in Zoho Books
Zoho Books makes it easy to switch to the new GST rates. You can review the new tax rates for all items based on their HSN Codes, Composite Items, and any recurring transactions. Once reviewed, you can schedule the update. Zoho Books will then apply the new GST rates across all transactions. To review and update:
- Go to your Zoho Books organisation’s Home page.
- Click View Details from the GST Slab Update banner.
- Click Review Updates to apply the new tax rates automatically.
- Review the tax changes and click Proceed to Schedule Update.
- If your organisation has more than 250 items, the preview will not be available.
- You can download the Tax Update file from the generated link to view the new tax rates for all items, along with their HSN Codes, Composite Items, and Recurring Transactions.
- Once you have reviewed the items and tax rates, click Confirm & Schedule.
- Select your preferred date for updating the tax rates.
| Date | How It Is Updated |
|---|---|
| 22 September 2025 (Monday) | New tax rates will be updated on this date. Any transaction created on or after this date will have the new GST rates applied. |
| 20 September 2025 (Saturday) | New tax rates will be updated on this date. Any transaction created after this date will have the new rates, but they will not be effective yet. |
| 21 September 2025 (Sunday) | New tax rates will be updated on this date. Any transaction created after this date will have the new rates, but they will not be effective yet. |
Note: If you create a transaction dated before the scheduled update, the new tax rate will be applied by default. You can manually change the tax rate from the item’s Edit page if needed.
- Check the I agree to manually update the tax rates for all my items and to ensure they are correct for all transactions created until September 22, 2025.
- Click Confirm & Schedule to schedule the update.
Alternatively, you can update the new tax rates manually. To do so, export all your items, composite items, and recurring transactions, update the new tax rates in a spreadsheet, and re-import the updated files into Zoho Books.
What Happens After GST Rates Are Updated
Once the new GST rates are updated:
- The Tax Rates under Taxes in Settings will display both the old and new tax rates.
- Items will be updated with new tax rates based on their selected HSN Code. For items without an HSN Code, you must update the new tax rates manually.
- Any transaction created after the update will have the new tax rate set as the default. You can still manually change the tax rate from the transaction’s Edit page if needed.
GST Settings
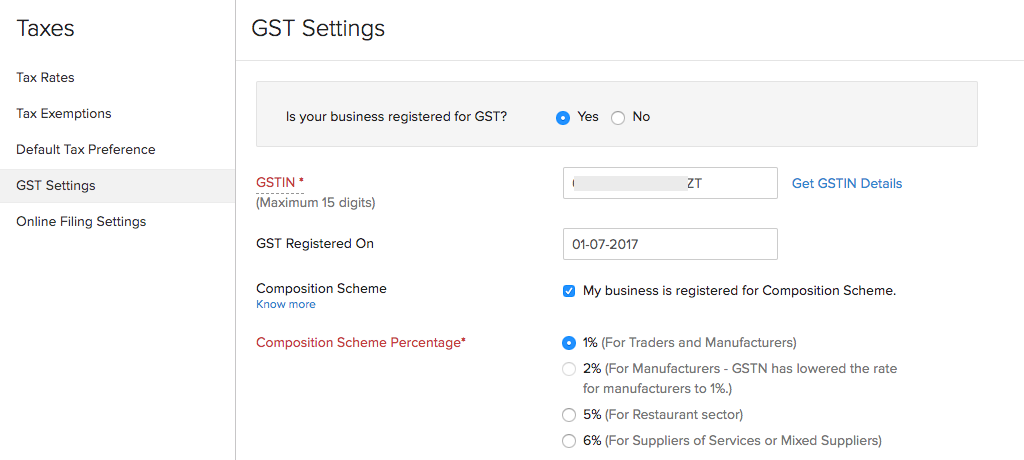
If your business has been registered for GST, you can configure your taxes in Zoho Books. These taxes will be included while you create a transaction, generate tax reports and so on. You might have been prompted to enter your tax details when you first set up the organisation. If you had skipped it, or if you would like to edit your settings, here’s how you can do it:
- Go to Settings on the top right corner of the page.
- Select Taxes under Taxes & Compliance.
- In the Taxes pane, select GST Settings.
- Select Yes for the option Is your business registered for GST?.
- Enter you 15 digit GSTIN and click the option Get GSTIN Details to view the details of your tax registration, previous returns filed, and so on.
Insight: The Goods and Services Tax Identification Number (GSTIN), is a unique 15 digit identification number issued by the tax department upon successful registration of GST.
- Enter the date of GST registration.
- Mark the box near My business is registered for Composition Scheme if you are a composition dealer and select your Composition Scheme Percentage.
Insight: Business owners whose aggregate turnover is less than Rs. 1.5 crore (less than 75 Lakhs for North-Eastern states) can register under the composition scheme. They cannot claim Input Tax Credits of supply GST exempted goods.
- Mark the box near Enable reverse charge in sales transactions if your customer is liable to pay the taxes for certain transactions.
- Mark the box near My business is involved in SEZ/Overseas Trading if you import or export goods and deal with supplies to SEZs. Enabling this option helps you to create Bills of Supply and Shipping Bills.
- Select the Custom Duty Tracking Account. You can select an account from the dropdown or create a new expense account by clicking + New Account.
- Mark the box near Track sale of digital services to overseas customers to record and track the digital services (such as software or cloud services) that your organisation offers.
Insight: While creating items, enable the It is a digital service option to classify it as a digital service. You can create a new tax rate for it and the transactions will reflect in the Overseas Digital Tax Summary report.
If a sales transaction contains a digital service along with goods, it will be treated as a service associated with the goods. In this case, only IGST 0 can be applied as the tax rate.
- Click Save.
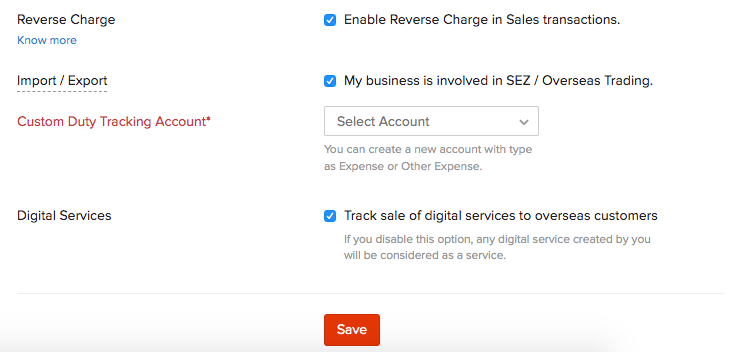
This will update your tax settings that will reflect in your transactions, reports and returns. If would like to file your GST from Zoho Books, you will have to enable online filing.
Enable GST for Locations Enabled Organizations
If you have enabled locations in your organization and want to enable GST, it is mandatory to associate a GSTIN with every active location.
Note: If you don’t want to associate a GSTIN with a location, you can mark it as inactive and activate it later if needed.
To associate GSTIN for your active locations and enable GST:
- Go to Settings in the top right corner.
- Select Taxes under Taxes and Compliance.
- Navigate to GST Settings and slide the toggle next to the Is your business registered for GST? option*.*

- Read the details in the “Associate active locations with GSTINs to enable GST in Zoho Books*”* pop-up that appears, and then click Continue."
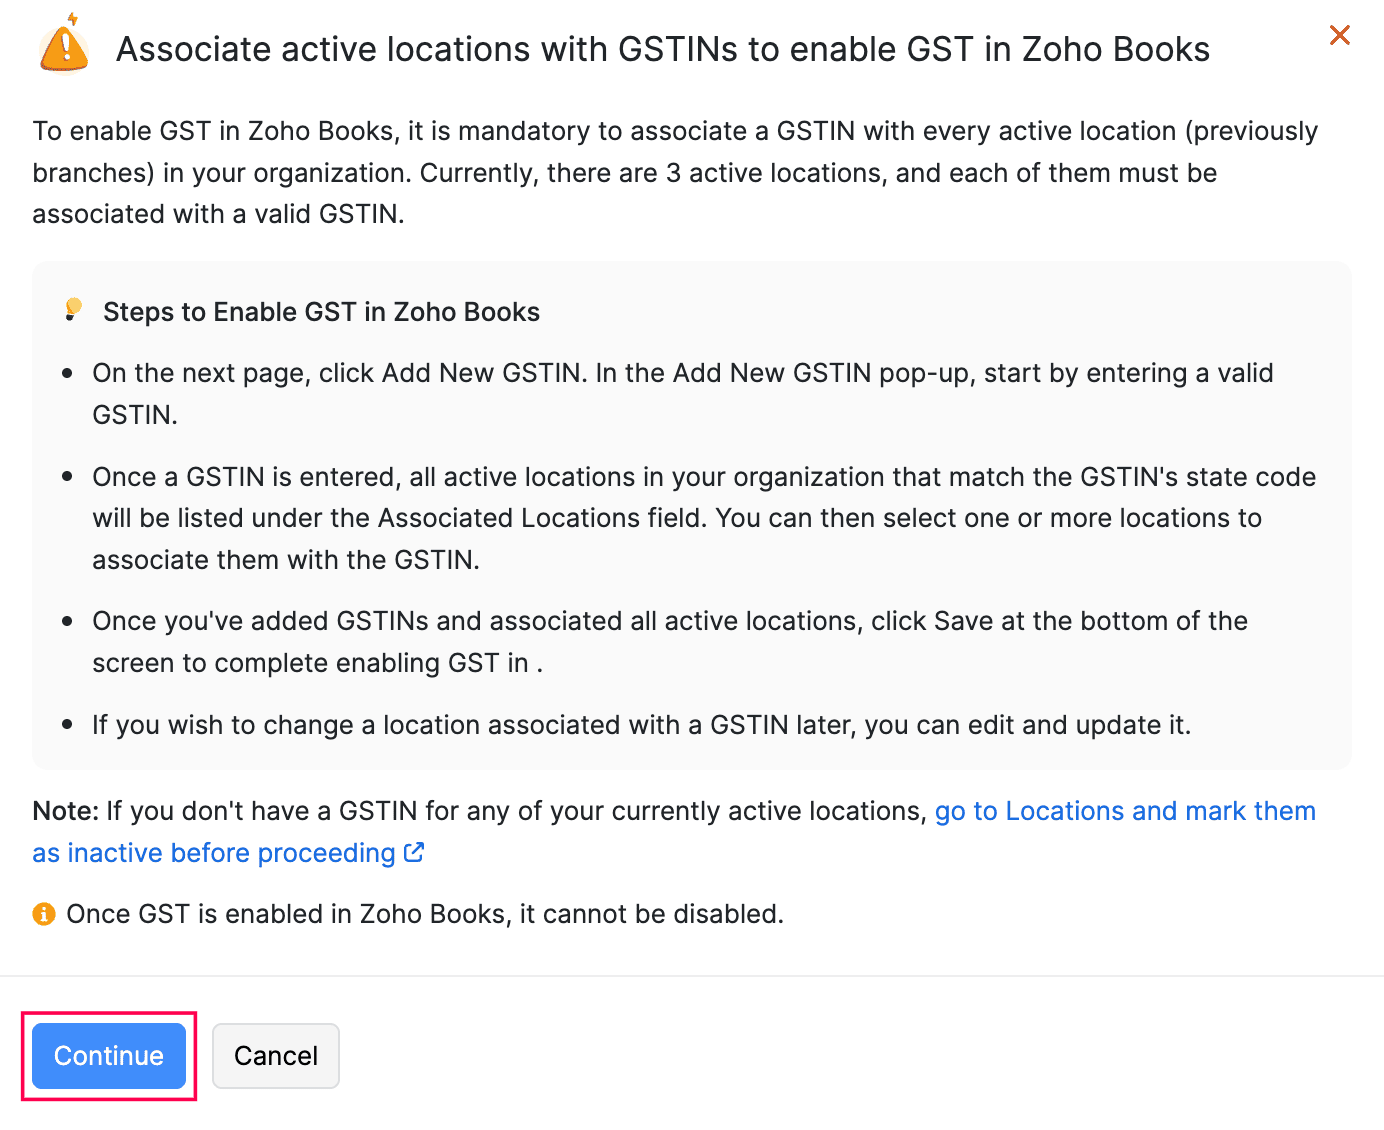
- Click Add New GSTIN and Associate Locations. In the New GSTN pop-up:
- Enter the GSTIN for the location.
- Enter all the other necessary details.
- In the Associated Locations field, select the locations you want to link to the GSTIN. Note that the dropdown will display locations based on the state code, which is derived from the first two digits of the GSTIN you enter.
- Click Add.
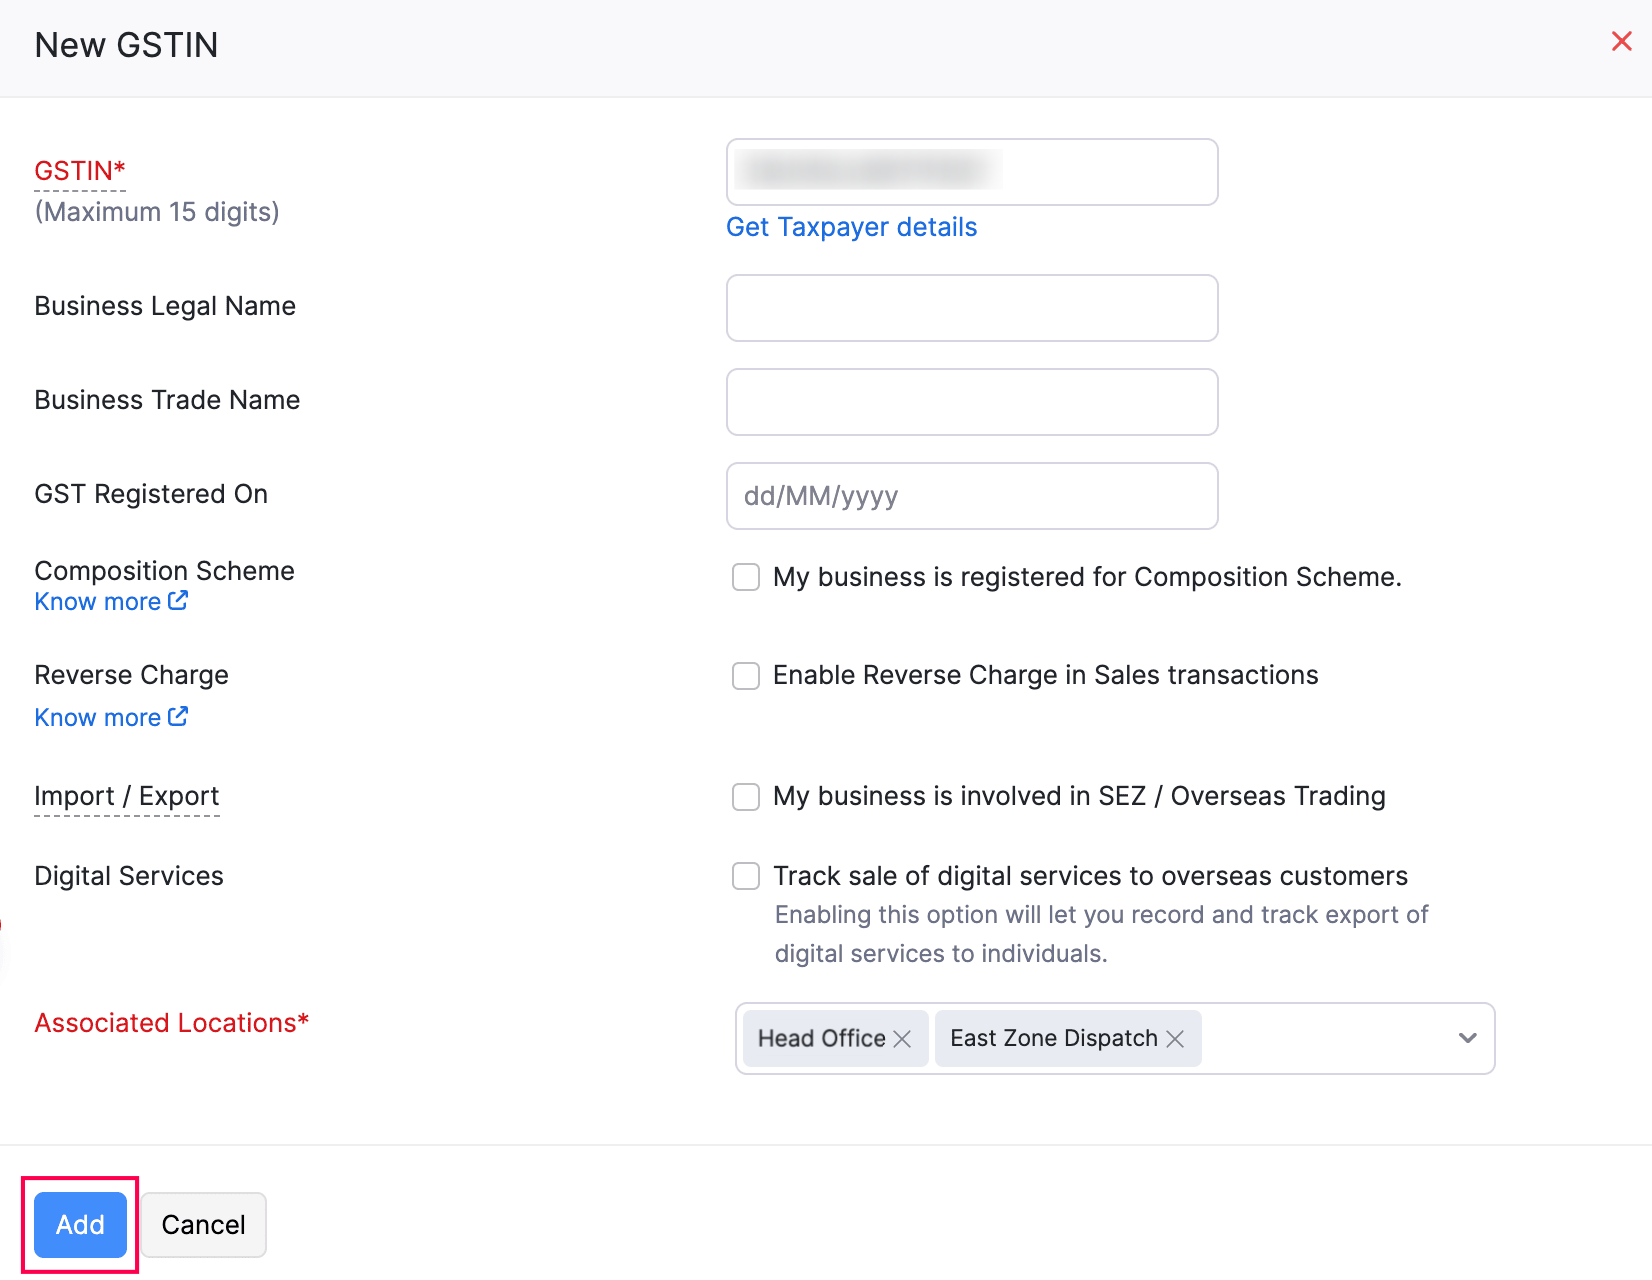
Similarly, add a GSTIN for each of your locations. You can view the locations that are not associated with GSTIN, by clicking View Unassociated Locations in the GST Settings page.
- Click Save once you’re done.
- Click Enable GST in the confirmation pop-up that appears.
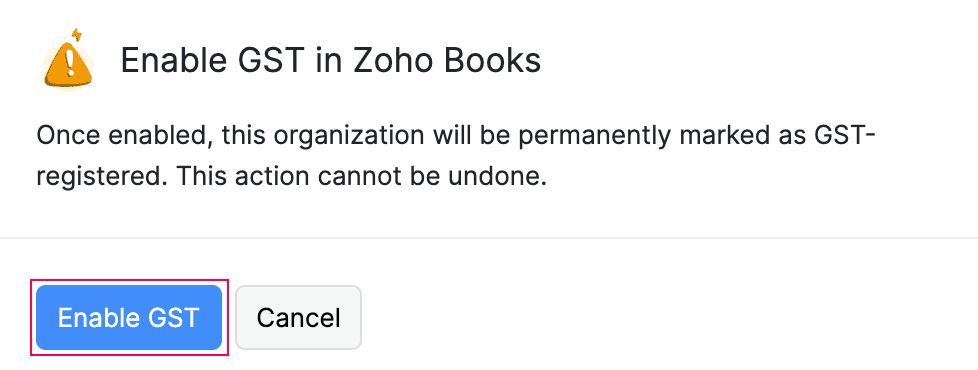
GST will now be enabled for your organization.
Note: If you wish to change the GSTIN associated with a location, go to Settings > Organizations > Locations. Click the dropdown next to the desired location and select Edit, enter the new GSTIN and click Save.
Associate GSTIN and Mark a Location as Active
If you’ve previously marked a location as inactive and now want to activate it and associate a GSTIN with it, you must first associate the GSTIN with the location, and then mark the location as active. Here’s how:
- Go to Settings in the top right corner.
- Select Locations under Organization.
- In the Locations page, click Associate GSTIN next to the location you want to update.

In the Associate GSTIN pop-up that appears, select one of the following options in the Associate Type field:
- To add new GSTN and associate it with a locations, select the Add New GSTIN & Associate, enter the GSTIN and and all the other necessary information and click Save.
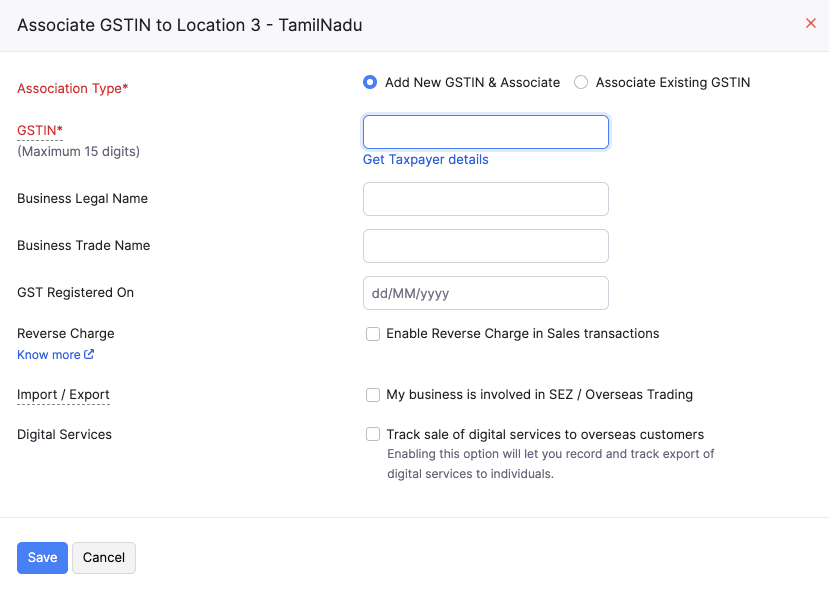
- To associate an existing GSTIN, select Associate Existing GSTN, click the GSTIN dropdown and select a GSTIN, and click Save.
The GSTIN will be associated with the location.
After associating GSTIN with the location, you can mark the location as active. To do this:
- Click the dropdown next to the location, and select Mark as Active.

The location will be marked as active.
Manage Additional GSTINs
If your business is eligible for multiple GSTINs, you can associate an additional GSTIN with a customer/vendor’s new address and track the taxes in your transactions accordingly. To associate GSTIN:
- Go to Sales > Customers or Purchases > Vendors and select the customer/vendor for whom you want include the additional GSTIN.
- Click Add Additional Address in the Overview tab and enter the required details.
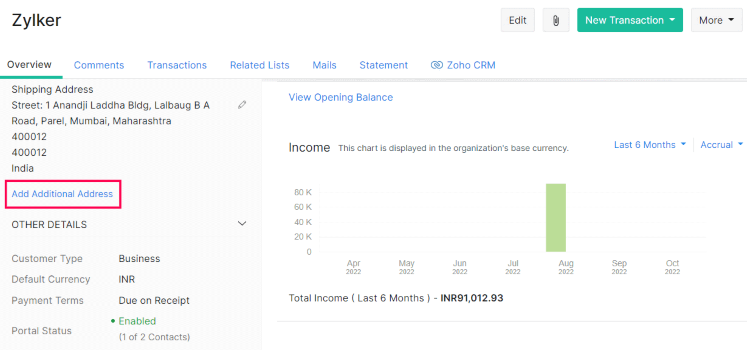
- Go to the Tax Information dropdown and select Manage Tax Informations to add or select the GSTIN that must be associated with this address.
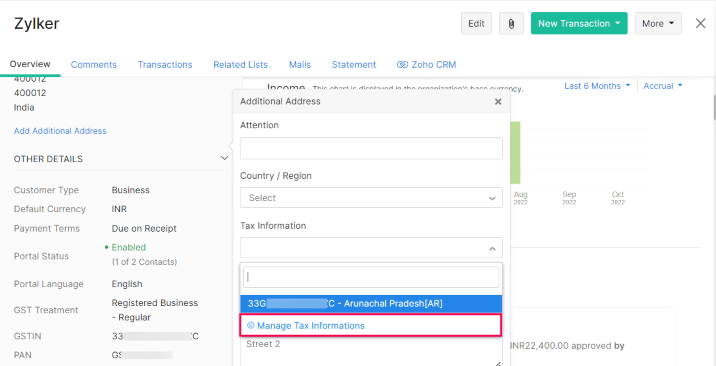
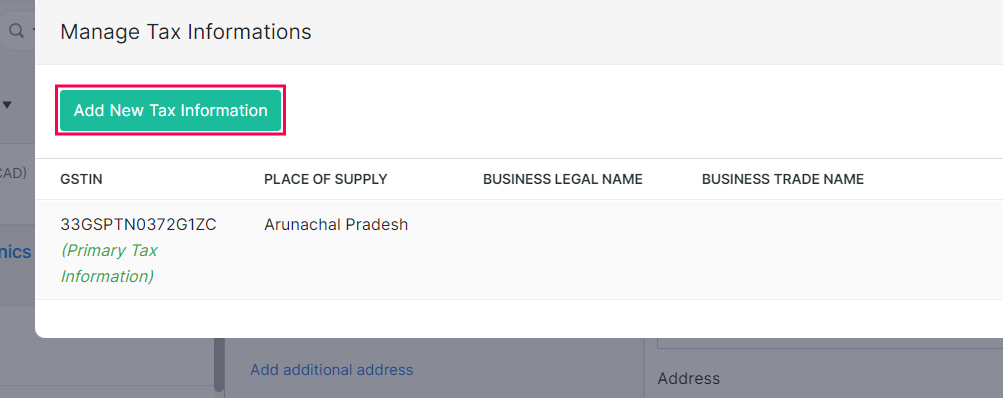
- In the pop-up that appears, click the Add New Tax Information button.
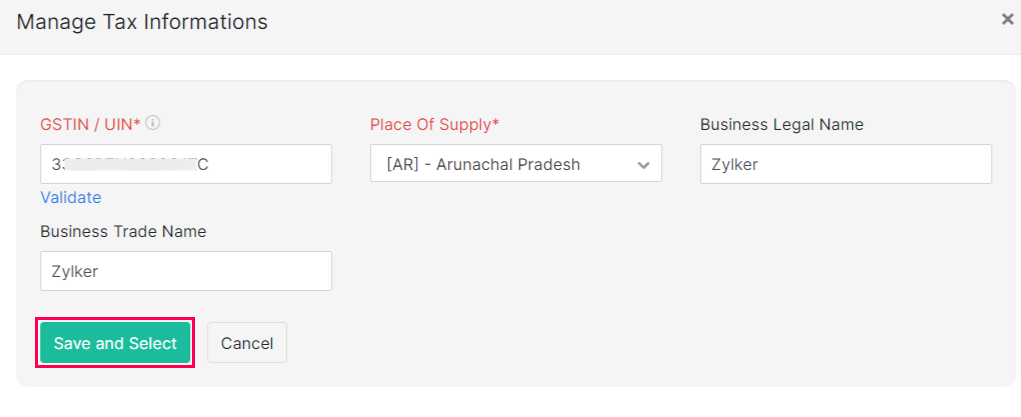
Enter the GSTIN/UIN and the Place of Supply will be automatically populated by Zoho Books.
Save and Select the tax information and it will be associated with the additional address.
Each time you choose an address while creating a transaction, the corresponding GSTIN will be used.
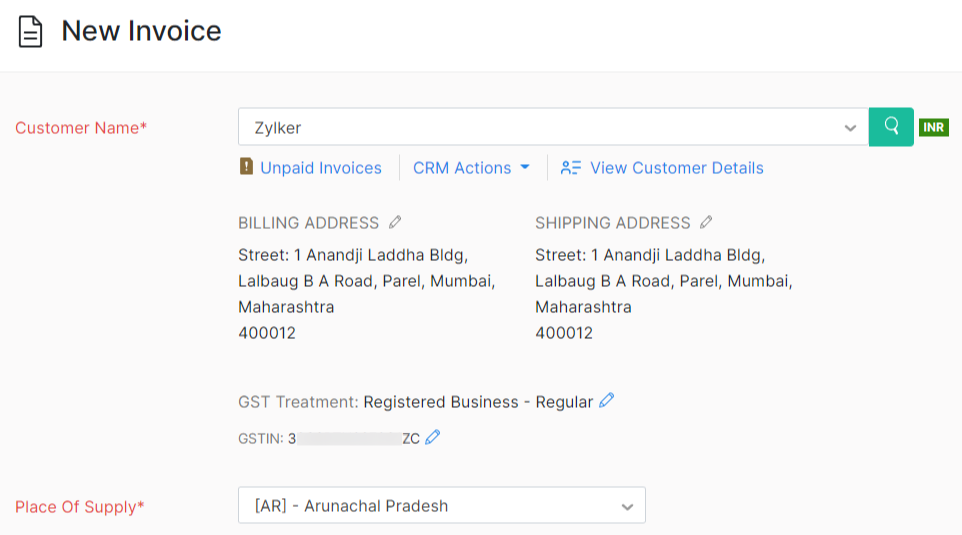
Insight: The Tax Information (GSTIN and Place of Supply) associated with the address while creating the contact will be considered as the primary tax information.
Online Filing Settings
Zoho Books lets you to connect your organisation with the GSTN to file your returns directly or push your data to the portal and file your returns. For this, you will have to enable online filing in Zoho Books. Here’s how:
- Go to Settings on the top right corner of the page.
- Select Taxes under Taxes & Compliance.
- In the Taxes pane, select Online Filing Settings.
- Enter your GSTN Username as issued to you by the GSTN.
- Select your Reporting Period. This can either be quarterly or monthly.
- Select the month from which you would like to generate returns in Zoho Books under Generate First Tax Return From.
- Enable approval process for filing GST Returns if you would like the users to submit returns to the admins before submitting the returns to the GST portal. Learn More.
- Select the approvers if you had enabled GST return approvals.
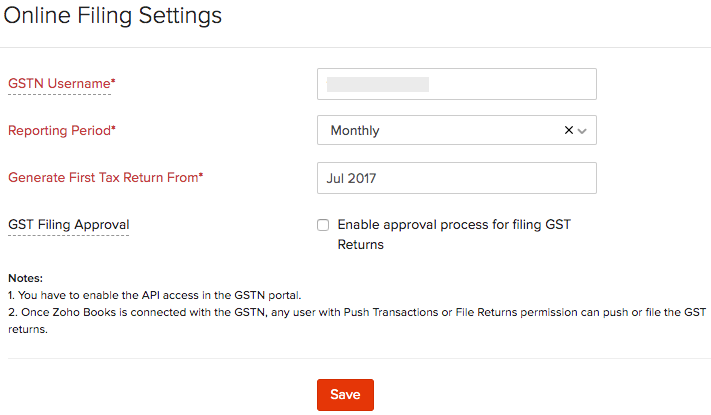
- Click Save.
Default Tax Preference
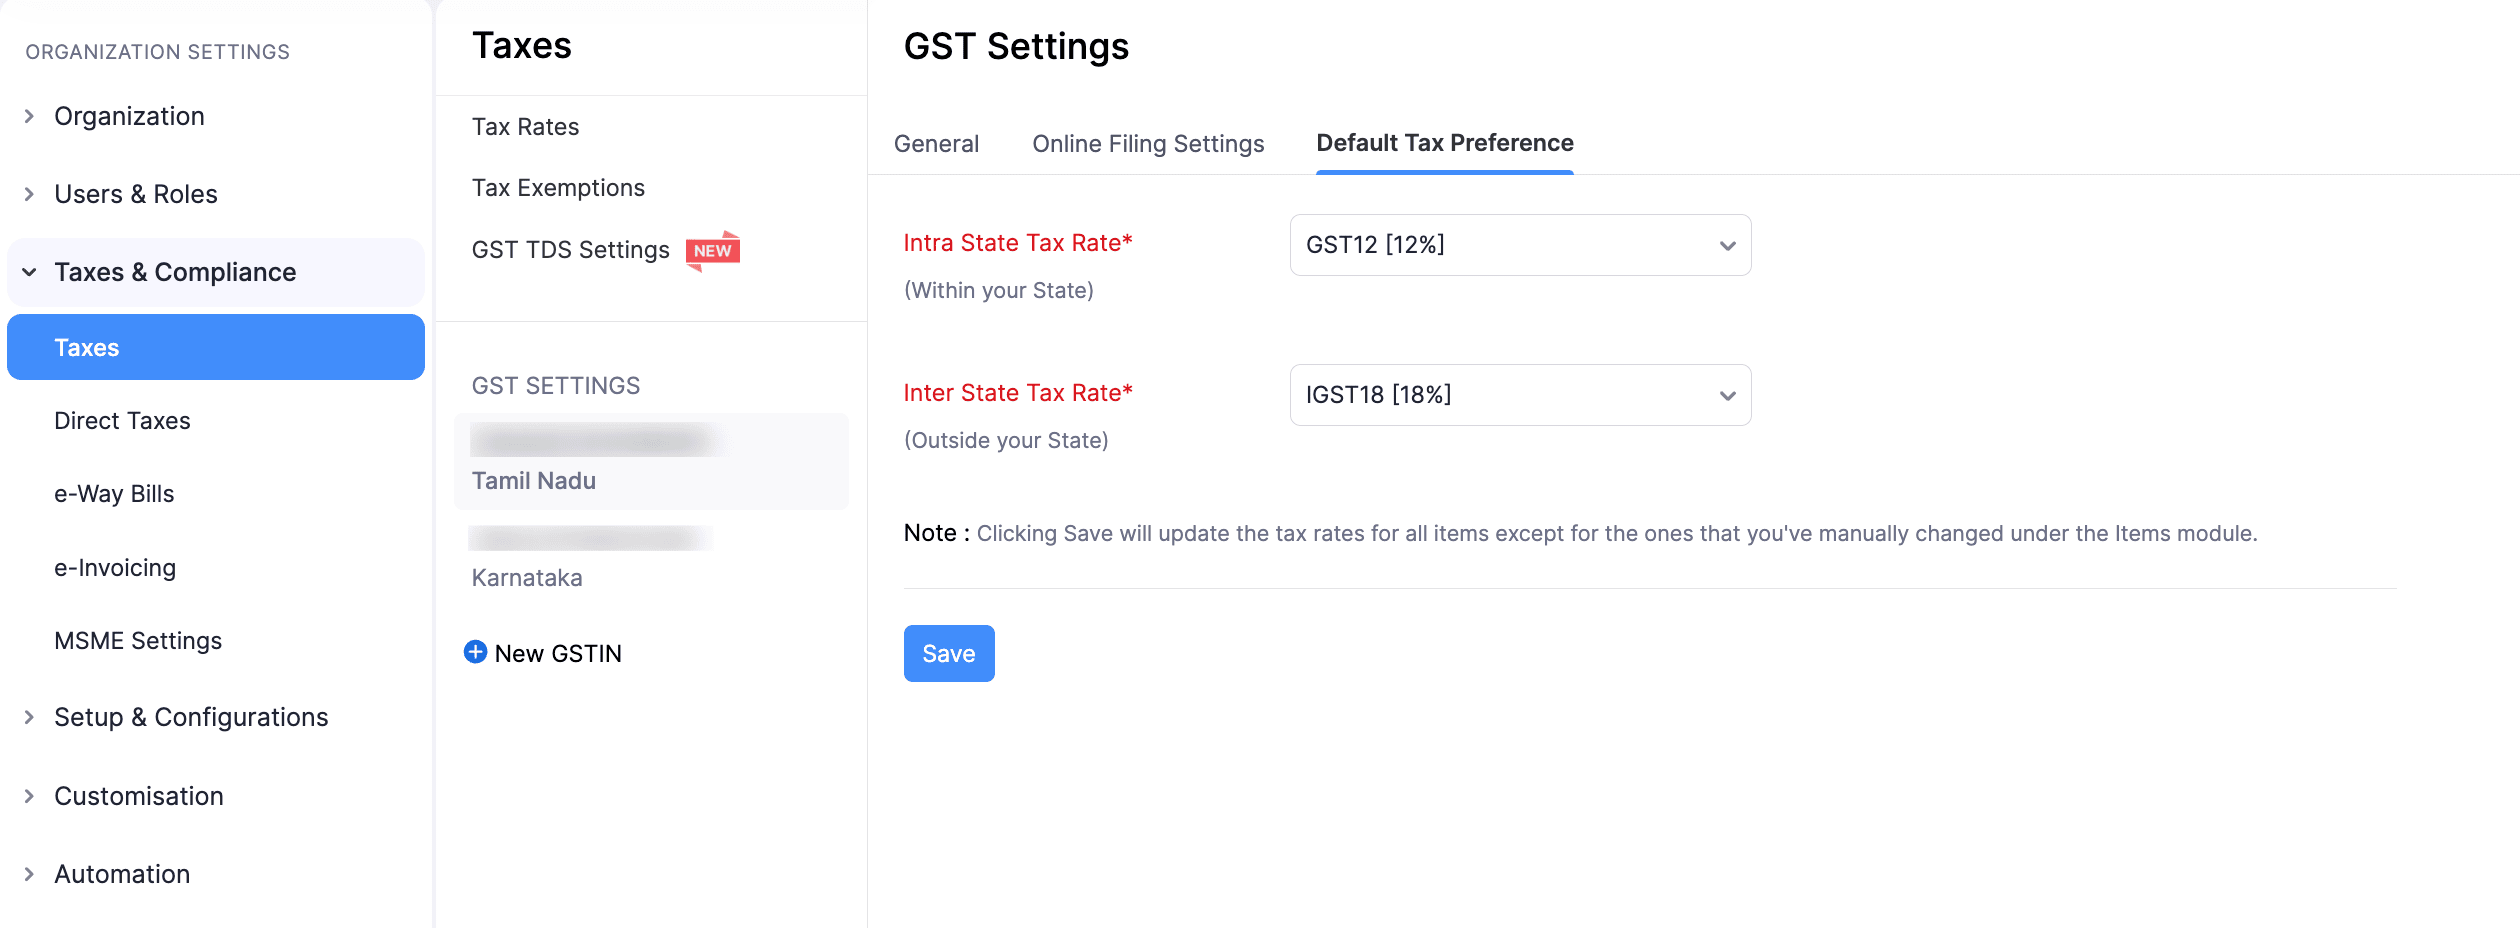
Based on the goods and services you deal with, you can select the default tax rate applicable to your business. You can also manually update the tax rate for each item on its creation page, or the default tax rate will be applied. To do this:
- Go to Settings.
- Select Taxes under Taxes & Compliance.
- In the Taxes pane, select the GSTIN for which you want to set a default tax rate.
- Navigate to Default Tax Preference.
- Select the default Intra State Tax Rate and Inter State Tax Rate applicable to your business.
- Click Save.
Tax Rates
In this section, you can create the tax rates that are applicable for your business based on the goods and services your business deals with.
Create Tax Rates
If you are registered for GST, default tax rates will already be created for you. If you would like to create new tax rates:
- Go to Settings.
- Select Taxes under Taxes & Compliance.
- In the Taxes pane, select Tax Rates.
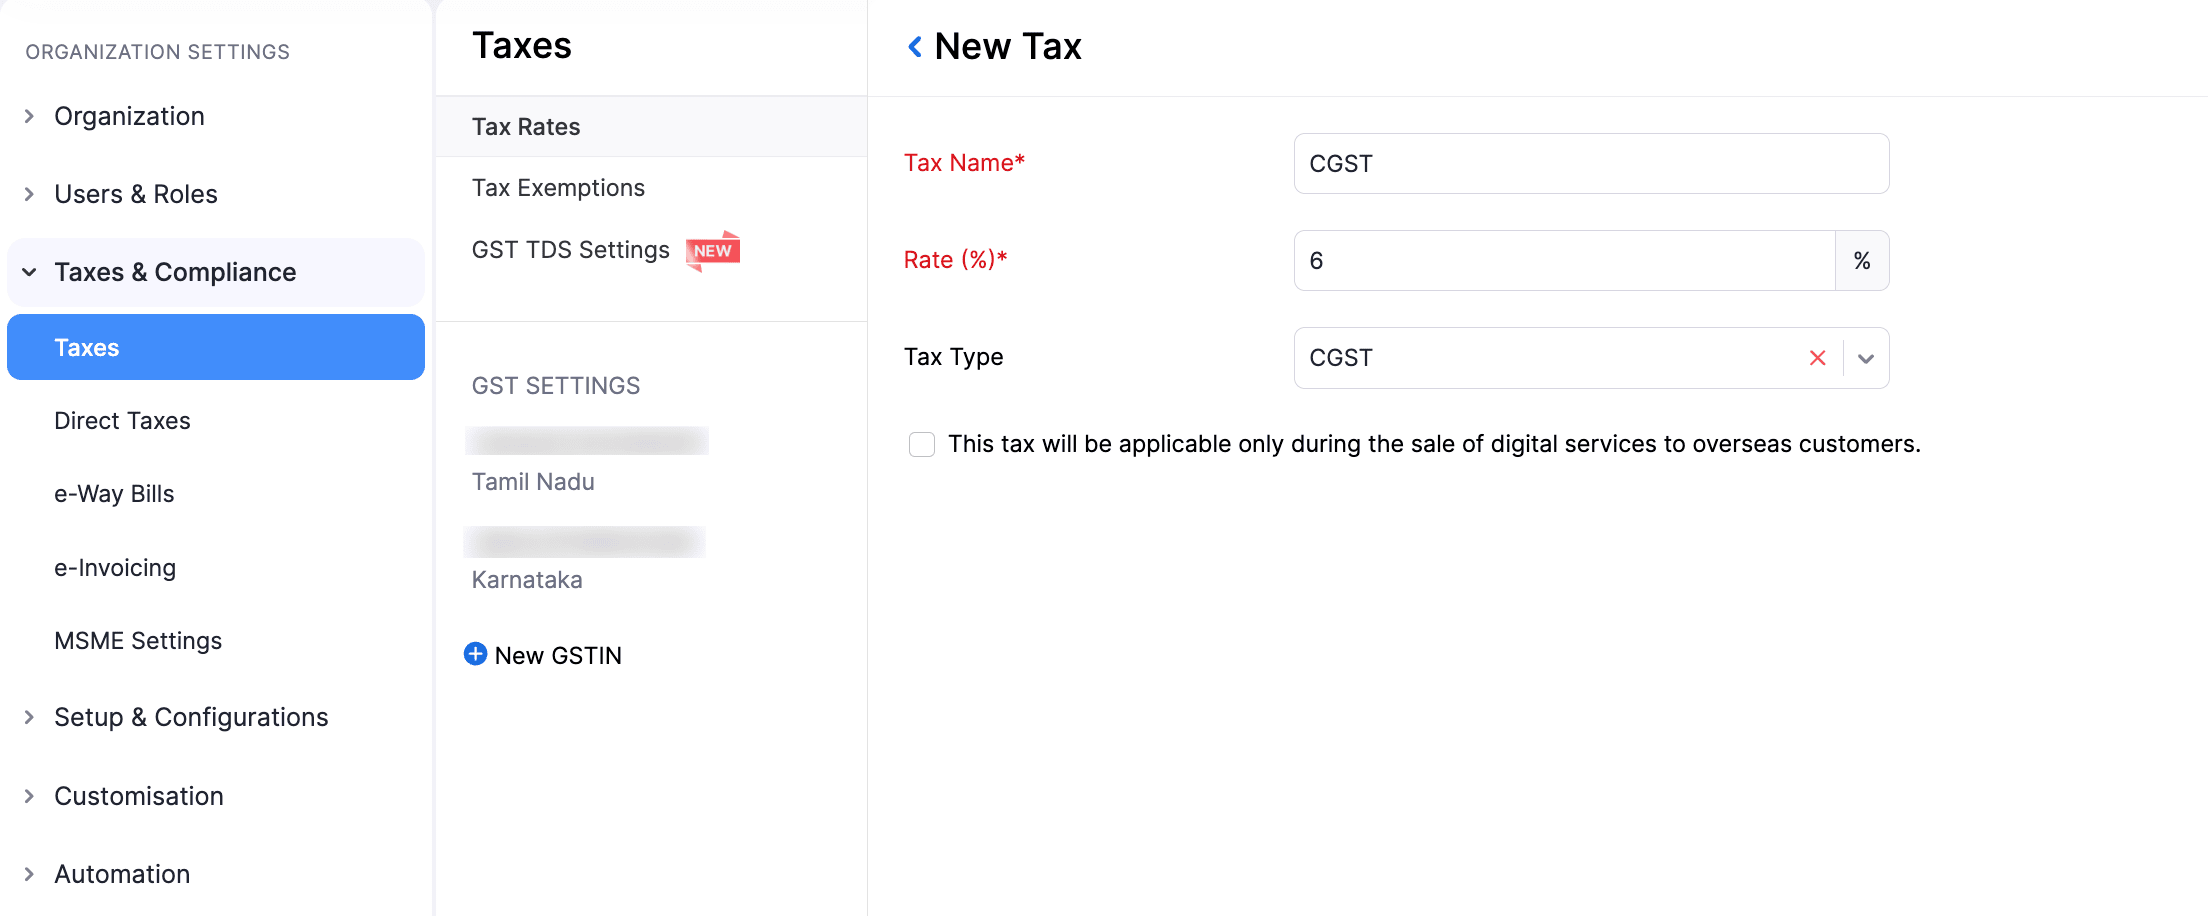
- Click + New Tax in the top right corner and in the pop-up that appears:
- Enter the Tax Name and Rate%.
- Select the Tax Type.
- Click Save.
- Check the option, This tax will be applicable only on digital services for overseas customers to create a tax rate for digital services and select the Country/Region you are trading with.
Create Tax Groups
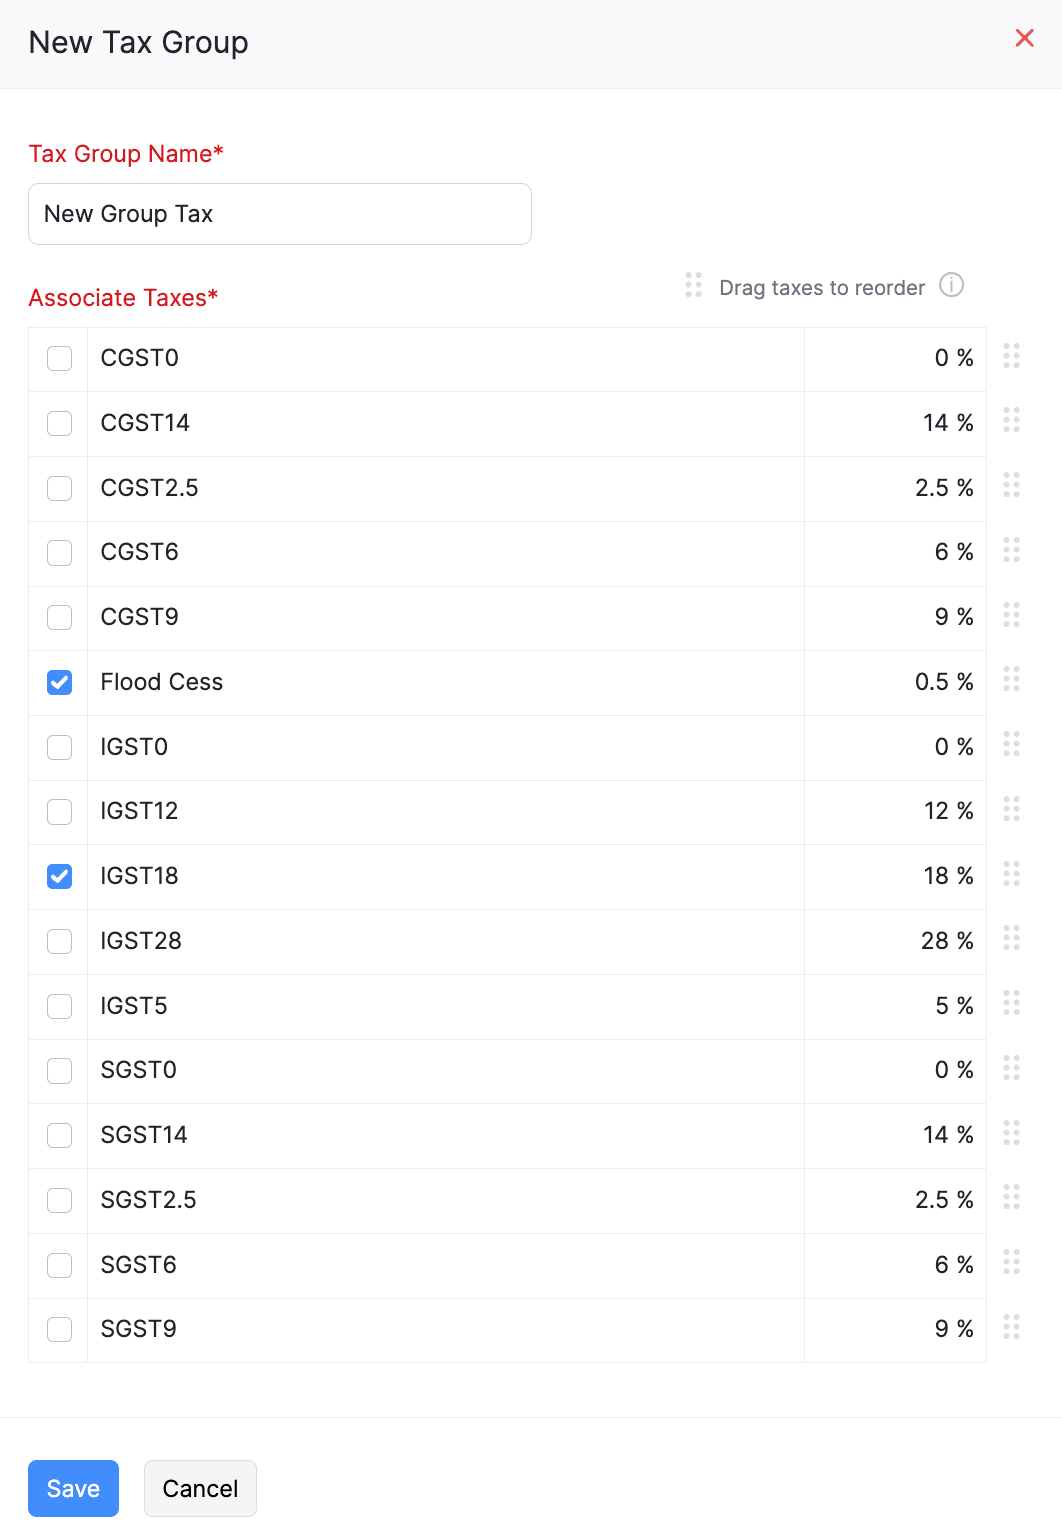
You can group two or more taxes together and apply them to your transactions. For example, if you need to charge your customers a newly introduced cess in addition to your regular tax rate, you can create a tax group that combines both and apply it to your invoices. Similarly, the standard GST rate of 18% is available by default as a tax group, which combines 9% CGST and 9% SGST.
To create a new tax group:
- Go to Settings.
- Select Taxes under Taxes & Compliance.
- In the Taxes pane, select Tax Rates.
- Click the dropdown next to + New Tax and select New Tax Group.

- In the New Tax Group pop-up:
- Enter a Tax Group Name.
- Select the taxes you want to associate with this tax group.
- Click Save.
Edit Tax Rates
To edit a tax rate:
- Go to Settings.
- Select Taxes under Taxes & Compliance.
- In the Taxes pane, select Tax Rates.
- Hover over the existing tax rate that you want to edit.
- Click the dropdown that appears next to the tax rate and select Edit to update any details.
- Check and enter the necessary details and Click Save.

Warning: Editing the tax rates will also update them in any active recurring profiles you have created.
The tax rate will be updated.
Delete Tax Rate
To delete a tax rate:
- Go to Settings.
- Select Taxes under Taxes & Compliance.
- In the Taxes pane, select Tax Rates.
- Hover over the existing tax rate that you want to delete.
- Click the dropdown that appears next to the tax rate and select Delete.
- Click OK in the pop-up that appears.

Warning: Editing the tax rates will also update them in any active recurring profiles you have created.
The tax rate will be deleted.
Mark a Tax Rate as Inactive
To mark a tax rate as inactive:
- Go to Settings.
- Select Taxes under Taxes & Compliance.
- In the Taxes pane, select Tax Rates.
- Hover over the existing tax rate that you want to mark as inactive.
- Click the dropdown that appears next to the tax rate and select Mark as Inactive.

The tax rate will be marked as inactive.
View Records Associated With a Tax Rate
To mark a tax rate as inactive:
- Go to Settings.
- Select Taxes under Taxes & Compliance.
- In the Taxes pane, select Tax Rates.
- Hover over the tax rate for which you want to view associated records.
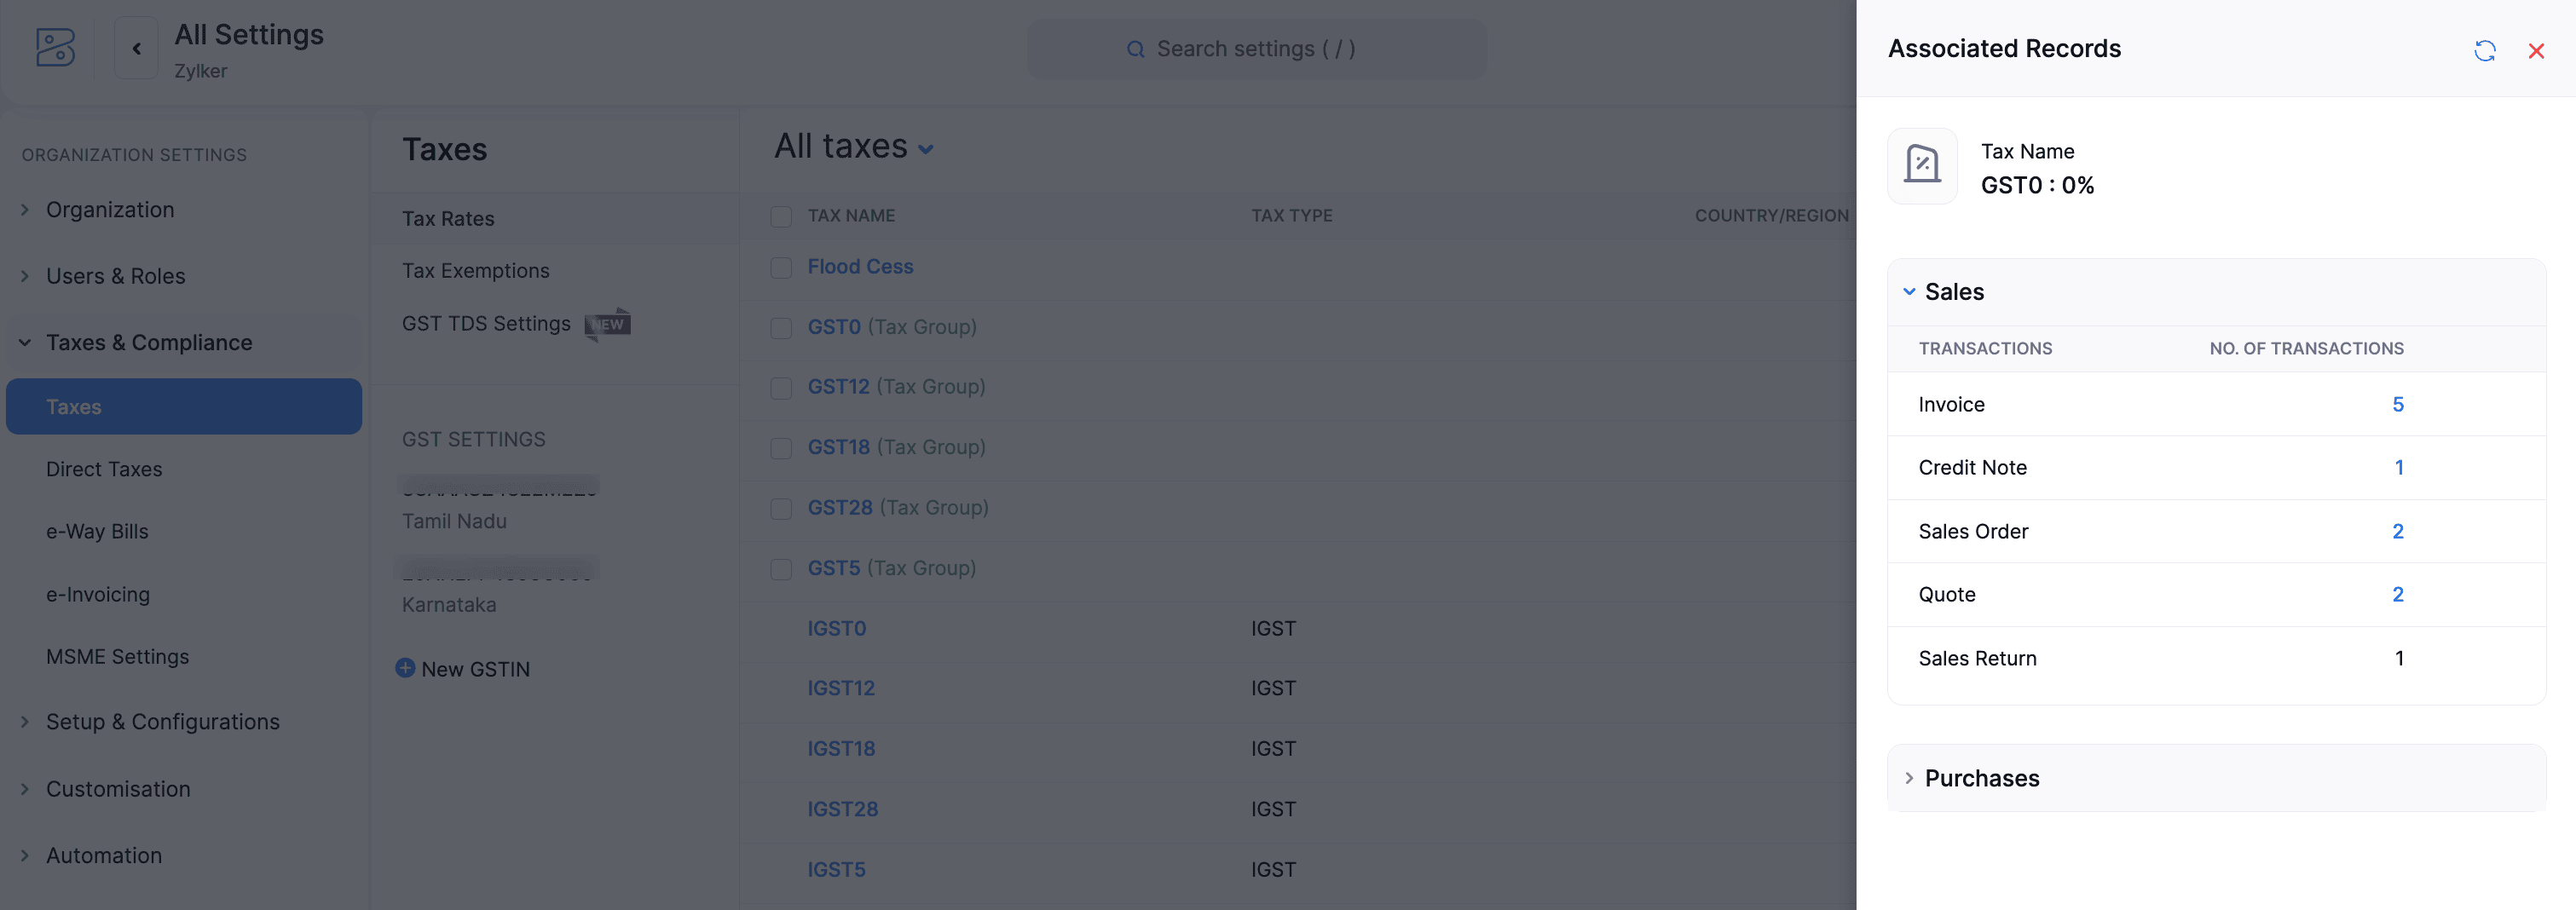
- Click the dropdown that appears next to the tax rate and select View Associated Record.

All sales and purchase transactions associated with the tax rate will be displayed in the Associated Records pane.
Tax Exemptions
Some goods and services under the GST regime are exempted from tax. Businesses will also not be able to claim ITC on their sales. Here’s a list of all the items that are exempt from tax. You can create tax exemptions in Zoho Books and apply them to items while creating invoices. Here’s how:
- Go to Settings.
- Select Taxes under Taxes & Compliance.
- In the Taxes pane, select Tax Exemptions.
- Click + New Tax Exemption in the top right corner.
- In the New Tax Exemption pop-up, enter the Exemption Reason, provide a Description and select the Type.
- Click Save.

Once created, you can apply the tax exemptions to your invoices.
Note: To bulk create tax exemptions in the Tax Exemptions page, click the dropdown next to + New Tax Exemption and select Bulk Create Tax Exemptions.
MSME Settings
On October 2, 2006, the Government of India introduced the concept of Micro, Small, and Medium Enterprises (MSMEs) through the Micro, Small, and Medium Enterprises Development (MSMED) Act, 2006 aiming to promote the growth of MSMEs in India. This provides benefits to businesses based on their size, investment in machinery or equipment, and revenue.
To ensure MSME businesses get paid on time, the Government of India has added a new clause, clause (h), in section 43B of the Income Tax Act of the Finance Act 2023. This clause states that if you make a purchase from an MSME-registered business and make a payment for that purchase within 45 days from the date of purchase, the purchase amount will be allowed as a deduction on an accrual basis (as of the bill date). However, if you make the payment after 45 days of the purchase, the purchase amount will still be allowed as a deduction on a cash basis (as of the payment date). If the payment date falls in the next financial year while the bill is in the current financial year, this will increase your tax liability for the current financial year.
In Zoho Books, if your organisation is registered as an MSME, you can add its MSME details. You can also enter the MSME/Udyam registration number in your organisation’s address to stay compliant with section 43B(h) of the Finance Act 2023. Furthermore, you can add the MSME details of your vendors to view your unpaid bills to your MSME vendors.
Add Your Organisation’s MSME Details
If your organisation is registered as an MSME, you can enter your organisation’s MSME details in Zoho Books. Here’s how:
- Go to Settings in the top right corner of the page.
- Select MSME Settings under Taxes & Compliance.
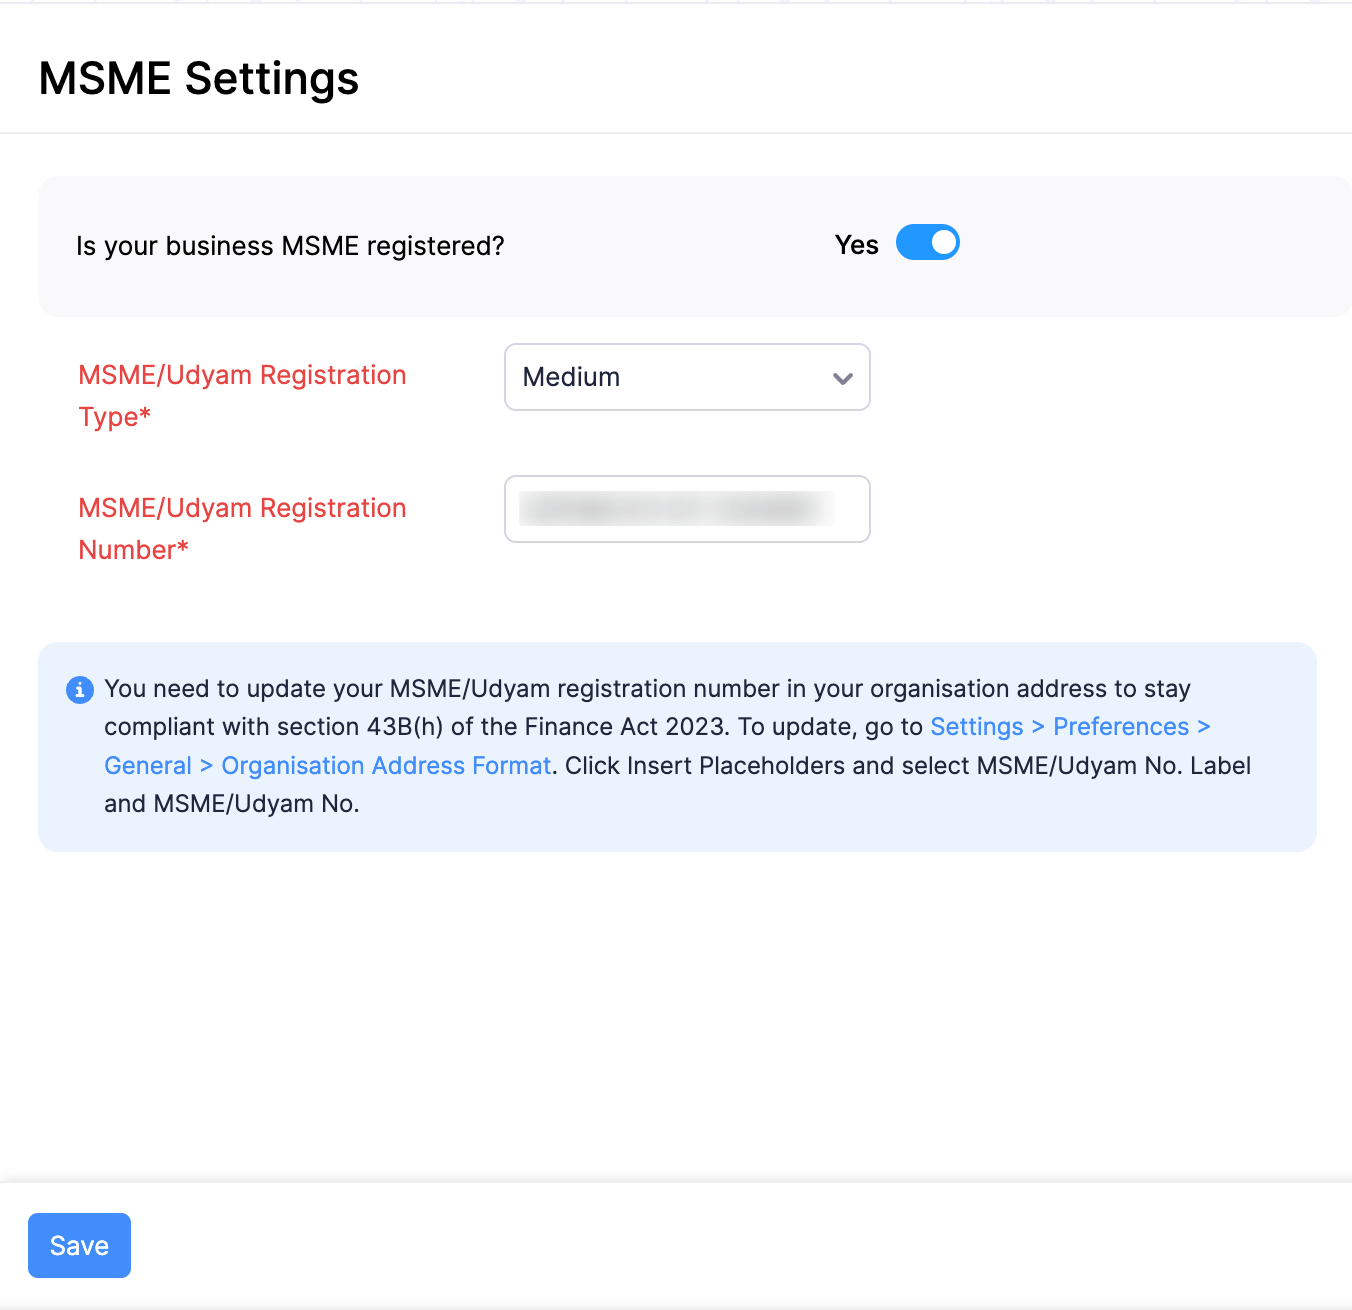
- Change the toggle near Is your organisation MSME registered? to Yes.
- Select your organisation’s MSME/Udyam Registration Type.
- Enter your organisation’s MSME/Udyam Registration Number. Ensure that it is in the format UDYAM-XX-00-0000000.
- Click Save.
Add MSME Number to Your Organization Address
If your organisation is MSME registered, it is mandatory that you add your organisation’s MSME/Udyam Registration Number to your organisation’s address to stay compliant with section 43(h) of the Finance Act 2023. Here’s how:
- Go to Settings in the top right corner of the page.
- Click General under Preferences.
- Scroll down to the Organisation Address Format section.
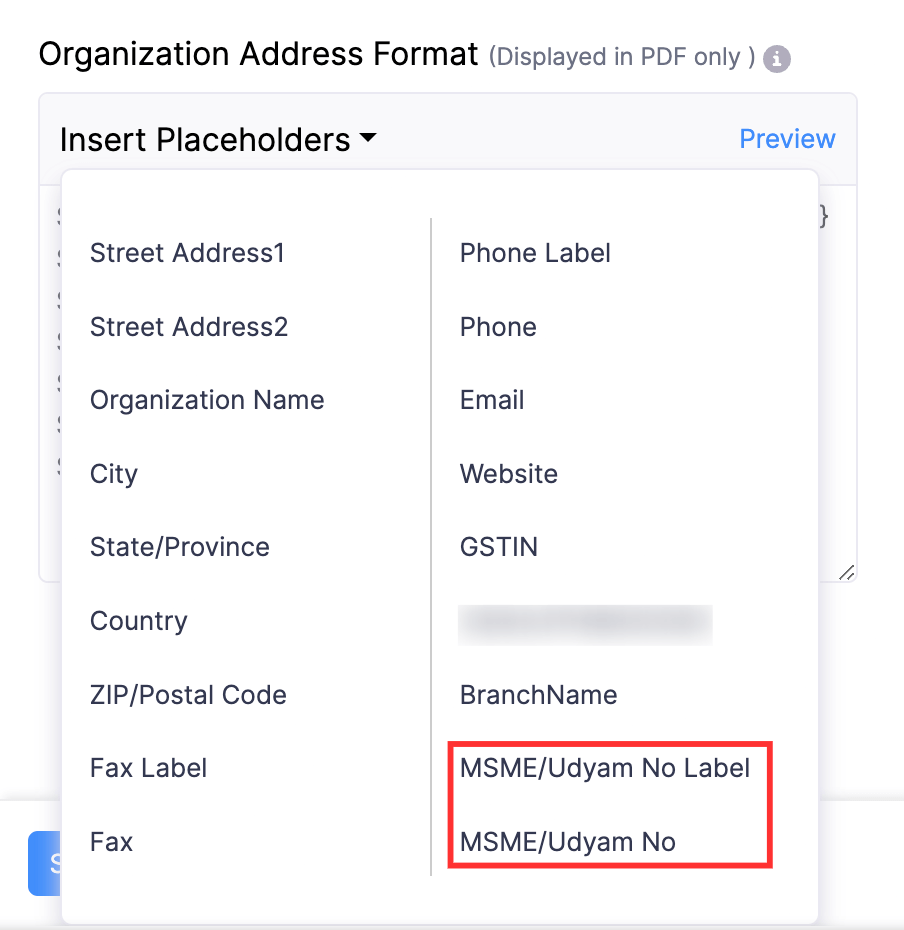
- Click Insert Placeholders.
- Select MSME/Udyam No Label and MSME/Udyam No.
- Click Preview to preview your changes.
- Click Save.
Your organisation’s MSME/Udyam registration number will now be displayed in the transaction PDFs sent to your customers and vendors.
Update MSME Details of Existing Vendors
It will be a time-consuming process to update the MSME details of each vendor. So, we’ve made it easier for you to update your vendors’ MSME details. You can simply export your vendors, update the MSME details of the MSME registered vendors in the exported file, and import the file into your Zoho Books organisation. Here’s how:
- Go to Purchases on the left sidebar and click Vendors.
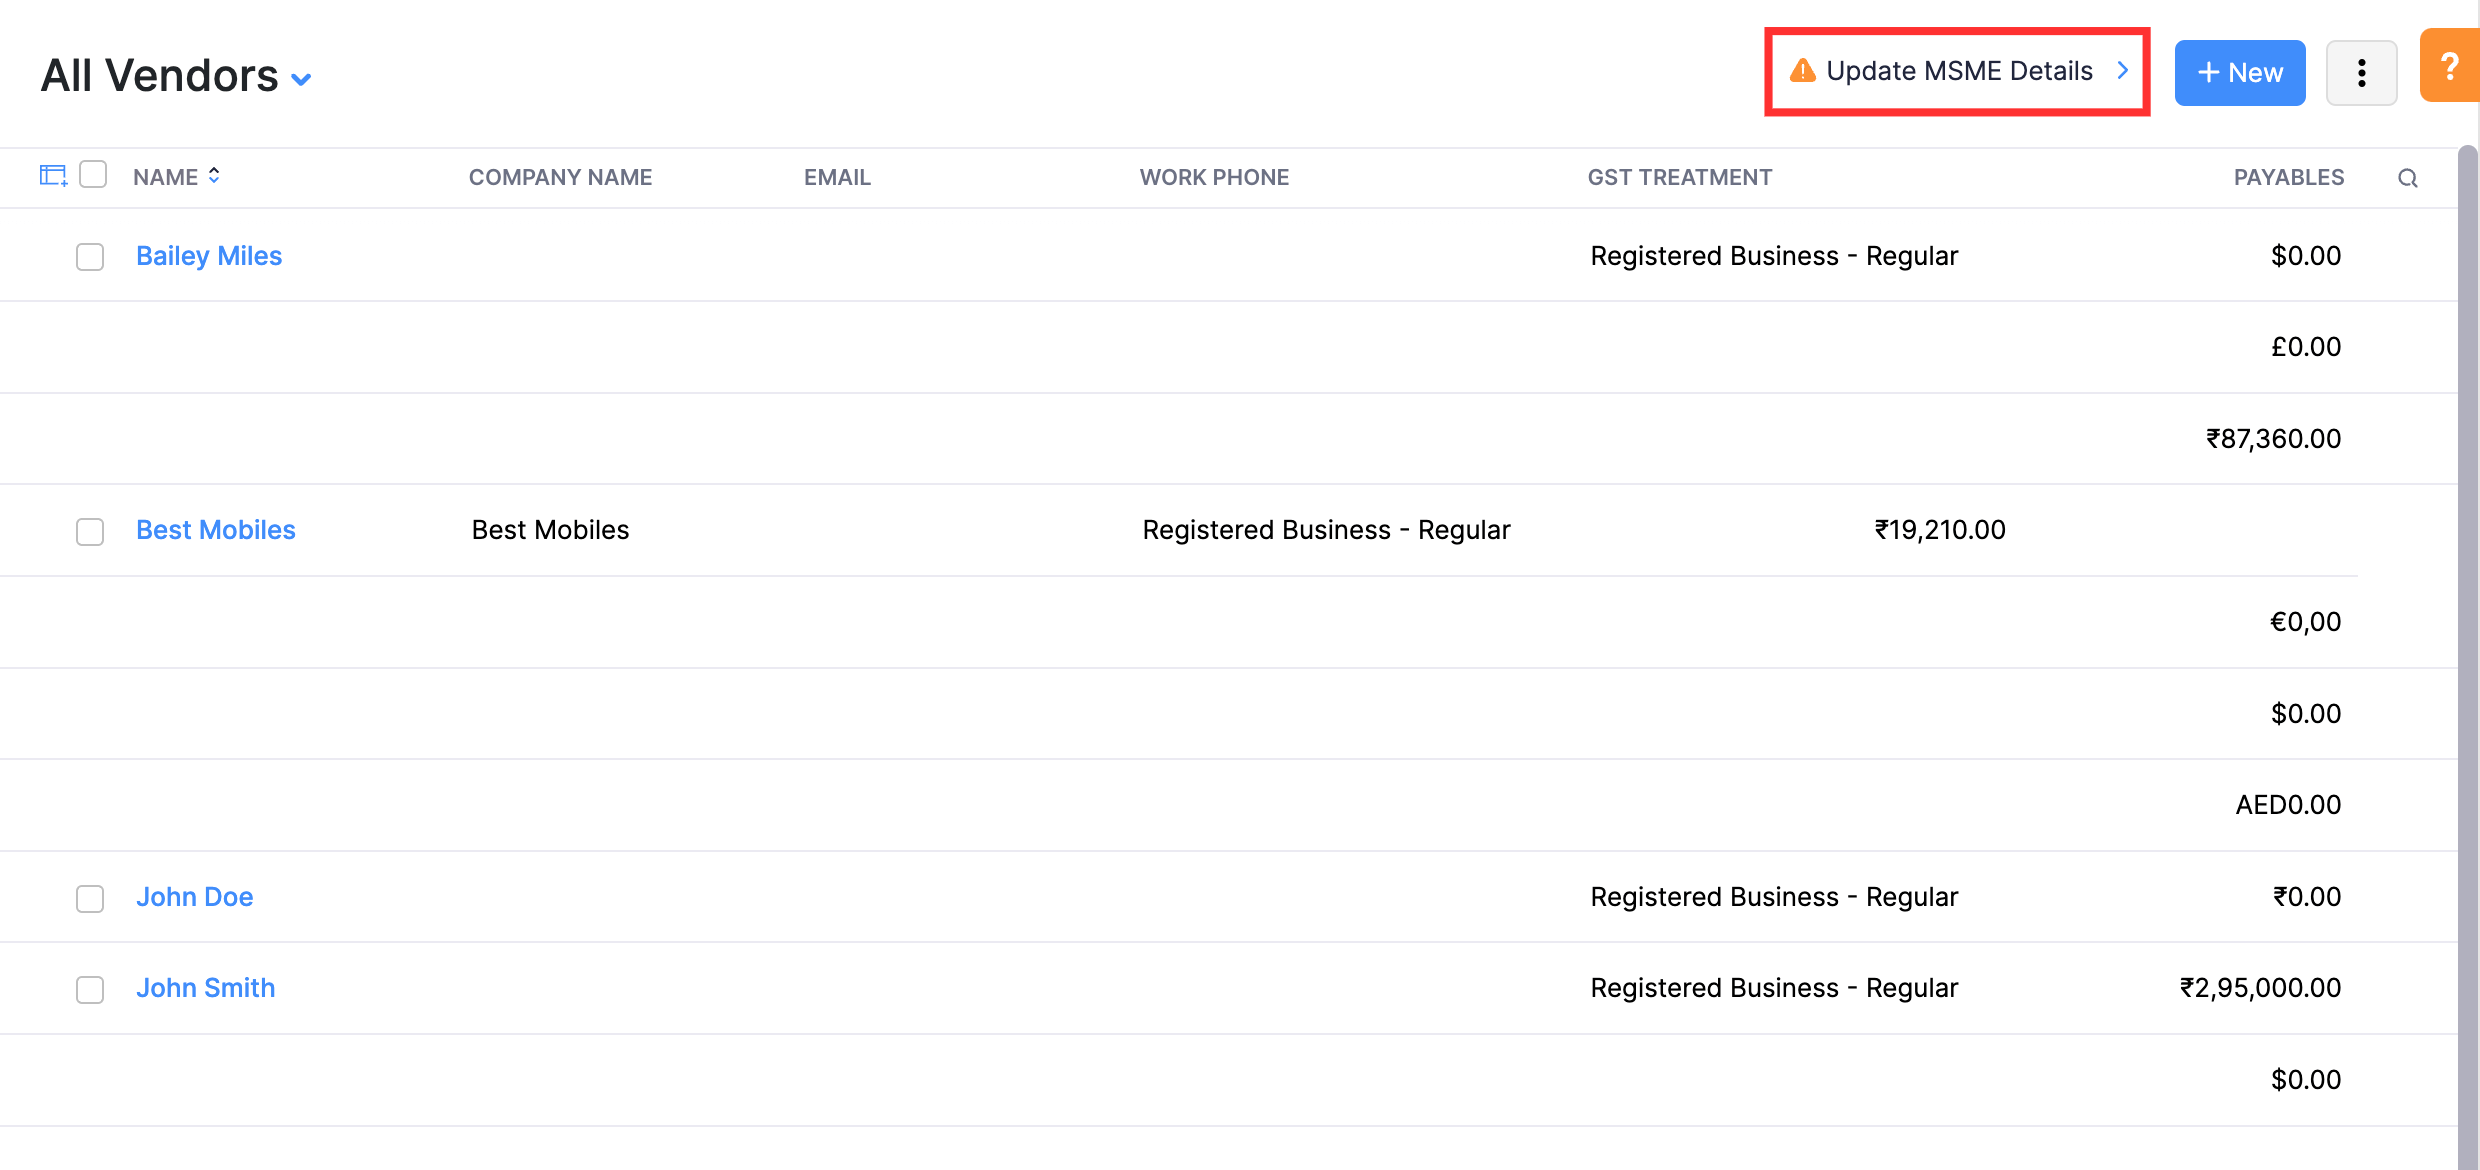
- Click Update MSME Details in the top right corner. You’ll be redirected to the Update MSME Details page.
- Click Skip and Proceed if you’ve already added your organisation’s MSME details. If you haven’t, add them in the respective fields and click Save and Proceed.
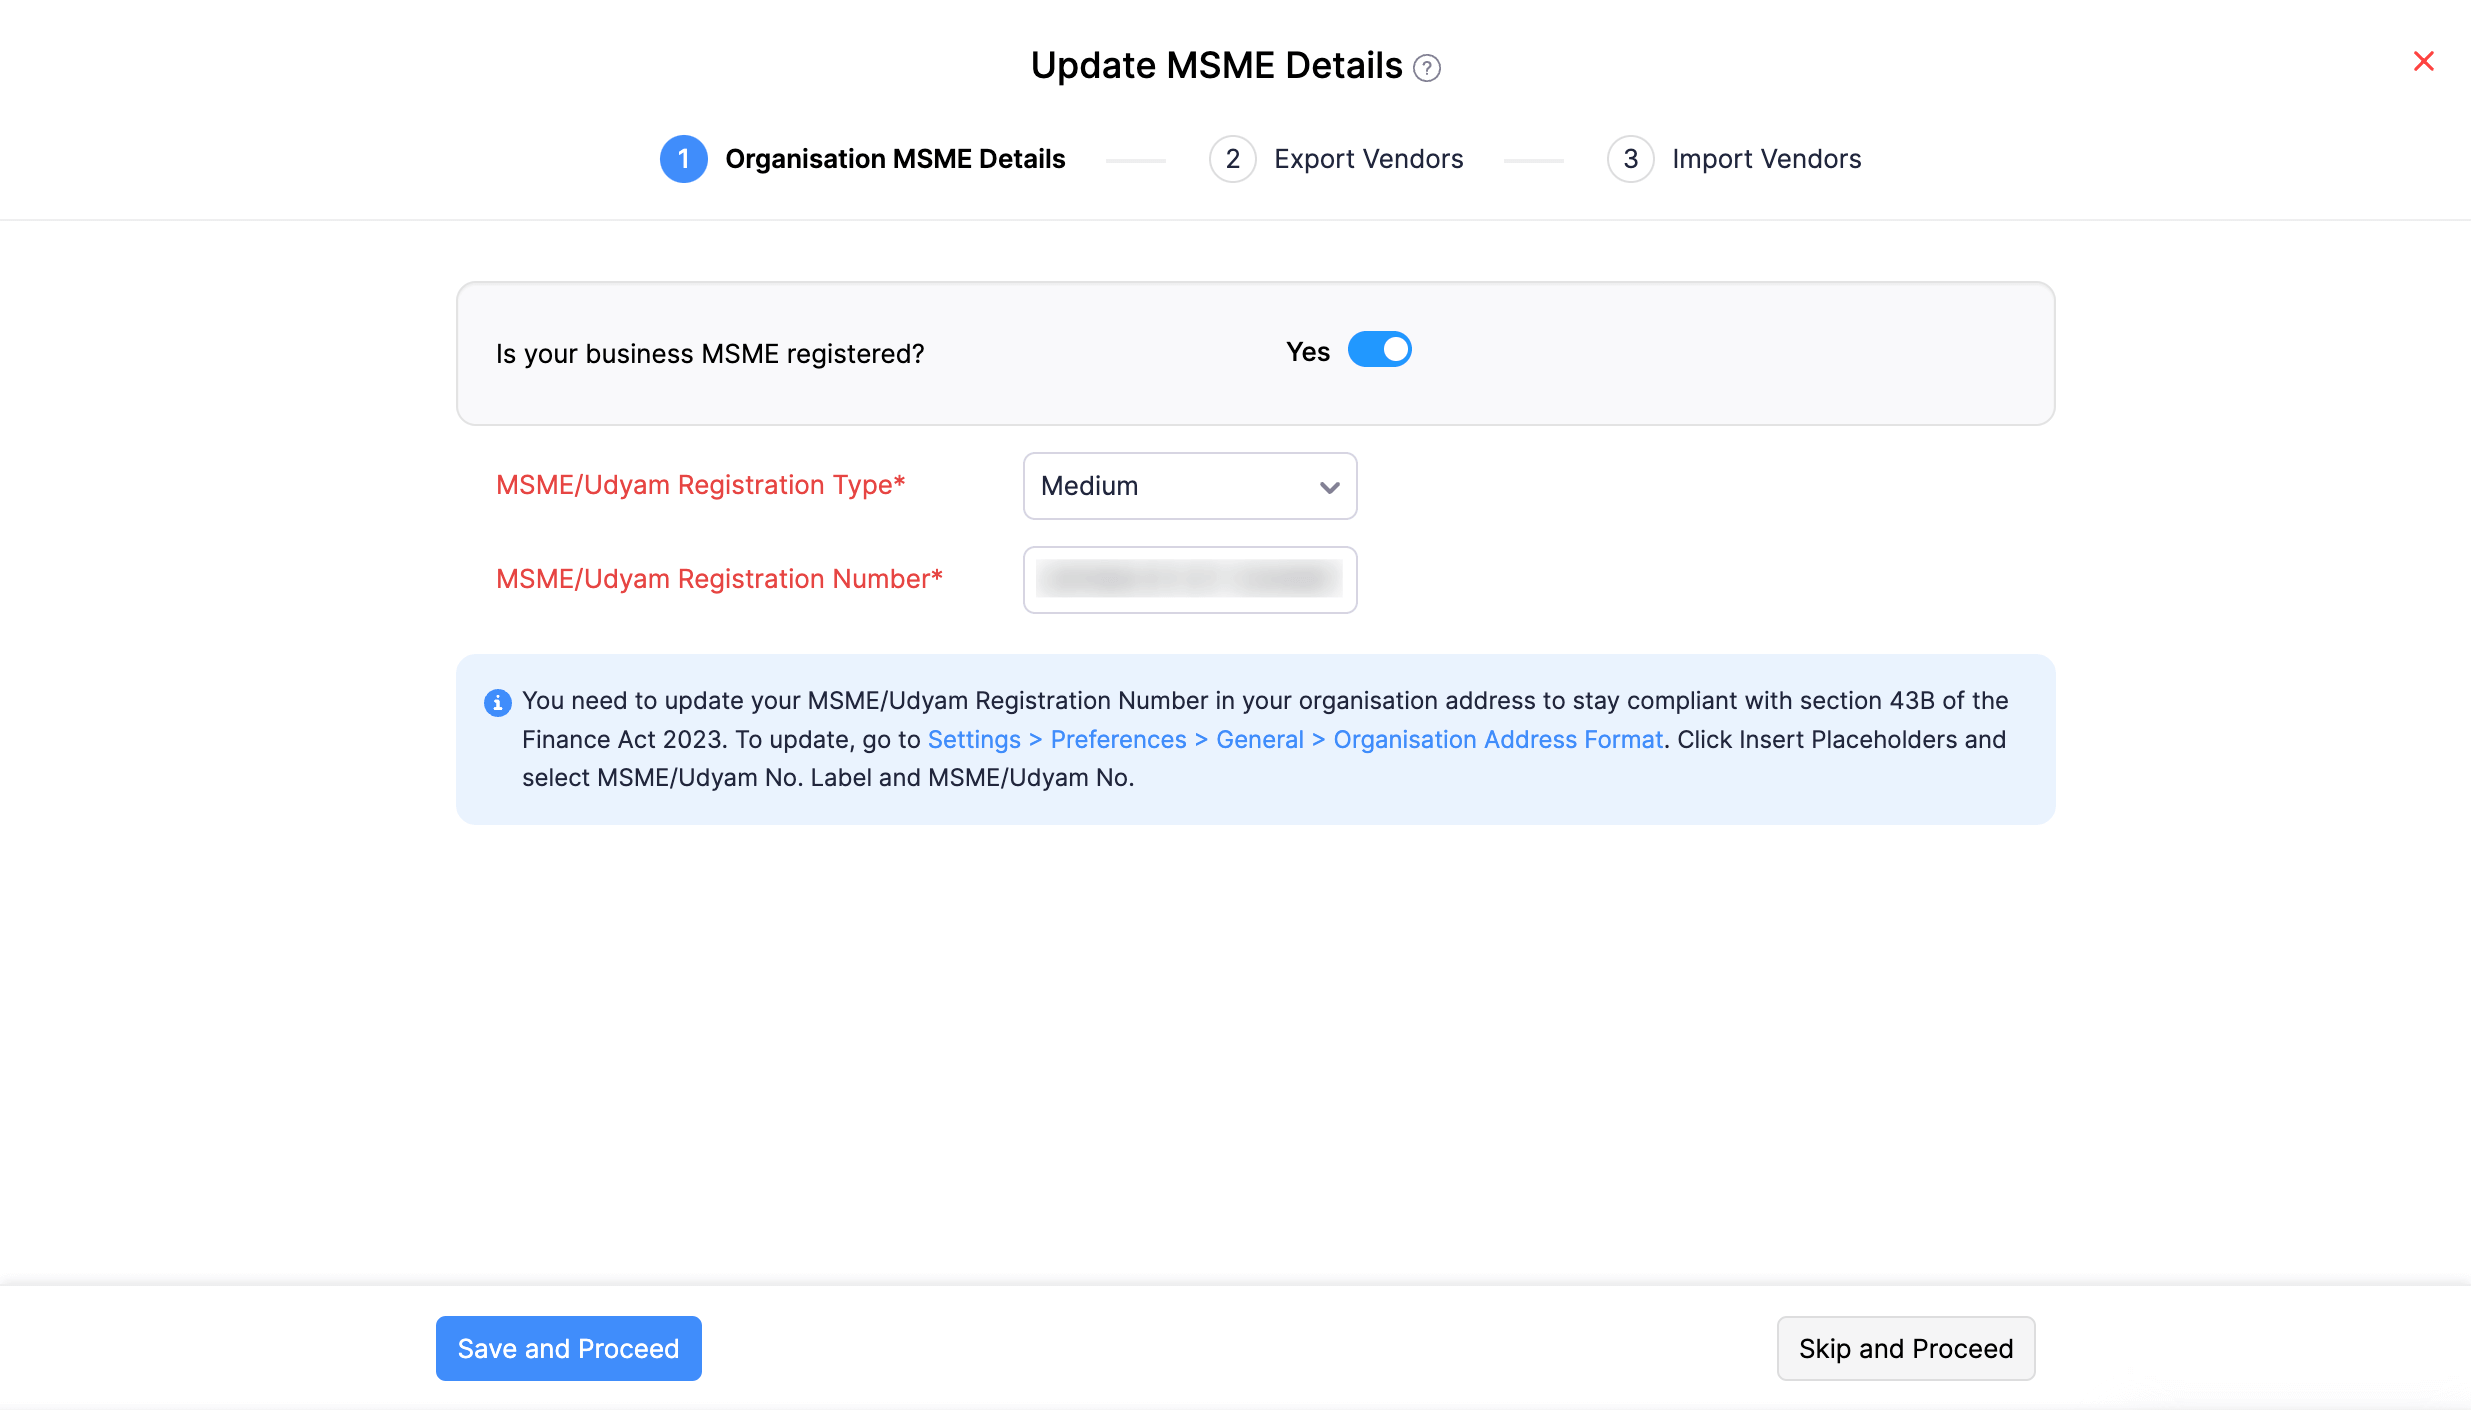
- In the next step, click Export Vendors. A CSV file with all your vendor details will be downloaded.

- Click Next.
- Open the CSV file and enter the MSME registration type and MSME registration number of your MSME registered vendors in the MSME/Udyam No and MSME/Udyam Type columns.
- Save the exported file.
- Now, go back to Zoho Books to upload the exported file. Click Upload File and select the file.

Click Import at the bottom of the page.
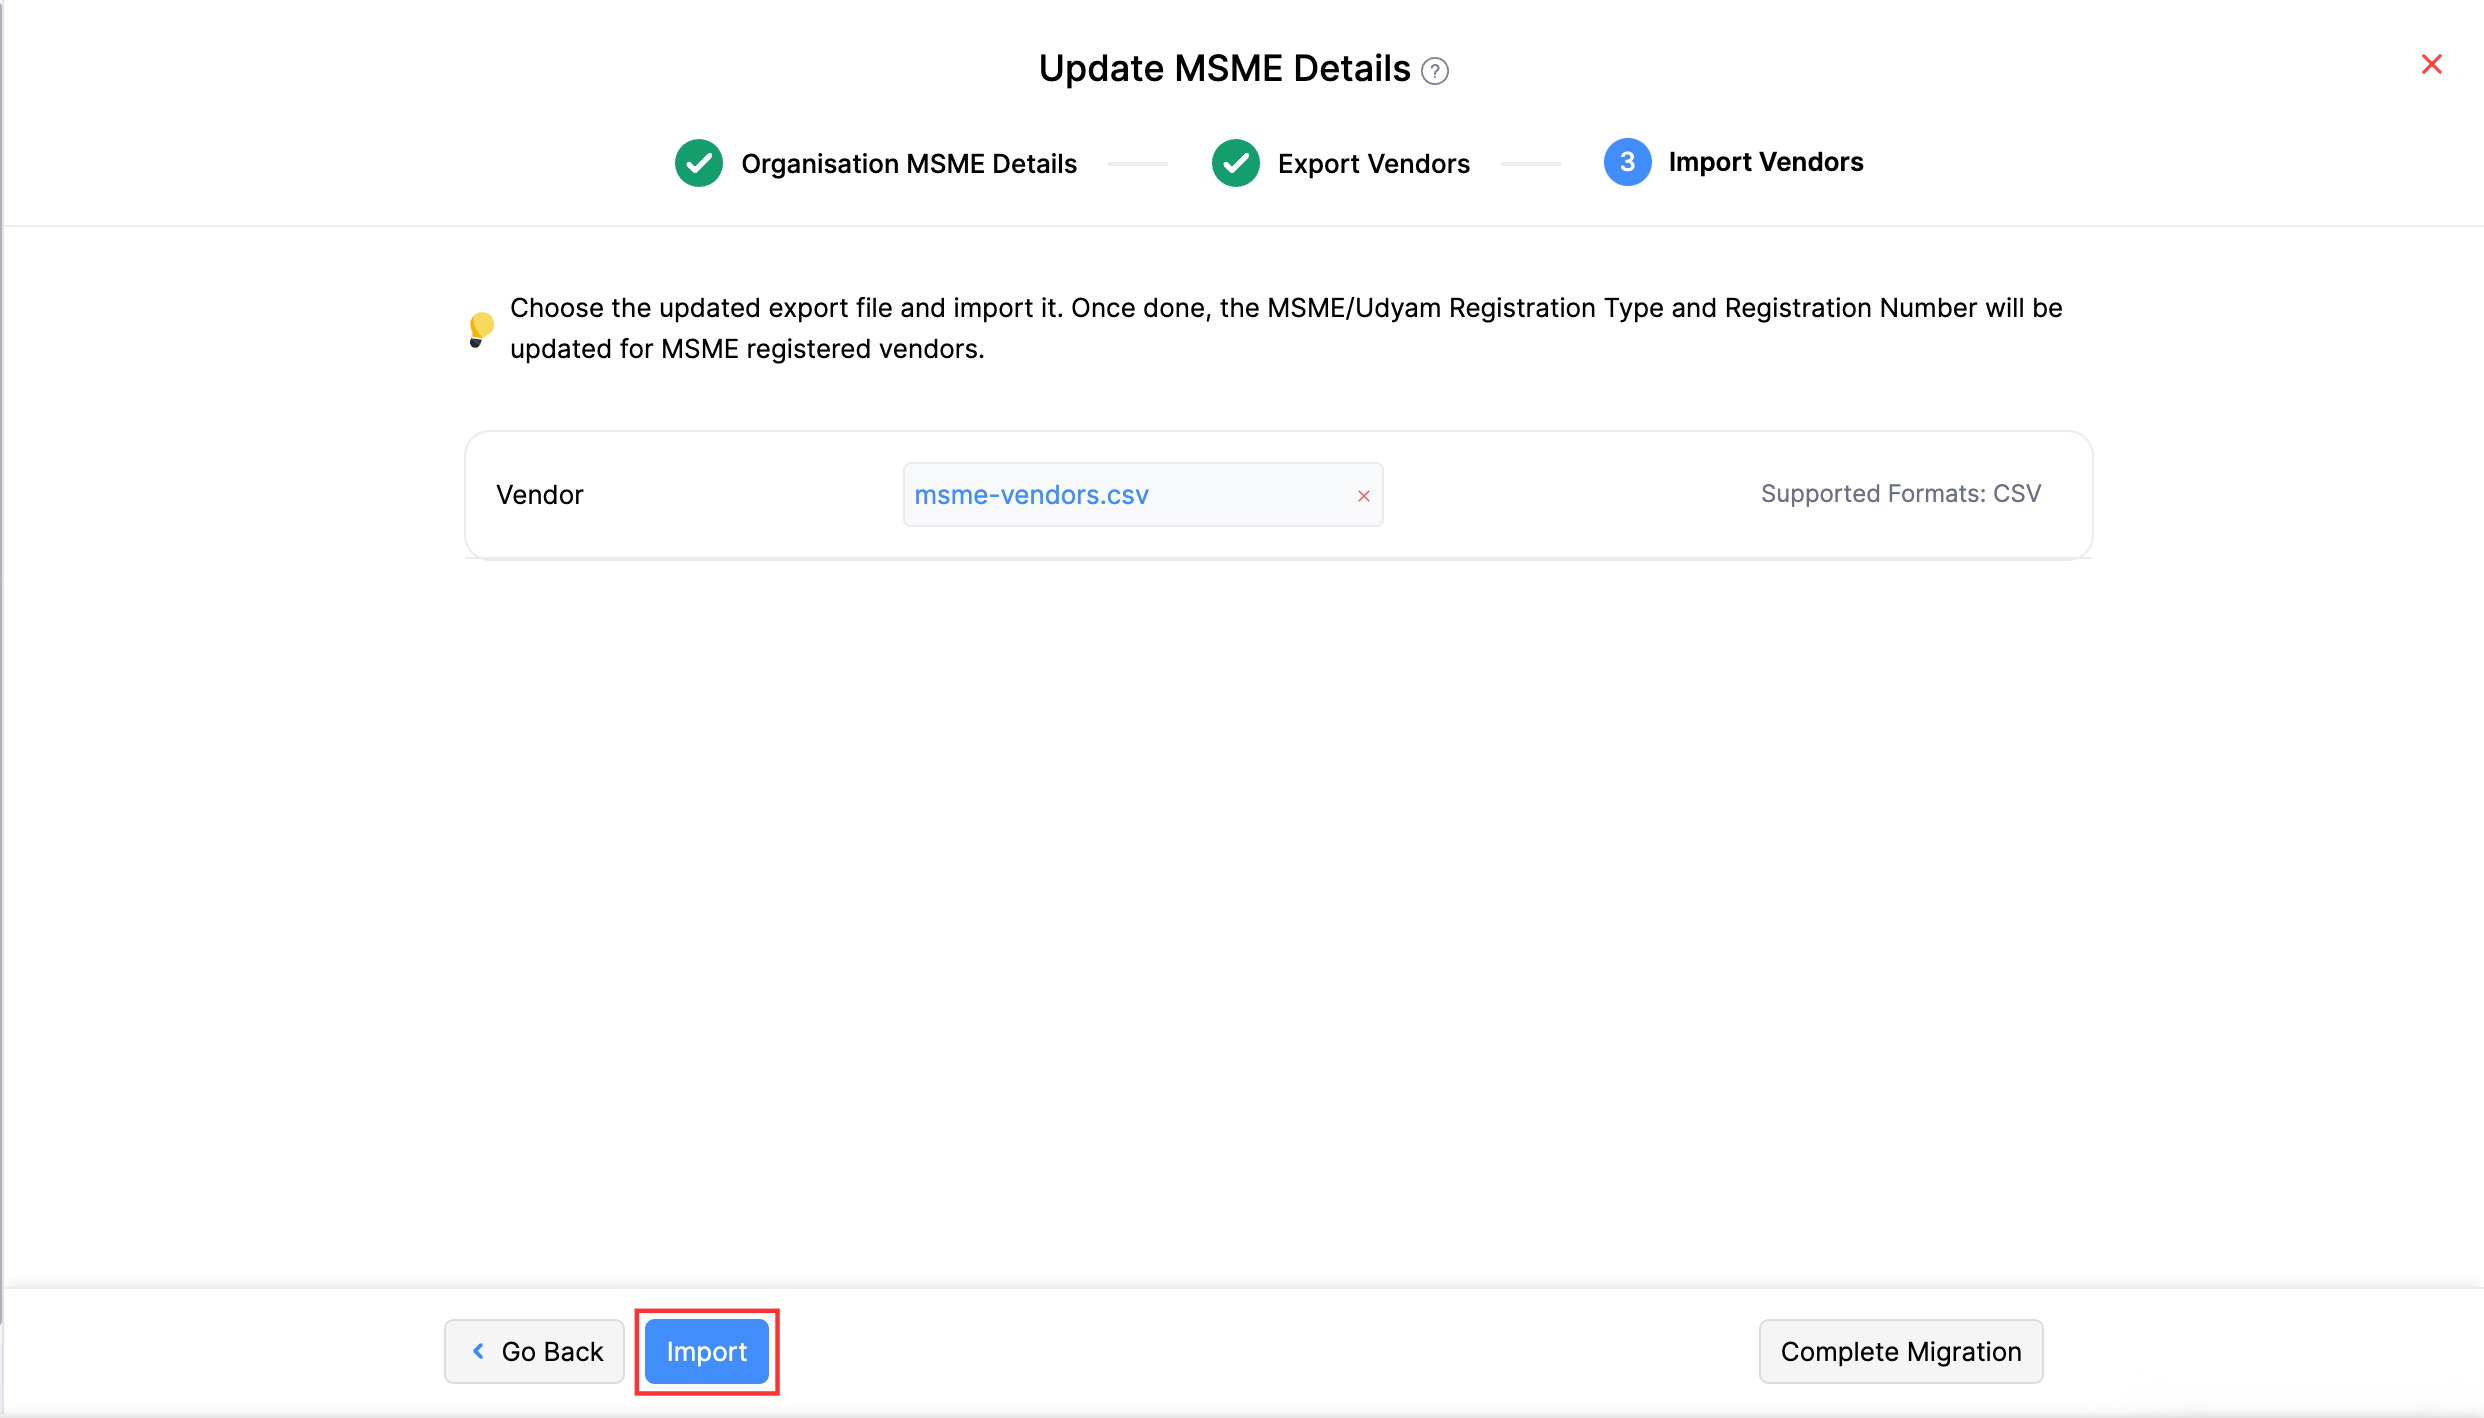
- Once done, click Complete Migration at the bottom of the page.
The MSME details of your existing vendors will be updated.
Add MSME Details of New Vendors
- Go to Purchases on the left sidebar and select Vendors.
- Click + New in the top right corner.
- Enter the necessary details.
- Check the This vendor is MSME registered option in the Other Details tab.
- Select the MSME/Udyam Registration Type.
- Enter the MSME/Udyam Registration Number.
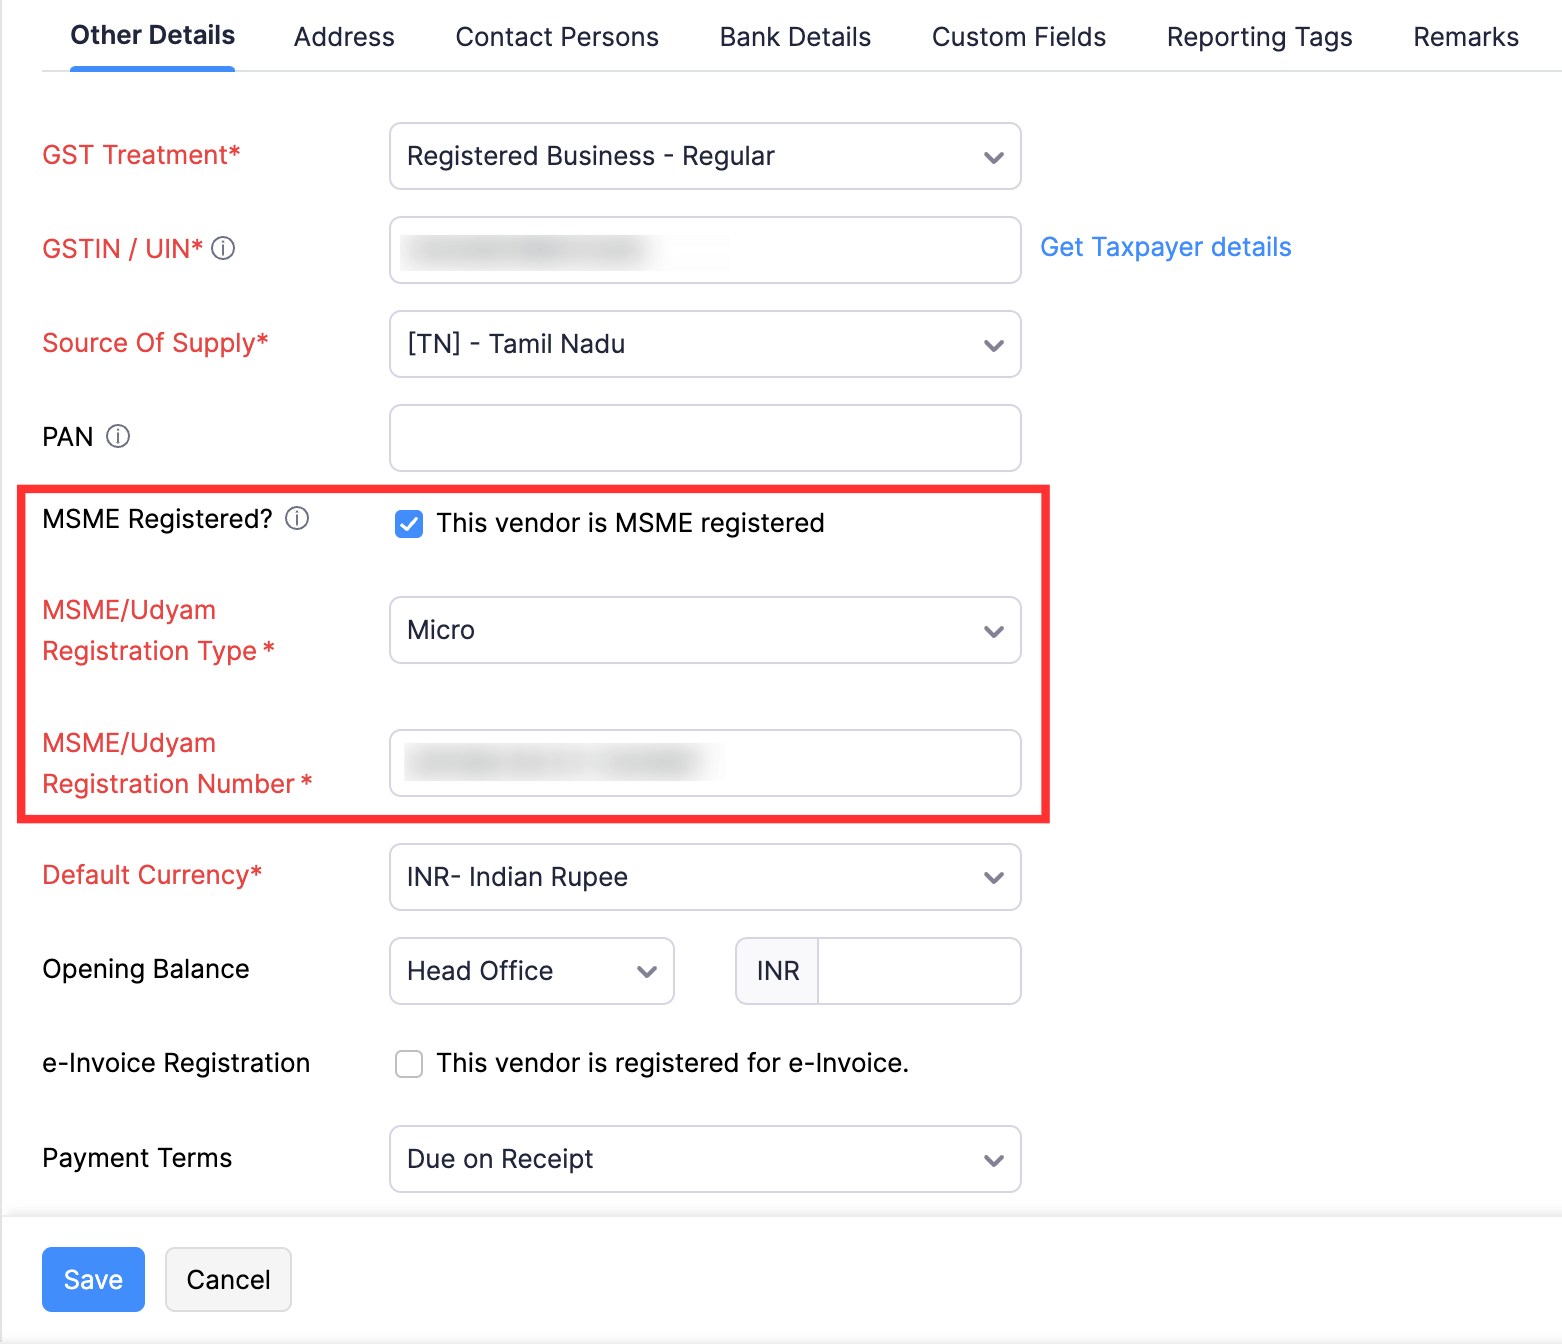
- Click Save.
View Unpaid MSME Vendors’ Bills
- Go to Purchases on the left sidebar and select Bills.
- Click the number below MSME Vendor Bills Unpaid for 40+ Days in the dashboard. You’ll be redirected to the MSME Vendor Bills Unpaid for 40+ Days page.

OR
- Click All Bills at the top and select MSME Vendor Bills Unpaid for 40+ Days.
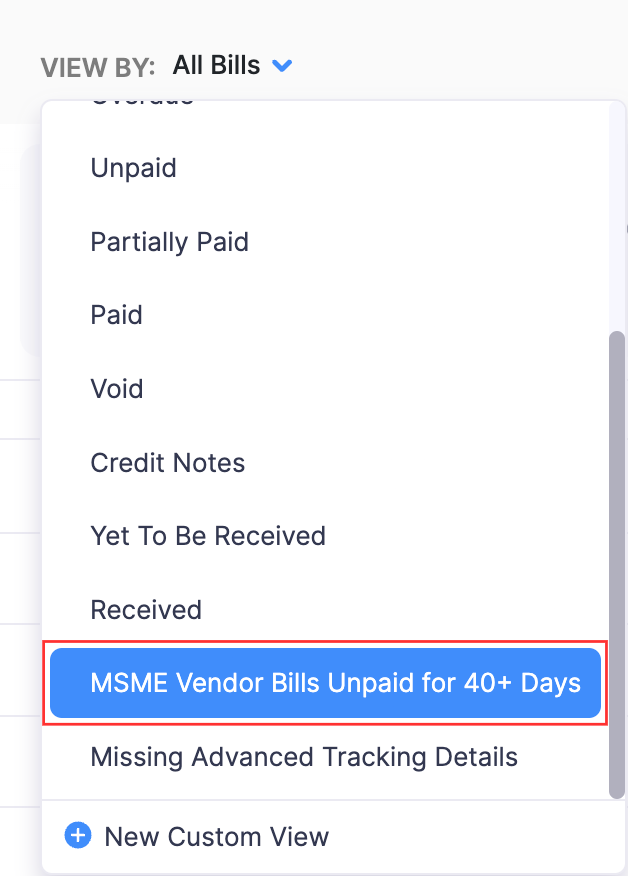
This page will list all your MSME vendors from whom you’ve made purchases but haven’t made payment for these purchases for 40+ days. Ensure that you make payment for these bills to stay compliant with section 43B(h) of the Finance Act 2023.


 Yes
Yes