
Connected Banking with HSBC
Zoho Books has partnered with HSBC to let you perform banking functions from within Zoho Books. With this integration, you can view your live account balance, initiate bill payments, fetch bank feeds automatically, and more. It brings banking and accounting onto one platform.
Benefits of This Integration
- Initiate payments to your vendors individually or in bulk.
- Make GST payments directly from Zoho Books.
- Fetch bank feeds and reconcile transactions effortlessly.
- View transaction status and real-time account balance.
- Make cross-border payments to your international vendors.
Note: This integration is available only for users in the India edition of Zoho Books created under the zoho.in domain.
Prerequisite:
- A HSBC corporate current account.
- Multi-Factor Authentication (MFA), other than Passkey, must be enabled for your Zoho account. Learn how to enable MFA.
Connect to HSBC
The integration with HSBC follows different flows depending on when it was set up.
Note:
- If you’re connecting to HSBC after November 2025, the integration will follow the new flow. Users who connected before this date using credentials provided by the bank will continue to use the old integration flow.
- Organisations that are already under the old flow will continue to follow their existing setup process, even if the integration is deleted and they want to set it up again.
- If you’ve received credentials from the bank but haven’t completed the setup, email hsbc-support@zohofinance.com to be manually migrated to the old flow and complete the setup.
Set Up Integration (New Flow)
Initiate the Integration
Note: Only the users with access to Vendor Payments under Settings can initiate this integration.
To initiate the HSBC integration in Zoho Books:
Go to Settings.
Select Vendor Payments under Online Payments.
Scroll down and click Set Up Now under HSBC.

In the pop-up that appears, read and agree to the terms and conditions for this integration.
Click Proceed to Connect.
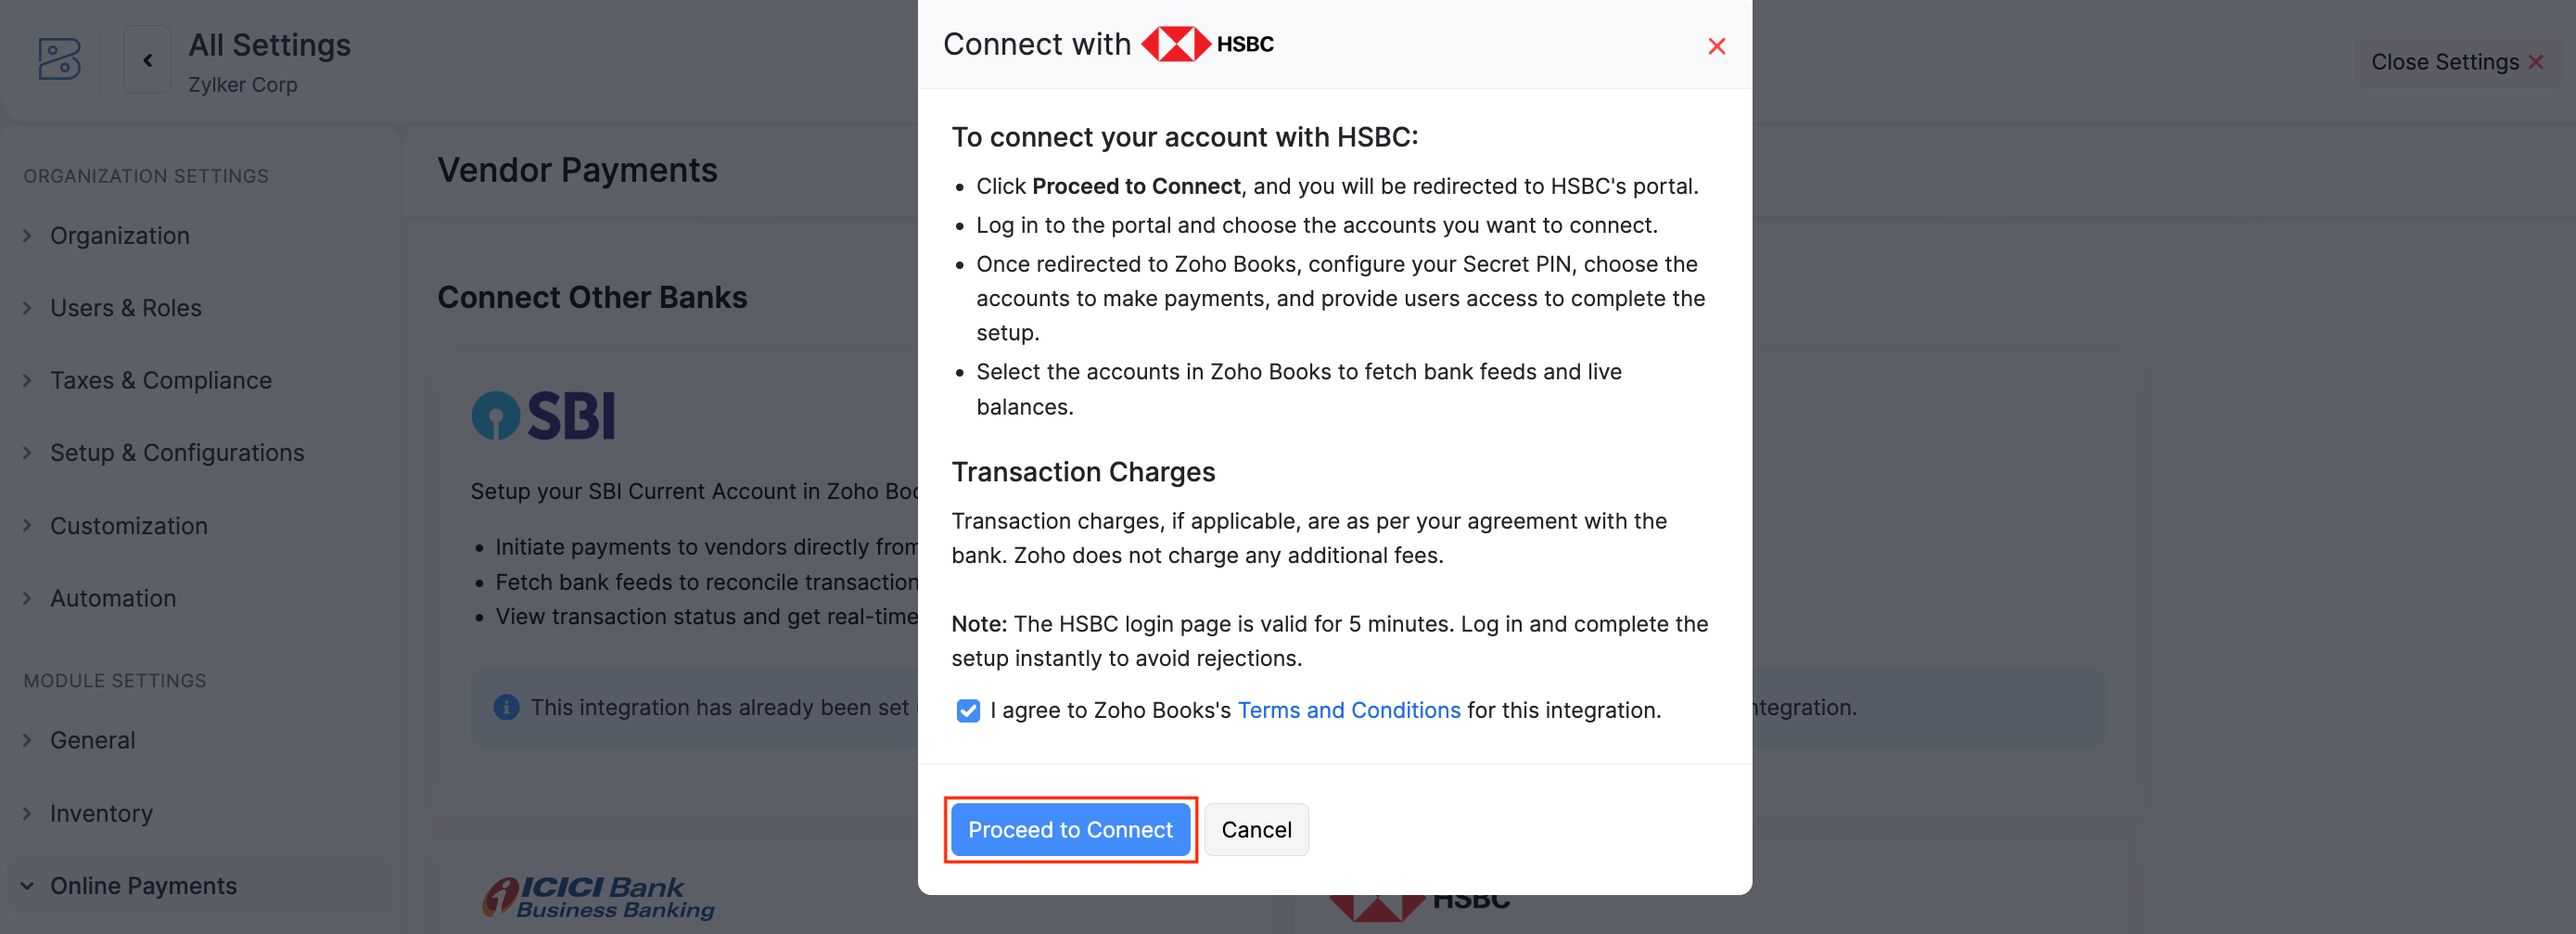
You’ll be redirected to the HSBC portal, where you must complete the authentication within 5 minutes. If the time expires, delete the integration and re-initiate the setup.
Authenticate HSBCnet Account
In the HSBC portal, you can authenticate your HSBCnet account and choose the bank accounts you want to connect with Zoho Books. To authenticate:
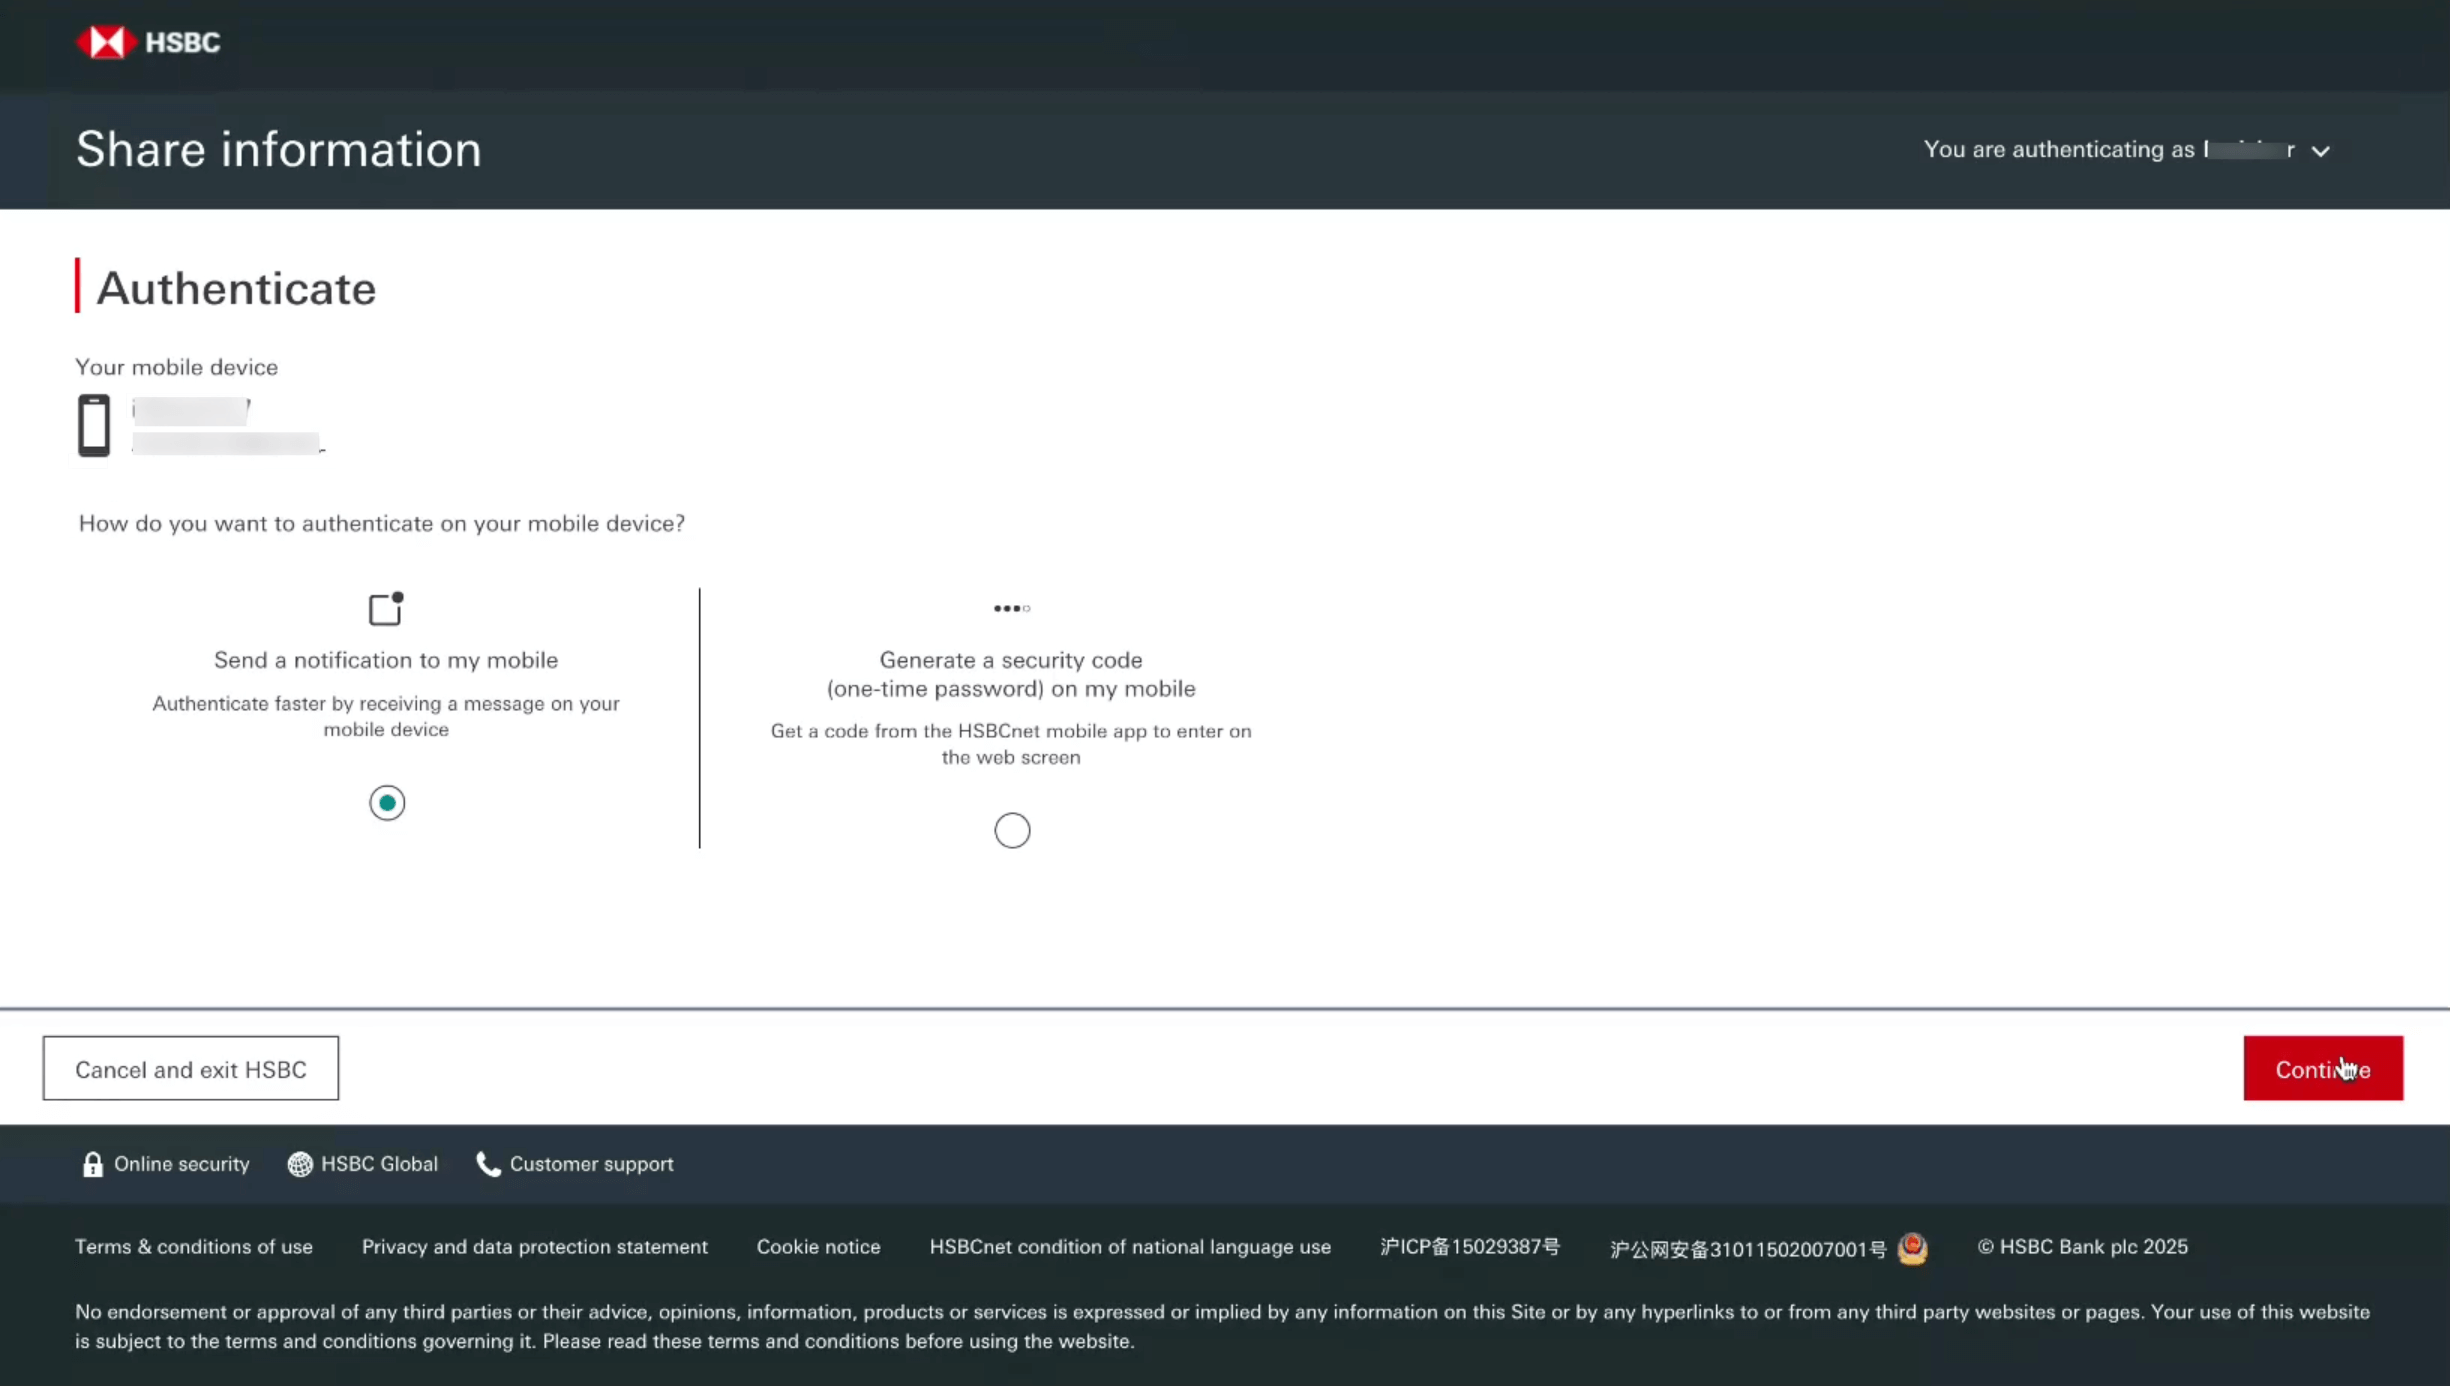
Click Log on if you are already using HSBCnet app.
Enter your HSBC Username and click Continue.
Authenticate your account using mobile notification or a security code from your HSBCnet app, and click Continue.
In the next page, select the bank accounts you want to integrate with Zoho Books.
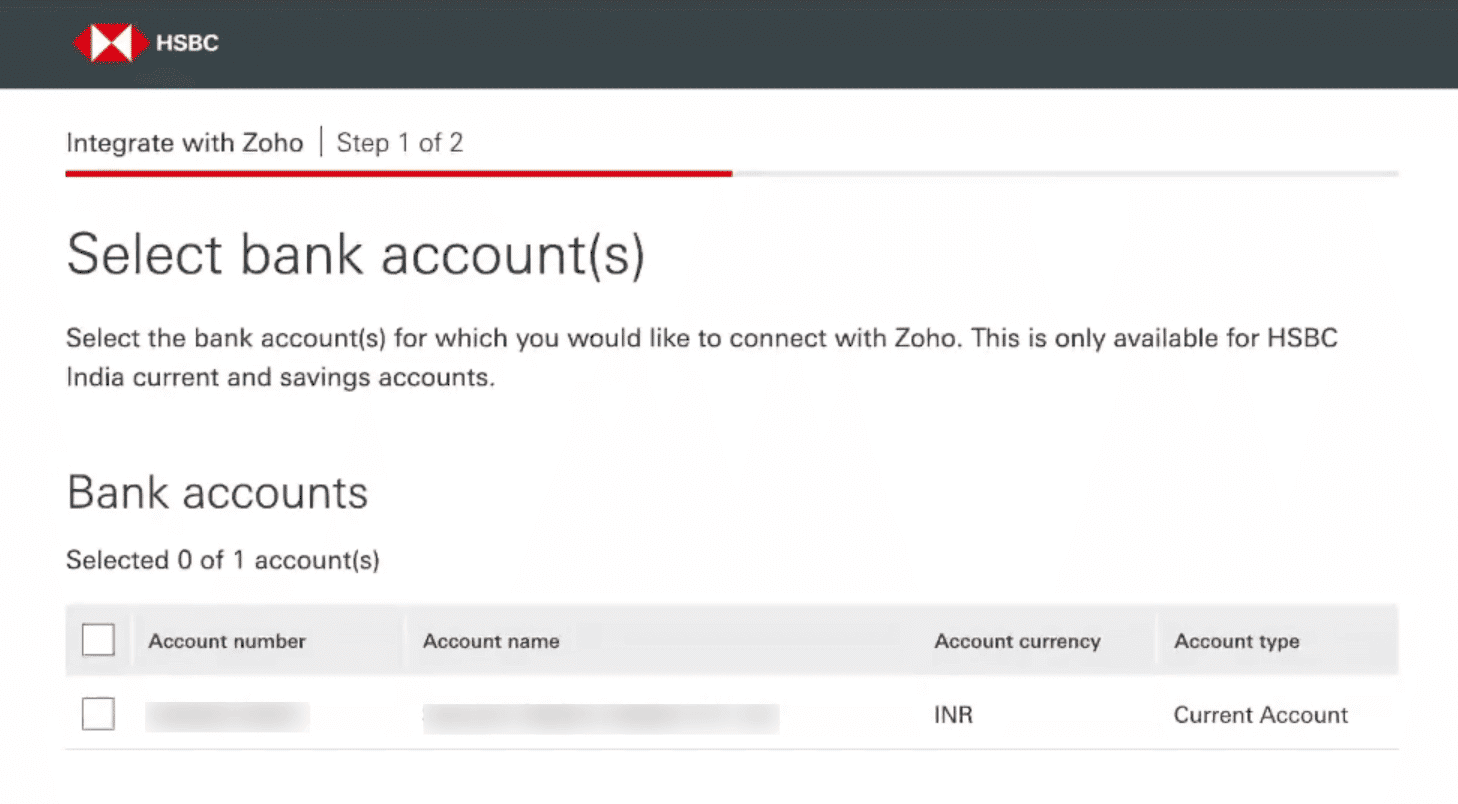
Accept the Terms and Conditions and click Continue.
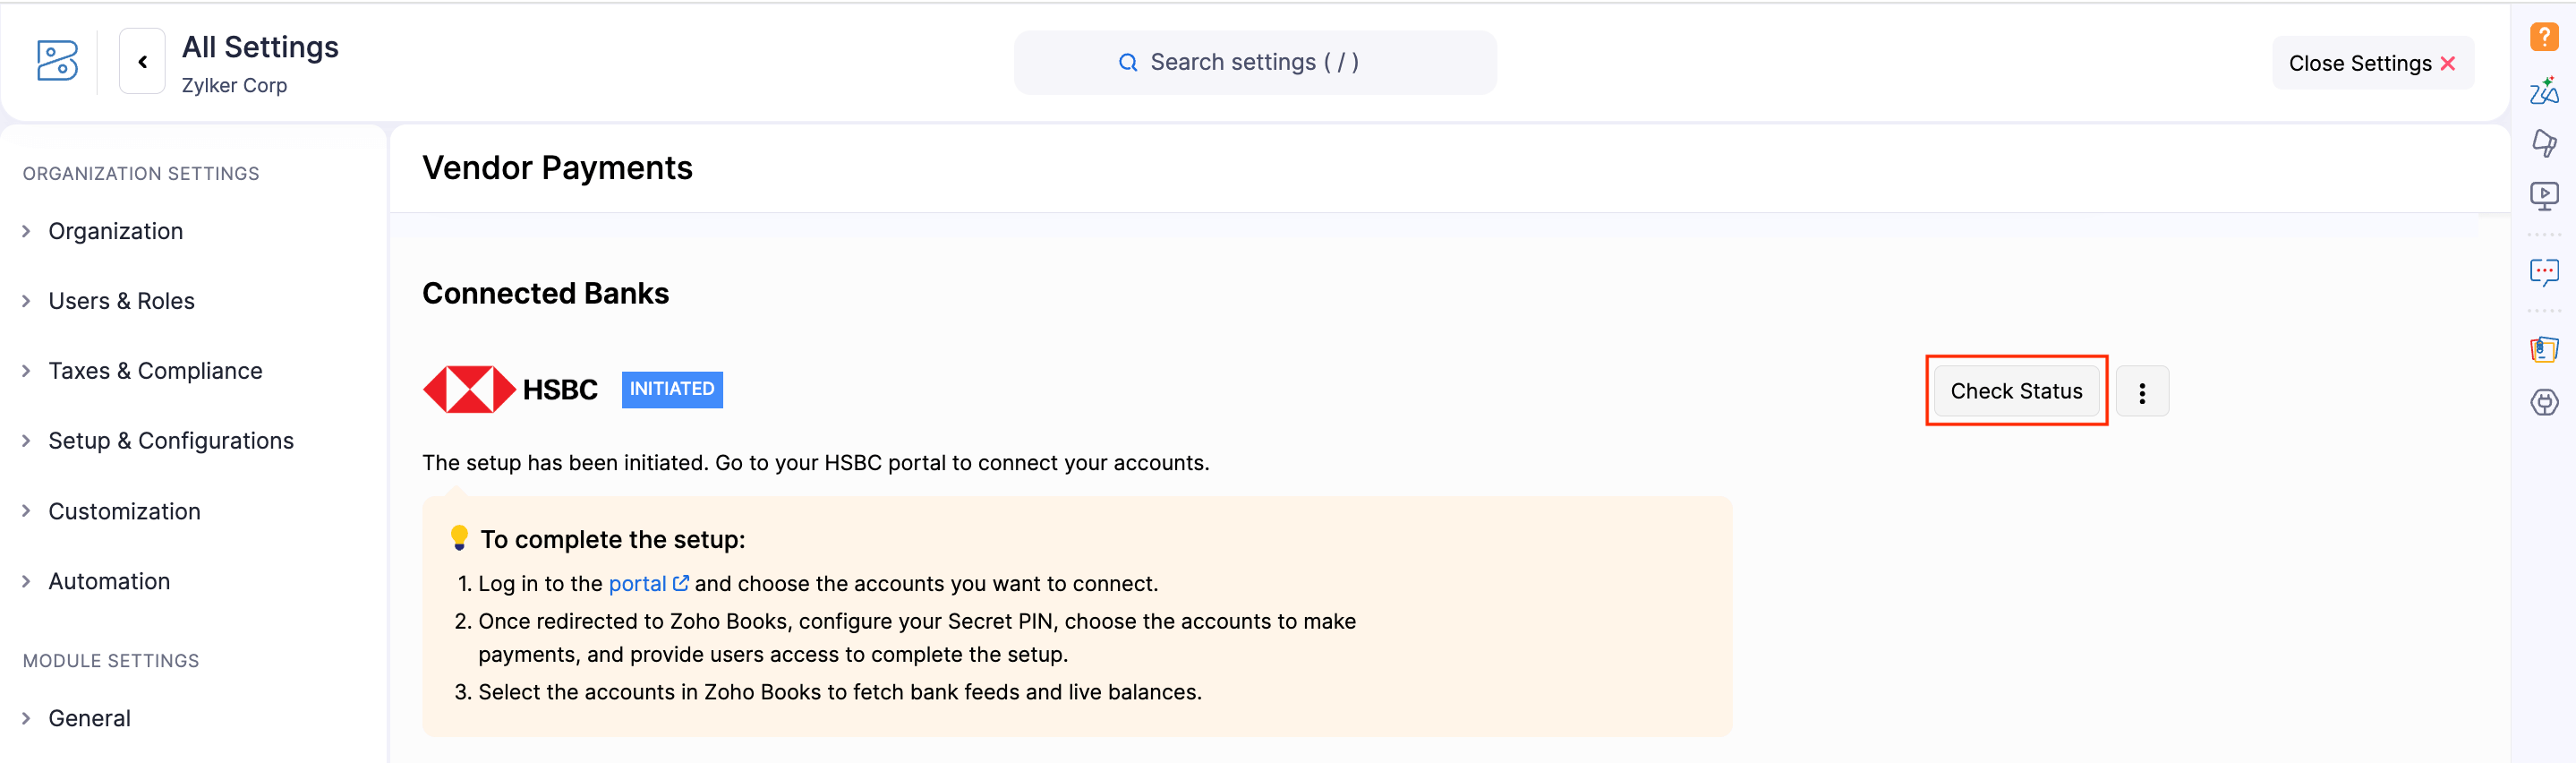
Once authenticated, the HSBC integration will appear under Connected Banks in Zoho Books with the status marked as Initiated. The integration may take up to 30 minutes to be processed. After that, click Check Status to manually update the status.
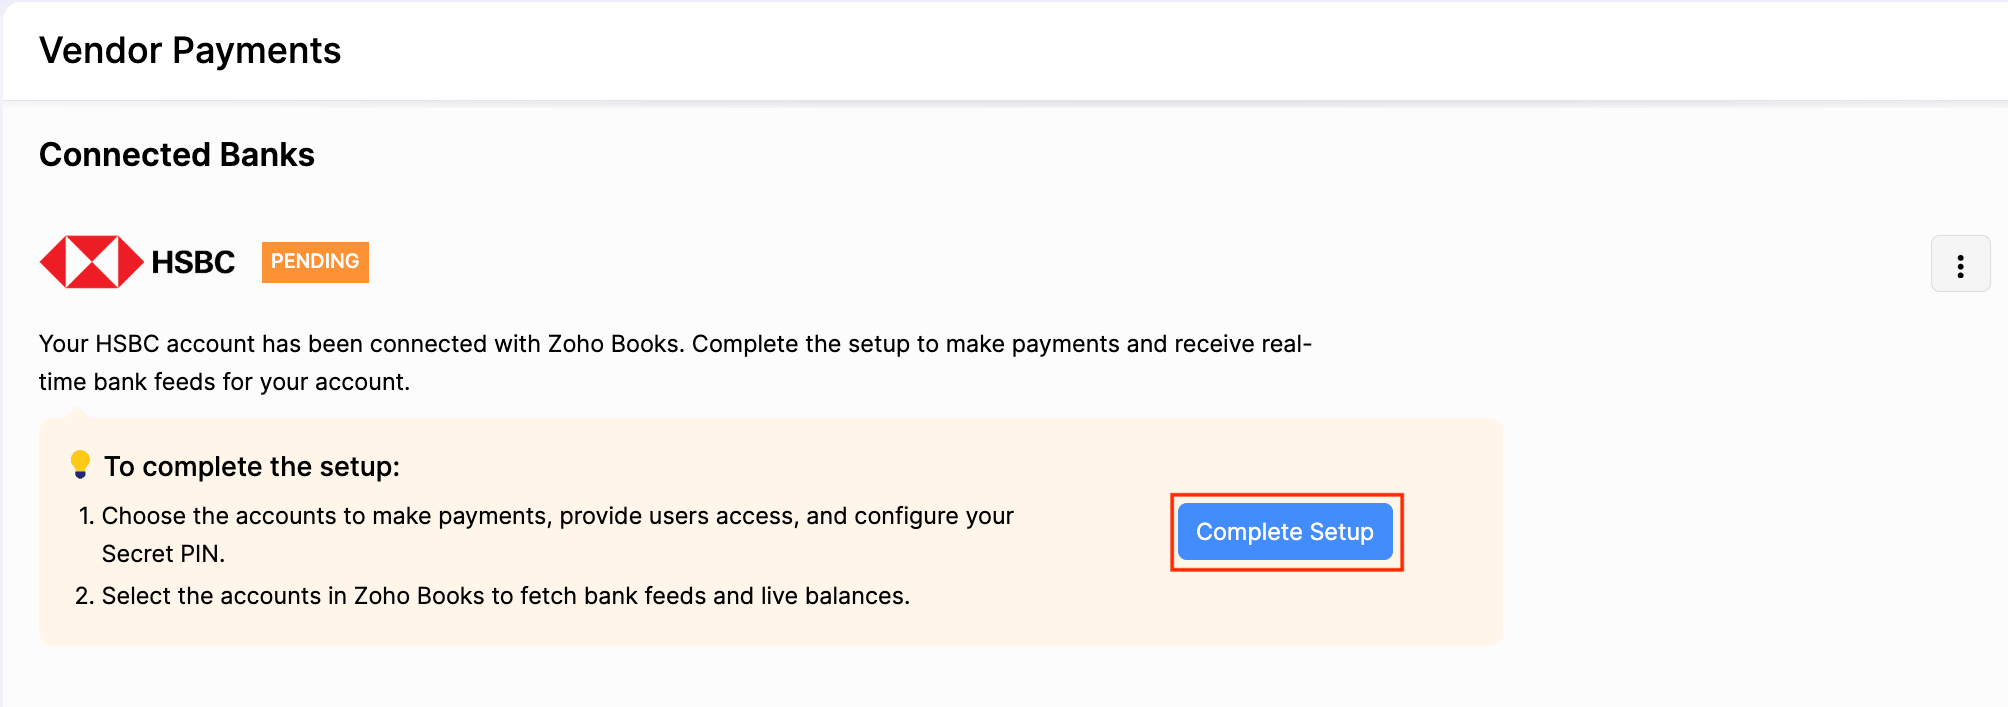
Complete Setup
Once the status is updated to Pending, click Complete Setup to proceed with the integration in Zoho Books.
In the pop-up that appears, complete the following steps:
1. Configure Bank Accounts
You can select the HSBC bank accounts from which you want to initiate vendor payments. To configure:
Select HSBC bank accounts from the dropdown.
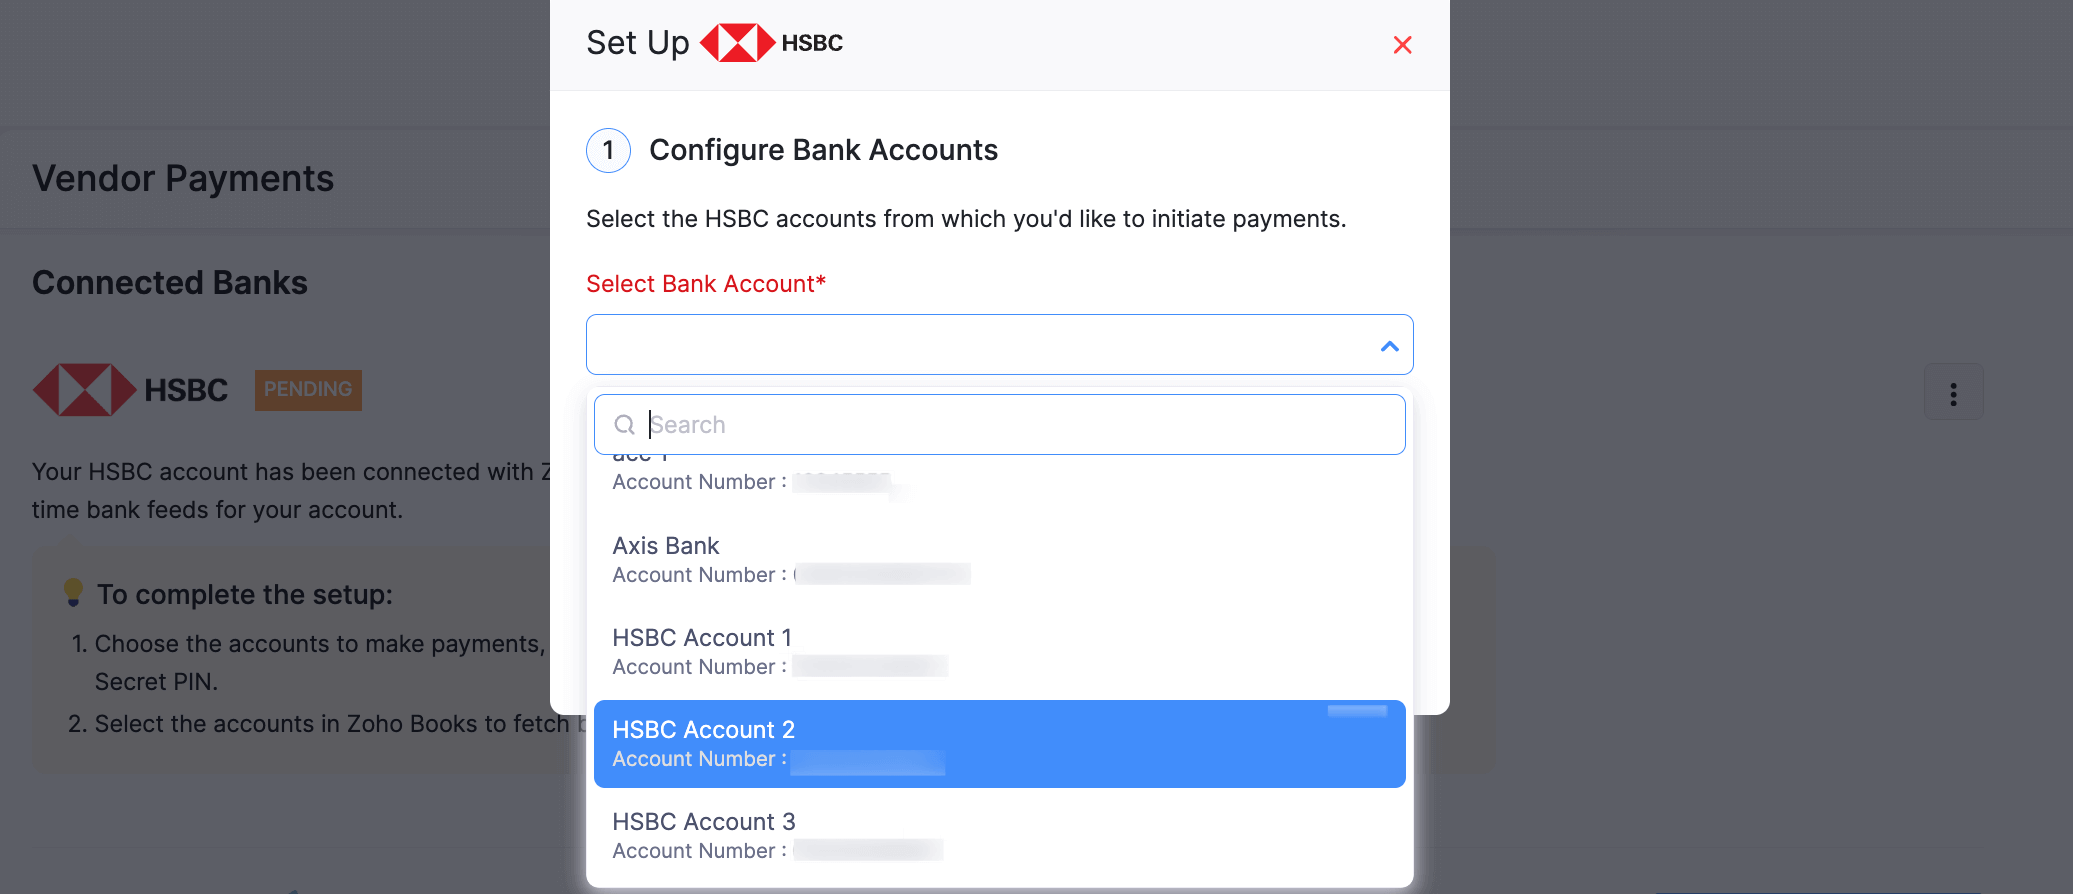
Click Save.
Your bank accounts will be added. Then, you can proceed to configure user access.
2. Manage Users
Since this is an organisation-level integration, you’ll need to grant access to users so they can initiate payments. To provide access:
Select the users from the dropdown.
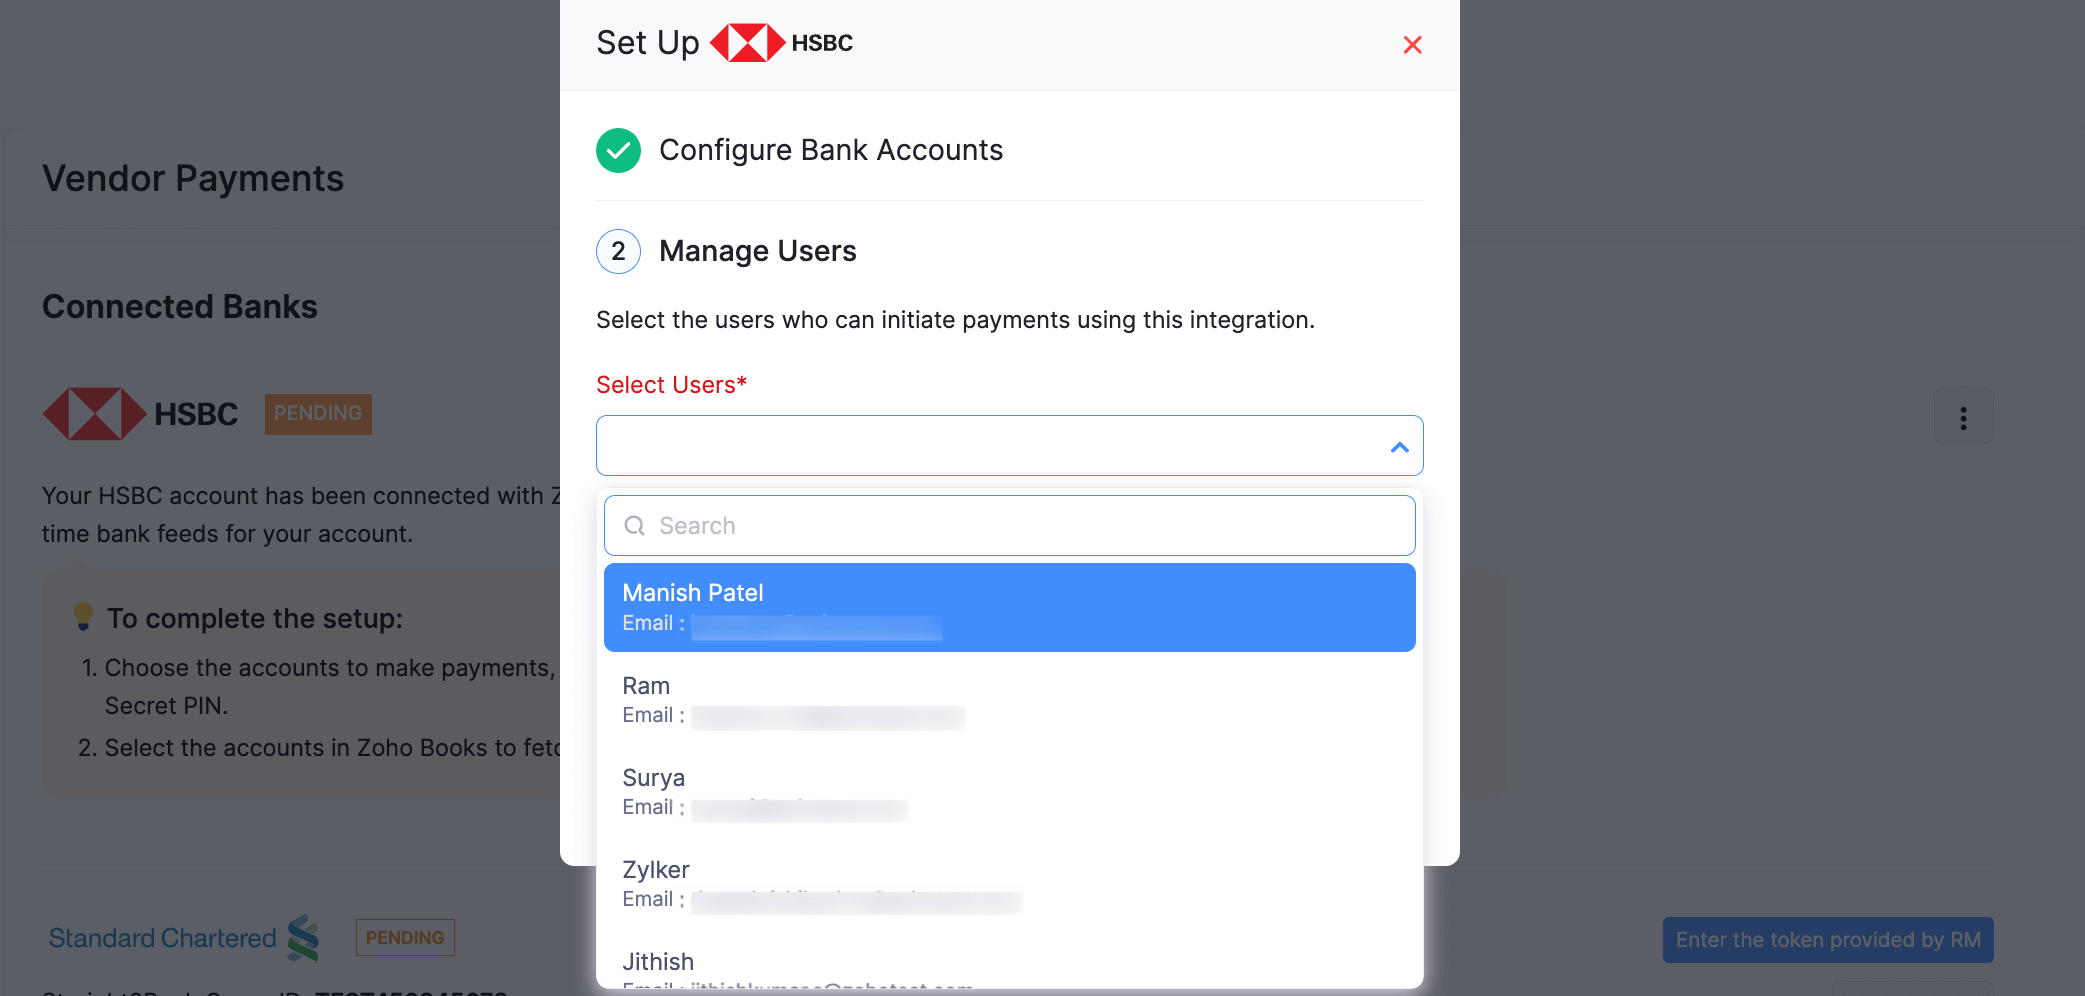
Click Save.
Note:To revoke access, click the Remove icon next to the required user.
Once done, you can create your Secret PIN.
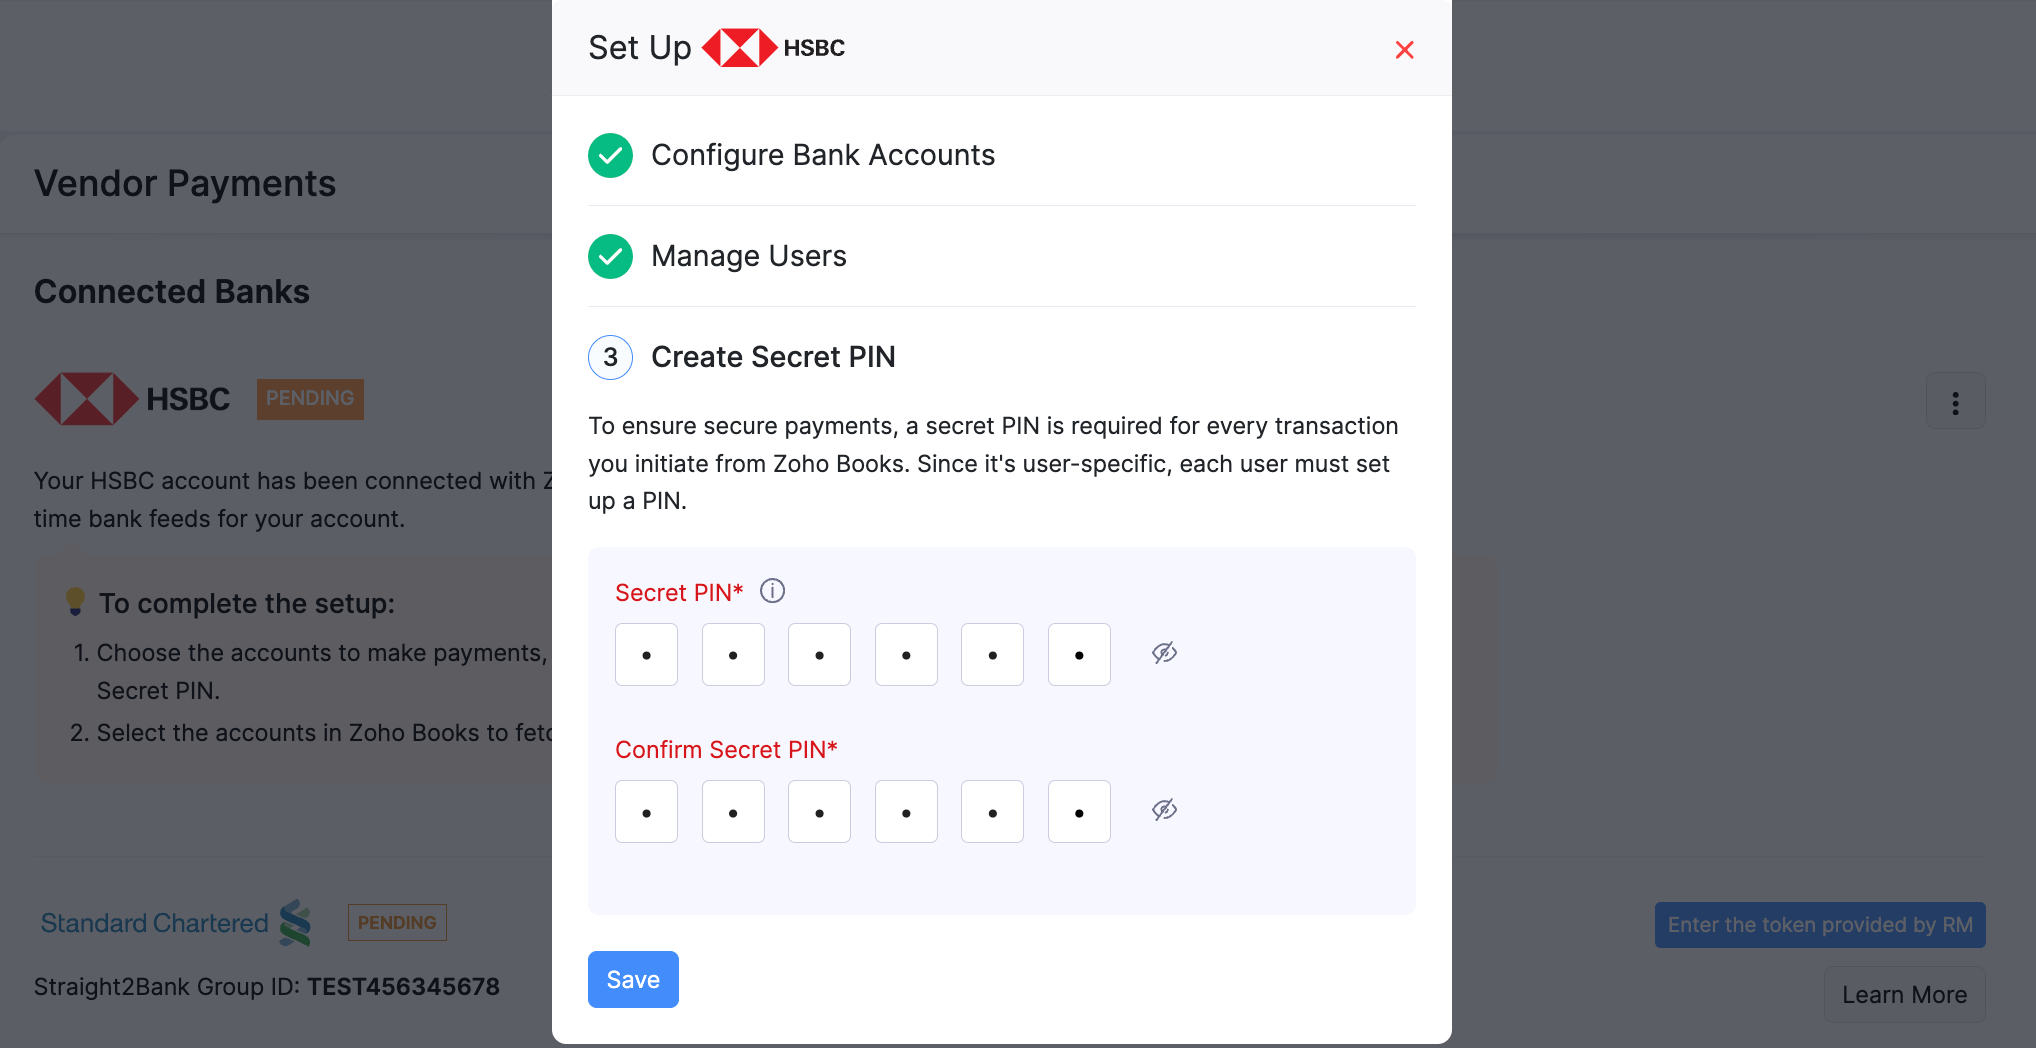
3. Create Secret PIN
Each user with access to this integration must set up a Secret PIN, which will be used to authorise all HSBC transactions initiated from Zoho Books. To create a Secret PIN:
Enter a 6-digit Secret PIN.
Confirm the PIN by entering it again and click Save.
Note: If you enter the Secret PIN incorrectly more than 5 times, the integration will be deactivated. If it’s deactivated or you forget the Secret PIN, disable the integration and complete the setup again to create a new Secret PIN.
Once the setup is complete, the integration’s status will be updated to Active.
Set Up Integration (Old Flow)
If you have received credentials from HSBC for integration, you can set up the integration at the user level, and other users will not be able to make payments on your behalf. To integrate:
Go to Settings.
Select Vendor Payments under Online Payments.
Scroll down and click Set Up Now next to HSBC.
In the pop-up that appears, fill in the following fields:
Field Description PC ID Enter the unique ID for your HSBC account, shared with you via email by the HSBC team. Client Secret Enter the confidential key provided by the HSBC team via email. HSBC Bank Account Select the bank account you added in the Banking module. If not, add it and select it here. Secret PIN Set a secure PIN that you will remember as you will use it to initiate payments in Zoho Books. 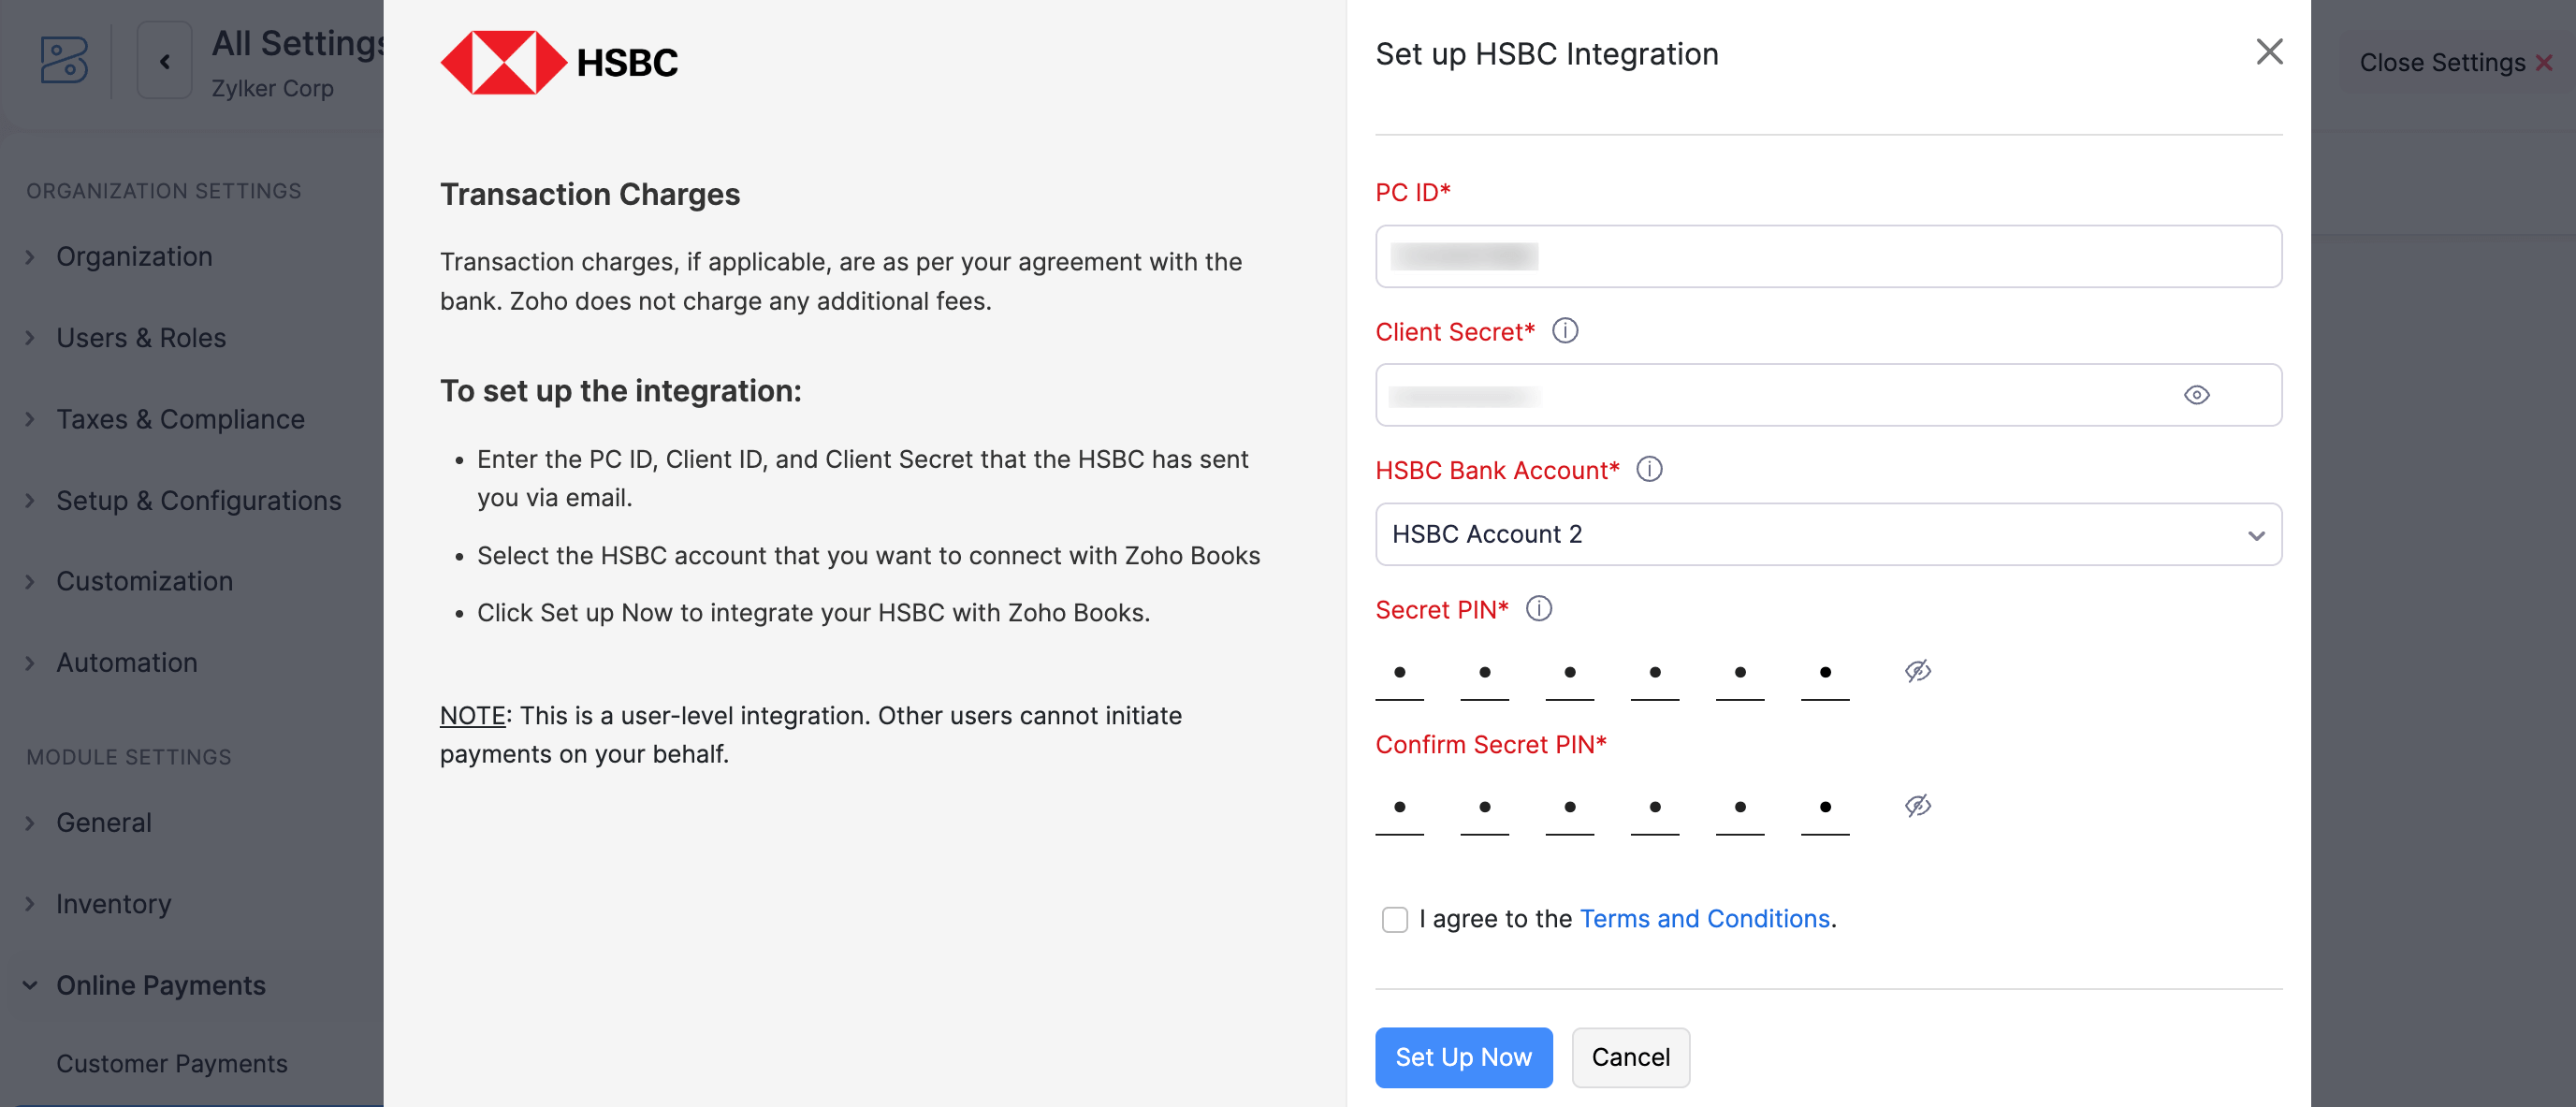
Read and agree to the terms and conditions.
Click Set up Now.
HSBC is now integrated with your Zoho Books organisation.
Add Vendor Bank Account
Before initiating vendor payments, you need to add the vendor’s bank account details. To add:
Go to the Purchases on the left sidebar and select Vendors.
Select the vendor to add their bank account details.
Click More icon in the top right corner and select Add Bank Account from the dropdown.
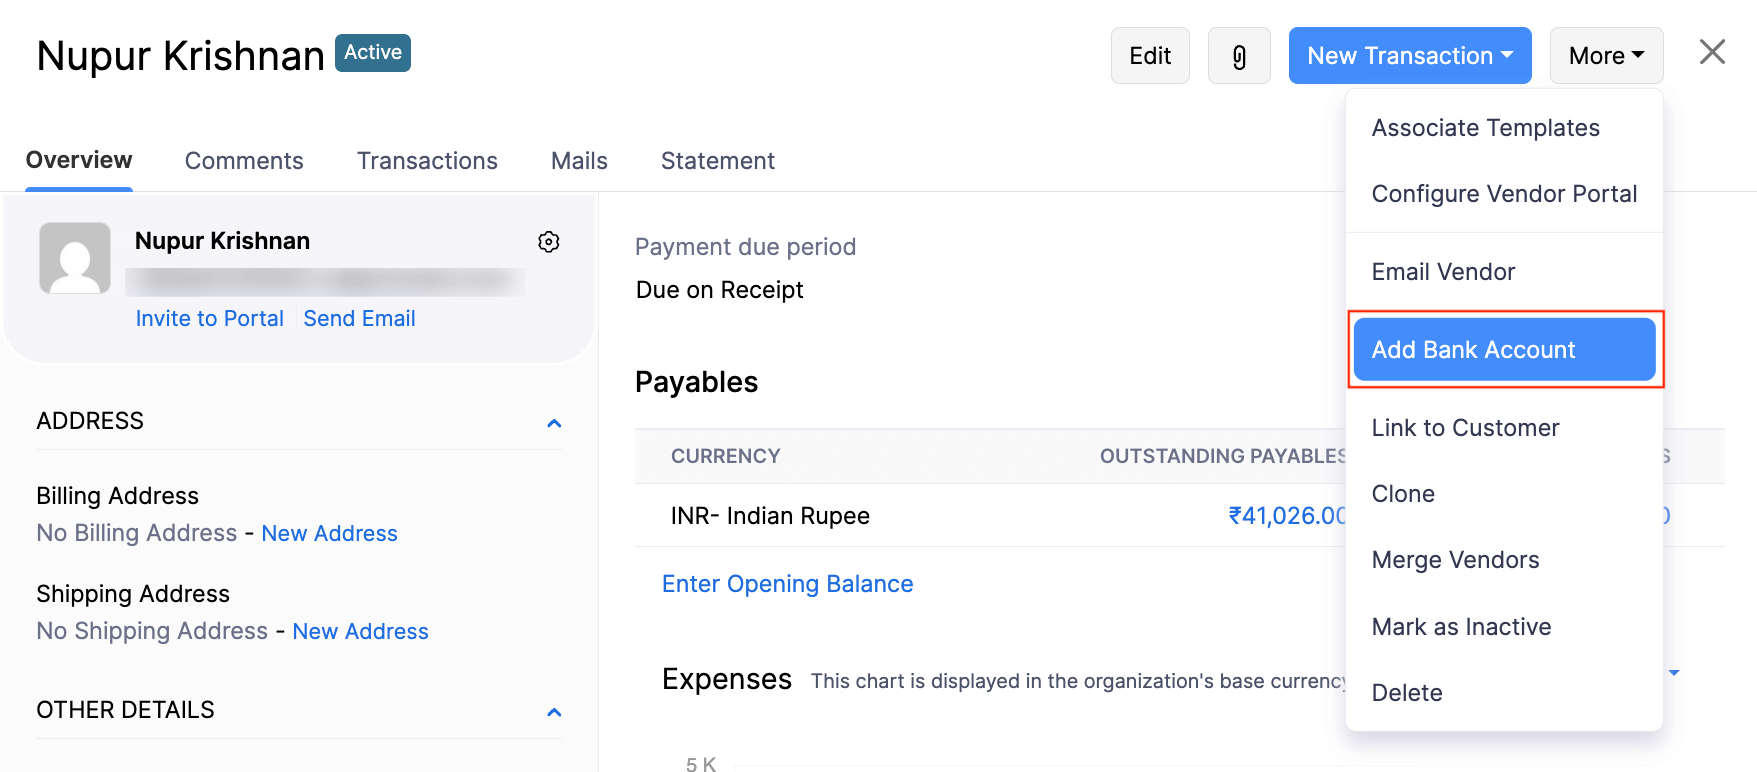
In the pop-up that appears, enter the vendor’s bank account details.
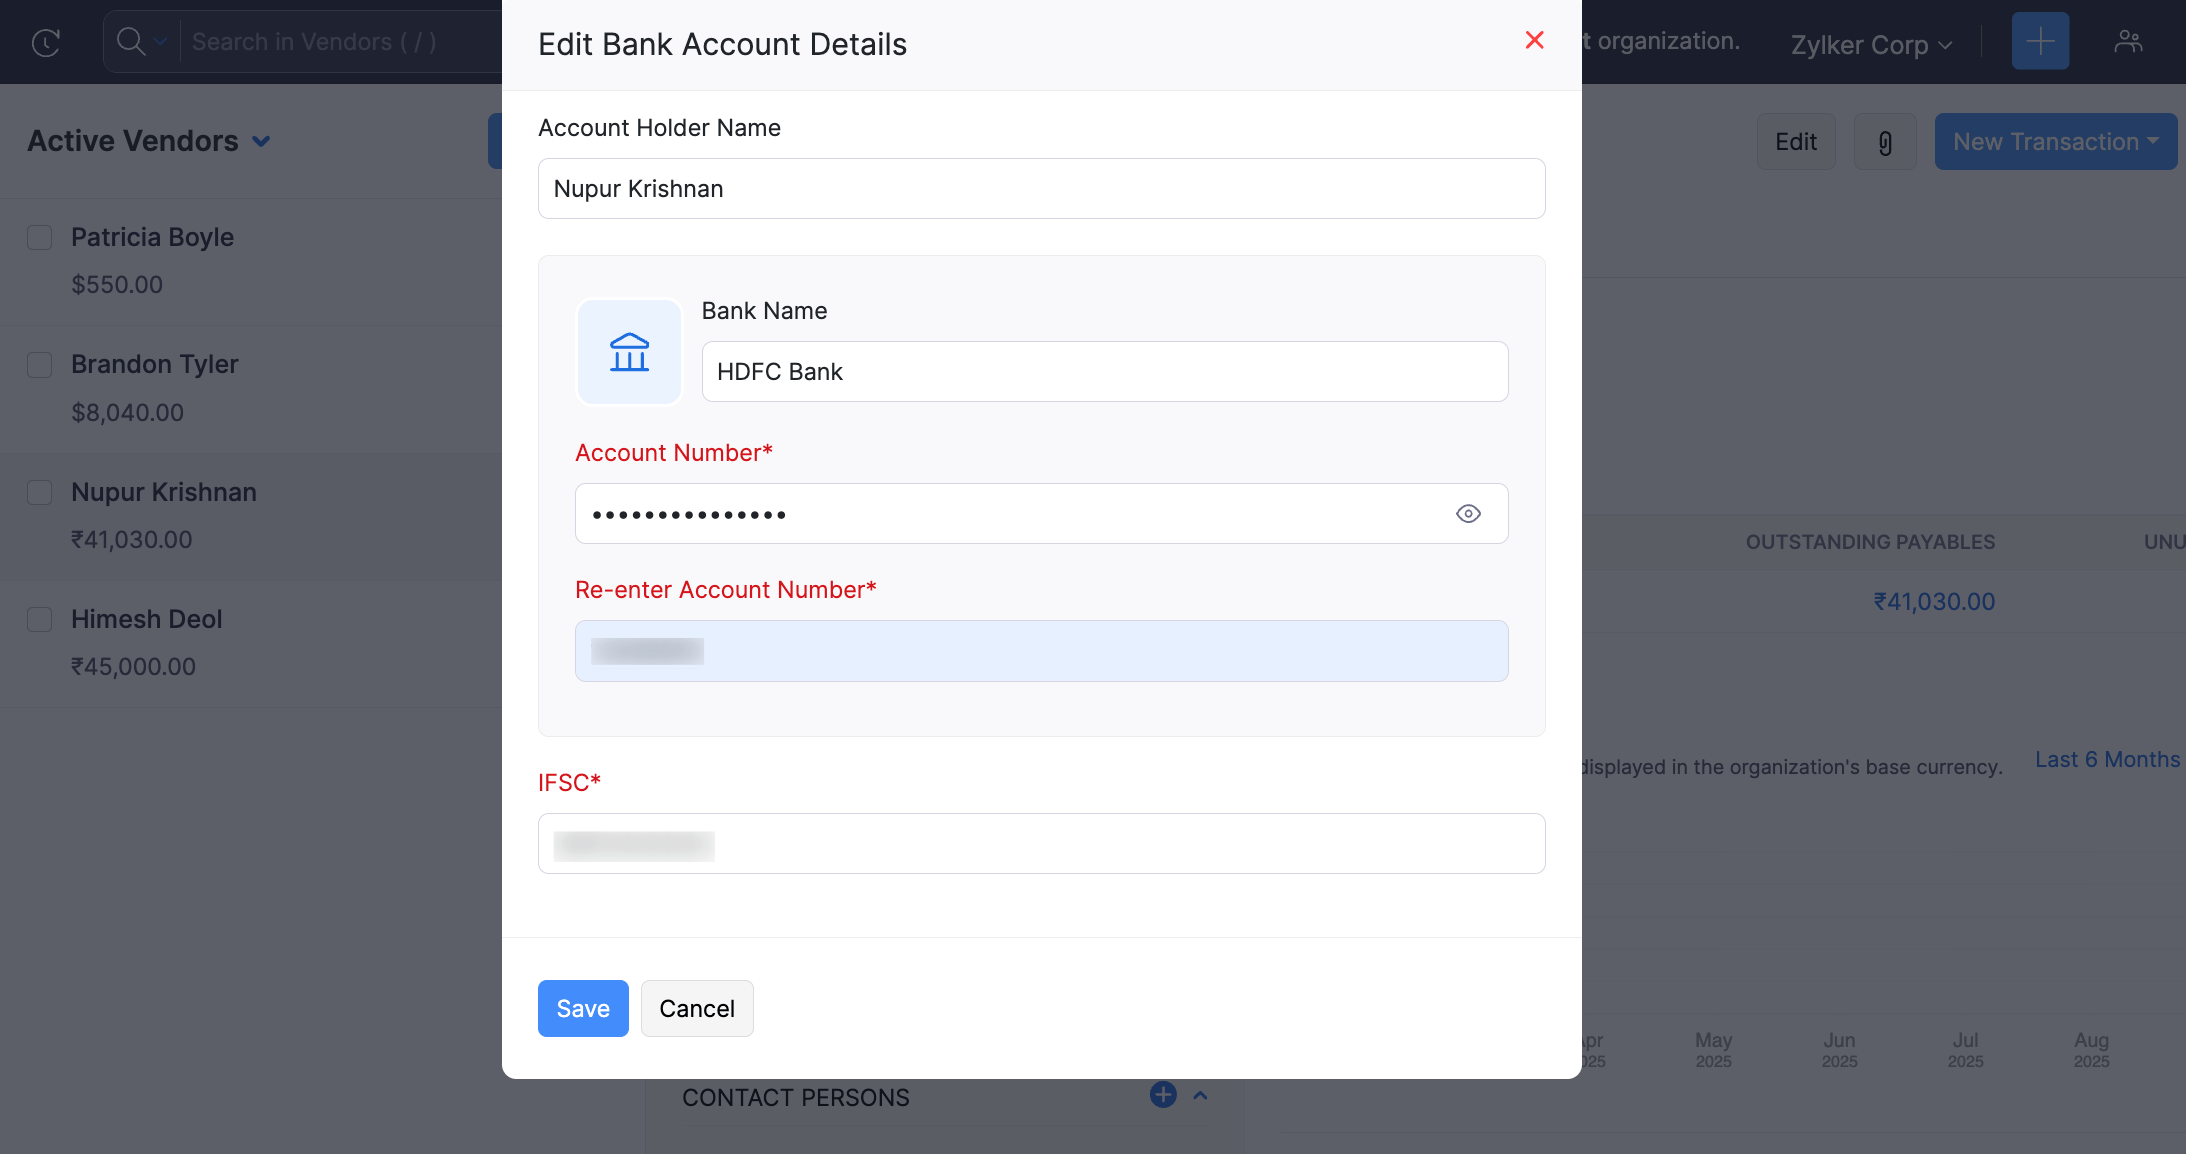
Click Save.
The vendor’s bank account will be added and you can initiate payments to this account.
Initiate Payments
Once your vendor’s bank account details are added, you can initiate payments via HSBC from Zoho Books in four ways:
You can also make cross-border payments for overseas vendors by selecting a foreign currency when creating or editing their profile.
Note:
Cross-border payments are only supported for the following currencies: HKD, INR, AED, AUD, BHD, CAD, CHF, CNY, CZK, DKK, JPY, KWD, LKR, NOK, NZD, OMR, PHP, PLN, QAR, RUB, SAR, SEK, SGD, THB, TRY, USD, EUR, GBP, and ZAR.
The cross-border payments feature is currently available on early access only. If you would like to access this feature, send an email to hsbc-support@zohofinance.com.
Individual Bill Payment
You can initiate payment for a bill via HSBC in Zoho Books. To initiate payment:
- Go to the Purchases on the left sidebar and select Bills.
- Select the bill for which you need to initiate payment.
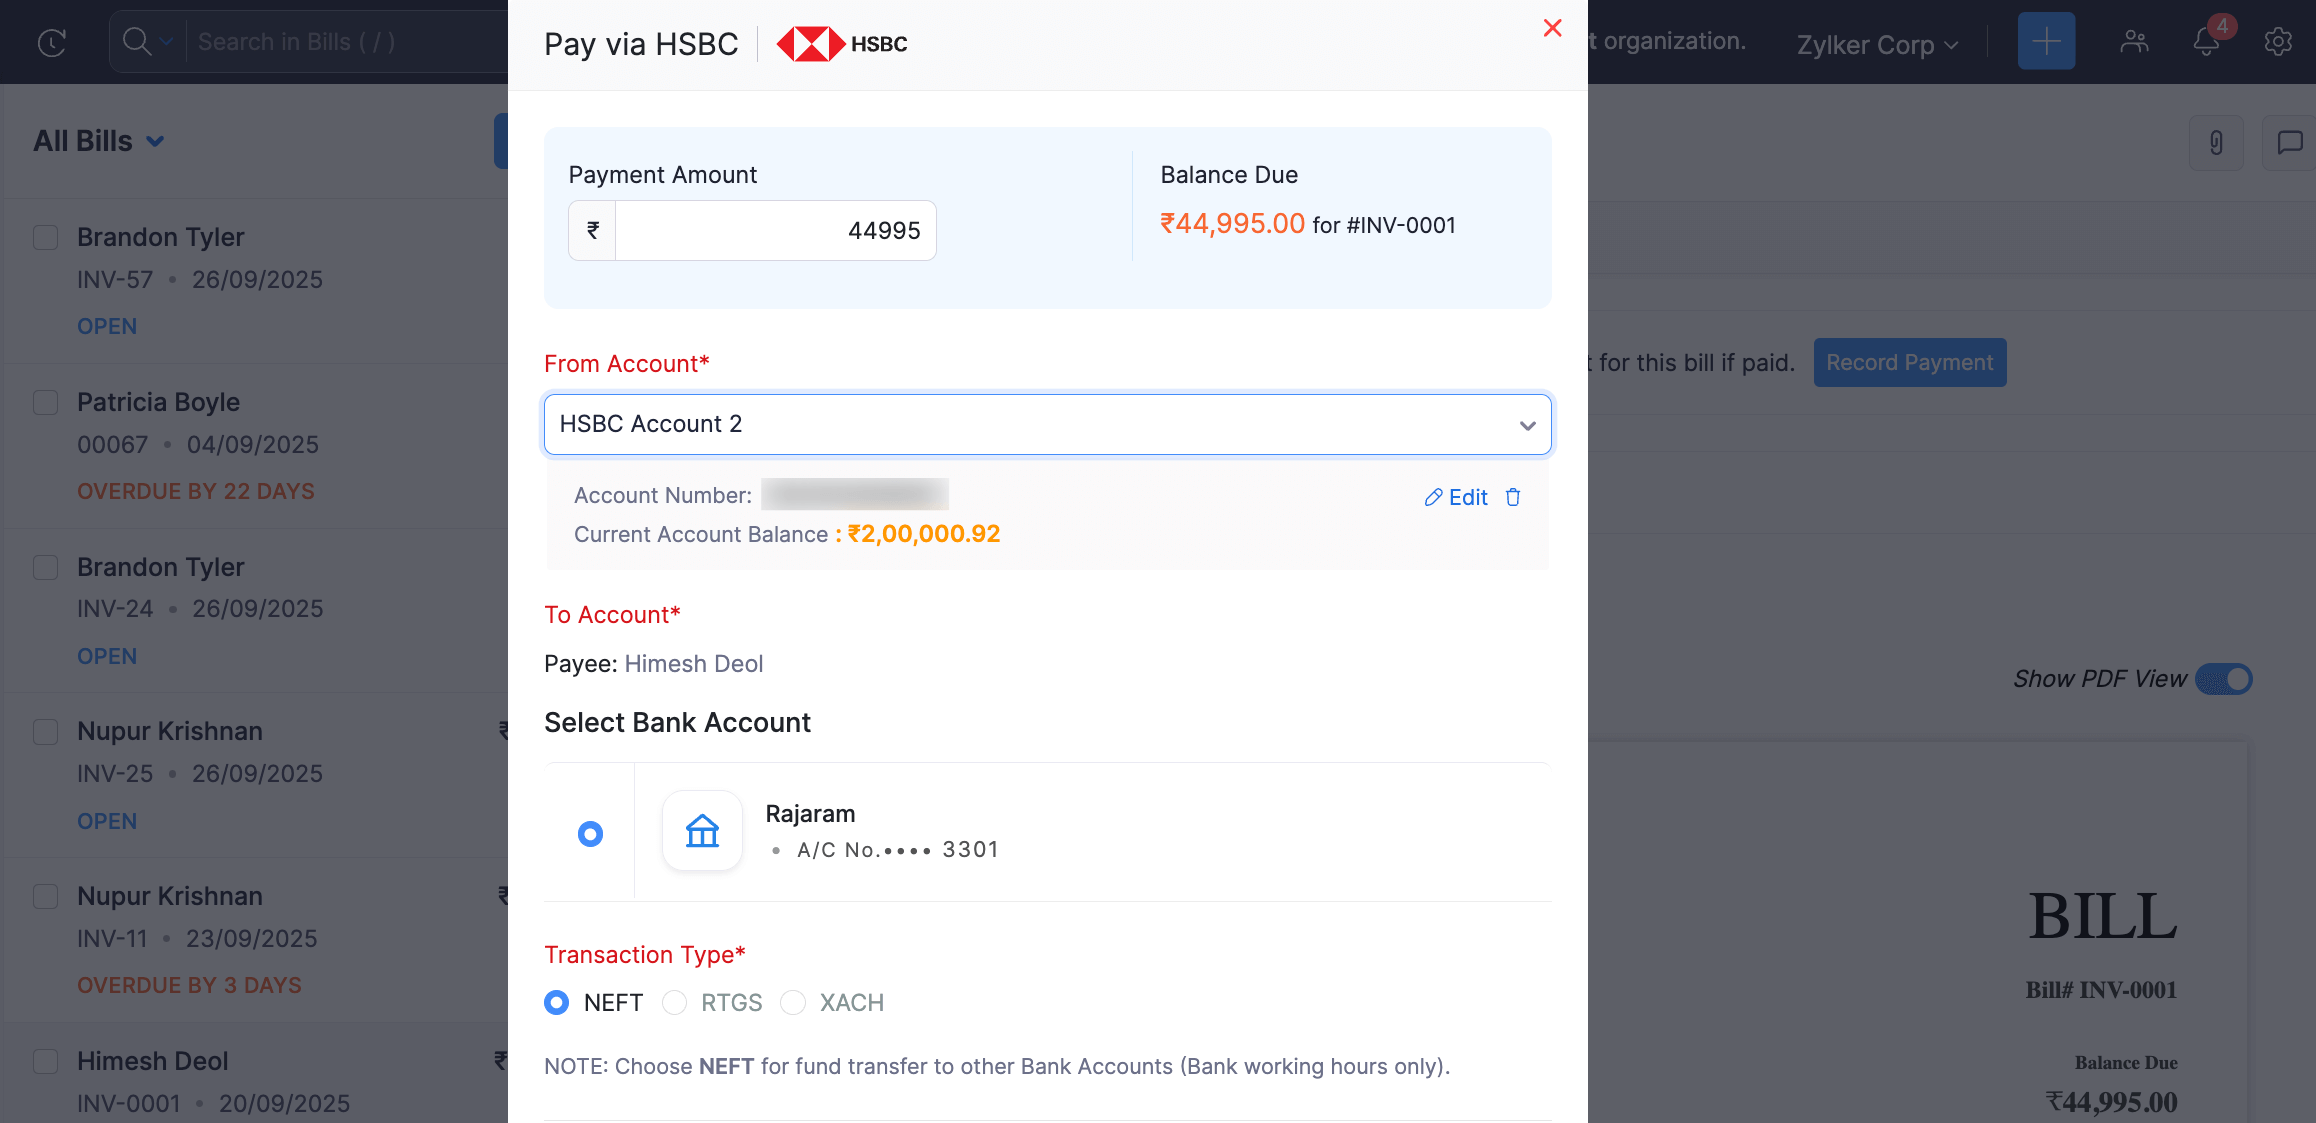
- Click Pay via HSBC at the top of the page.
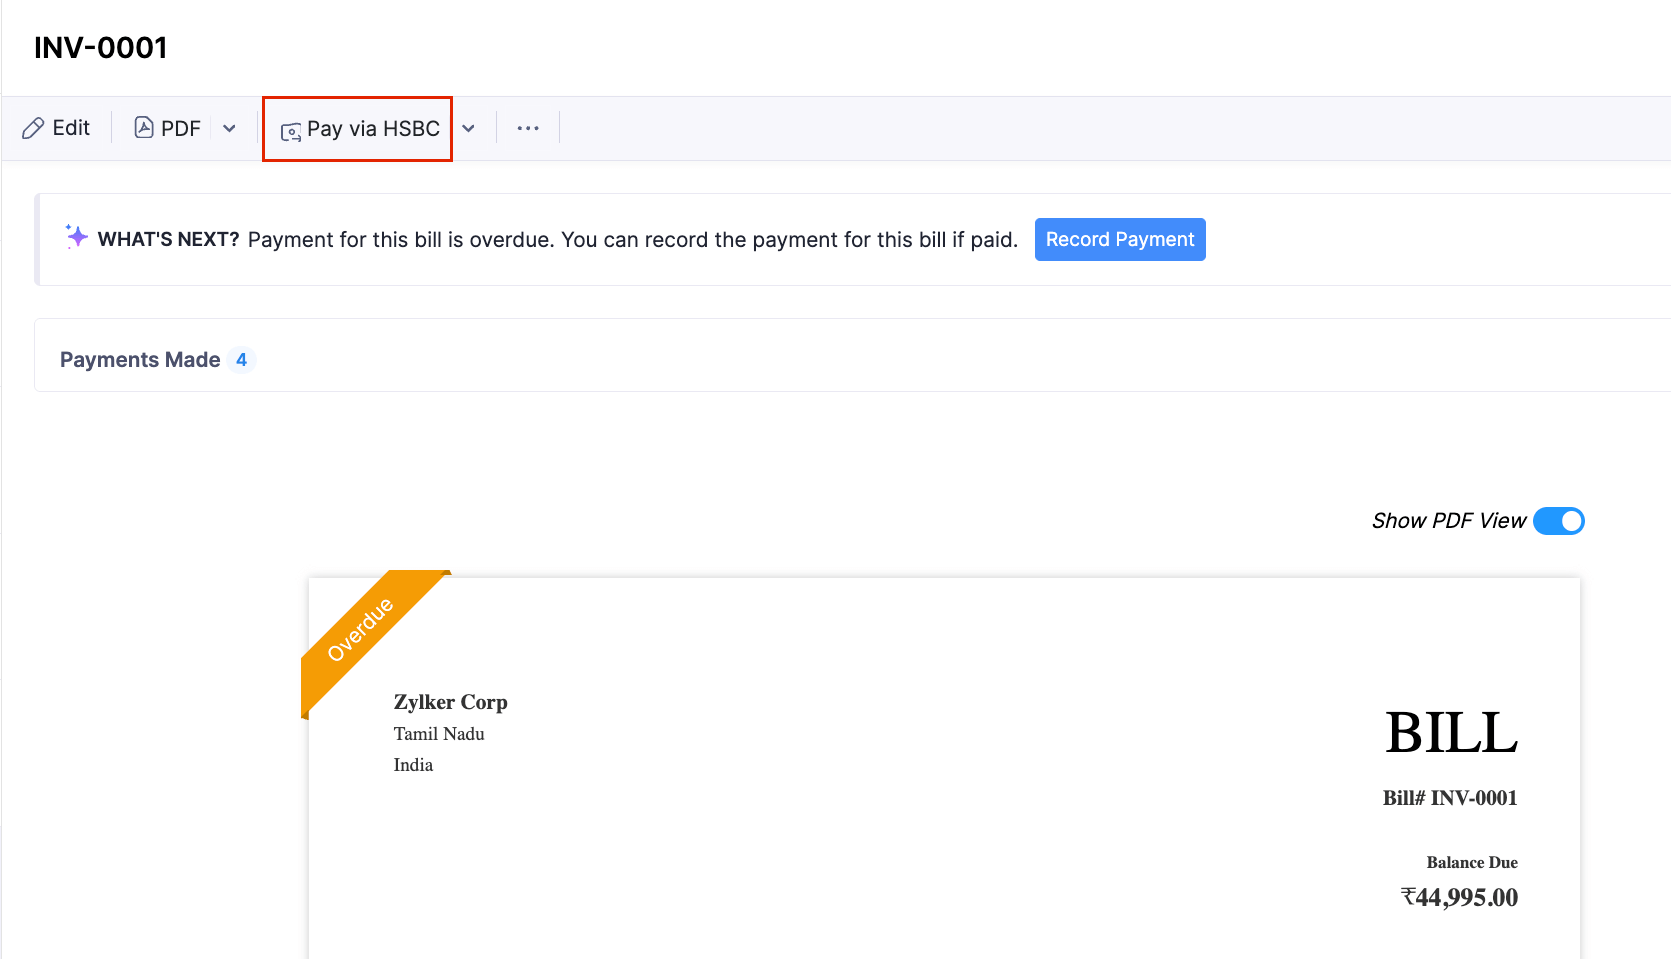
- In the pop-up that appears, fill in the following fields:
| Fields | Description |
|---|---|
| Balance Due | The amount due for payment for the particular bill. |
| Amount | Enter the payment amount. You can make a complete or a partial payment towards the bill. |
| From Account | Select the HSBC bank account from which you want to initiate the payment. |
| To Account | Select the account to which you want to make the payment. |
| Transaction Type | Select the Transaction Type from the available fund transfer options: NEFT, RTGS, or XACH. Choose RTGS when the transaction amount exceeds ₹2,00,000 and NEFT when it is less than ₹2,00,000. XACH is available only for cross-border payments and will be selected as the default transaction type when paying vendors in a foreign currency. |
Click Proceed.
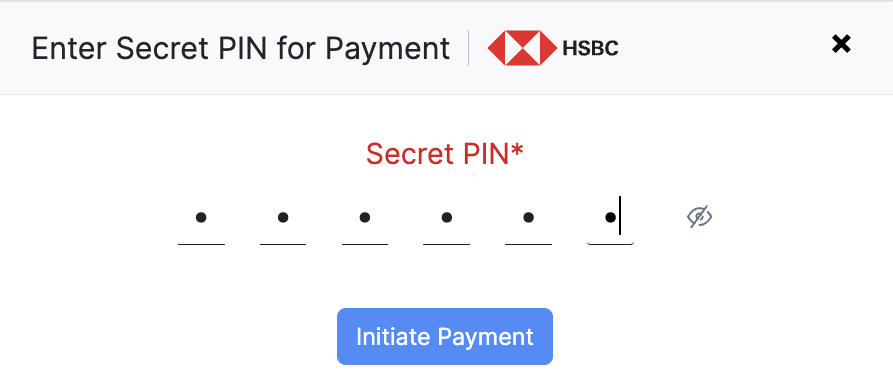
In the pop-up that appears, enter the Secret PIN and click Initiate Payment.
The payment will be initiated from Zoho Books, and you will need to authorise it in HSBCnet.
Insight: During cross-border payments, after authorisation, you may notice a difference in the amount due to exchange rate fluctuations. This difference can be recorded as a transaction in Zoho Books while reconciling accounts in the Banking module.
Multiple Bill Payment
You can initiate payments for multiple bills in two ways:
1. Pay multiple bills from same vendor
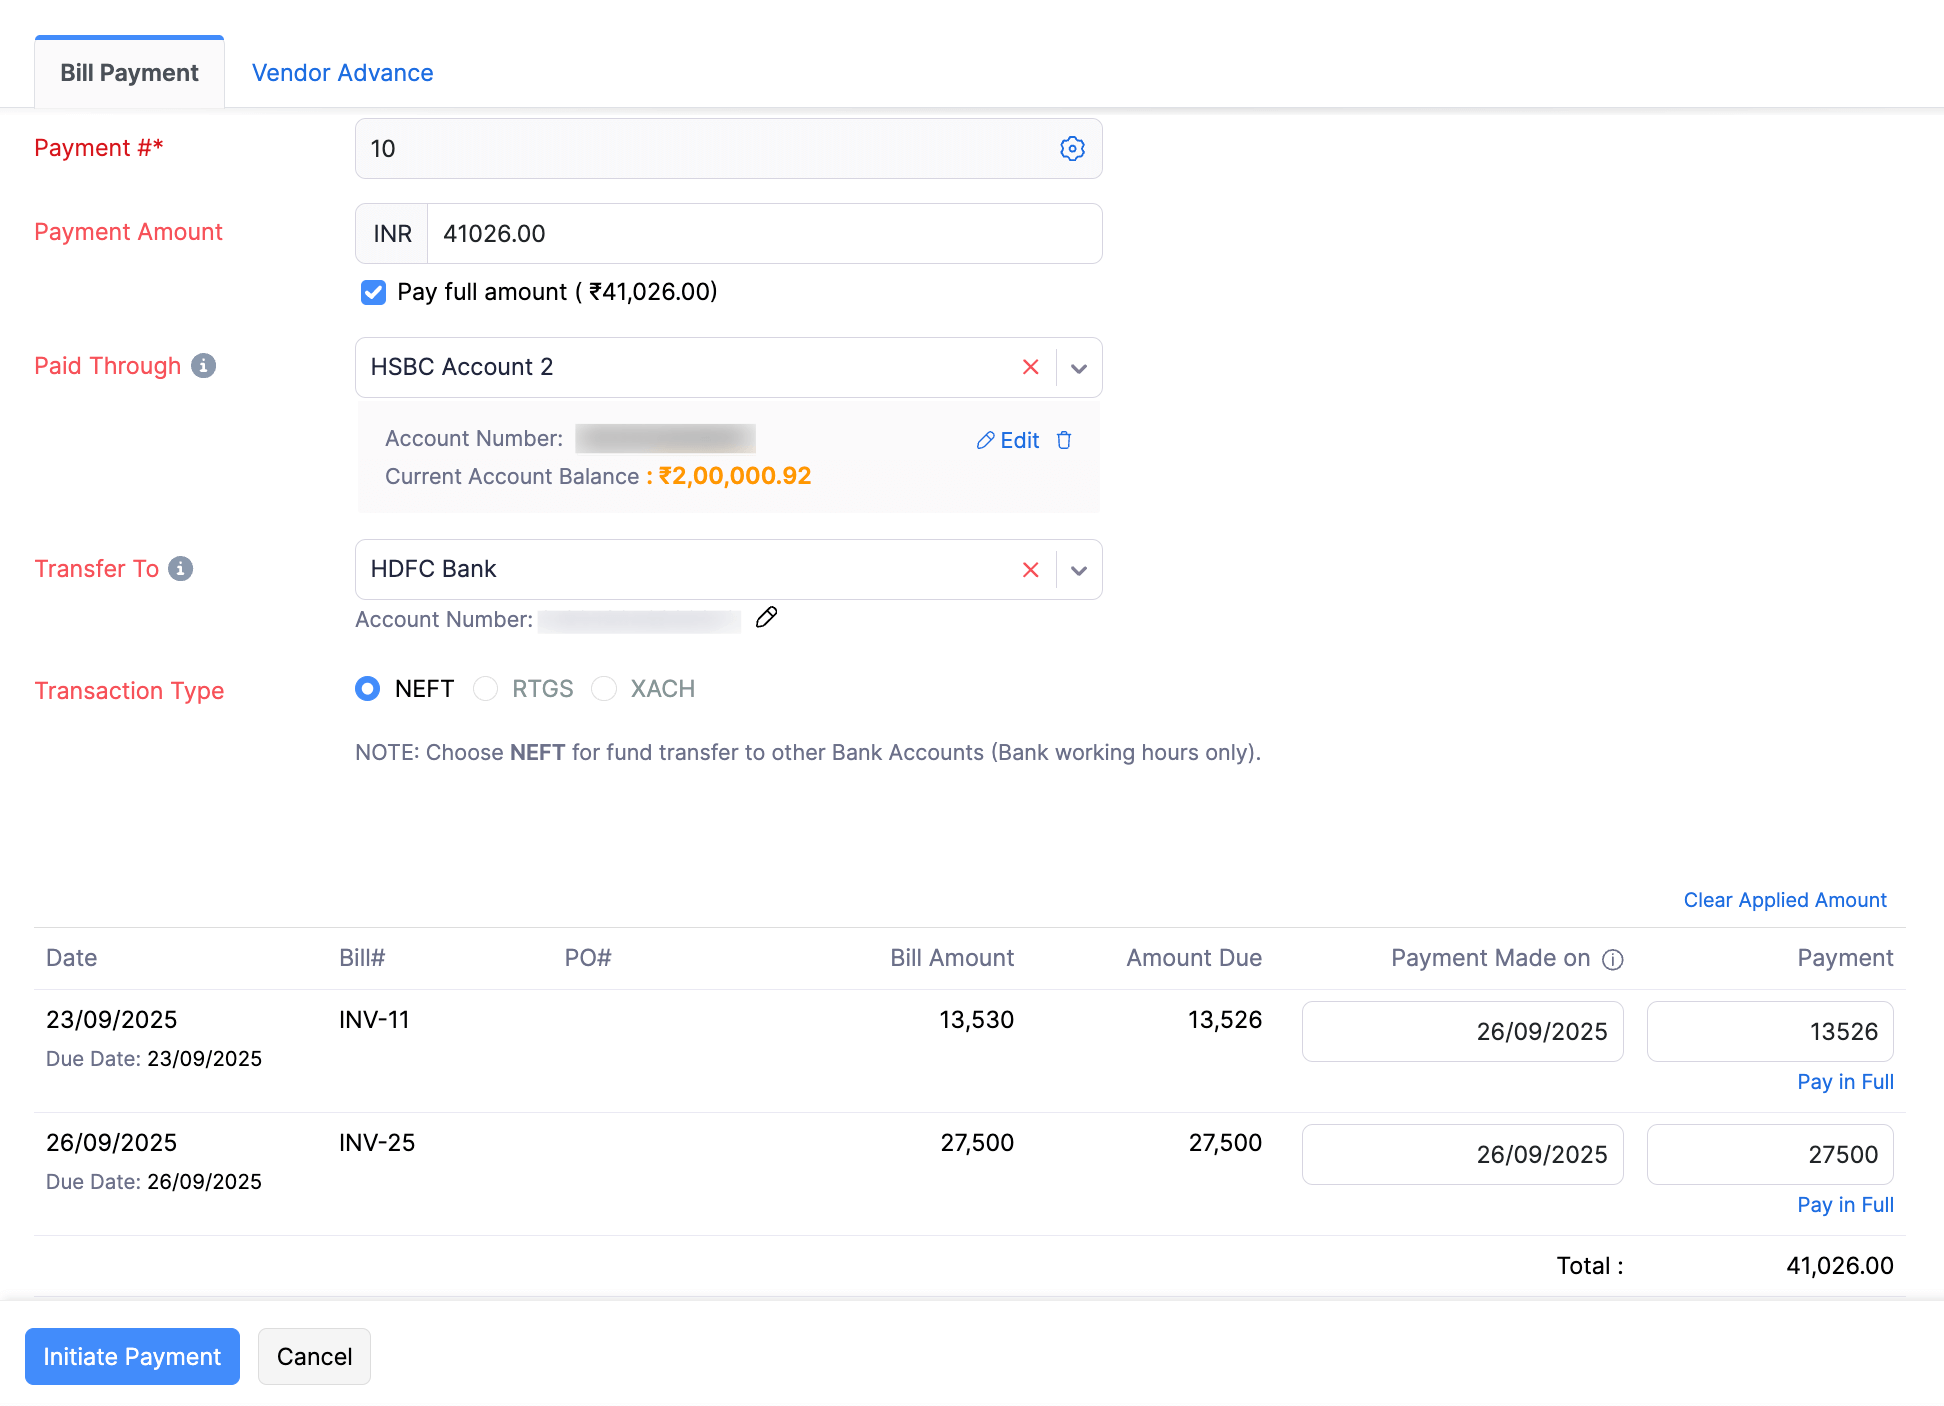
You can intiate bulk payments for multiple bills from the same vendor. To initiate:
Go to the Purchases on the left sidebar and select Payments Made.
Click + New at the top right corner.
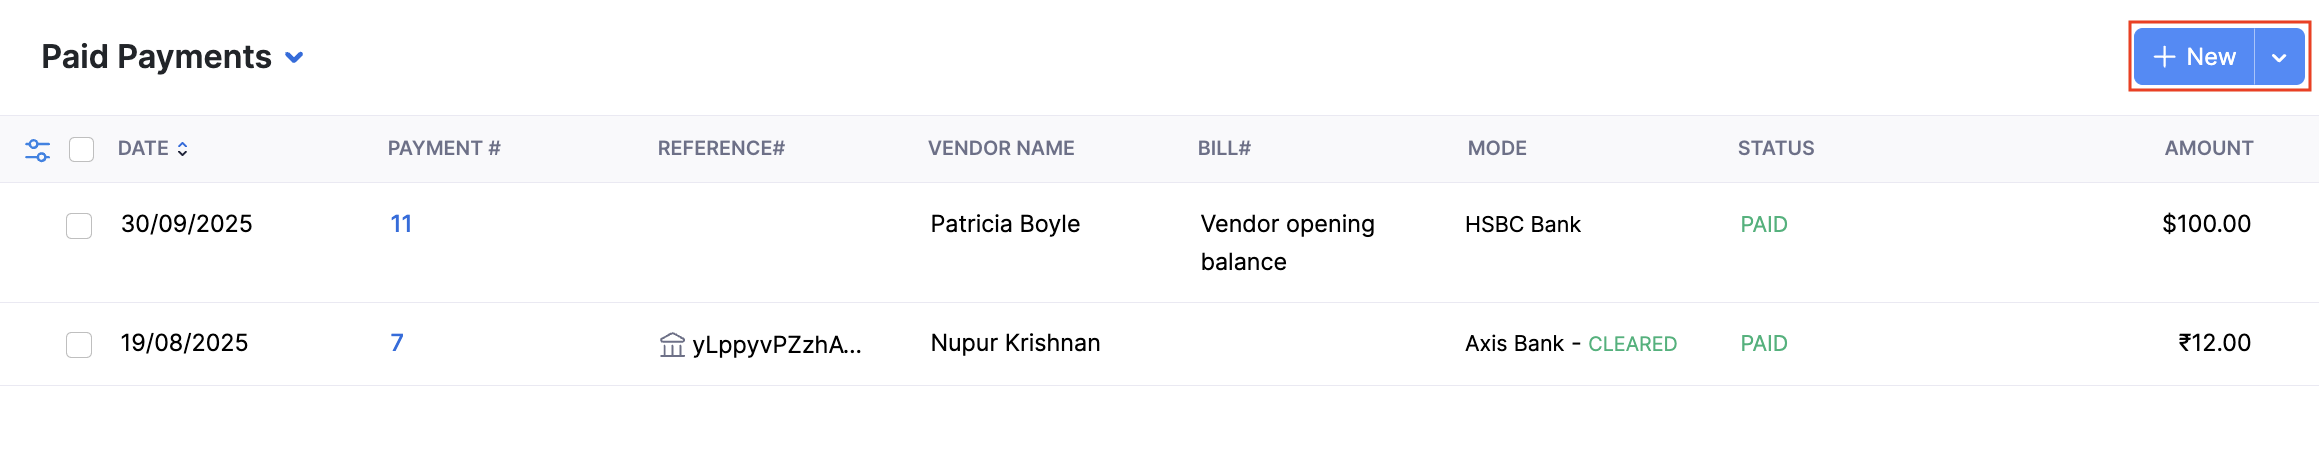
Select the vendor whose bills you want to pay.
Select the Initiate payment via HSBC option.
Enter the payment details and click Initiate Payment.
In the pop-up that appears, enter your Secret PIN.
Click Initiate Payment.
The payment will be initiated from Zoho Books, and you will need to authorise it in HSBCnet.
2. Pay multiple bills from different vendors
You can initiate bulk payments for multiple bills of different vendors. To initiate:
Go to the Purchases on the left sidebar and select Bills.
Select the bills from different vendors for which you want to initiate payment.
Click Pay via HSBC at the top of the page.
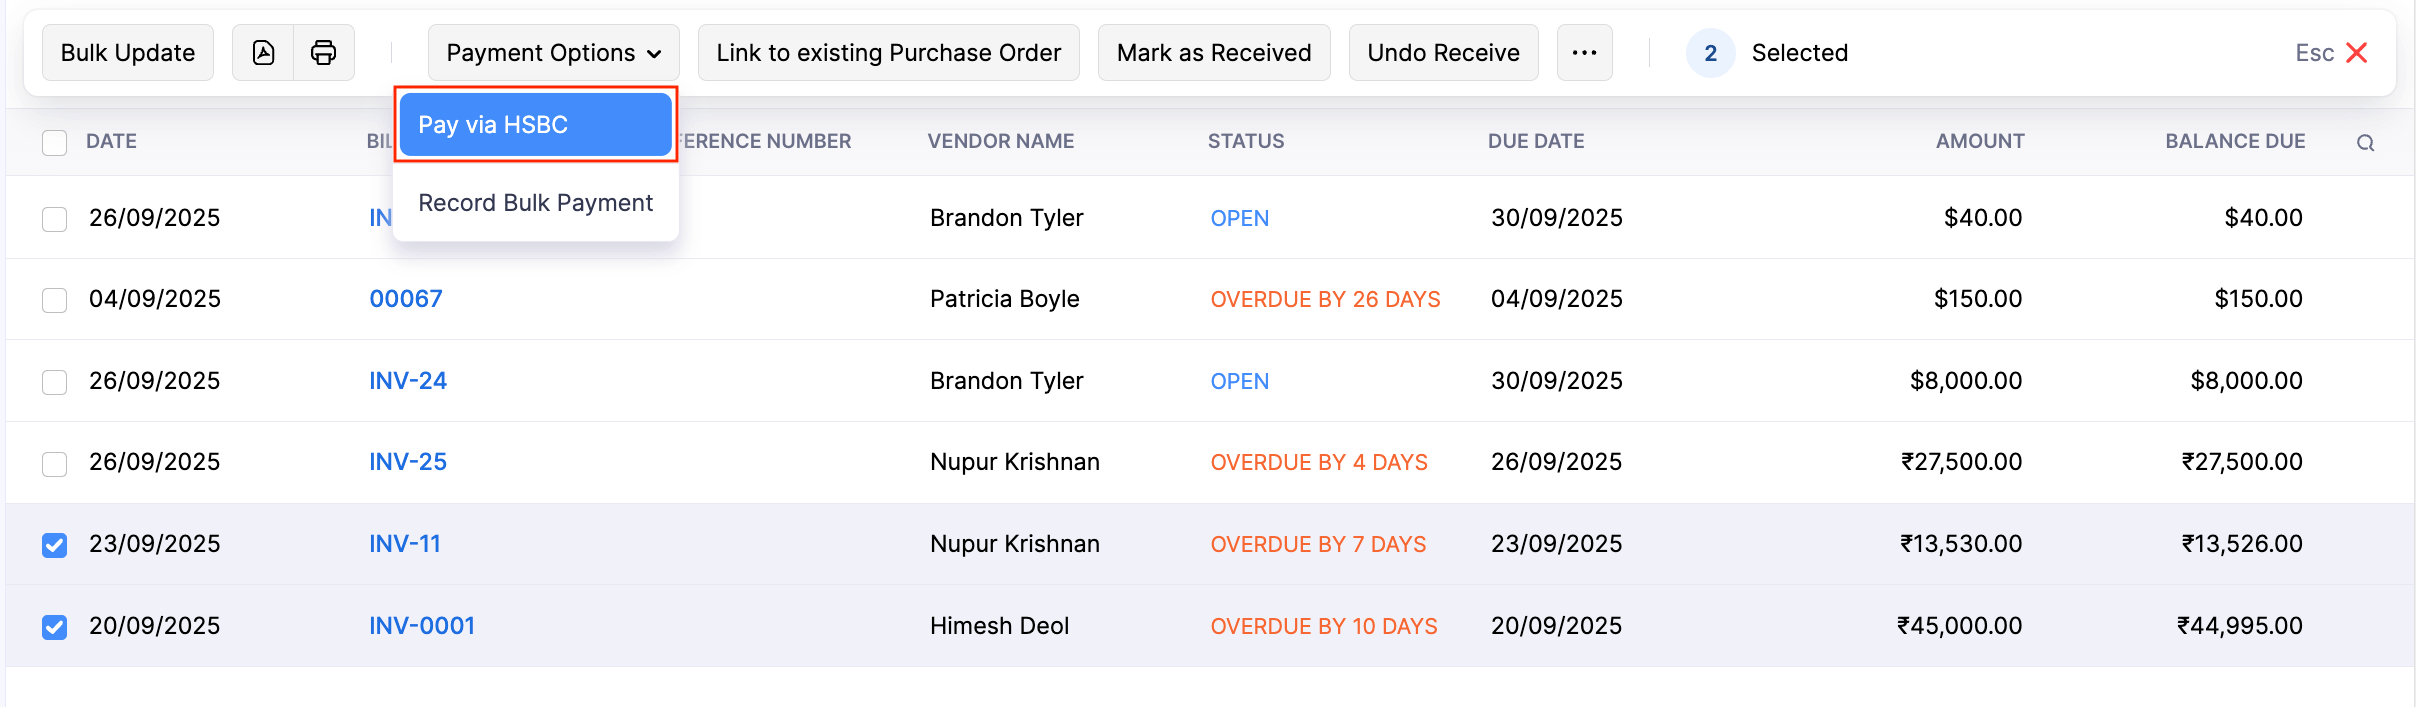
Enter the payment details and click Initiate Payment.
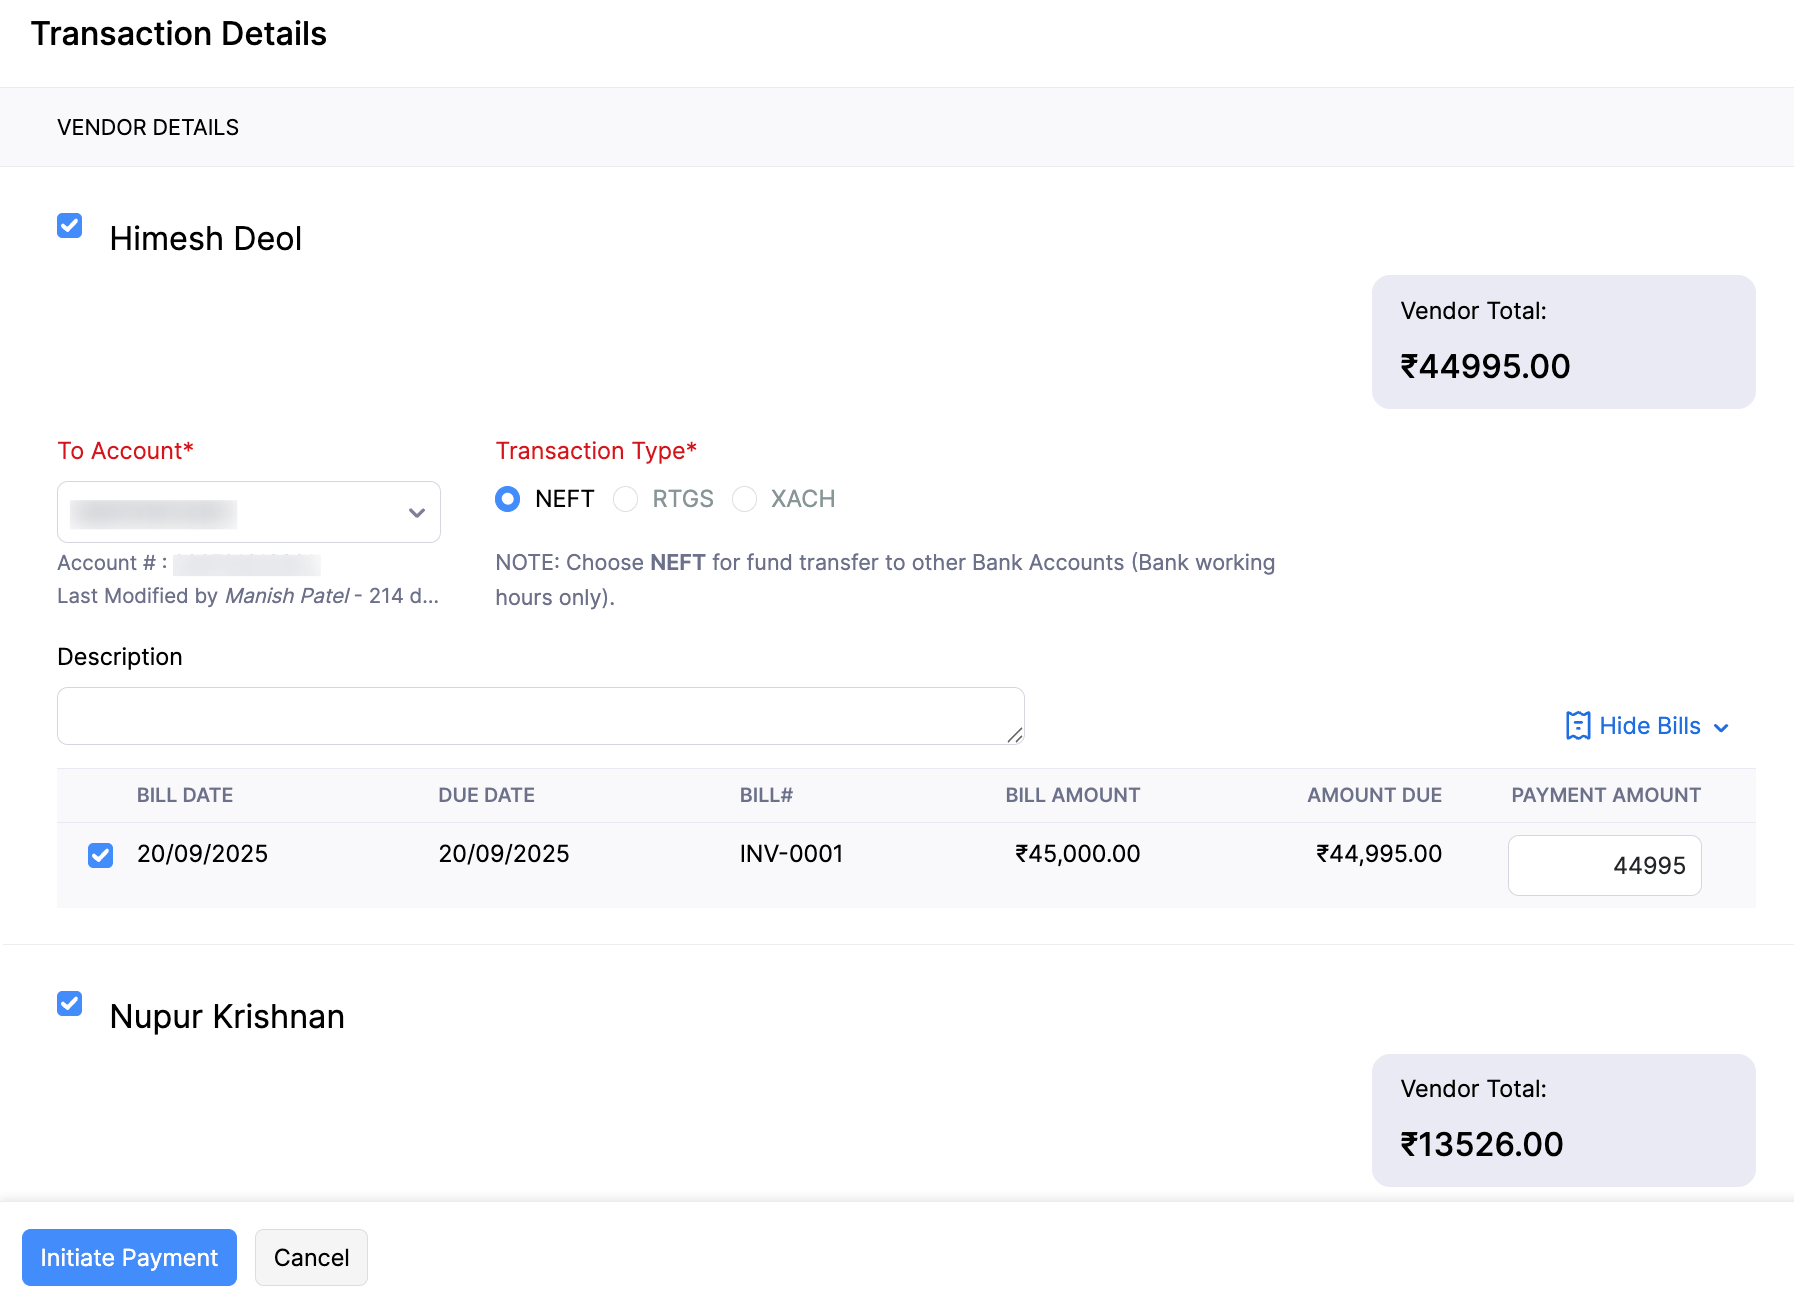
In the pop-up that appears, enter your Secret PIN.
Click Initiate Payment.
The payment will be initiated from Zoho Books, and you will need to authorise it in HSBCnet.
Advance Payments
You can initiate advance payments to vendors directly. To initiate a vendor advance payment:
Go to the Purchases on the left sidebar and select Payments Made.
Click + New at the top right corner.
Select the Vendor Advance tab.
Select the vendor to whom you want to initiate the advance payment.
Select the Initiate payment via HSBC option.
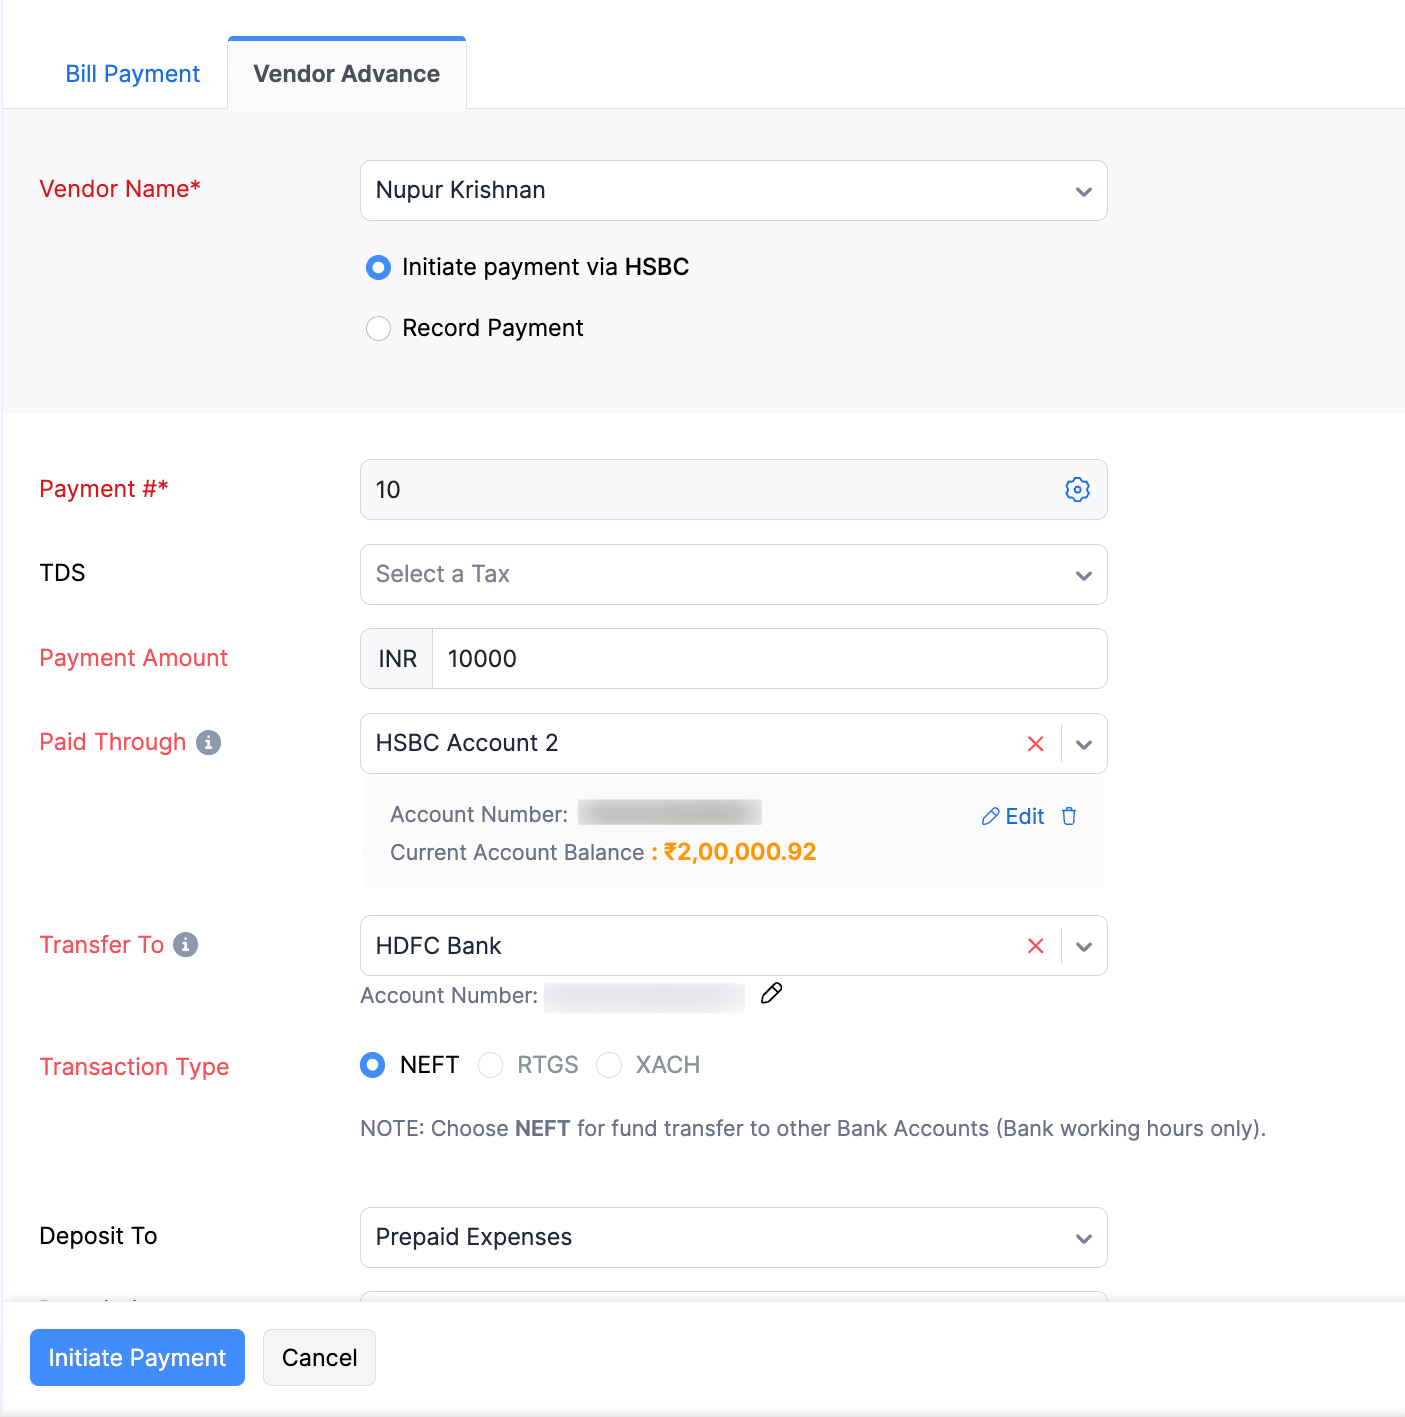
Enter payment details and click Initiate Payment.
In the pop-up that appears, enter your Secret PIN.
Click Initiate Payment.
The payment will be initiated from Zoho Books, and you will need to authorise it in HSBCnet.
GST Payments
You can initiate payments towards your GST returns directly from Zoho Books. To initiate GST payments:
Generate the challan in the GST portal.
Click GST Filing on the left sidebar.
Go to the Monthly / Quarterly Returns tab and click View Summary in the GSTR-3B Summary card.
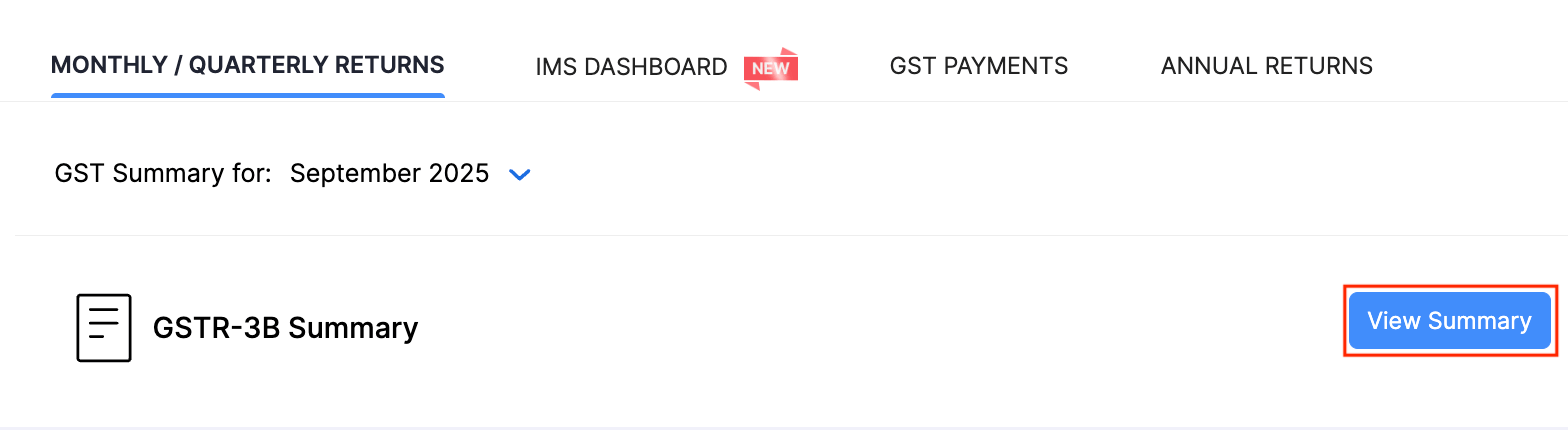
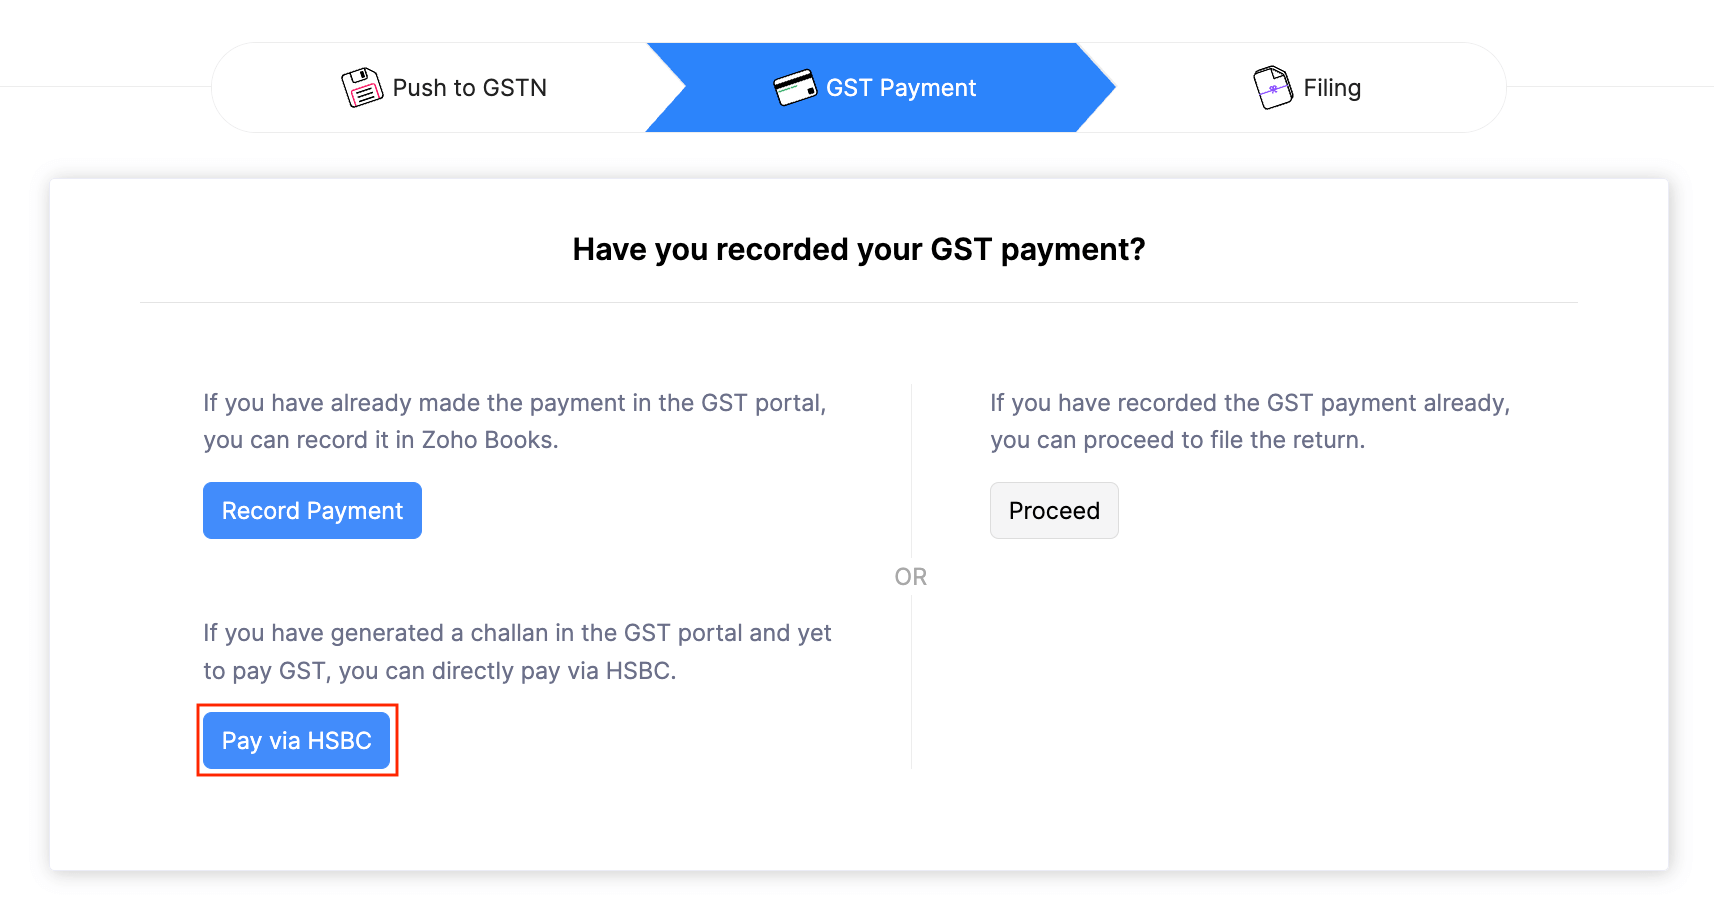
Go to the GST Payment tab
Click Pay via HSBC.
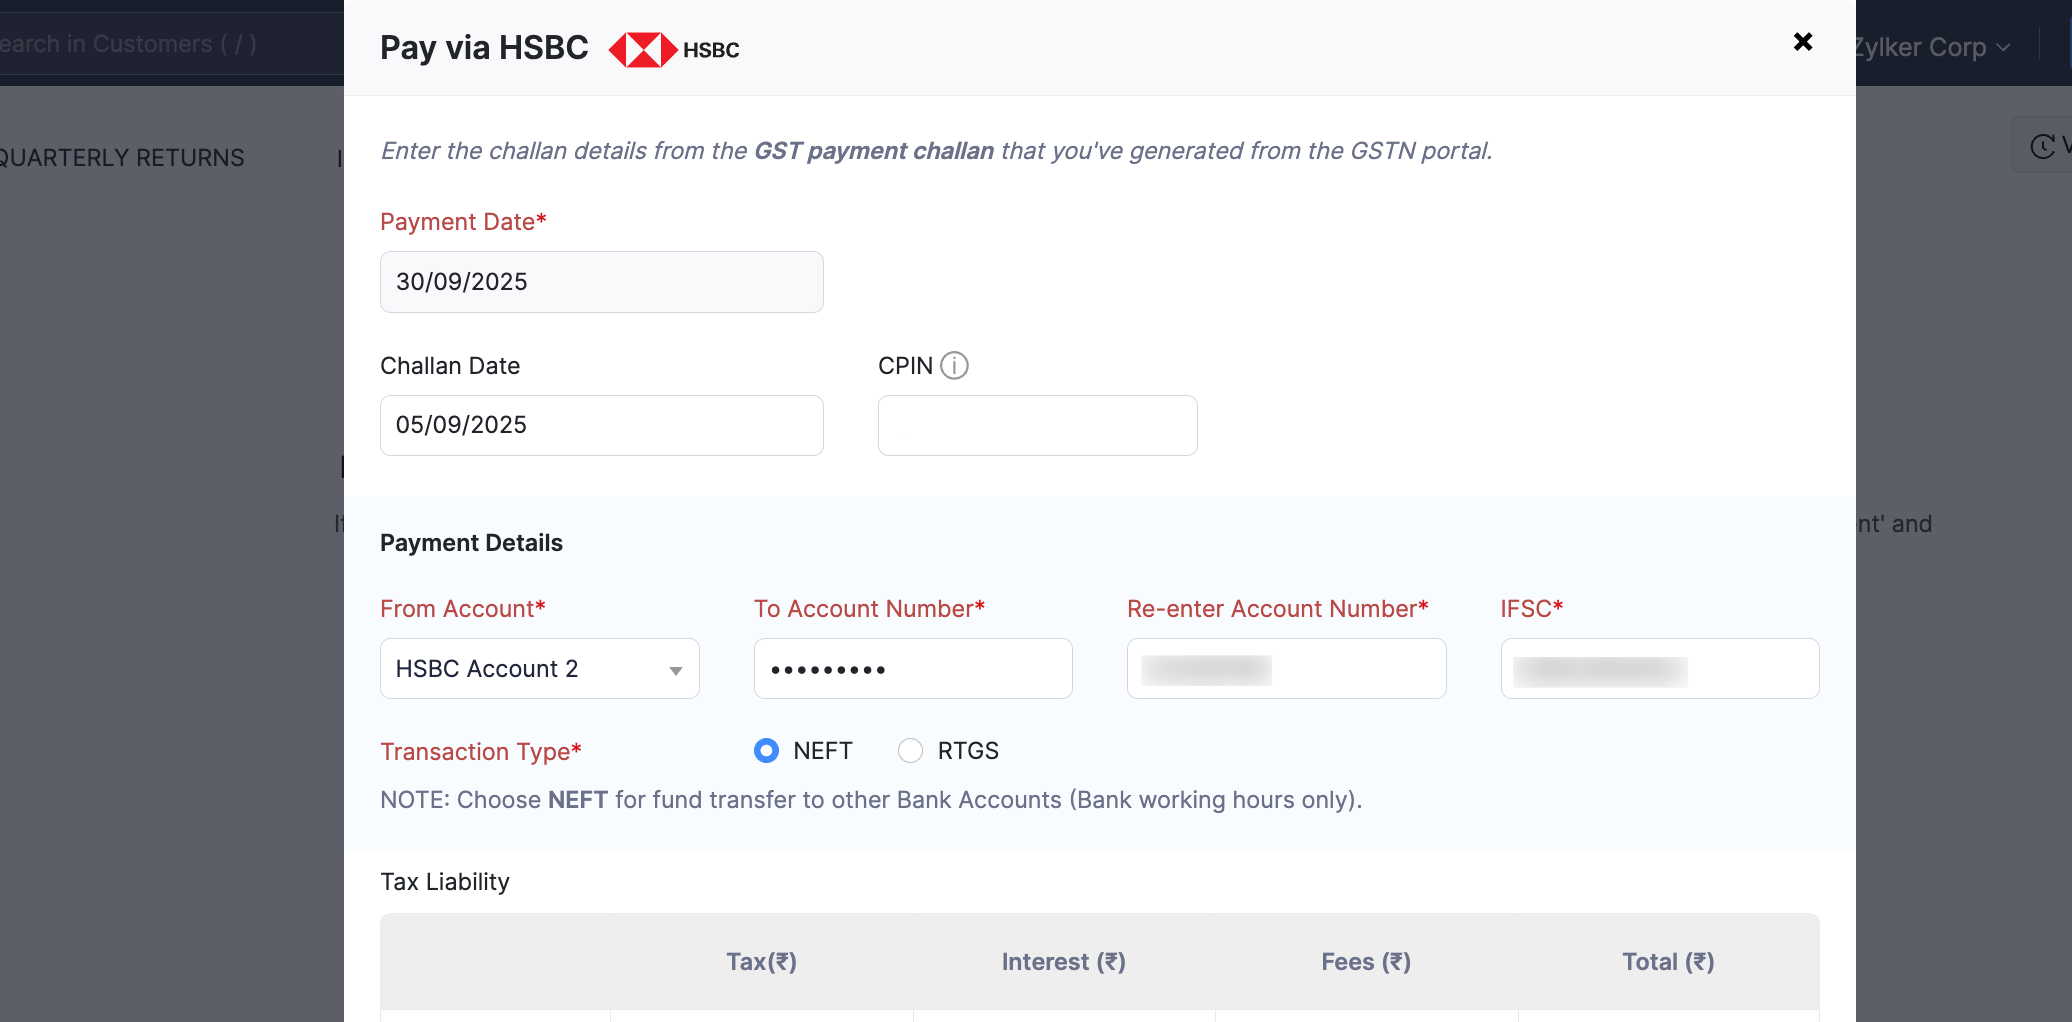
Enter the Payment Date and the Challan Date in the pop-up that appears.
Enter the Payment Details.
Enter the CGST, SGST, IGST and CESS values from your challan under the Tax Liability section.
Click Proceed to Pay.
Enter the Secret PIN and click Initiate Payment.
The payment will be initiated from Zoho Books and the status of the transaction will be In-progress. Once you authorise the payment at HSBCnet, the payment status will be updated in Zoho Books automatically.
Alternatively, you can also initiate GST Payments from the GST PAYMENTS tab in GST Filing directly.

Authorise Payment in HSBCnet
Authorise Domestic Payments
If you had initiated a NEFT or RTGS payment from Zoho Books, you will have to authorise that payment using File Level Authorisation (FLA).
To authorise payments from HSBCnet:
Log in to HSBCnet using your credentials.
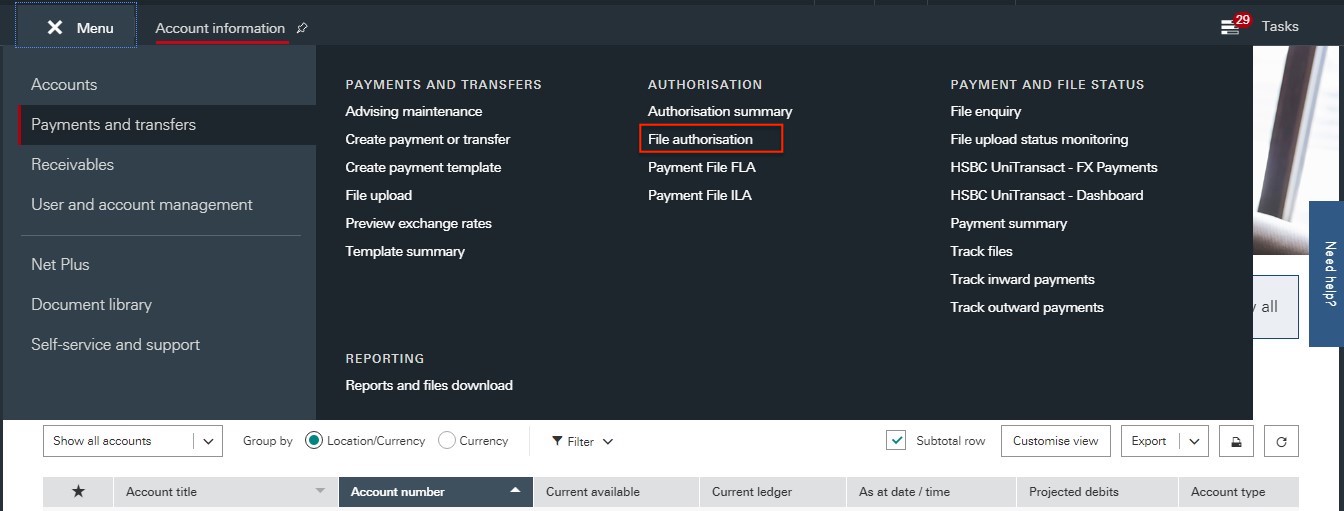
Navigate to the Menu and select Payments and transfers.
Click File authorisation. In the following screen, you will see the files of the NEFT and RTGS payments that you had initiated from Zoho Books.
Select the file and click Review files.
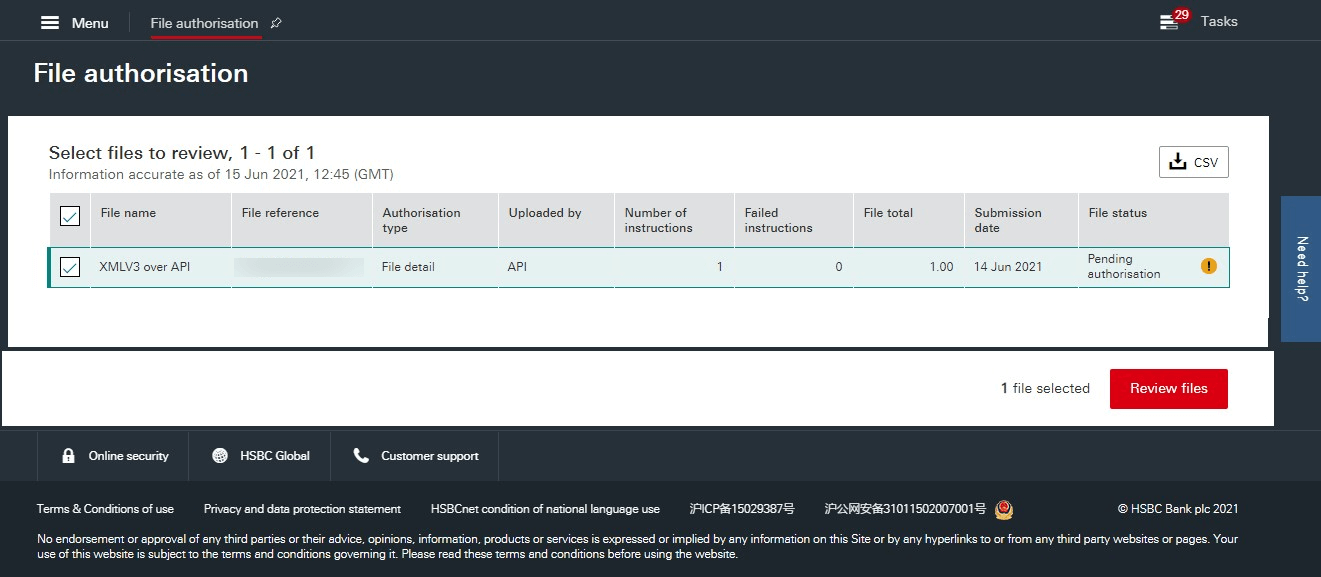
Click Authorise file to authorise the payment. Or, click Reject file to reject the payment.

Once you authorise the file, a confirmation screen will display the payment status and details. This payment may be sent for further authorisations based on the authorisation structure configured in HSBCnet for your account. After the payment is made, the corresponding bill’s status in Zoho Books will automatically update to Paid.
Authorise Cross-Border Payments
To authorise cross-border payments of transaction type XACH from HSBCnet:
Log in to HSBCnet using your credentials.
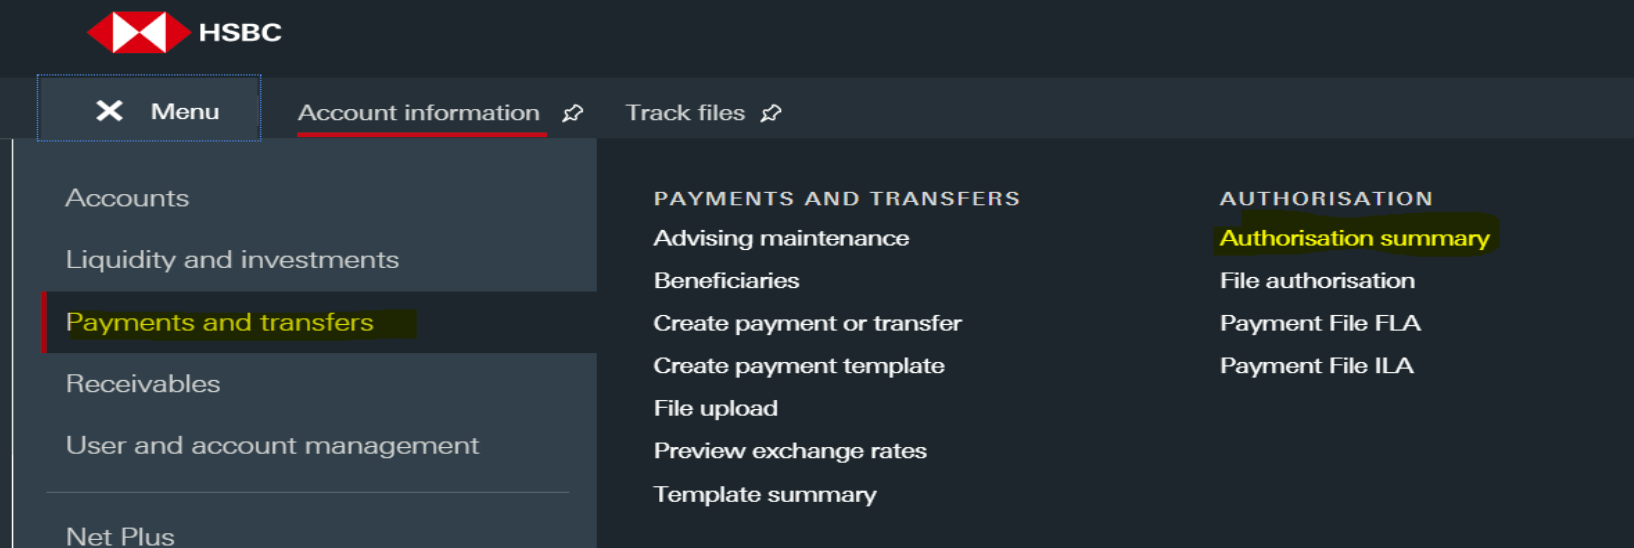
Navigate to Menu and select Payments and transfers.
Click Authorisation Summary under Authorisation section.
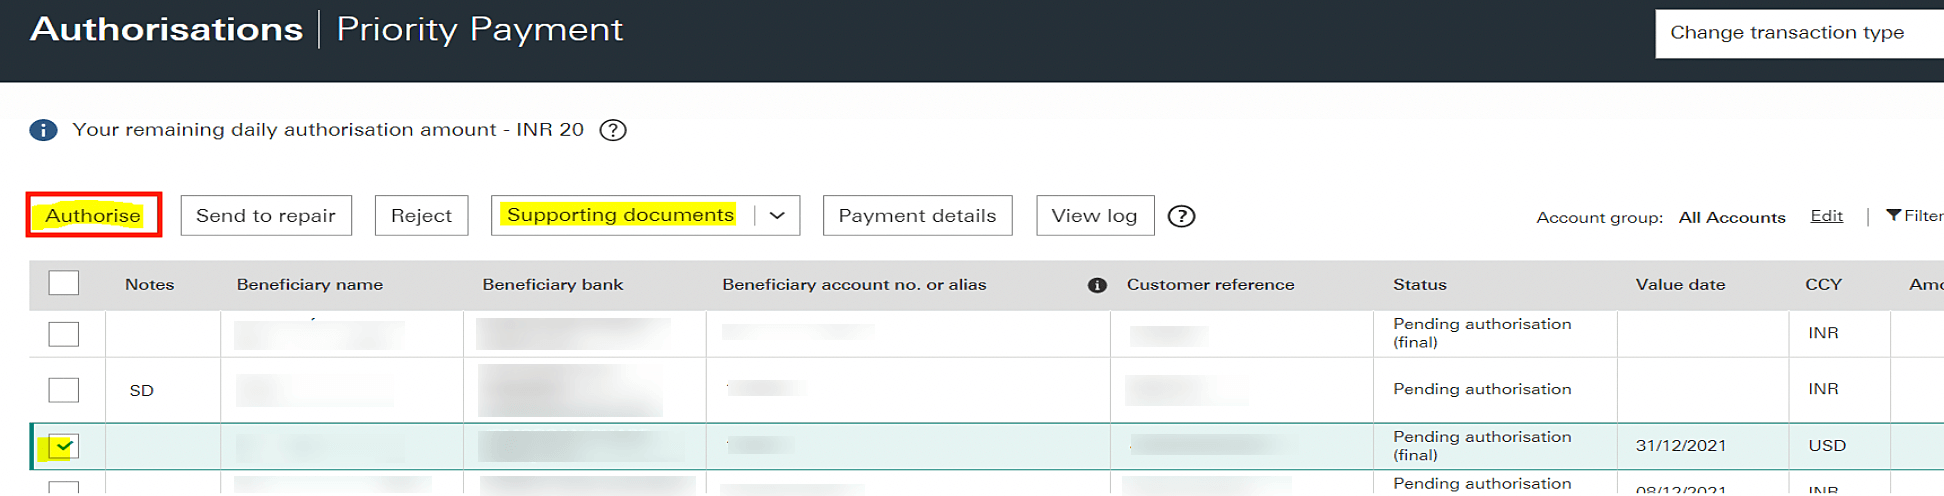
Select the transactions that are of the Pending Authorisation status.
Select Supporting Documents to attach regulatory documents, then click Authorise to complete the authorisation.
This payment may be sent for further authorisations based on the authorisation structure configured in HSBCnet for your account. After the payment is made, the corresponding bill’s status in Zoho Books will automatically update to Paid.
Configure and Manage Bank Feeds
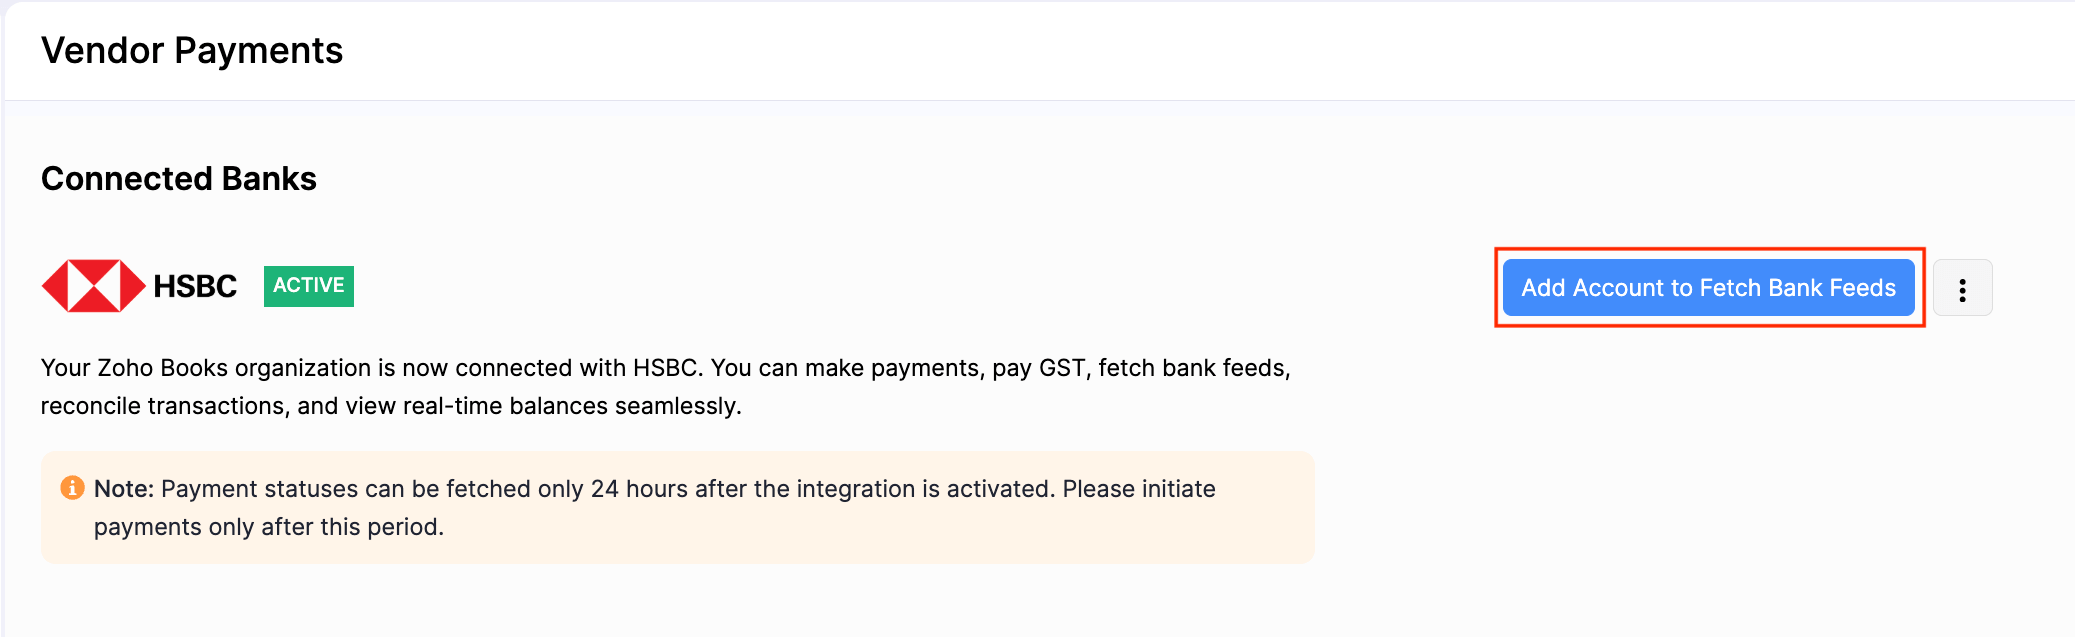
You can add your bank account to automatically fetch the bank feeds into Zoho Books. To add your HSBC bank account:
Go to Settings.
Select Vendor Payments under Online Payments.
Click Add Account to Fetch Bank Feeds next to HSBC.
Select the HSBC bank account that you connected from the HSBCnet portal and the date from which you want to import the bank feeds.
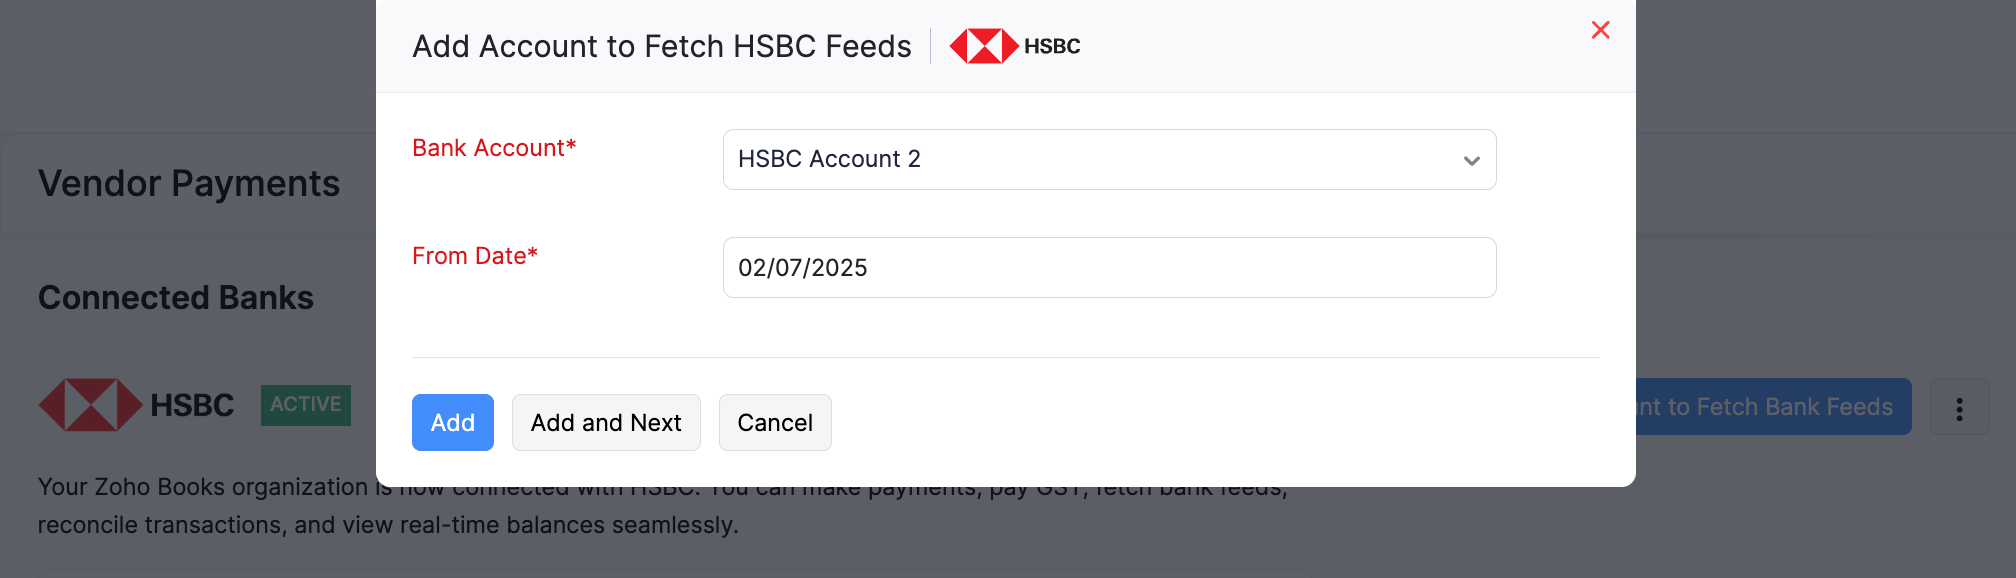
Click Add to add the bank account and exit. Or, click Add and Next to add another HSBC bank account.
Your bank account will be added and the bank feeds from the selected date will be fetched.
Zoho Books will automatically fetch bank feeds once every 24 hours. You can also manually refresh the feeds and check your live account balance from the Banking module. You can categorise and match transactions, add transactions, create transaction rules, and more from the Banking module using your bank account.
Disable the Integration
If you want to temporarily stop making payments from your HSBC accounts, you can disable the integration. To disable:
- Go to Settings.
- Select Vendor Payments under Online Payments.
- Click the More icon and select Disable.
- Click Disable Integration in the pop-up.
The integration will be disabled. To re-enable, complete the setup again.
Note: The integration is disabled at user-level. Other users in your organisation can still initiate payments using this integration.
Delete the Integration
For organisations under the new integration flow, if you do not want your Zoho Books organisation to be connected with HSBC, you can delete the integration. To delete:
Go to Settings.
Select Vendor Payments under Online Payments.
Click the More icon and select Delete Integration next to HSBC.
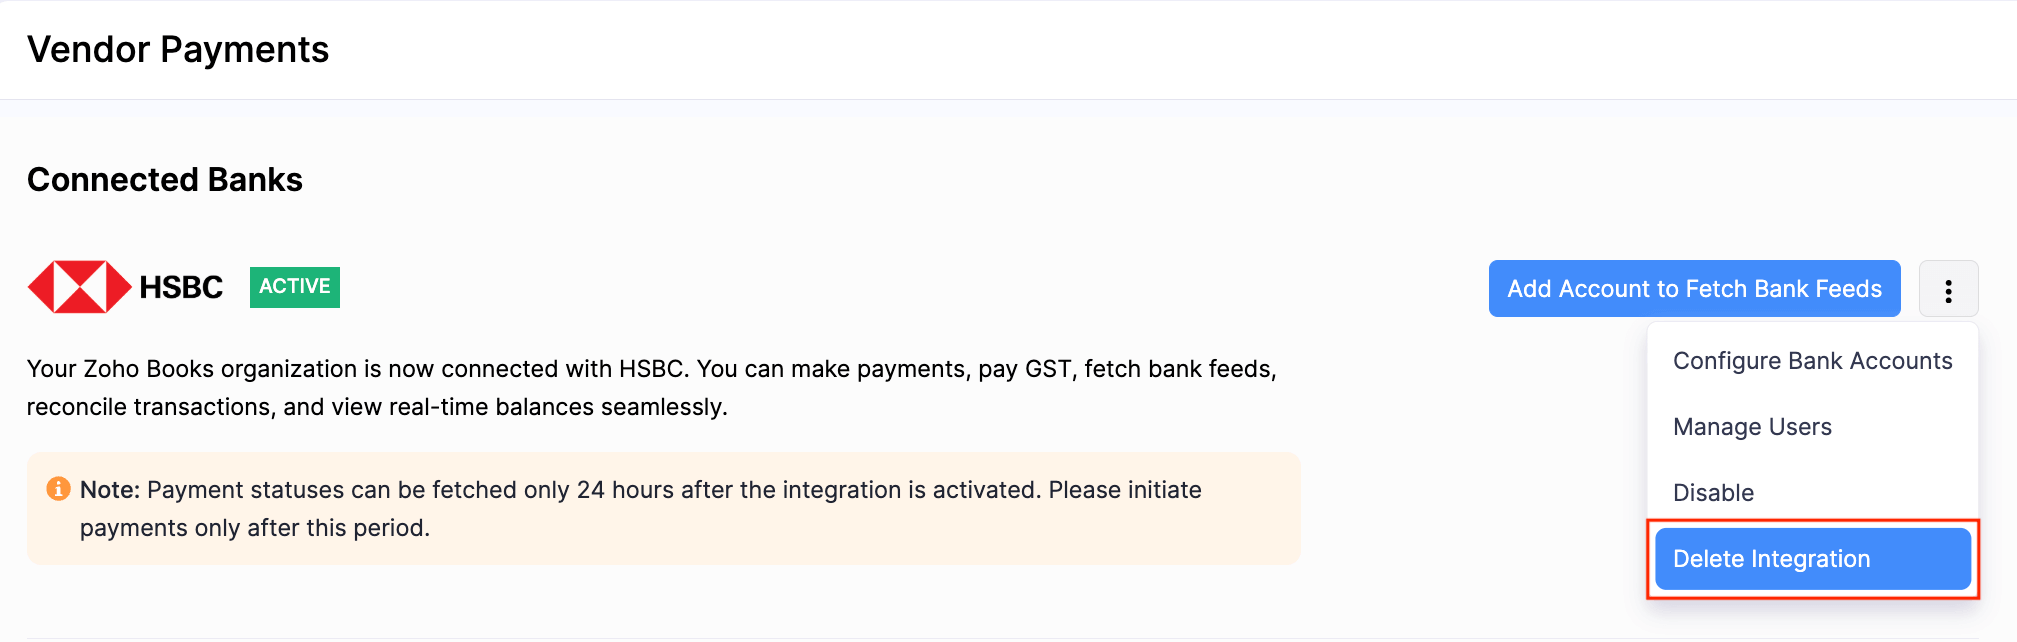
In the pop-up that appears, read and agree to the terms and click Delete Integration.
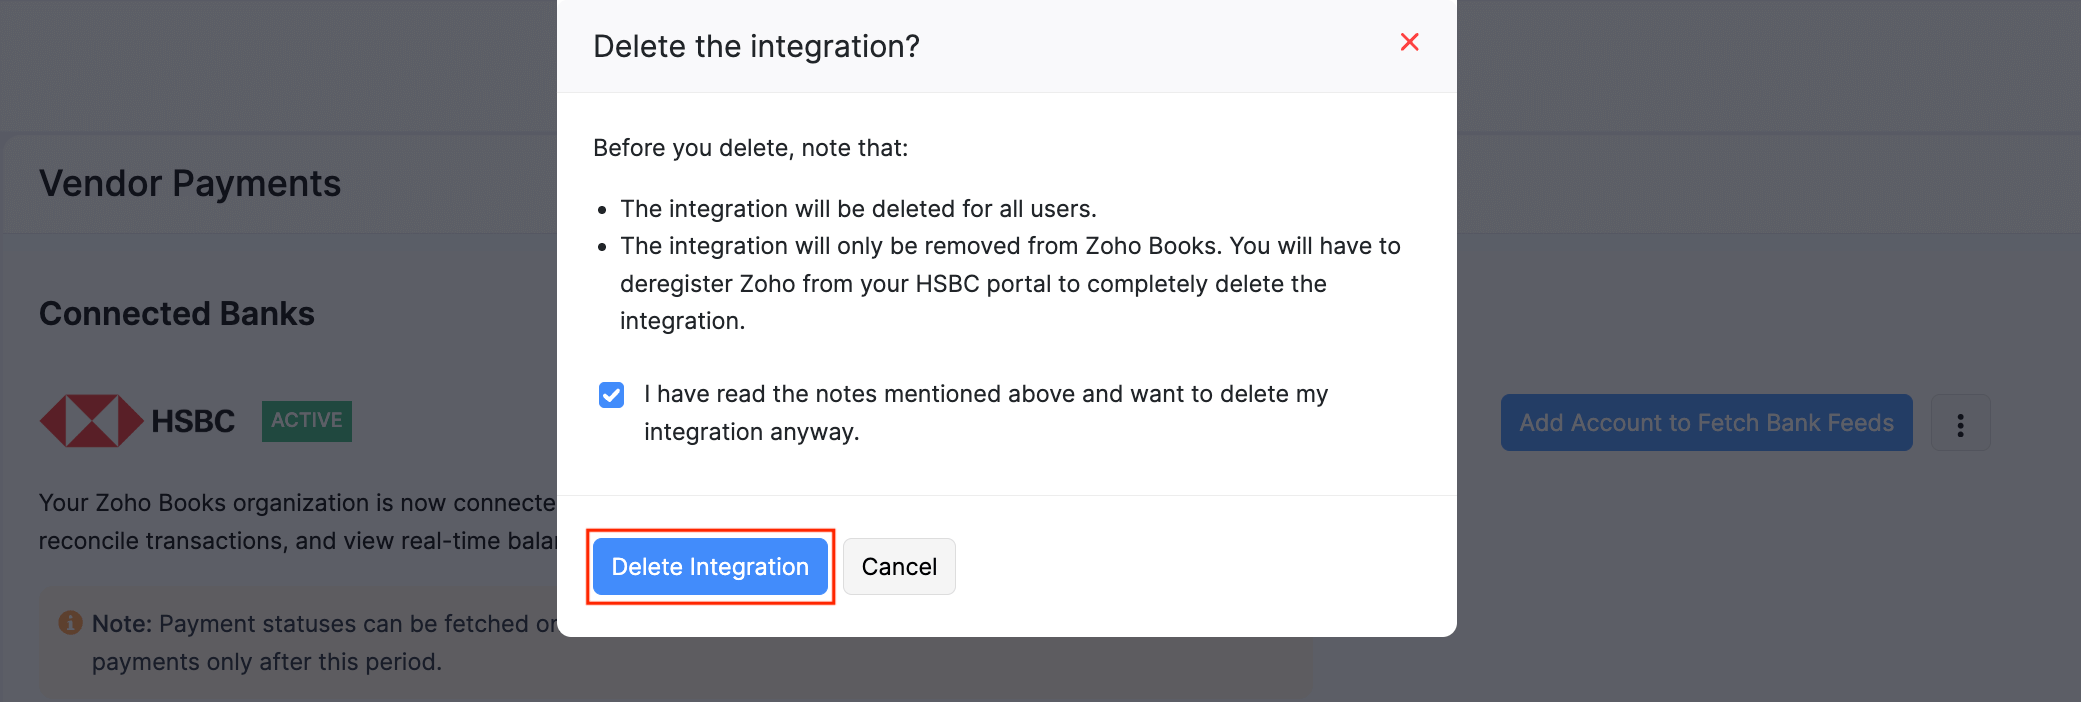
The integration will be deleted for all the users of your organisation.
Note: If you have any queries regarding the HSBC bank integration, write to us at hsbc-support@zohofinance.com.
 Yes
No
Yes
No
Thank you for your feedback!