


Employee Preferences

Employee Preferences let you control how employee records are set up in Zoho Payroll. You can choose how employee IDs are created, and add custom fields to store extra details that the default fields don’t cover.
You can manage these settings under Settings > General Modules > Employees. The page has two tabs:
- General — how employee IDs are created
- Custom Field — extra fields on employee records
General
On the General tab, you choose whether Zoho Payroll creates employee IDs for you, or whether you enter them yourself.
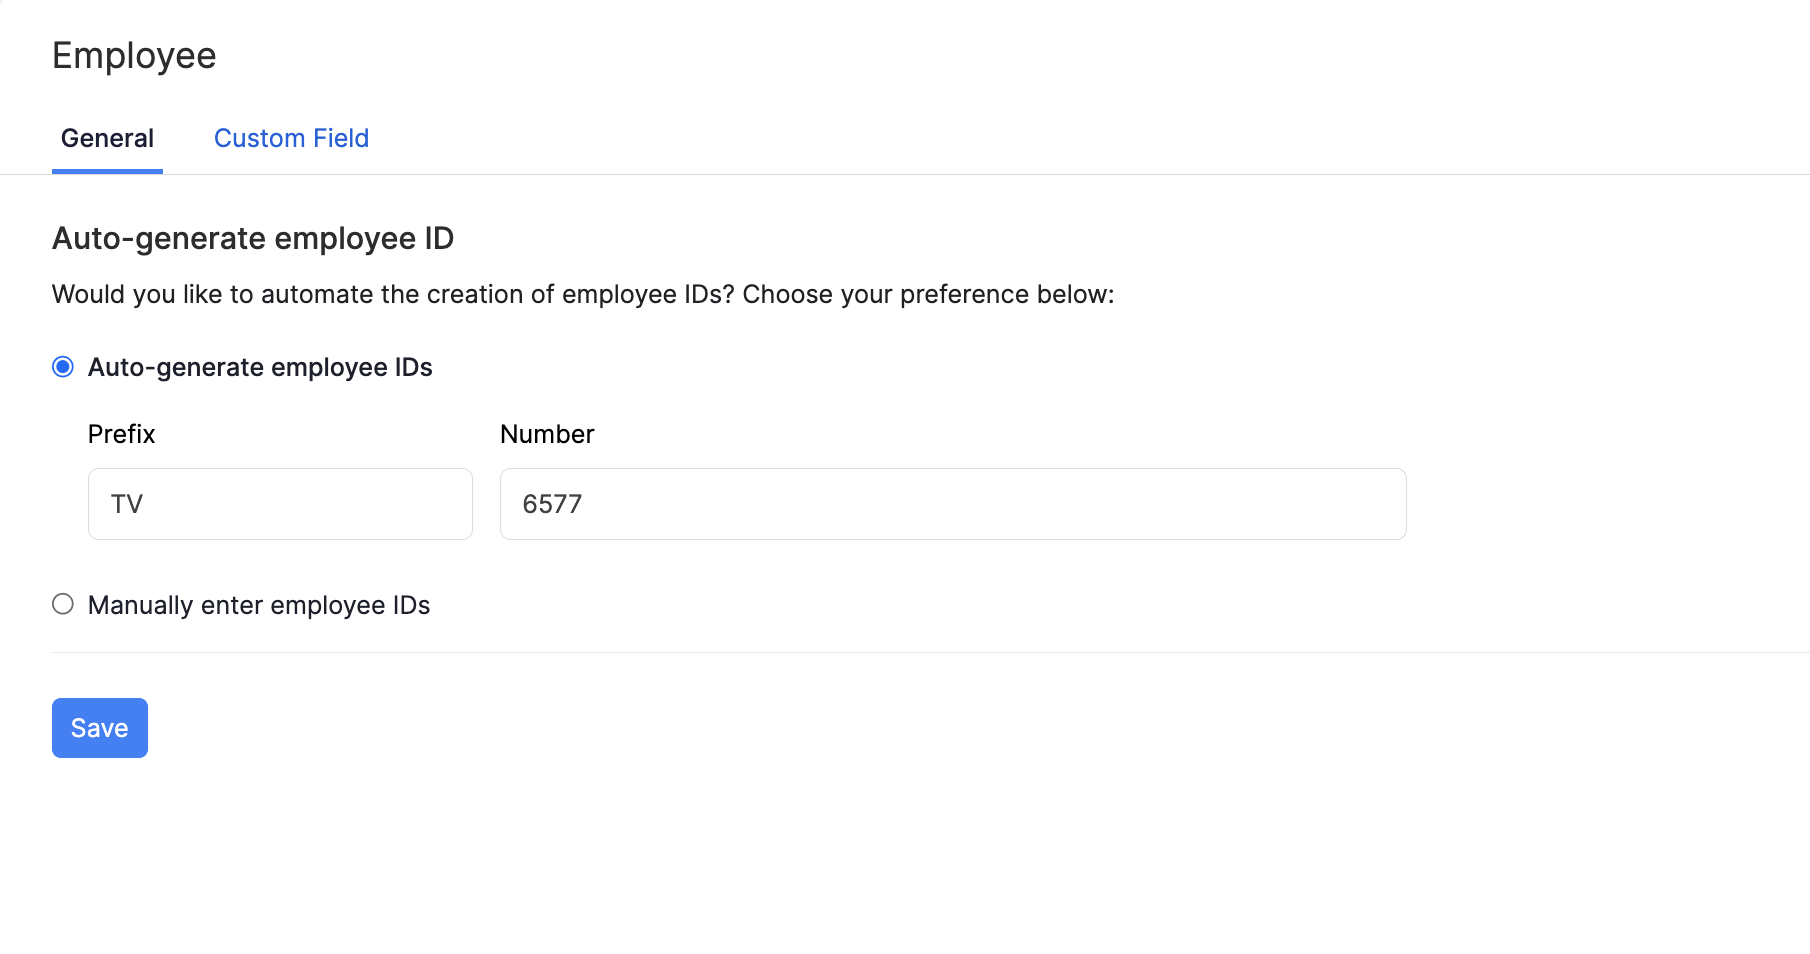
Auto-generate employee IDs
Select Auto-generate employee IDs if you want Zoho Payroll to create a unique ID each time you add an employee.
Then enter:
- Prefix — text that appears at the start of every employee ID, for example
TV - Number — the starting number. Zoho Payroll uses this for the next new employee, then increases it by one for each employee after that
For example, with Prefix TV and Number 6577, the next new employee gets the ID TV6577. The one after that gets TV6578, and so on.
Manually enter employee IDs
Select Manually enter employee IDs if you want to type each employee’s ID yourself when you add or edit them. Zoho Payroll will not create IDs for you.
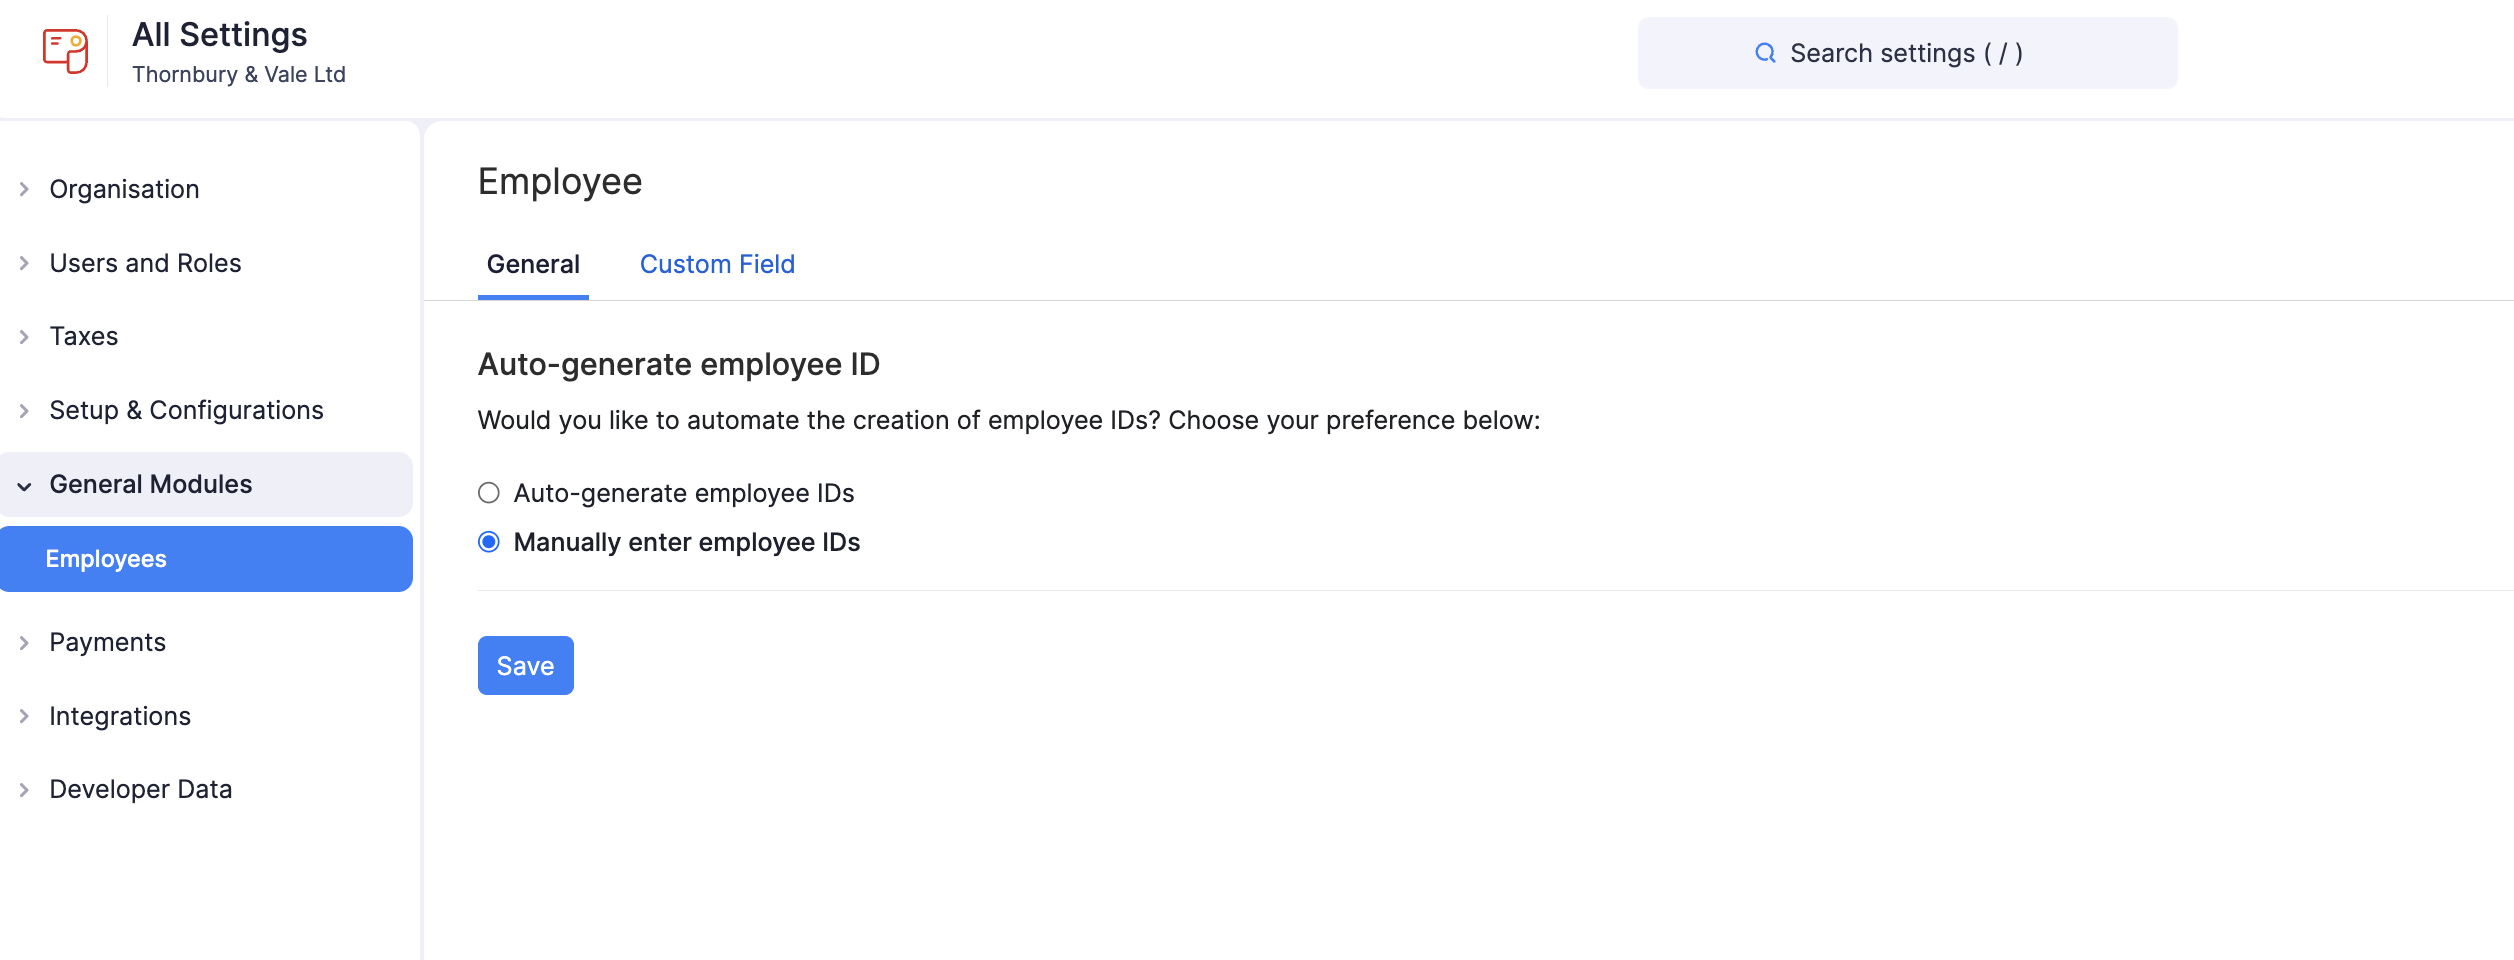
When you’ve chosen your preference, click Save.
Note: Employee IDs help you identify employees across payroll records, reports, and payslips. Choose a method that matches how your organisation already tracks staff, and keep IDs unique.
Custom Field
Custom fields let you store extra employee information beyond the default fields. For example, you can add a field for an emergency contact number, or any other detail your organisation needs.
The Custom Field tab lists each field with its name, data type, whether it’s mandatory, and its status (Active or Inactive). The page also shows how many custom fields you’ve used, for example Custom Fields Usage: 1/50.

Once created, a custom field appears on employee profiles. You can also choose whether employees can see it in the Employee Portal.
Create a Custom Field
To create a custom field:
- Go to Settings and click Employees under General Modules.
- Switch to the Custom Field tab.
- Click Create New. If you haven’t created any fields yet, click Create Custom Field.
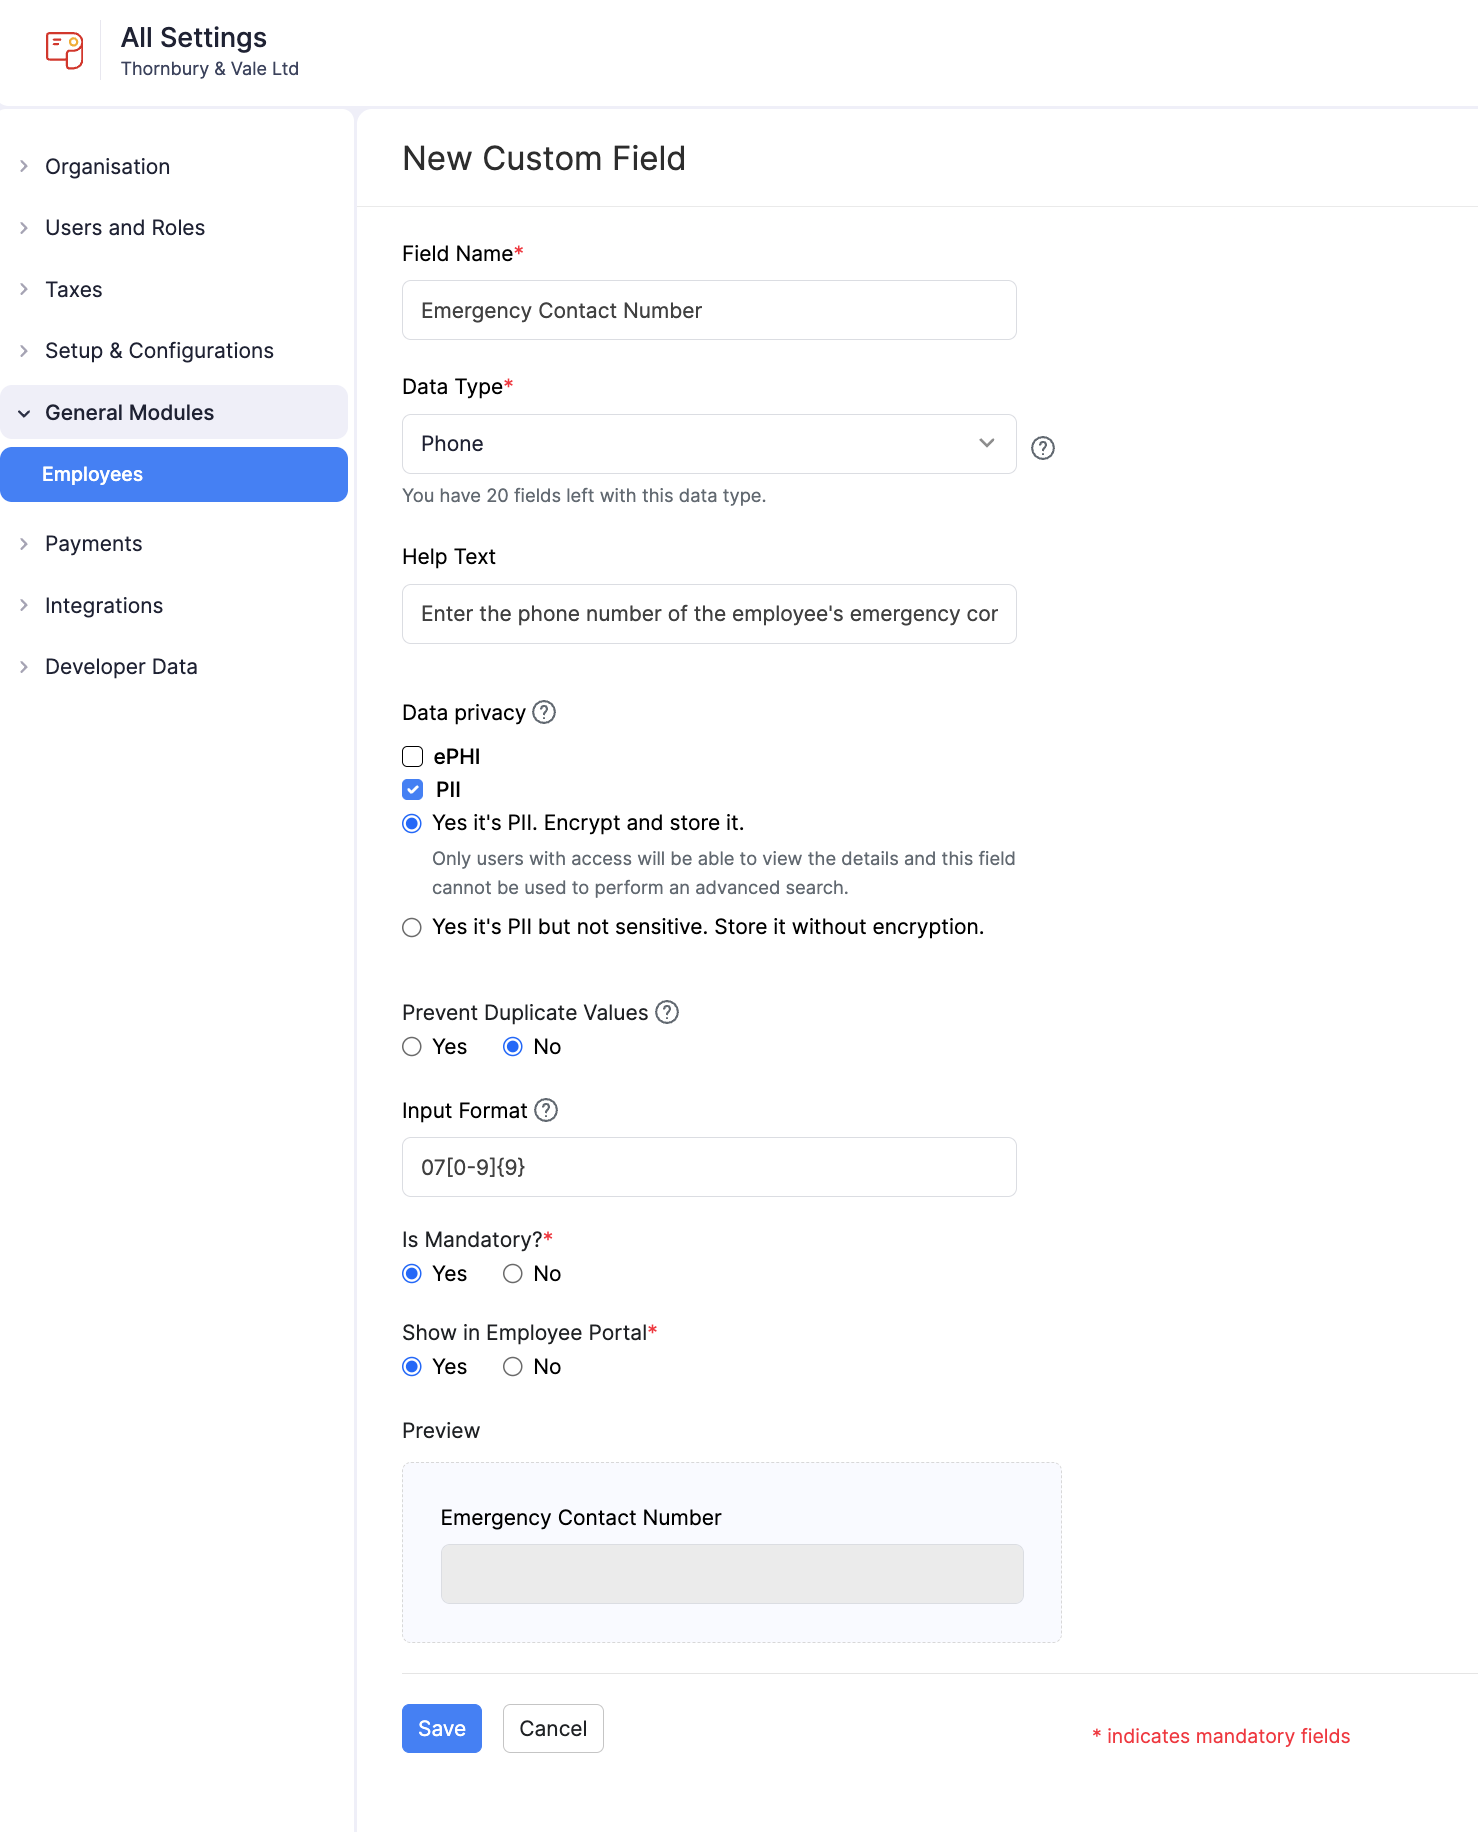
- Enter the details:
| Field | Description |
|---|---|
| Field Name* | The label shown on the employee record, for example “Emergency Contact Number”. |
| Data Type* | The kind of information this field stores, for example Phone, Text, or Date. Zoho Payroll shows how many fields of that data type you still have available. |
| Help Text | Optional guidance shown to the person filling in the field. |
| Data privacy | Select ePHI or PII if the field stores sensitive personal information. If you mark it as PII, choose whether to encrypt and store it, or store it without encryption. Encrypted PII can only be viewed by users with access, and cannot be used in advanced search. |
| Prevent Duplicate Values | Select Yes if each employee must have a unique value in this field. Select No if the same value can be used for more than one employee. |
| Input Format | Optional. A validation pattern that the value must match when someone enters it. Enter this as a regular expression (regex), not as a display mask. For example, 07[0-9]{9} accepts a UK mobile number that starts with 07 followed by exactly 9 digits. |
| Is Mandatory?* | Select Yes if users must fill in this field before they can save the employee record. |
| Show in Employee Portal?* | Select Yes if employees should see this field in the Employee Portal. Select No to keep it admin-only. |
Note: Fields marked with an asterisk (*) are mandatory. A preview on the form shows how the field will appear on the employee profile.
Insight: Input Format checks that the value entered is valid. It does not change how the field looks. If the value doesn’t match the pattern, Zoho Payroll won’t accept it.
- Click Save.
The custom field is now available on employee records.
Scenario:
Zylker wants every employee record to include an emergency contact phone number. The payroll admin creates a custom field called “Emergency Contact Number”, sets the data type to Phone, marks it as PII, sets the Input Format to 07[0-9]{9}, makes it mandatory, and shows it in the Employee Portal. From then on, the field appears when they add or edit an employee, and only valid UK mobile numbers are accepted.
Edit a Custom Field
To edit a custom field:
- Go to Settings and click Employees under General Modules.
- Switch to the Custom Field tab.
- Click the More icon next to the field and select Edit.
- Make the necessary changes and click Save.

Mark a Custom Field as Inactive
If you no longer need a custom field but may use it again later, mark it as inactive instead of deleting it.
- Go to Settings and click Employees under General Modules.
- Switch to the Custom Field tab.
- Click the More icon next to the field and select Mark as Inactive.

The field no longer appears on employee records. To use it again, select Mark as Active.
Delete a Custom Field
Note: You cannot delete a custom field if it still has data for any employee. Remove that data from employee profiles first.
Warning: Deleting a custom field is permanent and cannot be undone.
To delete a custom field:
- Go to Settings and click Employees under General Modules.
- Switch to the Custom Field tab.
- Click the More icon next to the field and select Delete.
- In the popup that appears, click Yes.

Configure Access
From the same More menu, you can also select Configure Access to control which users can view or use the custom field. Use this when the field stores sensitive information and should not be available to every user.